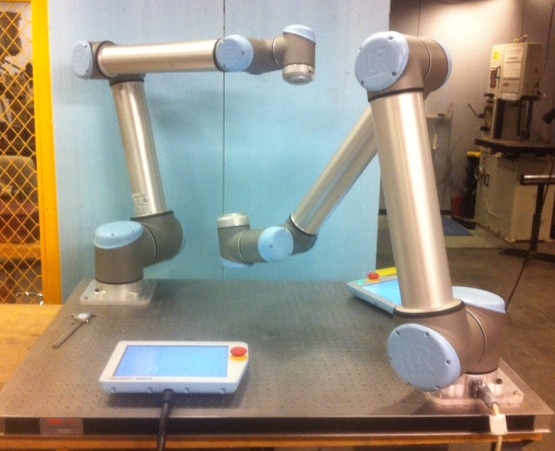
This pair of 6 degree-of-freedom robot arms is designed to safely work alongside and in collaboration with a human. These arms can follow position commands like a traditional industrial robot, as well as take force commands to apply a given force or torque in/around a specified axis. In addition to standard programming, the robots have a freedrive mode for tactile programming.
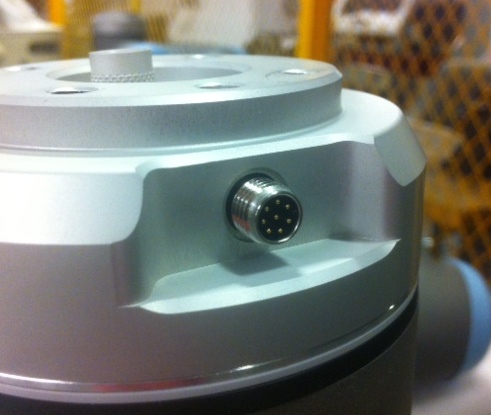
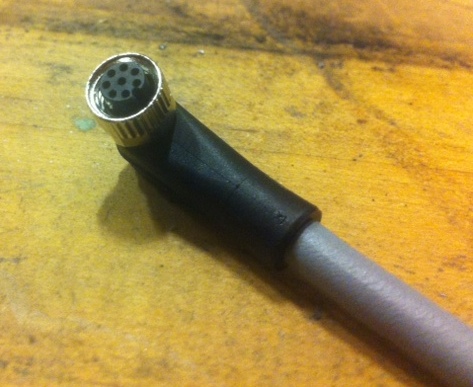
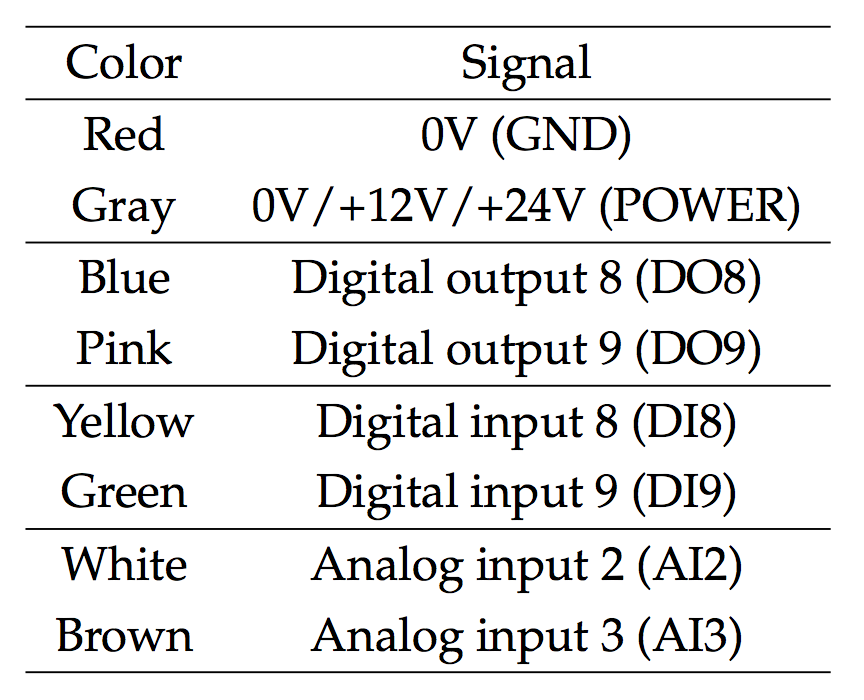
The toolhead has selectable 0/12/24V power, 2 digital inputs, 2 digital outputs, and 2 analog inputs. The layout is specified below. A suitable cable that mates to the toolhead is Lumberg RKMV 8-354.
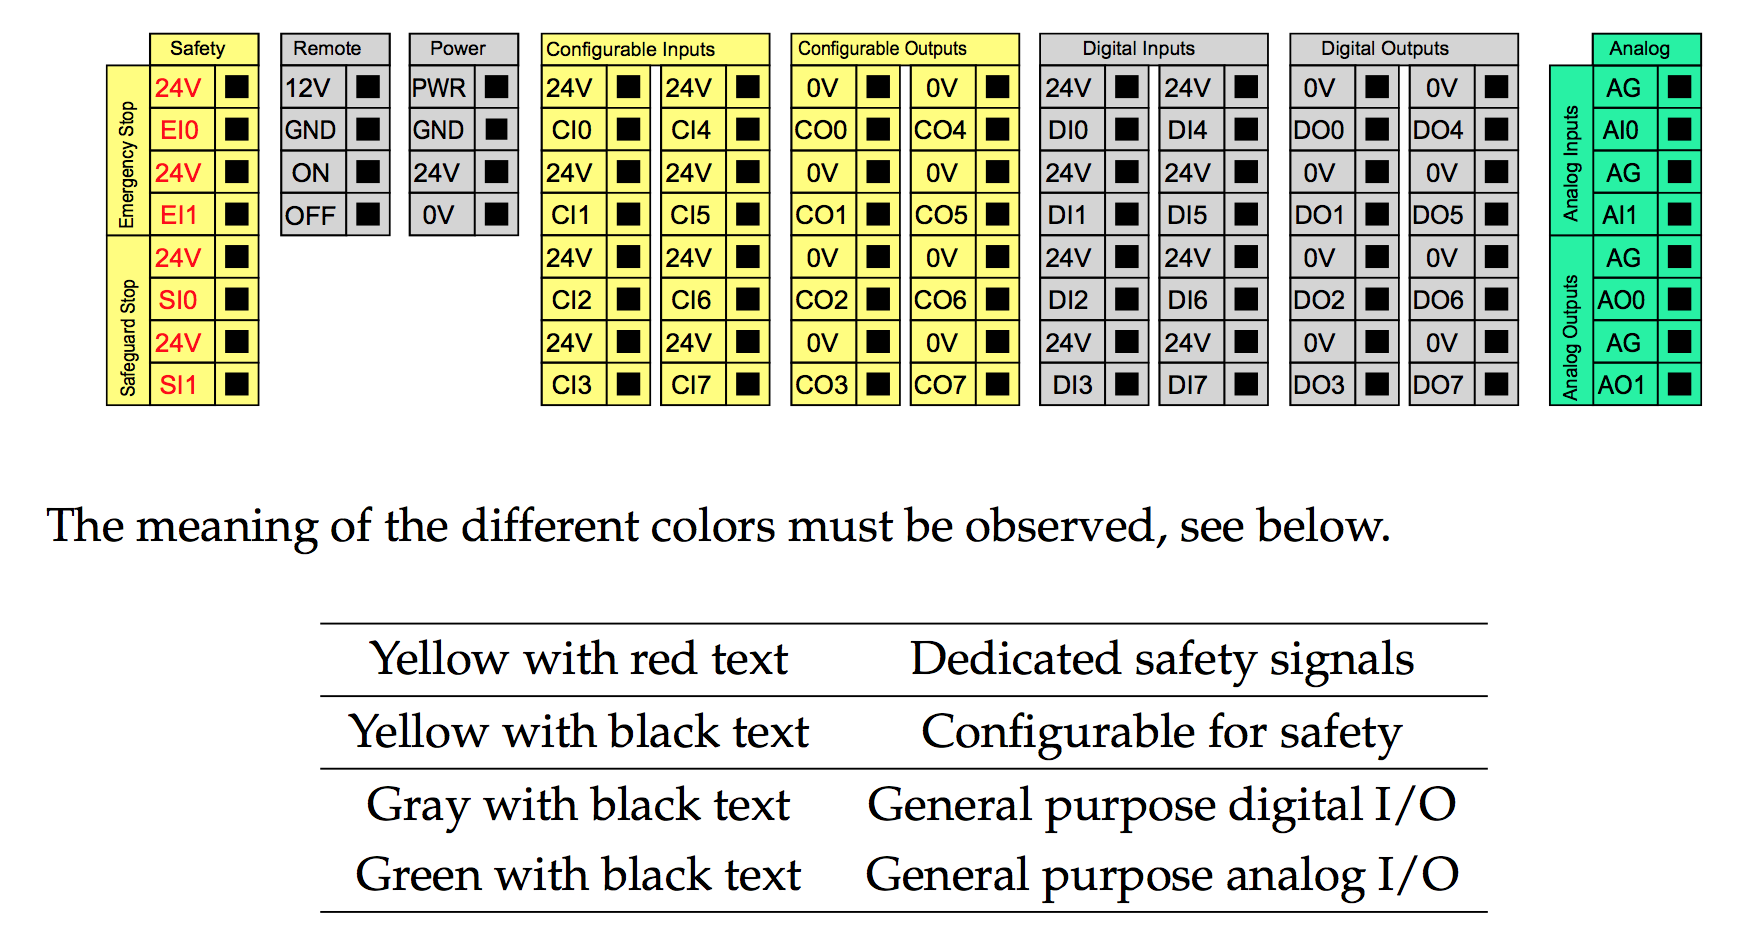
The controlbox grants more I/O capabilities (shown below), and these can be expanded even more through the modbus interface (See this video).
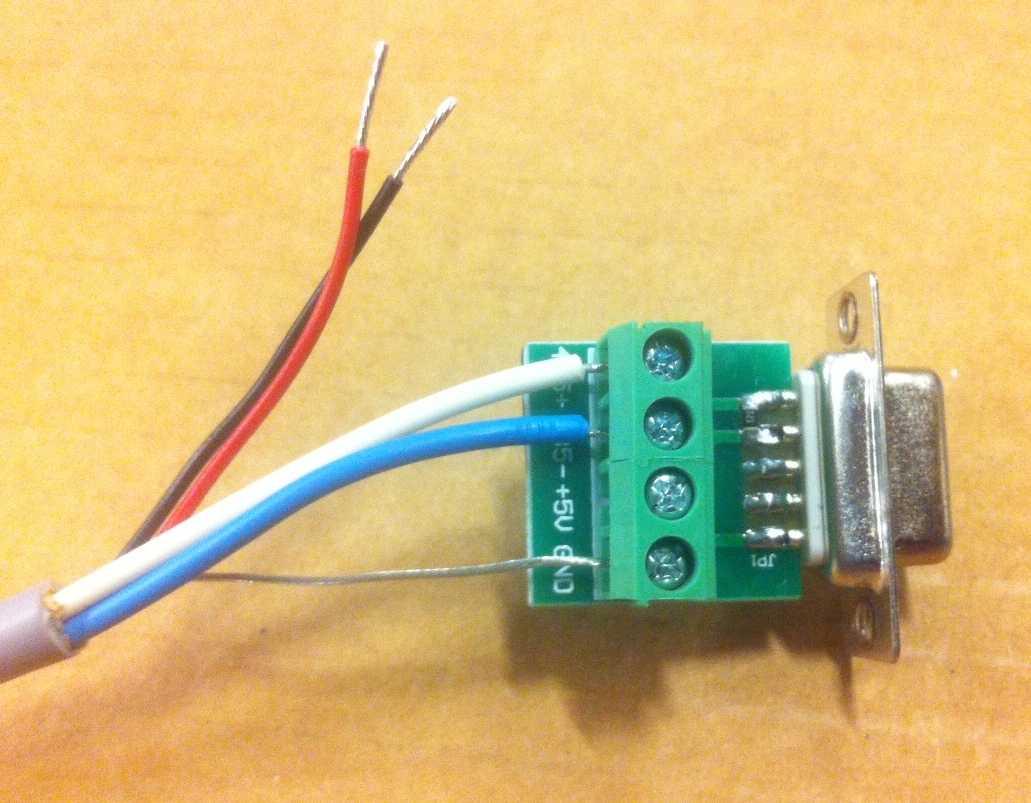
The gripper and force-torque sensor communicate through a RS-485 to USB adapter:

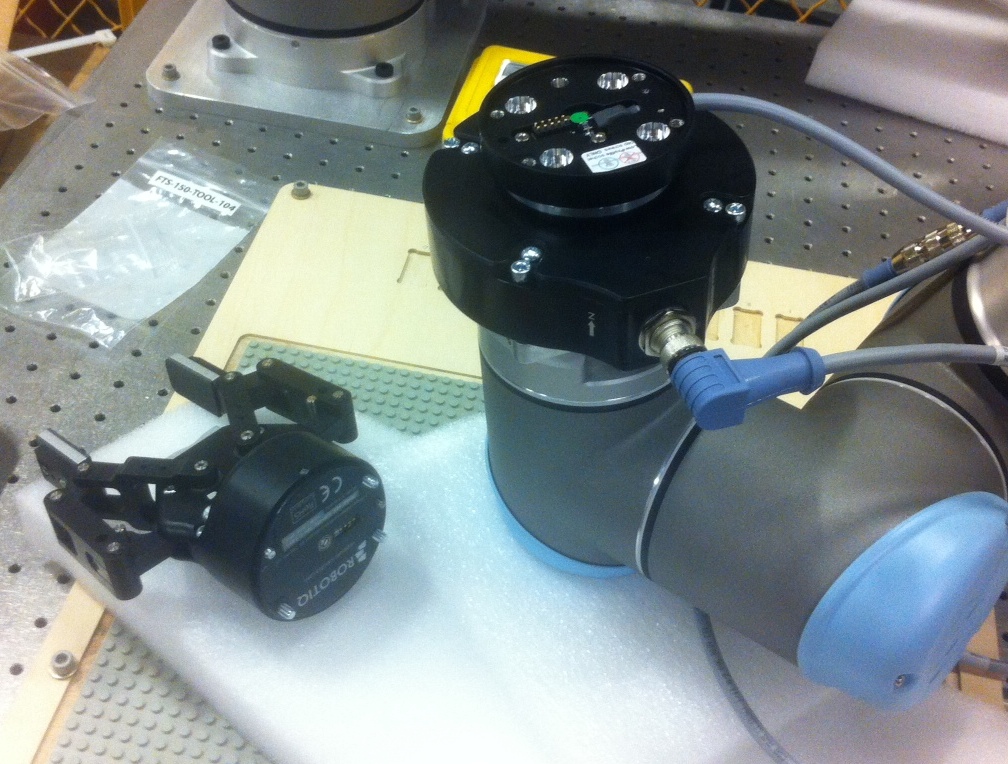
The gripper attached to the arm with a coupler. Be careful with the pogo pin connector!
Assembling legos with the gripper is a perfect application:
We found the arms regularly exceeded the published specification of 100 um repeatability. In this test, we used a dial indicator to measure position along an axis. The robot presses the plunger, goes away to swing around for a few seconds, and returns to a position often within 25 um of its previous position. The control loop of the robot is evident, and the dial shows a short damped oscillation around the desired value.
Using the onboard accelerometer in the toolhead (the values of which are reported over TCP) we can quantify the deviation of the toolhead as a function of acceleration. Over an aggressive swinging routine, we plot desired positions, actual positions, and accelerations.
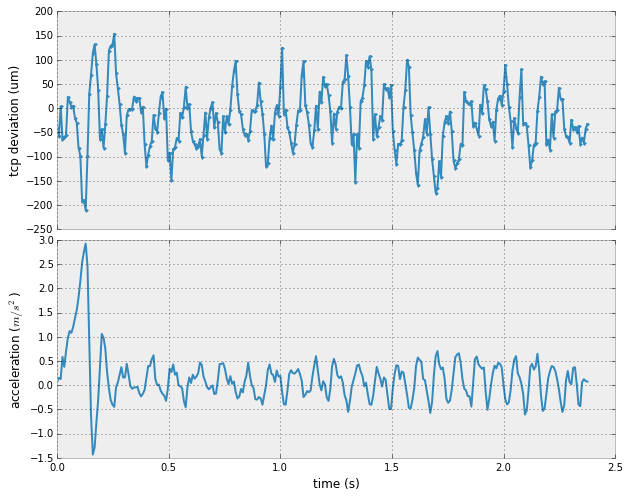
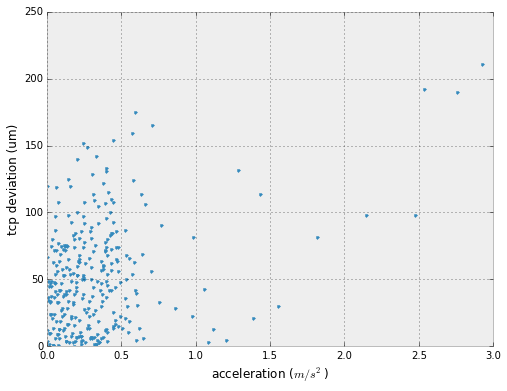
Here we can see the control loop does an admirable job. Within a region of reasonable accelerations, the tool coordinate deviation (as calculated through forward kinematics) stays remarkably on target. It's only for extreme accelerations (approaching the limits of the robot) that higher deviations occur. Of course, these deviations don't take into account flexing of the robot structure, or backlash in the harmonic drives.
There are several options for communicating with the robot controller, including using the teach pendant and opening a TCP Socket on a host computer (e.g. with python).
The simplest (and a surprisingly powerful) option for getting started talking to the robots is to use the Polyscope user interface on the teach pendant. The user manual contains extensive documentation of this interface.
As mentioned above, the toolhead and control box have a lot of GPIO pins available for custom end-effectors. For simple on-off devices, and some analog measurement, this is a perfect and easy solution.
By simply opening a TCP socket on a host computer, we can stream UR script commands to the robot. Here is an example of a host computer using python's socket library to send ur script commands to a pair of universal robot arms. Of course, there's nothing special about python -- we could do this with javascript, or another language of choice. Below is a video from an ultrasonic welding test: a python program on the host pc streams a list of points to measure with the load cell. The observed positions are then used to calculate the welding path.
The program running on the host PC can do anything it wants in addition to streaming commands to the robot. As a simple example, in the video below we grab each frame from a webcam mounted on the robot and tag it with the frame displacements and angles reported back from the robot.
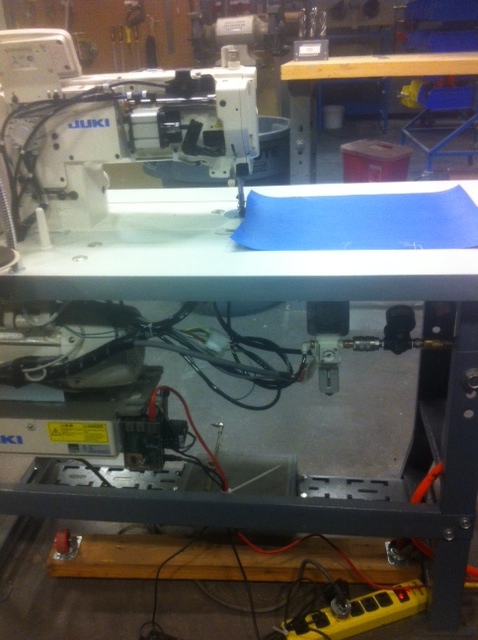
Similarly, TCP can be used to communicate with a number of nodes, not just the host PC. This is a great option for building end effectors, as a Raspberry Pi can easily communicate with the universal robot arms. Below on the left is a picture of our Juki industrial sewing machine, networked with the robot arms through a Raspberry Pi over TCP.
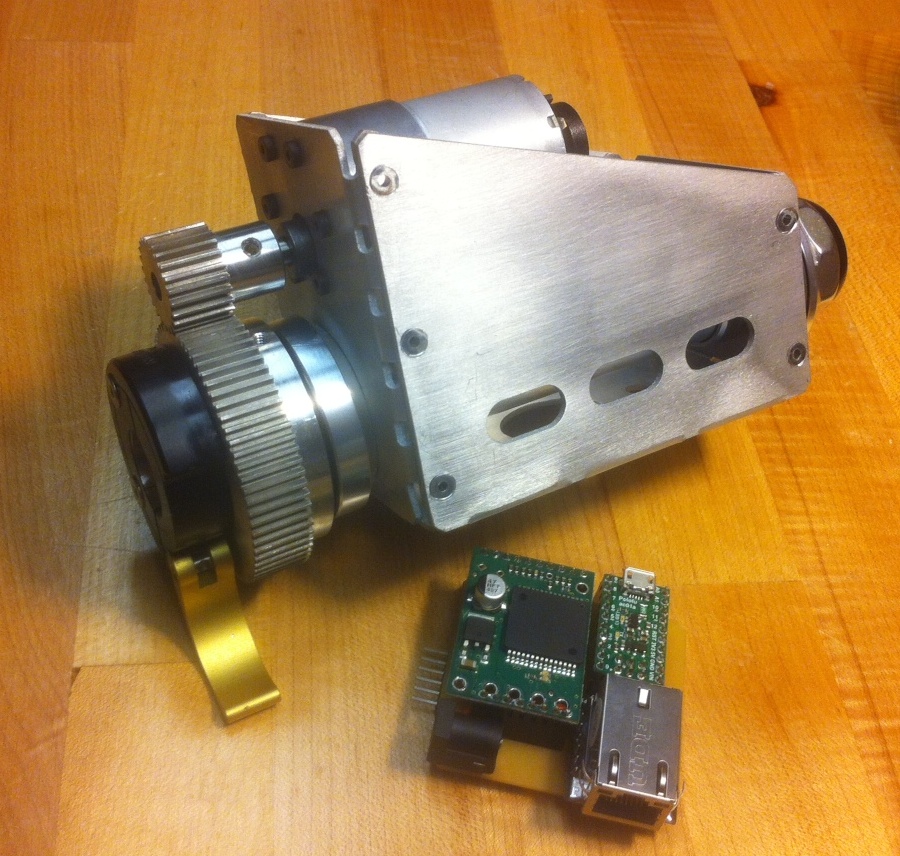
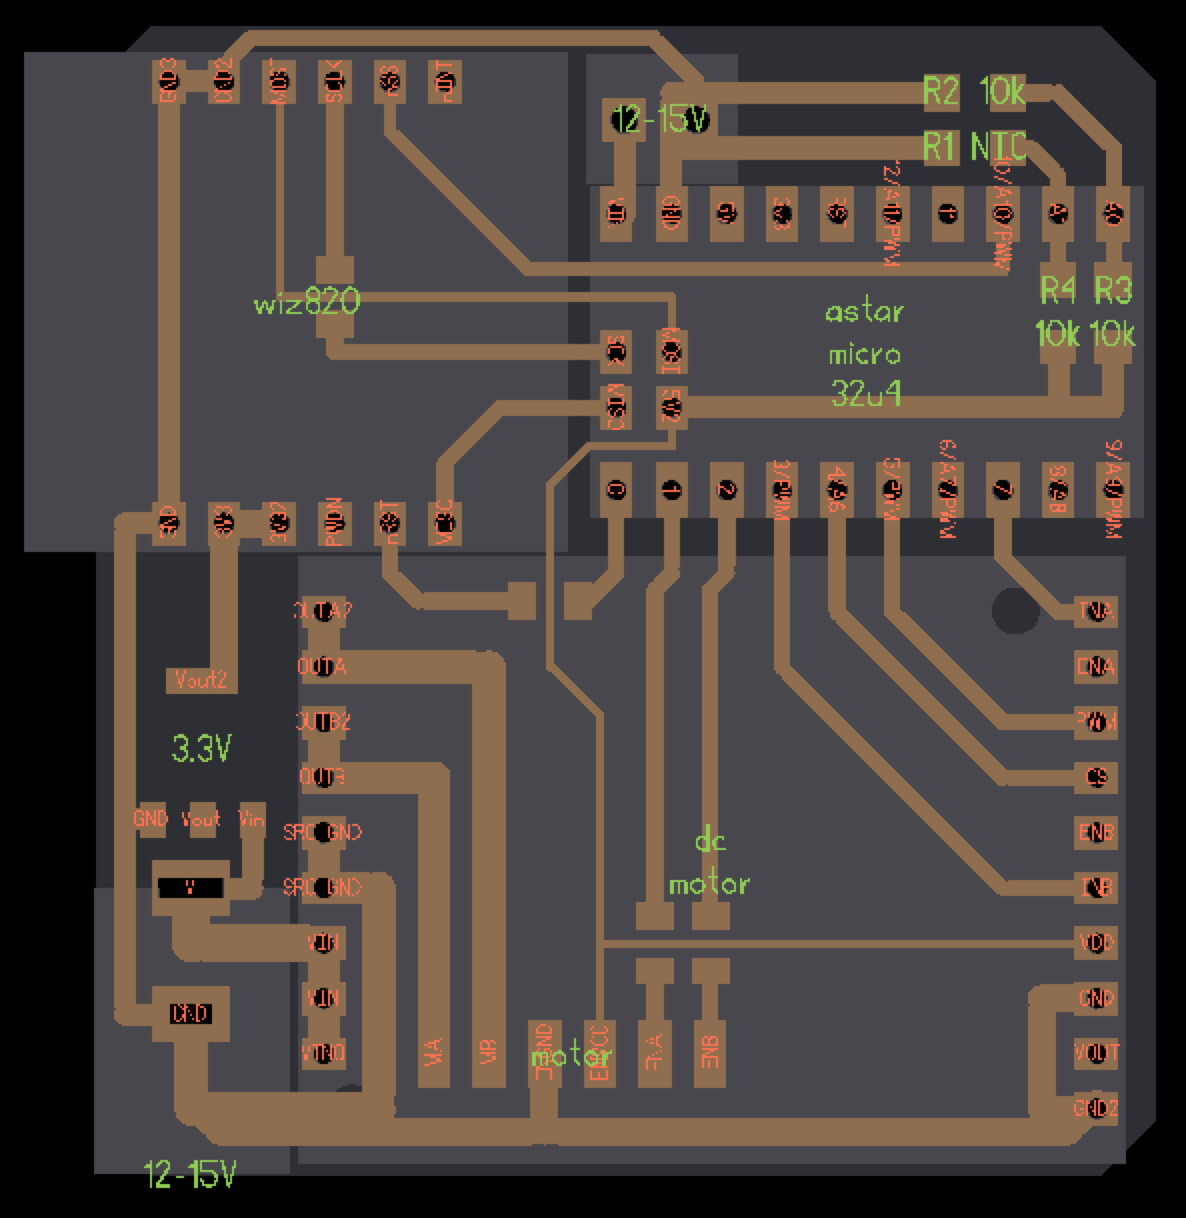
If a Raspberry Pi is too much infrastructure, the Wiz820IO module can also be used to communicate with the arms in the same way, translating between TCP and serial. The center and right pictures above show a rotary axis end effector with a Wiz820IO and a DC motor driver (board designed in Matt Keeter's kokopelli with this pcb library.
Efficiently and safely planning motions for the robot arms is a giant area of research. Whereas the line between attainable and unattainable performance of CNC machines with fewer degrees of freedom is relatively easy to distinguish, it is sometimes difficult to tell whether a task with be easy or hard to automate with the robot arms. Automating the generation of trajectories is an exciting and difficult process, but you can leverage the massive research body by using open source planners and libraries. Some notable ones: