PCB design: FabISP
For
this week, the assignement was to make a PCB for a FabISP (in system
programmer). This will allow us to interface between the computer and
the microcontrollers we will build in the future.
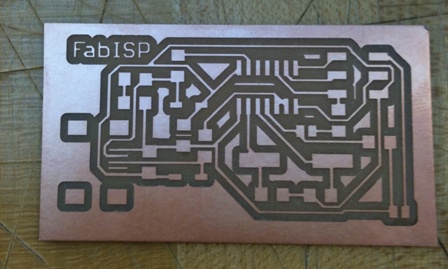
I
started by milling the board on the Modela. Due to huge time
constraints to use the machine, I opted for using the shear to cut the
outside of the board instead of milling it and I really can't tell the
difference between my board and the others in terms of finish. I got a
pretty nice finish to the traces and didn't need to clean out any
residues.
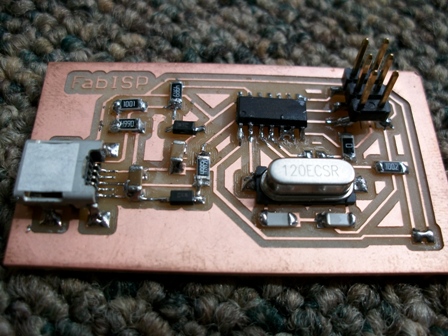
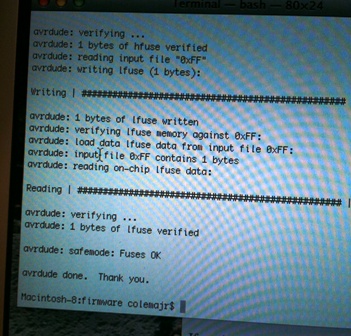
After
spending some time stuffing the board (and a lot of patience for
soldering), we tried programing it using an AVRmkII and I was extremely
happy when the microcontroller programmed correctly!! I didn't have any
shorts in that part of the board.
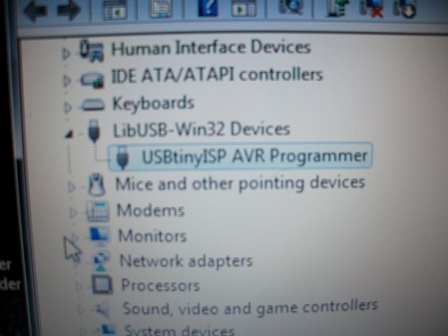
Alas,
the happiness was not to last because whenever I tried to plug the
FabISP to a computer it wouldn't get recognized and always showed as an
unknown device. Then started a long mission of debugging, I will list
here some of the common errors I had or saw at other people's boards
during those long hours of debugging :
- Check that none of the pins of the microcontroller are connected except the 2nd and 3rd from bottom right.
- Check that none of the pins in the 6 pin head are connected.
- Check
that there is a good connection between each of the pins of the
microcontroller and the corresponding one on the 6 pin head.
- Both the solder jumpers need to be on for the programming but SJ1 needs to be taken out before plugging into a computer.
- Check that small traces in the usb device are not connected and that the joints are good (this is the most common problem).
- Check that the diodes are in the right direction & that all the resistances /capacitors are the right ones.
- Check connection between crystal & microcontroller.
If none of this works, you need to check for continuity everywhere
& check that the microcontroller or the usb are not fried (try to
reprogram for example).
After
a long chase for the problem, I finally got it (my main problem was a
wrong resistor and the connection between the 2 pins of the
microcontroller wasn't there). Joyyyyyyyyy!!!!
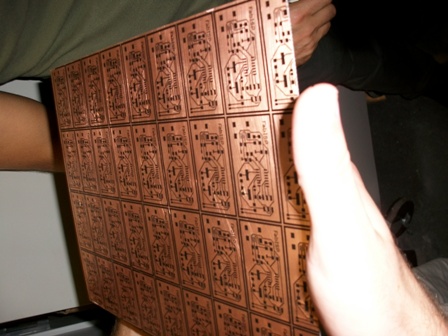
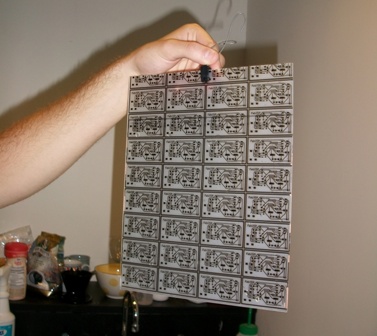
Etching
For
documentation purposes, I am putting here the steps for etching the
boards. This is by far more efficient than milling for etching multiple
boards.
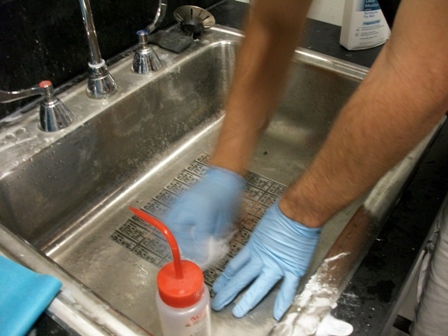
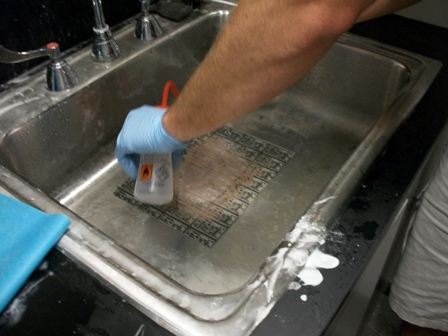
We started out by thoroughly cleaning the copper board
(FR4) then on a special paper we printed the traces (mirrored!!) before
putting the two into a laminator to print the traces on the copper. The
special paper is there because once you wash it, it peels off very
easily, leaving the board with the ink traces there. The big time input
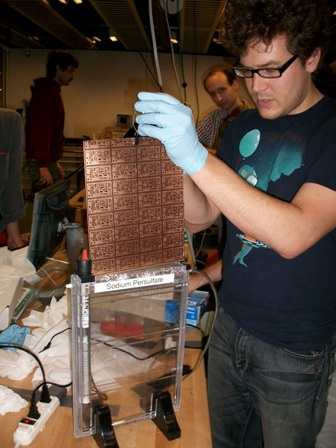
is in this phase where you have to clean and prepare the sodium
persulfate.
We then put the board into the sodium persulfate for it to etch the copper which isn't covered in ink.
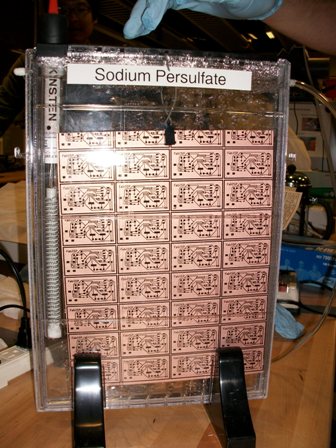
After about 5 min, something magical happens, in the space of seconds the copper disappears and we get an etched board!!!
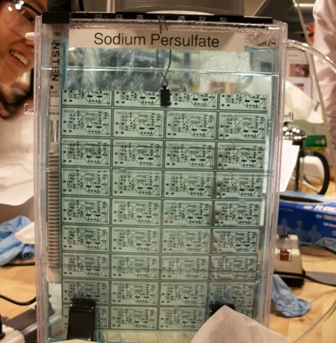
We then used a solvent (methanol or acetone) to clean the ink and have a board which is ready to be stuffed.
Voila,
we got alot of boards in a relatively short time. The big problem is
all the chemicals we had to use that are potenially dangerous.