05 | molding and casting
3-DIMENSIONAL OMS BY ALBERT CHING
With the rapid proliferation of smartphones, QR codes have become a powerful tool to embed information within
a code that is unreadable to the human eye. Whereas its predecessor the barcode encoded information along one
dimension,
QR codes work by layering information along a vertical and horizontal axis. Since this week's assignment
involved molding and casting in 3 dimensions, I thought it'd be interesting to imagine what a QR code might look like
if it was extruded into 3D dimensions.
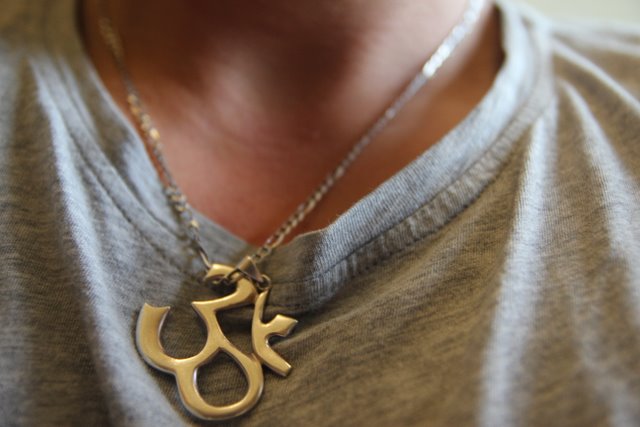
Which one of these are 3-D Oms?
The results were a bit a experimental since I just wanted to get through the workflow but I do think there is a lot of promise
in this technique both aesthetically (since a simple extrusion of a code looks like a city block) and perhaps one day functionally
if smartphones are able to read 3D QR codes.
Embedding an Om, the eternal sound of the universe, in a QR code
Om Shanti Om's song, Ajab Si featuring the most famous movie star in the world, Shah Rukh Khan and perhaps the most
beautiful woman in the world today, Deepika Padukone

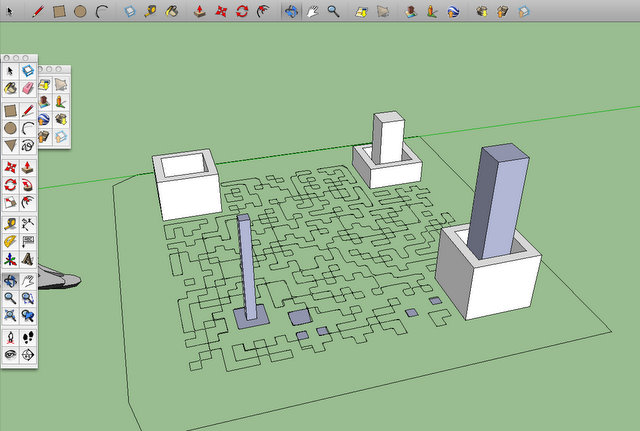
Extruding a 2D QR code into 3 dimensions
My 3D modeling skills are virtually non-existent and because of our tight milling timeline, I didn't think this was the week
to go for it especially since there was another workflow that I could use that would guide me towards a similar result.
I first did a quick and dirty model in Google Sketchup to visualize how the code would look with different areas extruded more
than others. Interestingly, it may have been an appropriate tool not just because of its ease of use but also because a 3D QR code
in many ways may look like a city block.
I then took the QR code and created different shades of gray for different depths that I wanted to mill using Photoshop
and Illustrator.

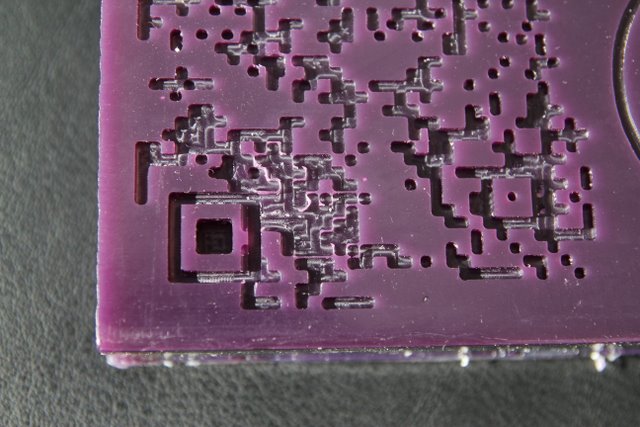
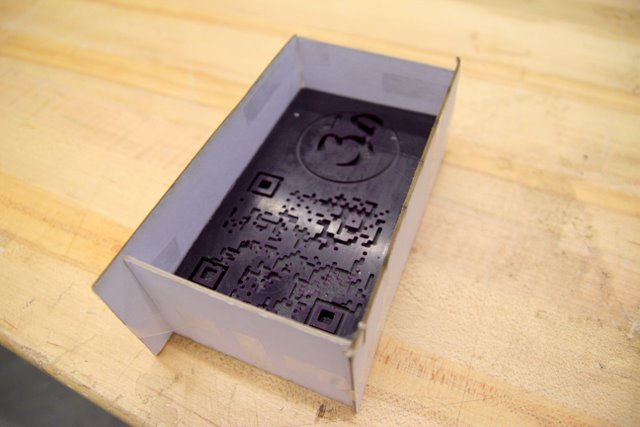
Milling the wax on the Shopbot
Converting the files into Shopbot ready files took a couple of iterations until I realized that Shopbot takes Illustrator files
pretty well. The limiting factor in the milling process ended up being the size of the wax, fine contours of the code and the
shaft lenght of the nmill. Although I wanted to create a more stunning 3D effect with the code, the 1/16th nmill could only
plunge 0.2 inches (despite a block depth of 1.25 inches). Consequently, the passes that we could make with the Shopbot
were flatter than what I would've liked.

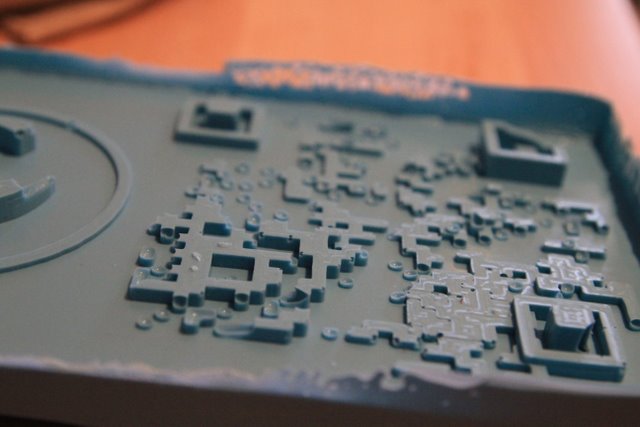
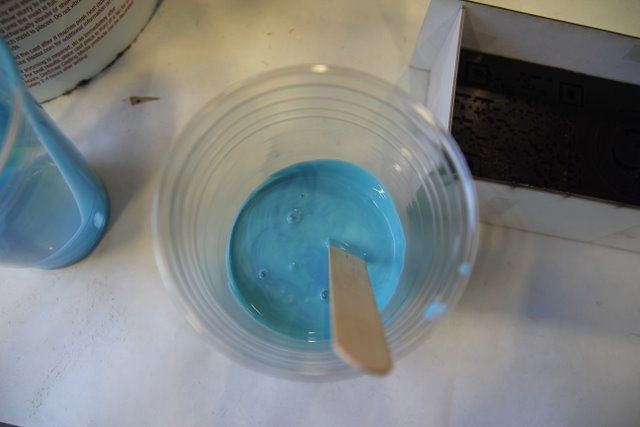
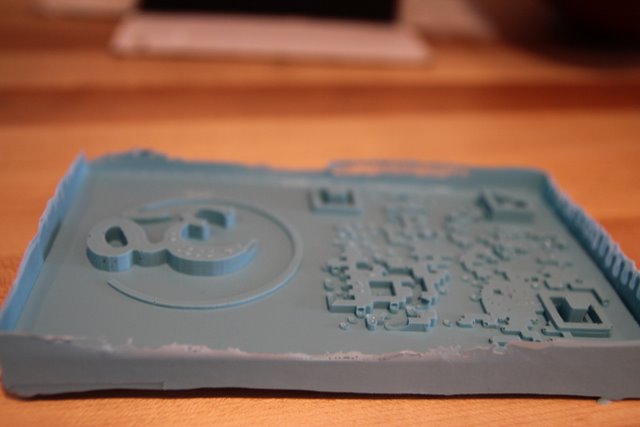
Making the silicon mold
My silicon casting process was not as successful as I would've liked - I suspect that I was mixing for too long and the
silicon was already starting to cure before it could seep into the deepest crevices of my mold. Also, despite my best
efforts there was a string of bubbles that formed especially in the smallest spaces on my wax block.

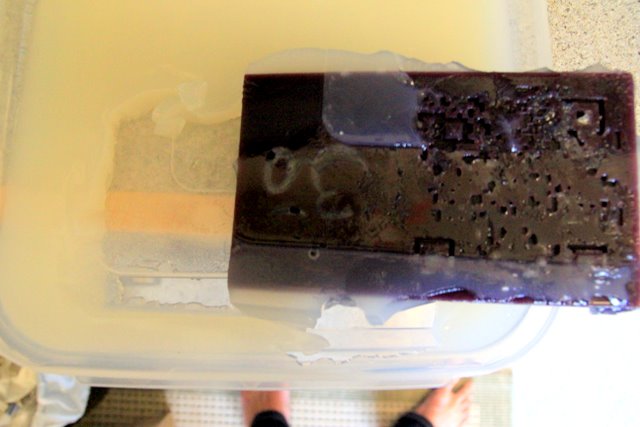
Testing a gelatin mold
I happened to have some gelatin in my apartment so I thought I'd try a run at making edible oms but unfortunately
the gelatin was too soft to retain its shape.
Acknowledgements
Another huge thanks to Tom for helping me out with the Shopbot, Sara for her help with converting my Illustrator
files into Shopbot ready ones and Vernelle for letting me go way past my scheduled milling time.