E M B E D D E D P R O G R A M M I N G
The idea was to program my board to 'do something'
THE PROCESS:
1-Design the board following the template
2-Mill the board
3-Stuff the board
4-Program the board
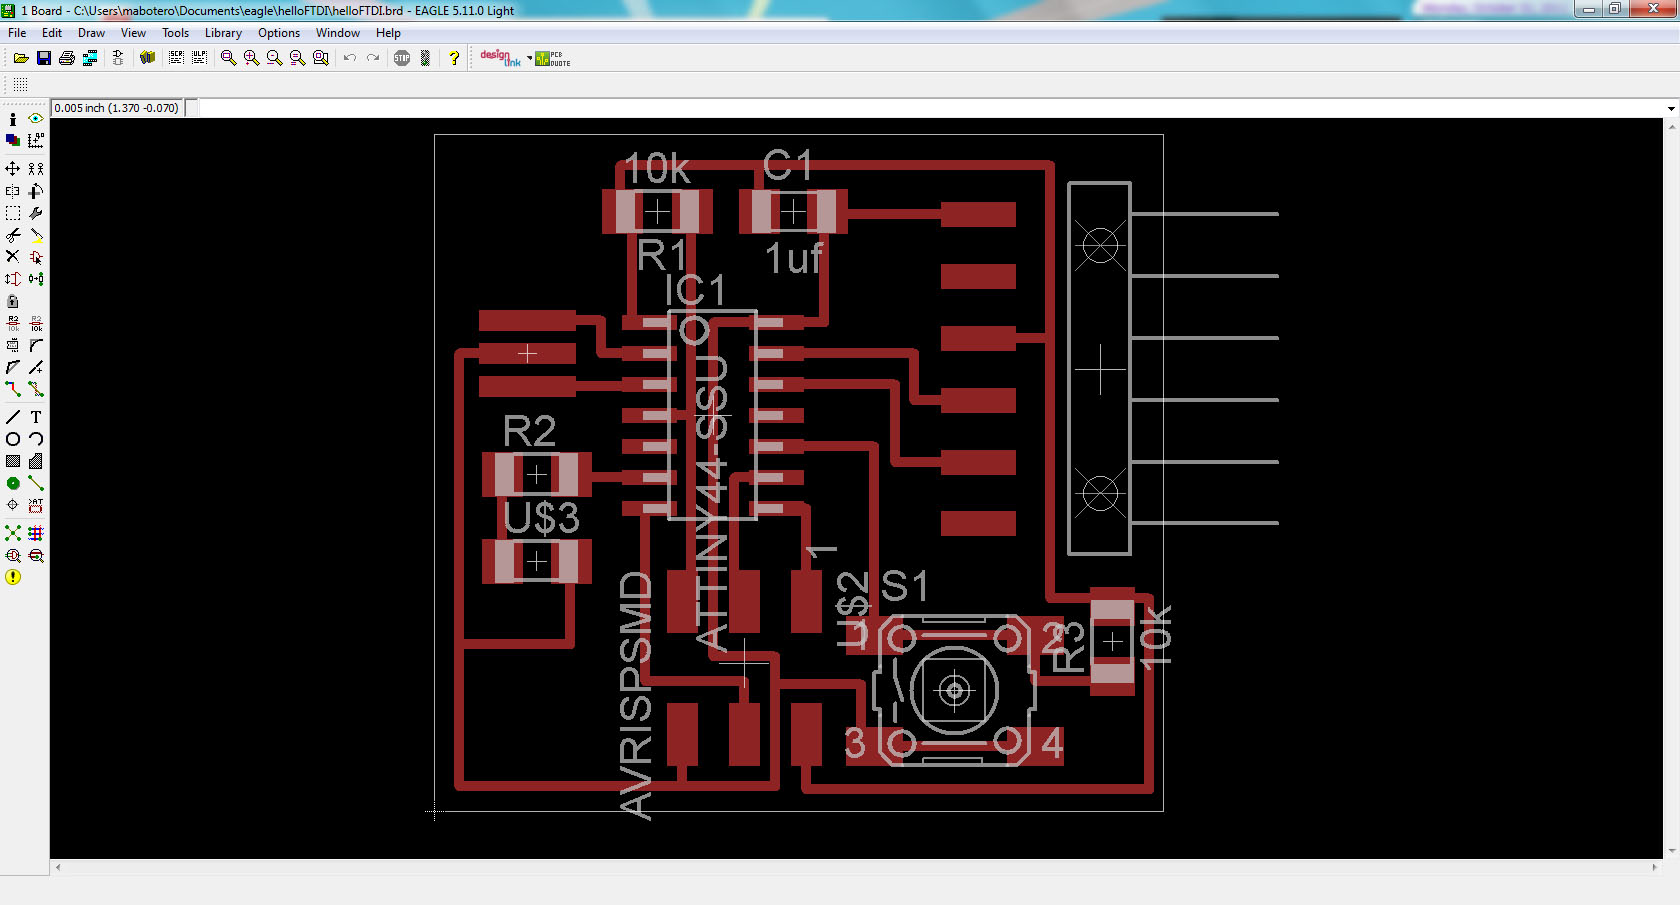
The routes and pads for the board were created using eagle's freeware program to create simple boards. The process was pretty easy since we followed Neil's template and just added a button and an LED.


These are the final images that was sent to the Modela, the one of the right is the board cut out and the one on the left is the traces...


The Roland Modela hates me, so even with help I had some strange results. The first board seemed to work just fine, but on close inspection, it had been scaled down somewhere along the process. I checked the file again on PhotoShop and it was in fact the correct size. I exported the PNG again and that time, the board was the correct size.
The second time, Novy San helped me with the Modela, giving me some of his good machine karma and yet.....Somehow the Model re-zeroed itself to a different location and began cutting out the board through the middle of the traces!! Eventually I got a good board cut out and on to stuffing it...
Now it was just a matter of making sure the board worked (unlike the Hello ISP from a couple of weeks ago.)
With Moritz Kassner's help, I was able to program the board with Neil's simple echo program in C. This confirmed my board was in fact working and that I could program it to do other things if I wanted to.
During the session Josh and Daniel were experimenting with Arduino and they had figured out different ways to program their boards to do a couple of things (variations of blinking the light, the light coming on and the light turning on and blinking when the button was pressed). Josh showed me Arduino on Windows and showed me how to edit a program in order to get the board to do a couple of things... The two main programs were to just have the light go on, the to blink then to blink faster and then to turn on once the button was pressed.
LESSONS LEARNED
With PCB creation, everything must be one step at a time. The first week, I tried to take on the whole task at once and failed. The most important thing was to have patience and return to the task repeatedly rather than keep at it until exhaustion. For some reason, more continuous time spent on this did not help the progress. I was better whenever I had a problem to abandon that task and return to it later (even if it was half an hour later).
The Roland Modela can be beat! You just have to really be able to comfortably loosen and tighten the bit so that you don't break it!!!!!
Keeping with the idea of one thing at a time, the next electronics assignment and the week from now until then will be to really giure out the programming aspect of the PCB creation and success. This way I will be able to take that task in its own time and hopefully succeed.
