Week 9 -- microcontrollers and sensor inputs
For this week I made everything!sensor.
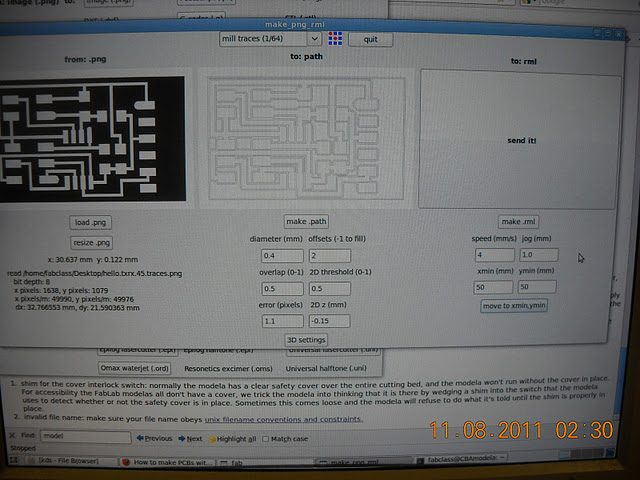
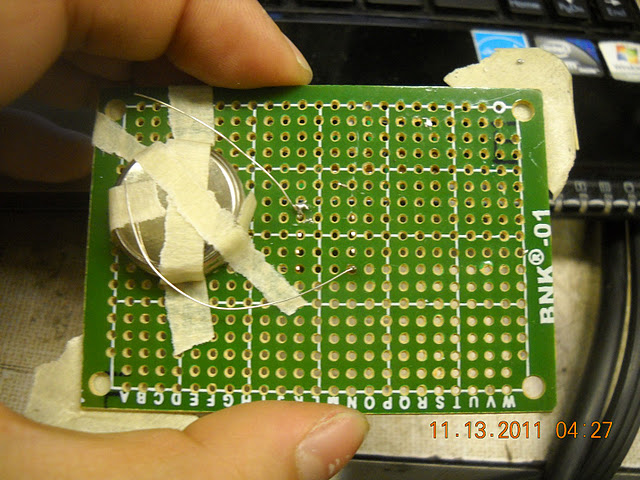
Milling straightforward -- same old, same old. PNG > modela via fab modules. My fab module settins are below:
Milled four, lost one to careless shearing and another to who knows where.
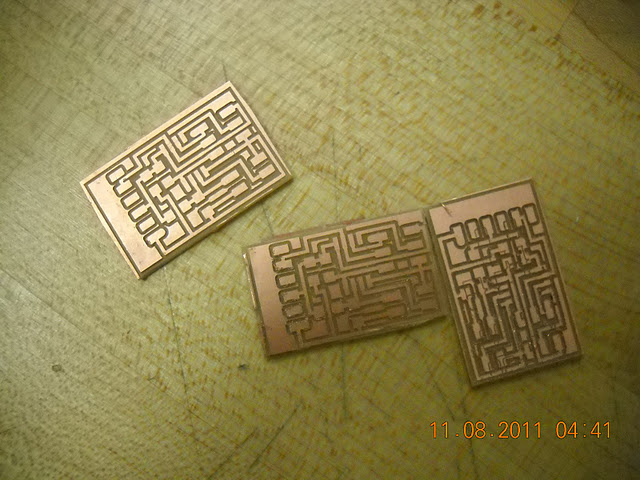
Stuffed -- very few components needed, yay.

Programming -- thank goodness some of my fellow students have awesome!documentation. Specifically, thanks to Theodora and Emma:
http://fab.cba.mit.edu/classes/4.140/people/theodora.vardouli/08_Input/08.html
http://fab.cba.mit.edu/classes/4.140/people/emma.benjaminson/index.html
The rest of you should have more text with your pictures o.o Those two were the only ones which had nearly all the steps needed.
Here is the setup for Ubuntu 11.10:
sudo apt-get install geany (optional code editor)
sudo apt-get install avr-libc gcc-avr avrdude (avr toolchain for ubuntu)
sudo apt-get install gavrasm (assembler for .asm files)
sudo apt-get install python-tk (for GUIs)
sudo apt-get install python-setuptools (allows use of easy_install for python “eggs”)
sudo easy_install pyserial
Get files: http://academy.cba.mit.edu/classes/input_devices/index.html
Specifically, the files under step-response > tx-rx
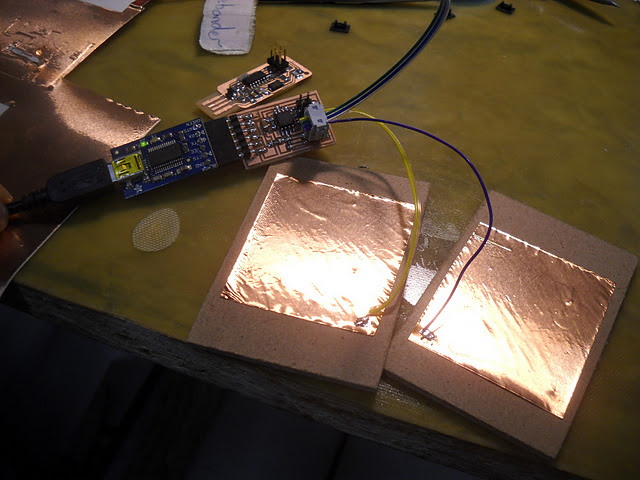
Plug in ISP (e.g. fabisp) to usb port, and use 6pin ribbon cable to connect ISP to target board (in this case the txrx board). My JS2 jumper is soldered on my ISP, delivering +5V power from the usb port through the ribbon cable to the target board. (not sure if that’s necessary)

Now, open up a terminal and run the following commands (once you cd to the correct directory):
make -f hello.txrx.45.make
sudo make -f hello.txrx.45.make program-usbtiny
// ^--sudo required unless you’ve modified your rules files -- see ladyada’s tutorial http://www.ladyada.net/make/usbtinyisp/avrdude.html
Now you can unplug the ISP programmer and the ribbon cable, and use an FTDI cable (or in my case an FTDI breakout + mini-b usb cable) to connect to the target board to get data back.
Oh right I added the copper pads (sticky copper sheet, normally for the vinyl cutter):
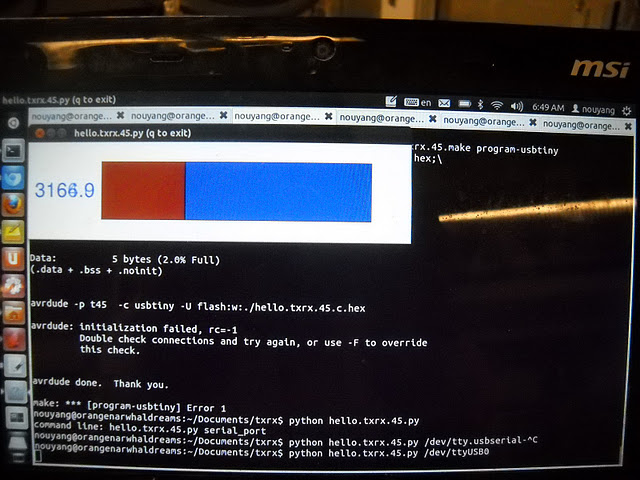
python hello.txrx.45.py /dev/ttyUSB0
(dmesg | grep tty if you’re not sure which port the ftdi connection is on)
Whoa, up pops a GUI that’s giving real-time data visualization! Exciting!

Also got POV working, yay.
http://tomscircuits.blogspot.com/2009/06/nano-pov.html

I wish I had one of the clippy programmers. I had major issues getting this working. I used an attiny85 instead of an attiny25, which turns out is indeed perfectly fine. However, I has trying to use gavrasm and avra to turn the *.asm into *hex, and no matter what I did (downloading the tn85def.inc, using .include instead of .device, etc.) this did not work. Oh, and the precompiled binary for gavrasm was unhappy on ubuntu.
Turns out there two different versions of the .asm files? And V1, avra will work fine, but V2 has macros like #define which avra will not recognize. I ended up installing AVR Studio 5 on a windows machine, used that to build the *.asm file, and then checked the "debug" folder to grab the *.hex file.
After that, I went back to Ubuntu and used avrdude to flash the file onto the attiny85.
sudo avrdude -p t85 -c usbtiny -U flash:w:avrasm1.hex
Yay it works!
I also made business cards out of laser-engraved pre-anodized aluminum and discovered that you can engrave paper on the lasercutter without everything bursting into flames. However, what puzzles me is how people are getting paper / settings that burn lighter.
Rapid metal business card creation, using stock a graduating senior left me:
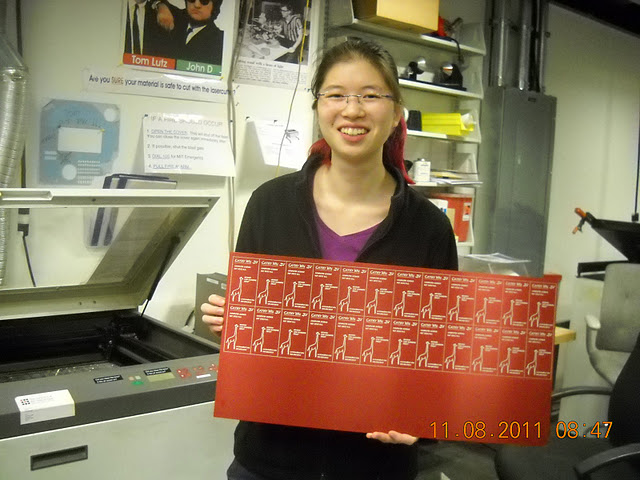

Lasercut in 3 hours, power shears to cut out (100w will not cut through metal -- would need waterjet). File down the corners to not file people.