Week 10: Composites
Overview
The 10th assignment of the semester was to create a 3D mold, and produce a fiber composite part. This week, I decided to make an archery bow and learned how to...- Use the Shopbot to mill 3D molds from styrofoam
- Produce fiber composite (linen and epoxy) parts


|

|
I exported the model as a STL file and used the ShopBot to mill out the mold.

When milling out the mold, I had to machine the right half and the left half separately since there were round edgeds on all sides.

After the milling process was finished, I glued the two halves together and got myself a nice mold.

|

|
Preparing the Linen
The next process would be to laminate the mold with linen and epoxy. But before moving forward, I used Solidworks and outlined the traces for the linen to perfectly match my mold. In order to maintain the flexibility, I decided to laminate the mold on only one side, except for the handle part. Also, I designed it so that I would have 7 layers of linen on the top and bottom ends, and 14 layers on the main body part for having a sturdy body with flexiable arms.

|

|
For cutting out the traces, I used the laser cutter. As for a good trick when laser-cutting fabric materials, Sam pointed out that using the magnet clamps would make things nice and easy.

|

|
The laser cutter was awesome for cutting out the fabric precisely, and in no time, I had the linen material ready.

Preparing the Vacuum Bag
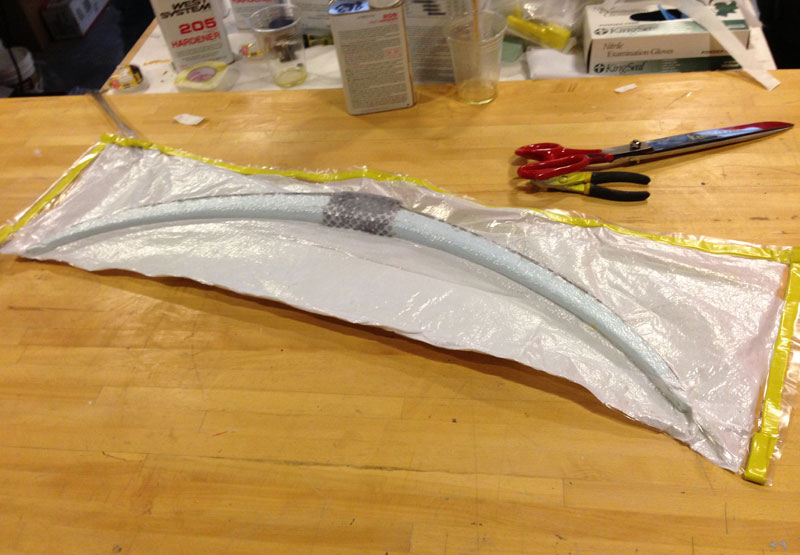
When curing the composite part, I decided to use the vacuum bagging technique. The vacuum bagging tecnique helps the linen and epoxy stick together firmly on the mold.
Although this tecnique is really useful, the process is not simple and it requires a lot of preparation. I first layed out the outer plastic and applied special silicone adhesive tape on the edges. I then layered the breather fabric and plastic. Finally, I attached a hose of the vacuum pump and everything was ready.

|

|
Laminating the Mold
When laminating the mold I mixed the epoxy resin with the hardener, and applied it to the linen. I then layered the linen parts one by one along the mold. I realized that 4 arms and hands would make the process so much easier. Thanks to Sujoy, I was able to laminate the mold faily easily.
After everything was done, I sealed the bag and sucked the air out of it. I let it sit for about 7 hours before I removed the vacuum.
Removing the Foam Mold
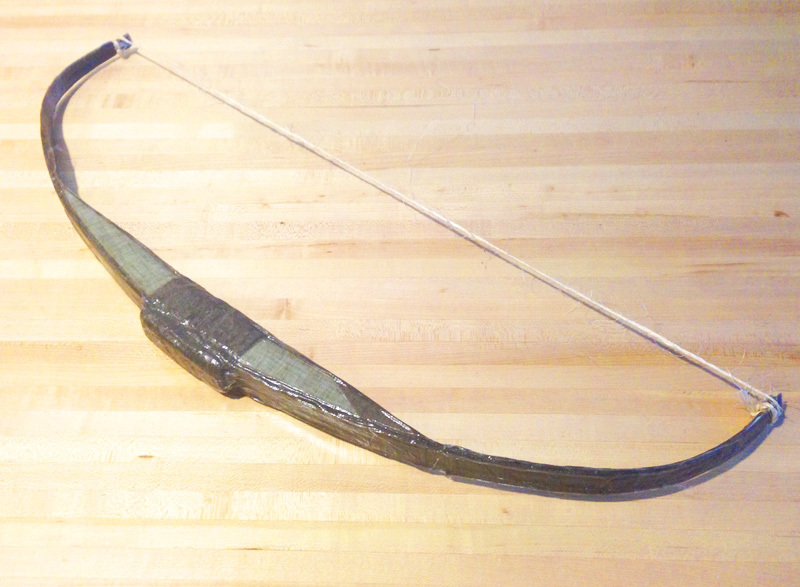
After the 7 hours of curing the epoxy, I removed the bow from the bag.

|

|
The bow turned out nicely, and it was time to apply the finishing touches. I used the band saw to cut off the foam mold on the top and bottom ends.

The shape came out fine, but I relized the the arms were a little weak.

|

|
Therefore, I decided to add 6 more layers to the top and bottom ends to make it more sturdy. I used the laser cutter to create more linen parts, and repeated the vacuum bagging process once again. After another 7 hours of curing the epoxy, I had a nice bow!
