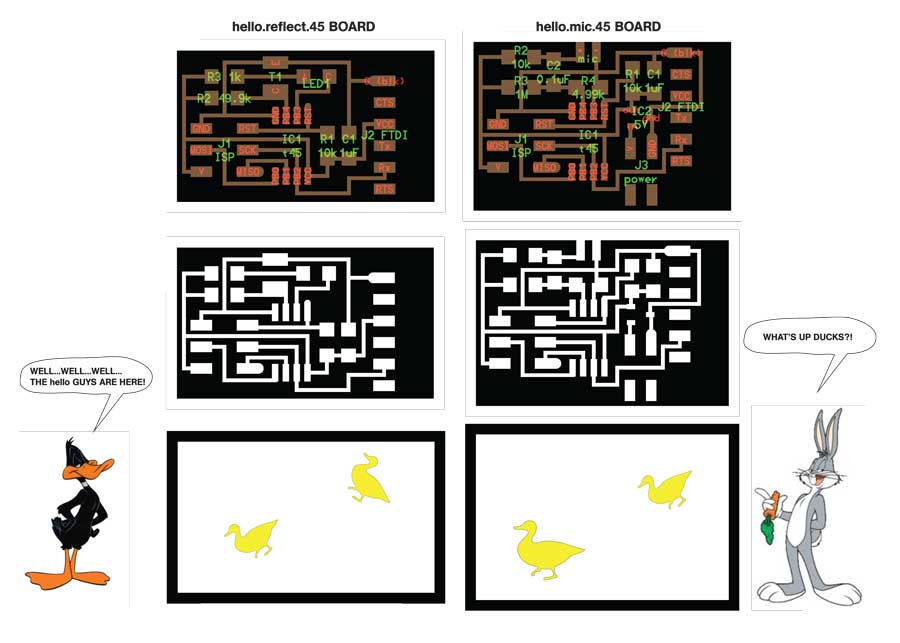
hello.reflect.45 + hello.mic.45 Boards
This week, we learned how to utilise the microcontroller to measure something. The class website lists a wide array of examples of boards that we could make. For this exercise, I decided to try making the hello.reflect.45, and the hello.mic.45 boards.
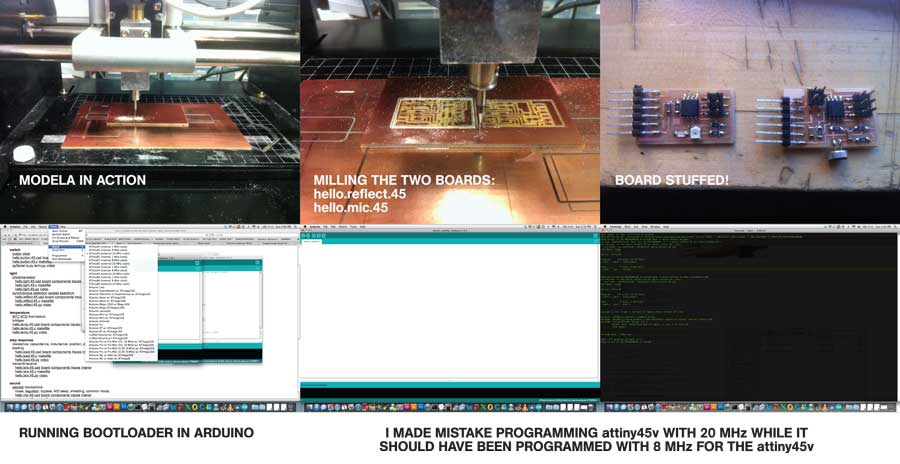
Milling Process + Initial Programming Failure
Once, it's ran, the milling process didn't take that long. I, then, spent approximately 40 minutes to stuff the boards. Using the AVRISP, I tried to program the boards.
The hello.reflect.45 was instantly recognised (green light!), but not the other one (not sure why, still). I tried to bootload it through Arduino with the 20MHz clock setting. I realised it later, that I was using attiny45v instead of the attiny45. 45v runs with a lower voltage, and could be damaged when forced to run with 20MHz external clock.
My board wasn't recognised at all after I successfully bootloaded it, so Daniela Covarrubias advised me to replace it with the new microcontroller. I desoldered it -- by this time, I'm pretty used to desoldering components with both the copper braid and the heat gun.
Dealing with Hardware Issues
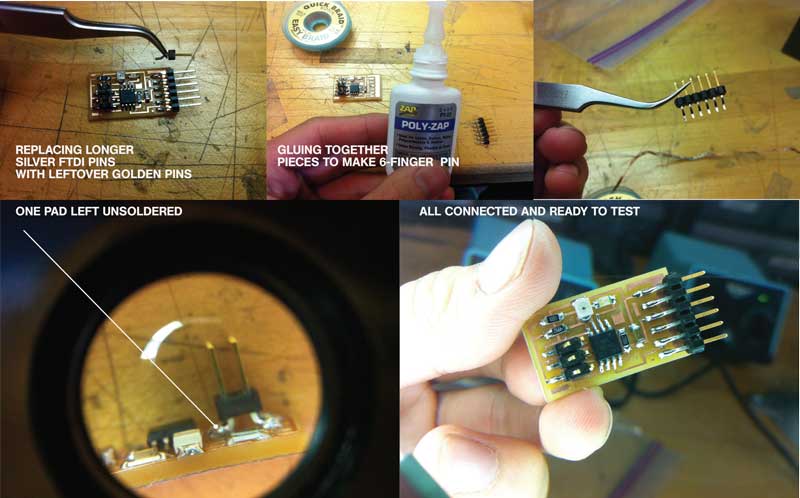
Just a few things that I had to deal with after finished replacing the attiny45v:
1. Changing the FTDI pins
Archi Shop ran out of these, so I used a slightly longer silver-plated pins, which fit nicely with the connectors. However, the FABisp wasn't happy reading the board, so Daniela adivsed me to just use her old pins. I glued them with the superglue and they sat nicely on the board.
2. Checking if everything was soldered properly
We found out that there was one 2x3 header pin which was soldered but not touching the board. This was easy fix, but could have taken longer time to figure out had Daniela not noticed it. Massive thanks to all her helps this week!
After these cross checks, I was happy to finally be able to program it with the USBtiny device smoothly.
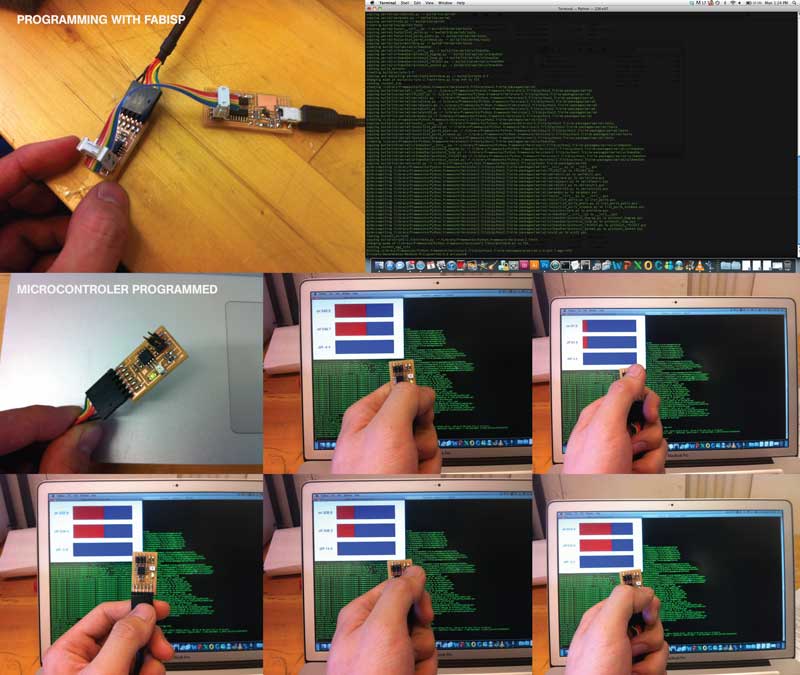
Programming + Running Python Script
Daniela also pointed out a good step by step board programming methods listed on MAS 863 alum, Lining Yao's, website.
Basically there are three steps that you have to go through once you download all the required files, the .c file and the make file. In my case, I did:
1. Make the hex file: make -f hello.reflect.45.make
2. Program with the USB/AVR ISP: make -f hello.reflect.45.make program-usbtiny
3. Download Python if you don't have it, and place this folder somewhere in your computer.
4. Go to terminal, and locate the folder, then type: cd pyserial-2.6
5. Setup Python: python setup.py install
6. Run the Python File to install the serial port: python hello.reflect.45.py
7. Locate the serial port with: python hello.reflect.45.py
8. Assign the right serial port using: python hello.reflect.45.py /dev/tty.usbserial- serial port and press "TAB" key in the end -- this gives you the serial port registration mark, then hit "ENTER".
9. You should be able to see the Python Visualisation on your screen, now.
hello.reflect.45 In Action
It worked nicely; the board senses the difference in light intensity of the environment and my finger that I used to cover the sensor. The Mic is still a mystery to be resolved, yet!