I'm out away much of this week (including class), so my molding and casting adventure was more rushed than I would have liked. I made mistakes, but I learned a lot in the process (and have a nice little pen holder now). Many many thanks to Lindy and Raj for showing me how to get started making the wax model on the modela.
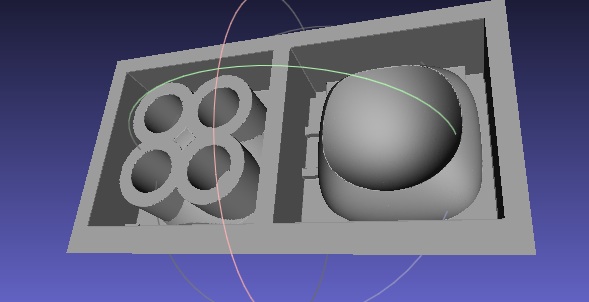
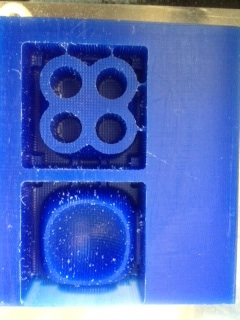
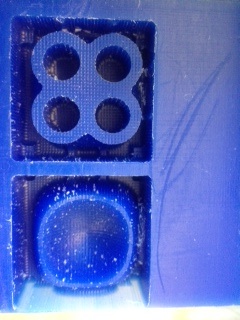
I'm making a paper-weight/pen holder which may be too small to actually hold pens, but is a fun shape nevertheless. Here's the .cad file, which I designed in kokopelli, and screenshots of the wax model, split into the top and bottom halves, with a sprue, vent and aligning columns:

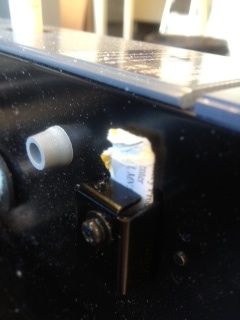
Milling took a lot longer than expected. Also, I needed to troubleshoot the modela. It wasn't working (you couldn't adjust the up/down buttons, or send any commands from the computer). After trying to cancel jobs (type ps -aux | grep cat into the command line, the kill XXXX, where XXXX is the number of the process to kill), turning the modela and the computer on and off several times, cleaning the modela, and checking all the cable connections, with Lindy's suggestion I realized the piece of paper jammed into the lid monitor wasn't adjusted just right, and adjusted it, and it worked. Here's the piece of paper:
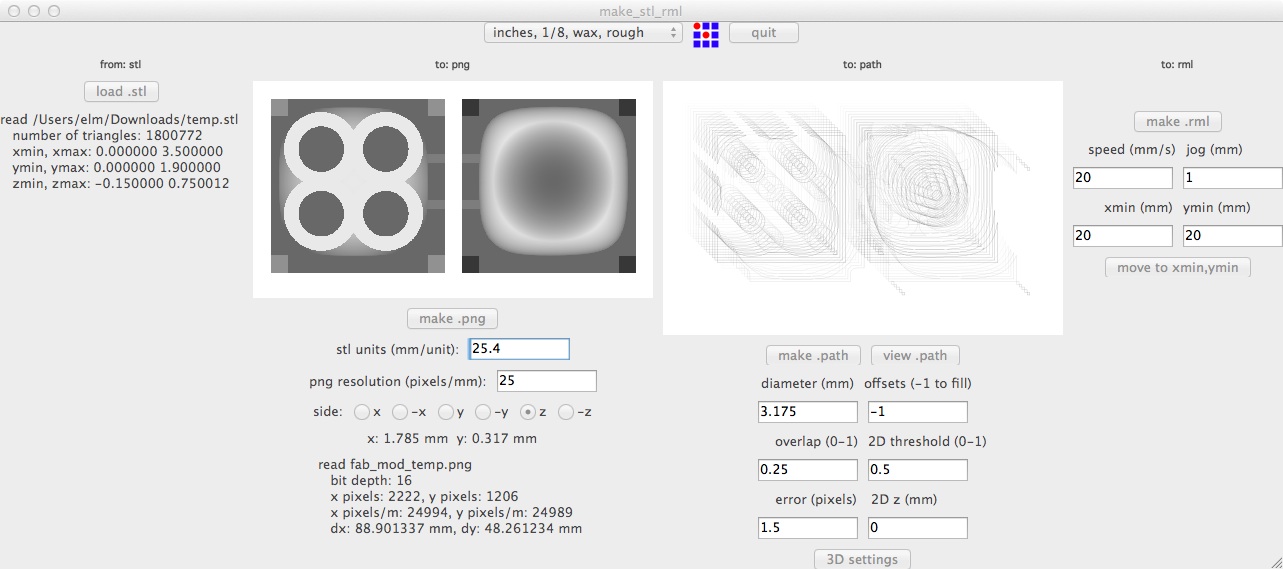
I used the fab modules to turn the .stl into the 3d tool path. I adjusted the 3D settings to that the depth went from 0 to negative, and set the units to inches (25.4mm/unit). I didn't need to adjust the axes.
Here's the rough cut wax, done with a 1/8in end mill:
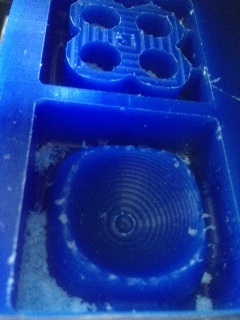
And here's the finish cut, also done with a 1/8in end mill, with .7 overlab (It isn't super smooth, but it's a lot faster then higher overlap settings). I realized I hadn't left enough space around my part for the endmill to go all the way to the bottom, and all the way around the parts. I was able to fix some of this by cutting some of the remaining sticks of wax with a knife, but there was still some wax left that made problems for my mold. Also, I was lucky that I didn't run off the piece of wax -- look how thin the wall is! In the future, I'll pay more attention to how much space I have and need. Here's before and after doctoring the wax with a blade:
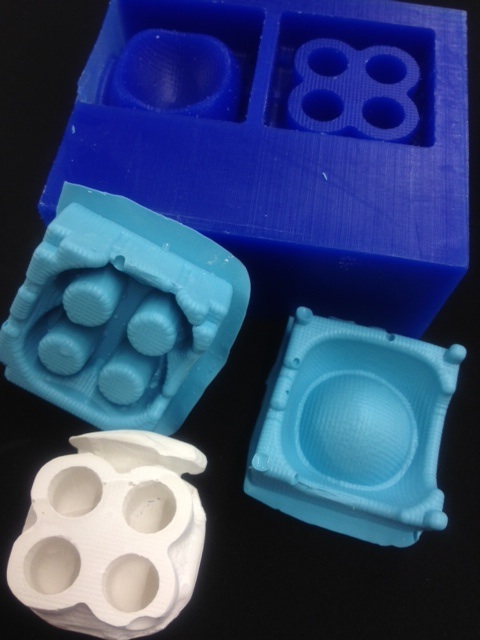
Next I poured the OOMOO mold, and tapped to try and get rid of bubbles, which floated to the surface (bit there were still a few bubbles left in the mold).
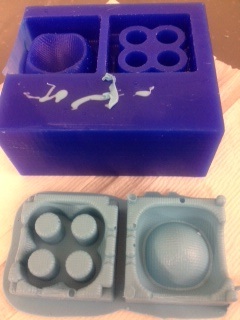
I was happy with the design and how the sprues and aligners lined up, but unfortunately my mold had holes in the sides where I hadn't allowed enough space for the end mill to clear.
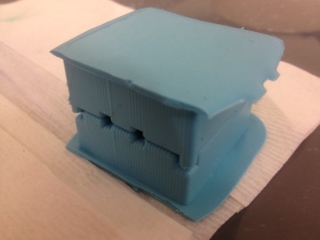
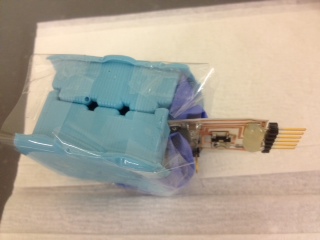
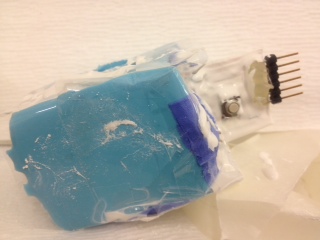
I used pieces of rubber glove and tape to block the holes. Also, I wanted to see if I could see an LED that was embedded inside, so I cast one of my circuits from last week inside. I filled it with DryStone, in two iterations, because it leaked too much to fill the whole thing with flowing DryStone in one go before some DryStone had hardened around the big holes. You can see the line between the two fills on the finished product.
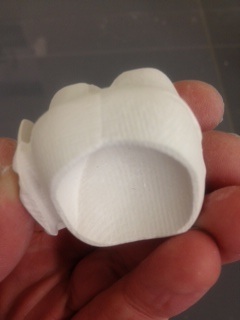
Once it dried, I took off the OOMOO mold. But I couldn't see the LED light up. This could be because the casting process damaged the surface, or because DryStone is quite opaque. A chip o DryStone doesn't let a LED underneath shine through it, so maybe DryStone is just too opaque.
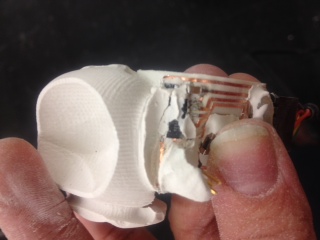

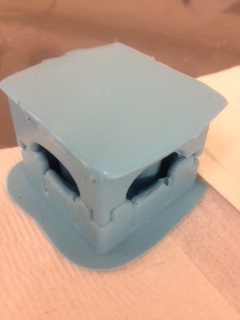
I sanded down some messy bits and pulled out the circuit, but left one messy bit because I thought it looked cool with the imprint of the rubber glove, and was a reminder to leave enough room around the wax model next time:
Molding and casting generates a lot of mess:

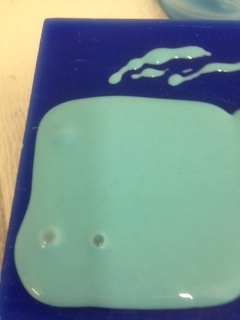
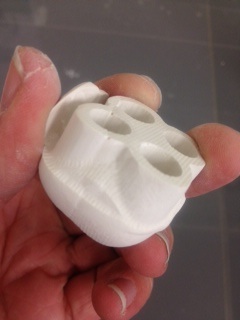
But in the end, even though I was worried it was too small and would topple over, and even though it had gone through a relatively jury-rigged casting process and had a PCB ripped out of it, the pen-holder worked!
