Week 8: MAKE SOMETHING BIG
This week for HTM(A)A, our task was to make something BIG using machine controlled cutting such as the CNC machine or the Waterjet cutter. Due to forseen hurricane sandy circumtances, I was unable to complete my big project, but hope to do so this upcoming weekend.
My original idea was to do something with plywood...and decided on a wood and tensile-wired hammock inspired by Adam Cornish's wood hammock. I spent many a great hours, refining it with more pieces, and playing with the form via grasshopper. But this proved to be too much material (5 sheets if base included), too much time, and too many unknowns, so I decided to put this project on hold for now.

I switched modes, and decided to look right in front of me for a new project! My desk is a red ikea laptop desk..simply too small for working..so why not build a new one that is Wider and Longer?
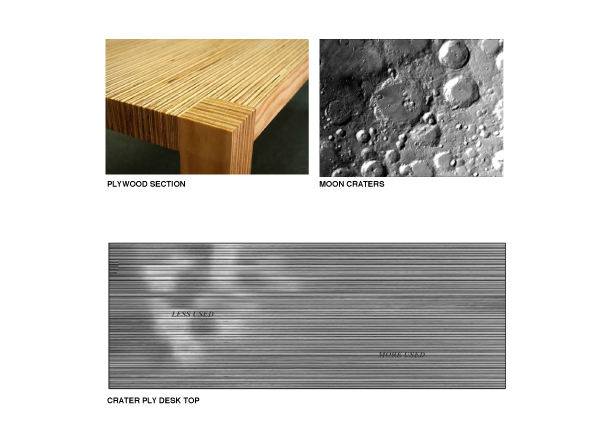
I splurged for 3 sheets of 4' x 8' x 3/4" plywood, so I decided to stick with plywood. Googling "plywood table" I found the above image which I thought could be beautifuly interpreted into a simple u-fold desk.
Also Not to be too boring, and also because Ive recently gotten fascinated into Moon craters, I also took the second image above as an inspiration. I thought that the less used portion of the desk could deform, almost as if it were struck by meteors--A little special touch! This was achieved with the heightfield command. This portion can hold my monitor or nothing at all, and if it becomes a nuisance , I figure I could just add a piece of glass on top.
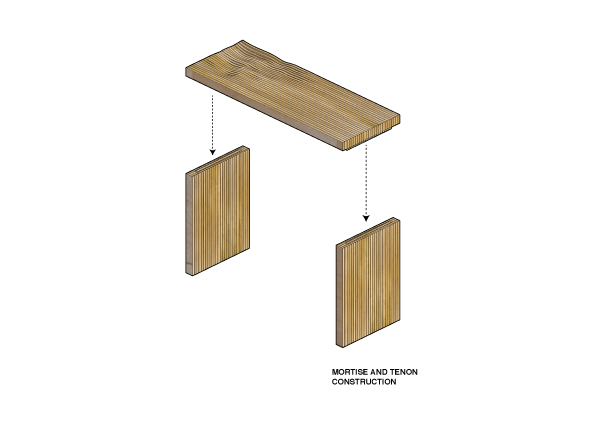
I designed it so the construction would be rather straightfoward: 3 components, each built up in one direction with .75" plywood sections. There would be 27 pieces for each of the 3 components (leg, leg, top). The top would connect to the legs via a mortise and tenon joint, milled into the majority of the sections.
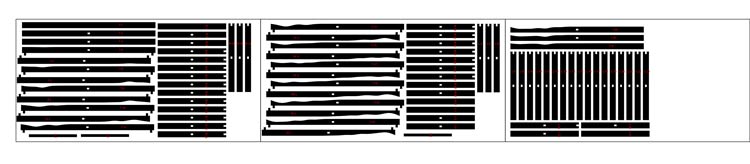
It turned out to be 2.5 4' x 8' sheets. Luckily I had enough. Phew. I made sure to use a generous (1/2") offset when laying out my boards, so if I could, a 1/2" endmill could fit in between. The geometry nested quite nicely on the boards still.
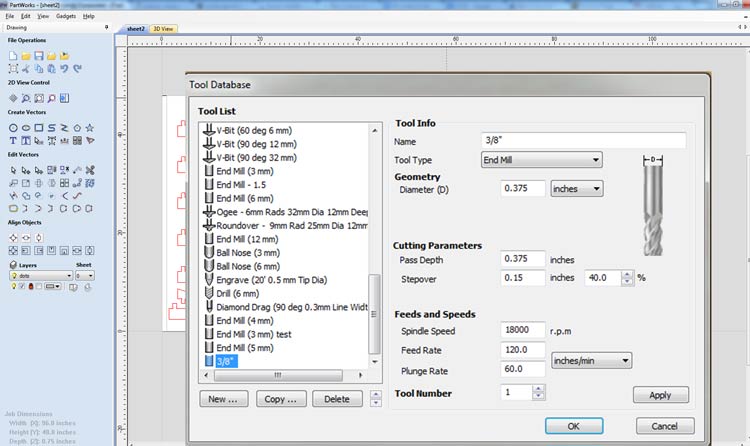
With the help of Costanza, I used Partworks to set up the Mill files. It's actually not too complicated! In order to speed up the process, a 3/8" end mill was used with a high plunge and feed rate. This allowed the 3/4" (Technically 23/32" I later found out) pieces to be cut in only 2 passes!
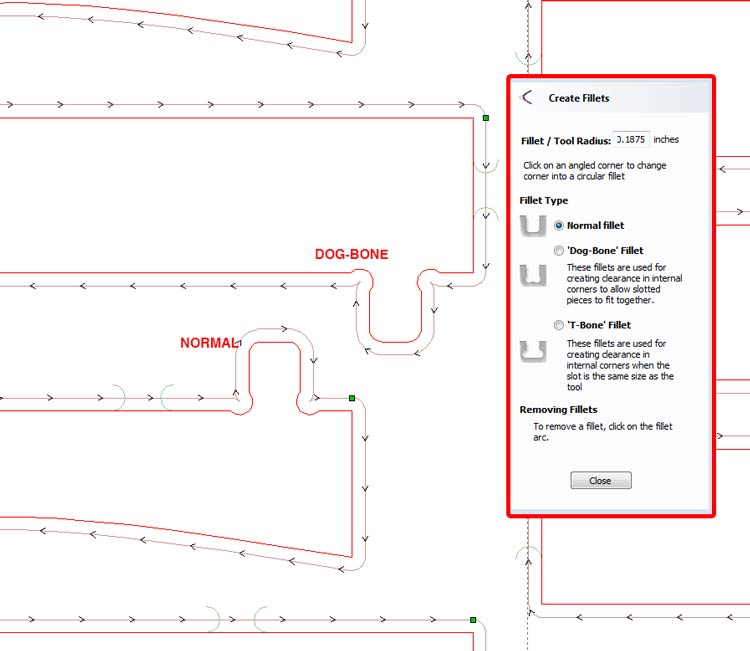
Because of press-fit joints, it was necessary to use filleting around some edges.
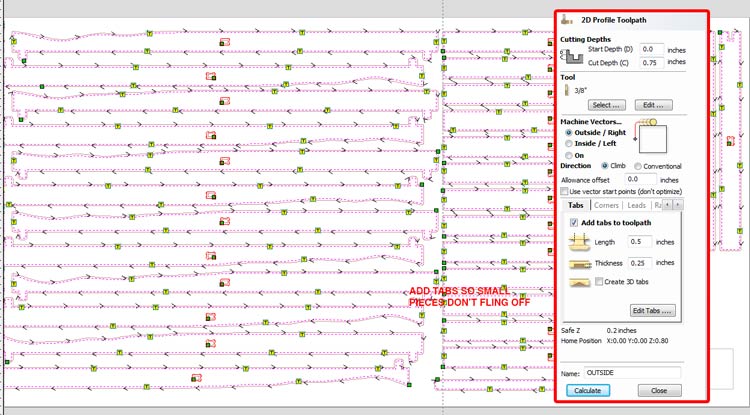
Adding tabs (basically things that will hold the piece into place after being cut) was necessary because the pieces were so small. They might fly off the bed if not properly secured.
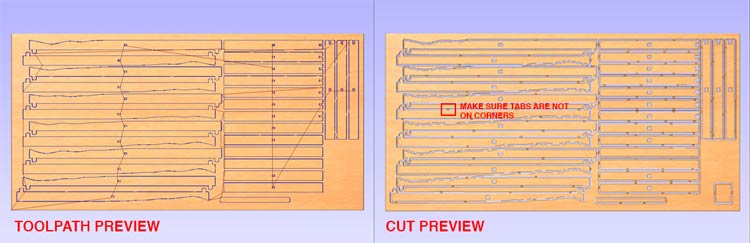
I used the preview option to make sure no tabs were on the corners (I used auto-tab, super nice)..this become kind of annoying when cleaning up the parts.

Drilling down the material was essential to allow for even cutting. I ran into a few issues where the wood was slightly raised, which called for additional wood screws.
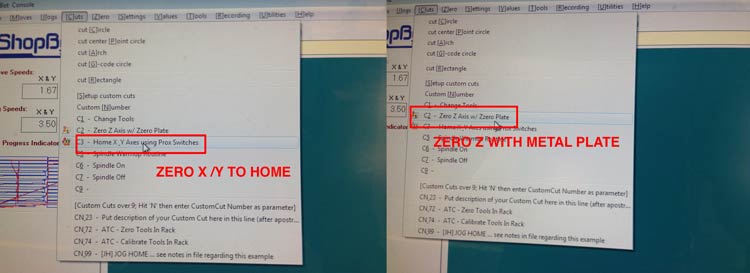
Zeroing is first done by Using the Home XY Axes (Prox Switches). This is good because it uses an absolute (great if the computer crashes mid-job). A Metal Plate is used for the Z axis, which you put on top of your material and the drill will make contact to calulate.
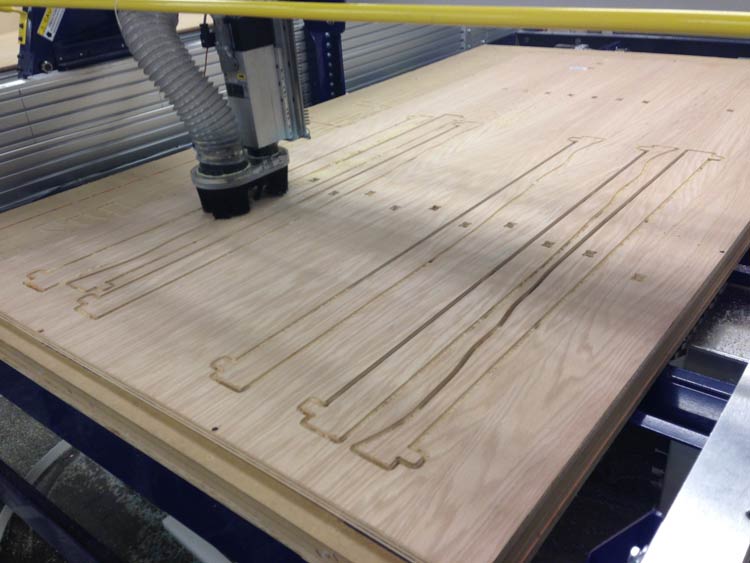
Milling the first sheet went fine. I set it up so it did the inside holes first, and then the outer edge last. Make sure you export it this way!
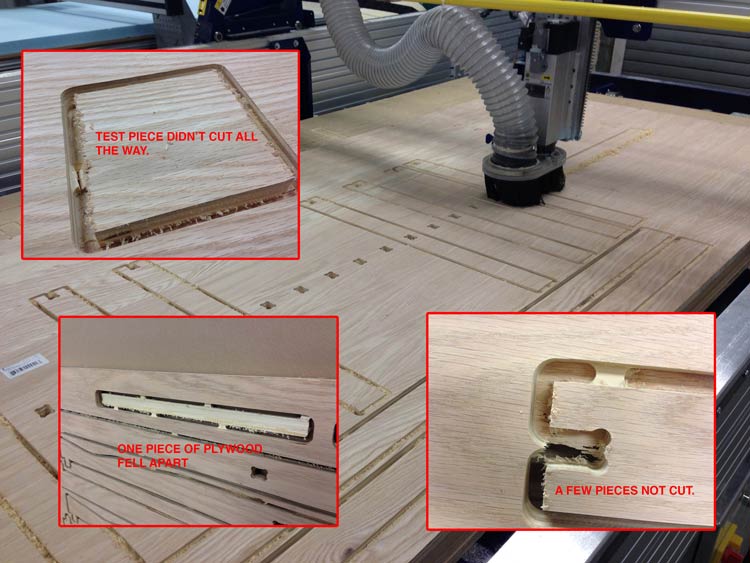
Above are a few Problems I ran into. Mostly it was because I either did not have enough screws drilled in to keep my material down or they were not drilled tightly enough. But I also had an instance where one of parts split in half as if the plies were not glued all the way?! Someone told me this is becuase home depot sells janky plywood.
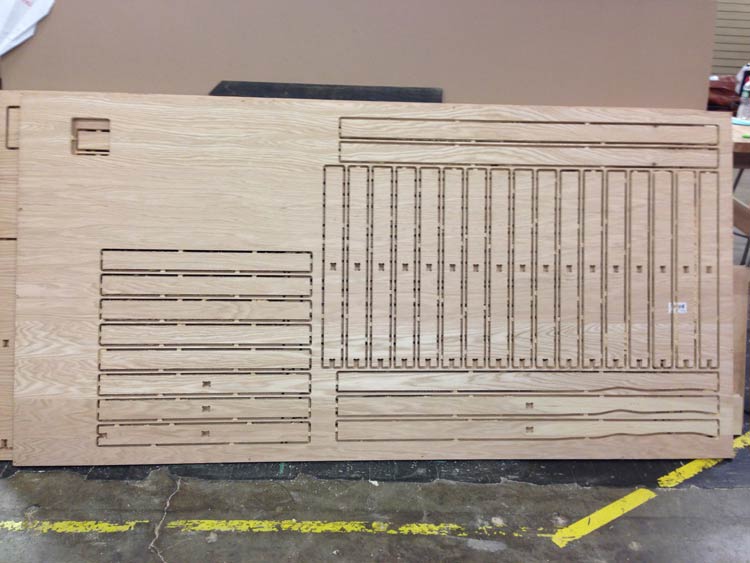
Sheets done! But they still need to be sanded and glued together. I will have to do this over the weekend, due to the shop closing at 10pm.
Thats all for now. The final result should look something like the images above. Stay tuned!
What to Improve
- As soon as I'm done, I'll let you know