A HANGING DRAWING MACHINE
|
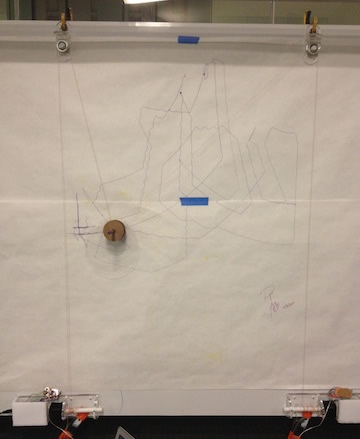
For the machines assignment Sophia and I made a hanging drawing machine, building on existing designs, and an idea of Matt Hirsch's (Info Eco colleague).
HOW TO MAKE A HANGING DRAWING MACHINE
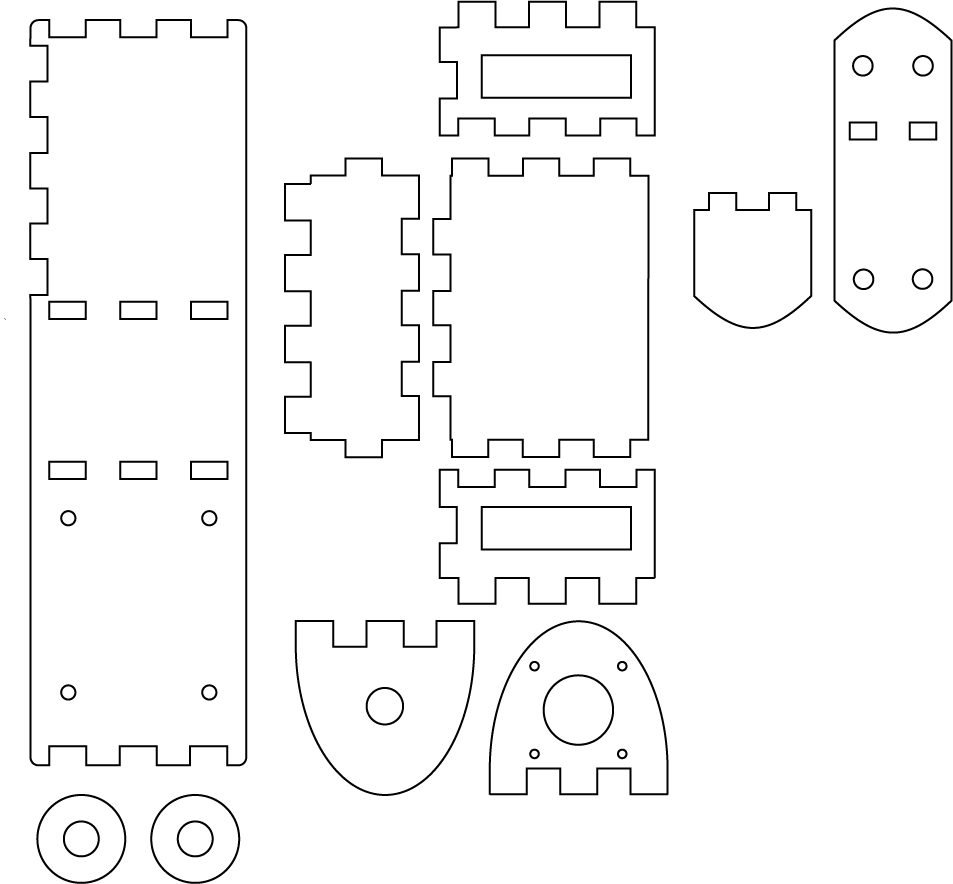
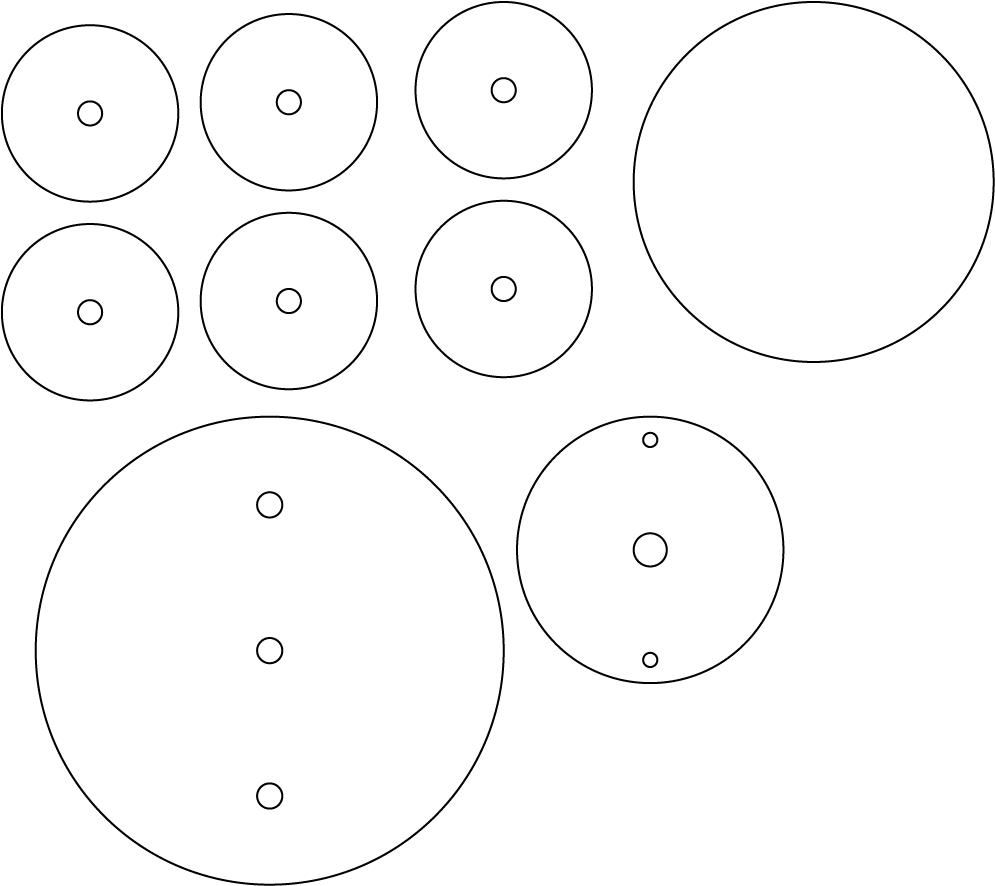
PARTS LIST
|
|
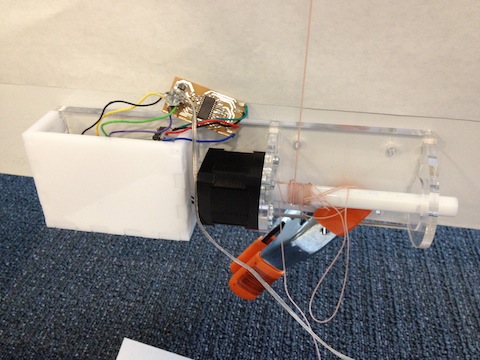
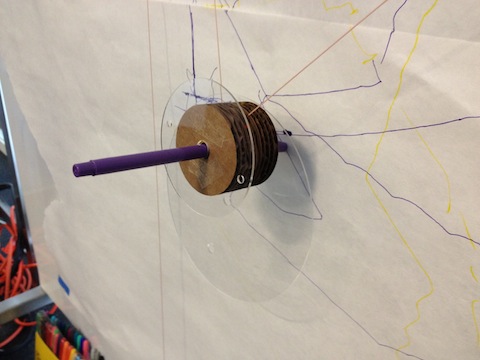
1: MAKE MOTOR HOLDERS WITH SPINDLES, PULLEYS AND A PEN GONDOLA
|
|
Motor housing and pulley mount:
|
Pen gondola:
|
 |
 |
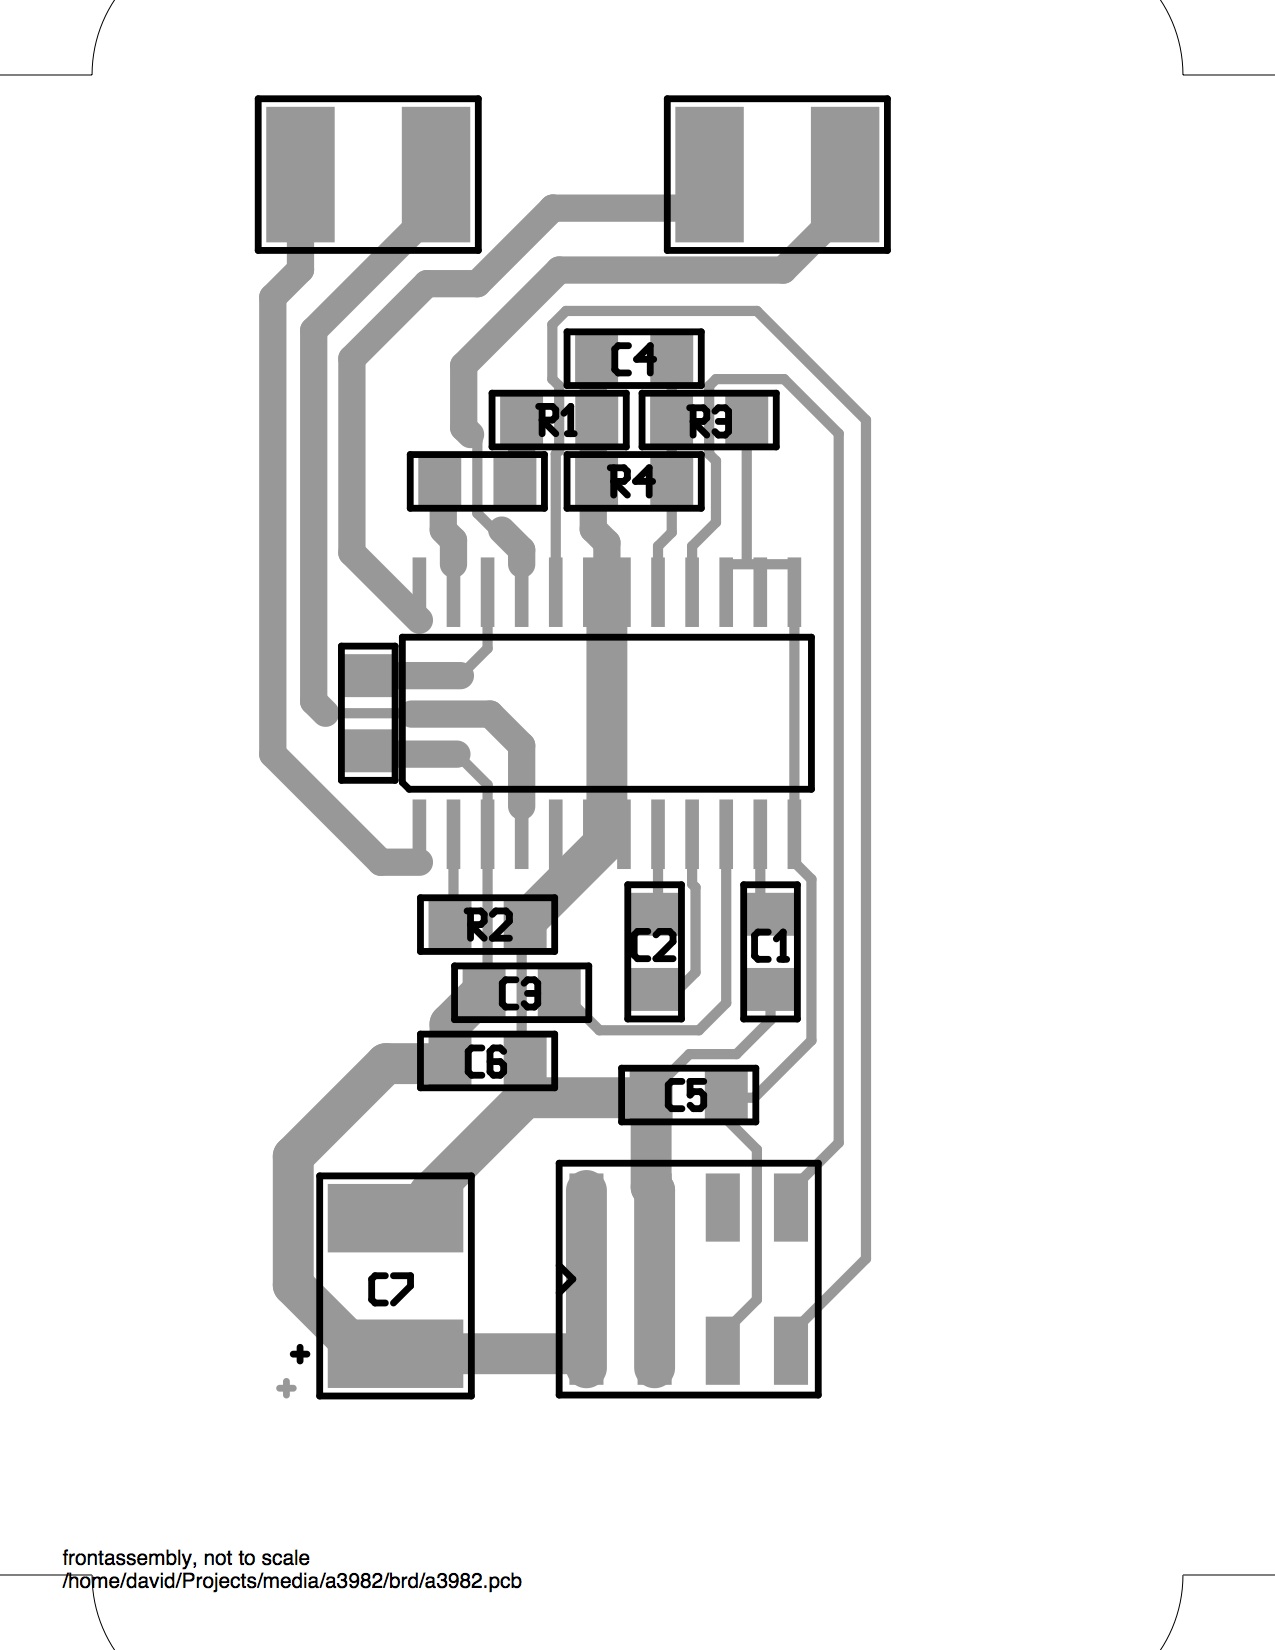
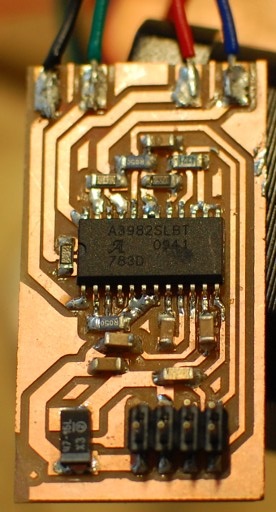
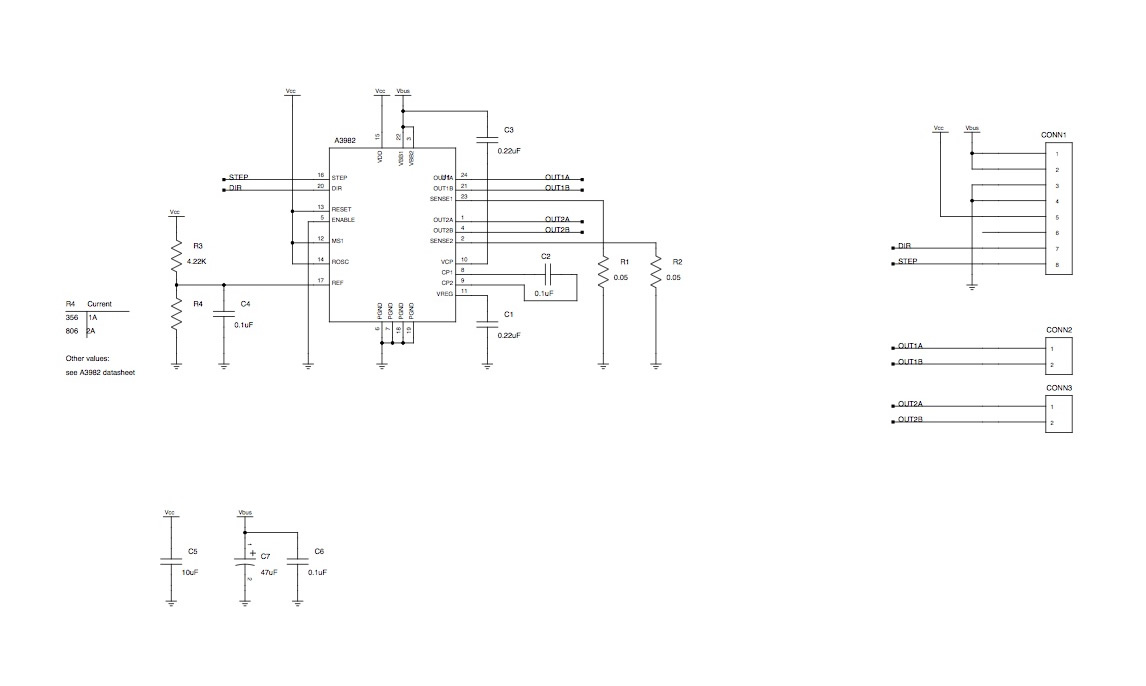
4: HOOK UP THE HARDWARE The motor driver we used was David Carr's design as we had some of the motor driver boards spare. Here is the schematic. I focused mainly on understanding this design and writing Arduino code to run the motors using these boards. |
|
 |
 |
5: MAKEA PROGRAM TO MAKE IT DRAW SOMETHING! Once I had got the motors talking to the computer through the hardware, Sophia wrote a program in Processing to make it move either motor with the arrow keys which, once you assemble the motors, pulleys and gondola with string on a wall to draw on, can create a very simple hand-controlled drawing! |
|