TEXTURED SURFACES
This week I tried to cast different textures onto solid objects by any other means than CAD-ing the textures - because CAD-ing textures takes me ages!!
I milled textures from a picture using the FabModules, cast textures from a sculpture that I made from normal craft materials, and applied textures to a simple SolidWorks model by overlaying textures onto an image and again using the FabModules.
HOW TO MILL TEXTURED SURFACES FROM A PICTURE
|
1: CREATE A GREYSCALE PICTURE THAT YOU WANT TO MILL
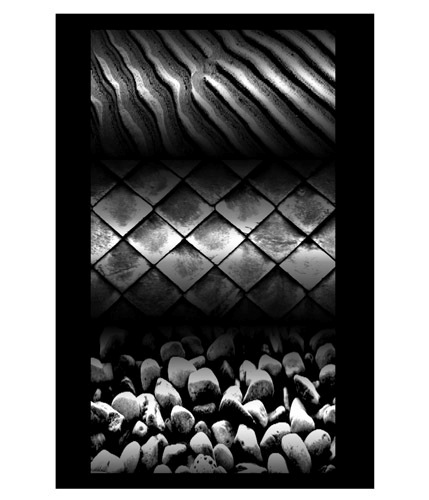
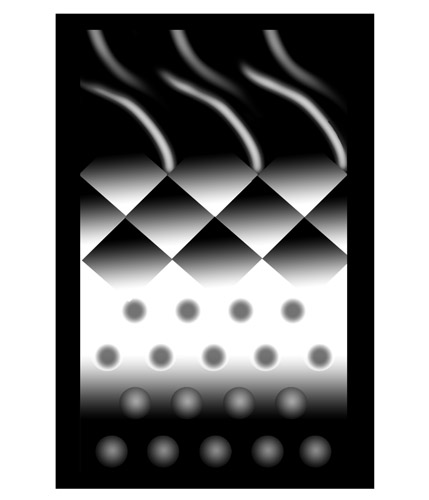
I wanted to experiment with different natural textures such as pebbles and ripples (see image on the left), but I thought that image would be too detailed to come out well on the Modela with the end mill sizes available, so I simplified the image to the basic shapes on the right. |
|
2: USE THE FAB MODULES TO CREATE A HEIGHT MAP AND MILL THE TEXTURE OUT OF A WAX BLOCK
I wanted to experiment with the Fab Module feature of creating a height map from a greyscale image.
- Glue your block of wax to the aluminium plate on the Modela bed using the hot glue gun
- Load the make_png_rml software from Terminal
- Load your greyscale image (with 1500dpi resolution)
- Choose 1/8" wax rough cut settings
- Go into the 3D settings and set the depth you want over the height of your image:
- Neil's tip: "The image intensity range from 1 (white) to 0 (black) is mapped from top height (usually 0, where tool was zeroed) to bottom height, in milling steps of the cut depth"
- The settings I used were:
- Top intensity: 1(i.e. pure white)
- Bottom intensity: 0 (i.e. pure black)
- Top height: -1mm (to mill off the top uneven surface)
- Bottom height: -8mm (so that my max depth would be 7mm)
- Cut depth: 0.5mm
- Make path
- Set your zero origin at the bottom left hand corner of the block on the top surface using the xy coord boxes and clicking "Move to min xy" to check if it's in the right place - be careful to secure your end mill high up in the collet initially to avoid it catching your block of wax when moving to a previous zero orientation
- Once you've set your origin, click Make rml, and then send it!
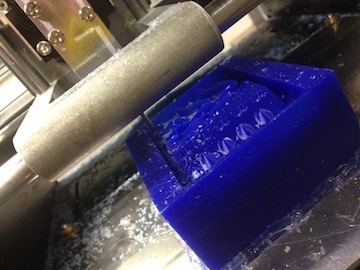
The Modela should then start milling out the first rough cut of your part.
To mill the finishing path, do the same as above, but use the 1/8" wax finishing cut settings - being careful to check that your 3D settings and origin is the same as for the rough cut
|
|
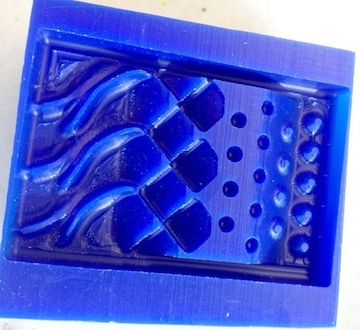
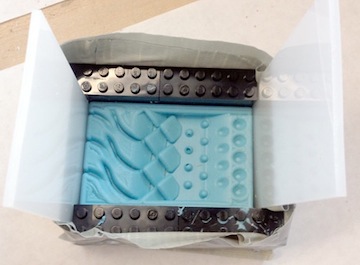
3: CAST A MOULD FROM YOUR WAX PART
I just simply cast some silicone directly on top of this wax mould, to make a texture 'tile':
- Wrap some tape around the edge of your wax mould, going above the top edge, to give your silicone mould some more height
- Measure roughly how much silicone you will need using water - the weight of water is roughly the weight of silicone
- I used Oomoo two part silicone for this mould:
- Measure out half of the weight of Part A into a cup (it's probably a good idea to use more than you need to prevent not having enough and needing to quickly mix more!)
- Measure out the same amount of Part B into the same cup
- Stir slowly and steadily using a wooden stick until the two colours have mixed together completely
- Tap the cup for a while on a hard surface to try to get the bubbles to come out
- Pour very slowly on one point in the mould until every thing is covered completely
- Leave to dry for about and hour or so
Once the silicone had set, I cast some of the DryStone plaster into the silicone mould:
- Make a solid structure around your mould to hold it together tightly, and prevent any leckages - lego, plastic, tape all work fine!
- Measure roughly how much plaster you will need using water
- Measure this weight out of dry plaster powder, and add the corresponding amount of water (DryStone is 100:20 and should look a bit like Greek yoghurt when mixed - if it's too hard or liquidy just add little bits more water or powder until it gets to the right consistency)
- Mix slowly and tap to get out any air bubbles
- Pour slowly into the mould
- Wait to dry - about an hour
|
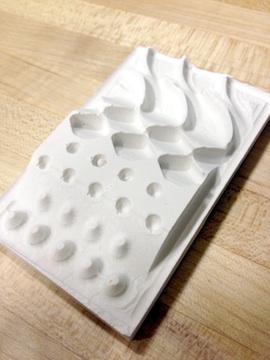 |
4: UNMOULD YOUR PART! |
HOW TO CAST TEXTURED SURFACES FROM A HAND-MADE OBJECT
|
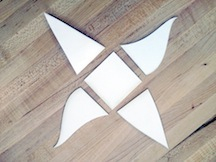
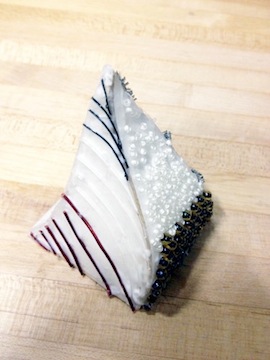
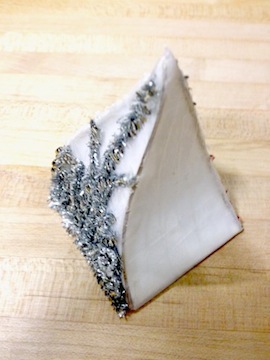
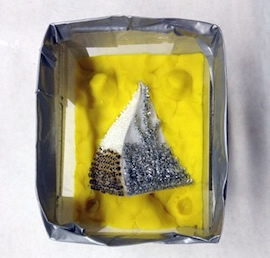
1: CREATE AN OBJECT YOU WANT TO CAST
As I was trying to find a way to more simply create complex textures on surfaces other than CAD-ing them, I experimented with making a small pyramid with different textures on the 4 sides:
- Make the structure of your object - here I used laser cut card taped together (and all over to make it water proof!) with selotape
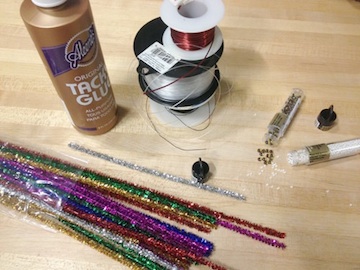
- Find some materials with interesting textures to stick to your object
- Stick them to your object however you would like (without any undercuts or negative spaces inside the object - this won't release from the mould). Use non-water soluble glue if possible - this will help the materials stick more firmly to your object
|
|
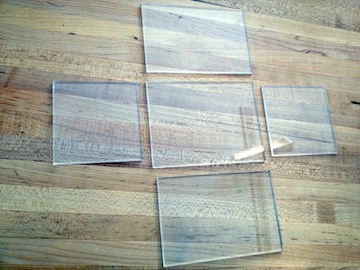
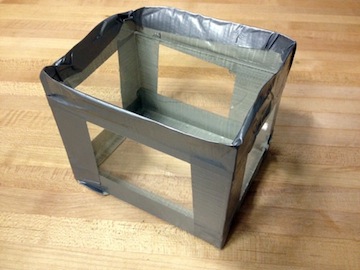
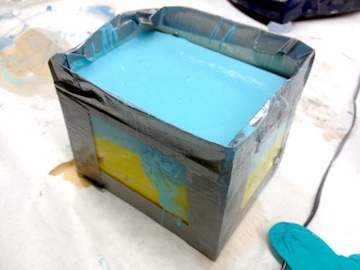
2: MAKE A SIMPLE BOX TO CAST YOUR MOULD INTO
A simple box made of plastic sheet (lego would also do!) taped together with duck tape. |
|
3: MOULD THE 'TOP' HALF OF YOUR CAST ON A BED OF PLAYDOH
In the first casting, you are casting the 'top' of the mould, so here the playdoh bed acts as the 'bottom' half of the mould:
- Try to set your object in the bed of playdoh so that any split lines are just at the surface of the playdoh - you can make the split line as wobbly as you like to match the split line you want on your model
- Make some aligning points - some bumps and troughs - in the playdoh to help matching the two mould halfs together when you come to cast the part, and a channel for the plaster to flow in when you cast your part
- Pour silicone into the top of the mould to cover your object completely
- Once the top of the mould has set, remove it from the casting box and take off the playdoh - it stuck to the silicone a bit here, so mould release (or just a bit of diluted soap) may have helped before I cast the top.
|
 |
4: MOULD THE 'BOTTOM' HALF OF YOUR CAST ON TOP OF THE 'TOP' MOULD YOU'VE JUST MADE
Now you can cast the bottom of the mould - you cast this directly onto the top silicone mould, so it's VERY important to remember to add a release agent to the surface of the top mould, otherwise everything will just stick together!
- Put the 'top' mould back into the bottom of the casting box
- Spray everything with Mould Release, or brush on a layer of soapy water
- Put your object back into the mould so that it fits exactly into where it was originally moulded
- Add some playdoh in the channel to add the casting material
- Add more Mould Release
- Add some more
- Pour some more silicone over the 'top' mould and other side of the object
- Once this is set you should be able to pull the two silicone halves apart and have a perfect mould of your object
|
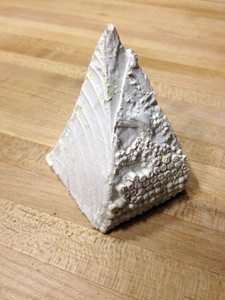 |
5: CAST YOUR PART IN YOUR MOULD
Once both moulds have set, you can tape them together without the object in the cavity, and cast it out of whatever material you like.
I cast this mould using DryStone again.
The textures came out very detailed - I would use stronger glue on my original object next time though, as some of the beads came off during the silicone casting. |