
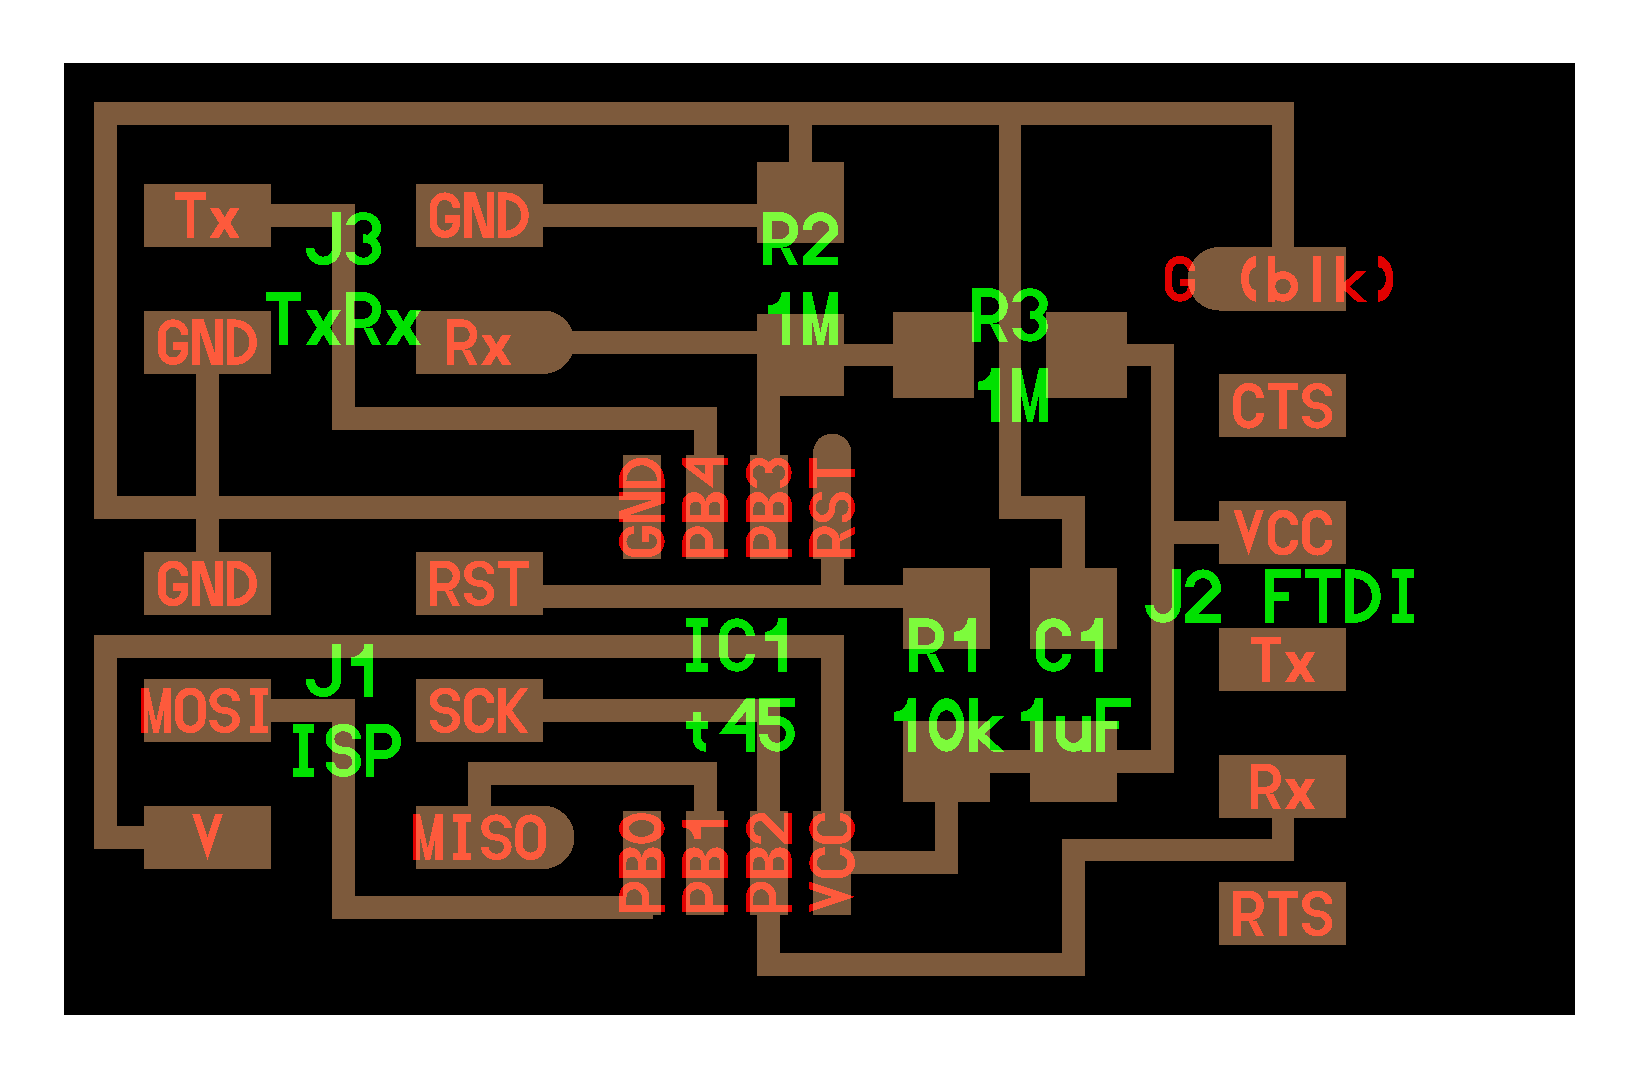
Step 1: Design PCB
I followed Neil's board design to make step response board with only two sensing channel. I milled PCB without any issues. I am getting familiar with milling PCB!
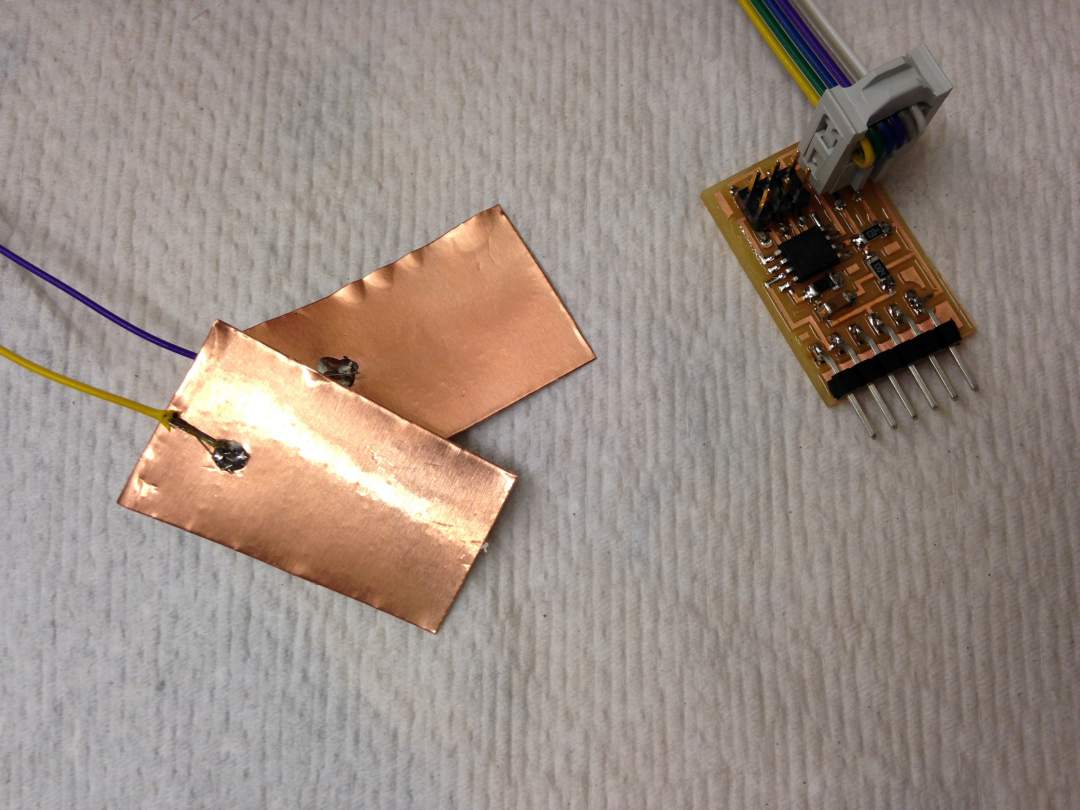
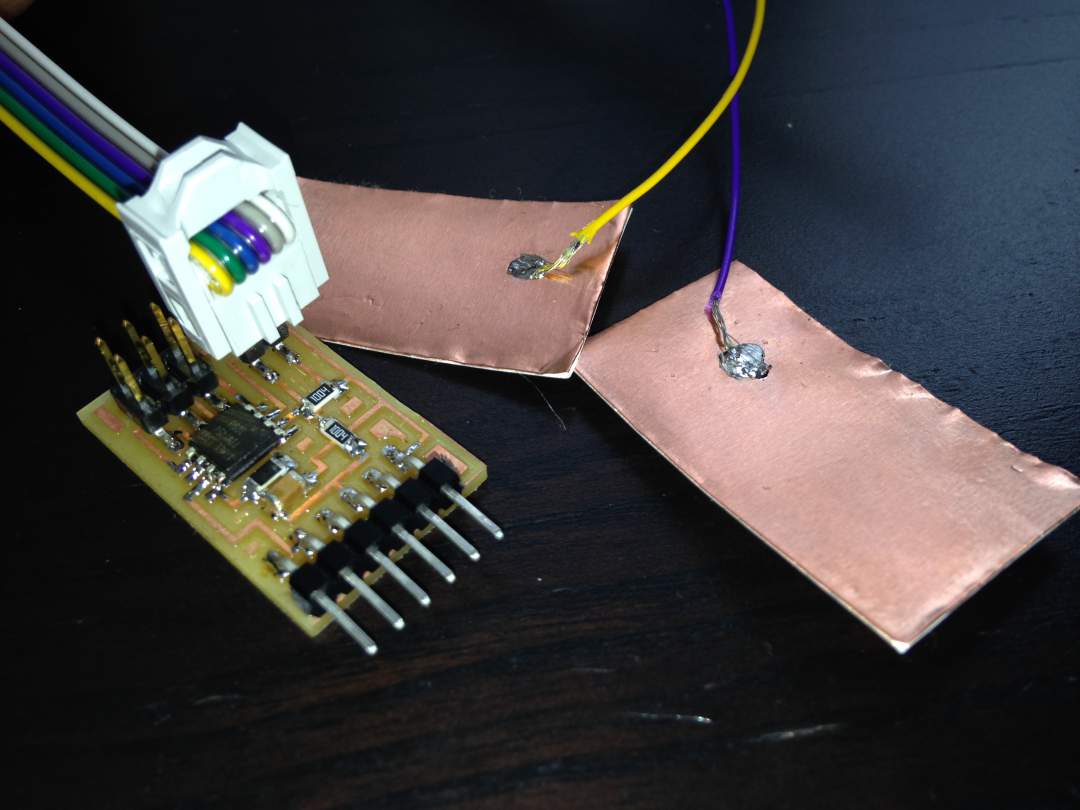
Step 2: Soldering PCB and making copper touch panel sensor
I soldered PCB, and also made copper touch panel using conductive copper film. Charles tought us we can solder wire to the conductive tape at 860 degree Celsius setting and quick. Now I have PCB and sensors.
Step 3: Programming Attiny 45 and measure something
Thank God I didn't encounter during programming process. I successfully programmed IC following the same instruction as I did for embedded programming assignment. However, I had issue when I was trying to send command to run python program . After I change my command stating correct USB resource name, I run the program. You can find the USB resource name in dev. Tomo and I was playing with this sensor, and finally came up with acting a famous scene of ET like this video.