This week we were molding and casting a 3D design. I was hoping to make something functional, but struggled at first to come up wiht an idea. When I got a feel for someone else’s final cast, I realized a hollow shape could make some sound when struck. I set out to make a “musical instrument”. Due to media lab sponsors week, I didn’t attend the lecture for this assignment, so…. Lots of mistakes.

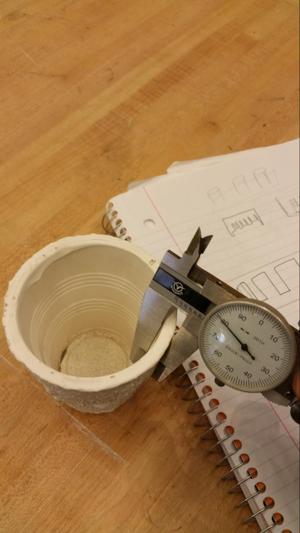
The first thing I did was design the musical pipes in inkscape, then extrude them in blender. I implemented the diameters of the columns using 10 linear steps between 0.2 inches and 1.0 inches. I used the measurement from the lip of the cast-cup in the image above to determine a workable width for the circle edges of the columns. I thought everything was going to be easy-peasy when I went to mill, so I packed everything pretty tight.
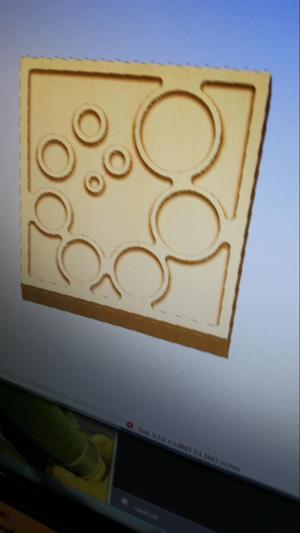
When I went to generate a toolpath, I realized that the musical pipes were too narrowly packed for the ⅛” bit to mill-out. This led to artefacts such as the connections between the pipes and the outer edge, as you can see below. In order to fix this, I redid the design to separate the pipes further apart. At this point, I thought everything was done, but to my surprise, I recalculated the toolpath and found that it would take ~2 hours to cut out my design.
My design was heavy in the z direction (to give the pipes extra height). This is cool, but would require a long period of time to cut. In order to reduce this time, I removed the outer edges of the design. Tom also increased the feed-rate, and we agreed to skip the finishing pass. This resulted in a 30 minute milling time.
Removing the outer edges would come back to bite me later during the casting process.
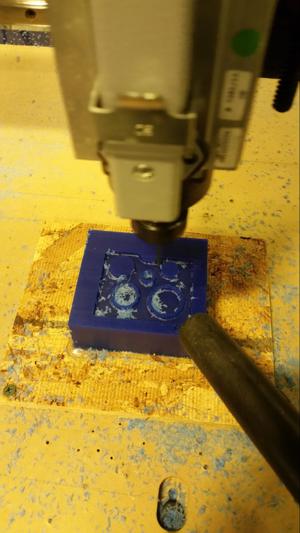
¾ of the way through milling, the bit broke off inside of the design. This was the result of the bit being fastened too low inside of the desktop shop-bot. This caused strain and eccentricity in the bit, which eventually snapped. The reason for mounting the bit so low was to get as much cut in the z-direction as possible.
Despite the bit breaking, most of the design was finished, and was good enough to form a mold from.
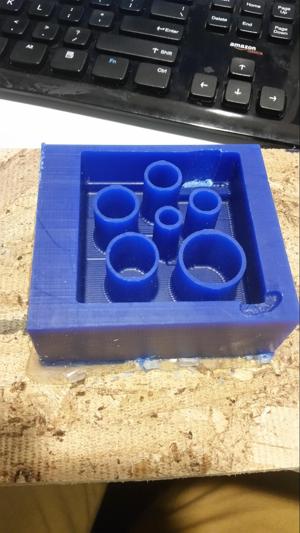
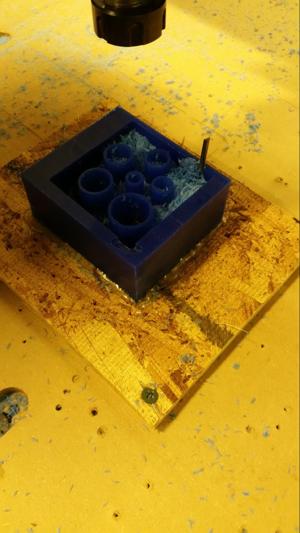
The finished positive was filled with oomoo and a mold was formed. There were two issues with this mold-positive:
- The walls go to the very top of the pipe, so there is no room for the oomoo to pool. This was fixed by taping an edge around the top of the mold-positive
- The pipe’s are really deep, which led to difficulty removing the oomoo. In the end, this process wasn’t too terrible, and just required a lot of shimmying to avoid ripping the mold.
Not having outside edges really made pouring the final-cast material difficult. I tried the tape around the top trick, only to have the tape seap through the container and onto the foom hood area (which i wiped down). I couldn’t figure out another alternative to create a frame beyond hot gluing wood to the outside. That being said, I tried another solution, which was to use a box cutter to manually remove a certain part of the middle between the pipes in order to build a frame.