This session of the course is focused on learning how to 3D print and 3D scan. The main assignments are:
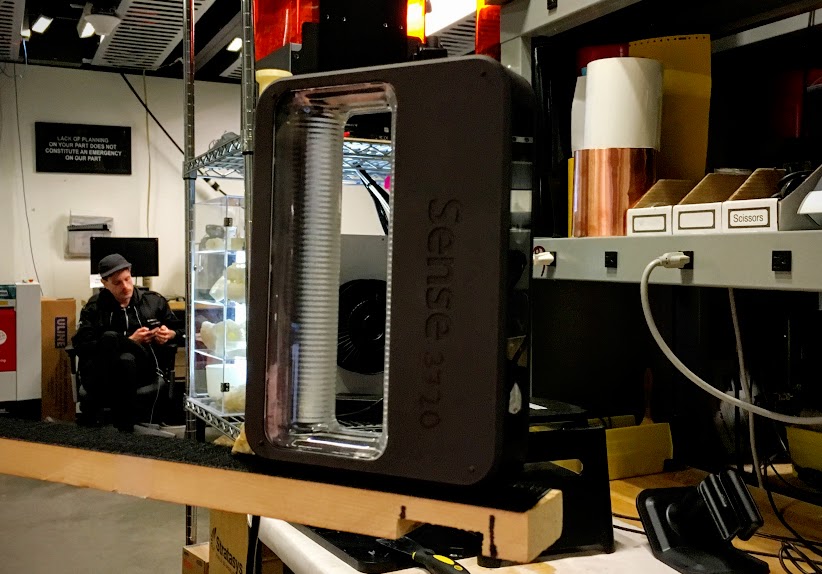
For the 3D Scanning, I decided to 3D Scan me. I used the Sense sensor. I fixed it and sat in a rotating chair. I then start scanning and rotated with the chair till it was done.
I actually had to do several attempts as it never gave me a nice result at the beginning. I realized I had to get closer to the sensor and move slower in order for it to work better.
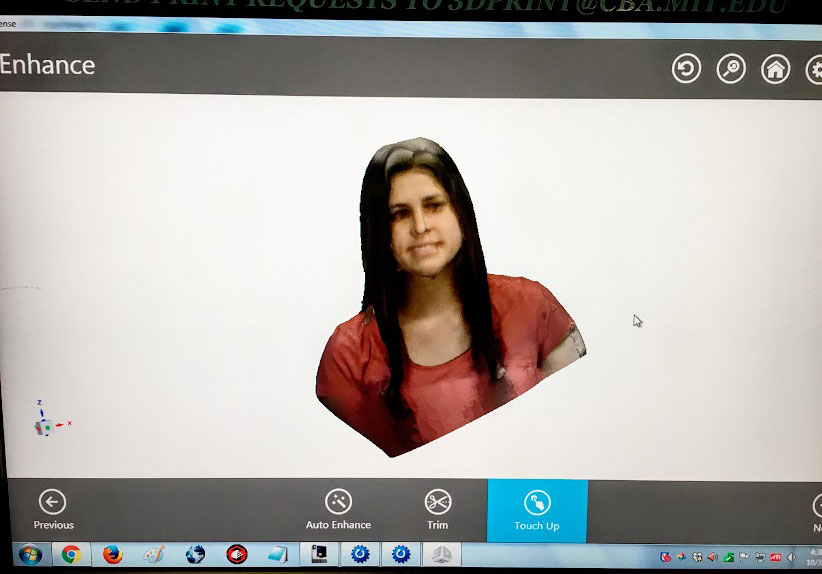
OMG!!!!! Yes, yes, I know, I look super creepy... I just wanted to 3D Scan me smiling! I guess my acting skills are not amazing... I was tired and it looks as a really fake smile. But well, that is what it is.
I finally managed to get a good result and I proceeded to clean the mesh with the Sense software. I deleted the parts that I didn't want, I solidified and I smoothed some of the areas of the model.
After that, I exported as STL.
And again, I have never 3D printed anything. So, level of excitement: quite high. In my old job, we had a MakerBot but I never used it. I could see my work colleagues using it and always wanted to try. But I never did. So now comes the time!
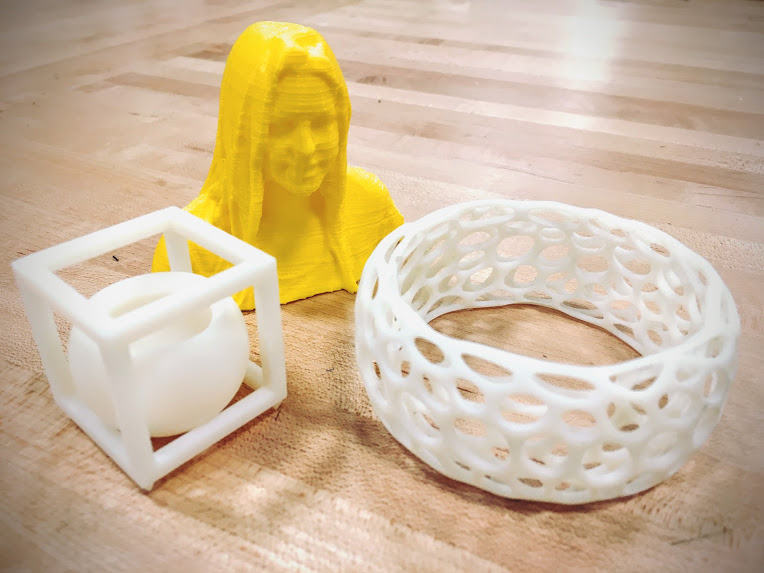
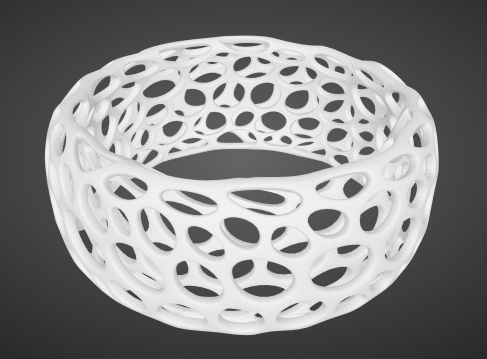
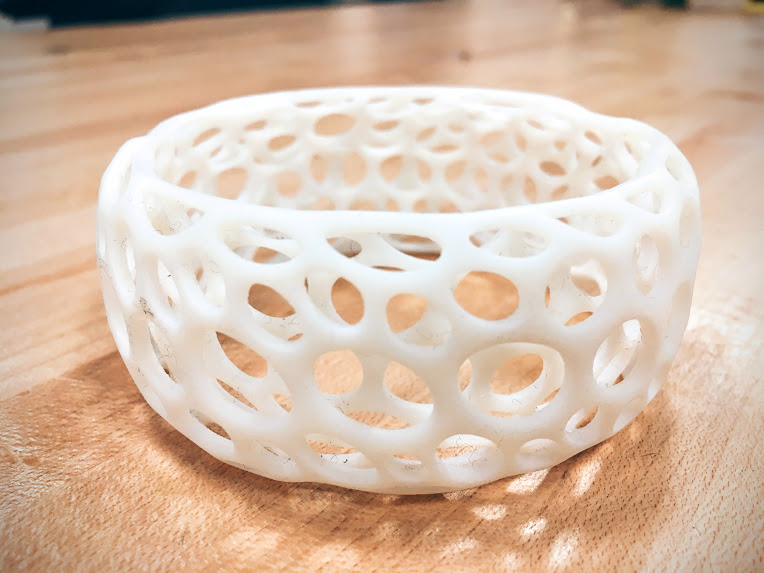
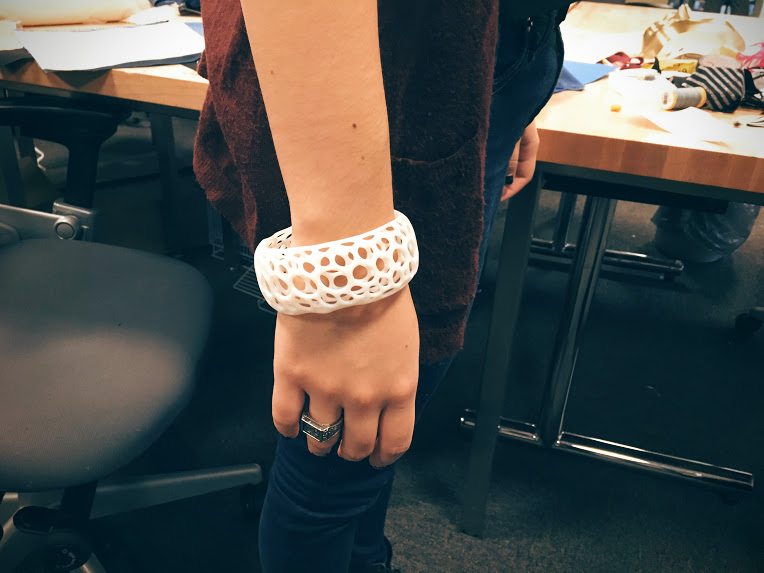
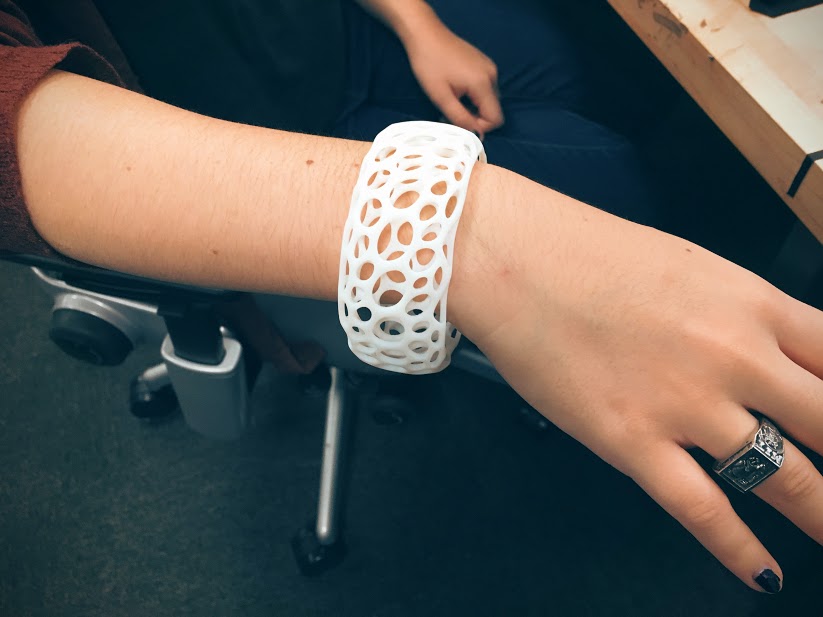
I first looked for something easy to 3D print. I found a very nice voronoid bracelet and I thought it could be a good test as it had wholes and little spaces.
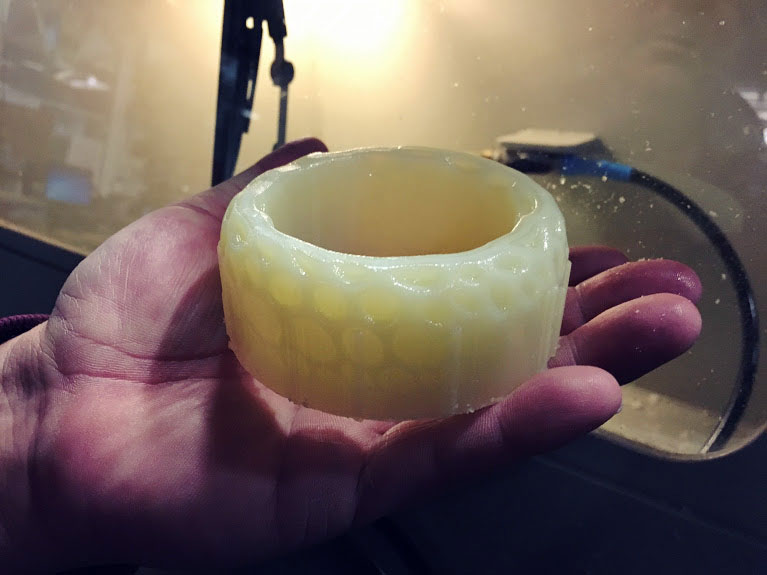
The test went well. I left it during the weekend, to print on the Eden260VS machine. When I arrived on Monday, the bracelet was printed perfectly fine but it had all the supporting material. I had to remove it.
John showed me how to use the WaterJet machine. Important things to check before using the WaterJet:
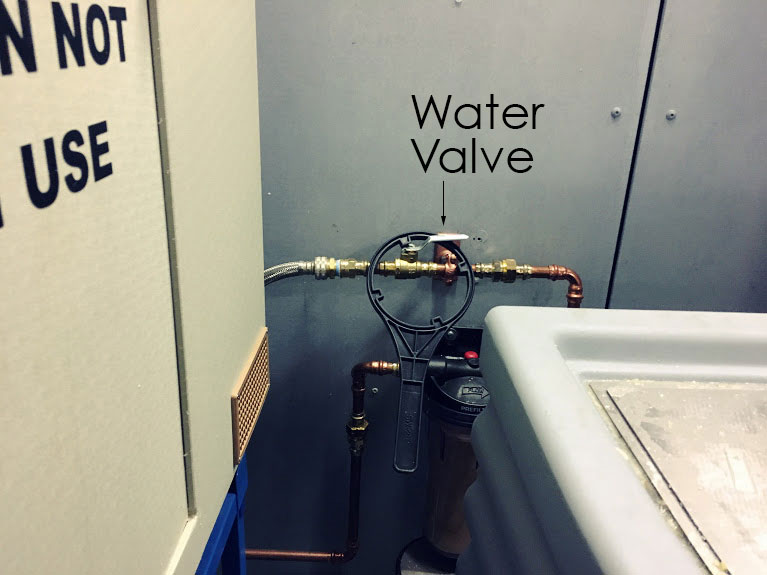
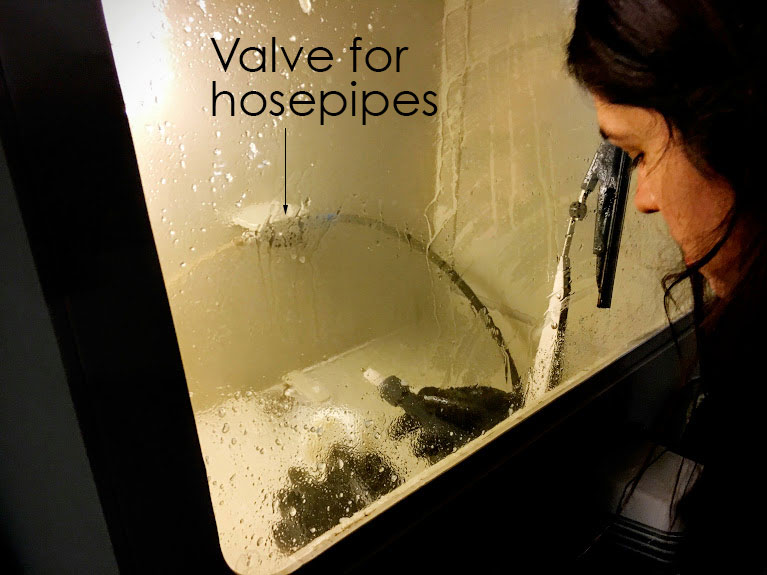
The WaterJet has two hosepipes. One pushes the water out stronger than the other. You need to make sure the one you use is not damaging the material of your model. It has to remove only the supporting material. I took the model out a couple of times and I saw that there was some material left so I put it back to finish the job. I finally managed to get all the supporting material out and I proceeded to dry the model with a drier from the CBA shop. I was quite happy with the result.
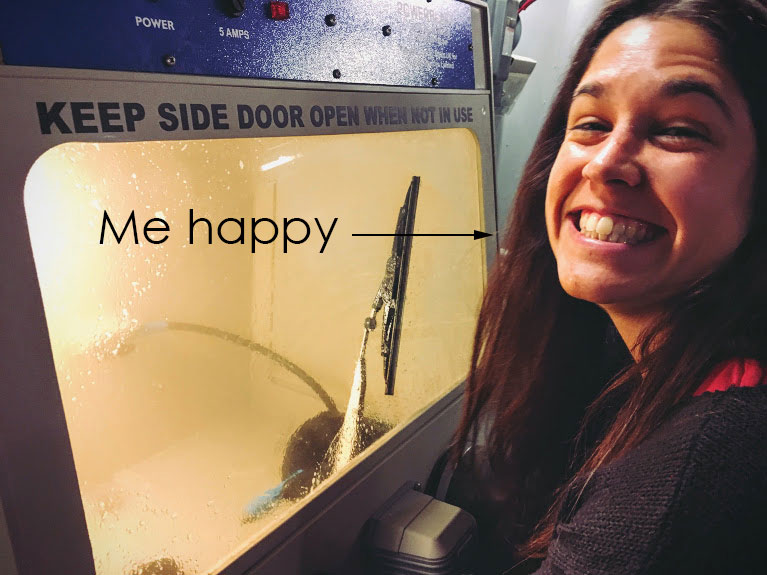
Yes, I was happy...
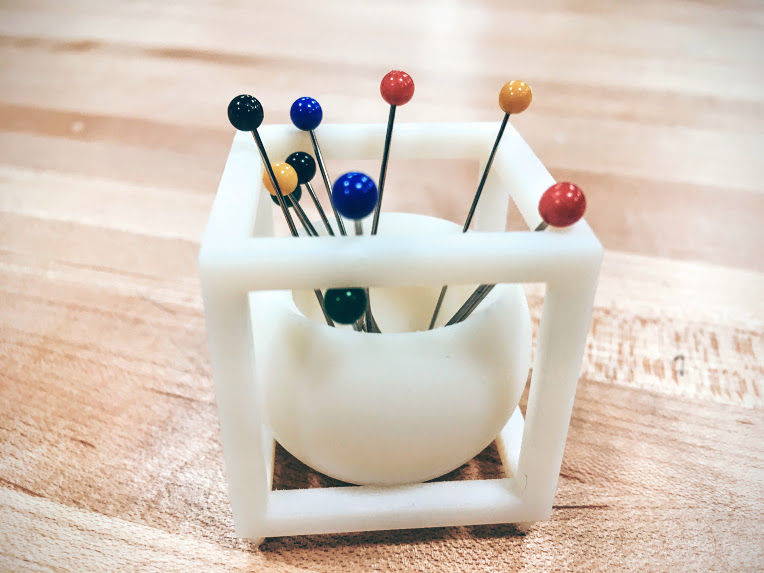
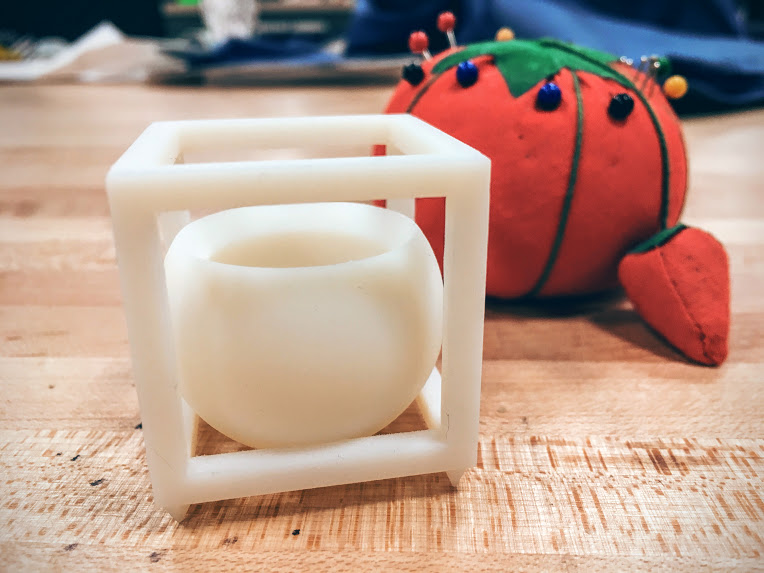
After printing the bracelet I decided to design an object that could not be made substractively. I made a pot. I wanted to put it in my office and put some plants on it. I designed it in Rhino. The design was not very difficult. It was a sphere inside a cube. Using the Boolean difference and Boolean union I could create most of the shapes.
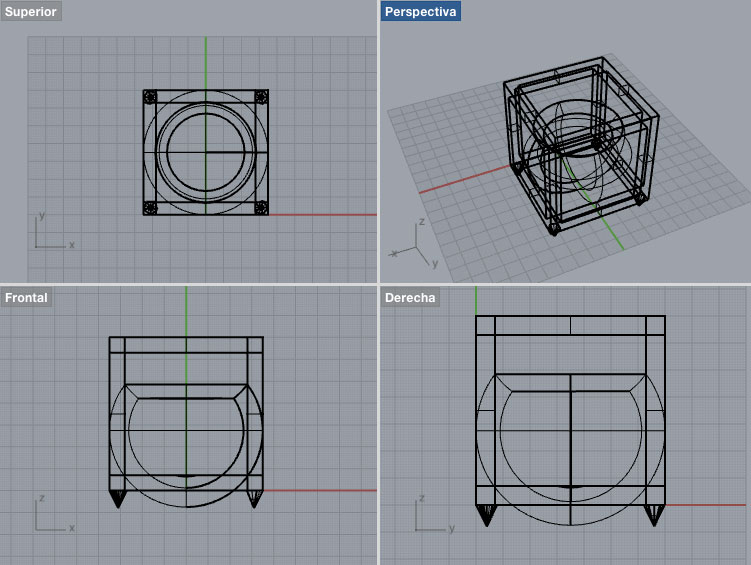
I sent the file on Monday in the evening so there was not a lot of time left and I was told that they would have to print it quite small. And indeed, it ended up being really small. So I decided instead of putting plants (that wouldn't probably fit), I would put needles. The process was exactly the same as the bracelet. I used the Water Jet machine to remove the supporting material.
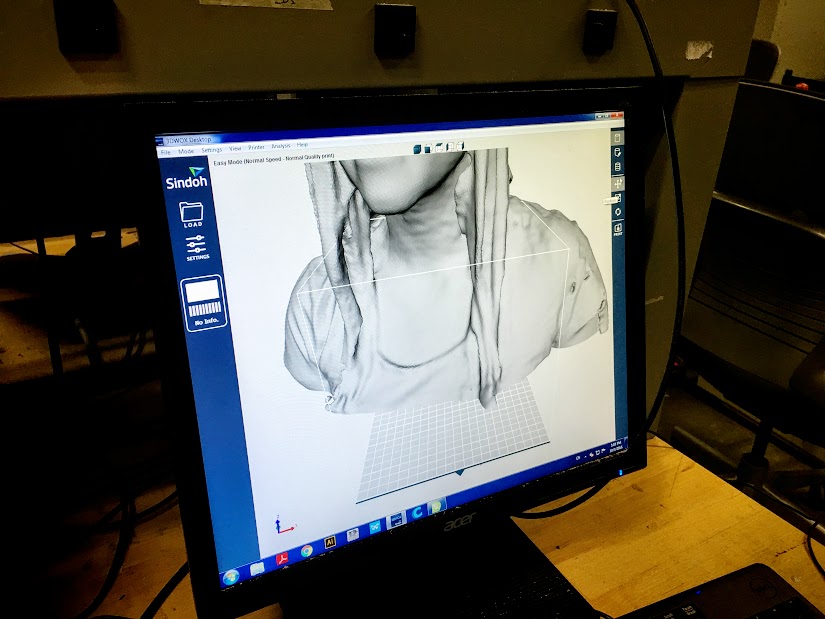
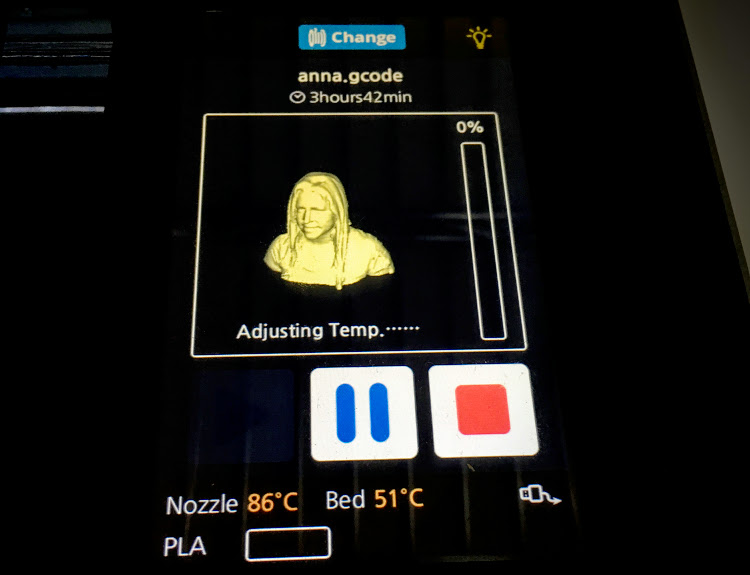
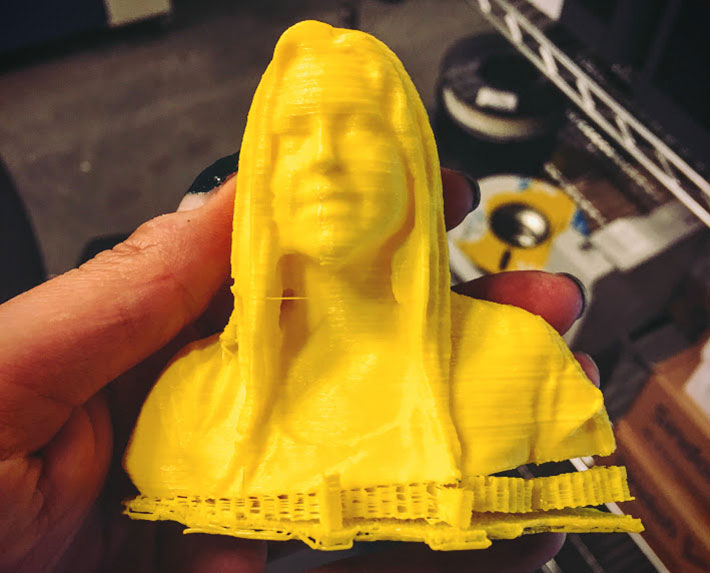
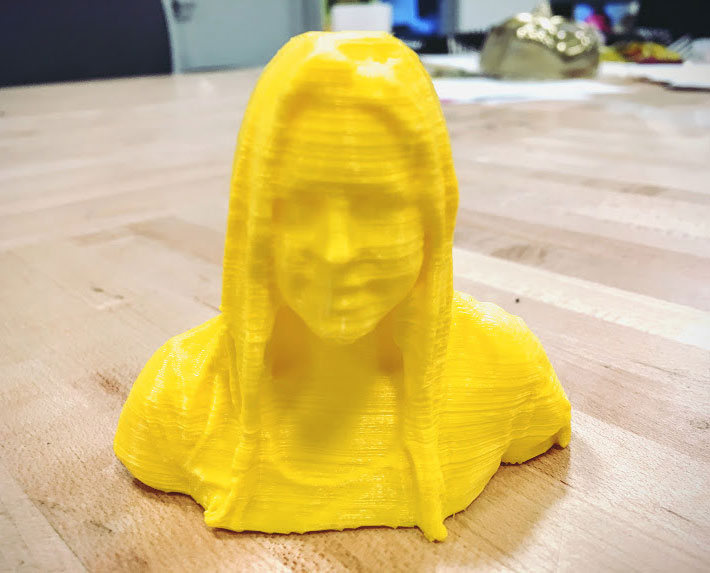
Once I had my head scanned in 3D with the Sense sensor, I had time to 3D print myself. I used the 3DWox machine. I first had to convert my 3D scan to GCode format in order to use it in the 3DWox machine. I used the 3DWox software, adjusted the size of my head and put the file in a USB memory stick.