For the final, I started with the step-response "HelloTxRx" board and wanted to reconfigure it to be able to measure how full a glass of liquid is. I also wanted to improve on the design by adding a crystal for better timing, and use CAD in conjunction with EAGLE. I wanted to take that signal and send a tweet via WiFi to let the bartender know you needed another drink. Seemed simple enough....
About the Project:
• What does it do?
BrewNet measures how much beer you have in your glass and tweets the handle @Brew_Network to say you need another beer.
• Who's done what beforehand?
Neil has created all the pieces, I'm just putting them together.
• What did you design?
I worked through the individual components one by one and fabricated everything myself. I designed the board and I designed the object it sits on.
• What materials and components were used?
The initial prototypes were fabricated on an aluminum base that was waterjet cut at Autodesk, and the pads were cut on the vinyl cutter out of copper.
• Where did the materials come from?
Aluminum was supplied by Autodesk and the rest of the materials were provided by Harvard Science Center as part of the How To Make Almost Anything section.
• How much did they cost?
This project is about $30 or $40 in parts total, with cost-saving measures available.
• What parts and systems were made?
Everything was fabricated from scratch except for the WiFi module and the LCD.
• What processes were used?
Waterjet cutting, lasercutting, PCB design and fabrication, input devices, output devices, molding and casting (but it was rejected).
• What questions were answered?
Was it possible to make an "Internet of Things" device that could be responsive in a casual environment?
• What are the implications?
This project expands the scope of the "Internet of Things" projects and implies that anything (even an object as humble as a beer coaster) can be embedded with intelligence.
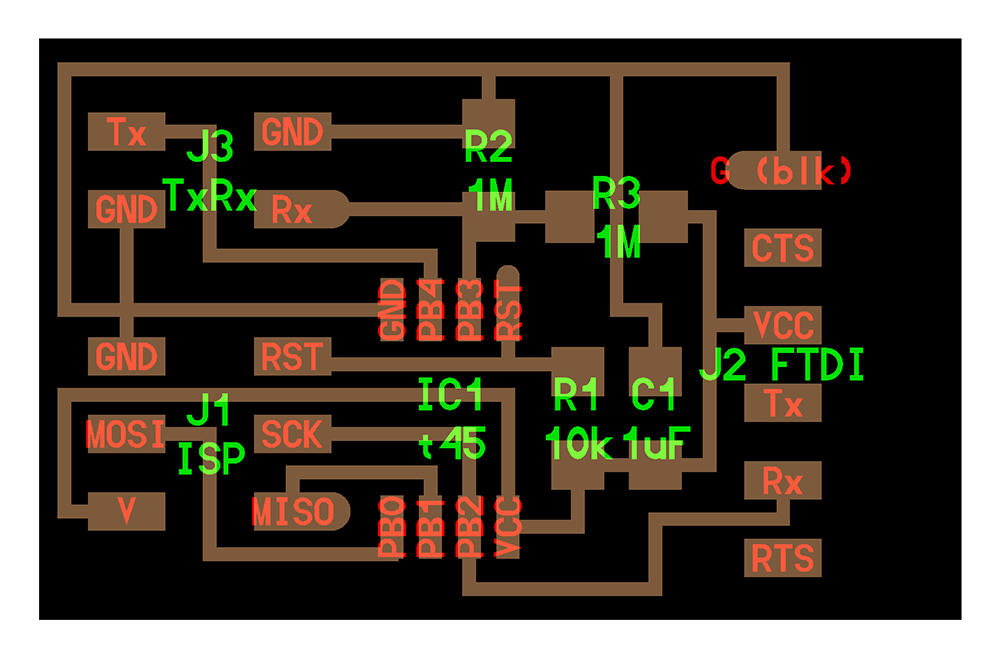
Here is the step-response "HelloTxRx" board I started with.
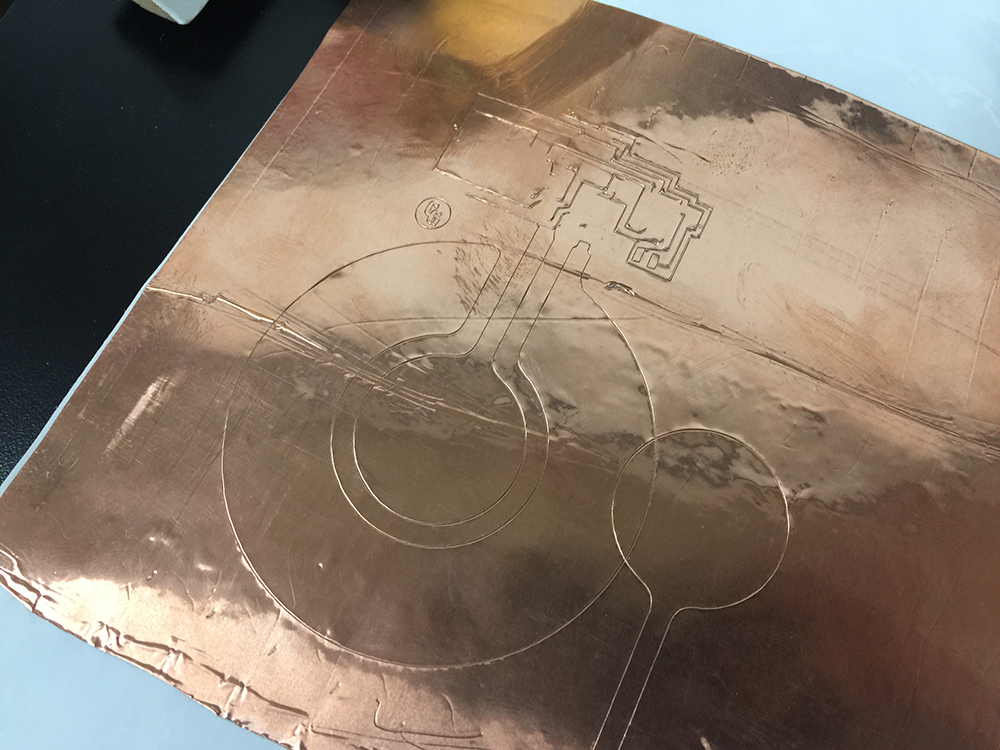
I started by creating the diagram in EagleCAD and adding in my improvements. This part proved to be the most challenging as there was nowhere to put a generic copper sensor. Since the sensor is just some pads of any shape, EagleCAD doesn't really have tools to approximate that. I got turned around quite a bit with thinking about this project because one of the pads has both 5V+ and GND going to it, and I kept thinking this is a short circuit.
I finally worked it all out and created the upper part of the board. I exported this to Rhino for the cad. The intention was to cut the pads on the vinyl cutter out of a roll of copper to save myself some milling time, then composite that with the board. I had a lot of issues with the vinyl cutter because the Linux partition was down and printing directly from Illustrator to the vinyl cutter left me with relatively zero control.
Here is what it should look like if it was milled on one board all at once. Ideal!
HelloTxRx Program. Language: C
HelloTxRx MakeFile. Language: C
HelloTxRx Python. Language: C
Vinyl Cutter Errors. Going too fast made the traces rip up. This is what made me change the idea to a 2 piece board.
Errors on the cutter again. In theory this should work, but I was not having any luck.
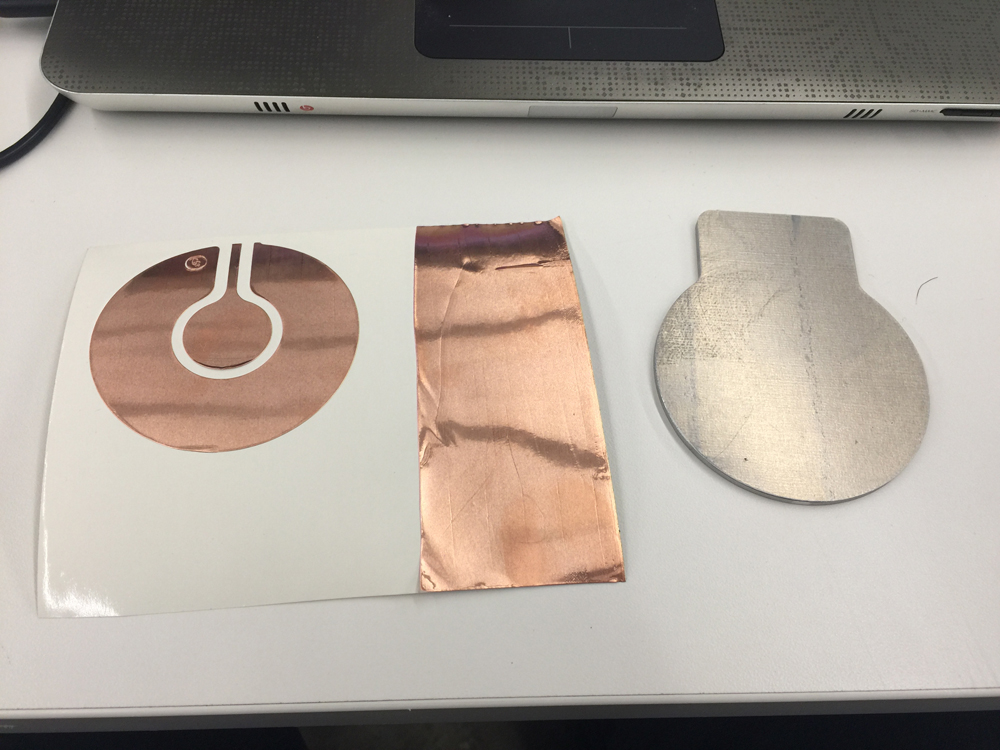
Cutting the copper on the Vinyl Cutter. I used transfer paper to transfer the copper to the backerboard, and placed clear transfer plastic on the backer for insulation. I cut the aluminum backer plate at Autodesk BuildSpace on the waterjet.
Mock-up of the board without the surface mounted components.
Starting to solder the components onto the board.
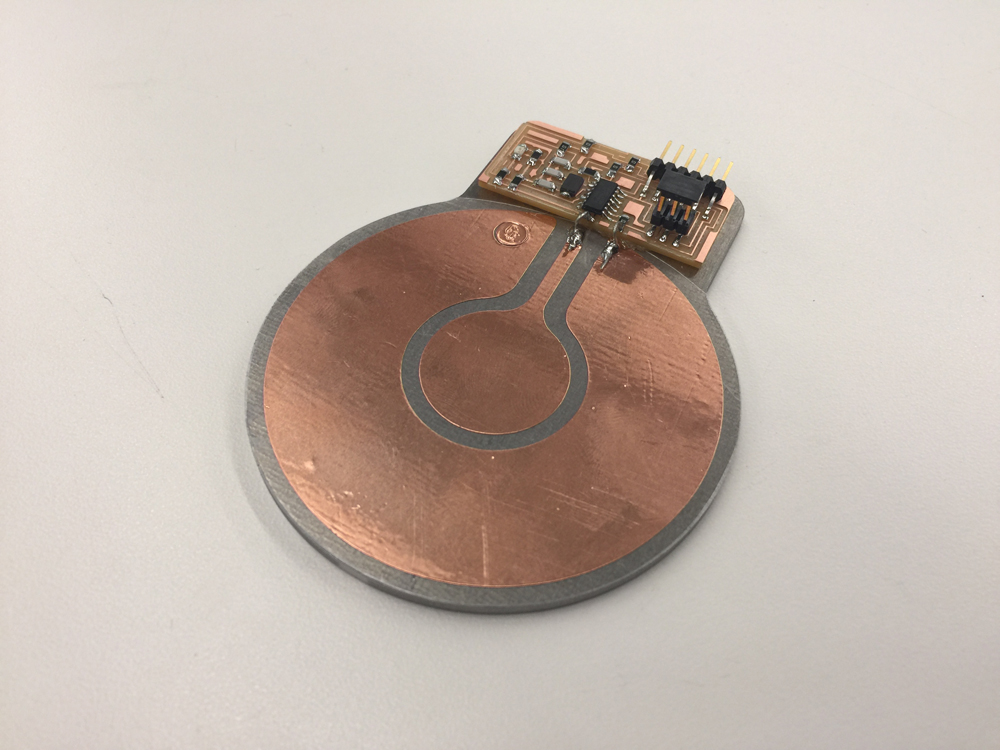
Here is the completed Beer Coaster! And suprise suprise, it didn't work.
I went back and created two more boards and used the TxRx Step-Response board Niel posted, and it worked.
Glamour Shot. Next steps: Add a battery. Add wifi. Add RGB LED. Add solar top.... The goal would be to have your coaster Tweet when you need a new glass of liquid.
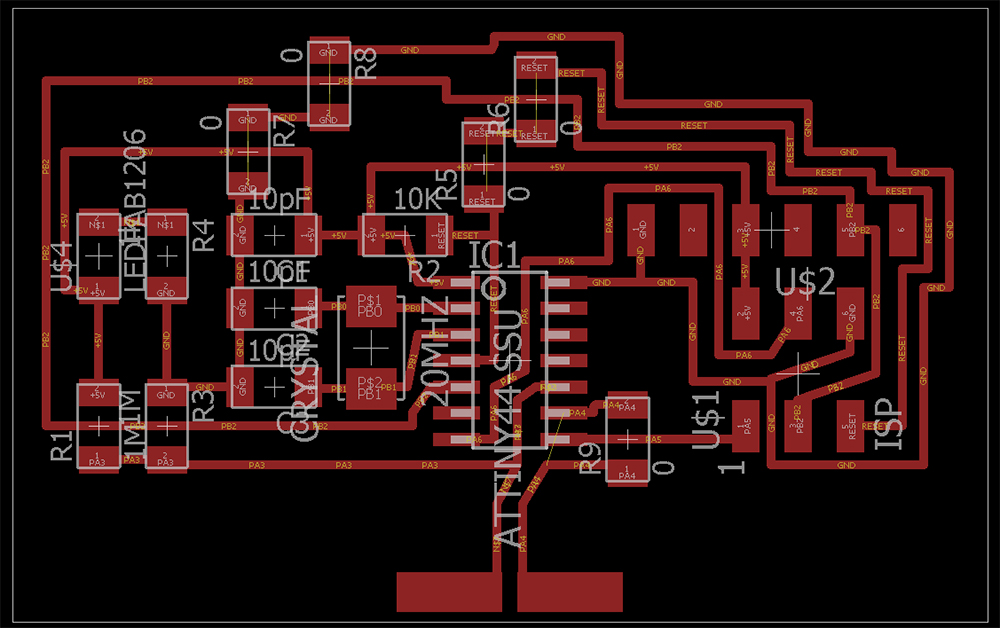
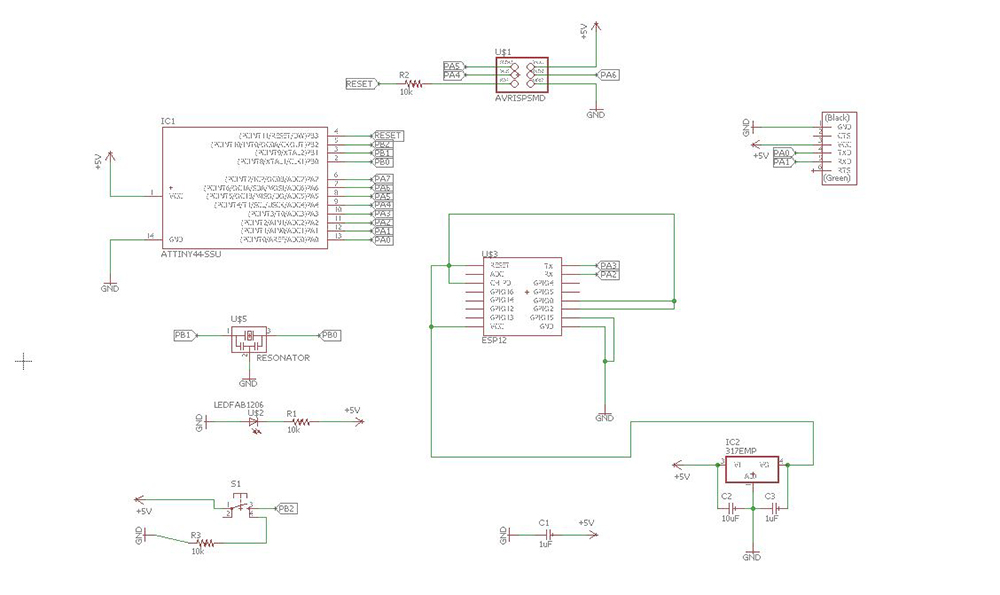
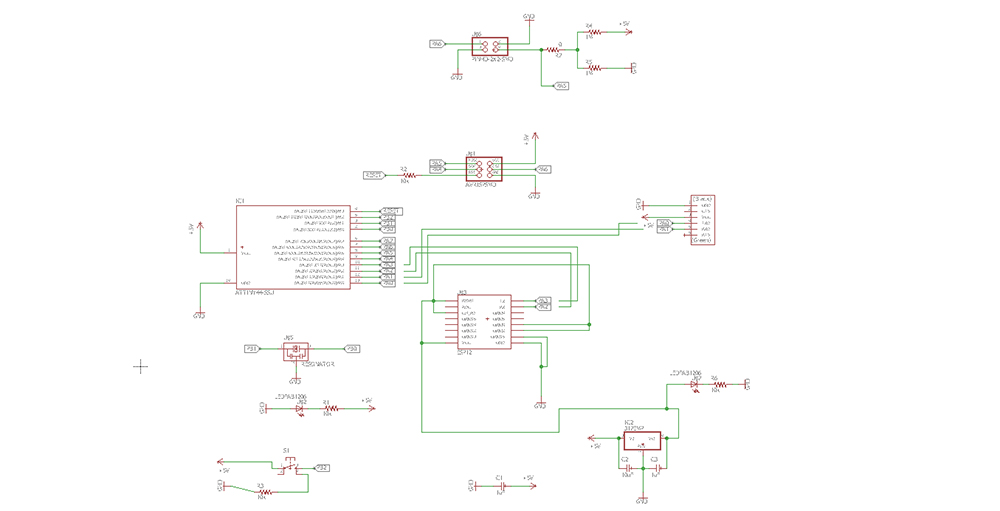
I then took the step-response "HelloFTDI" board and reconfigured it to accept a read/write wifi module (ESP8266 (2.4 GHz Wi-Fi)). The goal here was to create a board that would load a webpage with the push of a button. I started by creating the electrical diagram in EAGLE and adding in the module and the necessary power conversion hardware. The ESP8266 runs on 3.3V, so a regulator was required.
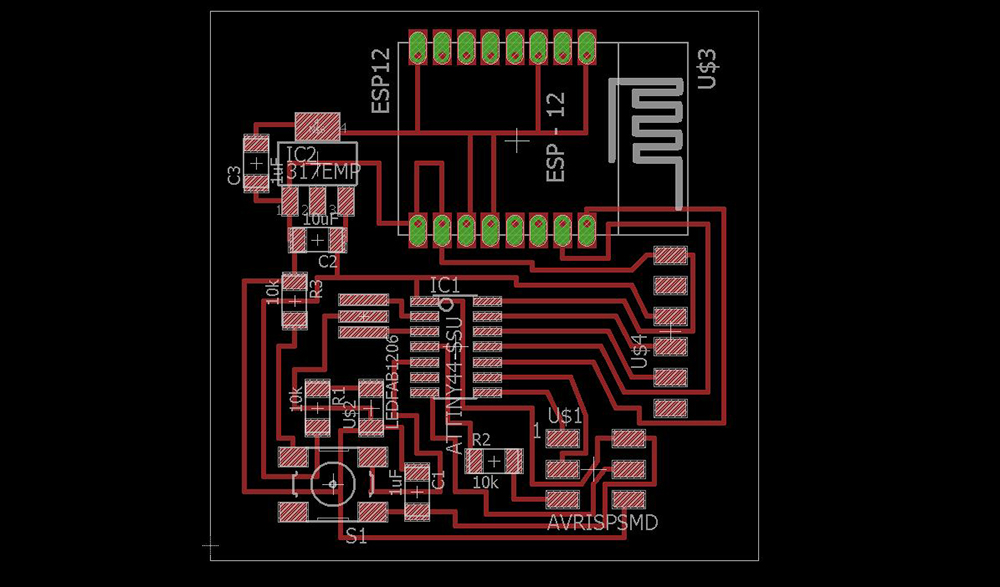
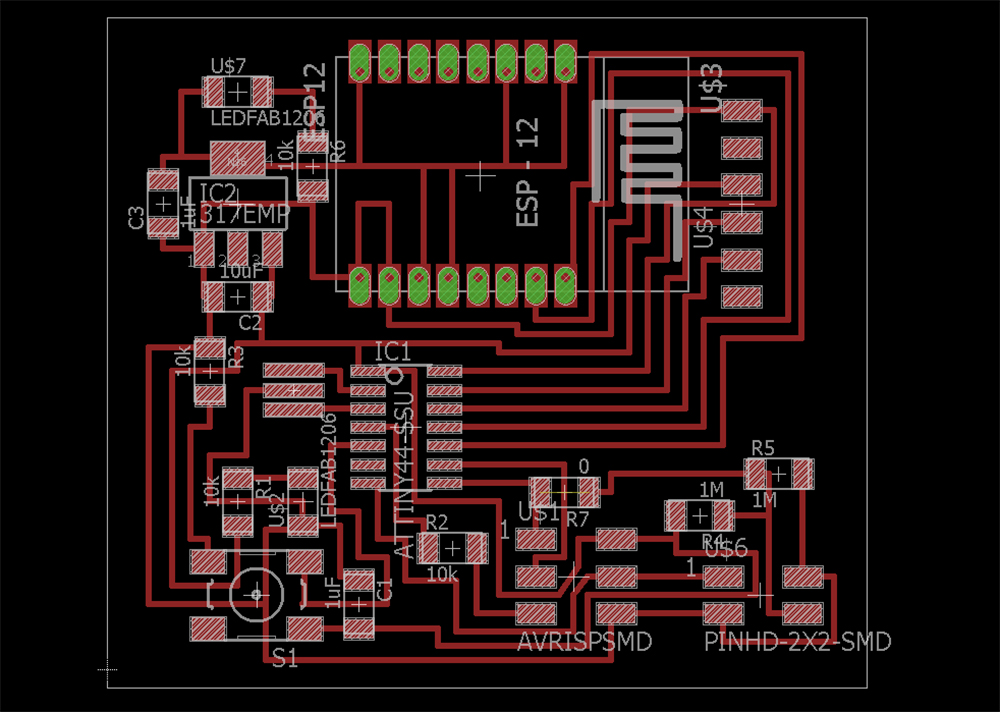
I then created the traces in EAGLE. I'm actually pretty proud of this because I didn't use any 0ohm jumper resistors, and no vias. I think it looks pretty great.
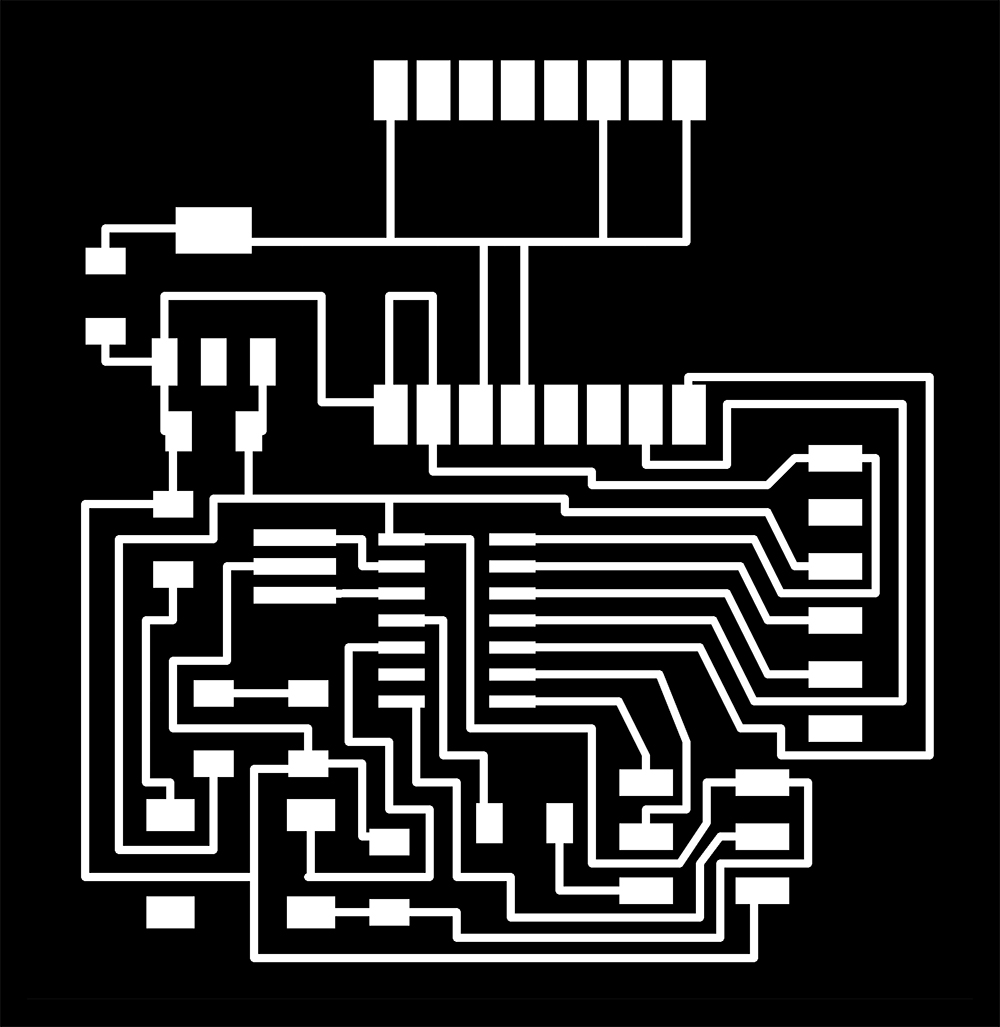
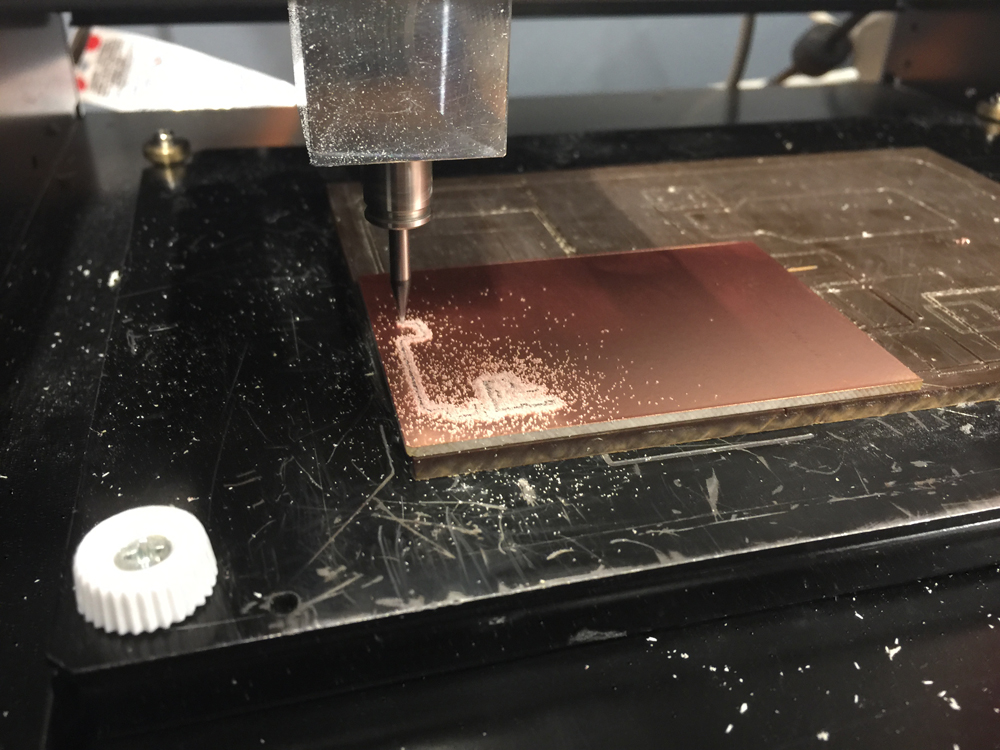
Here's the traces for the actual CNC Roland Mill.
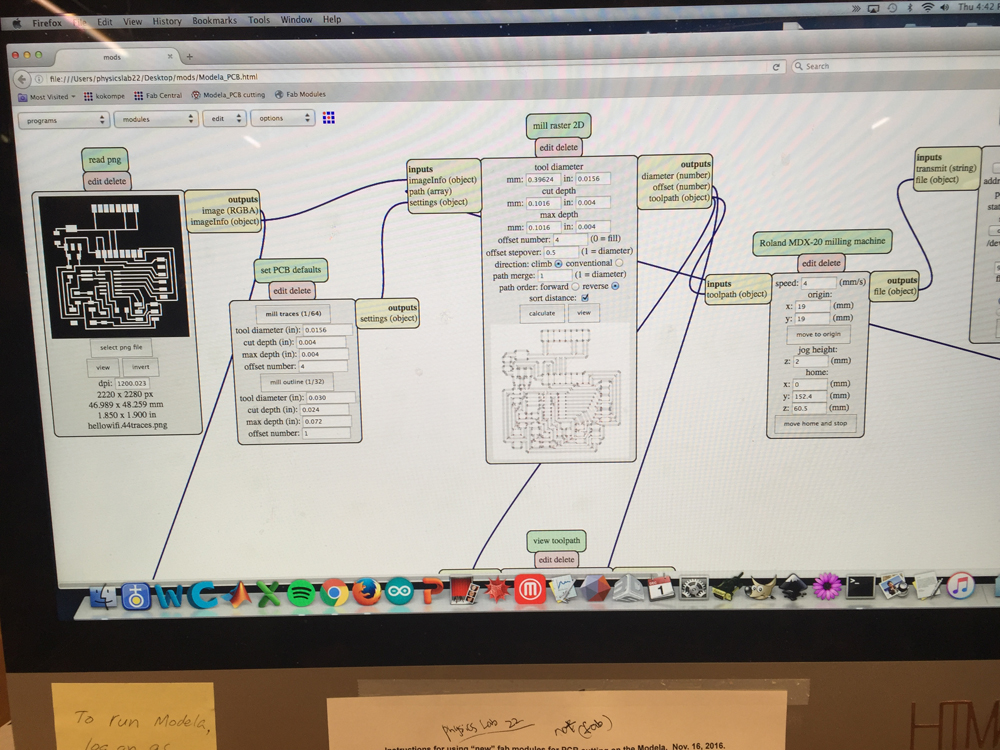
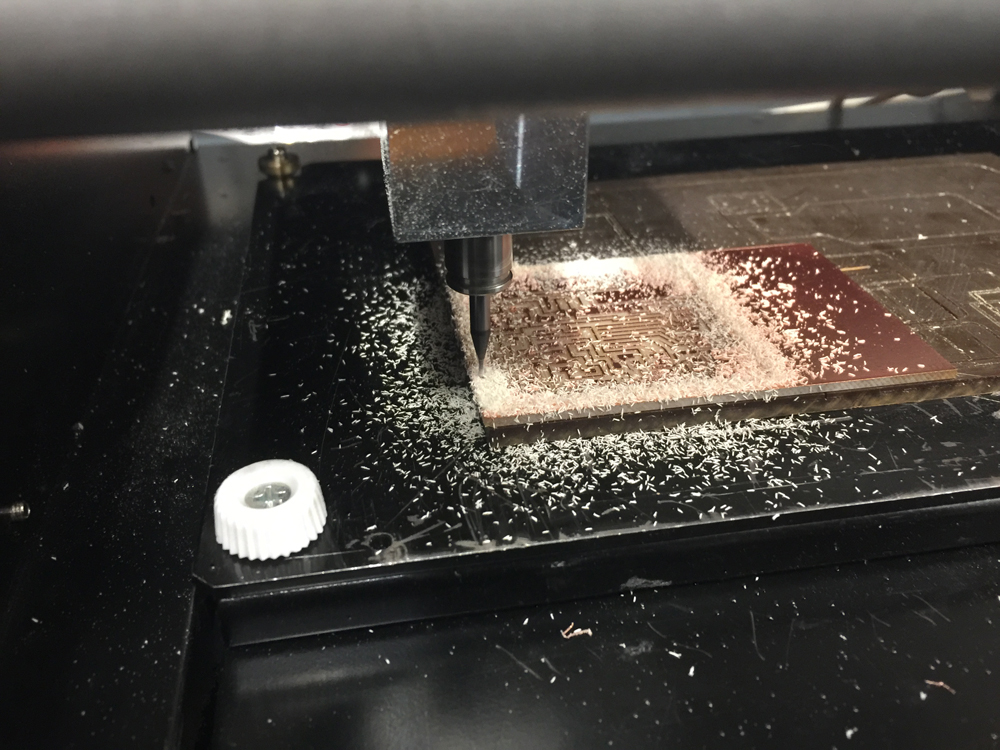
I've been using the new Mods, and I figured I should include a shot of the mods in action.
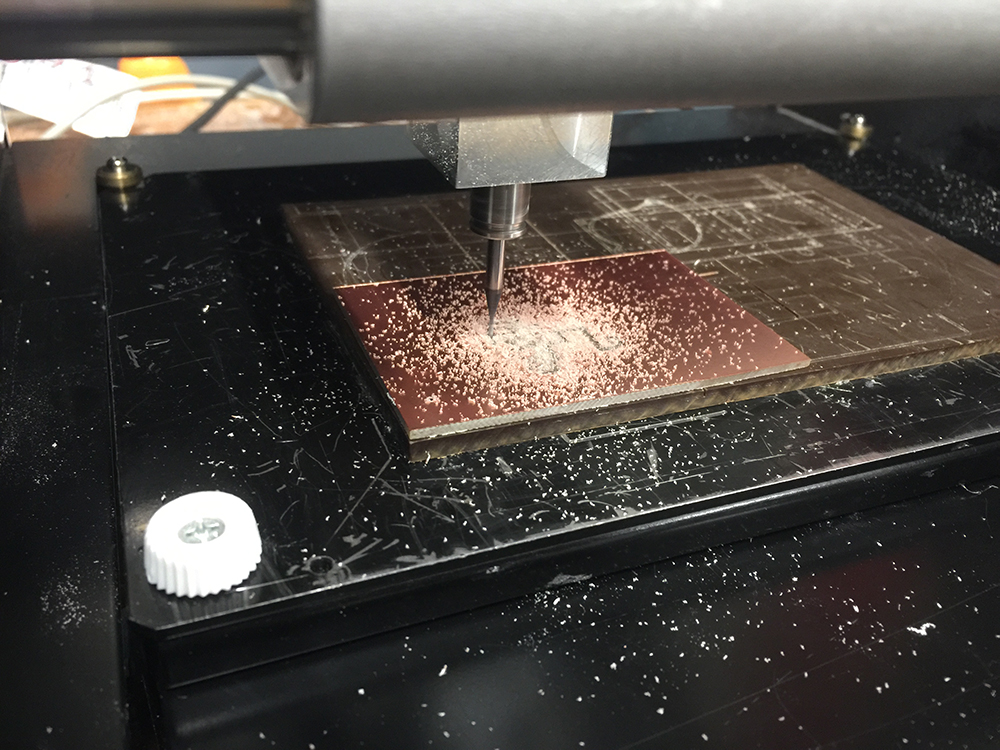
Milling the PCB on the Roland
Milling the PCB on the Roland Mill.
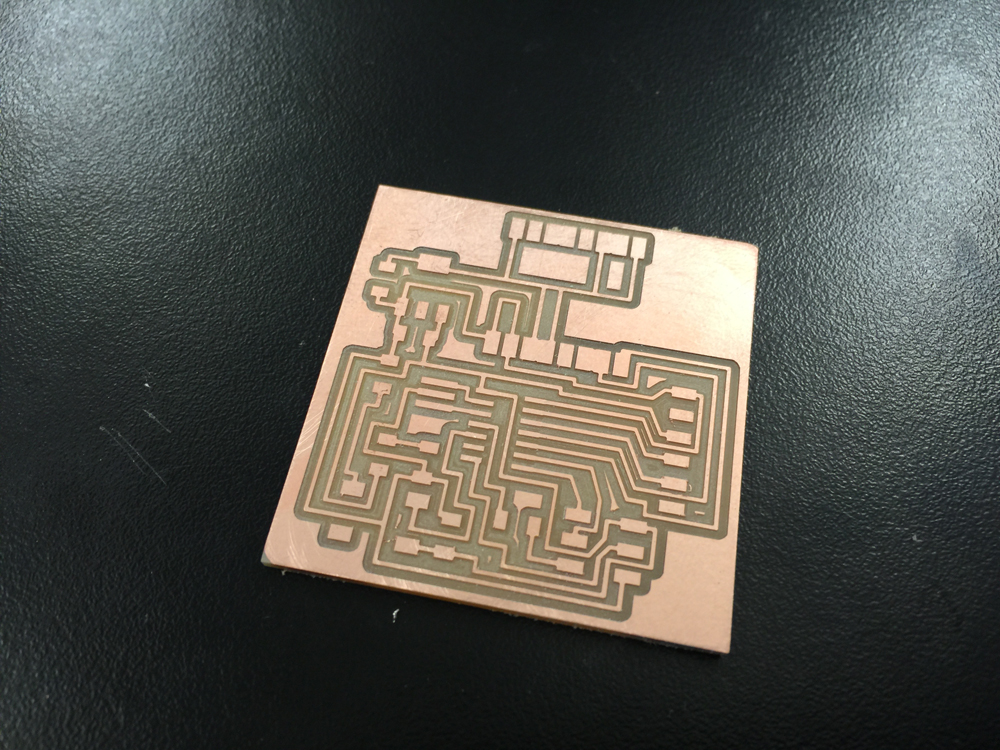
Here is the finished part straight from the mill. Luckily I only had a couple of issues with the mill missing some of the traces. X-acto to the rescue.
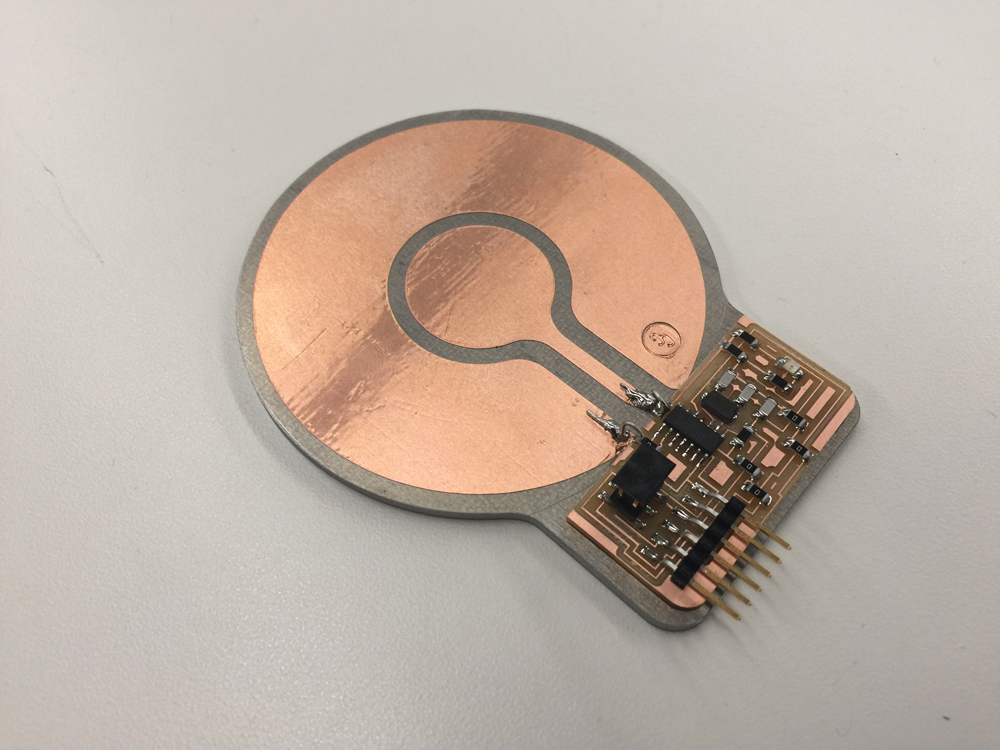
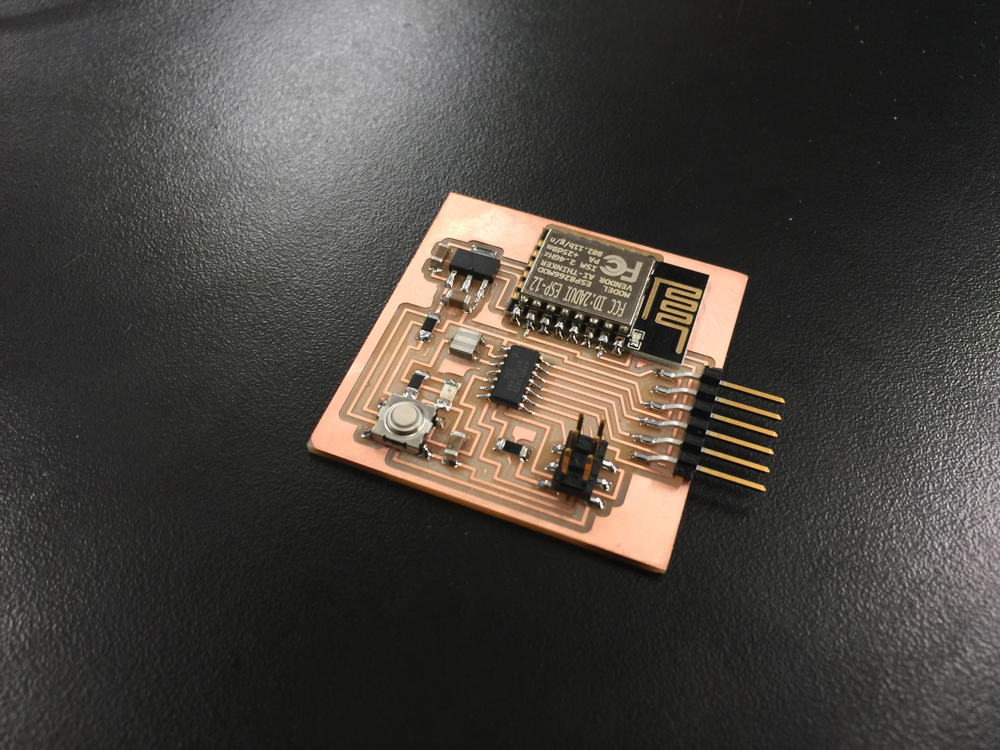
Here is the completed board with all of the components soldered on.
Here are all the ESP8266 commands you can do. Language: AT
Here's my first attempt at getting the ATTiny44a to talk to the ESP. Language: C
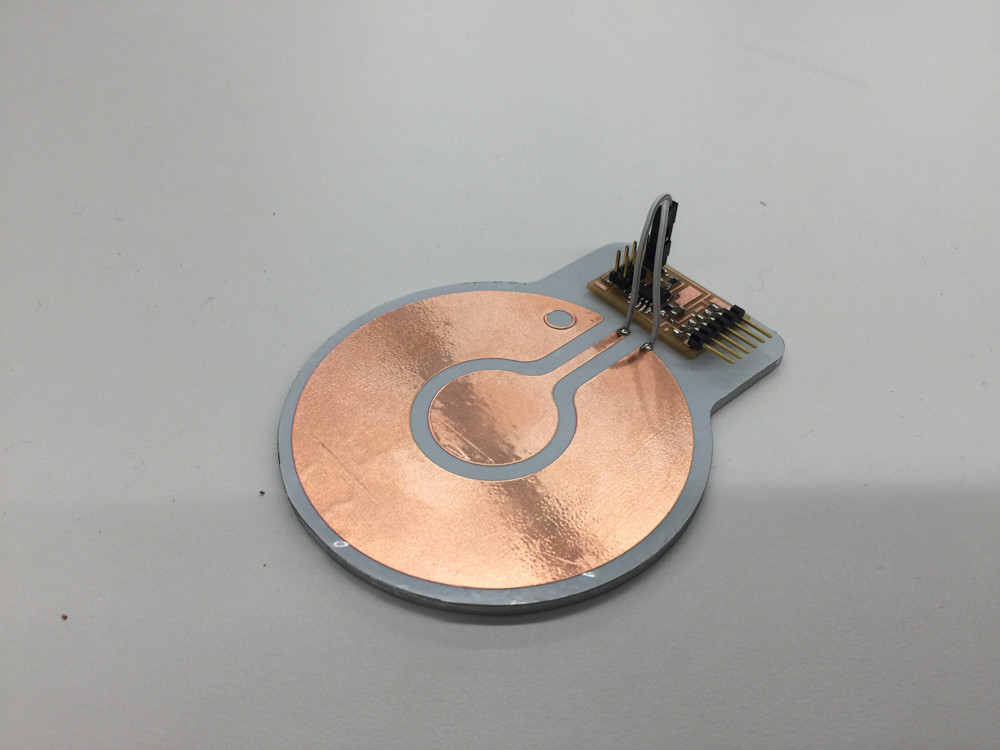
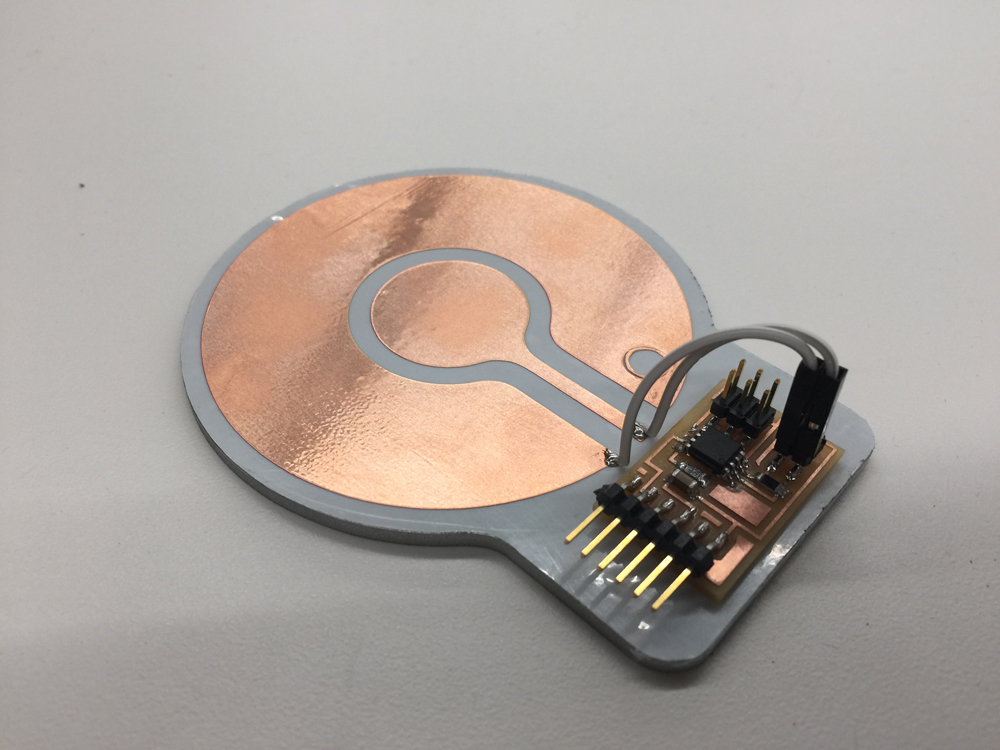
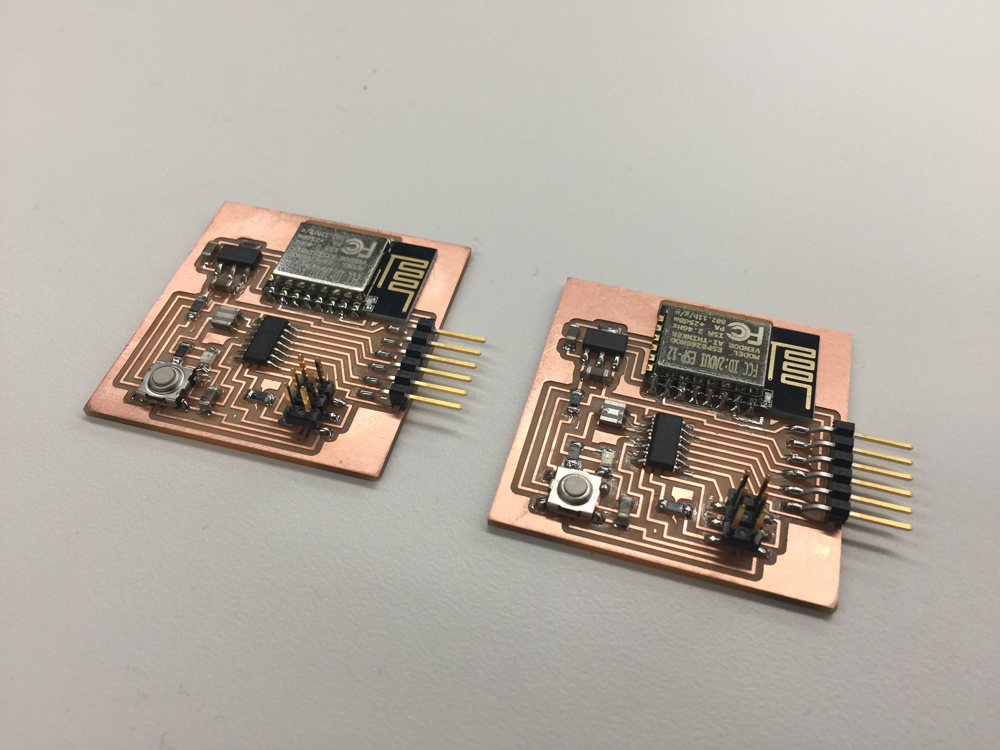
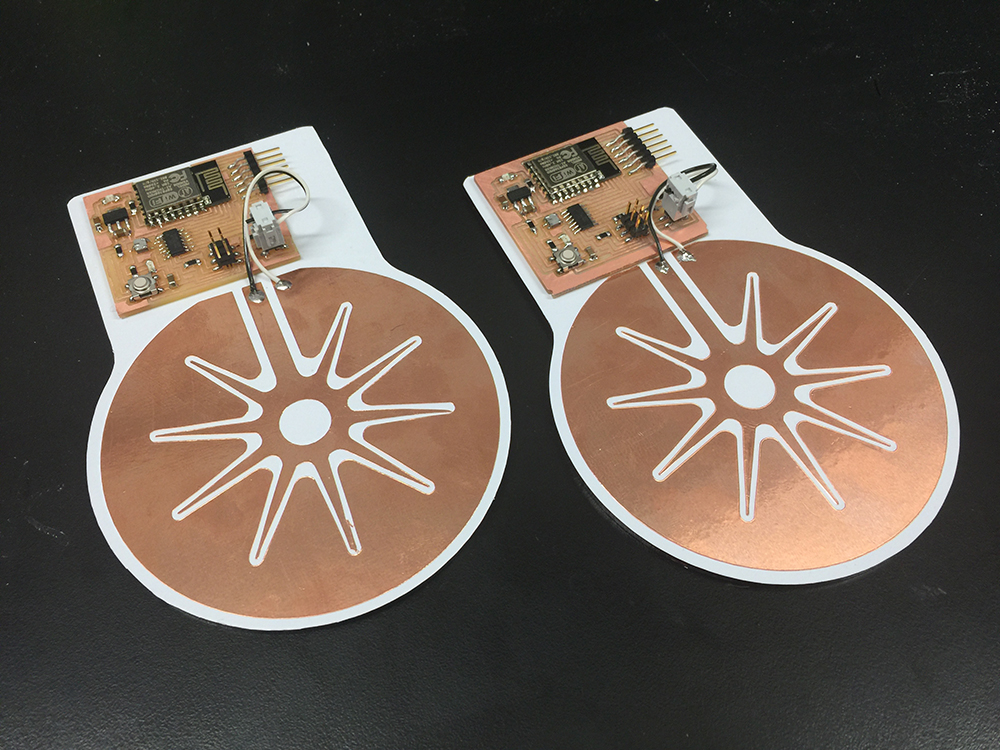
It turned out so nice I decided to make two of them.
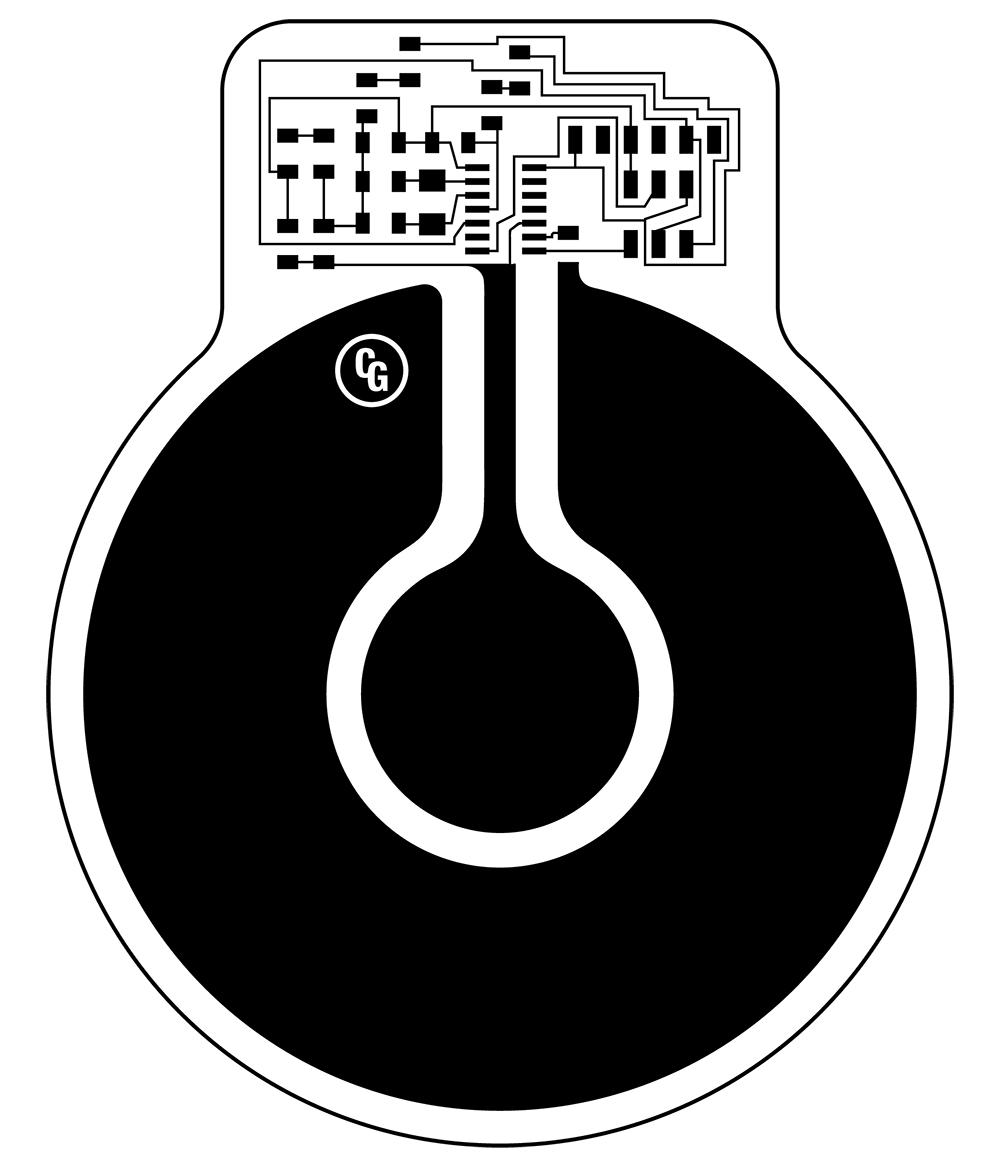
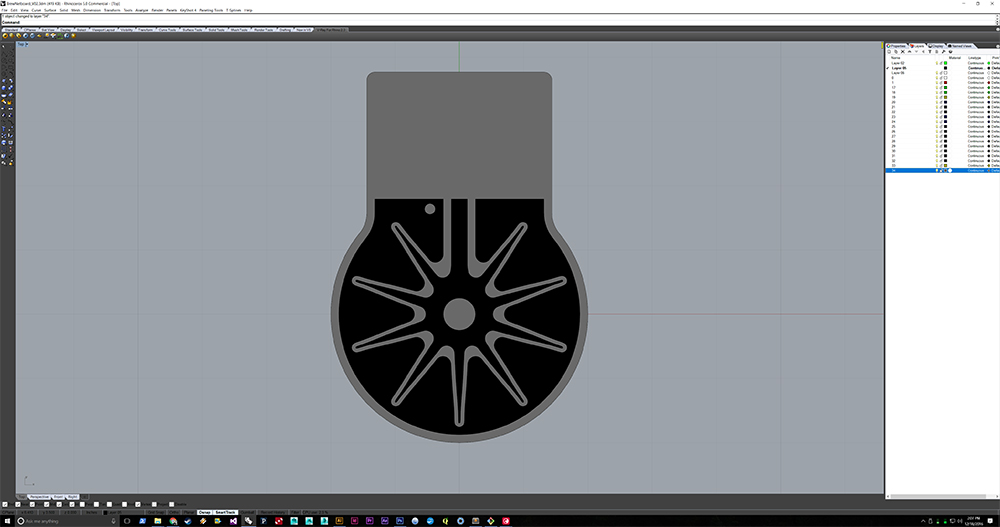
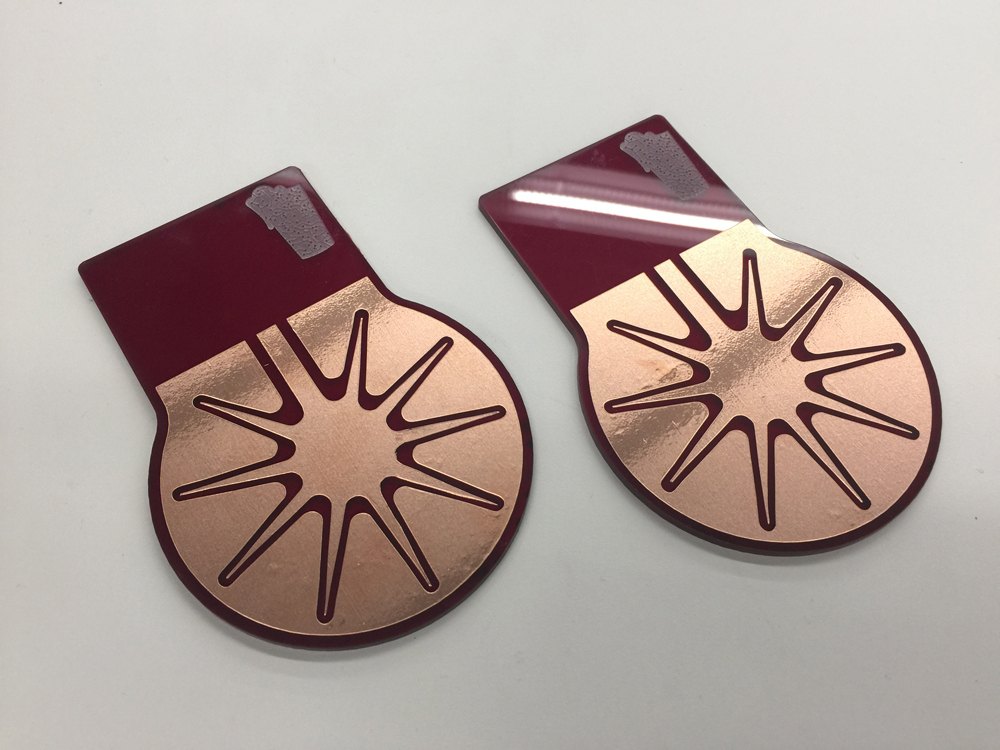
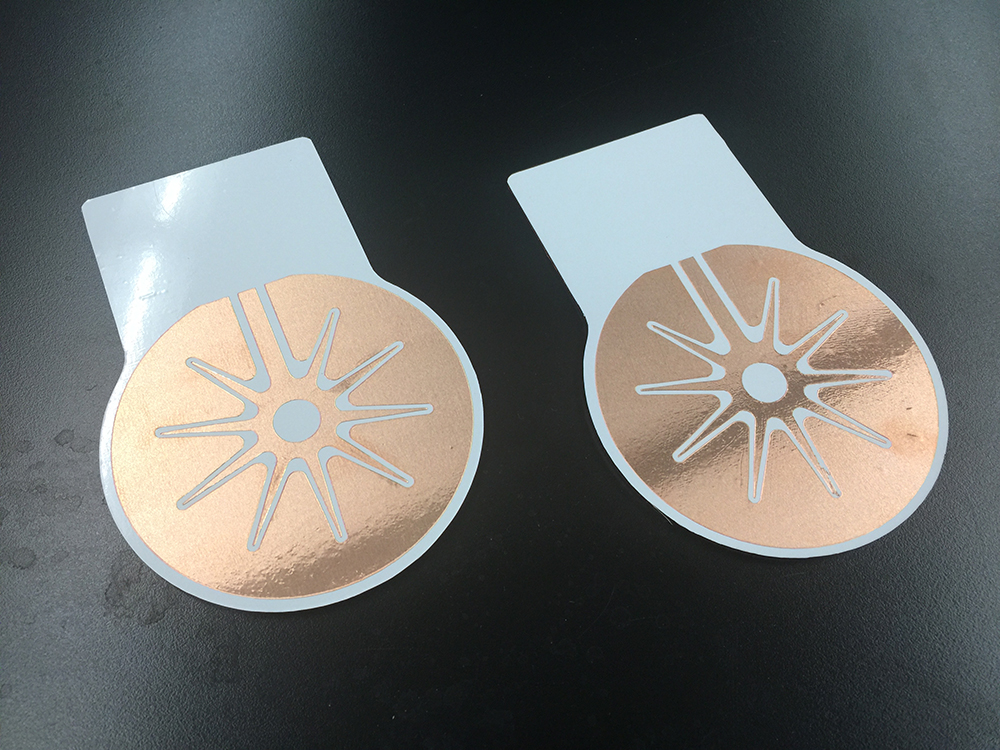
New board design. Some cups and glasses have a pushed-up center on the bottom, and the previous design didn't account for that indentation. I figured a star-burst kind of shape would take care of that problem.
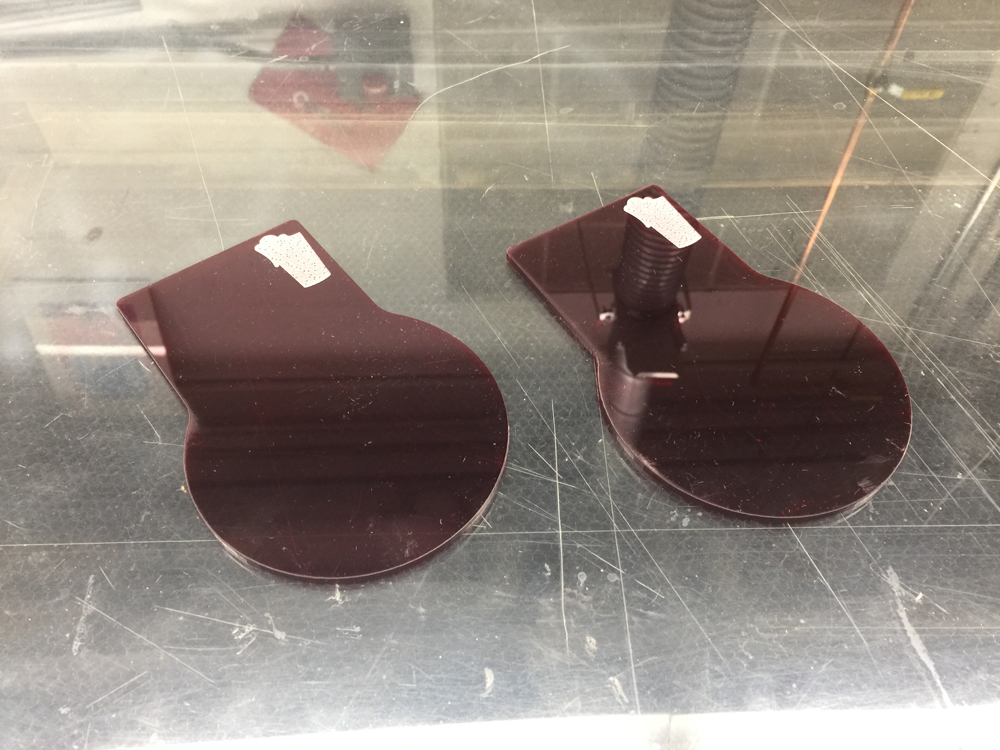
I decided to laser cut red acrylic and etch the logo into the coaster to save weight and make the project less conductive.
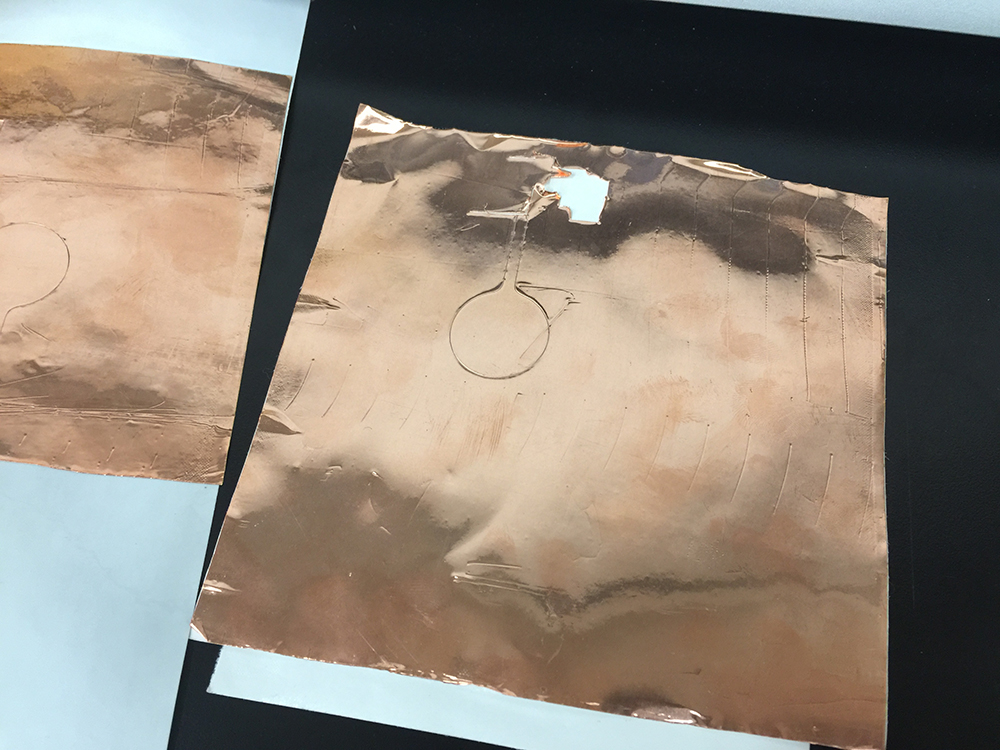
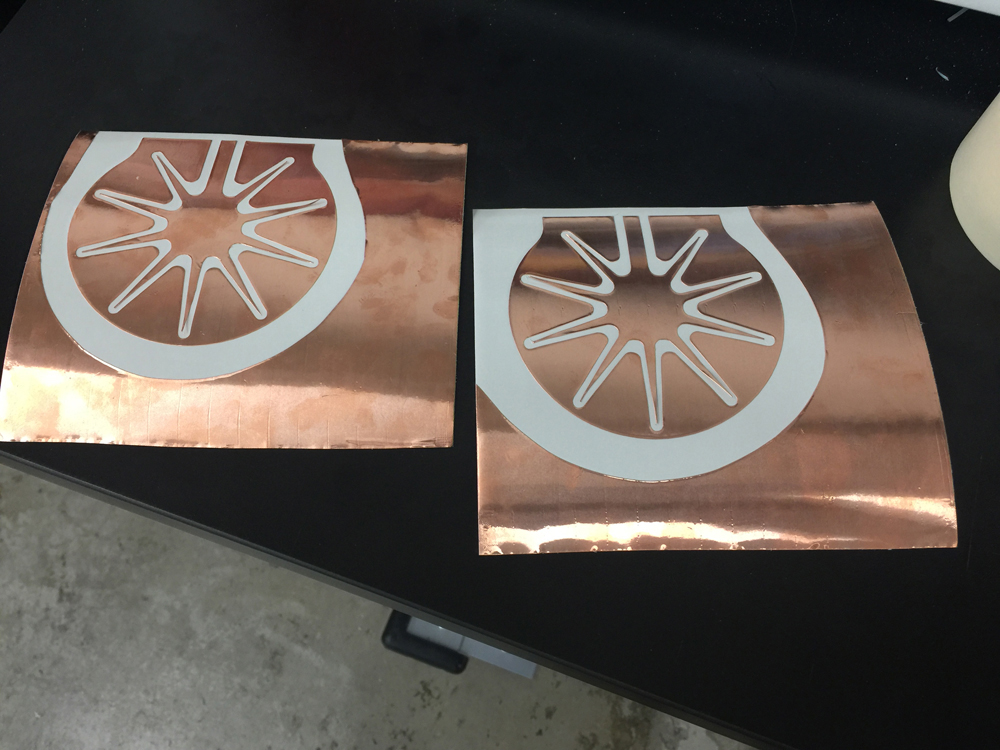
I cut the new pads on the vinyl cutter and used transfer paper to migrate the copper to the acrylic back plate.
Here's the copper stuck directly to the acrylic. I wasn't happy with the color. Looked a bit 70's to me.
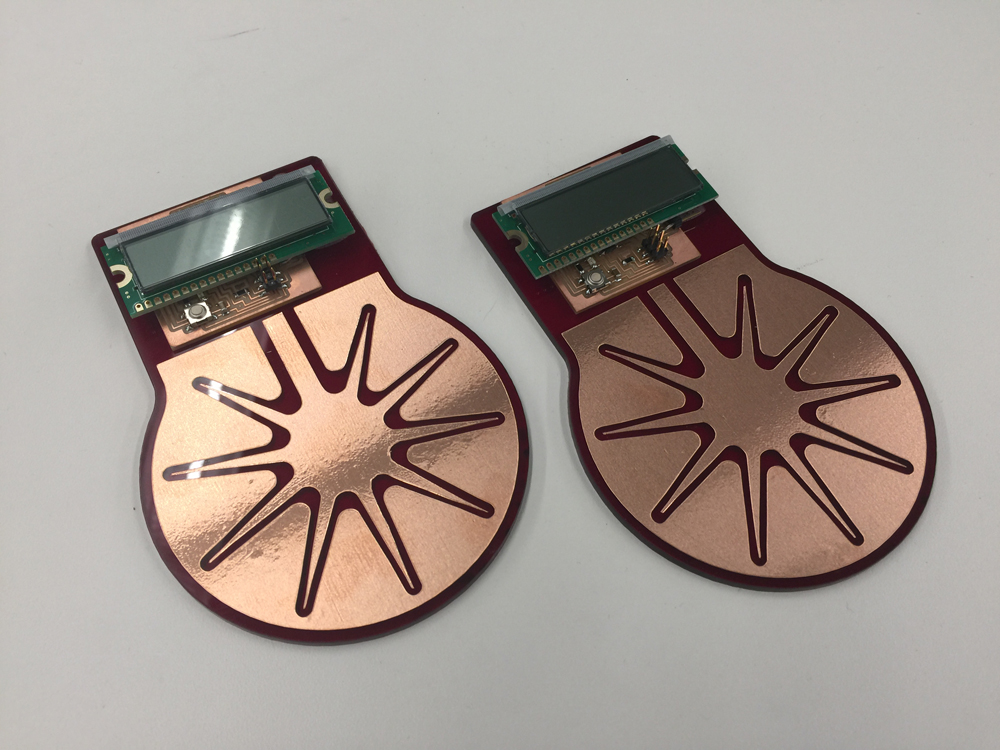
I thought it might be cool to integrate an LCD into the design to give users a percentage-based idea of how much liquid they have left.
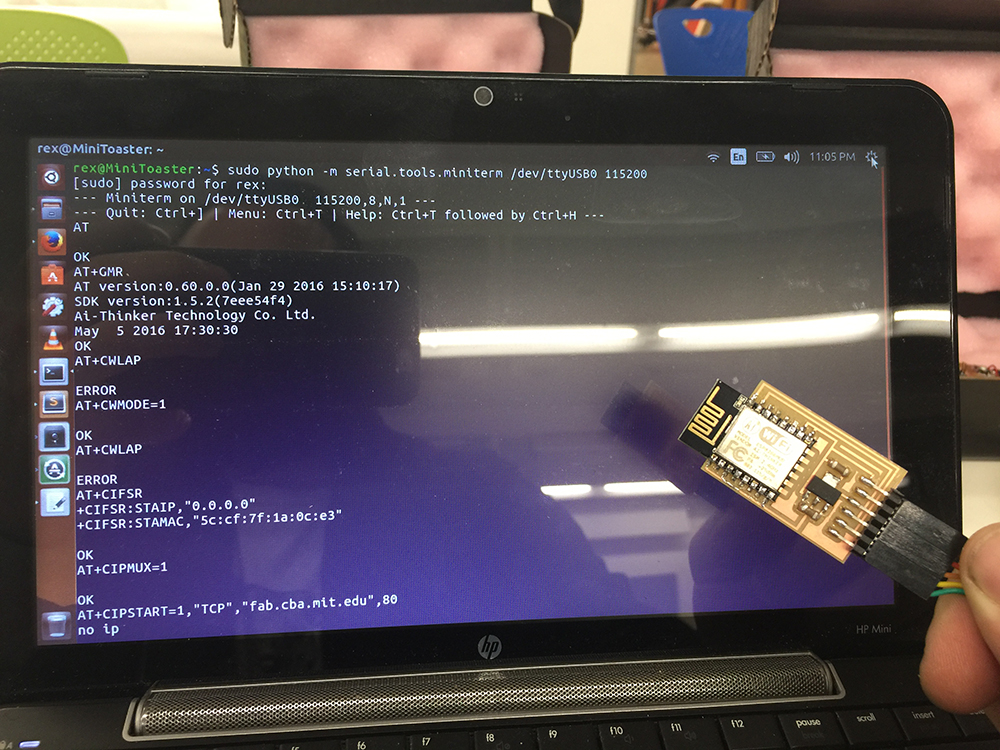
I went back and remade the hellowifi board because I was having issues communicating from the ATTiny44A to the wifi module, and I couldn't figure out what was going on. After making the wifi board, I learned that my previous board was programed with NodeMCU and not AT as pictured here. I had to reflash the wifi module on the other board to get it to work, then still had issues connecting to Harvard's Wifi. Apparently they don't allow these types of connections on their network...
I ripped up the copper and re-cut it on the vinyl cutter. I placed some white vinyl on the backer to get rid of that 70's vibe, and re-mounted the copper to that.
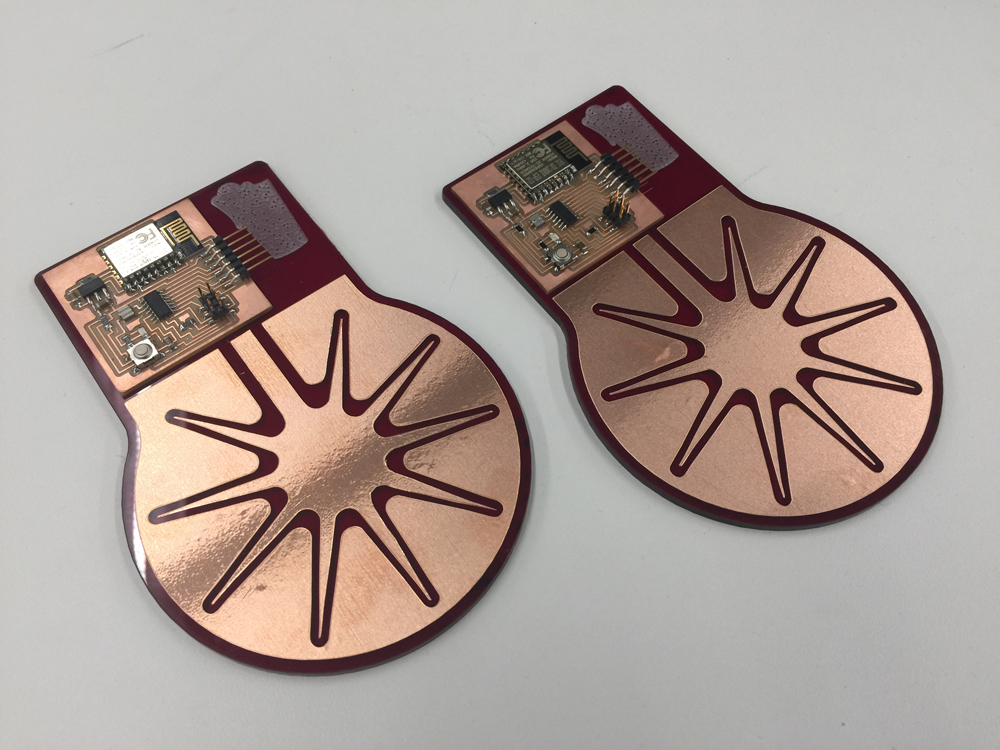
Decided to redesign the board to integrate the wifi module and the TxRx step response components. I ran out of pins, and decided to use the MISO and MOSI pins from the ISP programmer header to get the job done.
Here is the routing for the traces. Only one jumper and no vias.
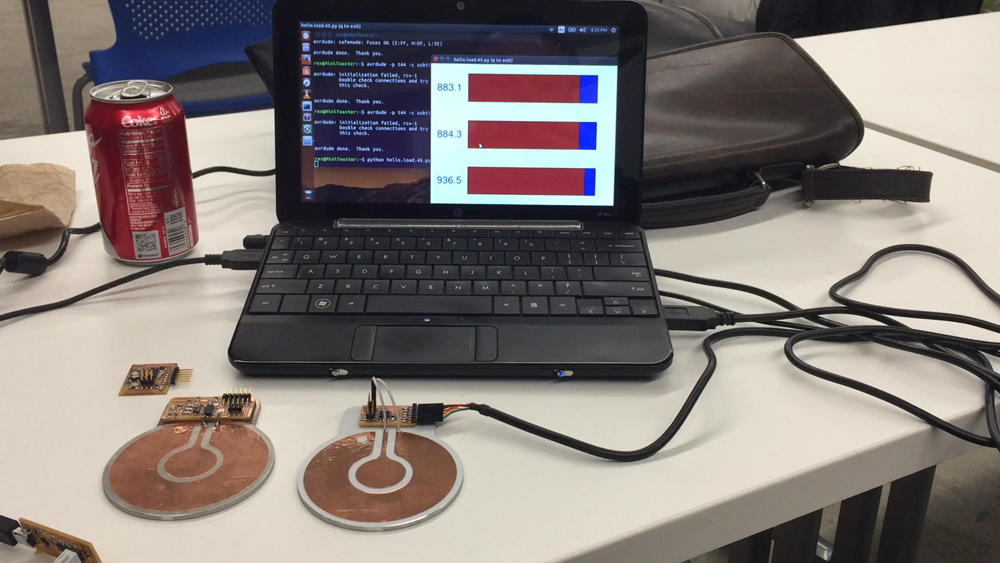
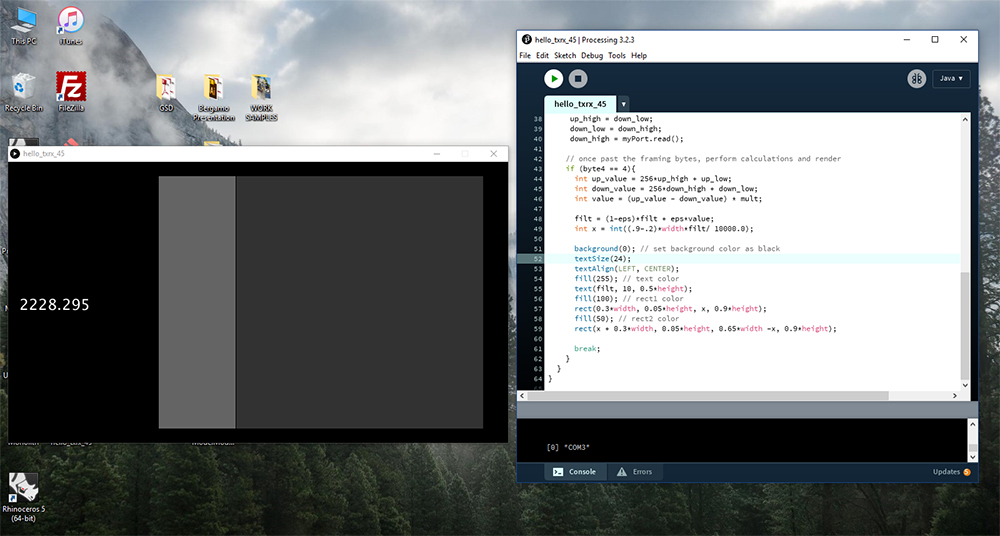
I was having the worst time trying to get all of this to run in the Linux environment, but luckily Nathan Melenbrink came to my rescue with a processing code that could talk to my boards. Seriously, a life-saver.
I found a twitter API link for processing HERE. This tutorial walks you through twitter integration for processing, and is fairly straight-forward except for the part that nobody tells you about (which cost me an hour of googling to figure out): the twitter library can't be loaded no matter which folder you place it in UNTIL you drag the .jar file INTO your processing sketch. Everything worked great after that, but it was one of the most un-obvious and trivial things.
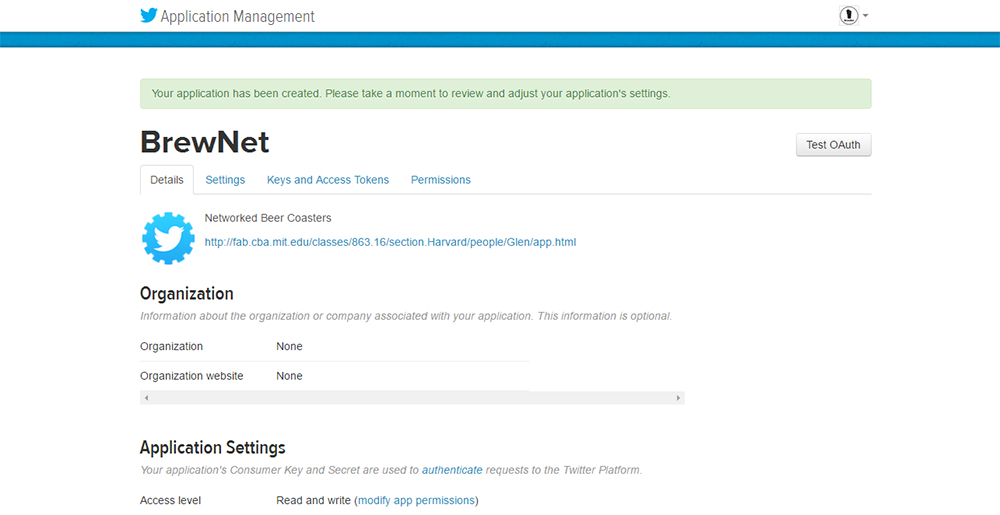
I then created a twitter handle: @Brew_Network, and used the developer mode to create a twitter App and got O-Auth permissions for that app. Their open API makes this super easy to do.
Here is the Processing Sketch I used to talk to my board and communicate with Twitter. I gave it 16 individual phrases to choose from, and let the program randomly select one of the phrases to post. Twitter has a thing about posting the same tweet twice in one day being bad, so I may have to hash the post, or time-stamp the tweet to get it to be unique. I figure that out later. Language: Processing (Java / C)
Here are the finished boards.
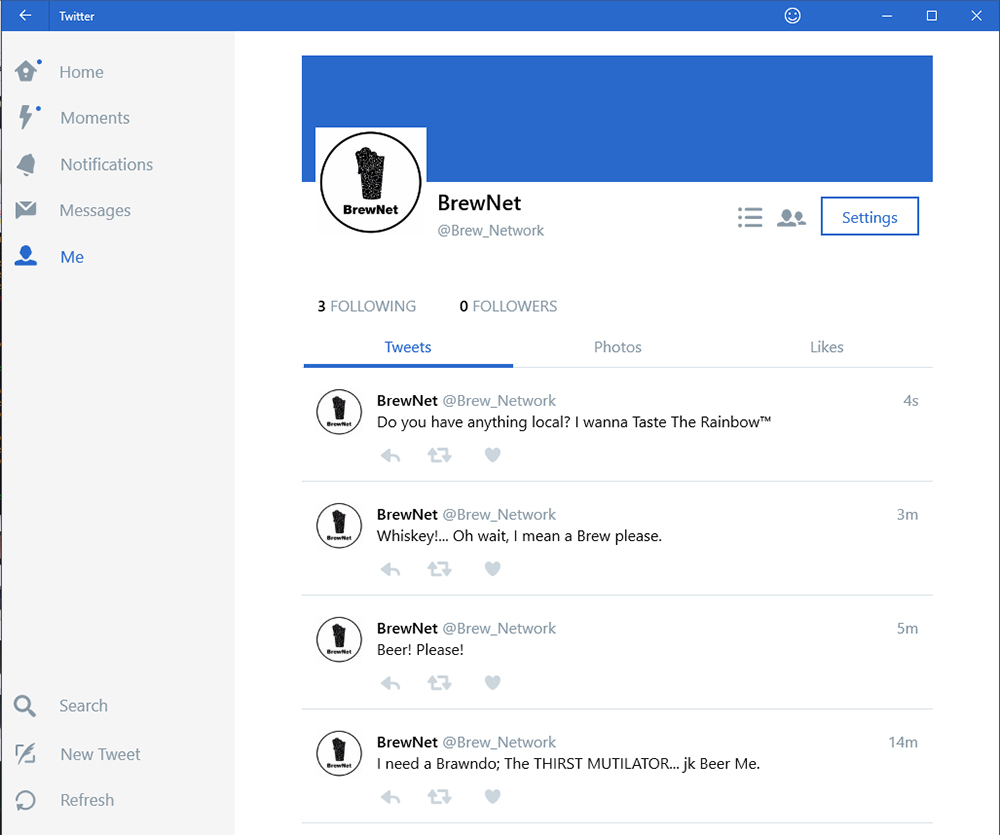
And the tweet storm commences. More to Come....