


PROCESS
THIS IS HOW I GOT THERE
↓

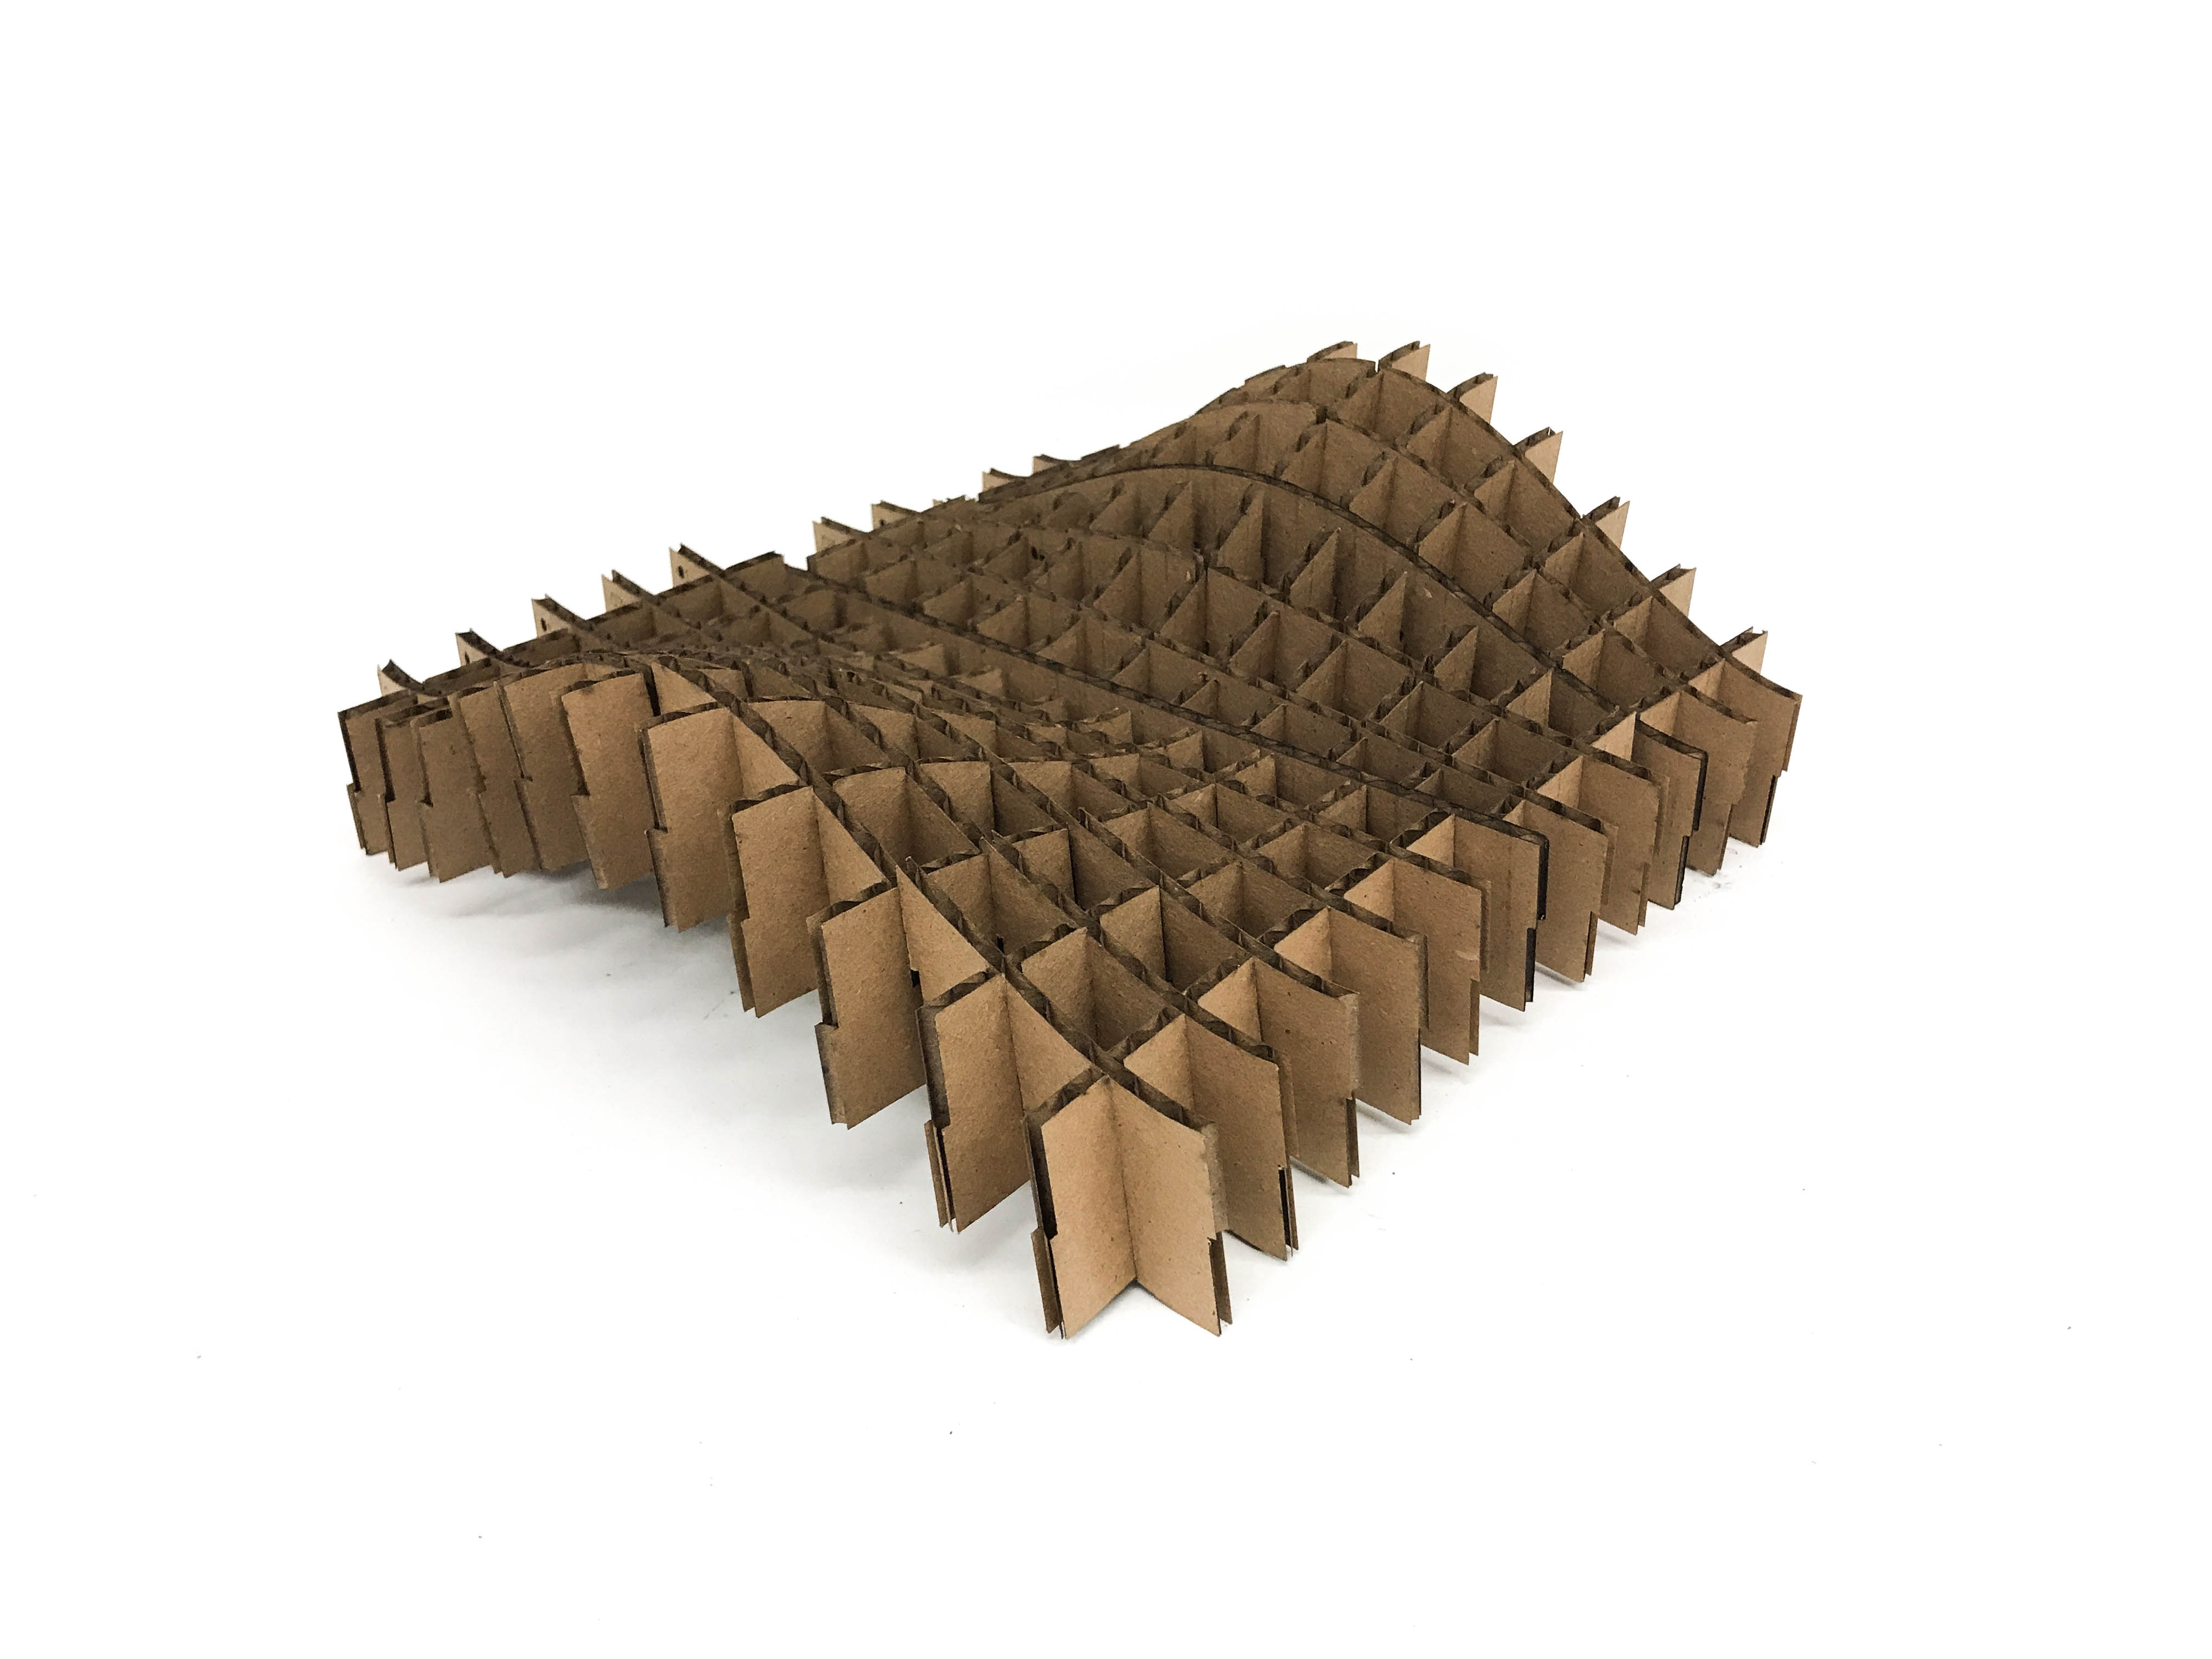
There are 4 of each unique segment in the kit, which totals 56 pieces. When put together, they can form a series of different wave geometries.

Above are a series of wave iterations the kit can produce. These studies were done is Rhino.

The next step was laser cutting. I have a video clip of the process, but have yet to condense the file to a reasonable size.


After cutting the press-fit pieces, I went on to assemble the geometries.
VINYL CUT
LAST BUT NOT LEAST, MY VINYL CUT!
↓

I love the vinyl cutter! What I did not love was the transfer paper. I learned that cutting very intricate files works wonderfully but pressing them onto transfer paper does not work well. Thus, my simple, sad panda.