Week 3: 3D Scanning and Printing
"Priyanka Learns HOW TO MAKE a 3D Printed Heel and Scan Her Foot"
For my third assignment for How to Make (Almost) Anything, I learned how to use a scanner, two different types of 3D printers, and software to create CAD-worthy files from half-made meshes.
Group Project: Testing 3D Printer Design Rules
The use of the 3D printers in the EDS facility is quite straightforward. Since I was unavailable during the time of everyone getting a run through of 3D printing, I got a separate individual tutorial from TA Daniel. He took me through the simiarities and the differences between the two types of 3D printers in the shop, a uPrint (more fancy and thus more capabilities) and two Shindoh 3Dwoks (super user-friendly yet with fewer capabilities) and then learned the step-by-step process of actually operating these two machines properly. Here below you can see pictures of the two printers.
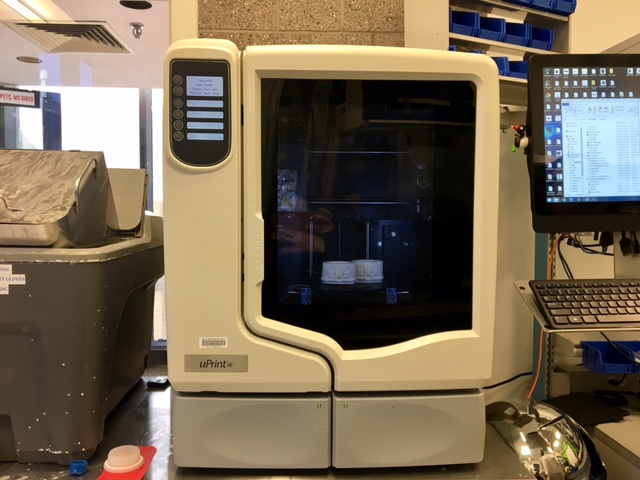
Figure 1: uPrint High Resolution, Support Material-Capable 3D Printer
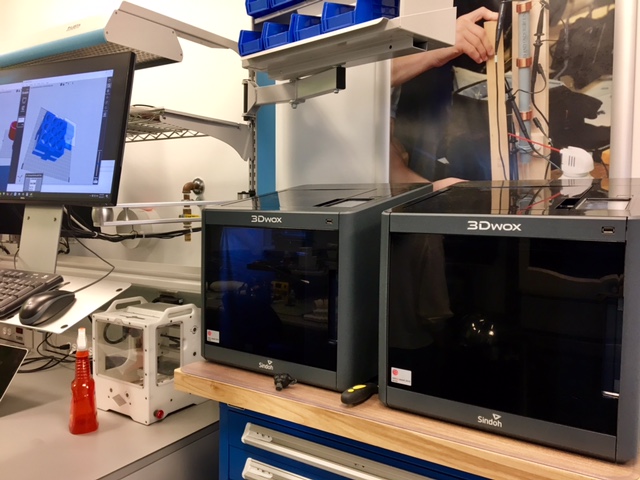
Figure 2: Shindoh 3DWok (Super User Friendly) 3D Printers
In the tutorial, I learned how to vary the different parameters of these machines and how to upload my CAD file via STL file format to each of the 3D printers, and was even able to see a demo run. The most important parameters for printing were 1. Resolution (I don't want too high a resolution, if not necessary, in order to save filament and time) 2. Orientation on the Bed (in order to limit the need for support material and to ensure that, when being printed, the structure can hold its own weight at each level of cross section) 3. Position on Bed (so it has enough clearance on the bed tray), 4. Type of Filament (depending on my design and application for the final product, different materials (that can indeed be 3D printed) are better than others) and 5. Proper setup of the Machine (making sure that there is enough filament and support material for the project, the runtime is not completely crazy, the bed is locked, and that all the controls are setup properly).
I then got a quick runthrough of how to use the scanner to scan items that can then be converted into a "mesh", which can then be sculpted and "solidified" in a very nifty program called MeshMixer, which can then output an STL file which can then be uploaded and inputted into the 3D Printer software to be 3D printed. I was excited and ready to get started working with these tools! So here comes the results of my Individual Project for the week!
Individual Project 1: DESIGNING and Printing a 3D Object
For this part of the project, I plan to design the first version of my to-be 3D printed heel for my final project--the LED shoe. I started off by taking measurements of a similar shoe that I own, which has the general shape that my final project shoe will roughly imitate. However, the shoe I own is 2 inches high, and since I want to include electronics EMBEDDED inside the heel, I decided, to have enough room for all the components, I will make a 3 inch high heel.
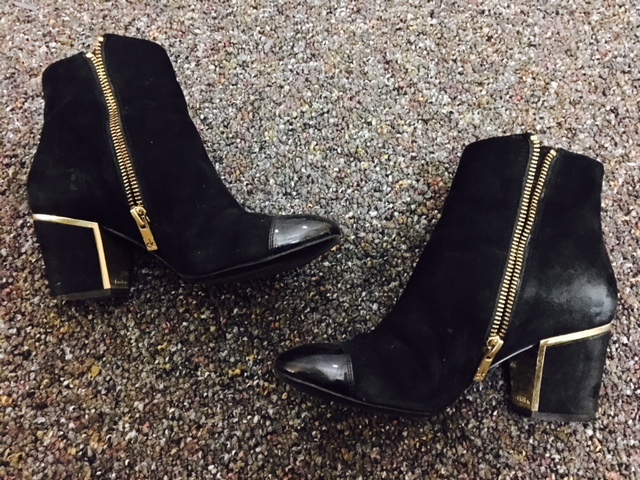
Figure 3: My Black Heeled Booties that I will Imitate the Shape for my Final Project
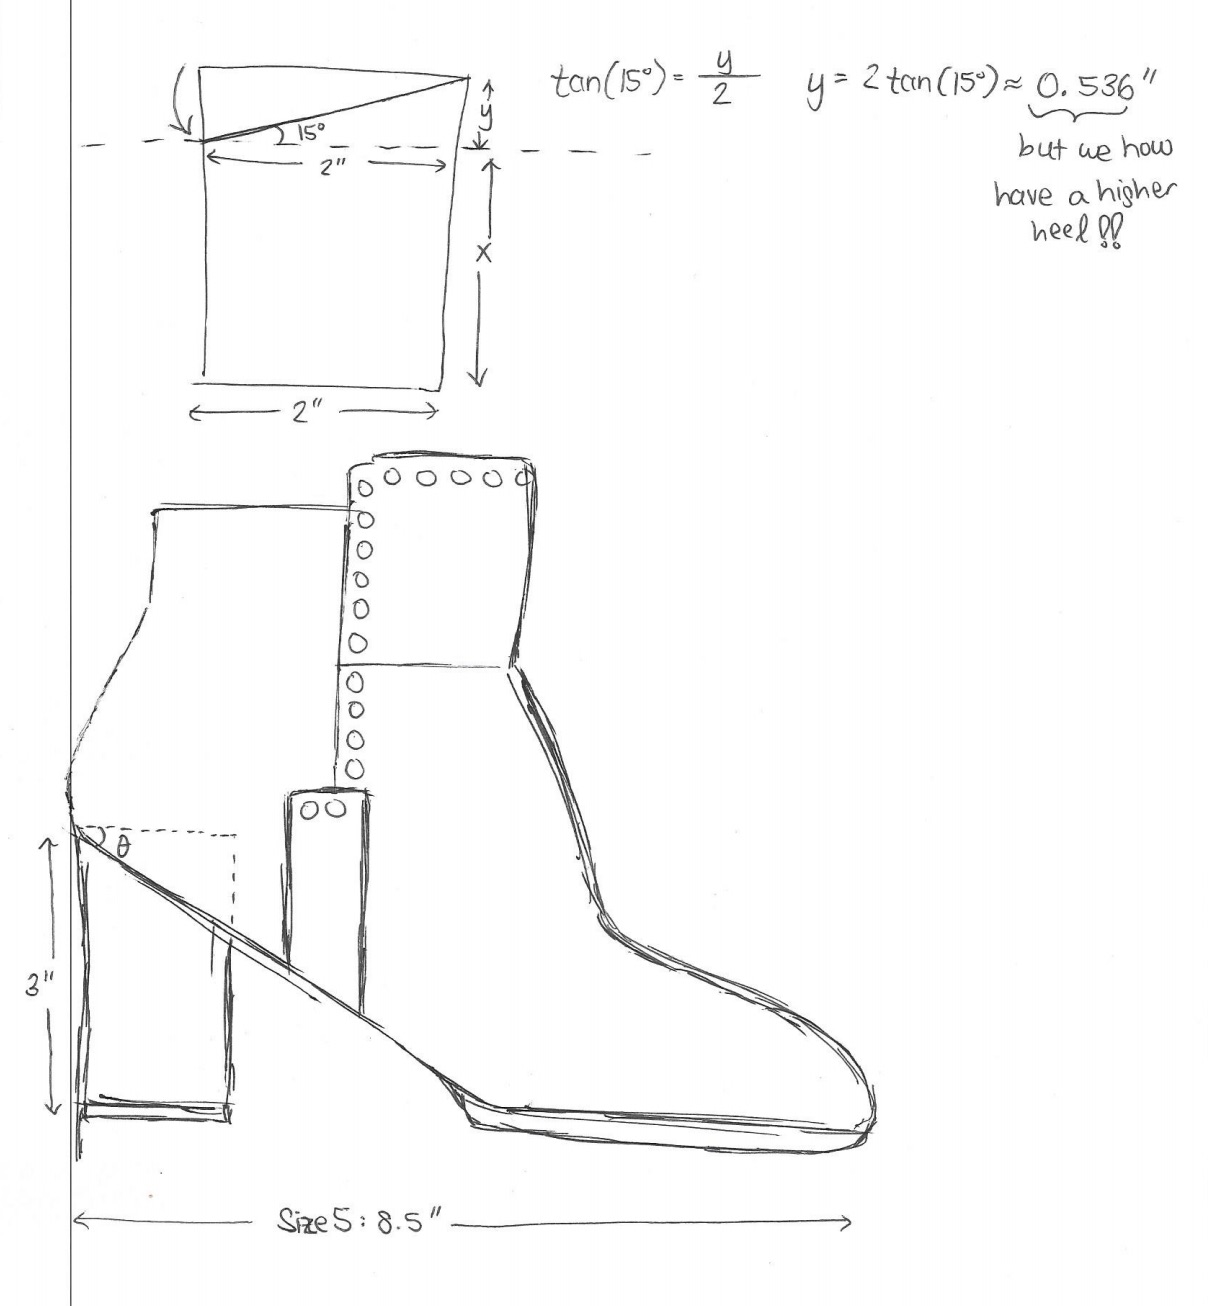
Figure 4: Rough Dimensioning for the To-Be-CADded Heel
I then went ahead and CADded the 3-inch heel with a 5 degree taper and hollowed it out so then electronic components and at least one PCB can fit inside. For following iterations, I plan to include two stacked compartments--the top being for the electrical components and then the bottom for the battery back. I plan to also include a latched cover at the base of the shoe, where one can recharge and replace (when necessary) a Lithium-Polymer battery pack that will be powering the electronics (will need to do a Power Budget for that). However, here is the first iteration of the external enclosure that I will be 3D printing.
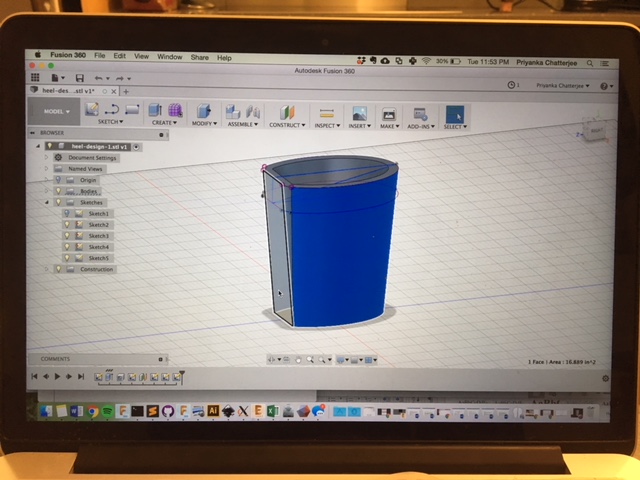
Figure 5: 3D CAD Model of Shoe Heel Enclosure in Autodesk Fusion 360
I then learned how to convert Fusion 360 files into .STL files via MeshMixer and then upload the file onto the Shindoh 3DWok machine. Here below is my design with an upright orientation in Meshmixer.
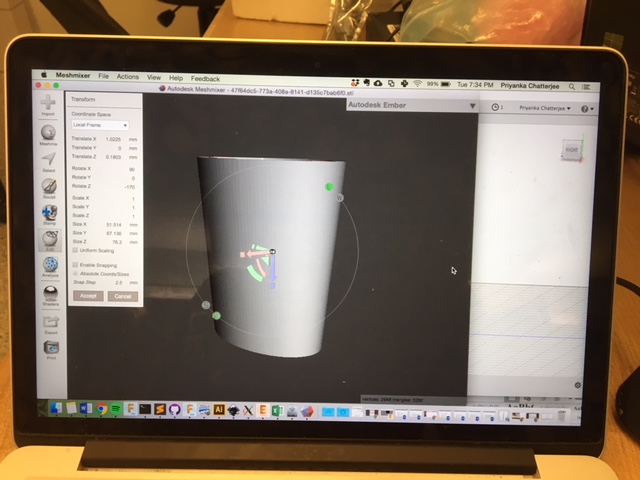
Figure 6: Heel Mesh in MeshMixer to Convert to STL
I then uploaded the STL file onto the Shindoh software connected to the 3DWok printers, set my parameters to a medium resolution using PLA filament (with the help of Dave, the shop manager!), oriented the part flat face side down lengthwise, and then sent it to the printer to print. Easy as pie!
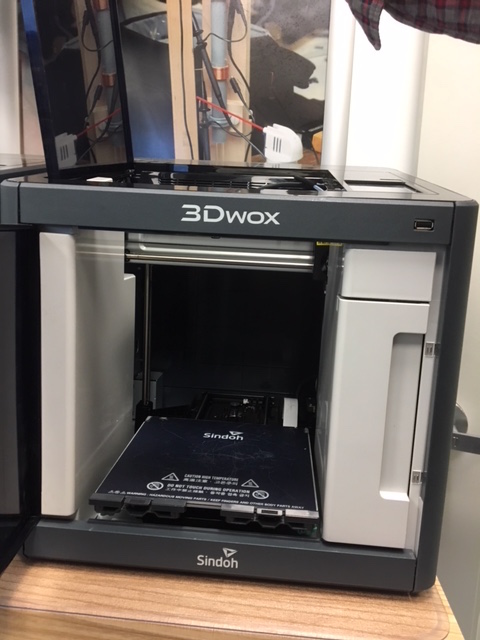
Figure 7: First Making Sure the Bed is Locked
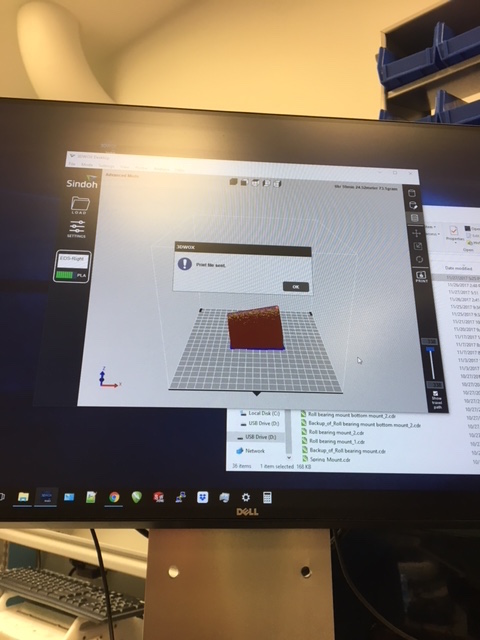
Figure 8: Sending to Printer
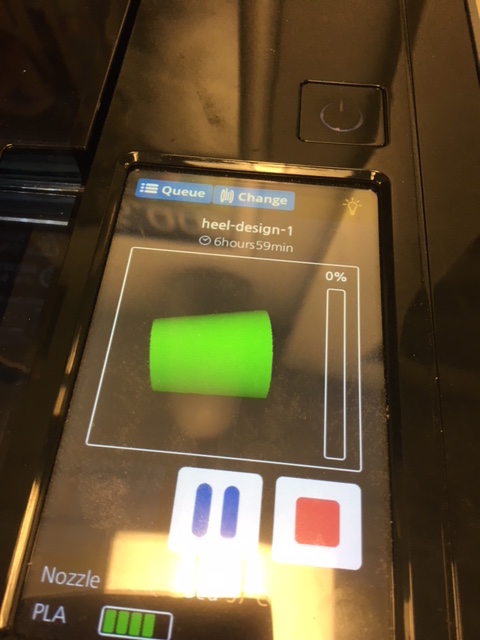
Figure 9: The Machine Recognizes the Part and Ready to Print!
I will be running the part in the machine overnight and check on it in the morning. Results to come!
RESULTS!!
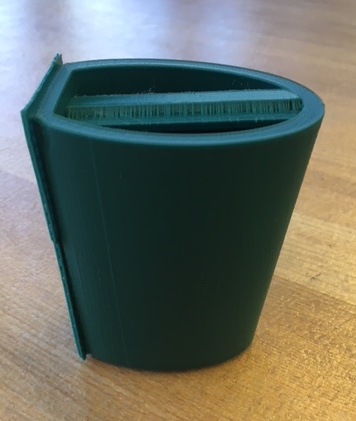
Figure 10: Heel - Right Side View
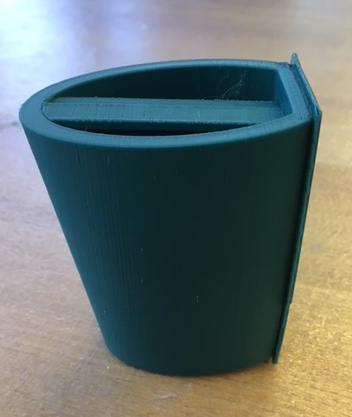
Figure 11: Heel - Left Side View
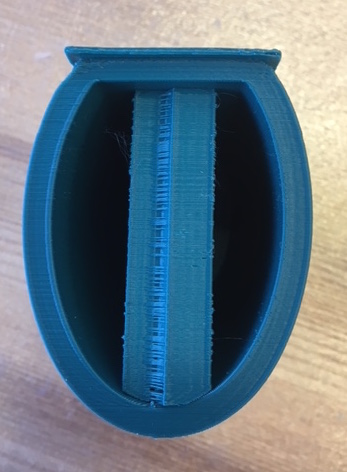
Figure 12: Heel Upper Edge - Showing the support Material Inside
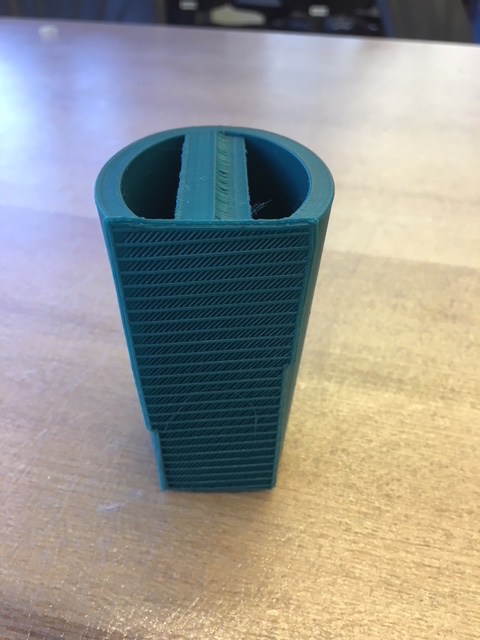
Figure 13: Heel Inside-Facing Edge -- Showing Support Material Ridges, where Printing Began
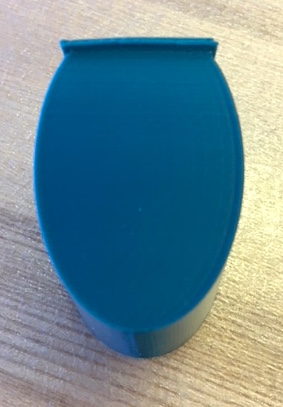
Figure 14: Heel Bottom - Looking Good except the Extra Support Material from above just down past the Edge of the Bottom, making it Slant Slightly
The heel actually didn't turn out too bad! At the base (or specifically the inside edge of the heel), there turned out to be an annoying ridge pattern where the PLA material diposited initially before moving on to making the actual heel, yet that is indeed support material and can be taken off. You can also see inside the heel there is significant amounts of support material INSIDE the (supposed to be hollow) heel! Even though the support material should not be very dense (with lots of air pockets between the grooves and thus rather hollow), since PLA is so stiff, it proved extremely difficult to get the support material off. Here is the result of my attempt at trying to pry out the material using an Exacto utility knife and failing miserably. Will definitely try another orientation (so maybe there will be less support material) soon!
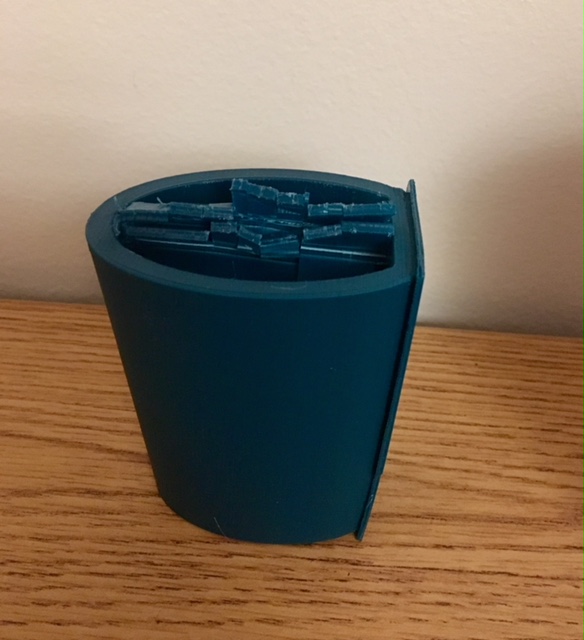
Figure 15: Side View -- Trying to Cut & Pry Out the Support Material
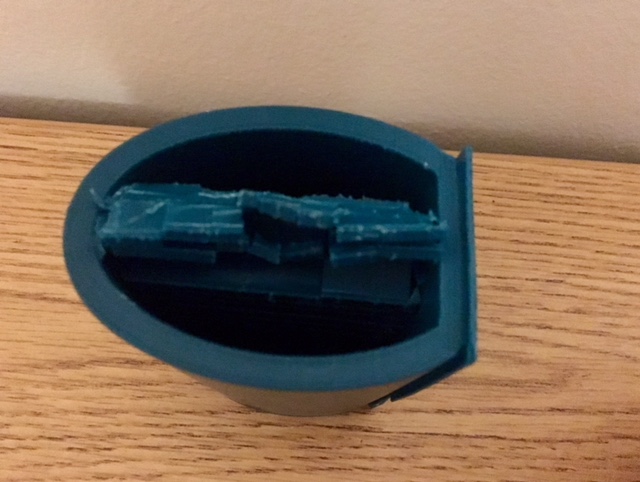
Figure 16: Top View -- Trying to Cut & Pry Out the Support Material
It really did damage to my (brand new) Exacto indeed.
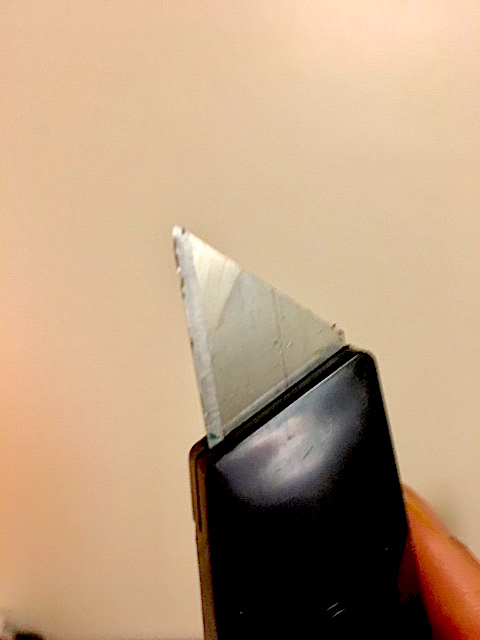
Figure 17: Blunted Exacto :'(
Now that I have attempted my first 3D print, I am excited to have more 3D Printing adventures to come! And to learn more about this fascinating (though how much can it replace?) technology.
Individual Project 2: SCANNING and Printing a 3D Object
I was really excited to be using the scanner this week (see the device below) and attempting to scan both my feet and hands. I hope to use this more often!
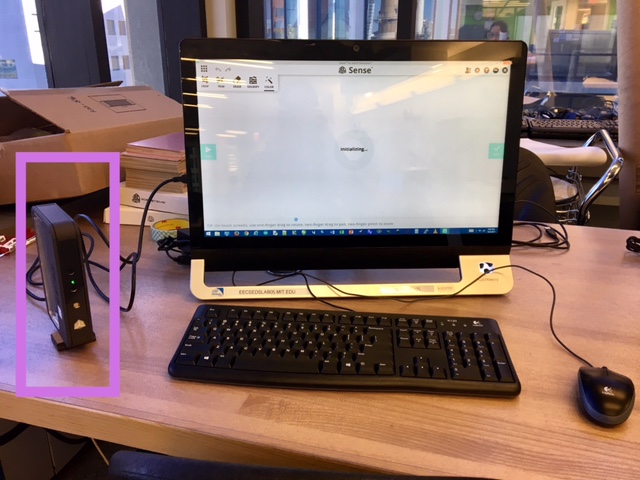
Figure 18: Using the Scanner for the First Time!
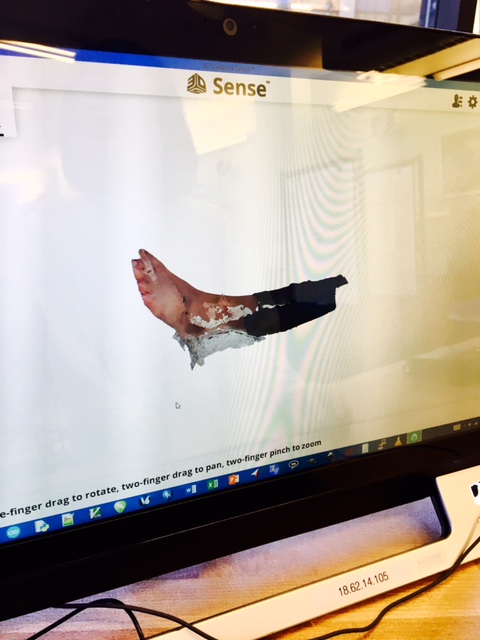
Figure 19: Scanned Right Foot
Now I imported this file into MeshMixer to fill in the gaps and make it CADworthy.
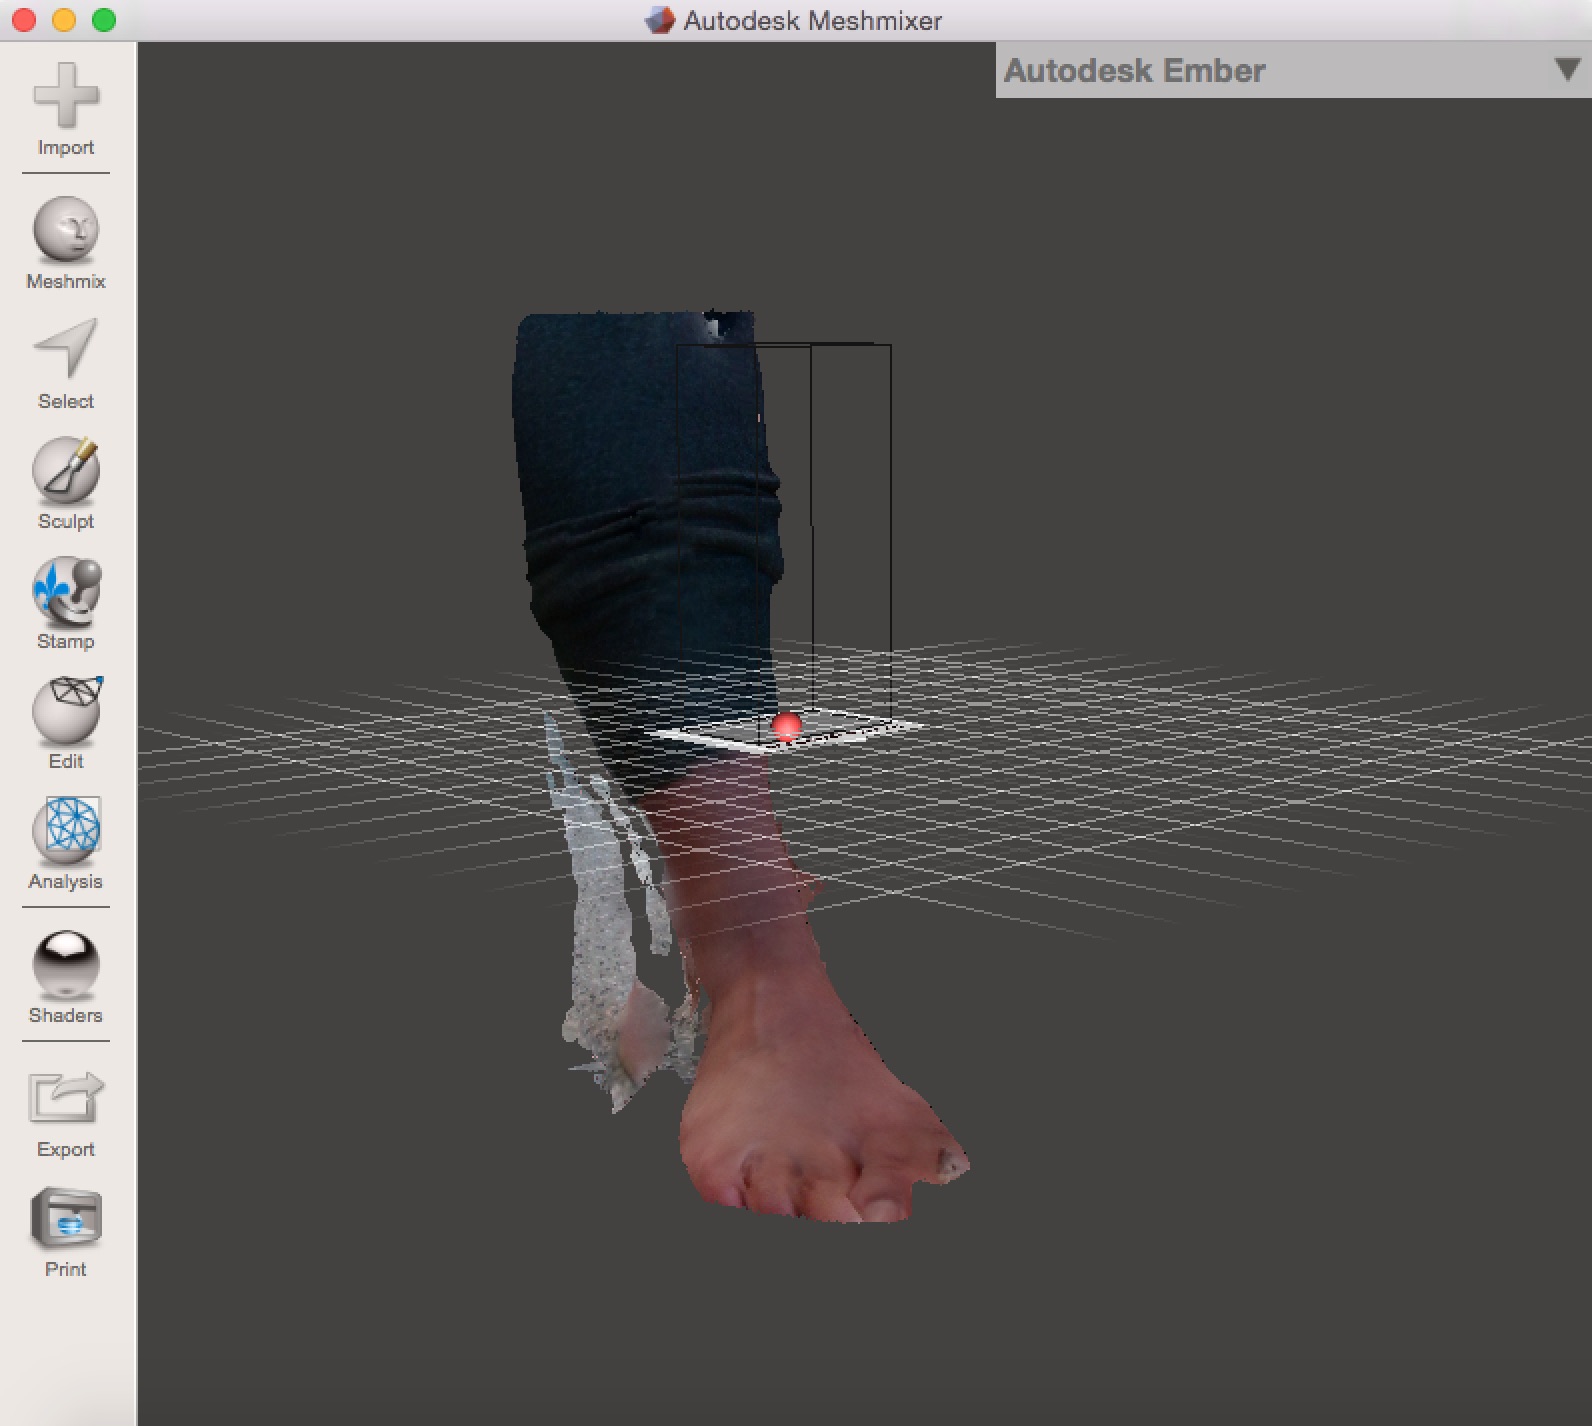
Figure 20: Scanned Foot in MeshMixer
I will be cleaning this up and sending it to the printer shortly! Now to practicing scanning my hand...
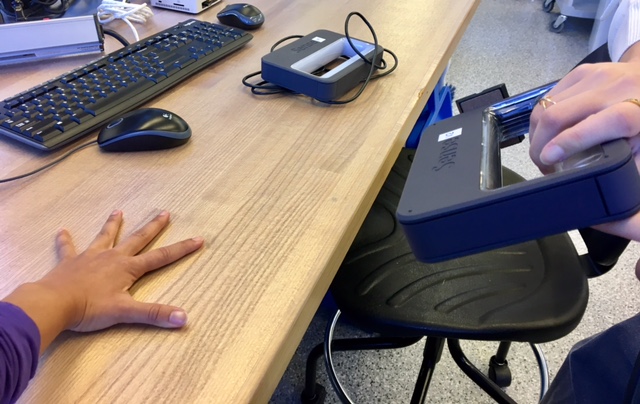
Figure 21: Hand with Scanner
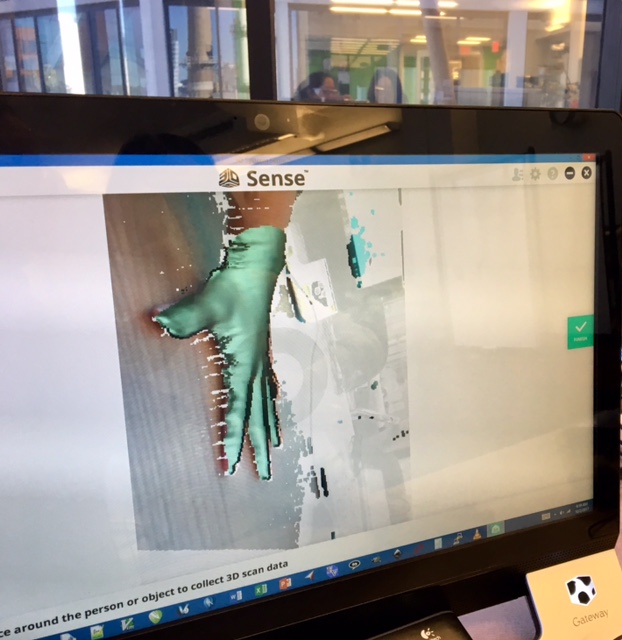
Figure 22: Scanning Left Hand
The goal will be to clean up both scans in MeshMixer and then importing the STL files onto the uPrint machine and creating a perfect model of both my hand and foot to use to make custom gloves and shoes for myself! And then using a similar process to scale up to producing multifunctional shoes and gloves for other people! Updates on this to come (well past / beyond the class too)!