week 1: computer-controlled cutting
This week's assignment had three parts: (1) in groups, characterize and test our laser cutter, (2) vinyl cut something, and (3) design and laser cut a parametric press-fit construction kit.
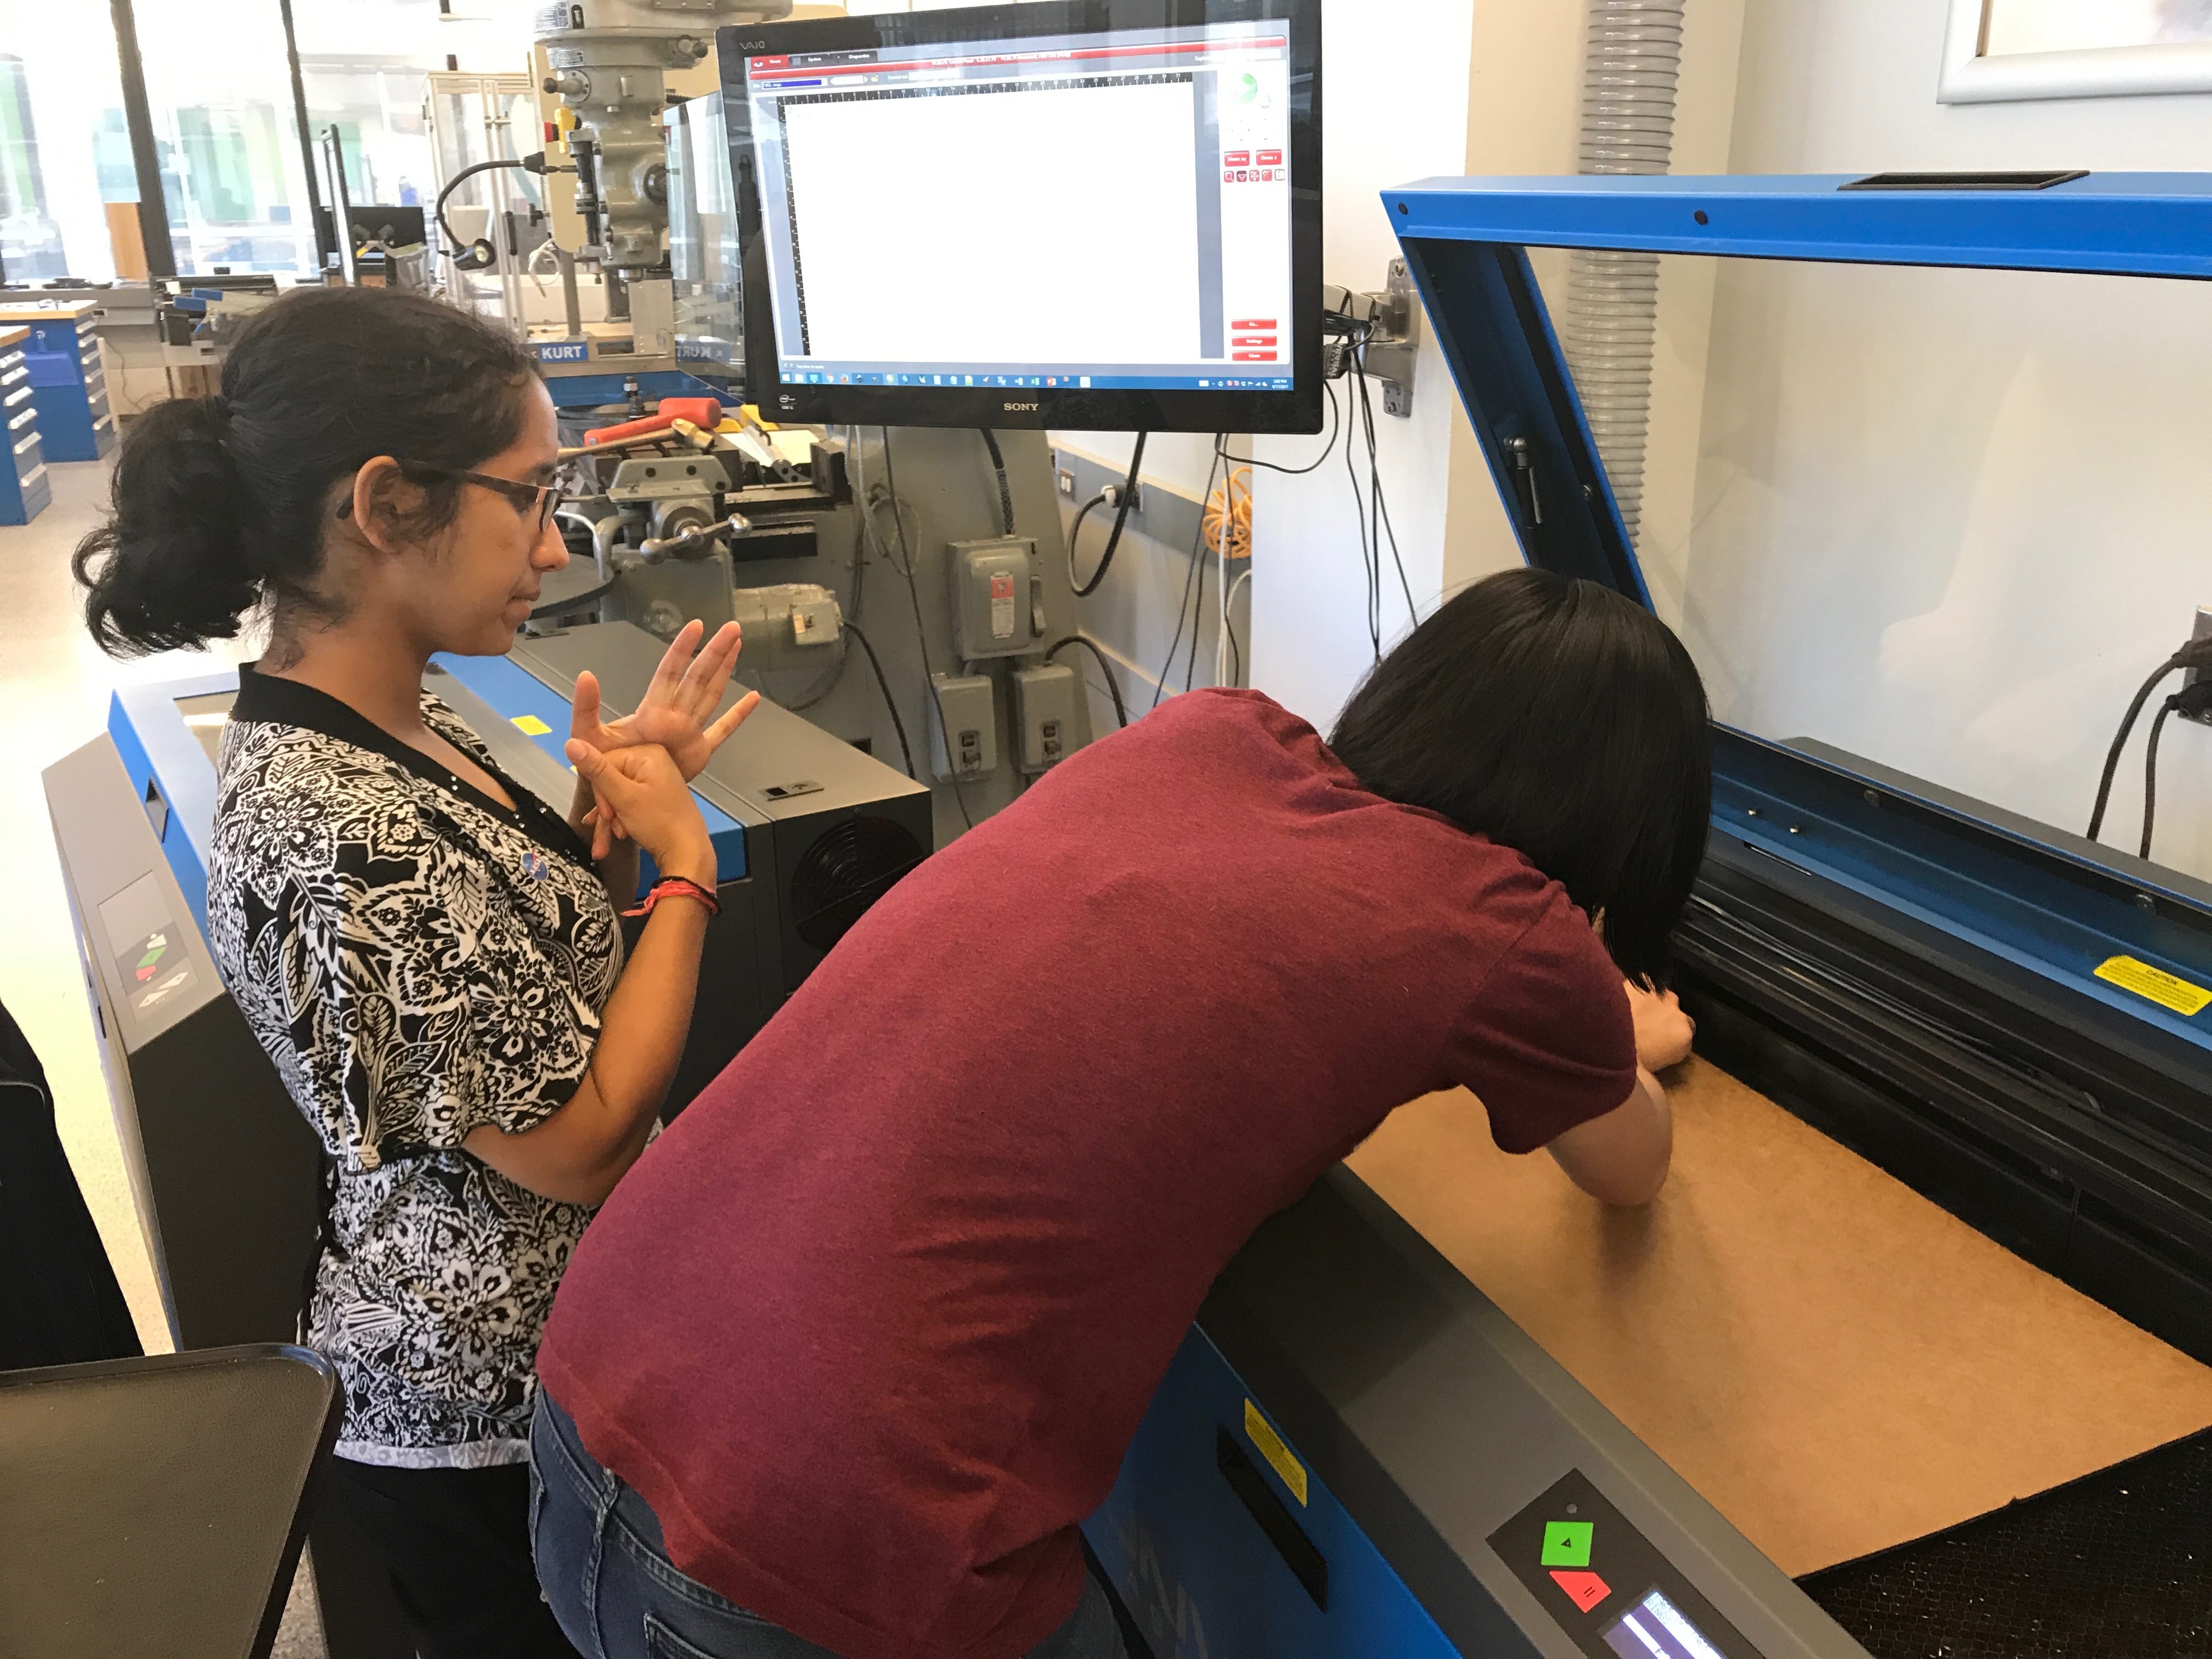
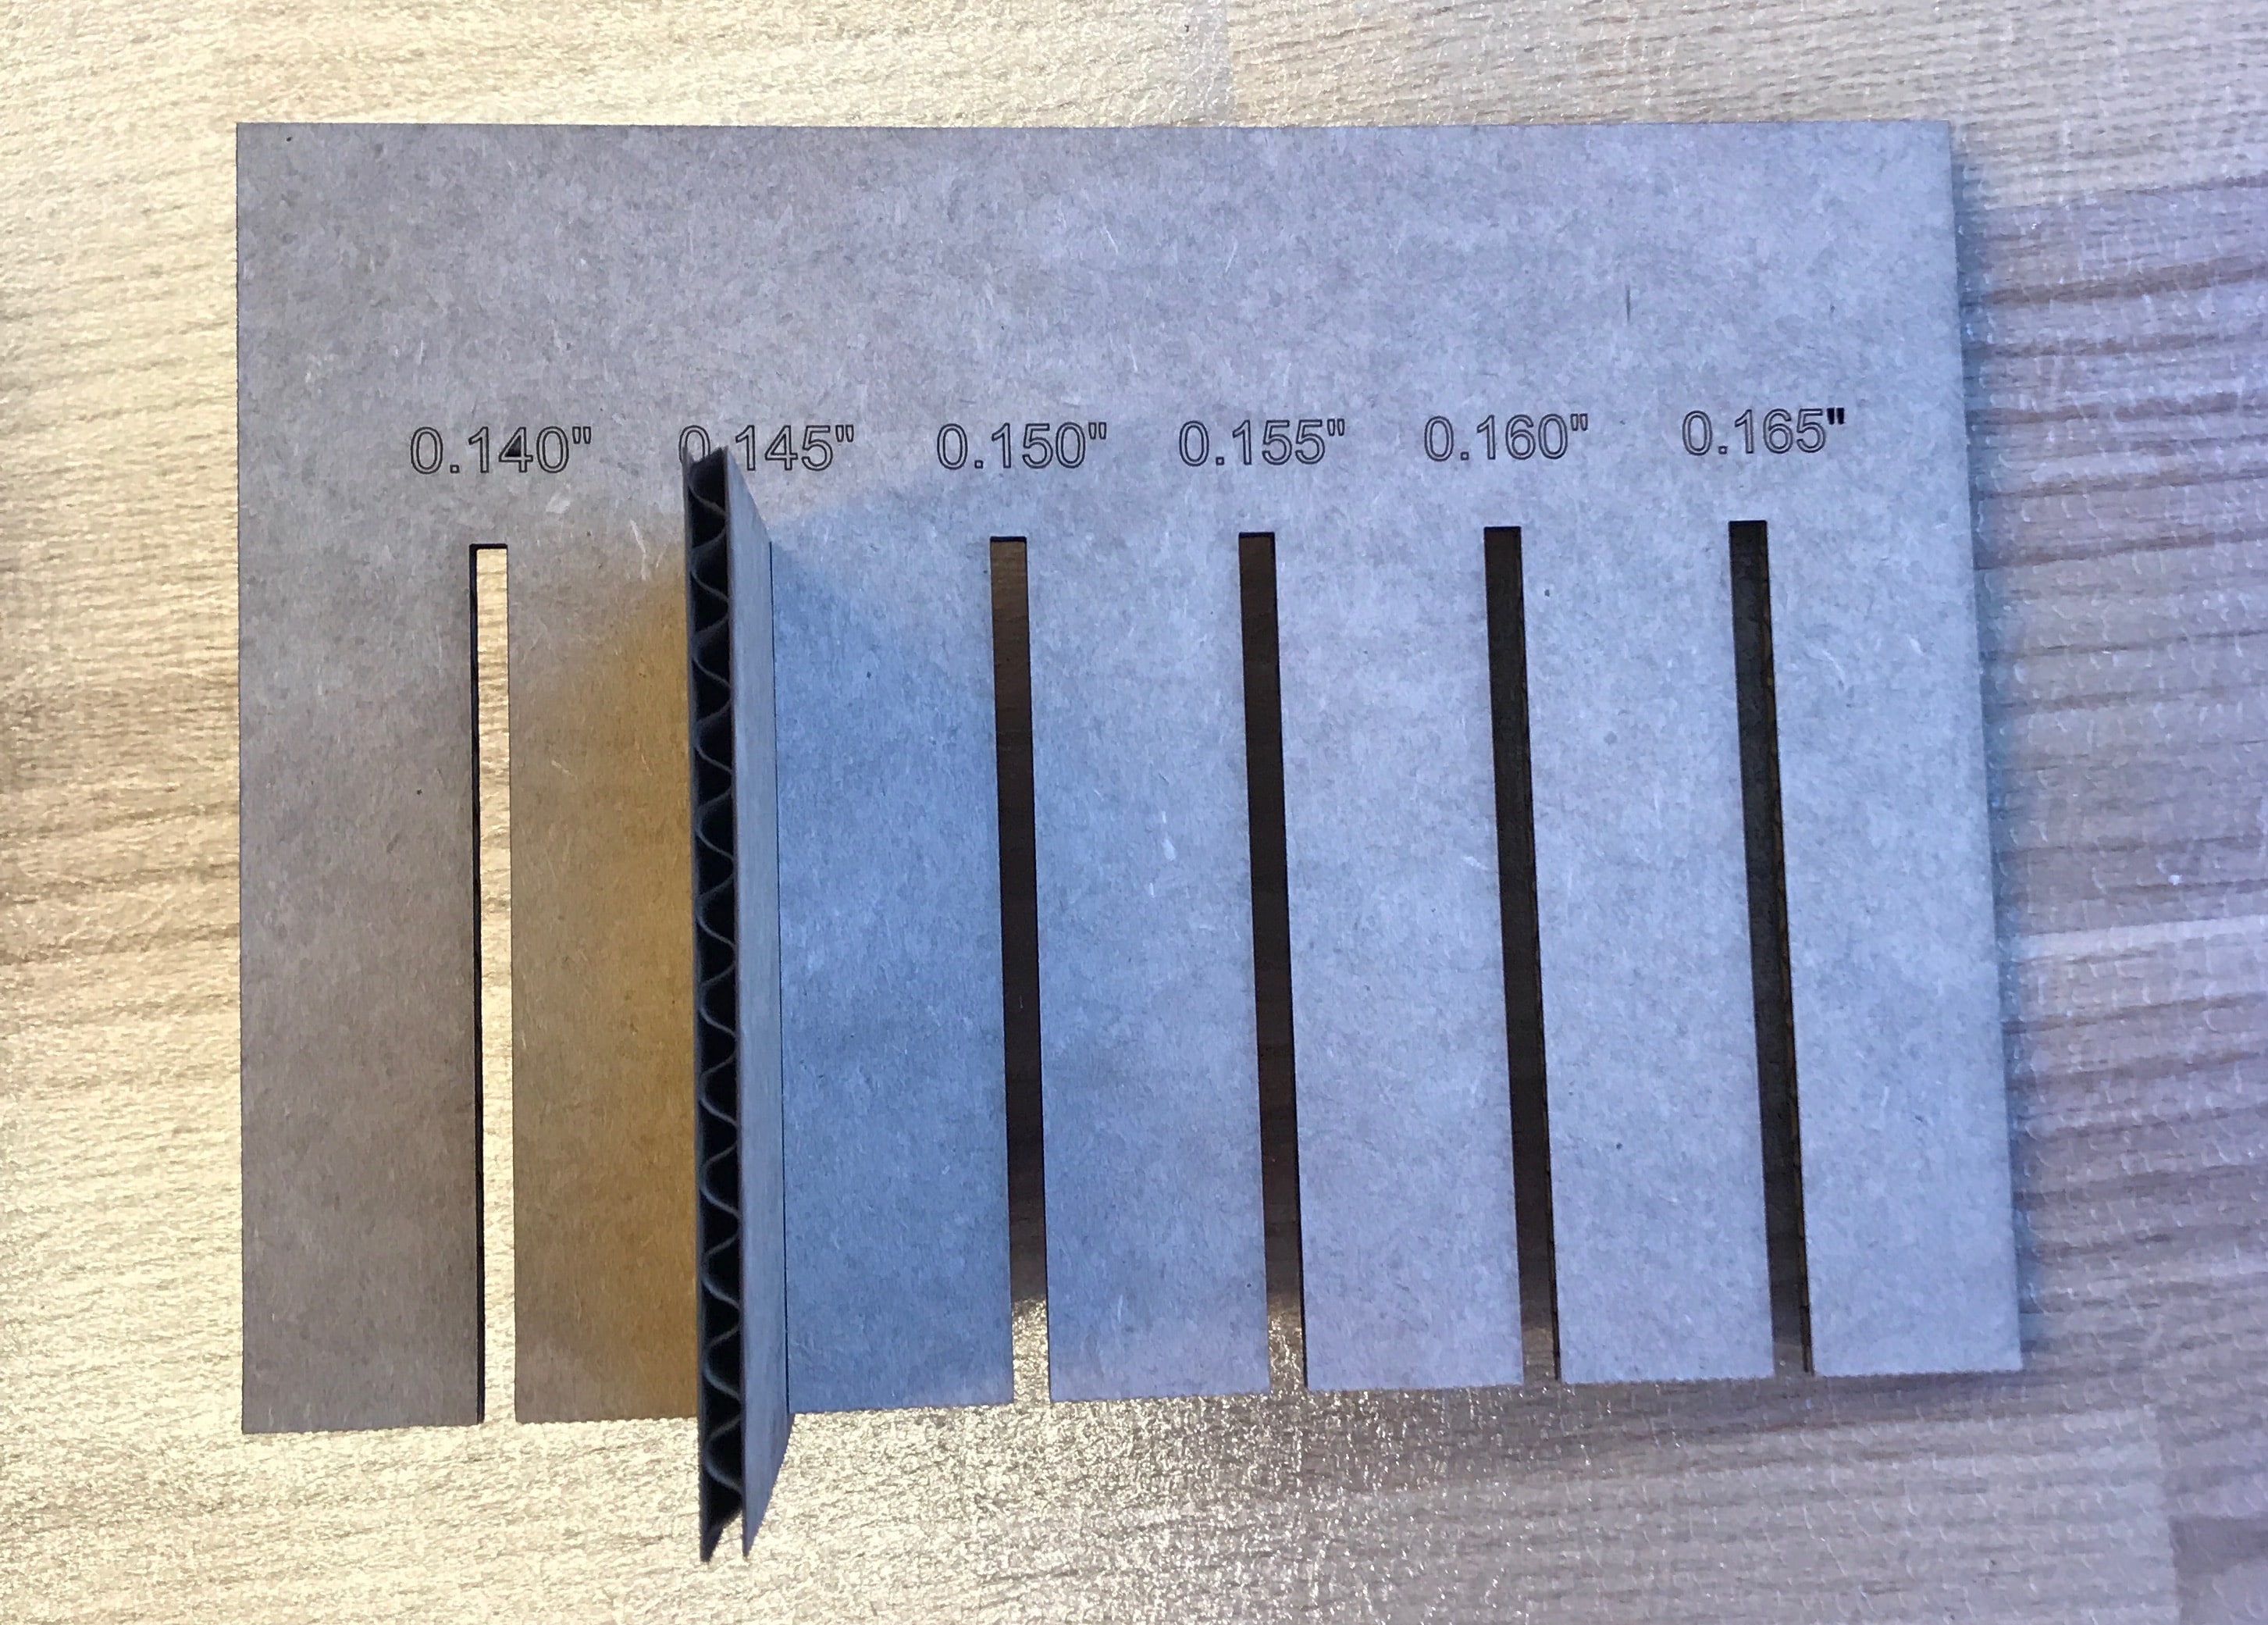
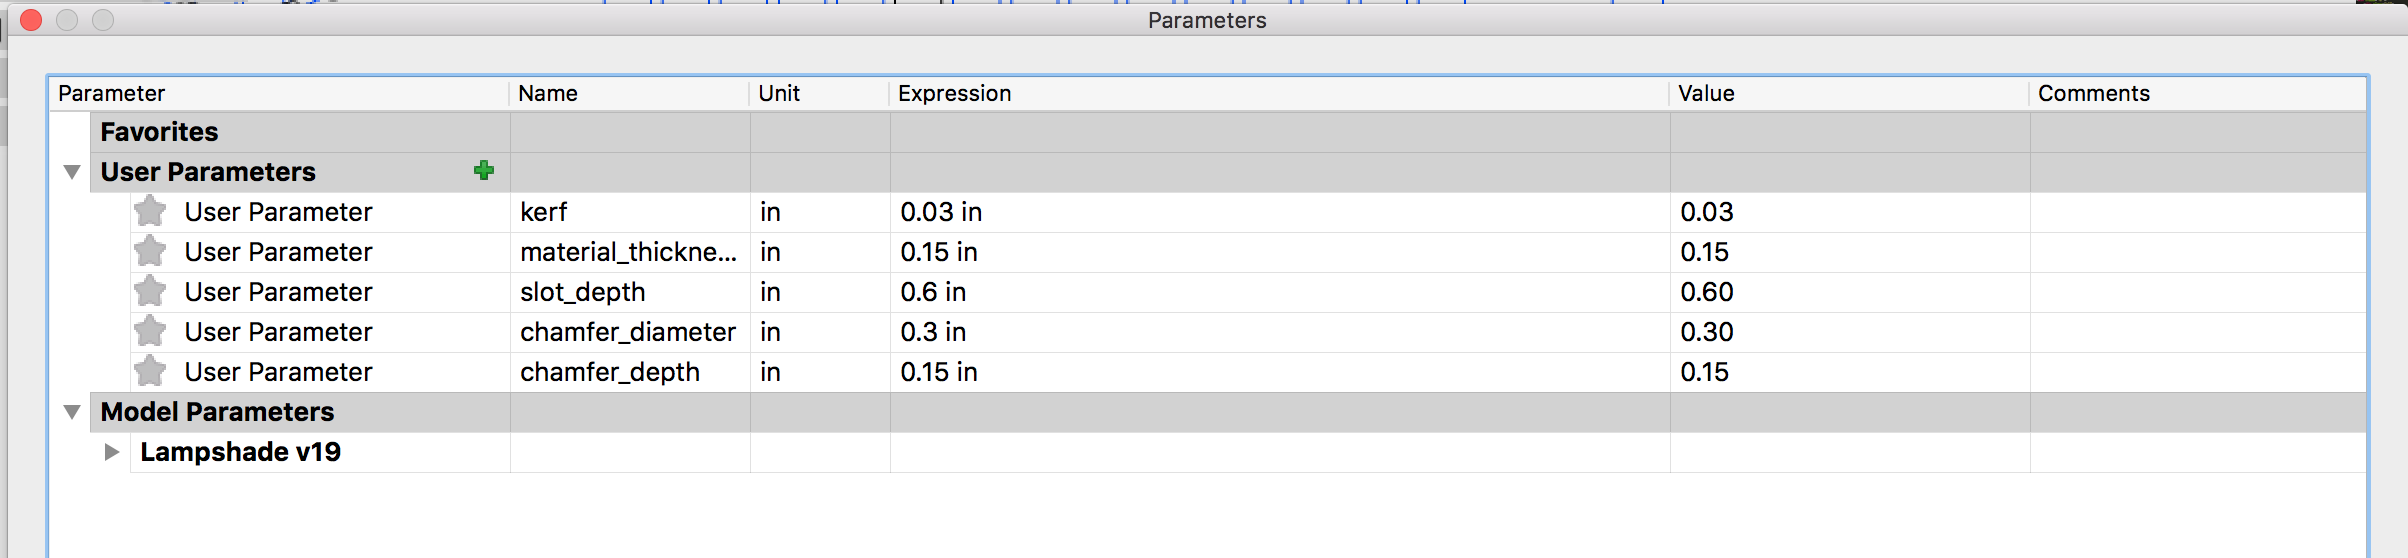
To start this assignment, I worked with a group of students in my section to characterize the laser cutter we were working with in EDS. We determined the kerf, adjusted speed settings, tested slot thicknesses, and experimented with chamfers. We determined the kerf to be around 0.02-0.03", and I incorporated this kerf in my own cardboard kit.
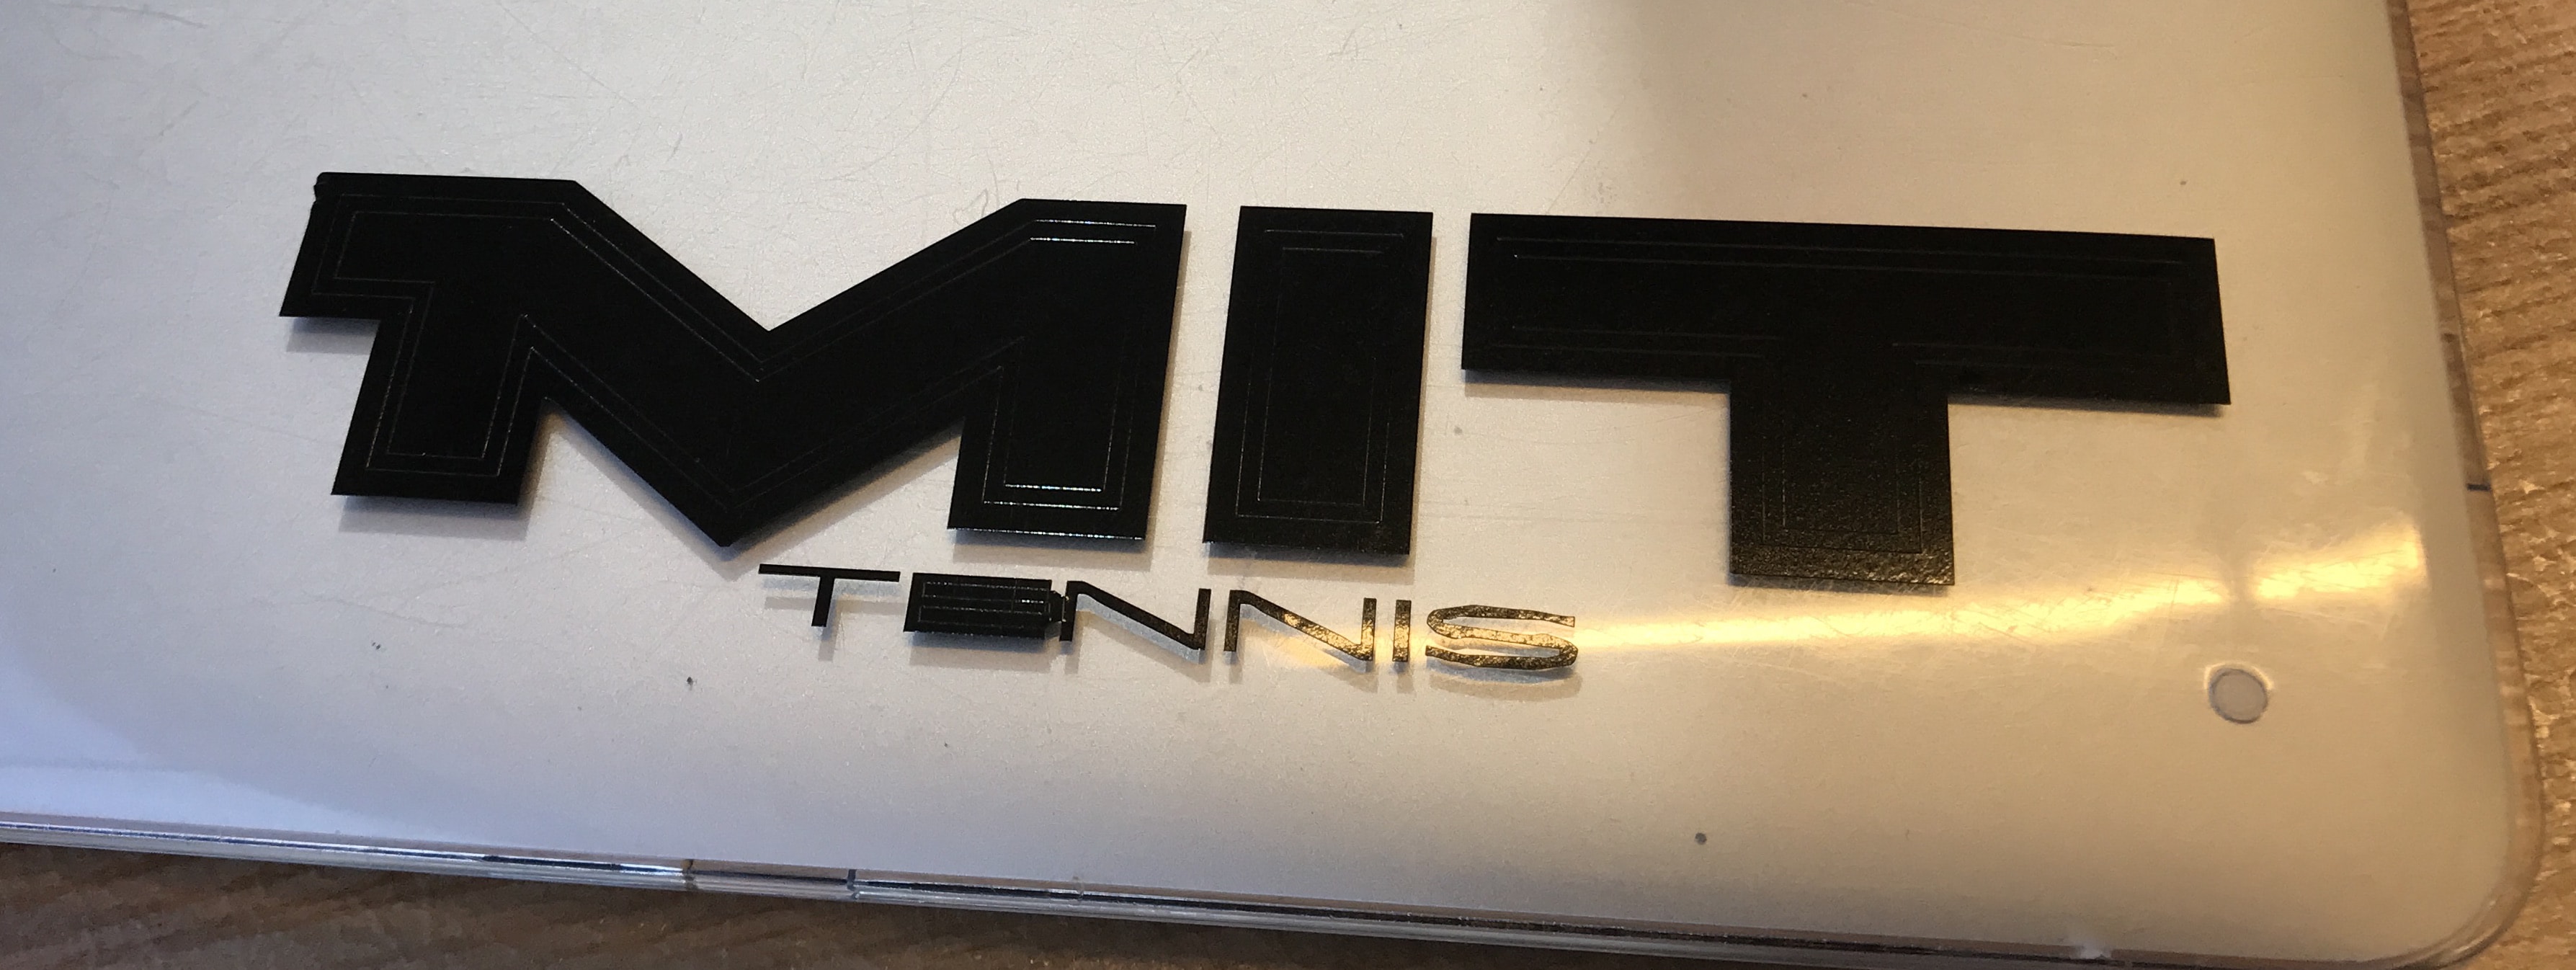
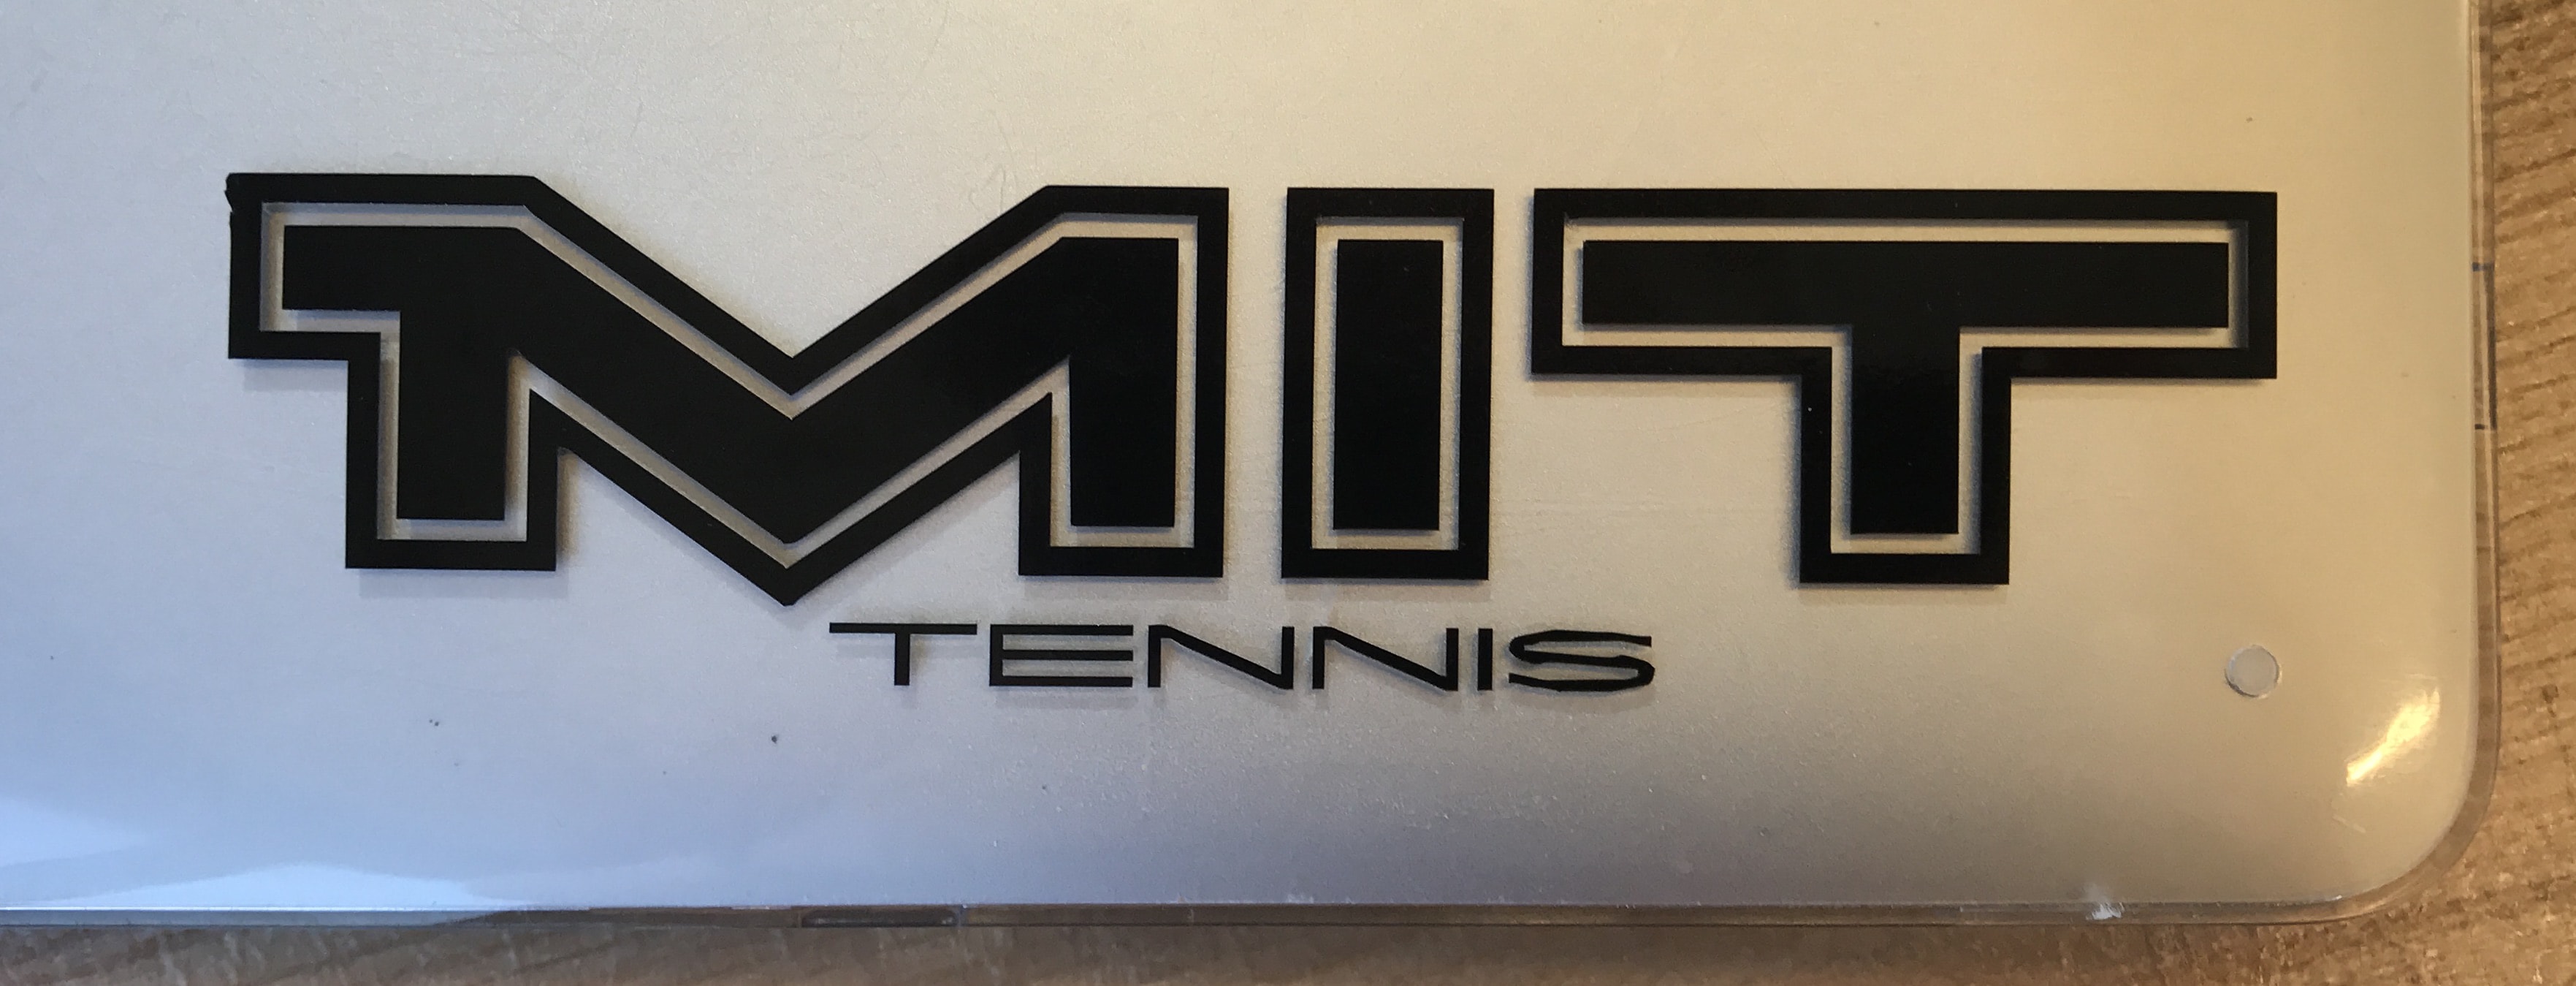
Before I began laser cutting my own project, I used the vinyl cutter to create a laptop sticker from a PNG of the MIT Tennis logo. Based on the recommendation of a fellow student, I started the power at 70% (rather than 50%). The hardest part was probably peeling the sticker onto the transfer paper, although that may have been because I was being overly cautious and paranoid about ripping part of the cutout. I had to use tweezers to remove the space inside the letters of MIT, but it worked well and I'm happy with my newly decked out laptop case:
For my own press-fit construction kit, I began with the idea of making a set of alphabet blocks with connectors, but ended up actually cutting a lampshade. I started modeling the alphabet blocks in AutoCAD. I was confused by the parametric features in AutoCAD, because I couldn't figure out how to define variables any way except for drawing shapes that weren't part of my design and adding dimension constraints with names that I used in my actual design. I created a basic block and connector with parametric constraints, but the constraints didn't behave as I wanted them to. For example, when I tried to change the kerf or the material thickness, the square block shape would become completely not square, and random angles would change.
I decided to switch to the idea of making a lampshade after being inspired by a design I saw online, and I also decided to switch from AutoCAD to Fusion 360. I found Fusion 360 to be much better for defining parameters (although it's entirely possible I just don't know how to use AutoCAD). I defined a set of parameters, and then created dimensional and geometric constraints in my sketch. Throughout the process of using AutoCAD and Fusion 360, I got better at figuring out which constraints I needed to achieve the behavior I wanted. The biggest problem I had was that my computer at some point decided it hated Fusion 360, and would completely freeze if I tried to change the value of a parameter. I still haven't solved that problem.
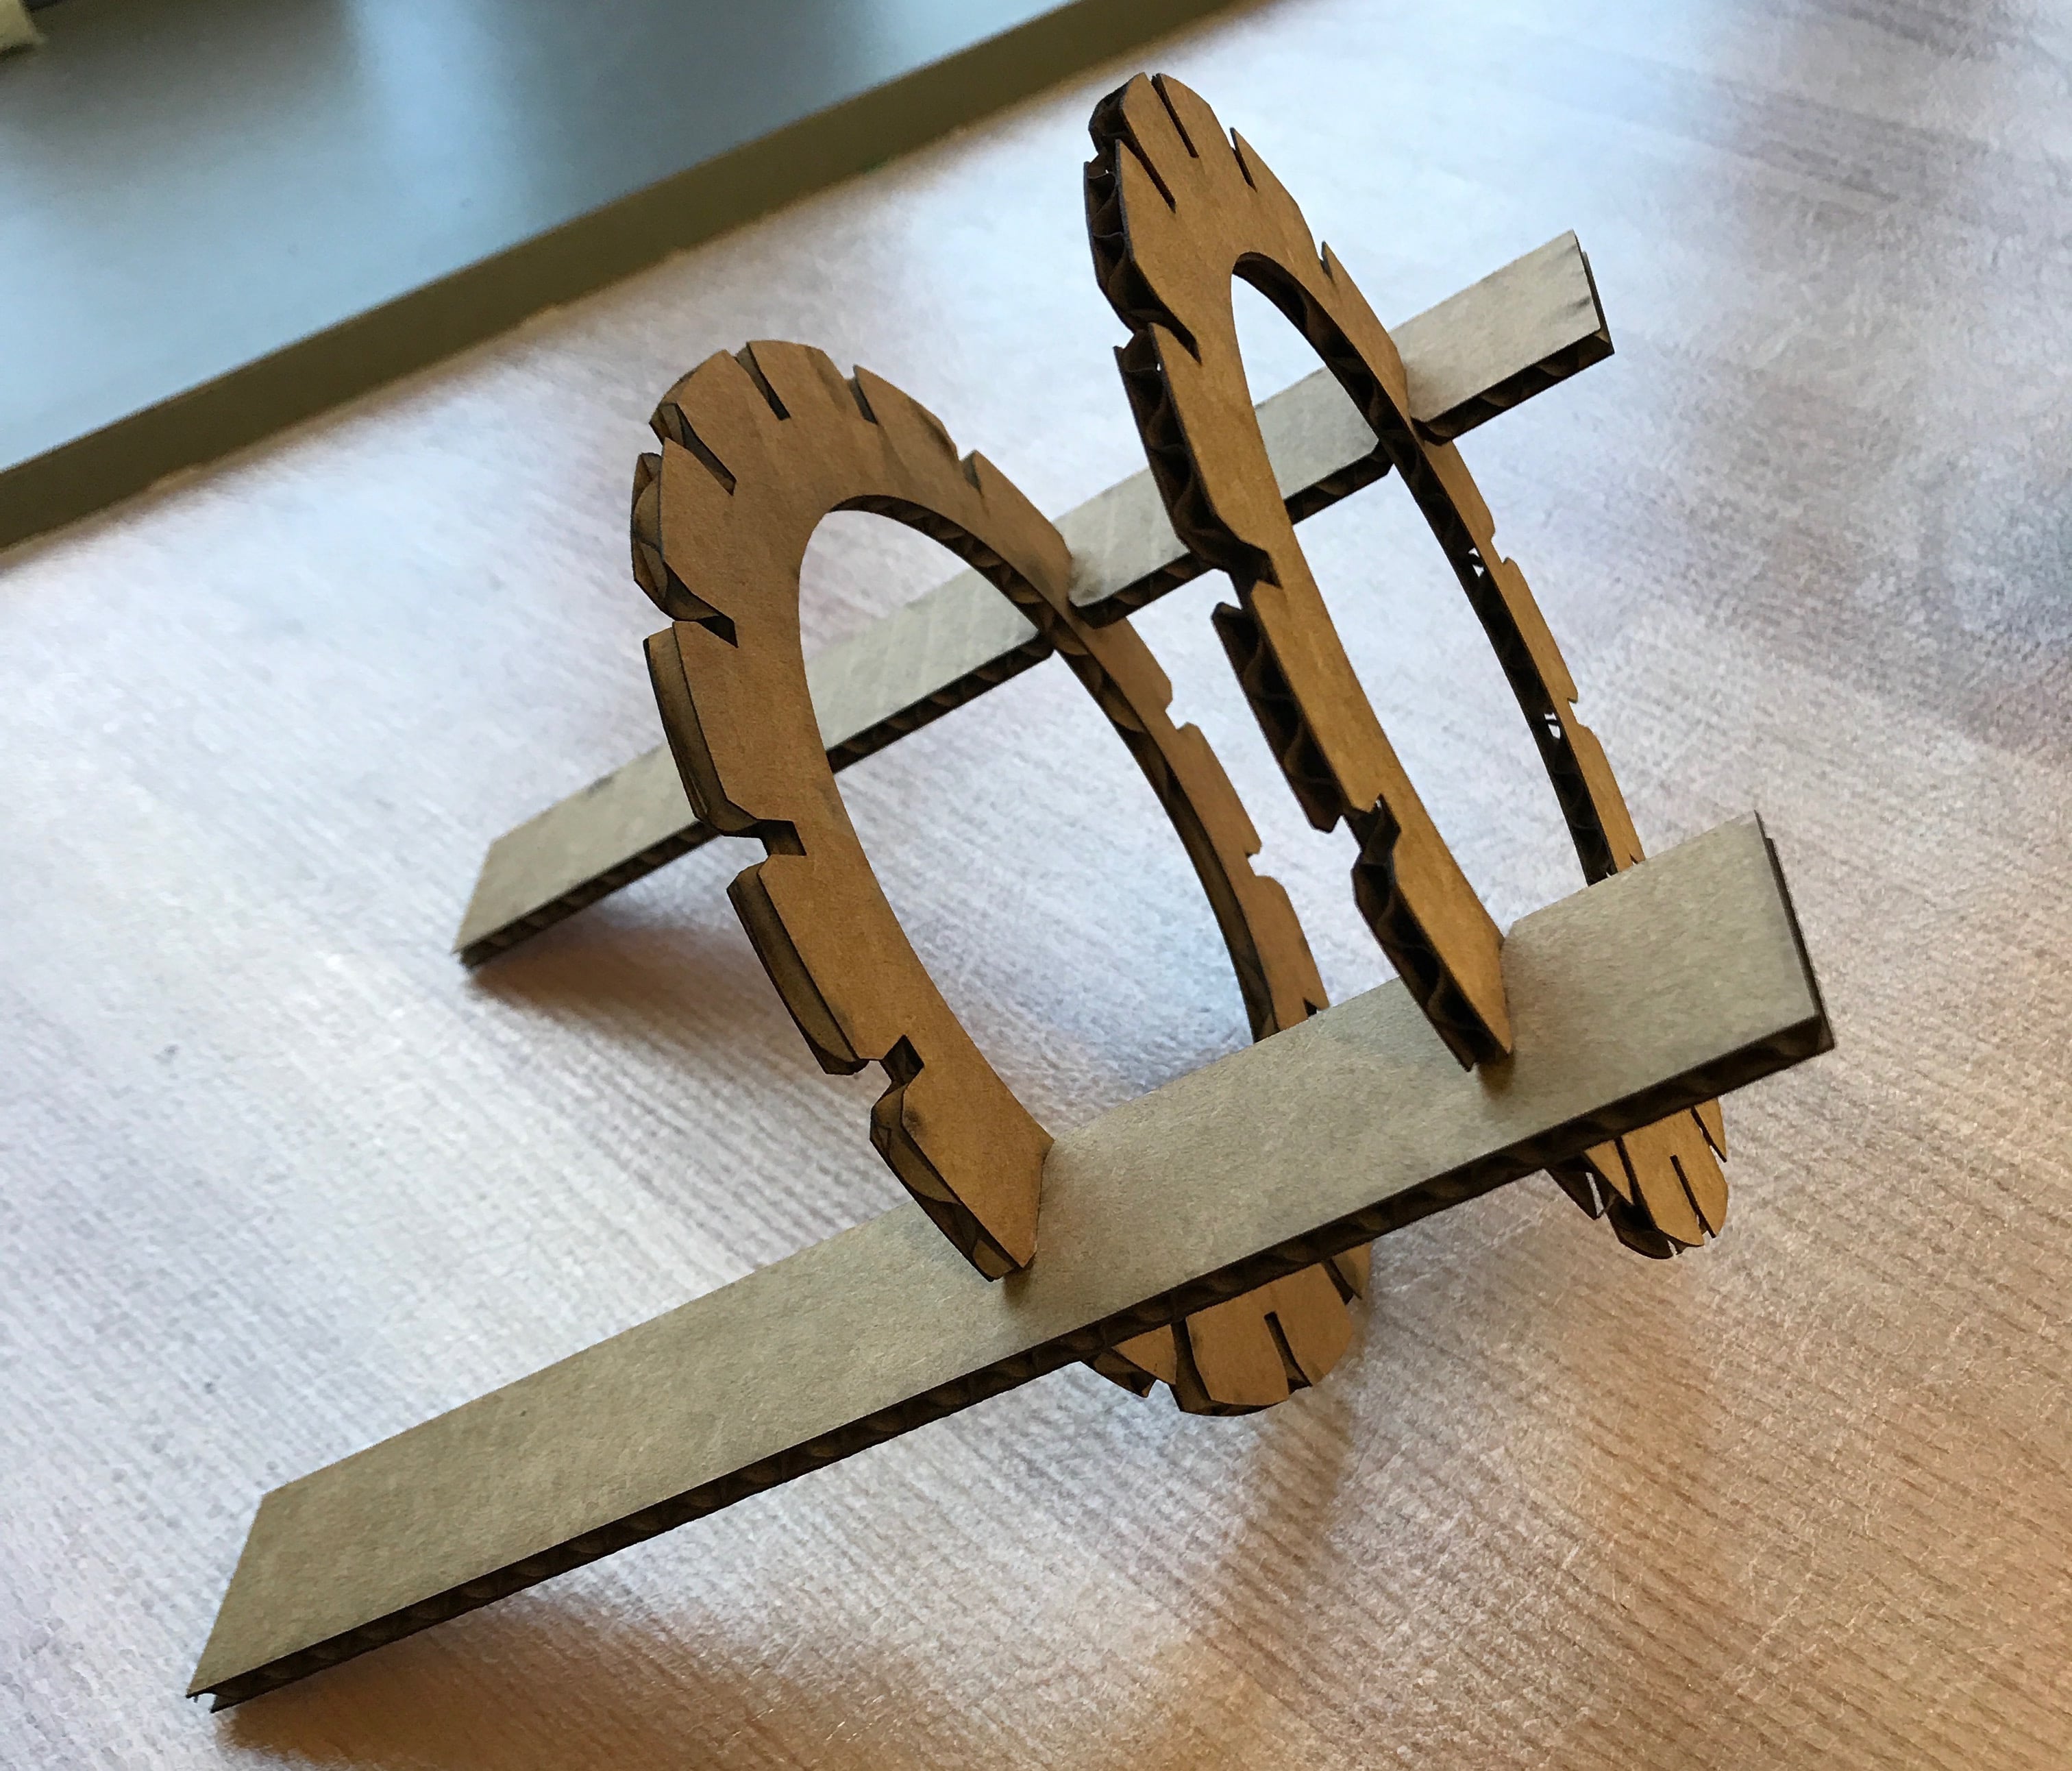
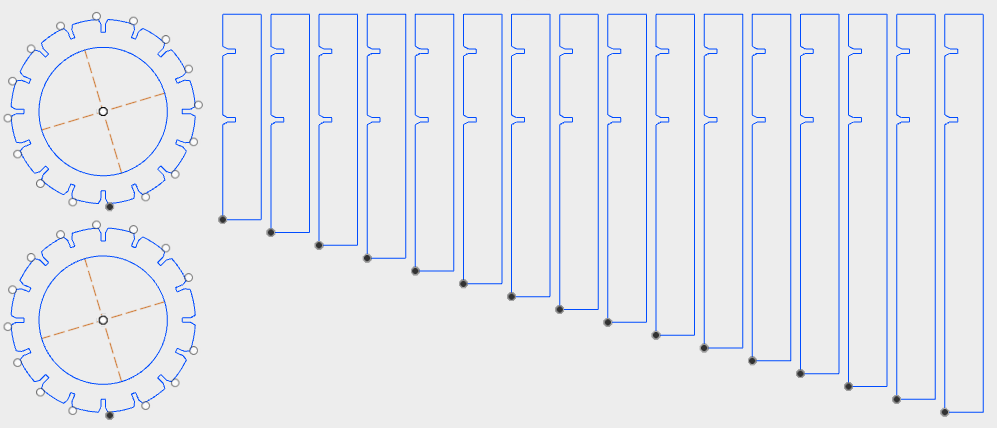
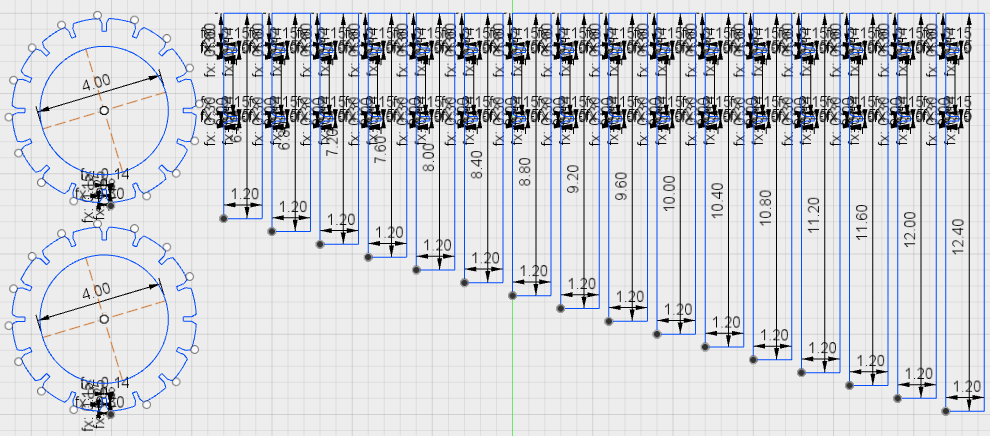
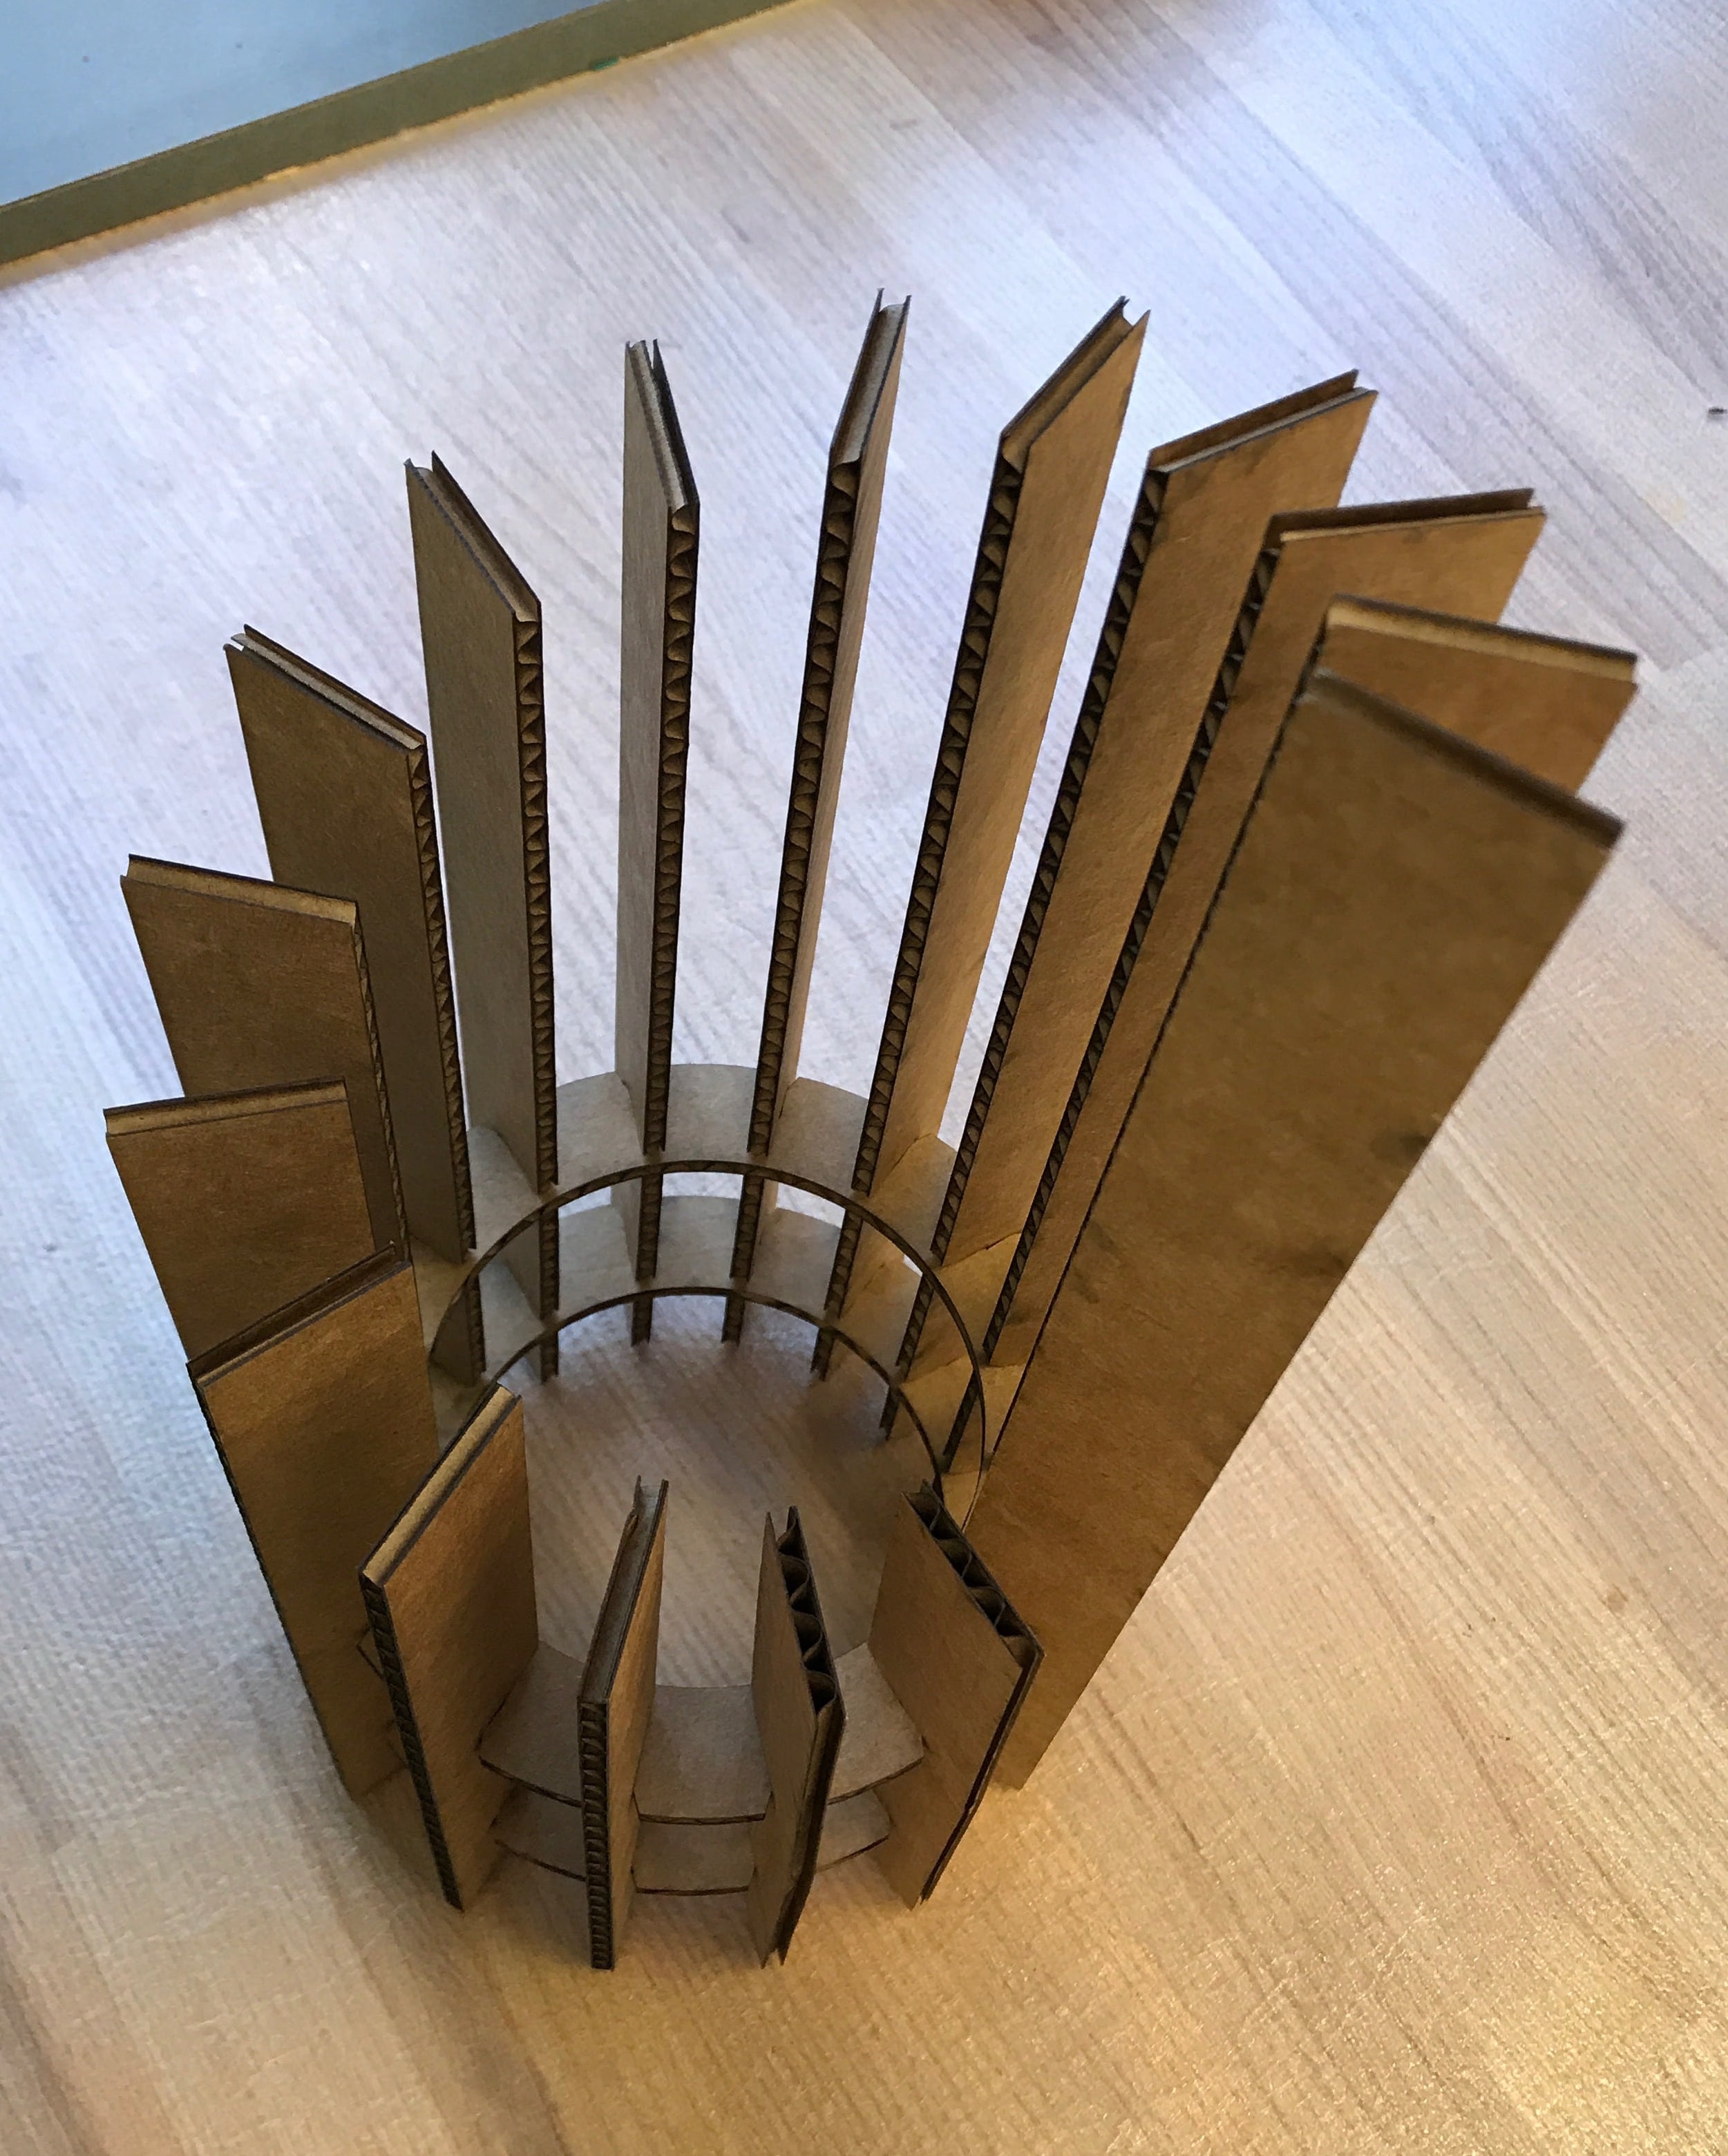
My lampshade design was simple and just involved two circular rings with 16 slots, and 16 rectangular bars that fit into those slots. In my first attempt, the rings were too large, and the bars were too thick. However, the 0.140" slot width worked well to account for kerf and achieve a snug fit.
I adjusted the design and finished with these sketches (so many constraints!).
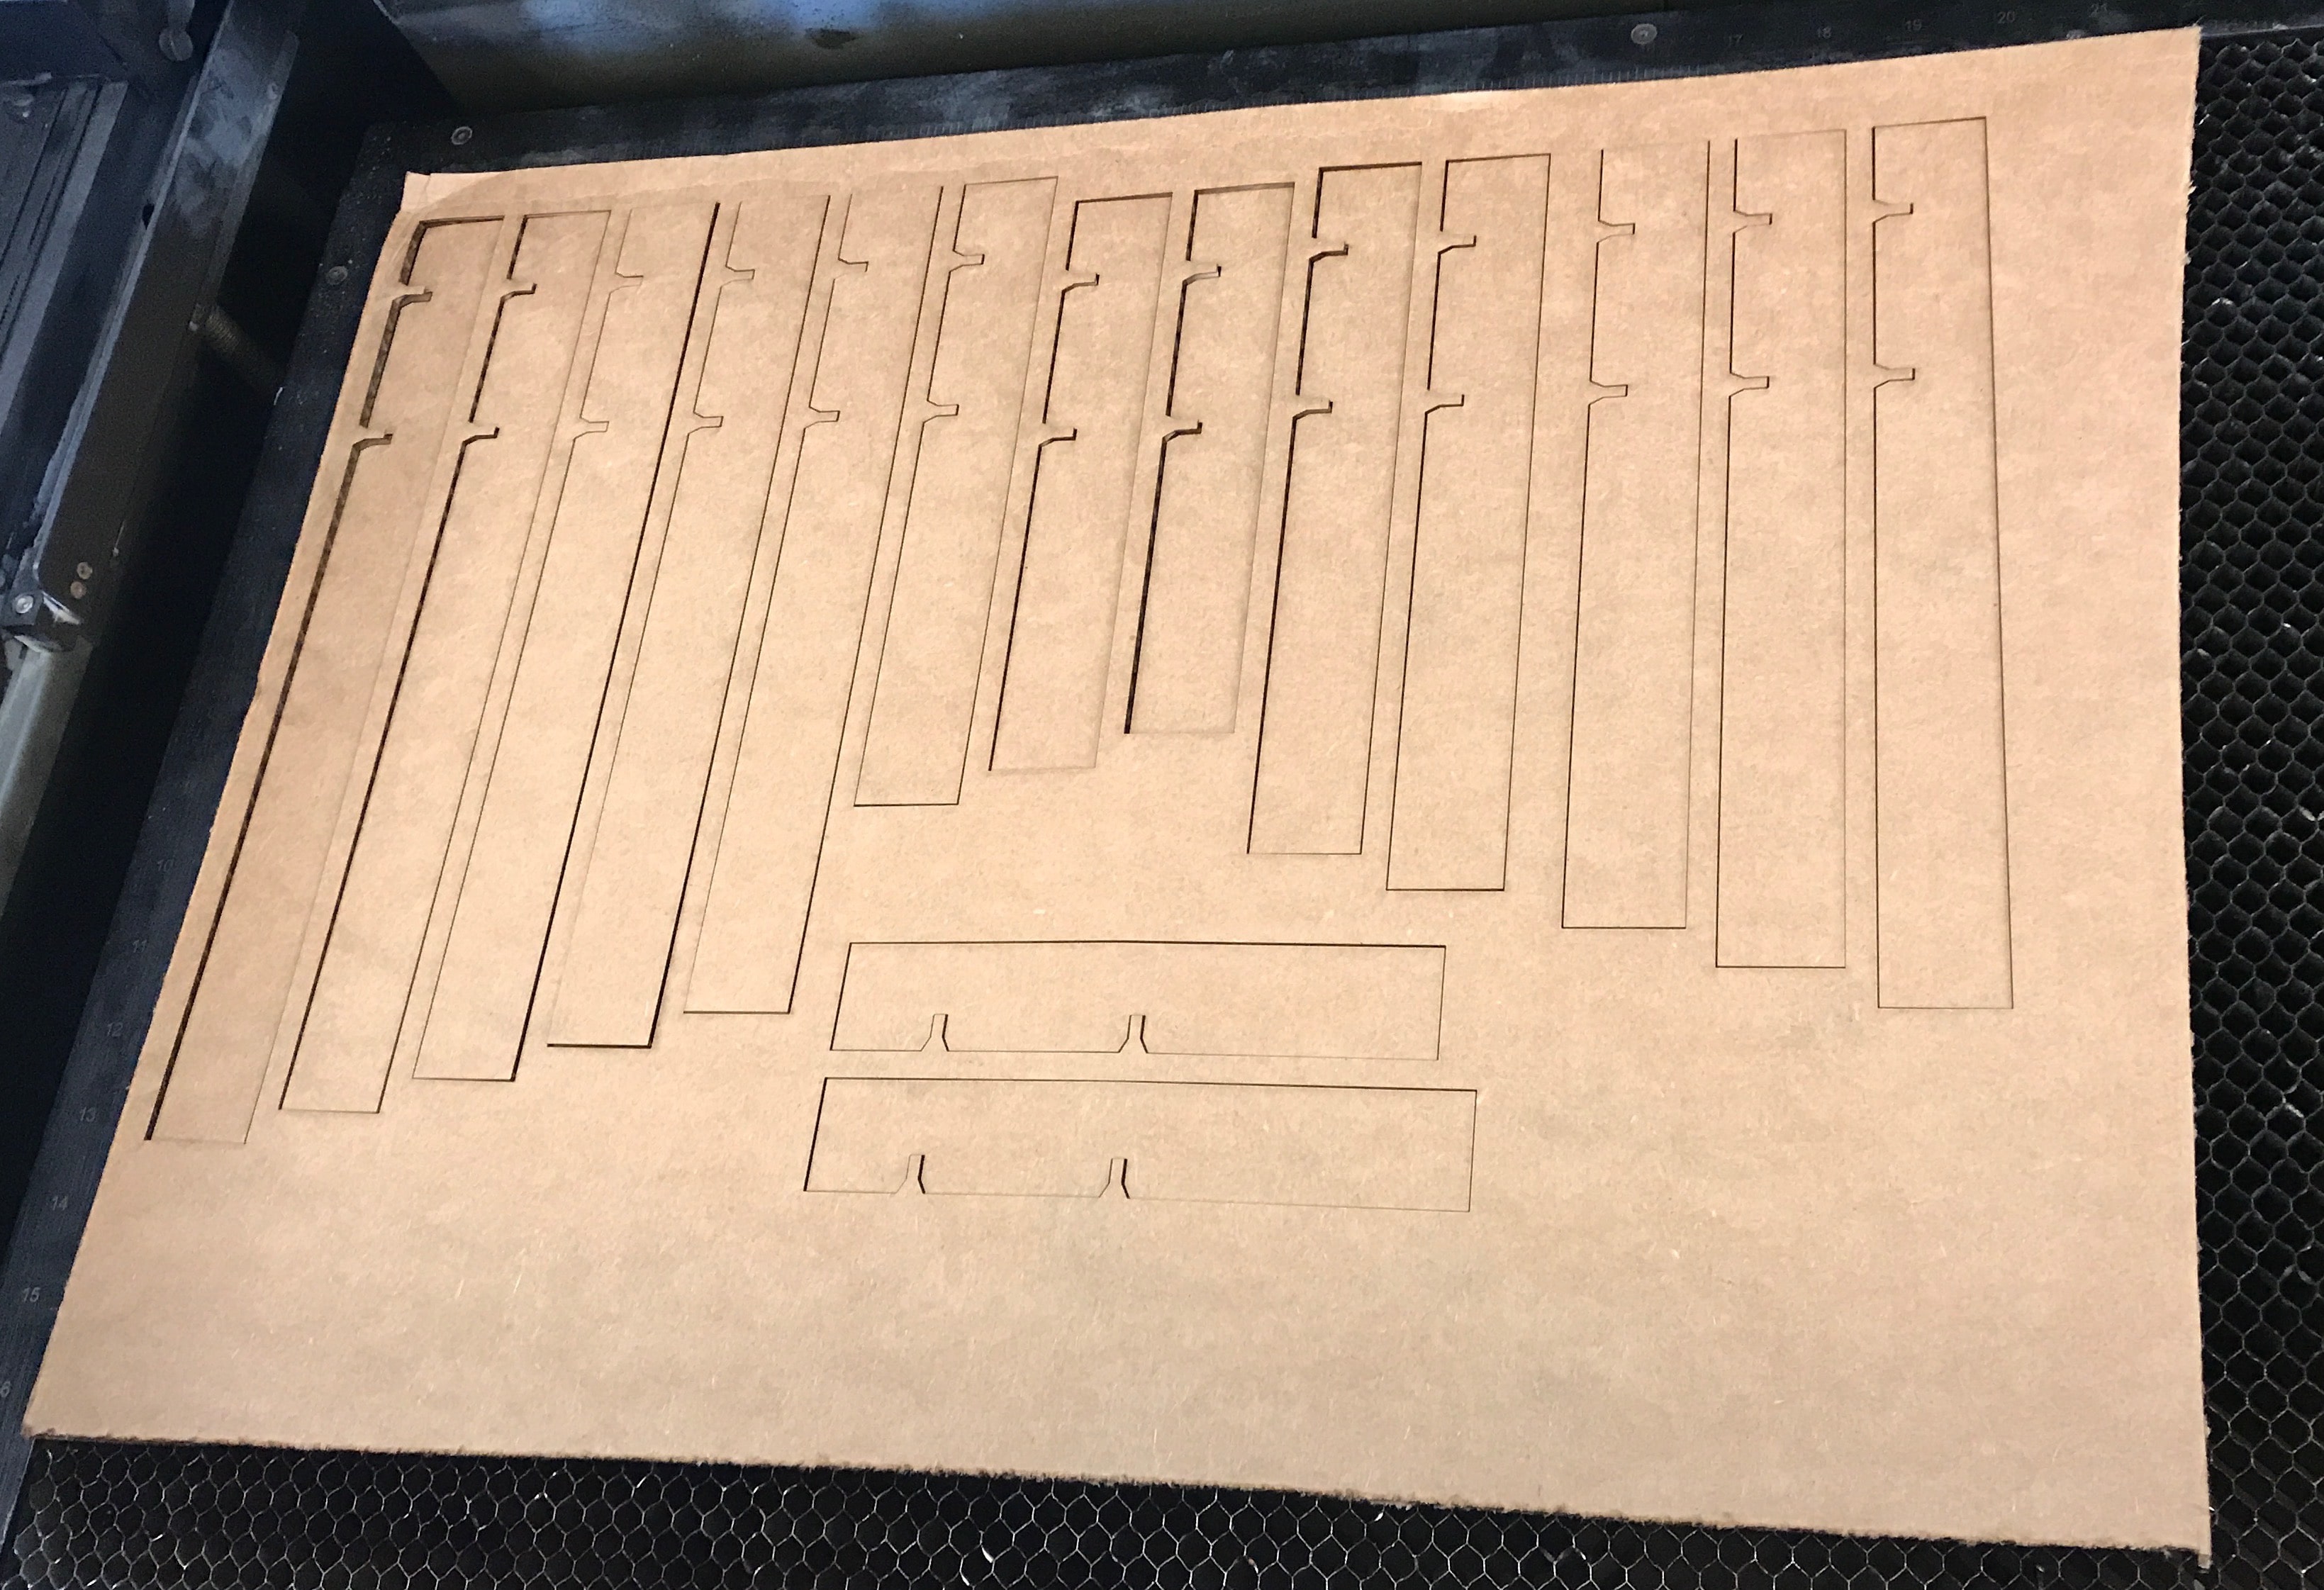
Here is a photo from while I was laser cutting the parts.
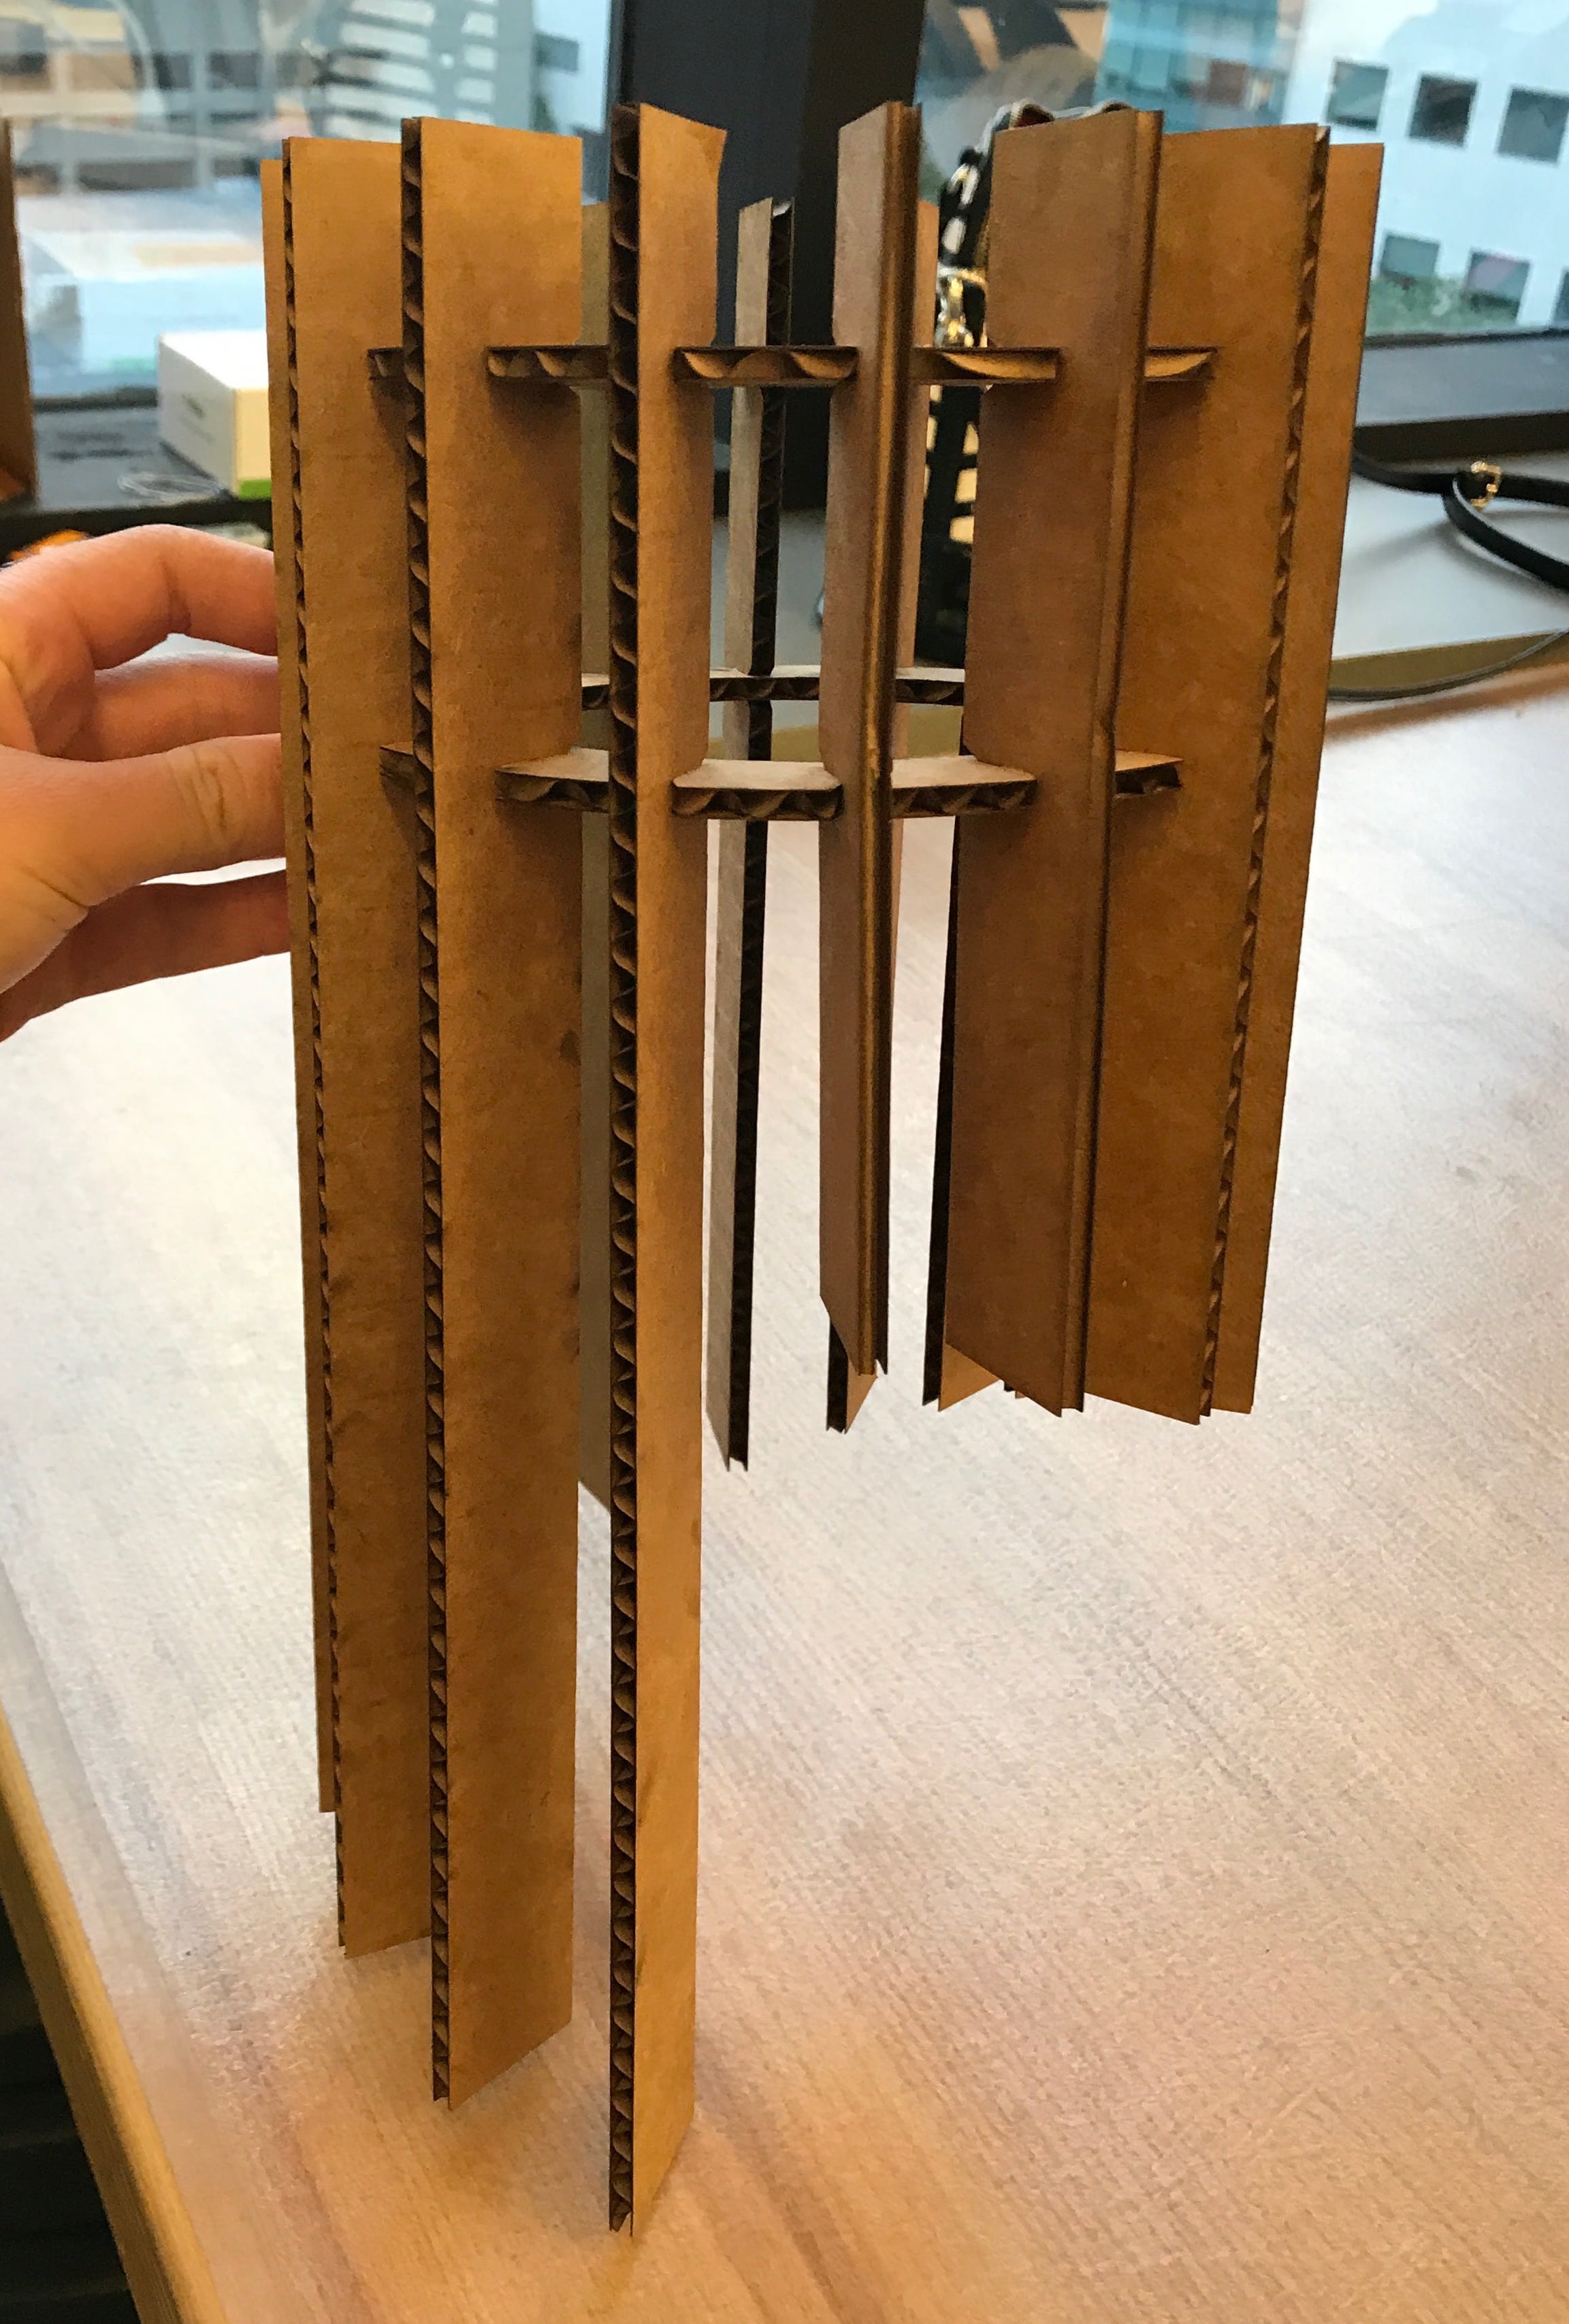
Here's how the lampshade turned out when I cut the final version (you have to pretend that there's a lightbulb in the middle).
I want to add more interestingness to the project, so I designed an alternative ring structure with diagonal slots, and two alternative possibilities for the bars.
Update 11/8
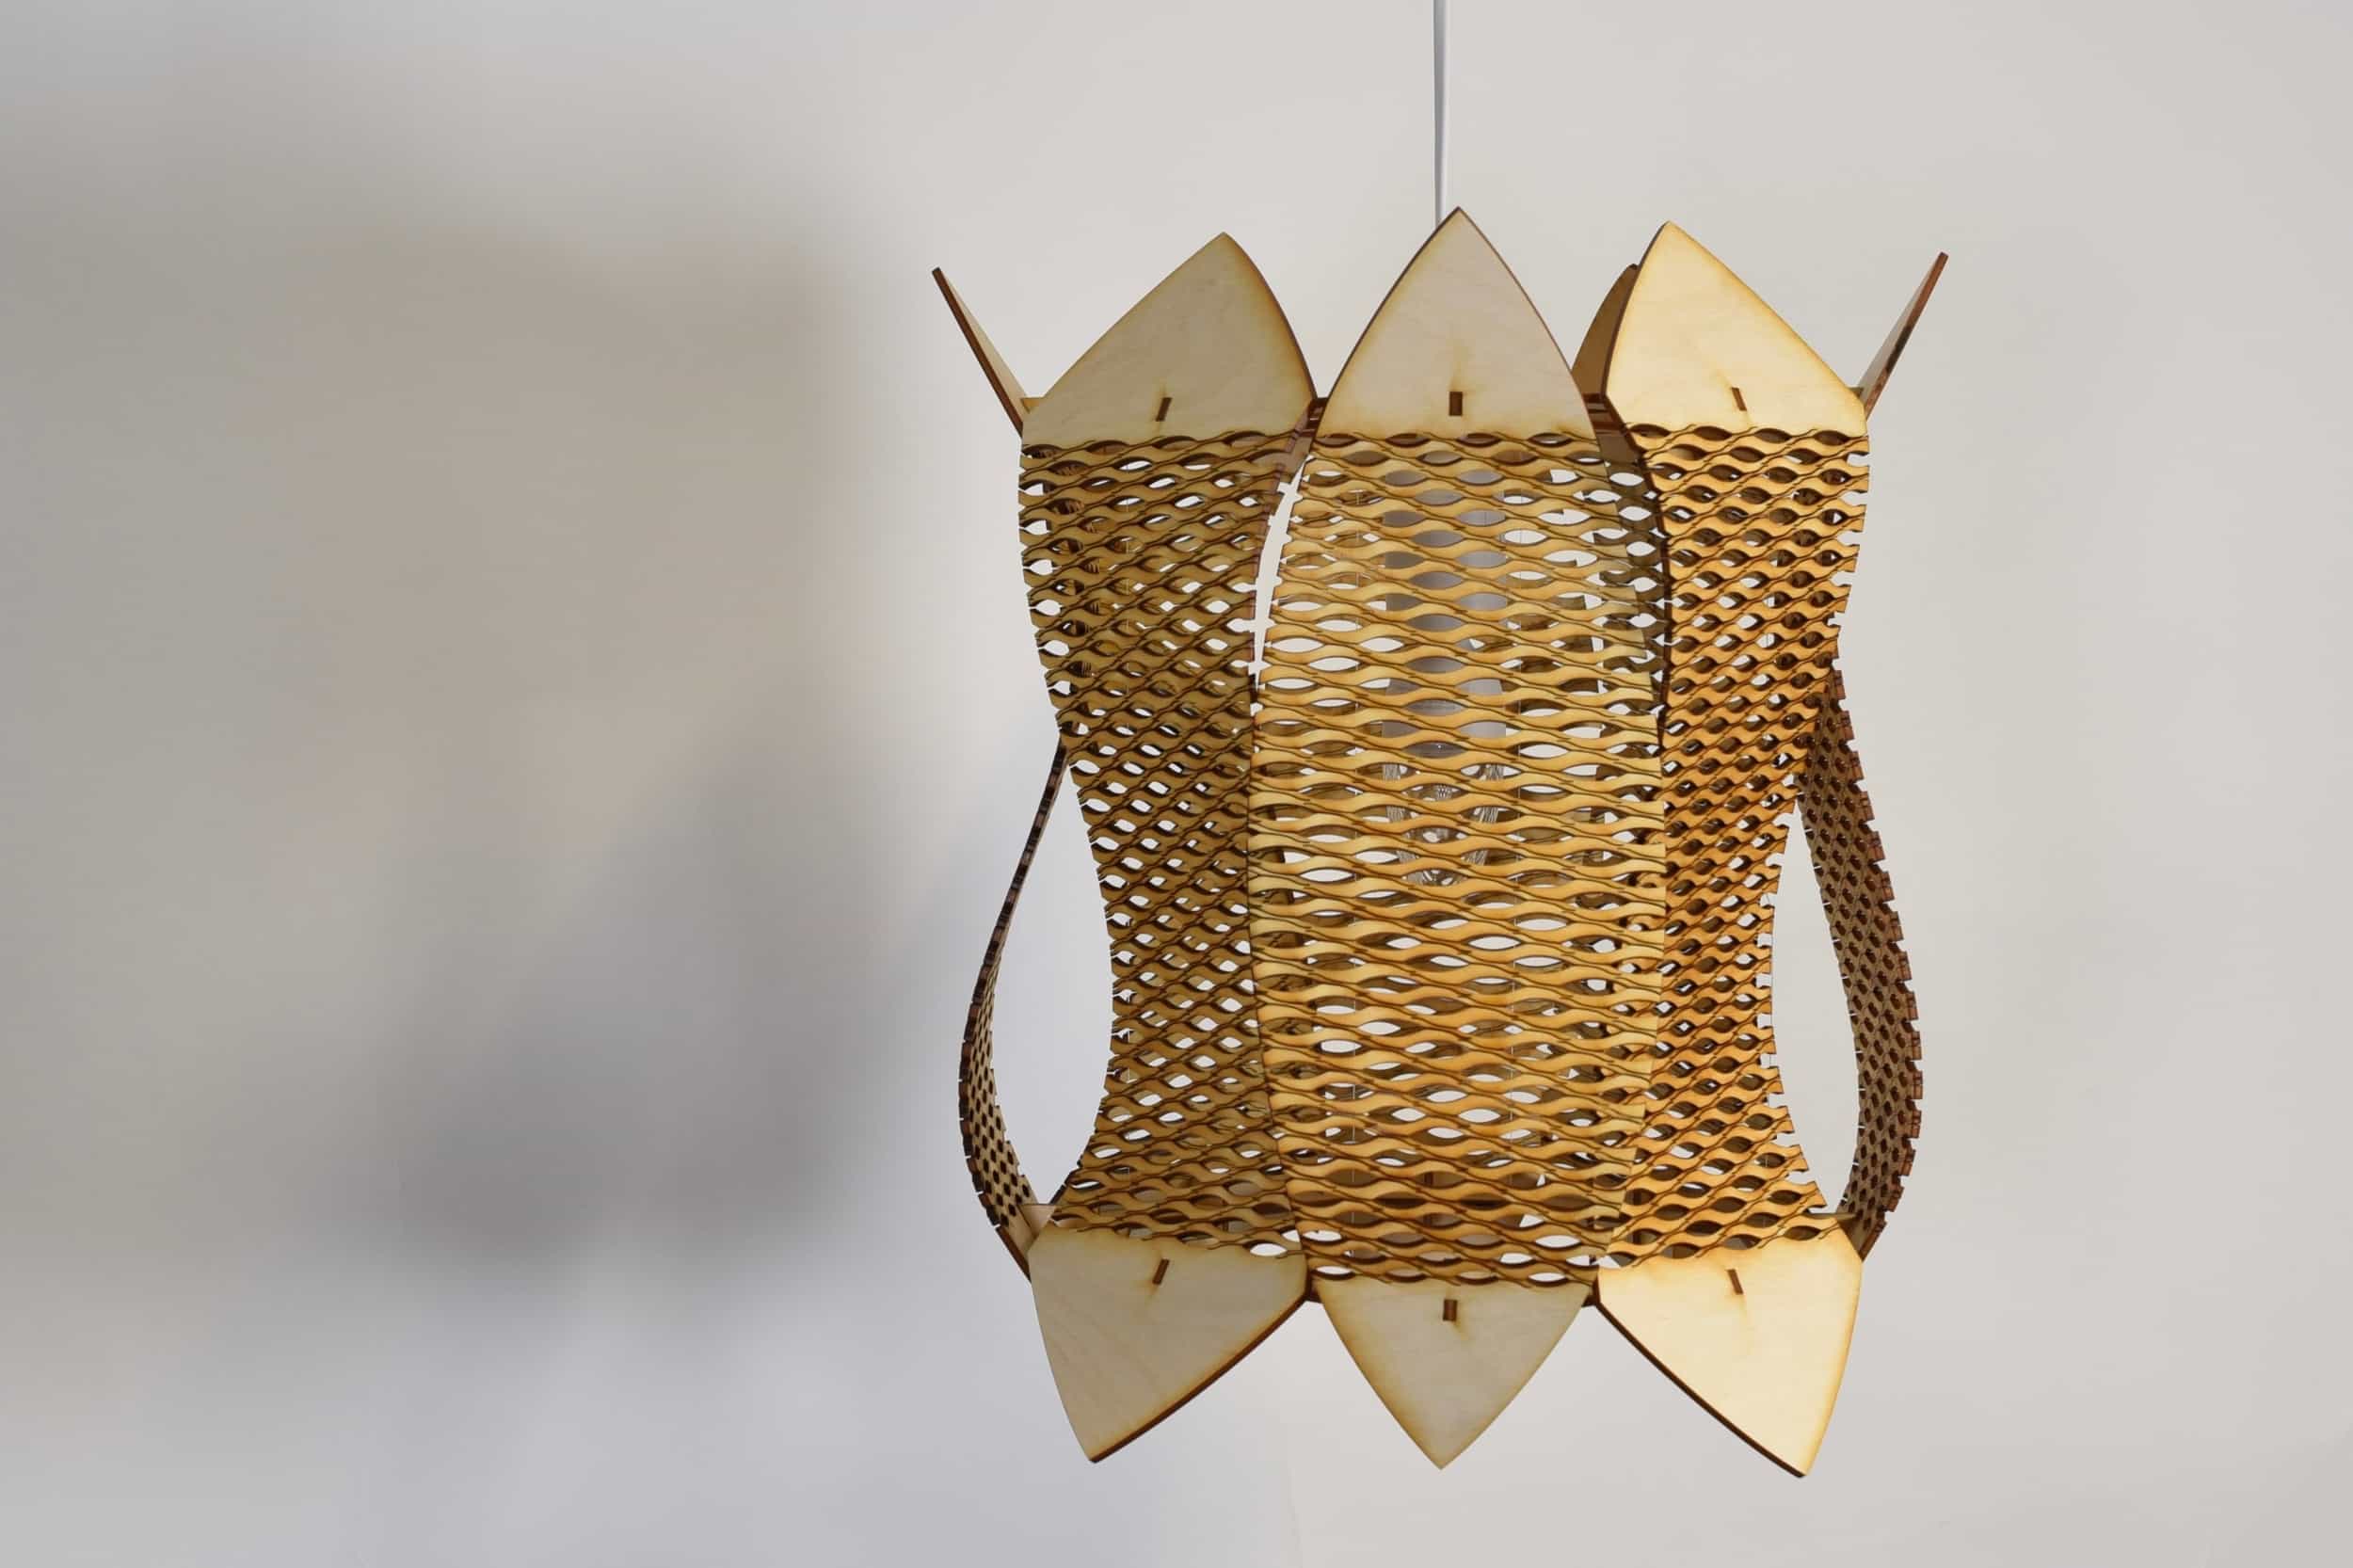
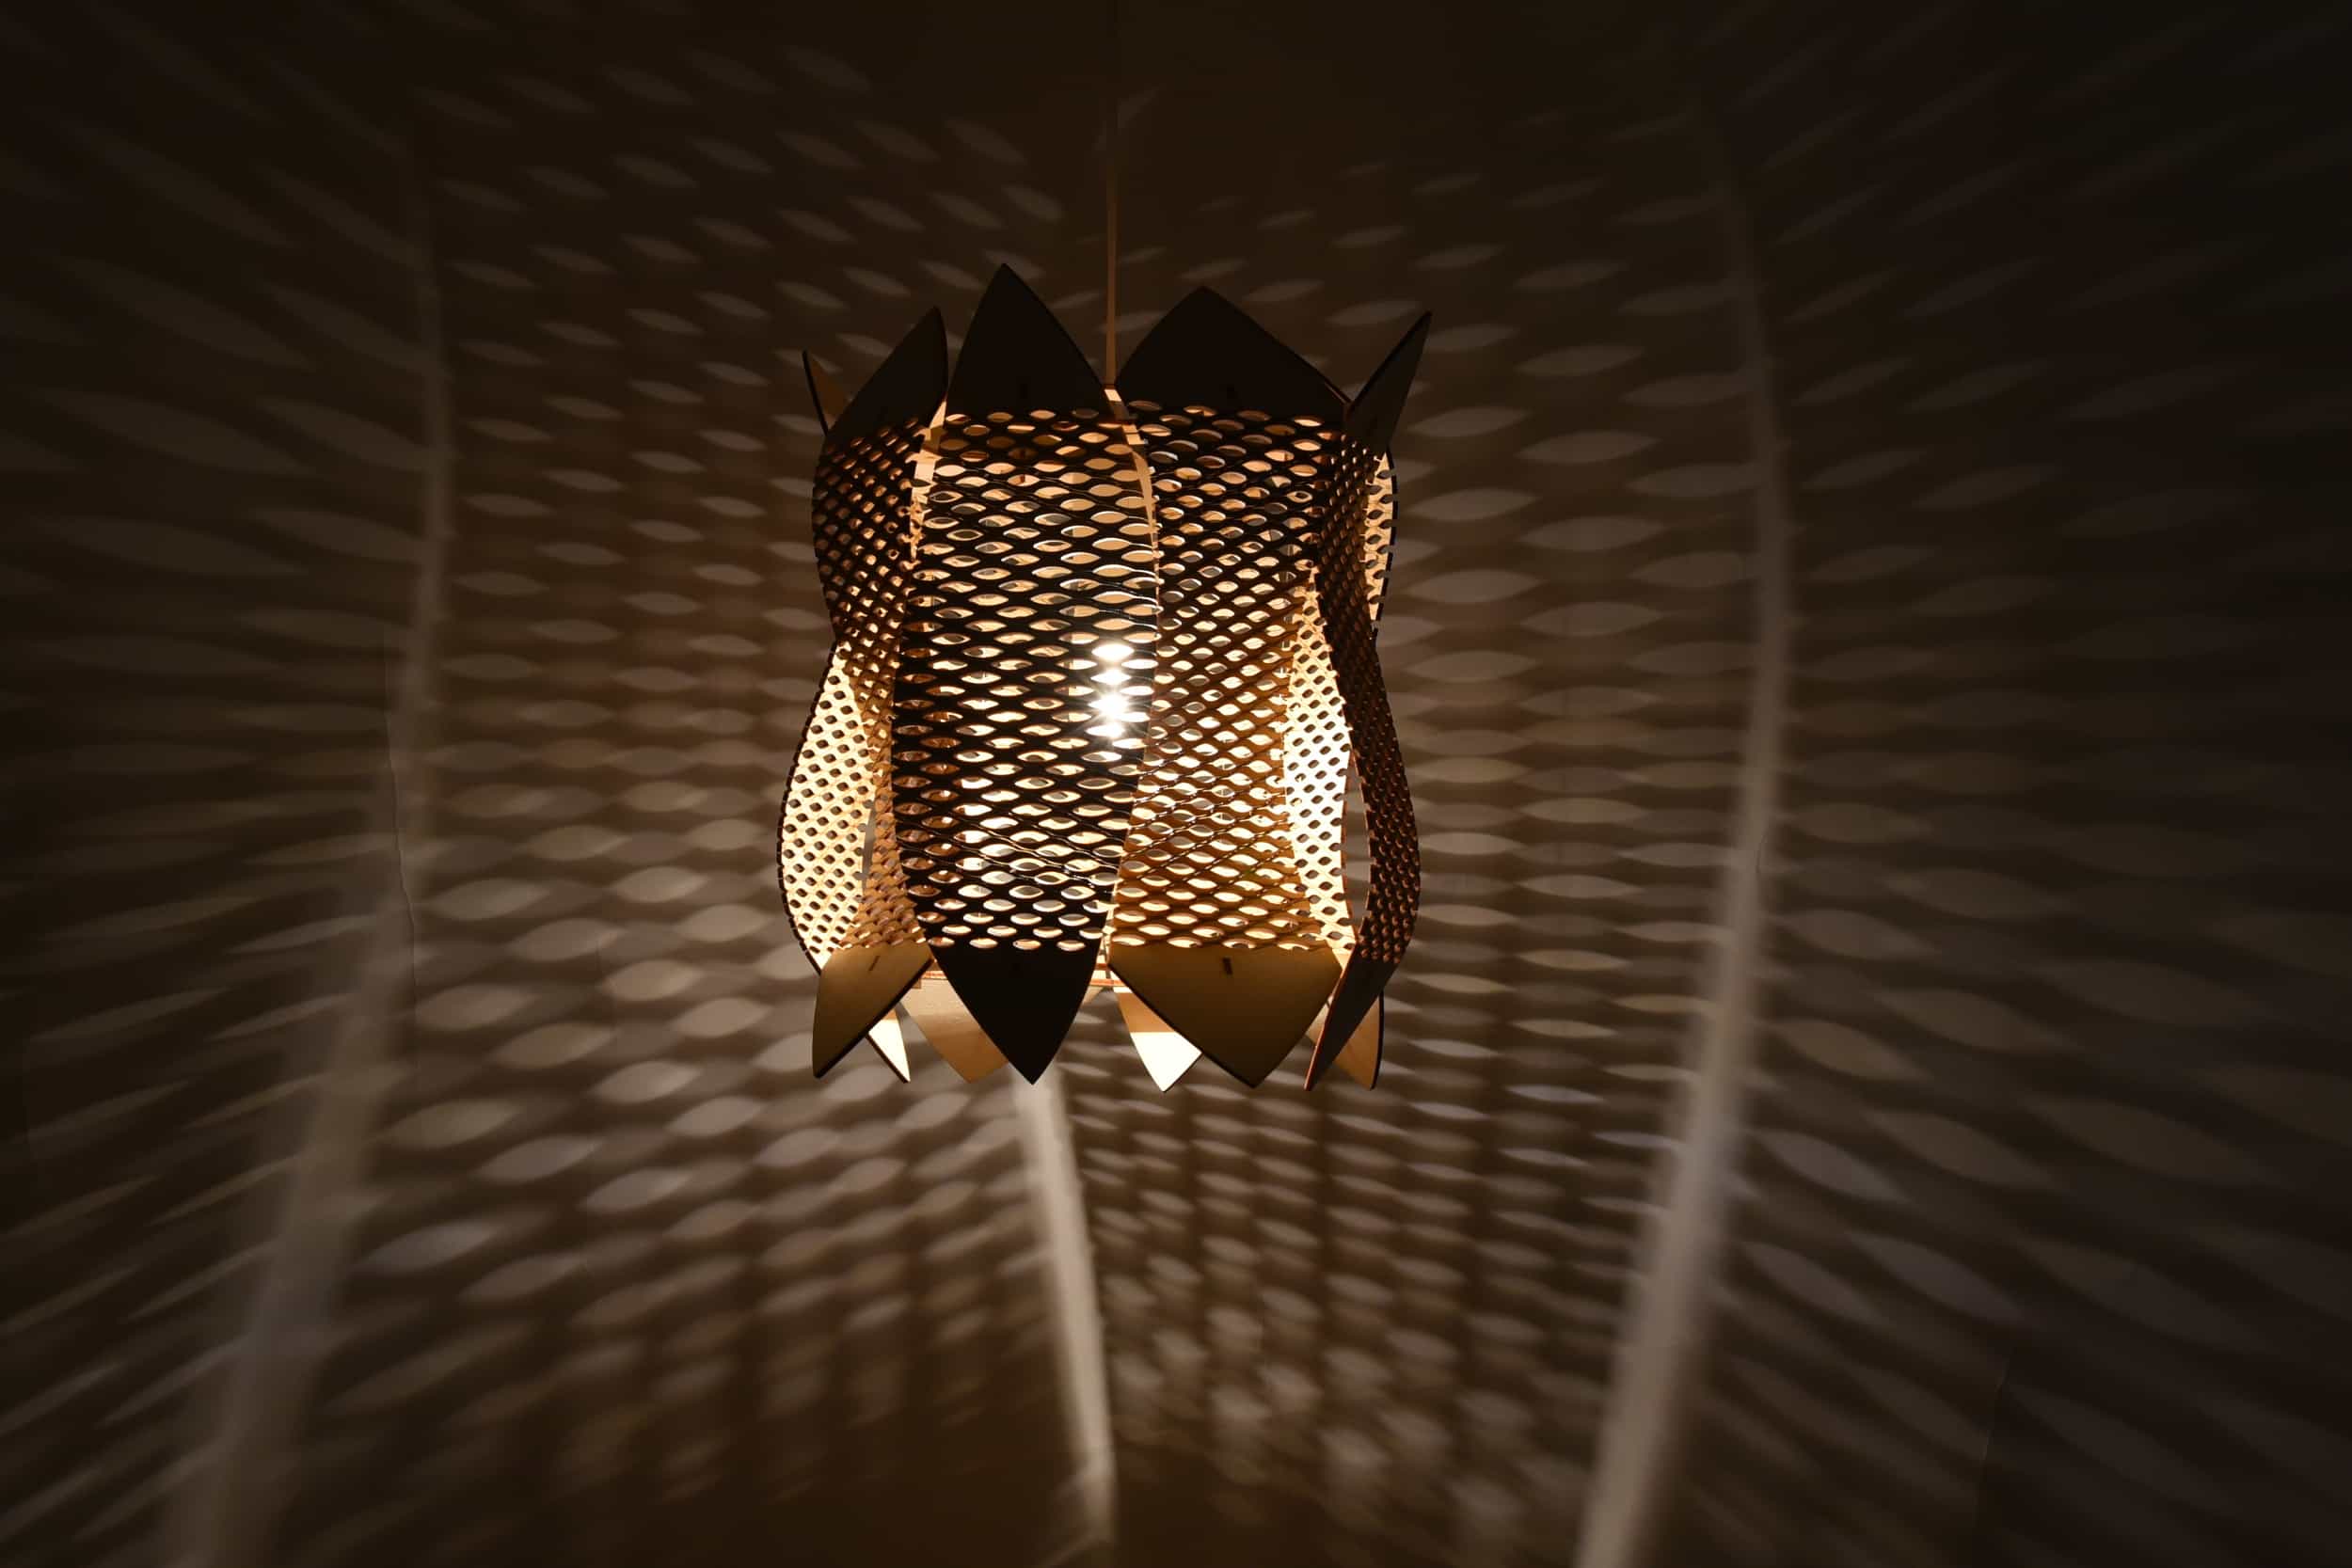
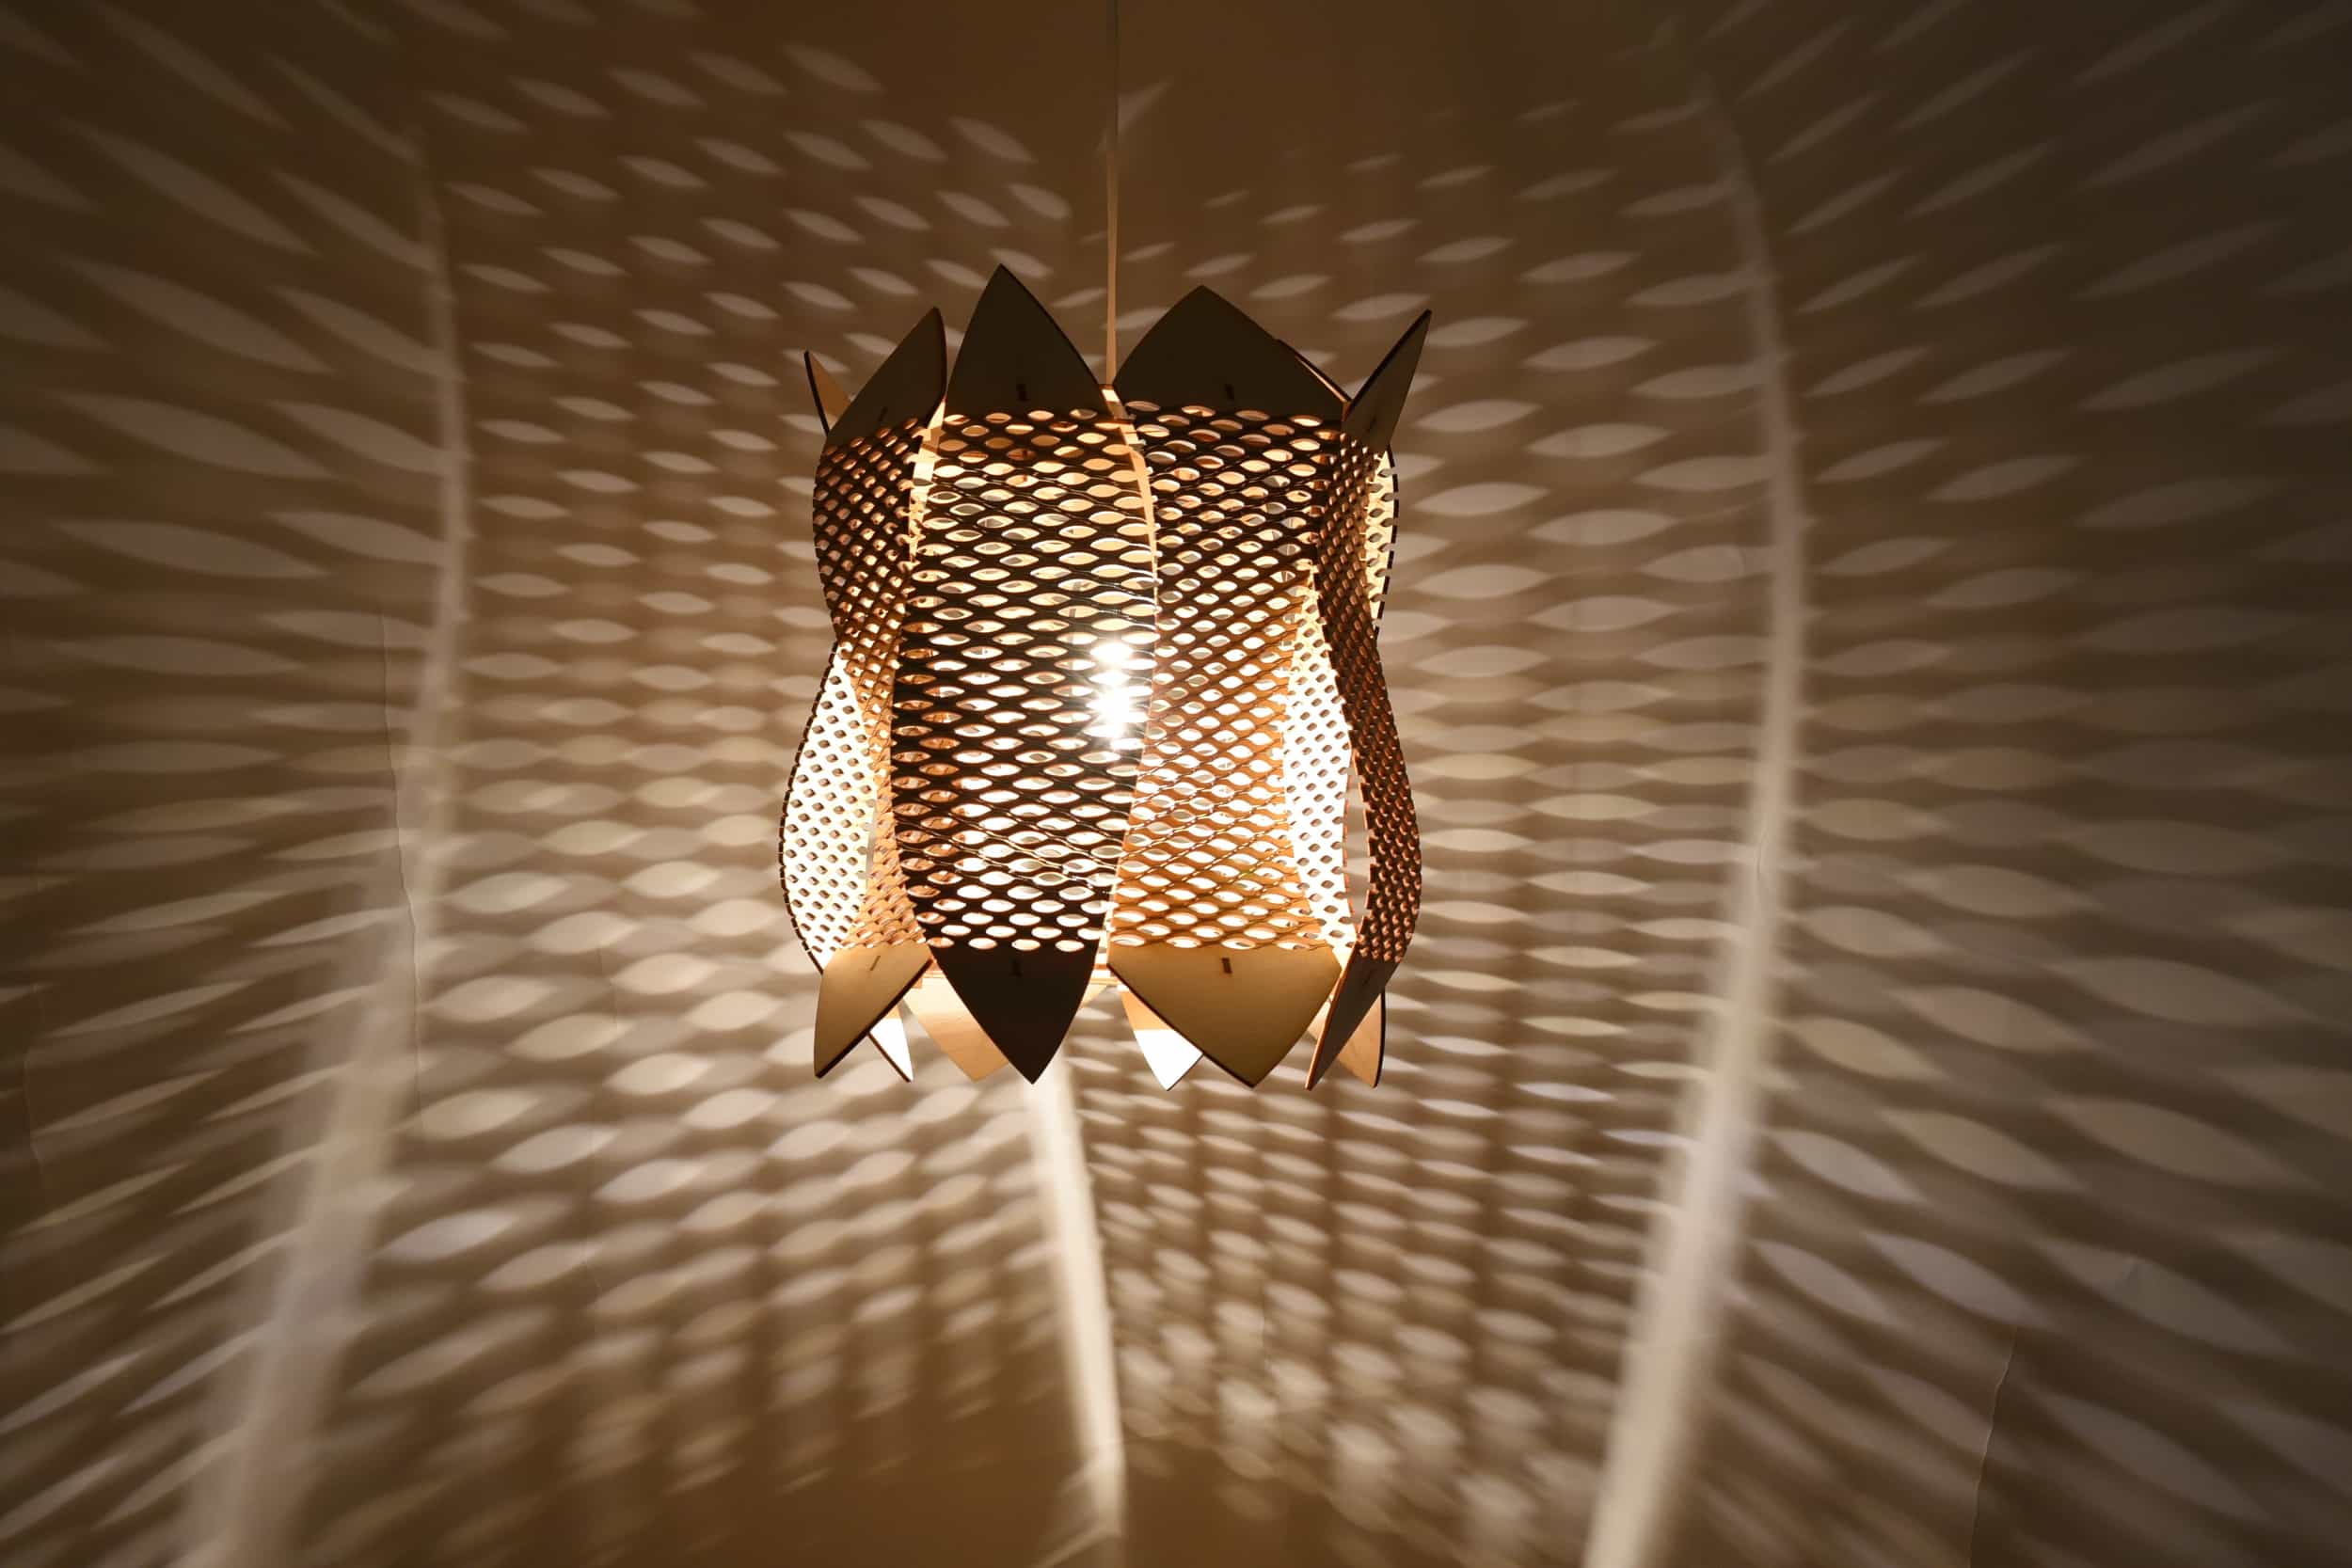
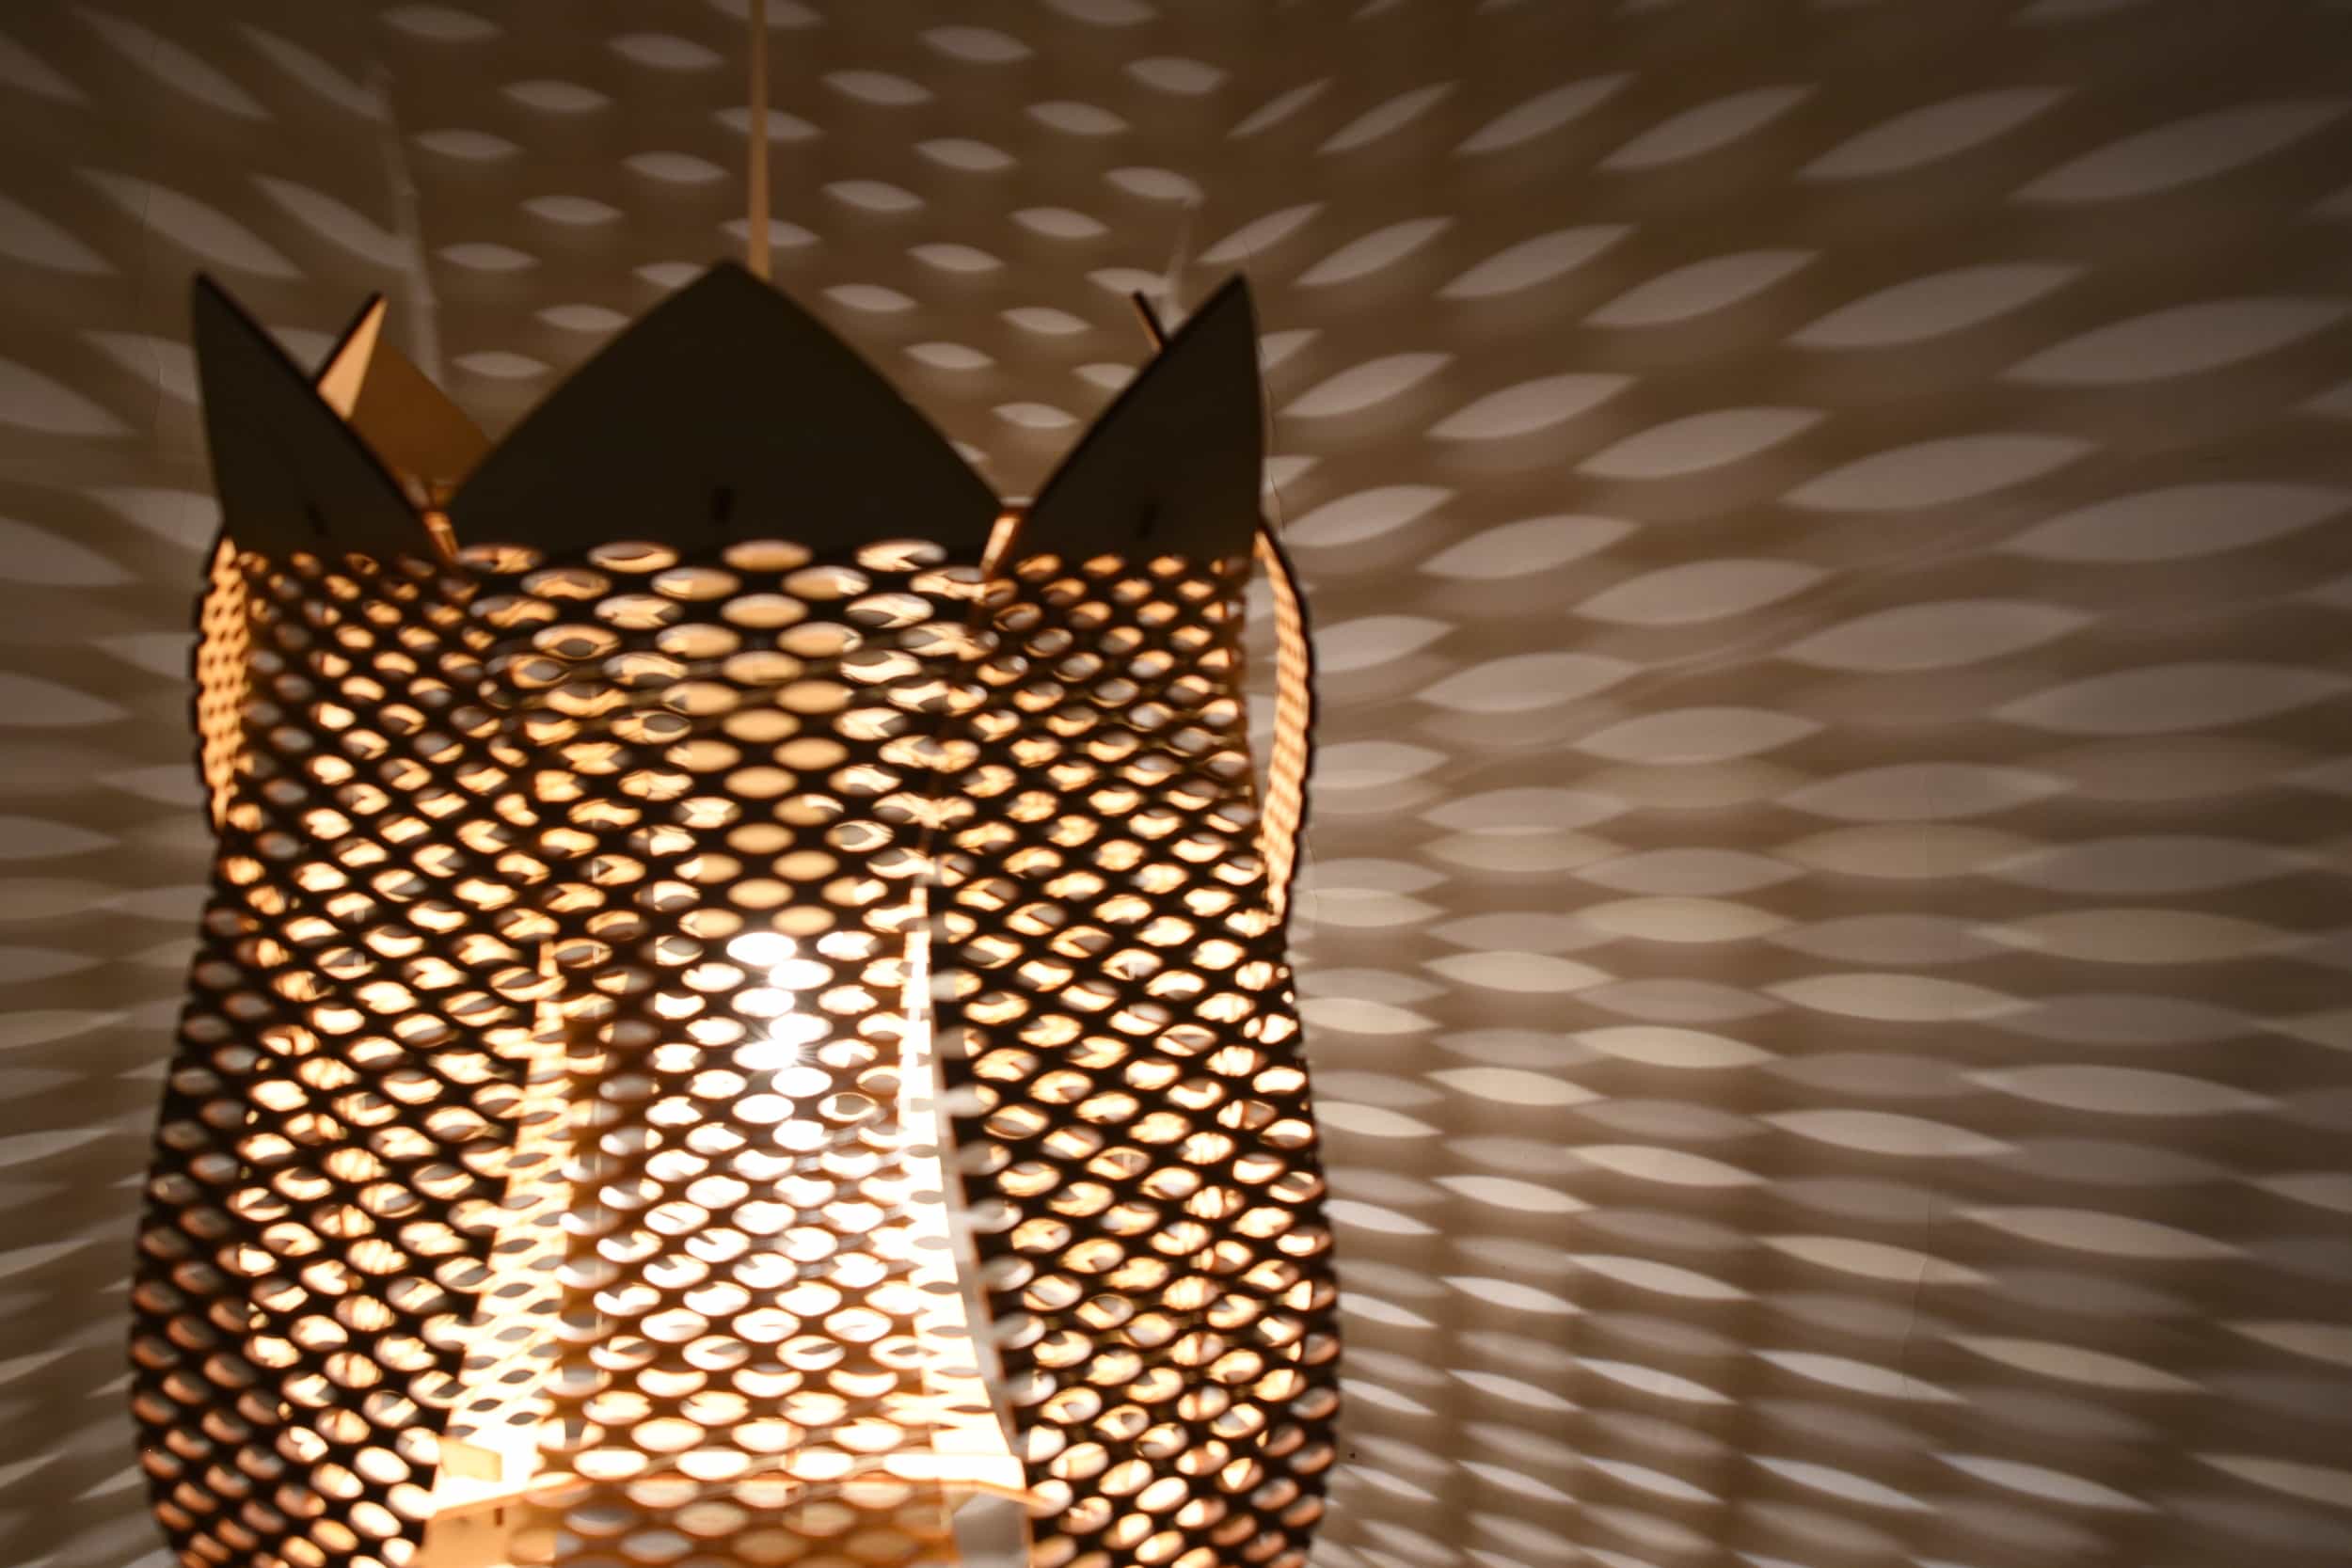
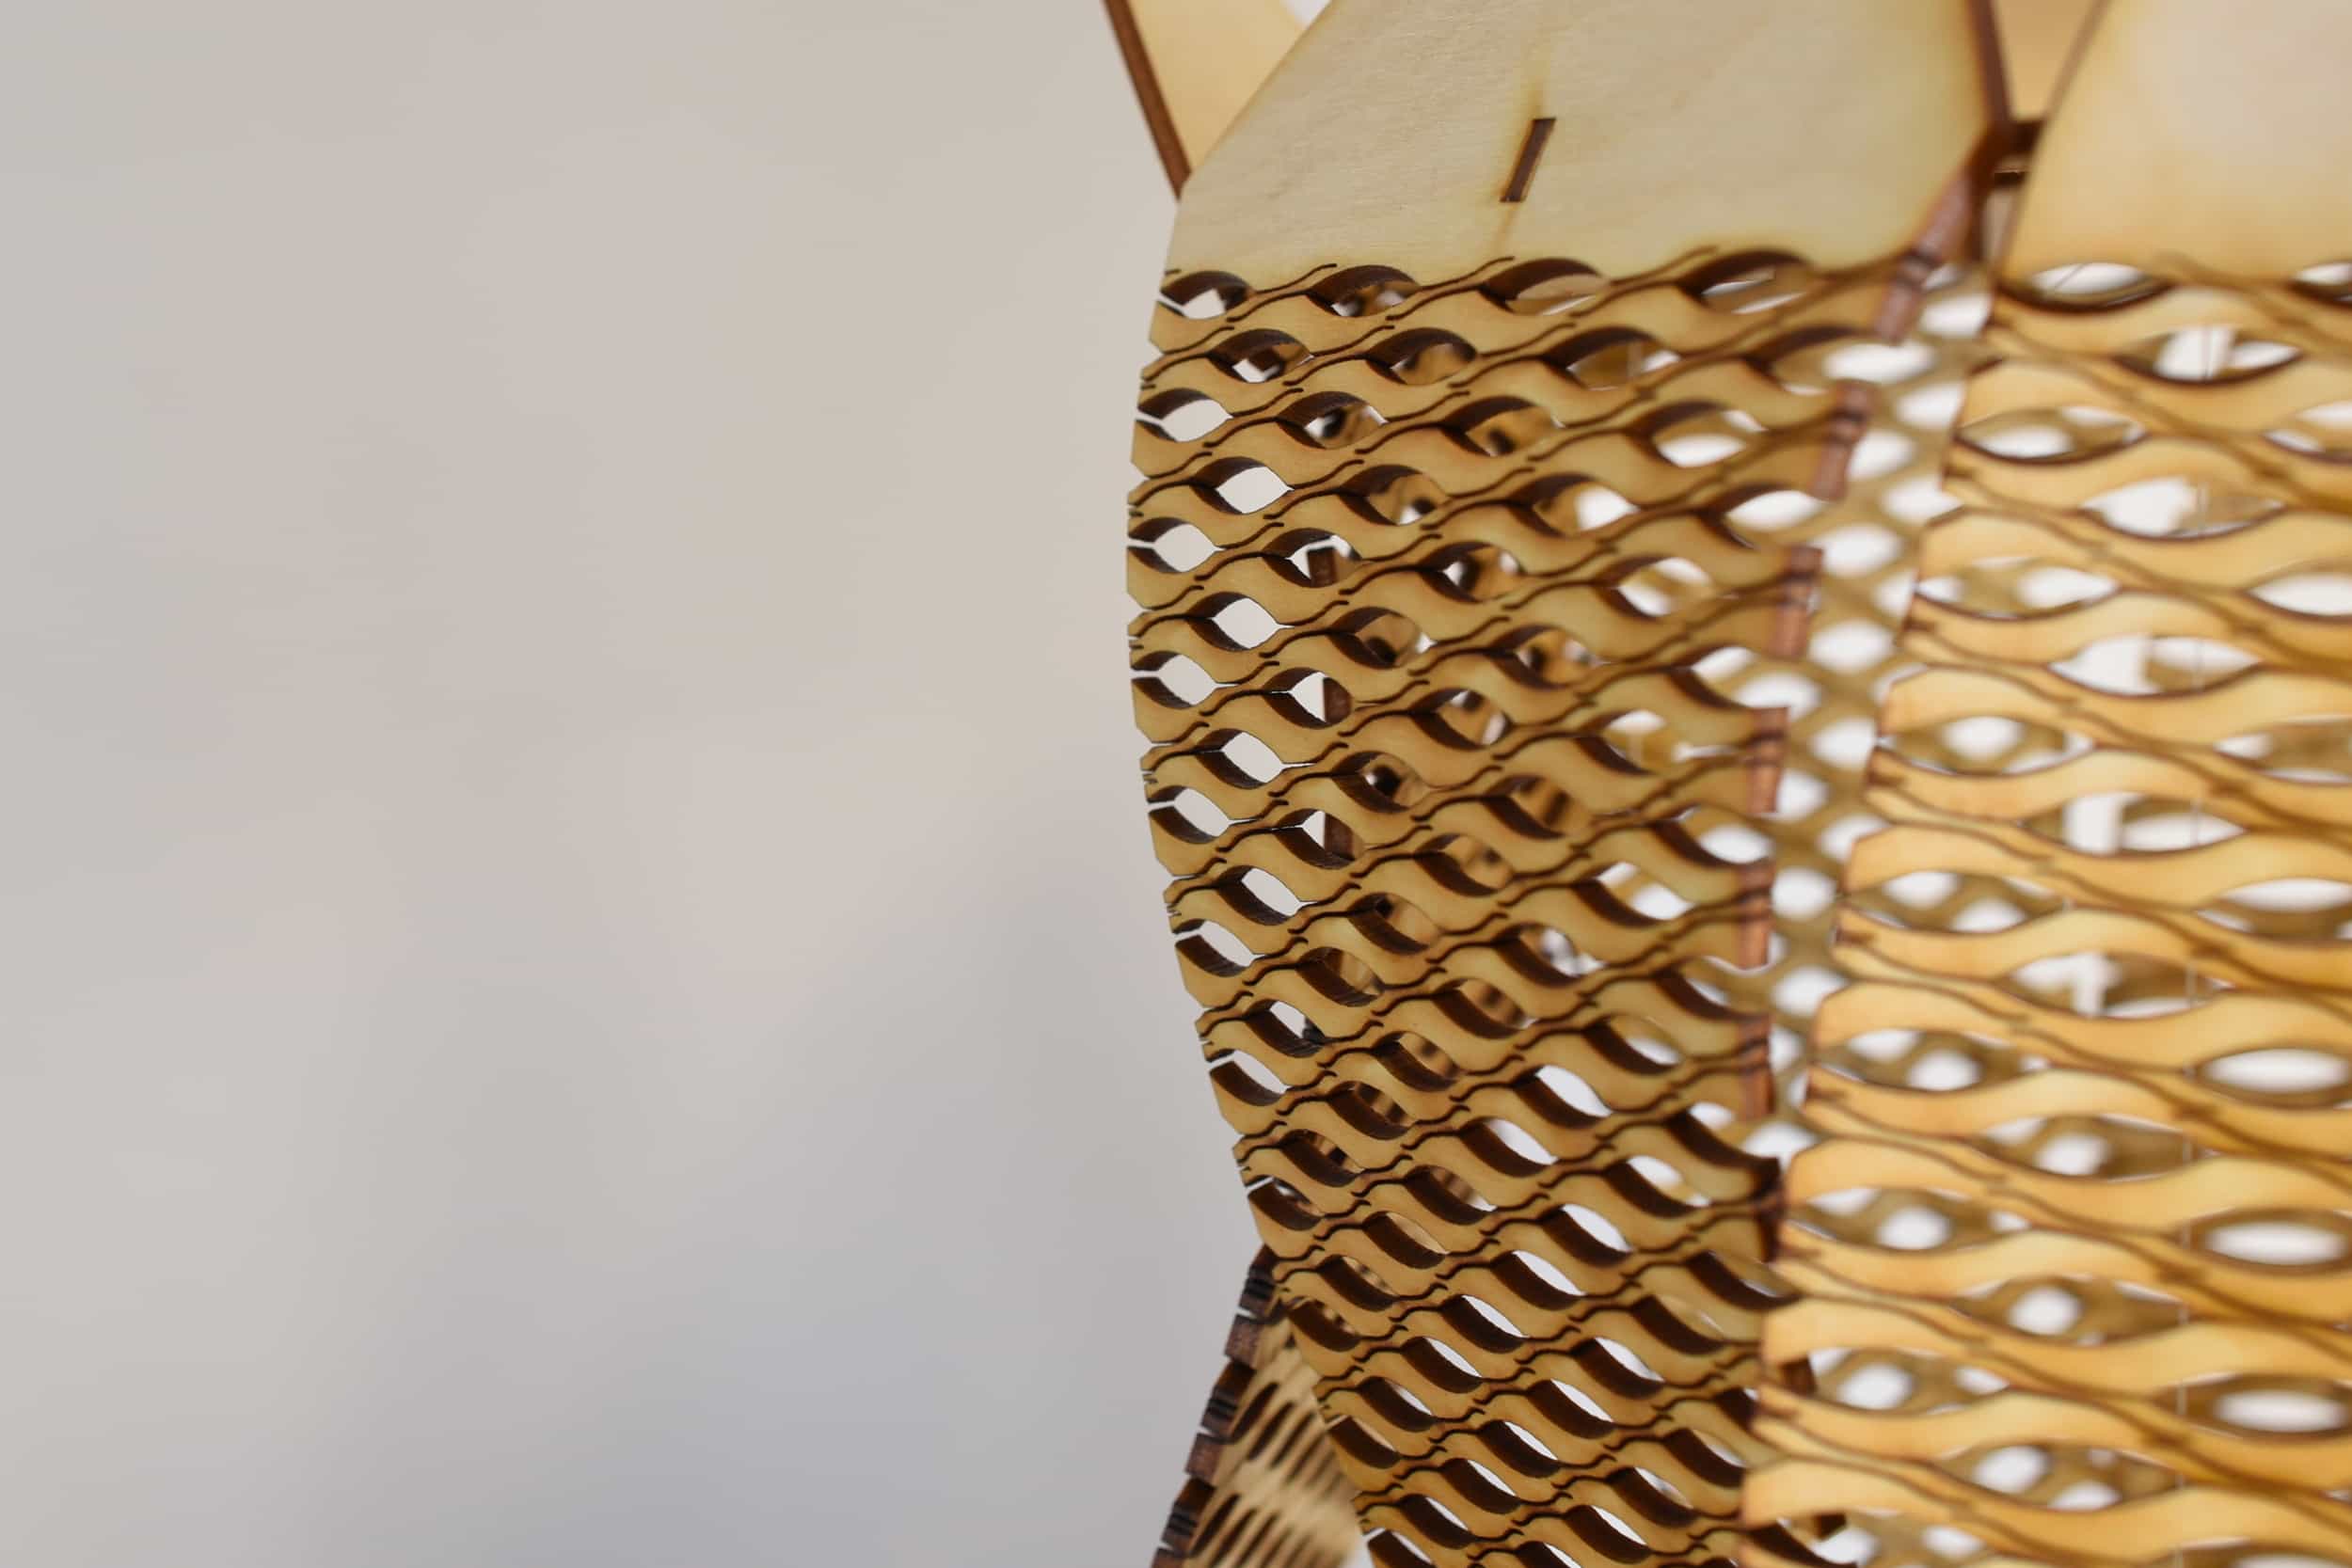
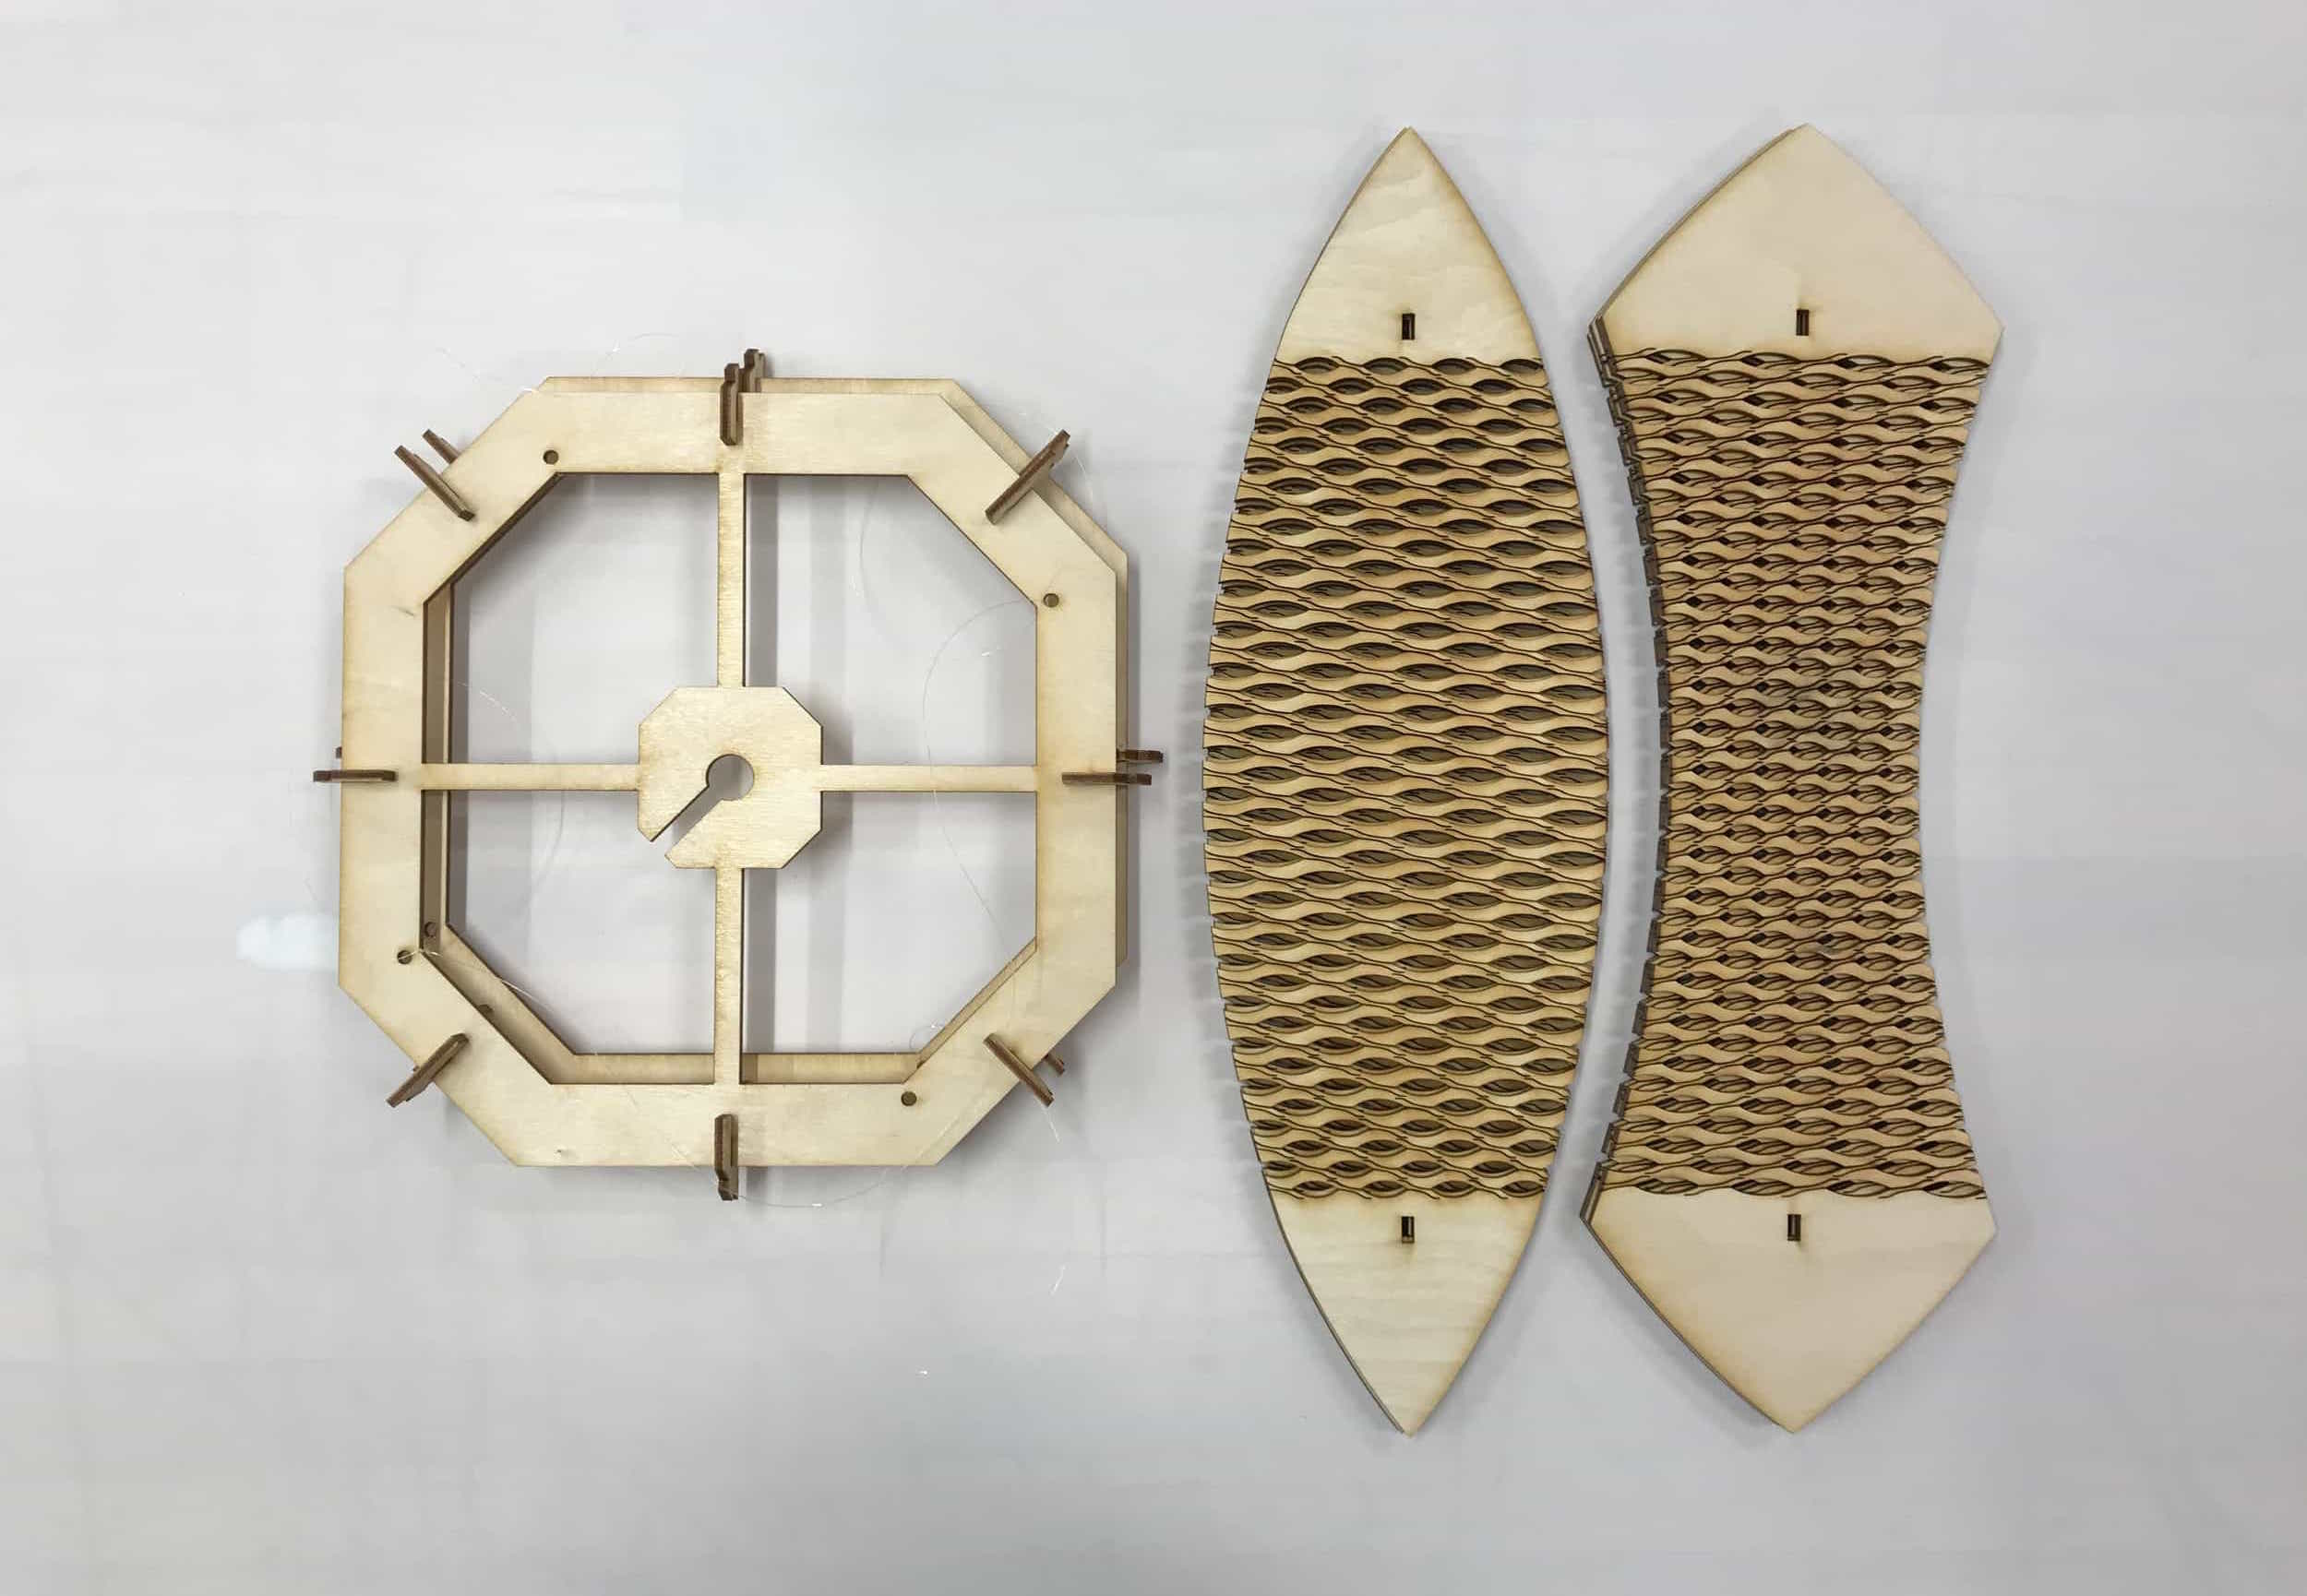
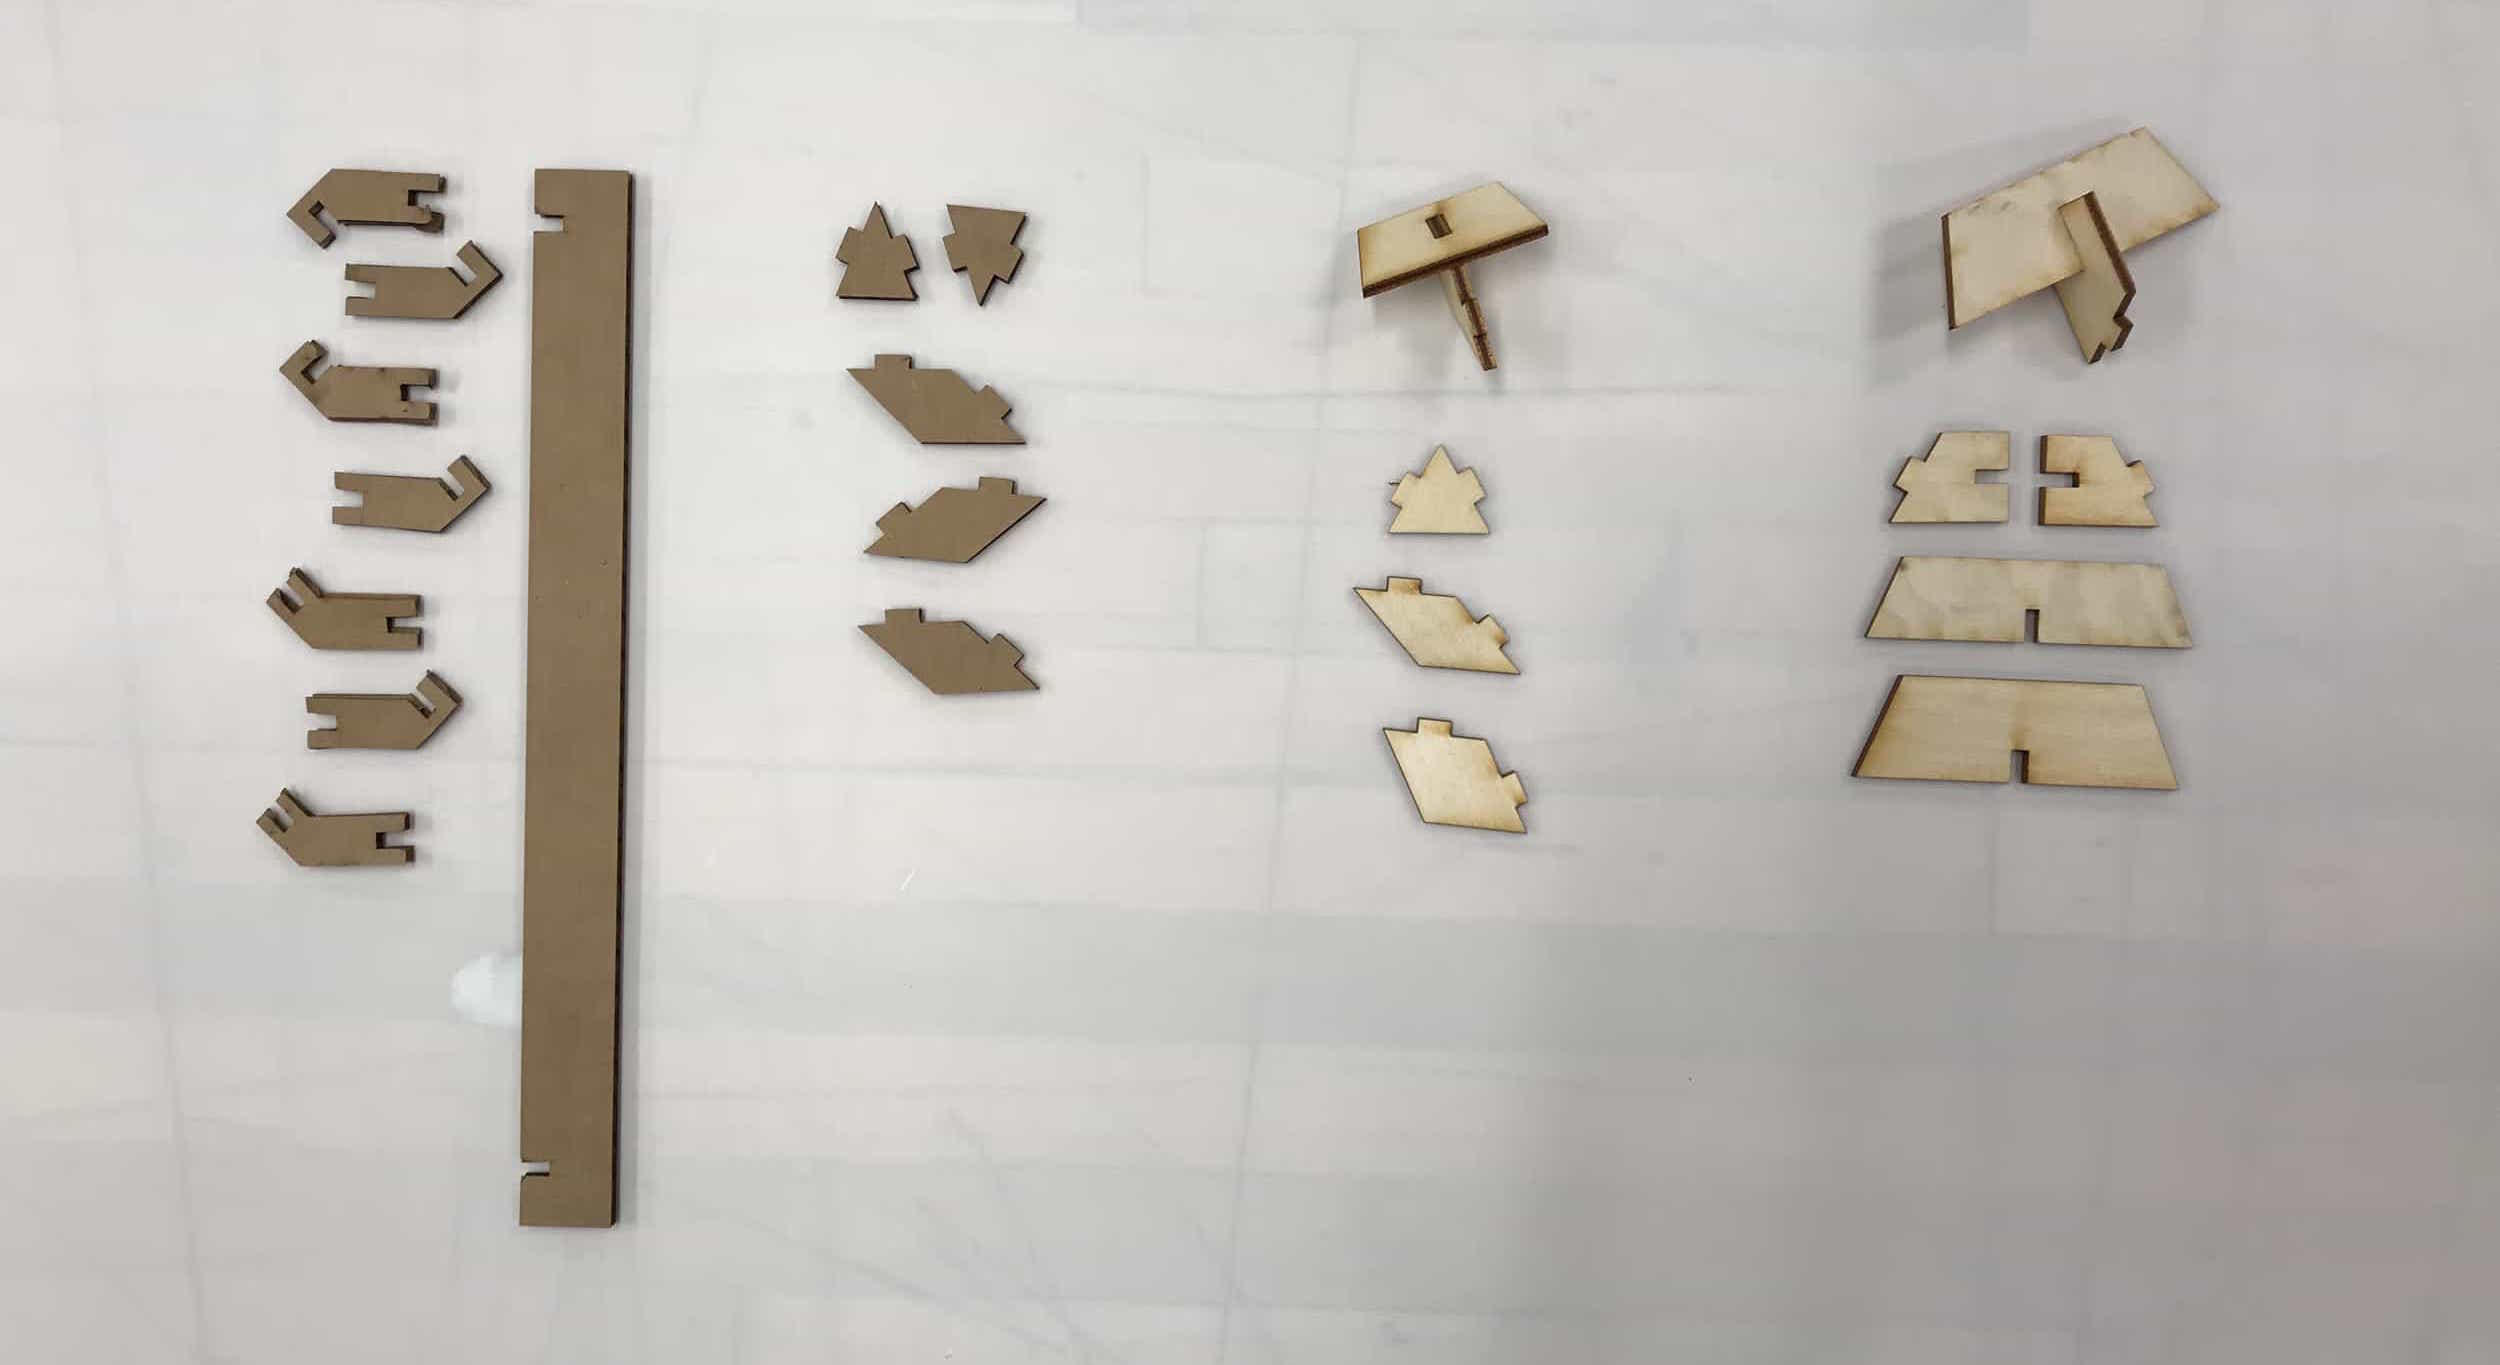
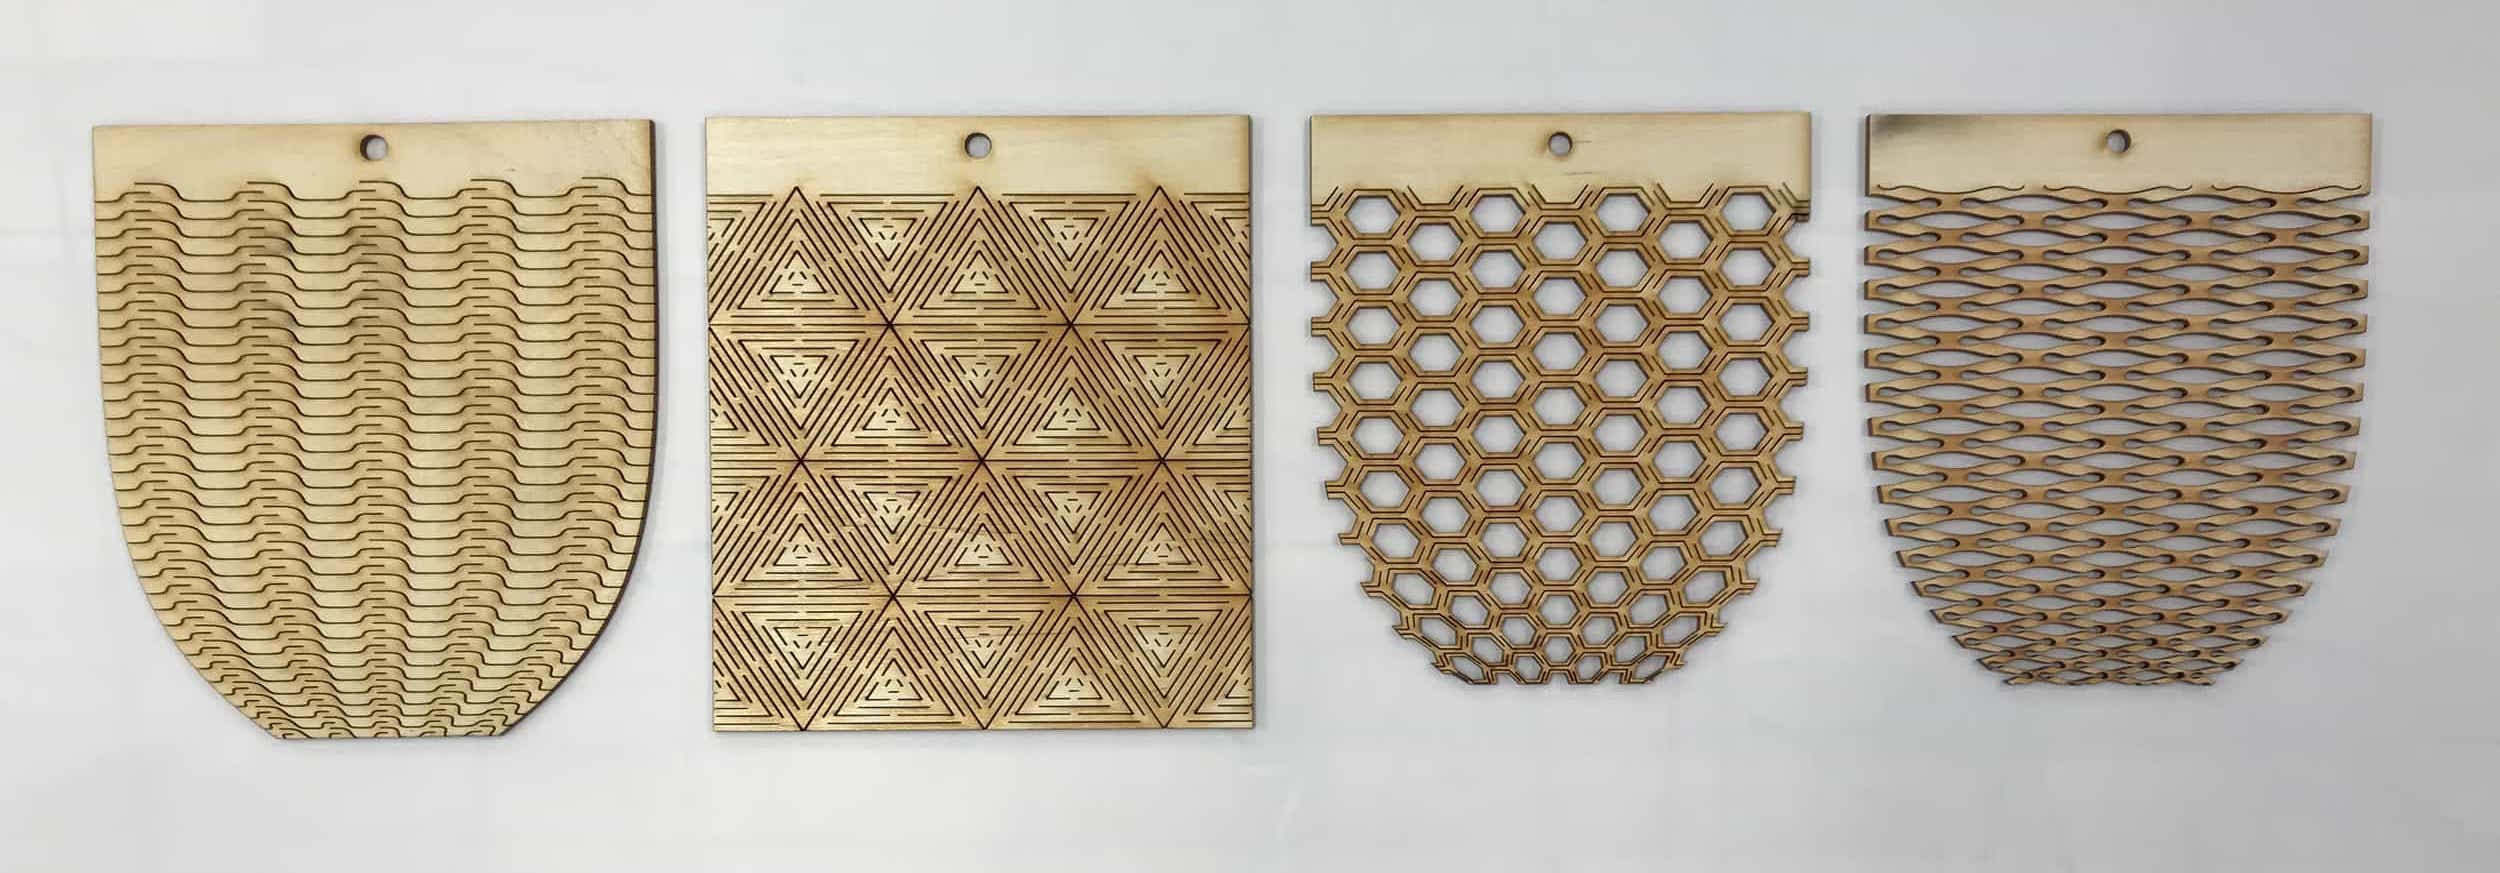
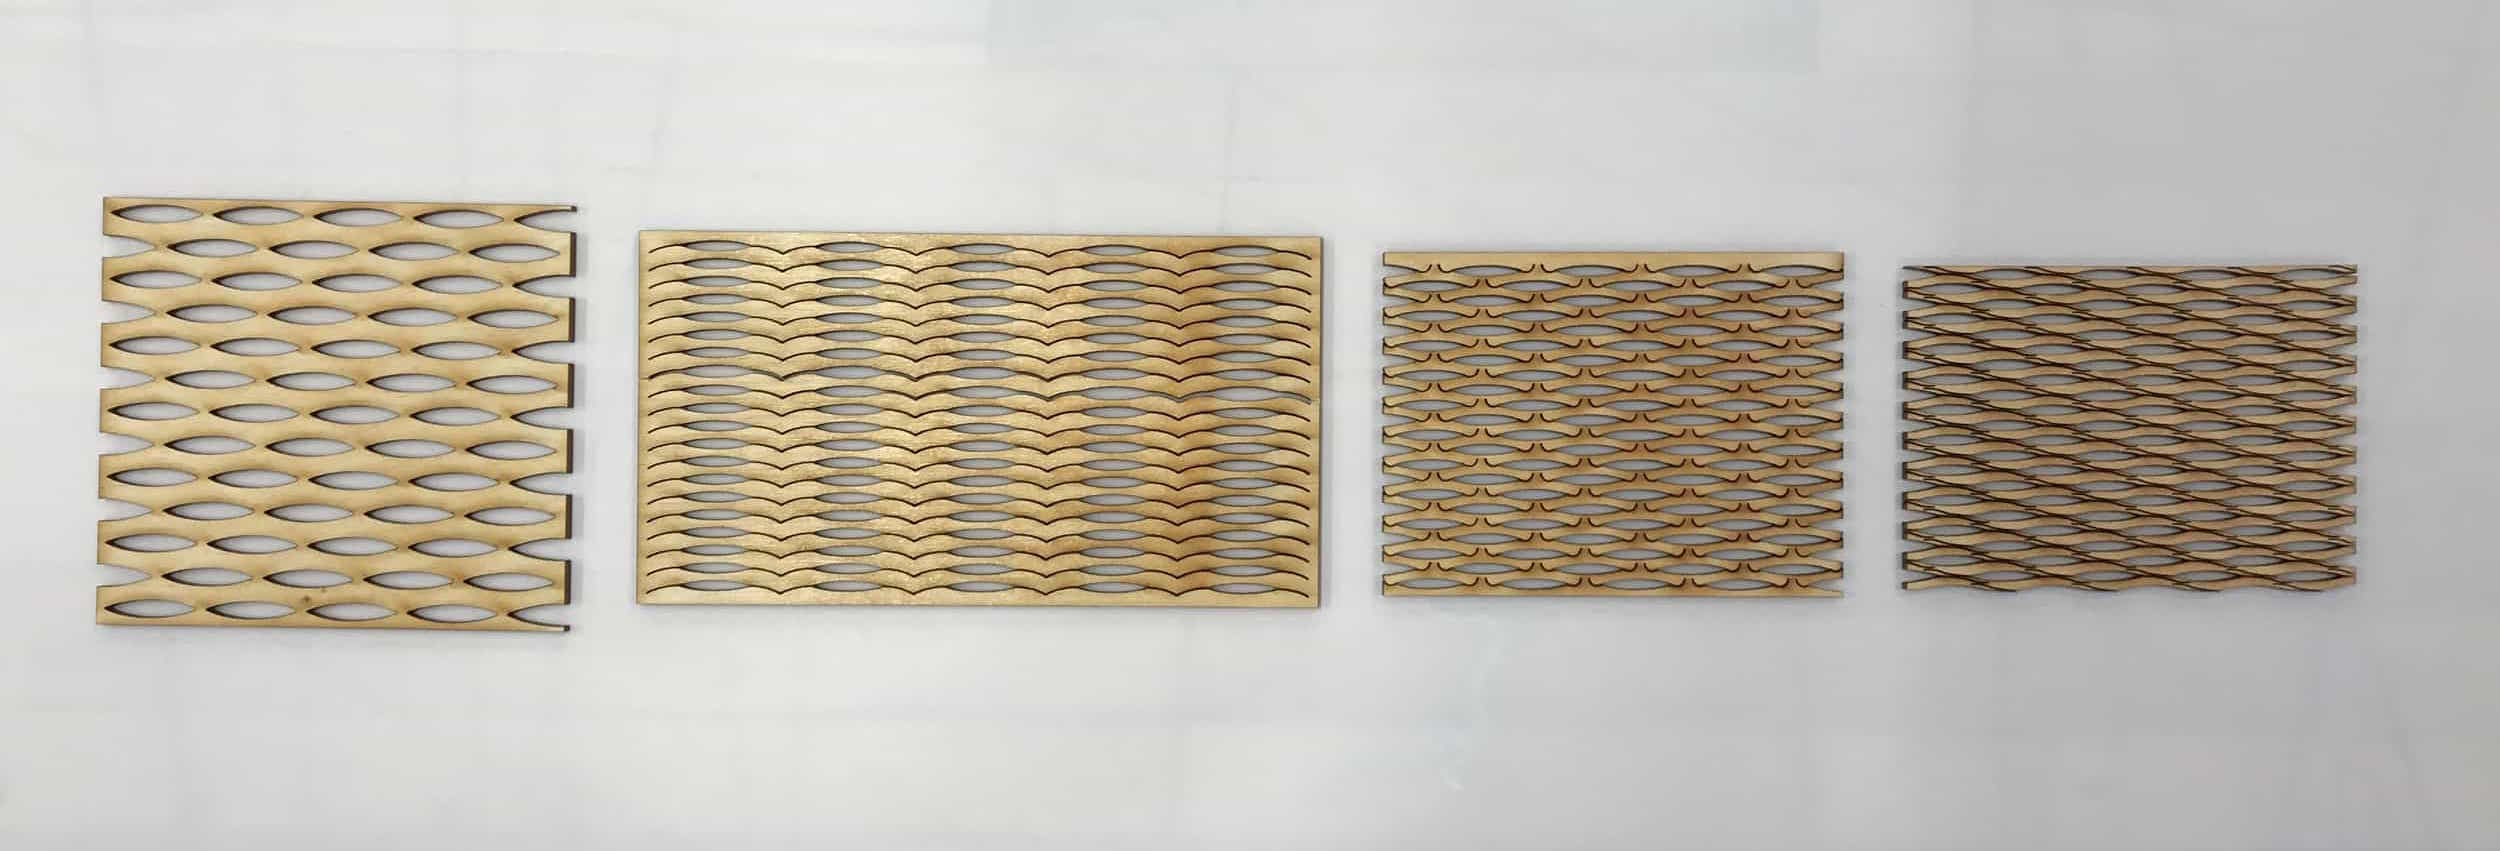
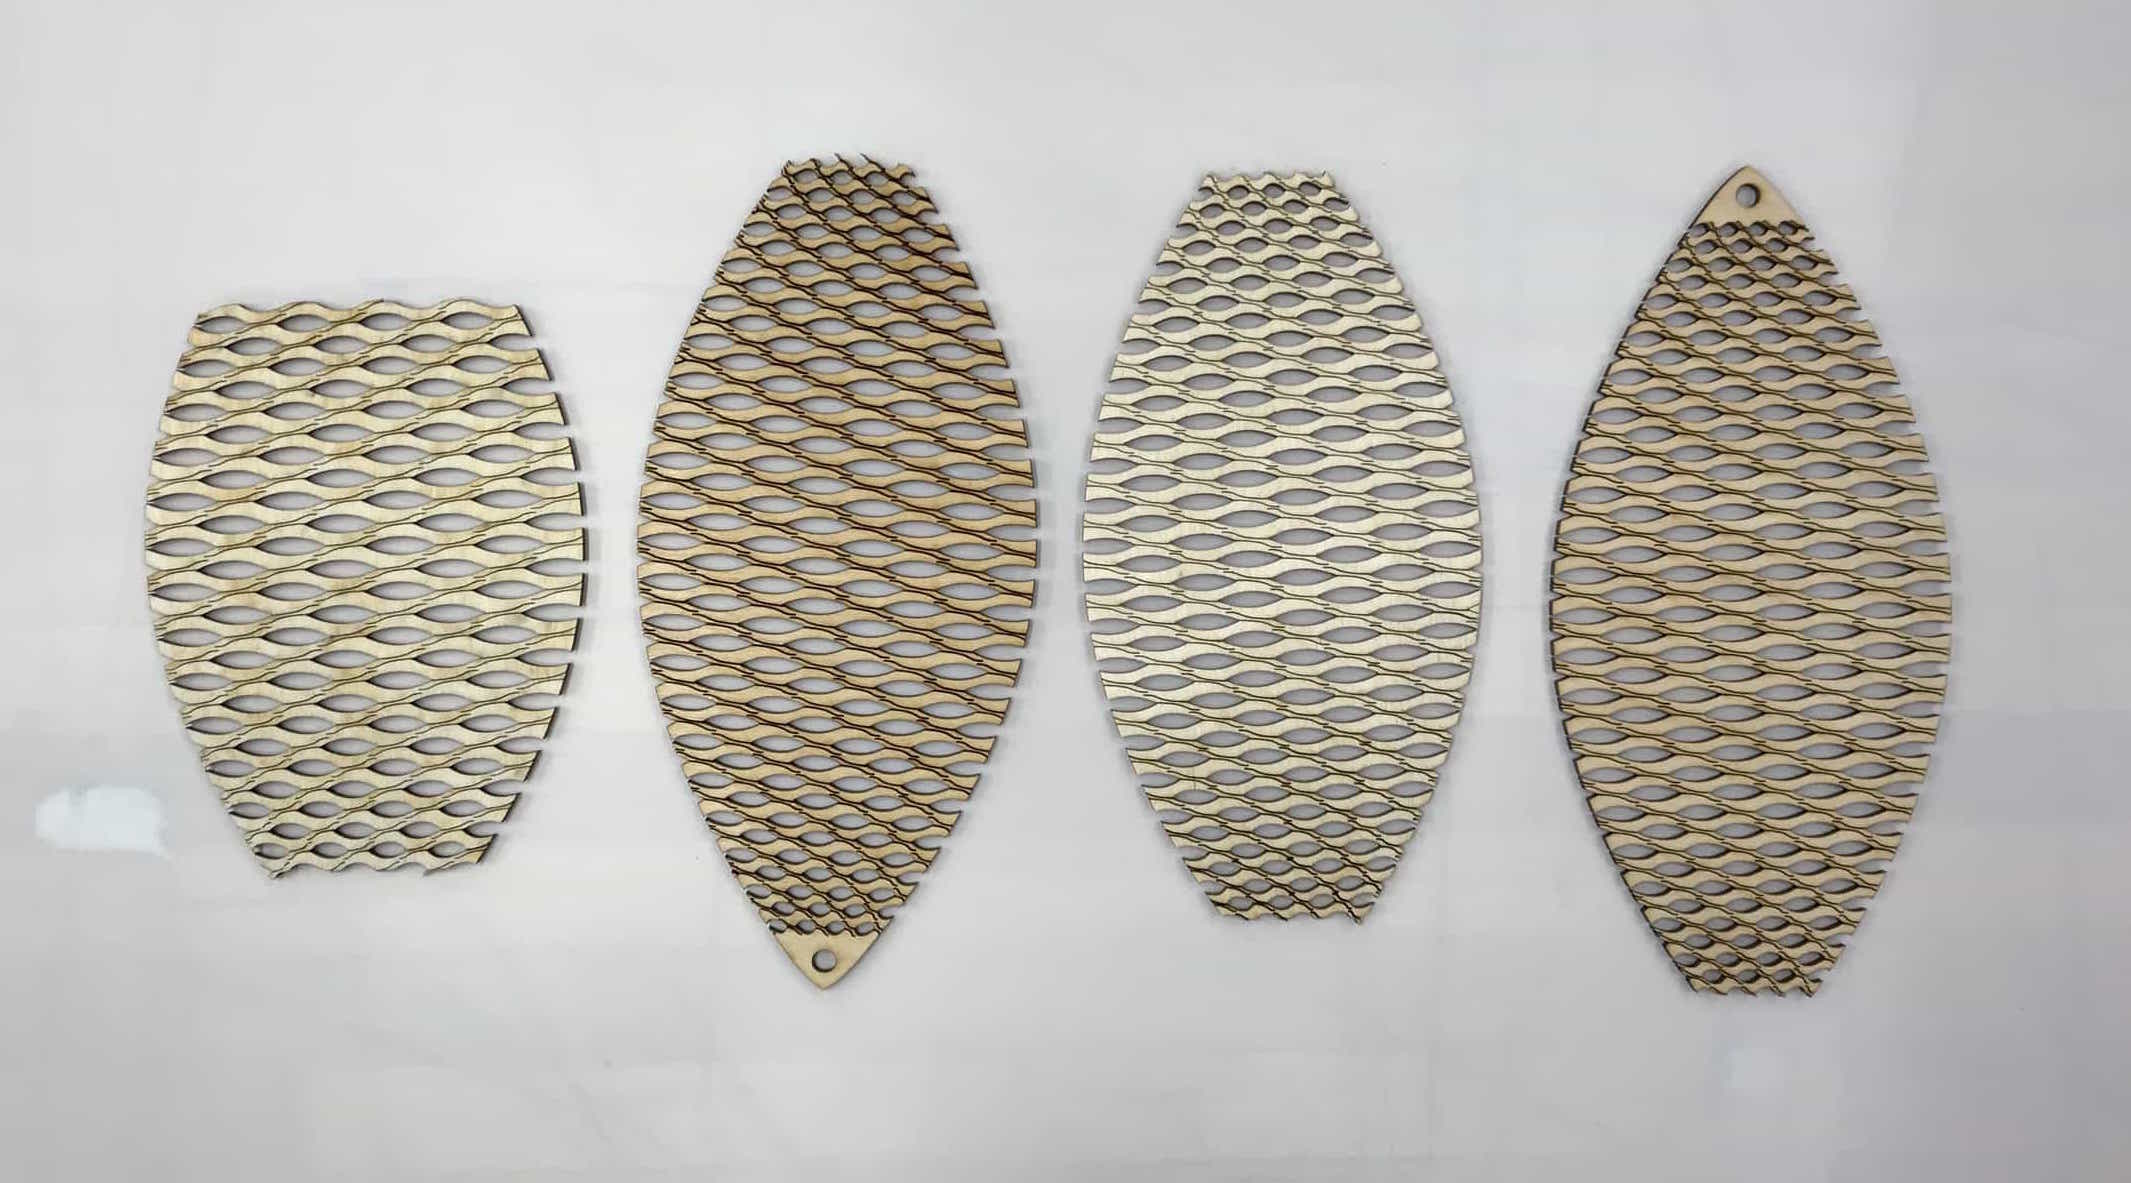
I wanted to add a quick update here since I've been doing some neat working with laser cutting for a project for another class. Our assignment for a design studio class was to design and build a lamp from laser cut plywood and/or polypropylene. I thought it'd be the perfect opportunity to experiment with parametric kerfing, since I hadn't gotten to for HTMAA yet. I began by laser cutting existing kerfing patterns I found online, then attempted to design my own. I created one design which turned out to be very flexible, so I used Grasshopper/Rhino to warp that pattern onto different panel shapes. The entire lamp is press-fit together, so I also had to experiment a lot with creating joints and accounting for the kerf of the laser cutter. Here are some photos of my final lamp, along with some pictures from the process of experimentation and prototyping. Enjoy crazy shadows.