Touching the Sun
It only burned a little
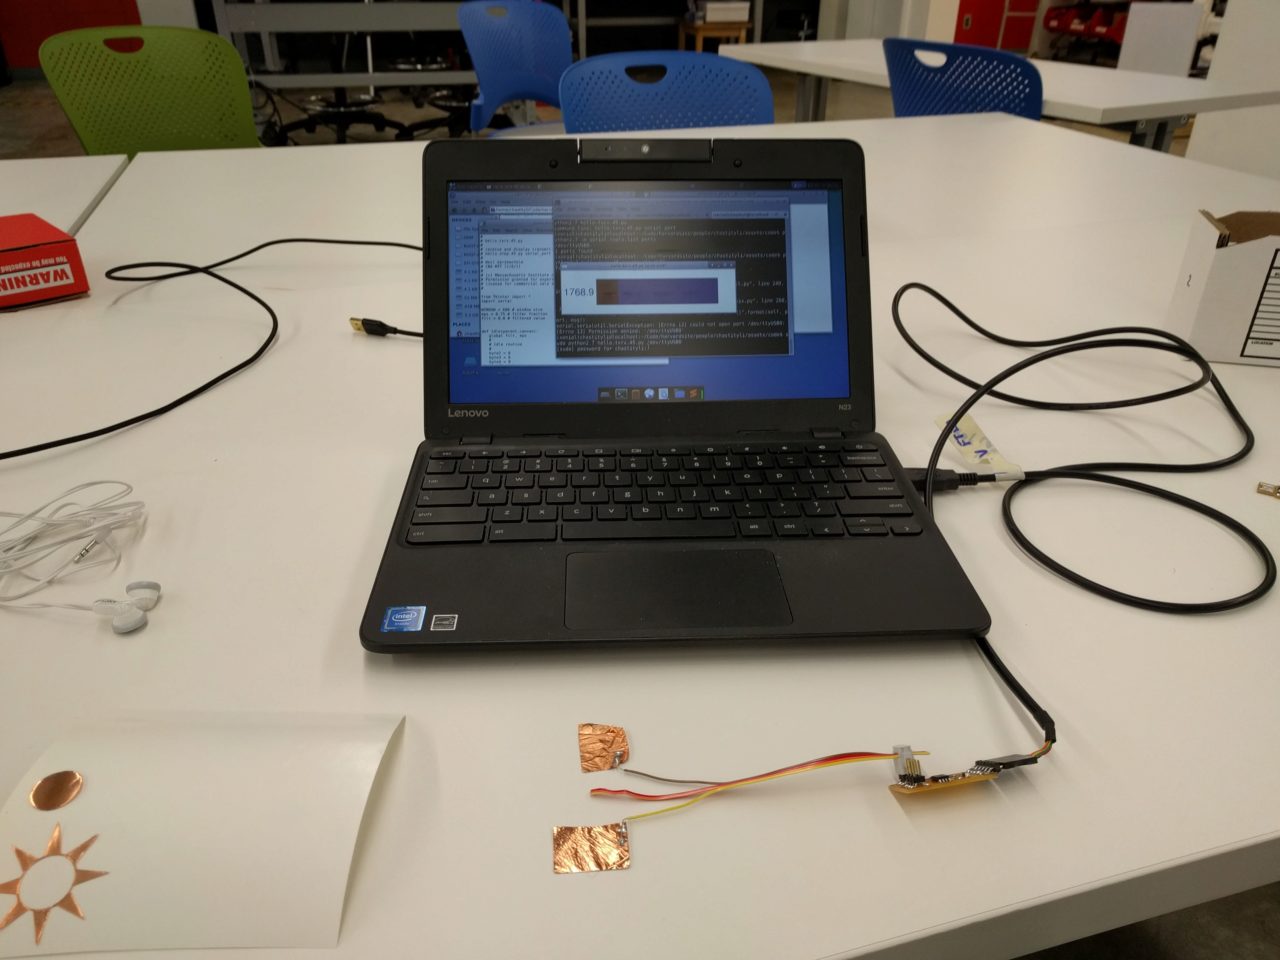
I wanted to try to make a capacative sensor because I will need to use it for my final project. I started by making a simple transmitting and receiving board based on Neil's example board. For the final project, I want to make a board that will identify where on each ring of the maze you are on. Since I didn't understand exactly how it worked, I decided to make the simple version with two electrodes. In the future, I want to be able to resolve the locations on at least 4 rings. The electrodes should be in concentric circles and in rays emitting from the center of the maze. A large part of this week was also designing the electrodes. More on that later.
I milled and stuffed the board with no major issues. I forgot to take a close up picture, but all the connections were good after I checked with the multimeter. I programmed the board with Neil's example code and used the Python serial to visualize the results. This was the first time that it worked.
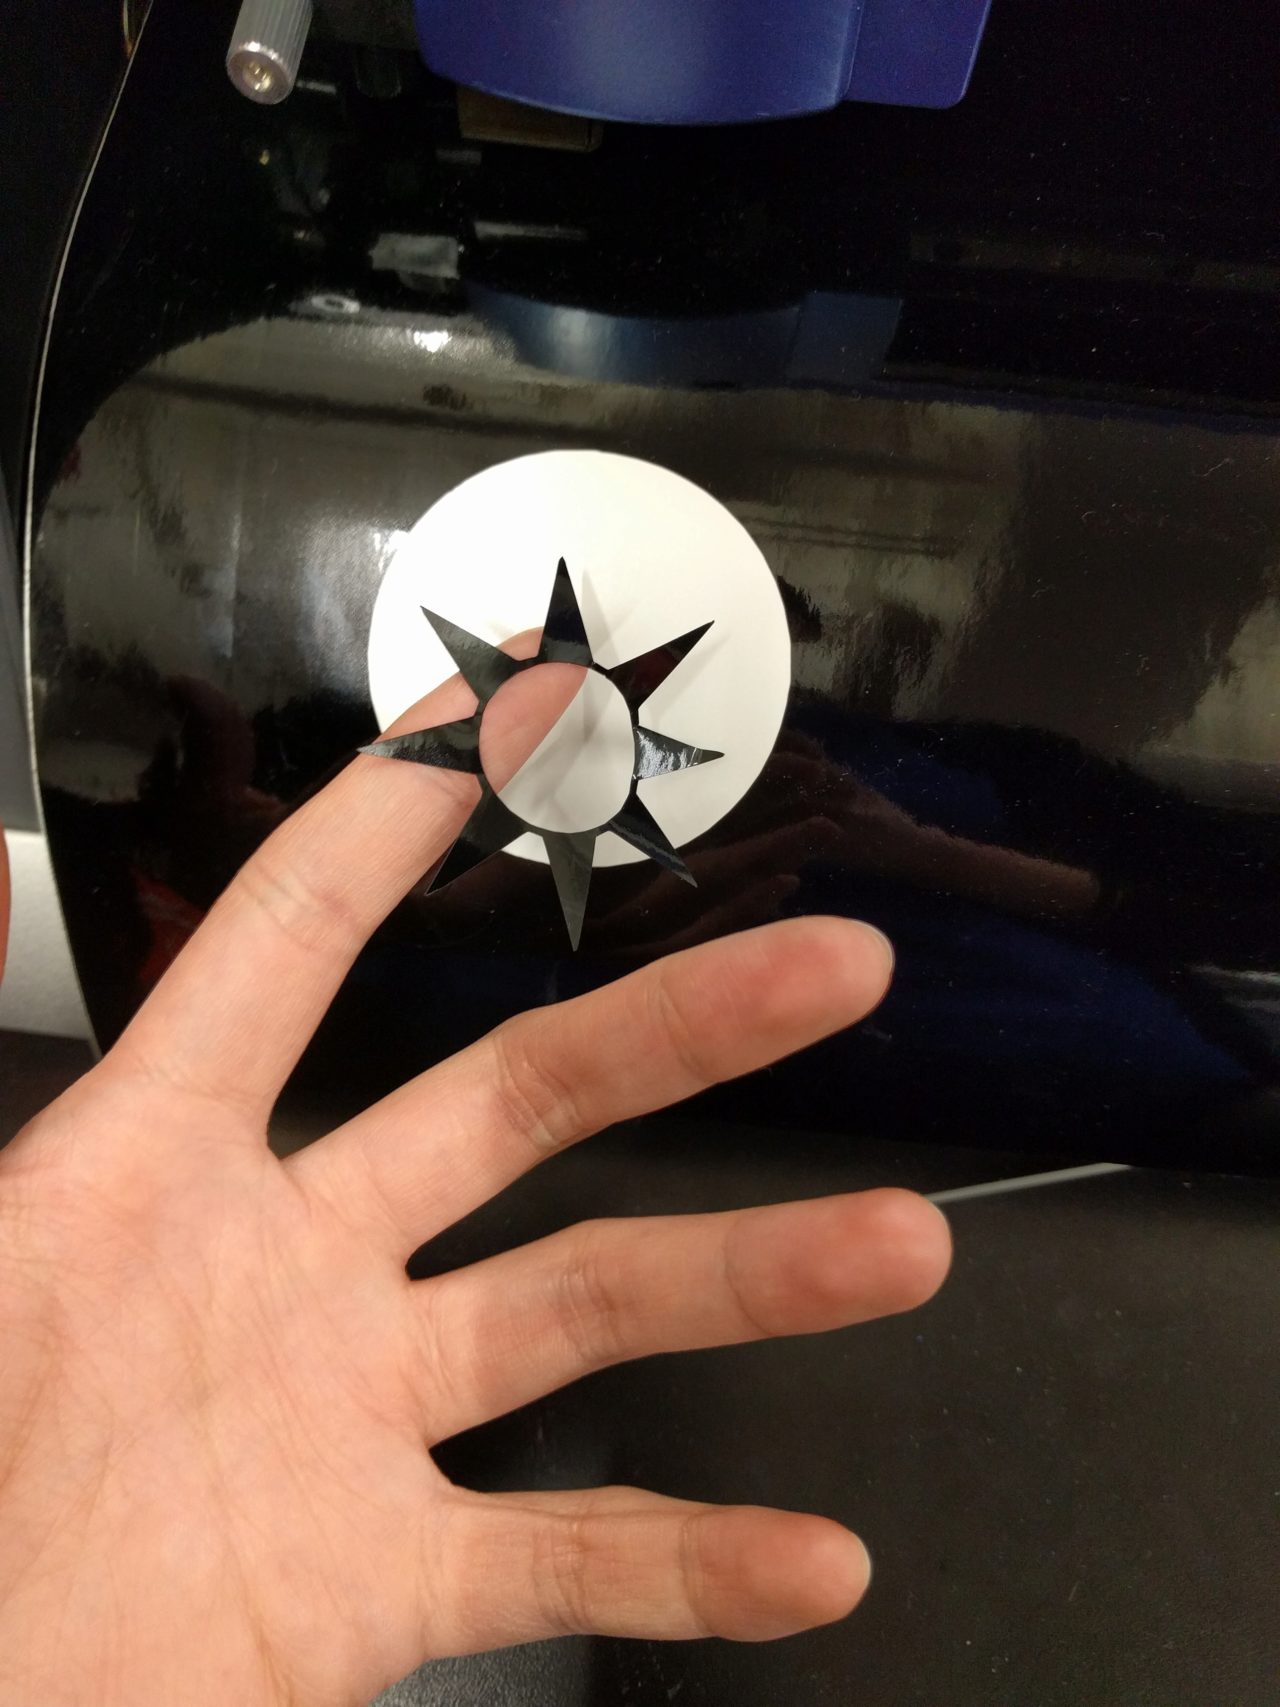
Next, I wanted to try with two electrodes that were fixed and more similar to the shape I want. I designed the electrodes in Onshape and exported it as a DXF file. I used Inkscape to fill in the shape. I next cut a test piece on the vinyl cutter, using simple black vinyl to get the right size and pressure. This was the size that I settled on for cutting.
However, when I started to cut the copper, the copper seemed to get caught on the knife on the turns so it pulled the corners up, messing up the cut. Here was the first failed cut.
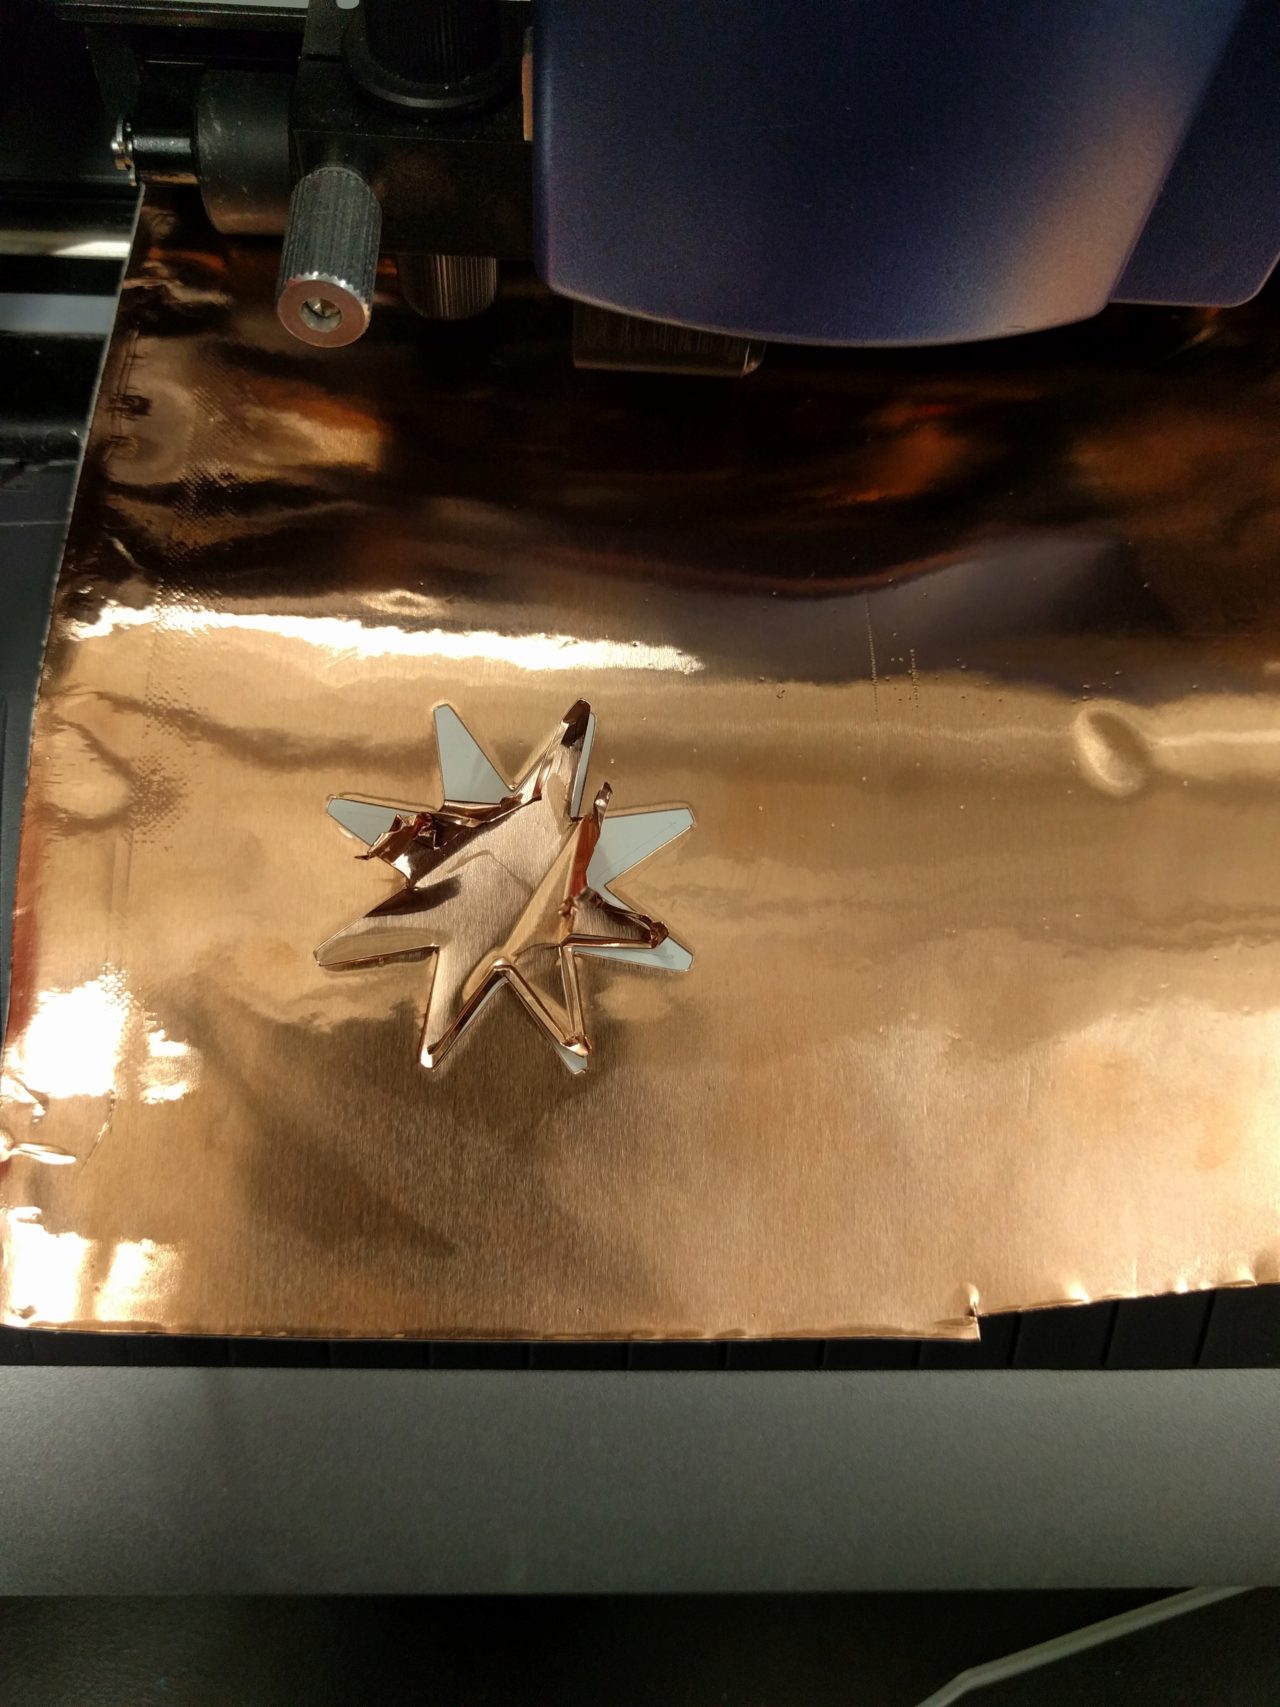
I scaled up the image some, so the corners were less sharp. This helped some, but didn't completely solve the problem. However, I was able to salvage the electrode.

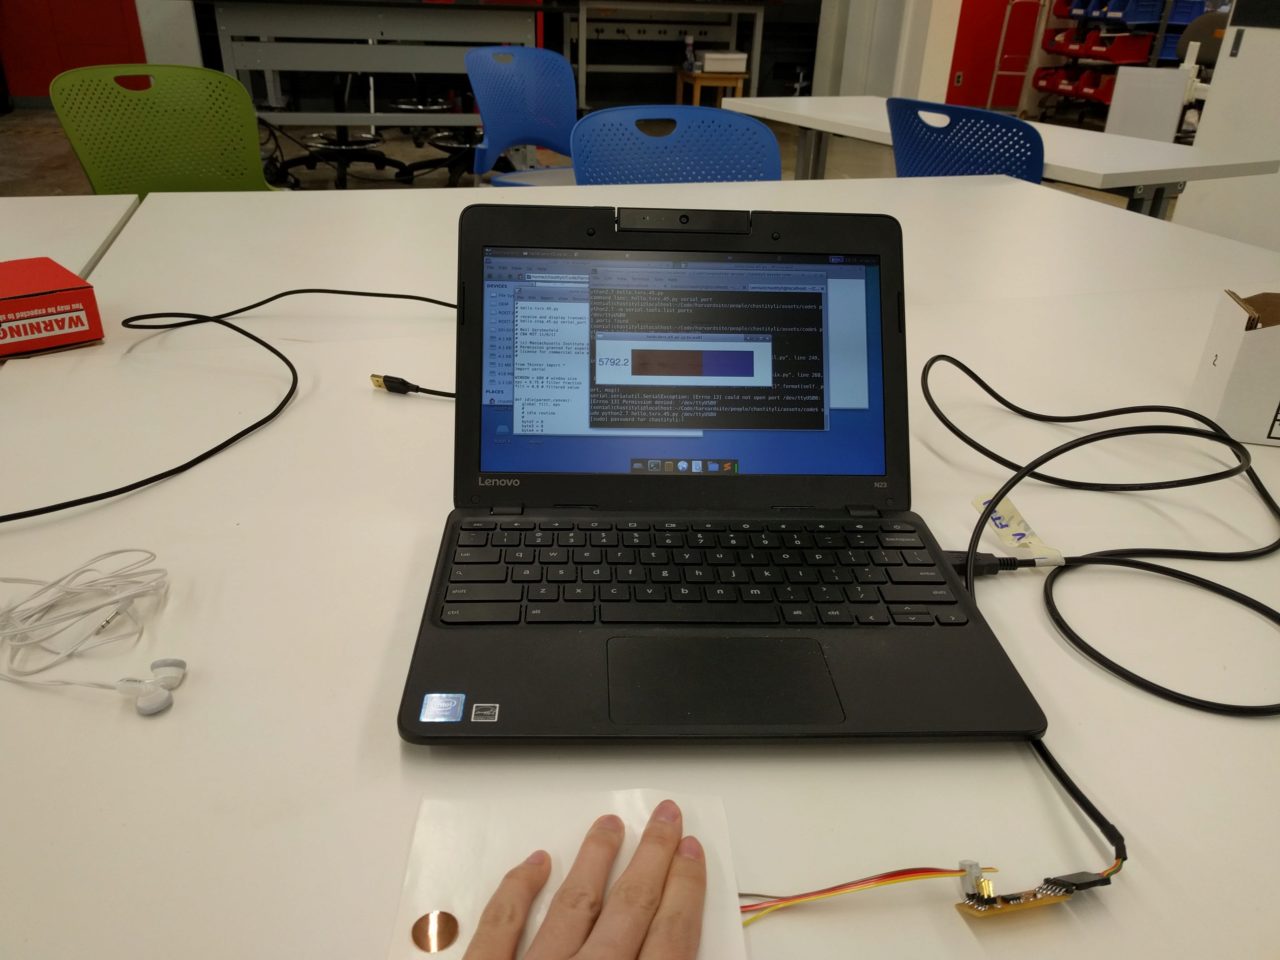
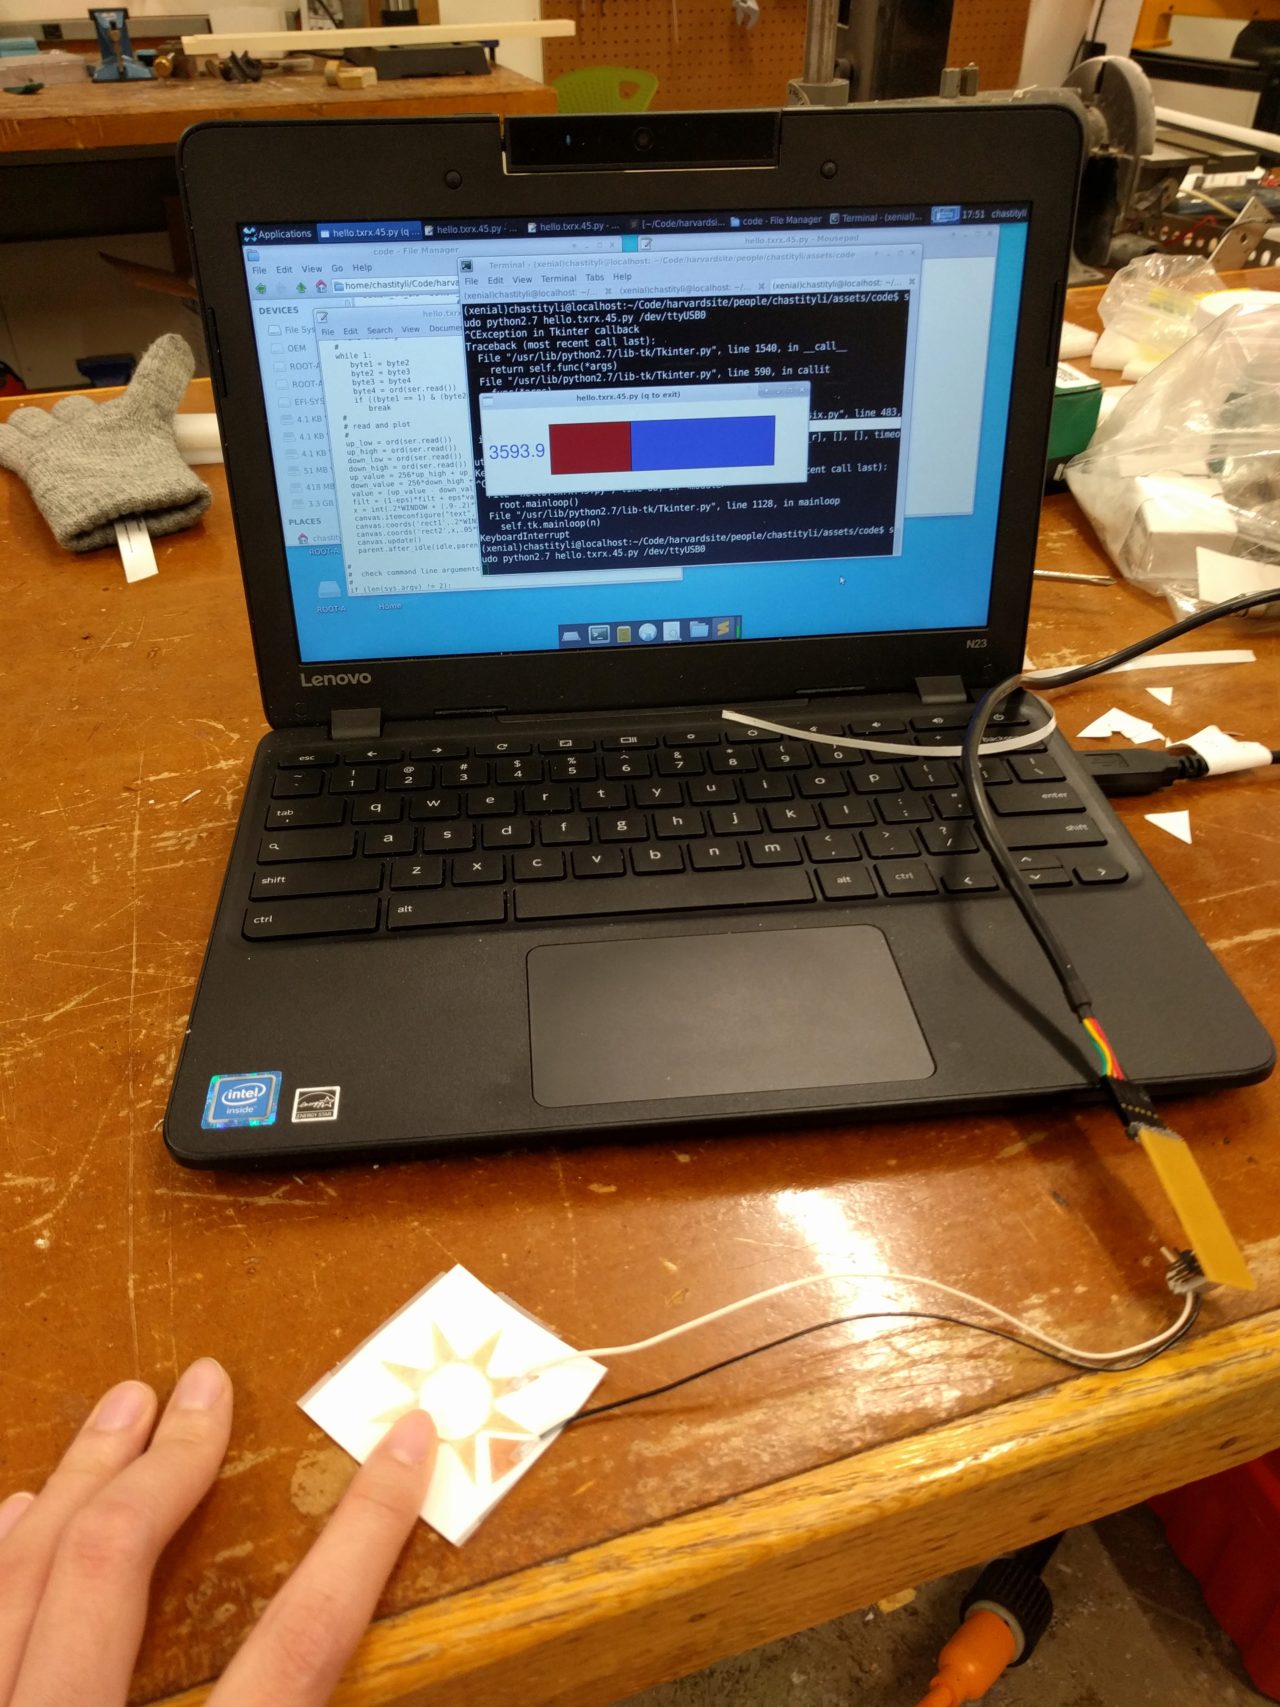
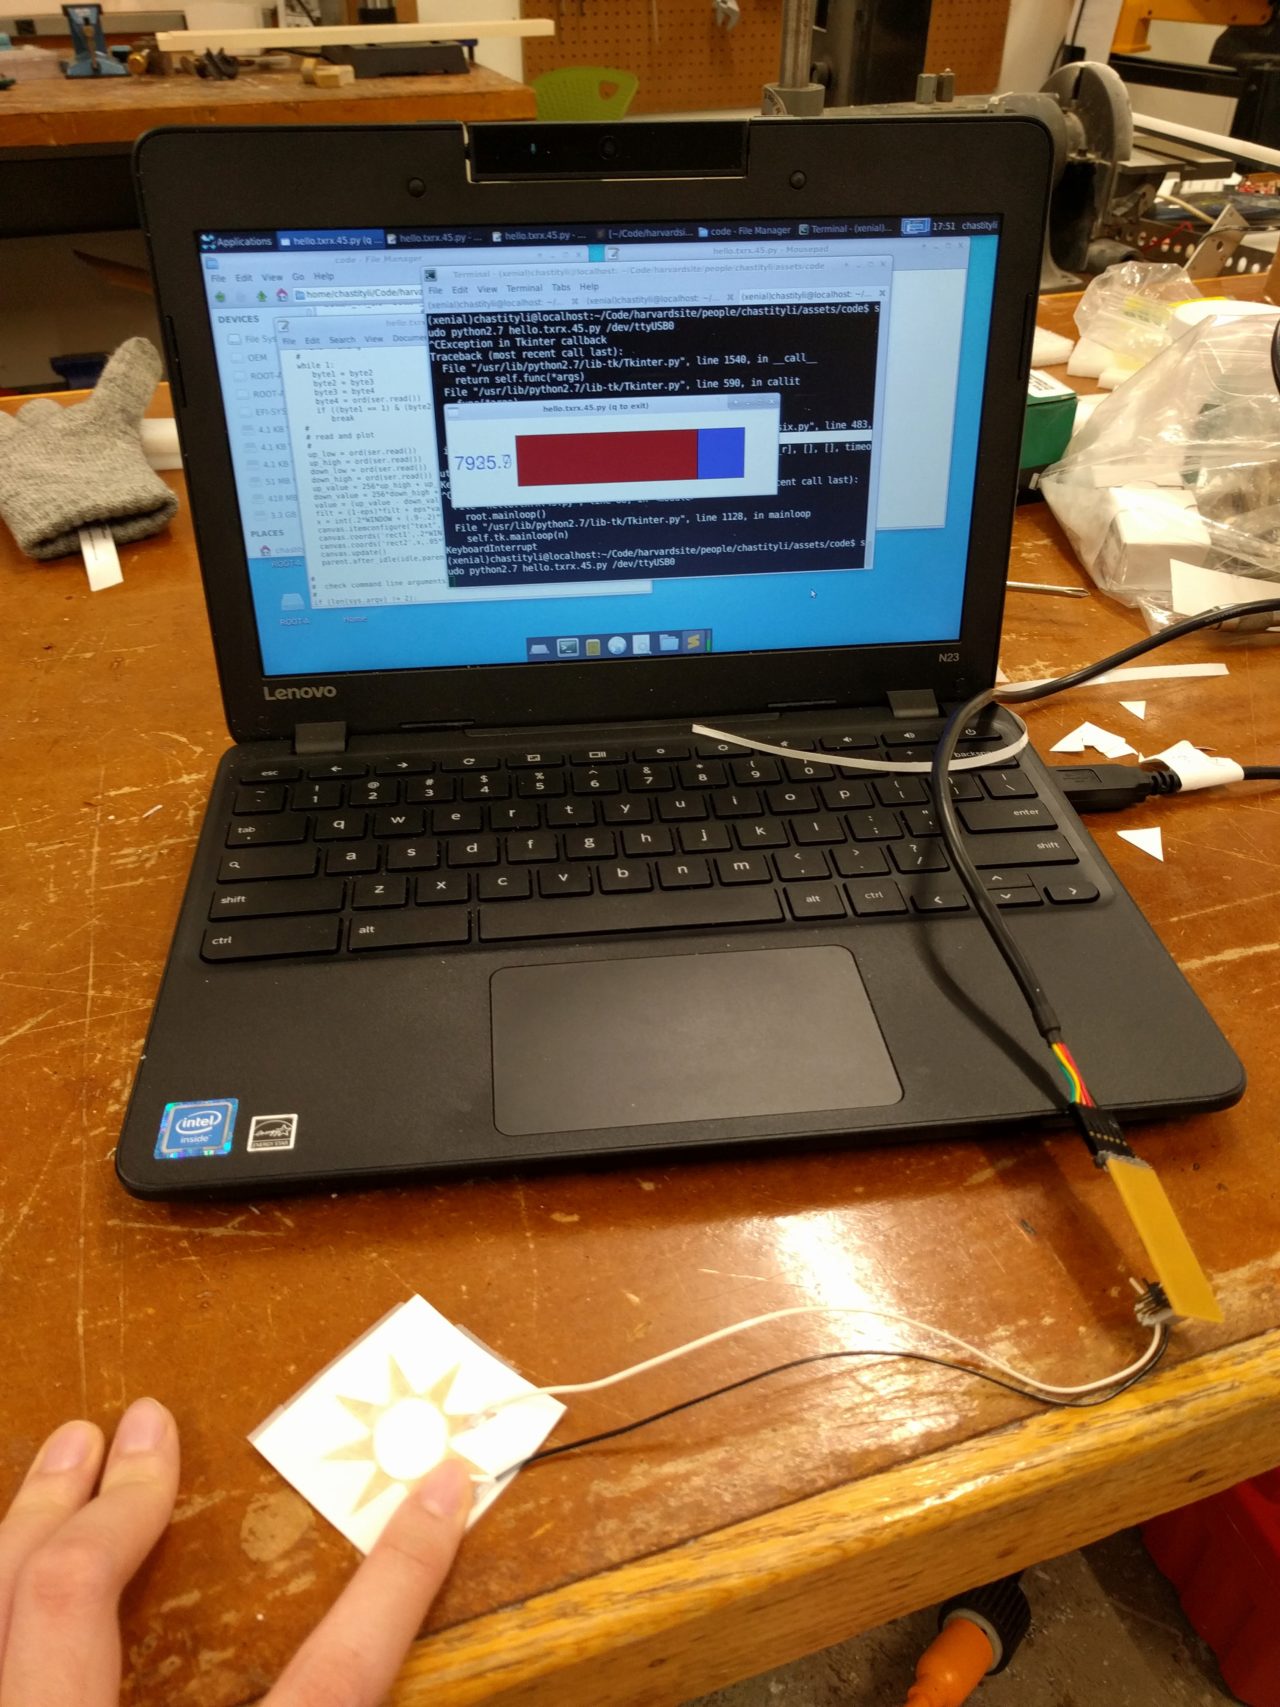
However, there was another problem with my design of the electrode design. Originally, all of my electrodes were concentric circles, but I realized that this wouldn't work because the intesection of a pulse electrode with a receiving electrode is what resolves the location. If all the electrodes were concentric, then there wouldn't be a way to resolve the location of the touch. After I realized this problem, I just cut a piece that would fit in between the wedges. The actual electrode would have multiple connected pads going towards the center. But this is a good first step and useful for helping me to figure out how the code works. I afixed it to some scrap backing from earlier vinyl cuts and covered it with scotch tape. I then ran Neil's output GUI to see the result.
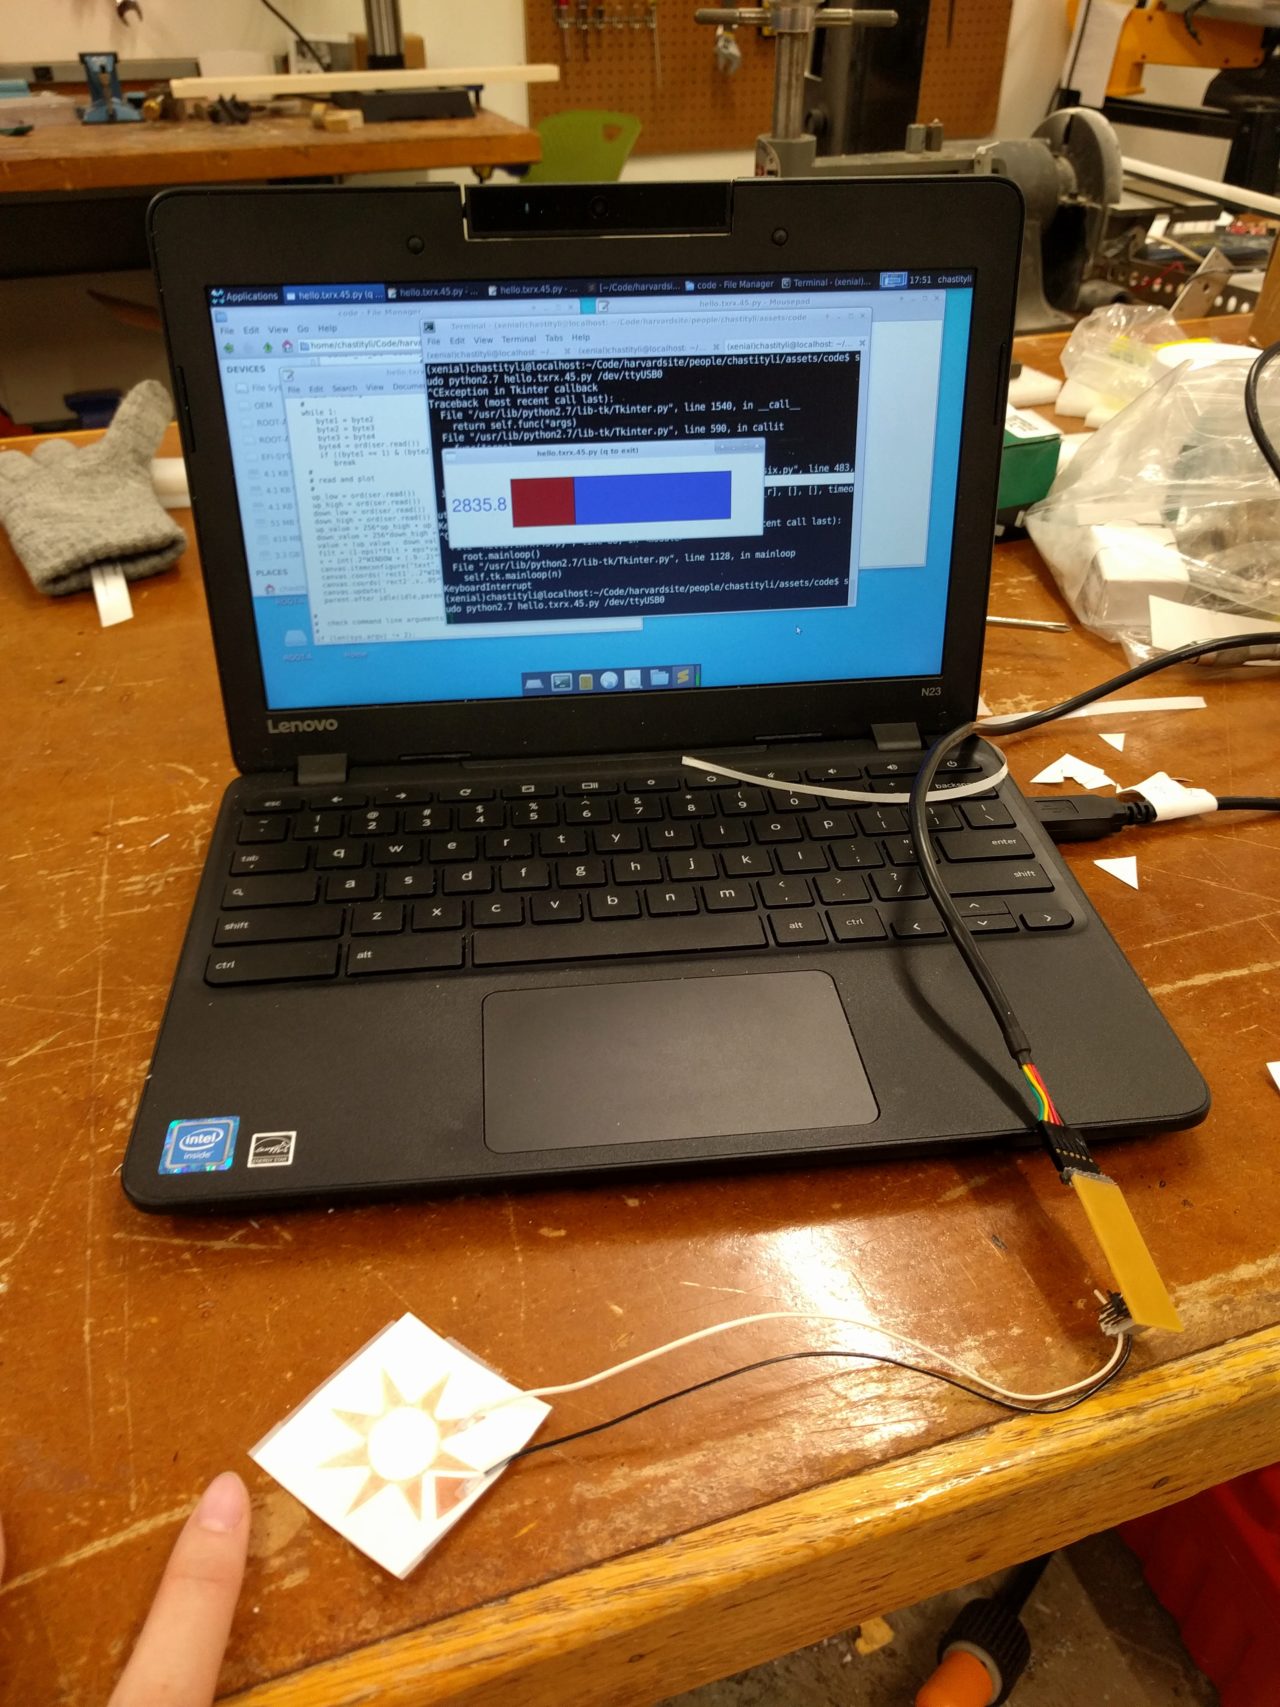
For my final project, I will have to use at least the ATtiny 44. Julia helped me to look over Neil's code to see how to add the functionality I want for my final project. I am getting a better understanding of how to use ADMUX and MUX to communicate with the computer. As for how the Python serial communication works, I have basically no idea. But I'm asking around (i.e. people who've used TKinter and Pyserial) for help. It helps that I'll be spending Thanksgiving break with someone who does this for a living. So, will be updating once I figure it out! Important note, because I know I will need it later, I need to use it later: to determine which serial port to use the command: python -m serial.tools.list_ports to list the ports. Then just append to the python *.py command
Special thanks to Rob, Olga, Will, and Julia for their help this week!