Molding and Casting
This week's assignment was to design a 3d object, mill it and use this model to cast a mold for final objects. Having the 3d design done in the software of our preference, the basic idea is that the work would be developed in 3 steps:
positive - 3d milled model
negative - mold
positive - final object
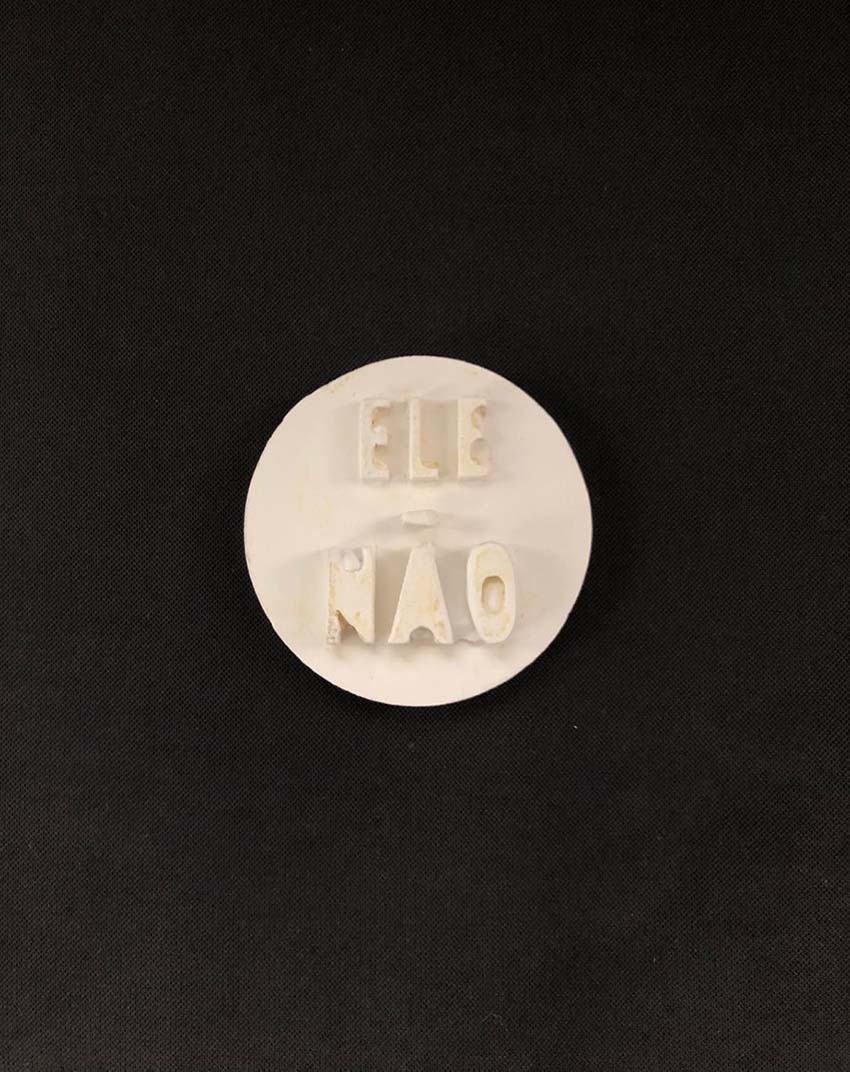
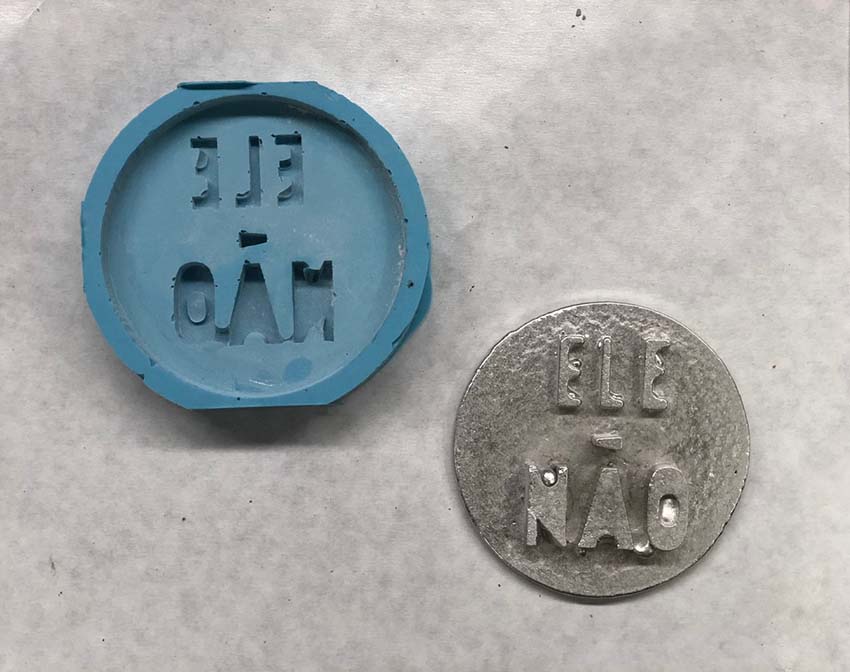
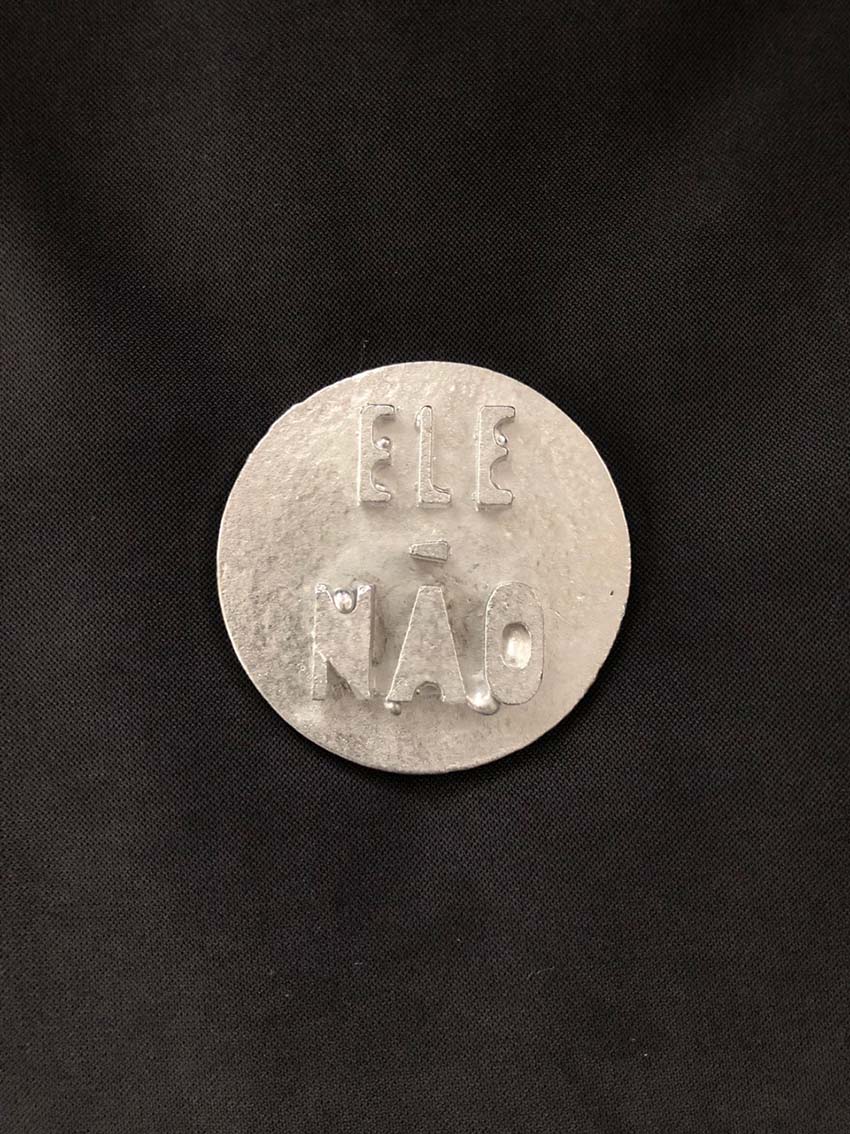
I decided to design a button, against the politician Jair Bolsonaro, for the Brazilian elections that happened last Sunday. The button has the saying ELE NÃO, from the popular hashtag #elenão that was used during his campaign. Unfortunately, Bolsonaro won. Thus, the buttons won't be used just as initially thought, on Sunday, but for the next 4 years.
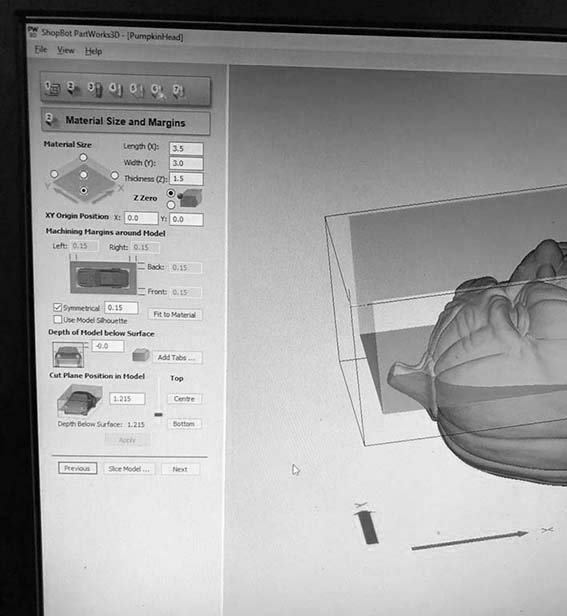
To start the 3d design of the bottom, I have made the initial drawing in Illustrator and then imported it to Rhino. Since the design is very basic, I just had the vector lines imported from illustrator and extruded it. While drawing the first sketch in illustrator, it was important to consider the diameter of the tool, to be sure that the endmill would be able to machine in between the letters and therefore build the intended shape (other than that, if there is not enough space for the tool, the machine won't consider this cutting paths and instead of your design you end up having an unformed mass). It is also crucial to consider a margin for the wax block in which the design will be milled so that you have borders to contain your casting material to build the mold. A good reference for the margin is to consider it as thick as the diameter of the milling tool, in this case, 0.15 inches. It is also important to note that different endmills, with different pits, make a different surface finish.
With the 3d design done, I have glued the piece of wax (3.5 x 3 x 1.5 inches) over an OSB board using the glue gun around the edges of the wax block. After that, I have screwed down the OSB piece on the machine bad, aligning the board parallel with the edges of the bed.
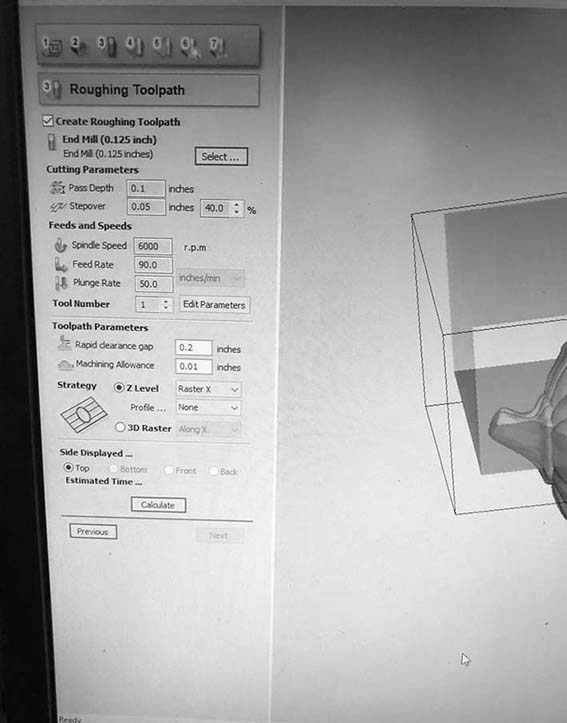
I have used the following settings to configure the cutting path:
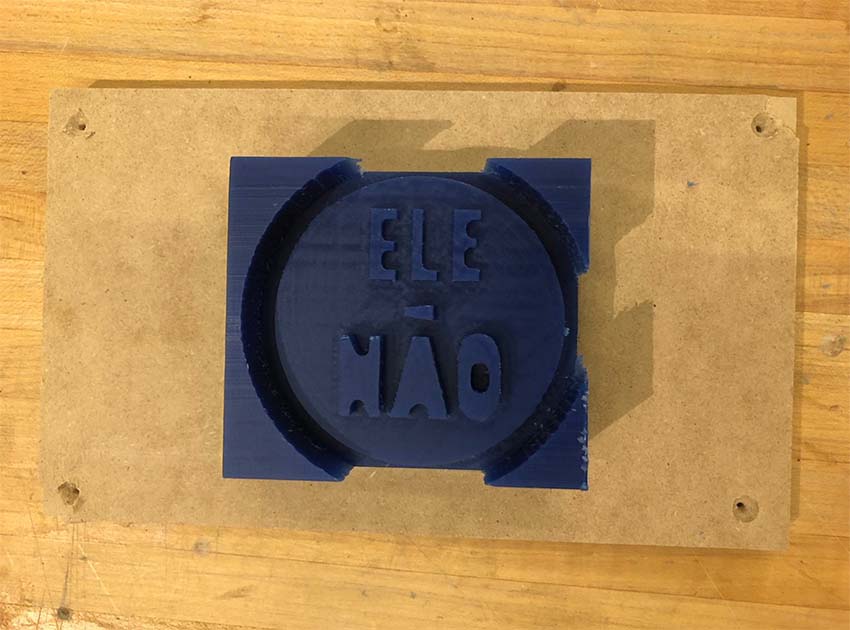
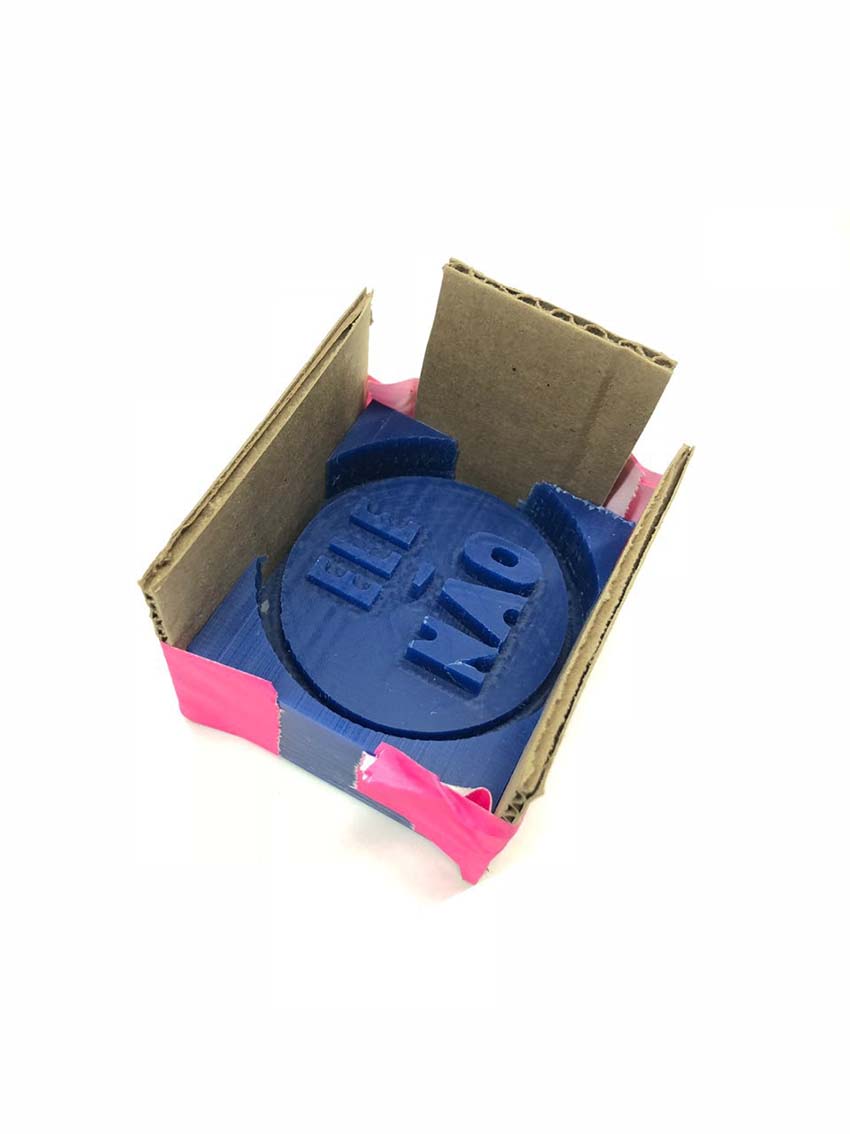
After milling, I realized my margins were smaller than they should, and I had holes in the borders. To fix that I have attached some pieces of cardboard.
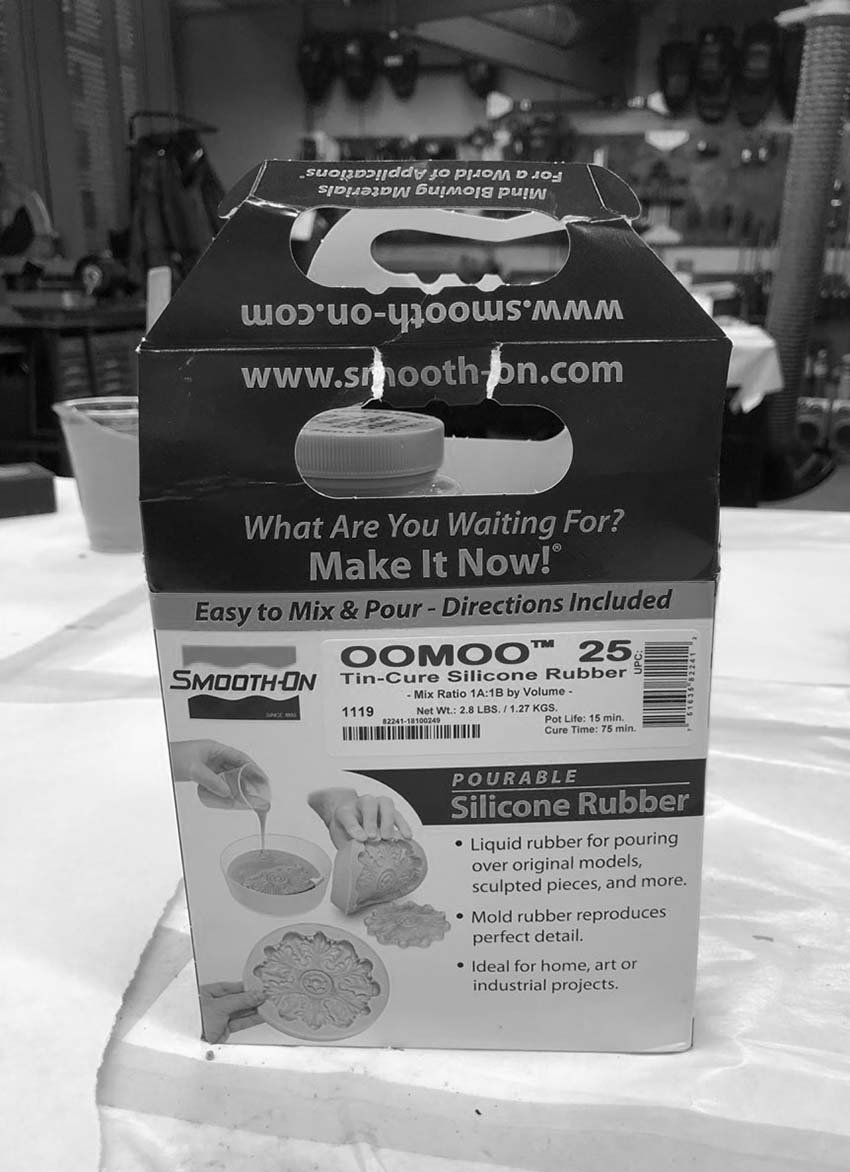
With the model done, the fun part began. The first step as to make the mold for casting with different materials. I used the OOMOO 25 silicon rubber, which is composed of two products - they should be mixed using the same volume of each to get the right proportion.

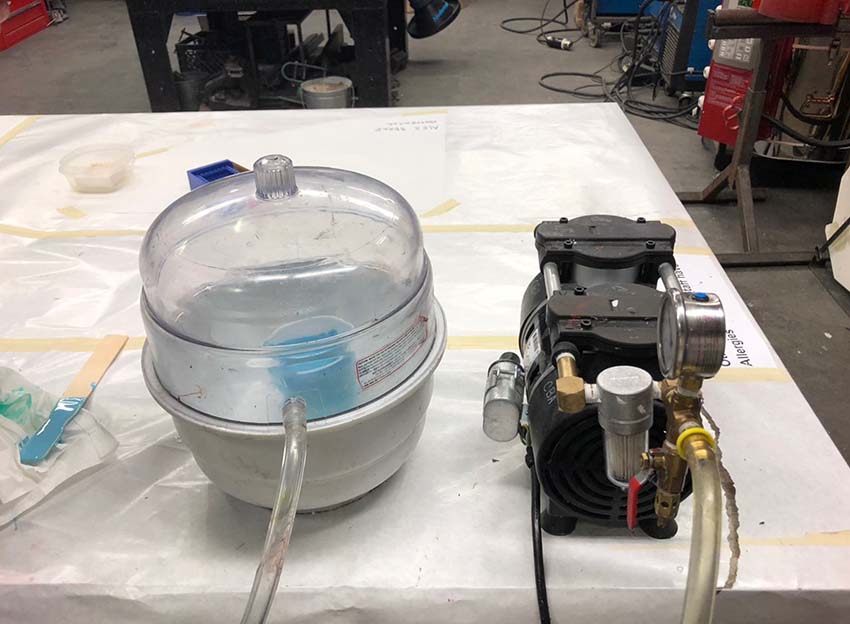
After mixing both well, I had them set in the vacuum machine for a couple of minutes to remove internal bubbles, so that the mold could be uniform and homogeneous. After that, I poured the solution into my wax model very gently, the tinner the liquid comes down, the easiest it is for remaining bubbles to fly out. It is also good to lean the model a bit and have the solution flowing diagonally, as serving beer into a glass. The OOMOO 25 has a 15 minute pot life and 75 minute cure time.

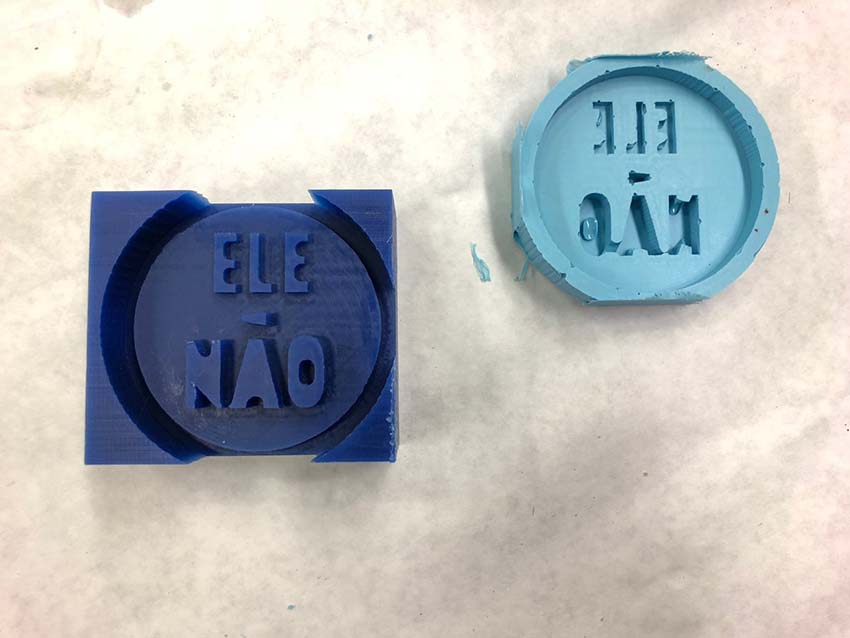
After the cure was complete I realized that there were some bubbles around my letters and inside their curves that would certainly impact the casting of the final object. I think the OOMOO is maybe to thick to flow in small meanders and details.
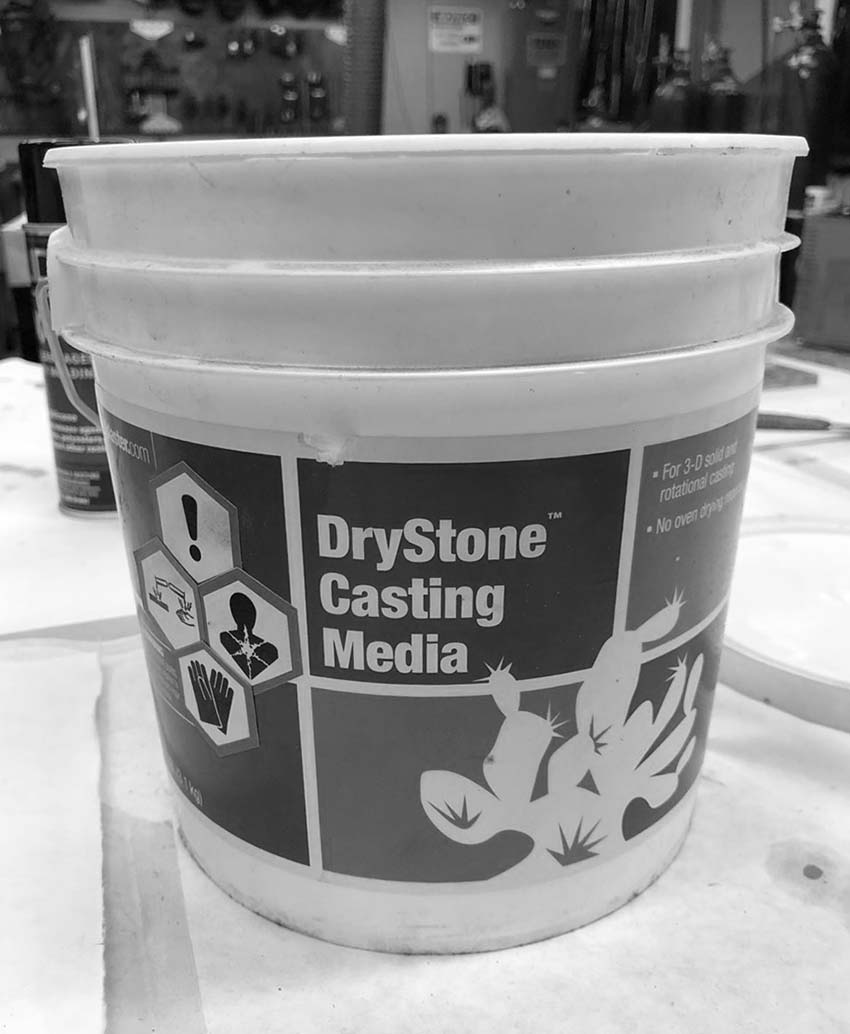
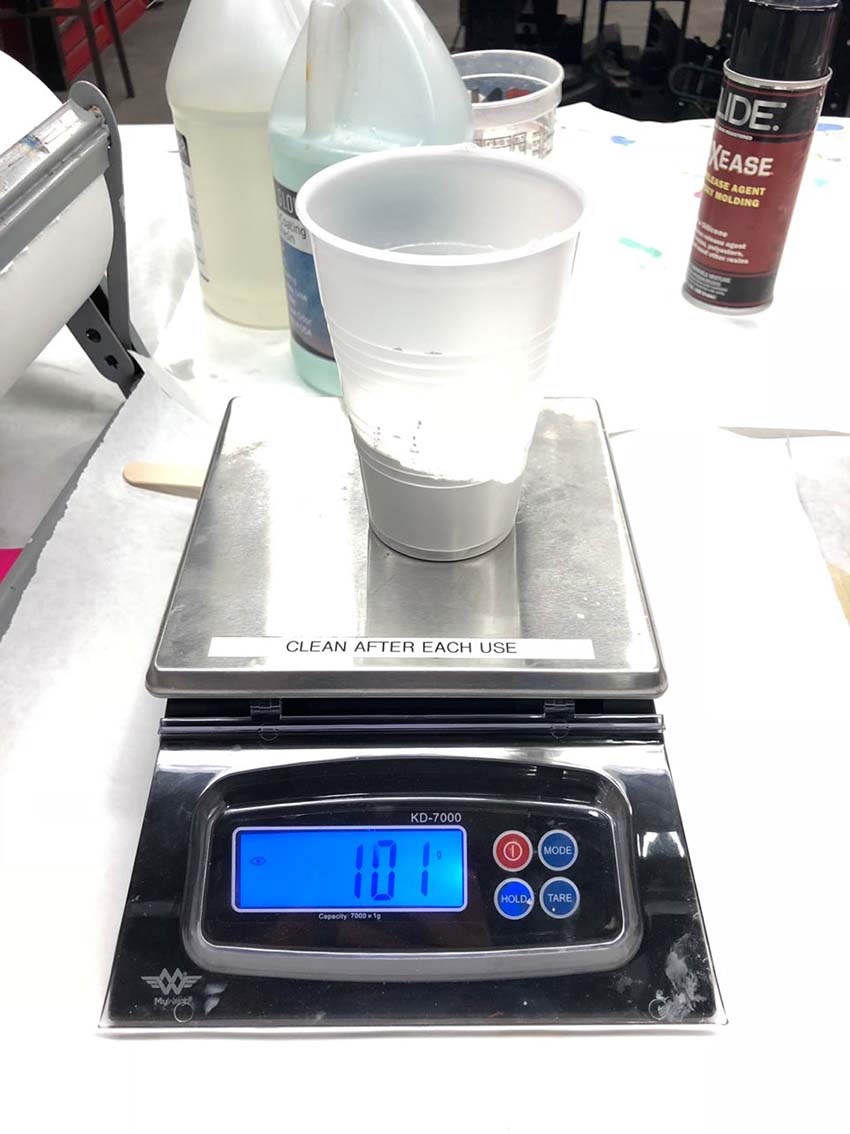
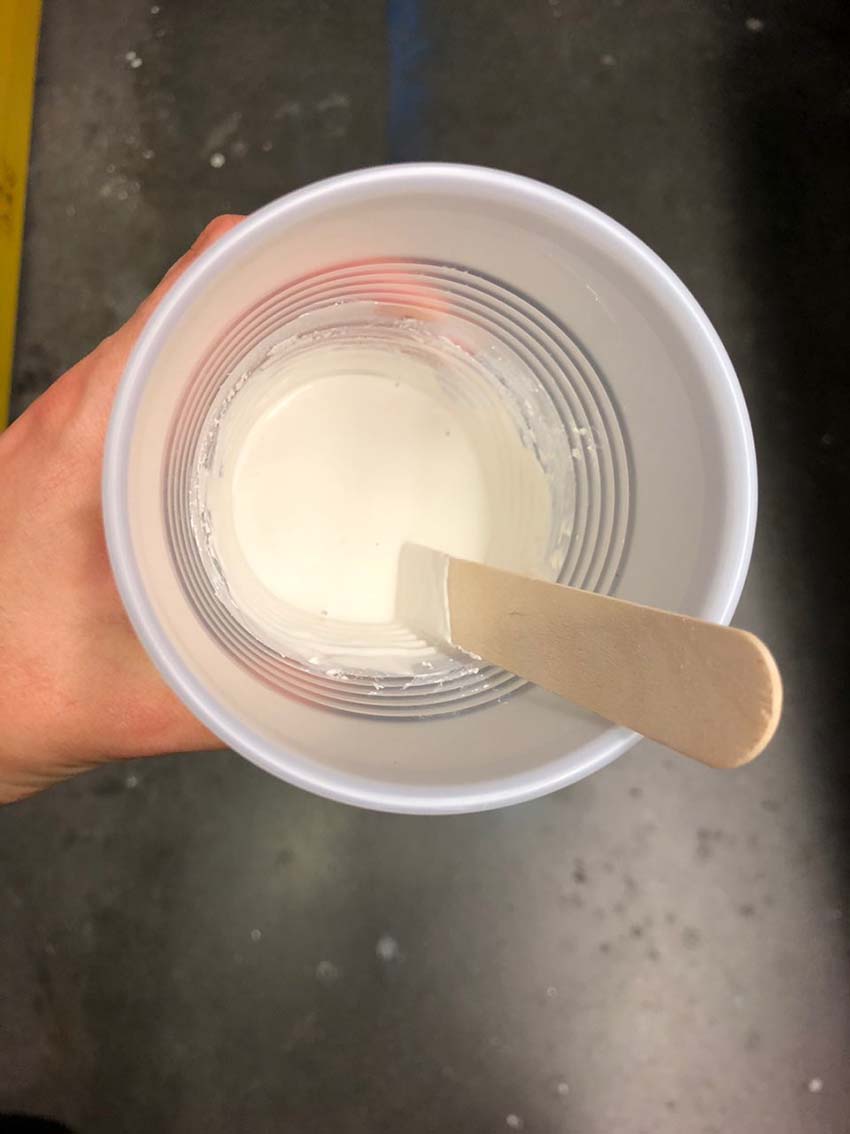
With the mold done, I have tried different casting materials. I have started with drystone, then with the epoxy resin and with metal (Bismuth 281). For all of them, it is crucial to follow the instructions properly, mainly in relation to the proportion of the materials so they cure and settle right.
Drystone:
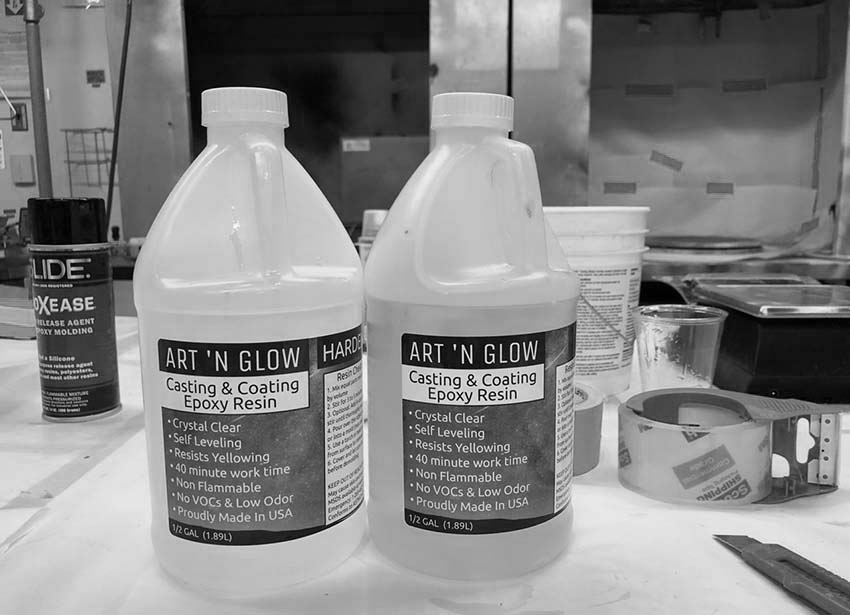
Epoxy Resin:
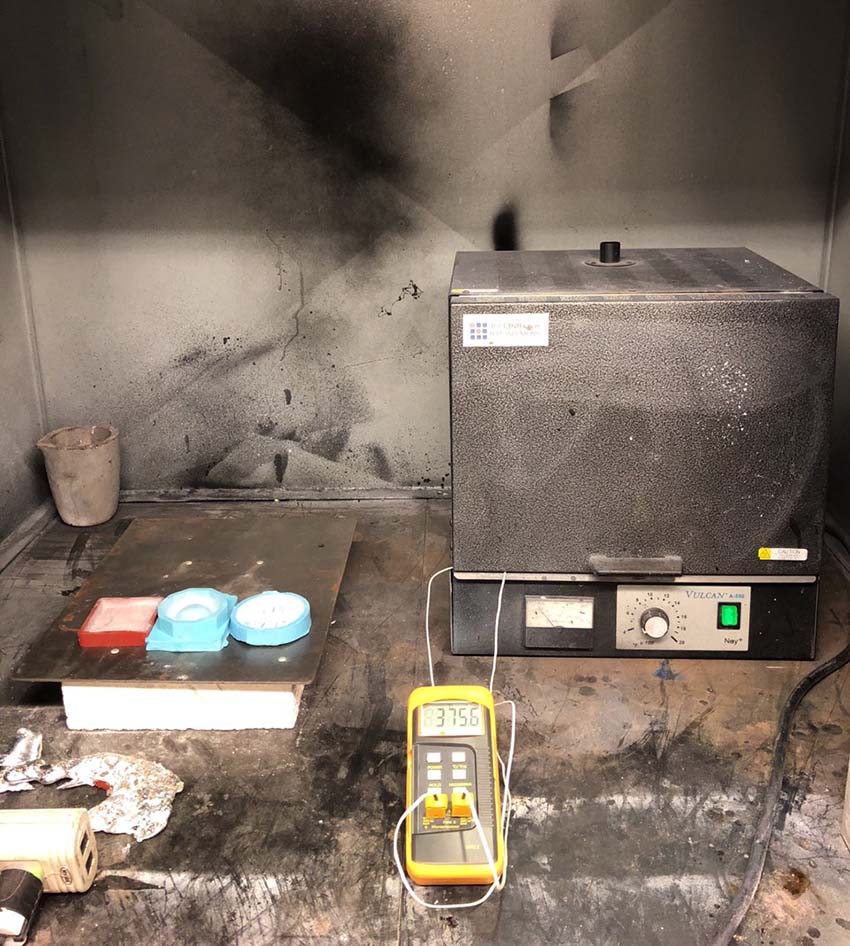
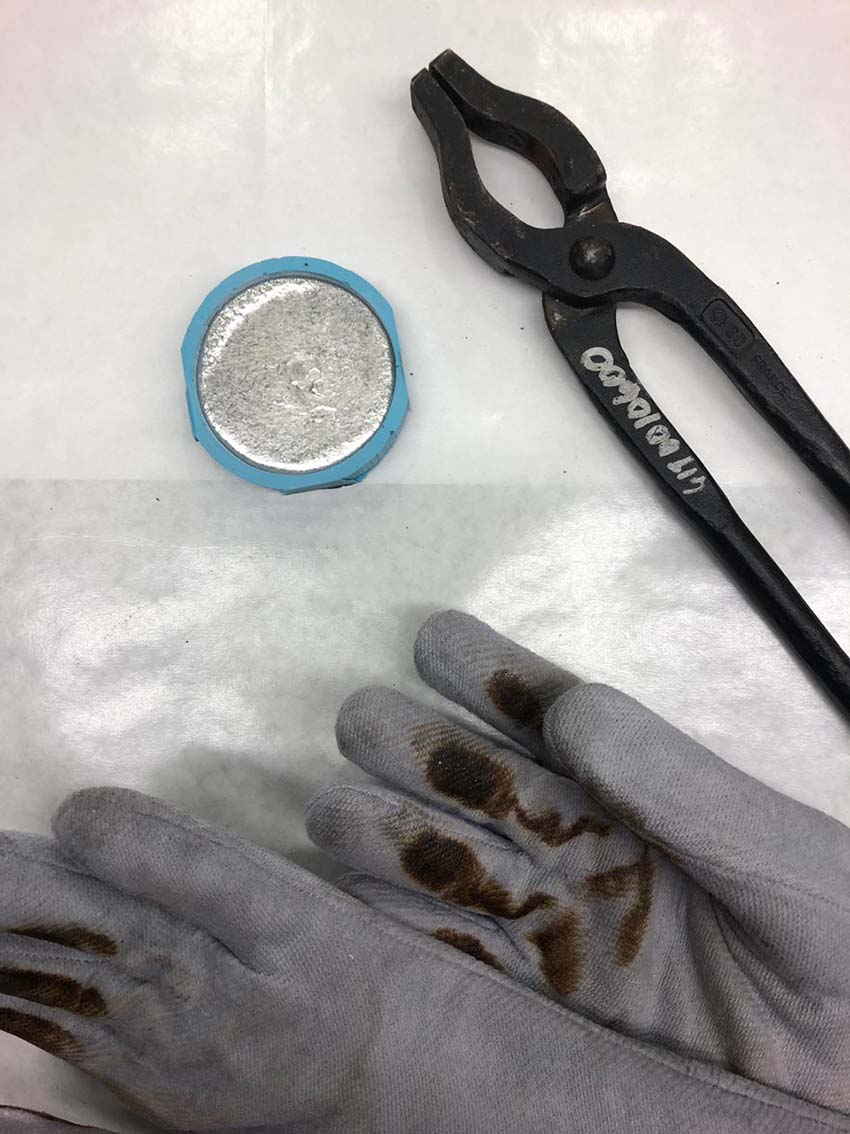
Metal:
For casting with metal, I have done a new mold using the Mold Max 60, which is a high heat resistant rubber compound. However, I had an issue with the scale and apparently mixed the materials in the wrong proportion and my mold did not cure on time, it was supposed to be done after 24 hours but after this time period, it was still pretty liquid. Even so, it was possible to cast metal, after we found out that we could use an aloi (Bismuth 281) that has a lower melting temperature (400º farenheits) in the OOMOO 25 mold.

This week's assignment was to design a 3d object, mill it and use this model to cast a mold for final objects. Having the 3d design done in the software of our preference, the basic idea is that the work would be developed in 3 steps:
positive - 3d milled model
negative - mold
positive - final object
I decided to design a button, against the politician Jair Bolsonaro, for the Brazilian elections that happened last Sunday. The button has the saying ELE NÃO, from the popular hashtag #elenão that was used during his campaign. Unfortunately, Bolsonaro won. Thus, the buttons won't be used just as initially thought, on Sunday, but for the next 4 years.
To start the 3d design of the bottom, I have made the initial drawing in Illustrator and then imported it to Rhino. Since the design is very basic, I just had the vector lines imported from illustrator and extruded it. While drawing the first sketch in illustrator, it was important to consider the diameter of the tool, to be sure that the endmill would be able to machine in between the letters and therefore build the intended shape (other than that, if there is not enough space for the tool, the machine won't consider this cutting paths and instead of your design you end up having an unformed mass). It is also crucial to consider a margin for the wax block in which the design will be milled so that you have borders to contain your casting material to build the mold. A good reference for the margin is to consider it as thick as the diameter of the milling tool, in this case, 0.15 inches. It is also important to note that different endmills, with different pits, make a different surface finish.
With the 3d design done, I have glued the piece of wax (3.5 x 3 x 1.5 inches) over an OSB board using the glue gun around the edges of the wax block. After that, I have screwed down the OSB piece on the machine bad, aligning the board parallel with the edges of the bed.
I have used the following settings to configure the cutting path:
After milling, I realized my margins were smaller than they should, and I had holes in the borders. To fix that I have attached some pieces of cardboard.
With the model done, the fun part began. The first step as to make the mold for casting with different materials. I used the OOMOO 25 silicon rubber, which is composed of two products - they should be mixed using the same volume of each to get the right proportion.
After mixing both well, I had them set in the vacuum machine for a couple of minutes to remove internal bubbles, so that the mold could be uniform and homogeneous. After that, I poured the solution into my wax model very gently, the tinner the liquid comes down, the easiest it is for remaining bubbles to fly out. It is also good to lean the model a bit and have the solution flowing diagonally, as serving beer into a glass. The OOMOO 25 has a 15 minute pot life and 75 minute cure time.
After the cure was complete I realized that there were some bubbles around my letters and inside their curves that would certainly impact the casting of the final object. I think the OOMOO is maybe to thick to flow in small meanders and details.
With the mold done, I have tried different casting materials. I have started with drystone, then with the epoxy resin and with metal (Bismuth 281). For all of them, it is crucial to follow the instructions properly, mainly in relation to the proportion of the materials so they cure and settle right.
Drystone:
Epoxy Resin:
Metal:
For casting with metal, I have done a new mold using the Mold Max 60, which is a high heat resistant rubber compound. However, I had an issue with the scale and apparently mixed the materials in the wrong proportion and my mold did not cure on time, it was supposed to be done after 24 hours but after this time period, it was still pretty liquid. Even so, it was possible to cast metal, after we found out that we could use an aloi (Bismuth 281) that has a lower melting temperature (400º farenheits) in the OOMOO 25 mold.