Week 14 - Wildcard
There’re so many fun project in wildcard week!!! I decided to take USB Profile, Waterjet, Vacuum Form! (But probably focus on USB profile)
USB profile
Useful links
Questions
Choose clock
Ask for Ben’s help in gitlab issue. He said we have some 16MHz crystal in our stock.
(Maybe a @bzy question, thanks!)

I'm looking for the correct clock for USB (8MHz crystal or 16 MHz resonator in fab inventory?).

I found [Andrew Mao's page](http://fab.cba.mit.edu/classes/863.14/people/andrew_mao/week11/), he said:

* In order to use Full-speed (12 Mbit/s) USB, the microcontroller needs to be able to generate a precise 48 MHz clock with a deviation of no more than 0.25%. Since resonators have 0.5% tolerance, This means only quartz crystals can be used, and moreover, they need to evenly divide into this frequency in order for a phase-locked loop to generate this clock. For the **ATMega16U2, this will require an 8MHz or 16MHz crystal - no substitutes.**

And another blog [FabFTDI](https://ppatil.pages.cba.mit.edu/FabFTDI/) said:

* The USB controller needs a precise clock, therefore, **an external 16MHz resonator** is used as a precise clock source (note- eventhough the resonator is not as precise as a crystal, its precision is sufficient for a USB 2.0 full speed device).
Ben’s answer:
Not in standard fab inventory. However, EECS stockroom has lots of the following parts:


ABLS-8.000MHZ-B2-T (unit cost $0.28)

ABLS-16.000MHZ-B2-T (unit cost $0.30)

ABM3-16.000MHZ-D2Y-T (unit cost $0.69)

ABM3-8.000MHZ-D2Y-T (unit cost $0.63) (note: ESR 140 ohms)

The first two are largeish HC49 and the second two are smallish (but still largeish) ABM3.
ATmega16U2
Andrew Mao’s documentation is very helpful.
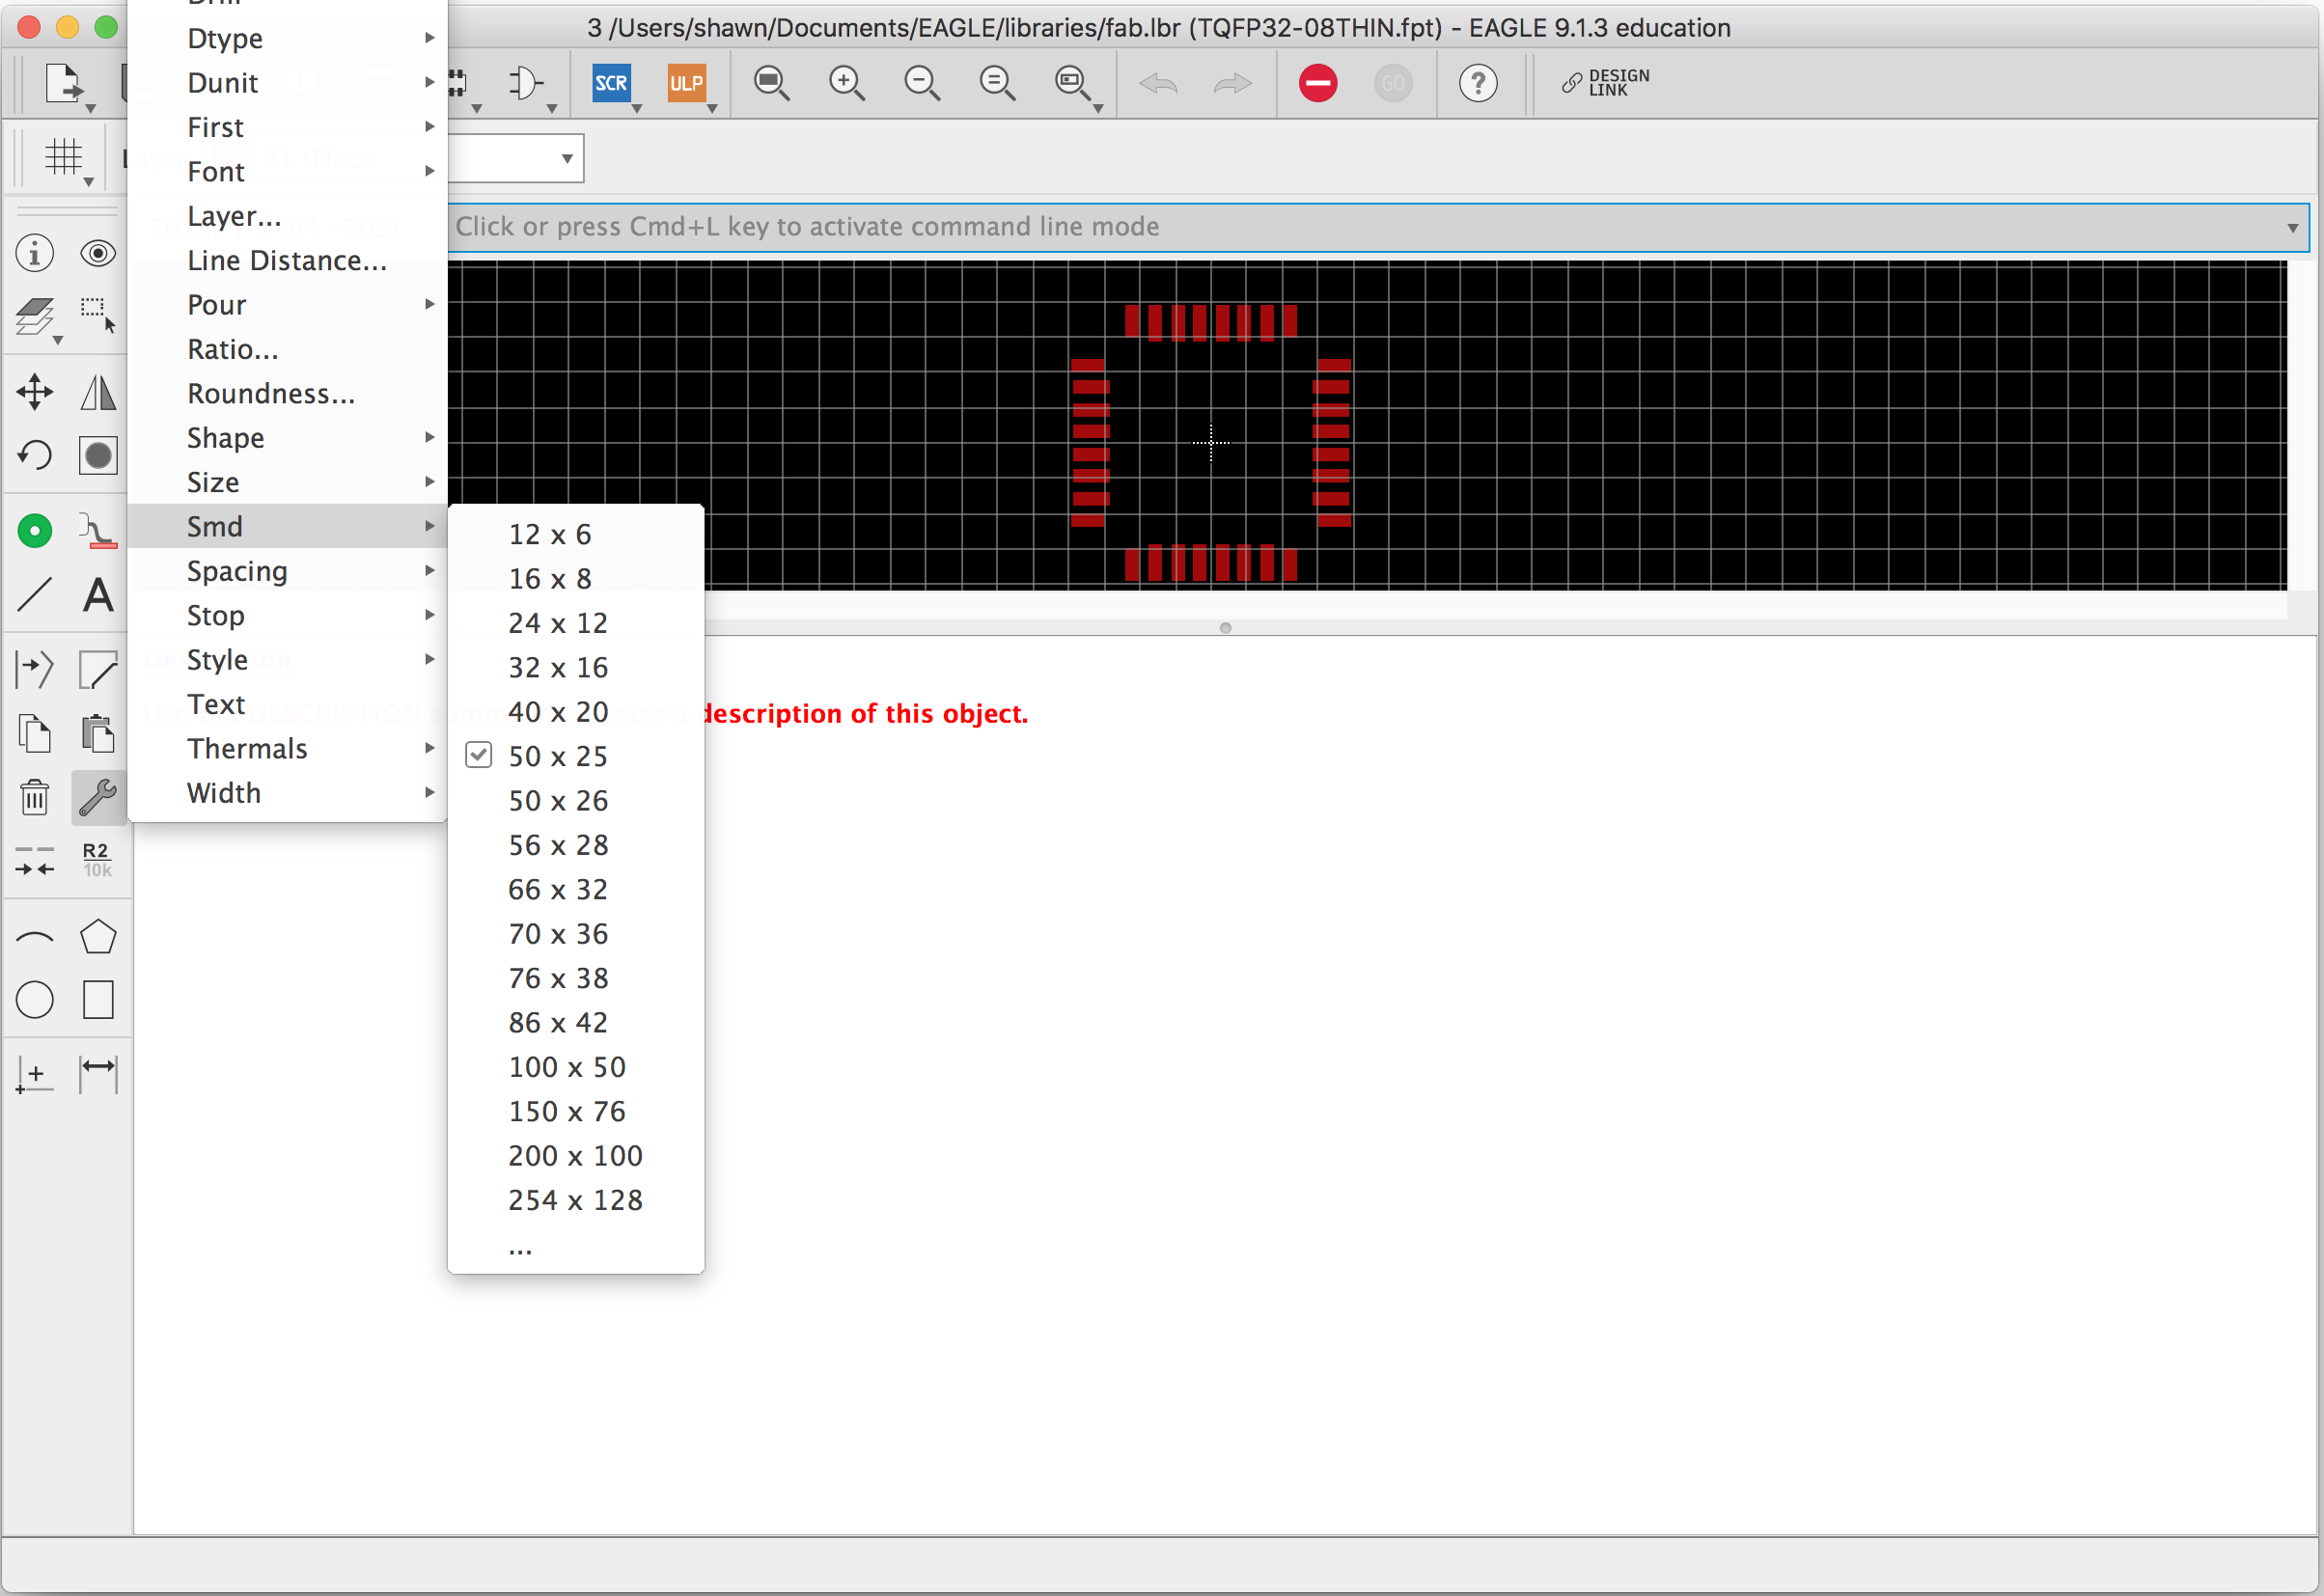
Because the pin is much closer to each other, we need to change the pins’ SMD size to be milled.
In Eagle, we could:
- Open Library Manager
- Choose the library to modify and click Edit
- Double click the footprint that need to be modified
- Click Change -> SMD -> … to type in the desired size
- Click the pad to change (Or right-click the pad to change property)
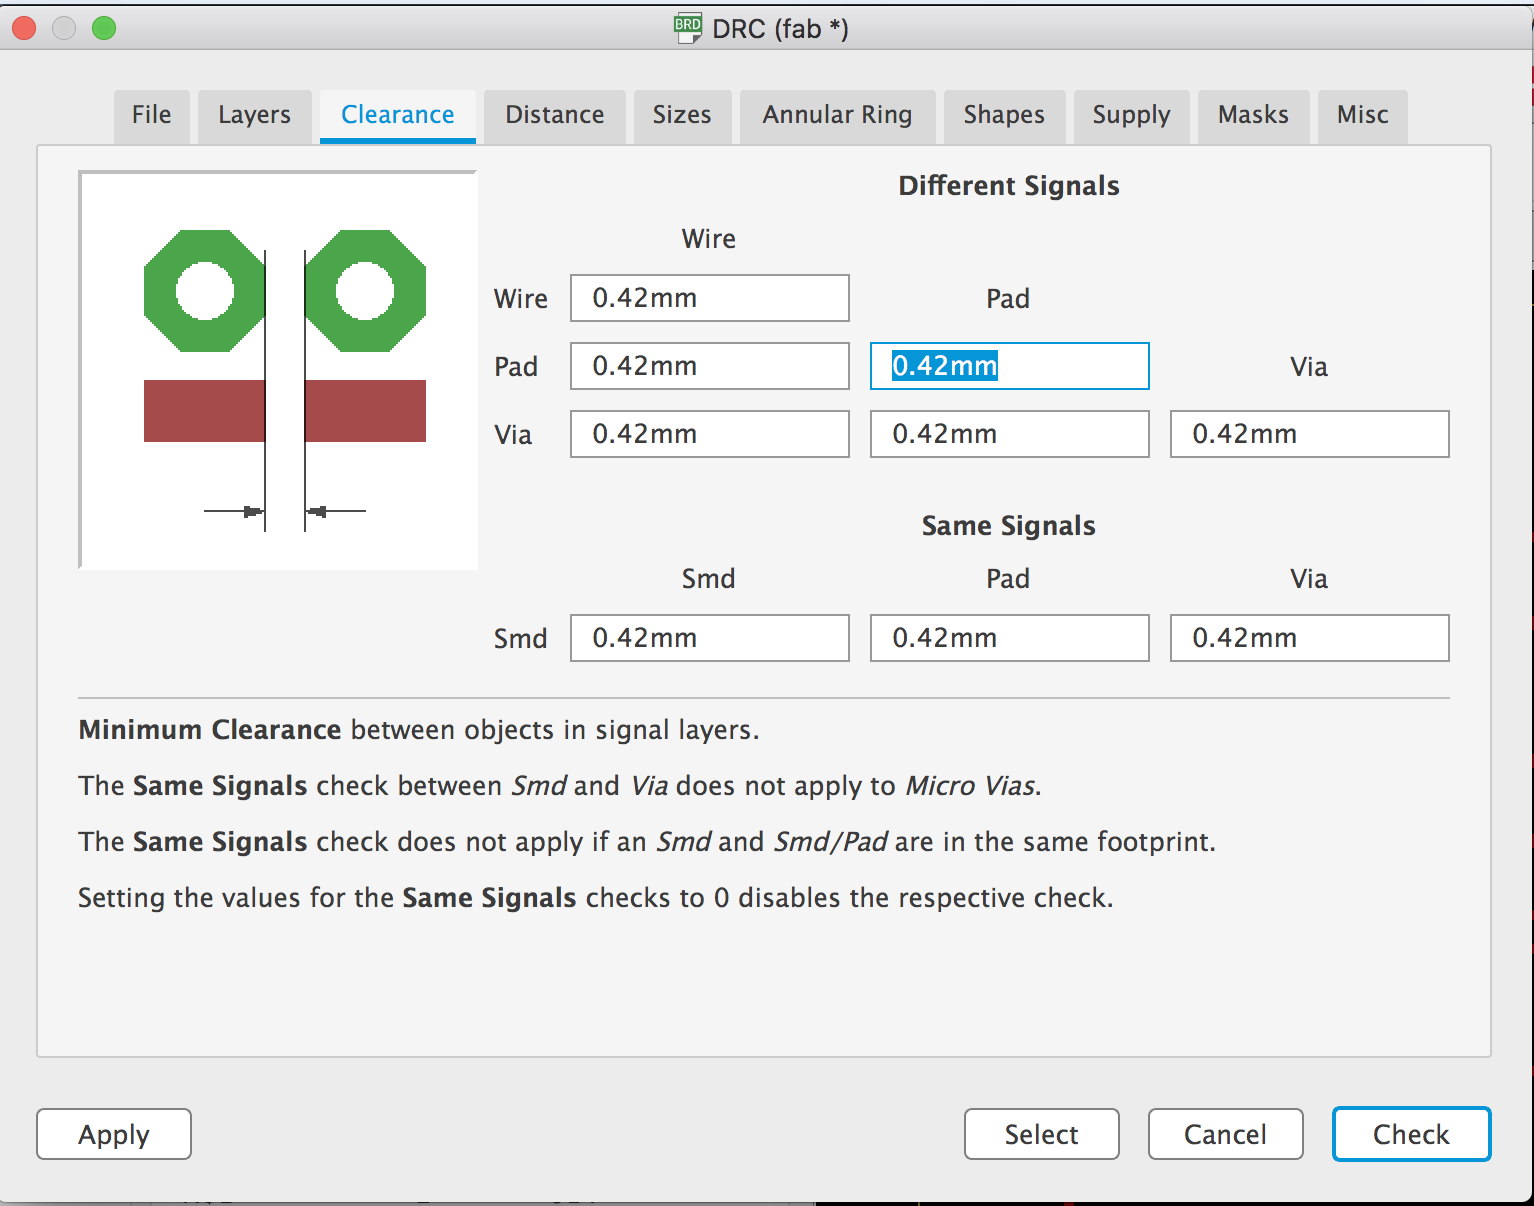
Also for the micro-usb connecter, the pad will be too closed too. We could change the Eagle DRC:
These two parameter will be helpful to tune. (I changed Minimum Width from 10mil to 8mil)

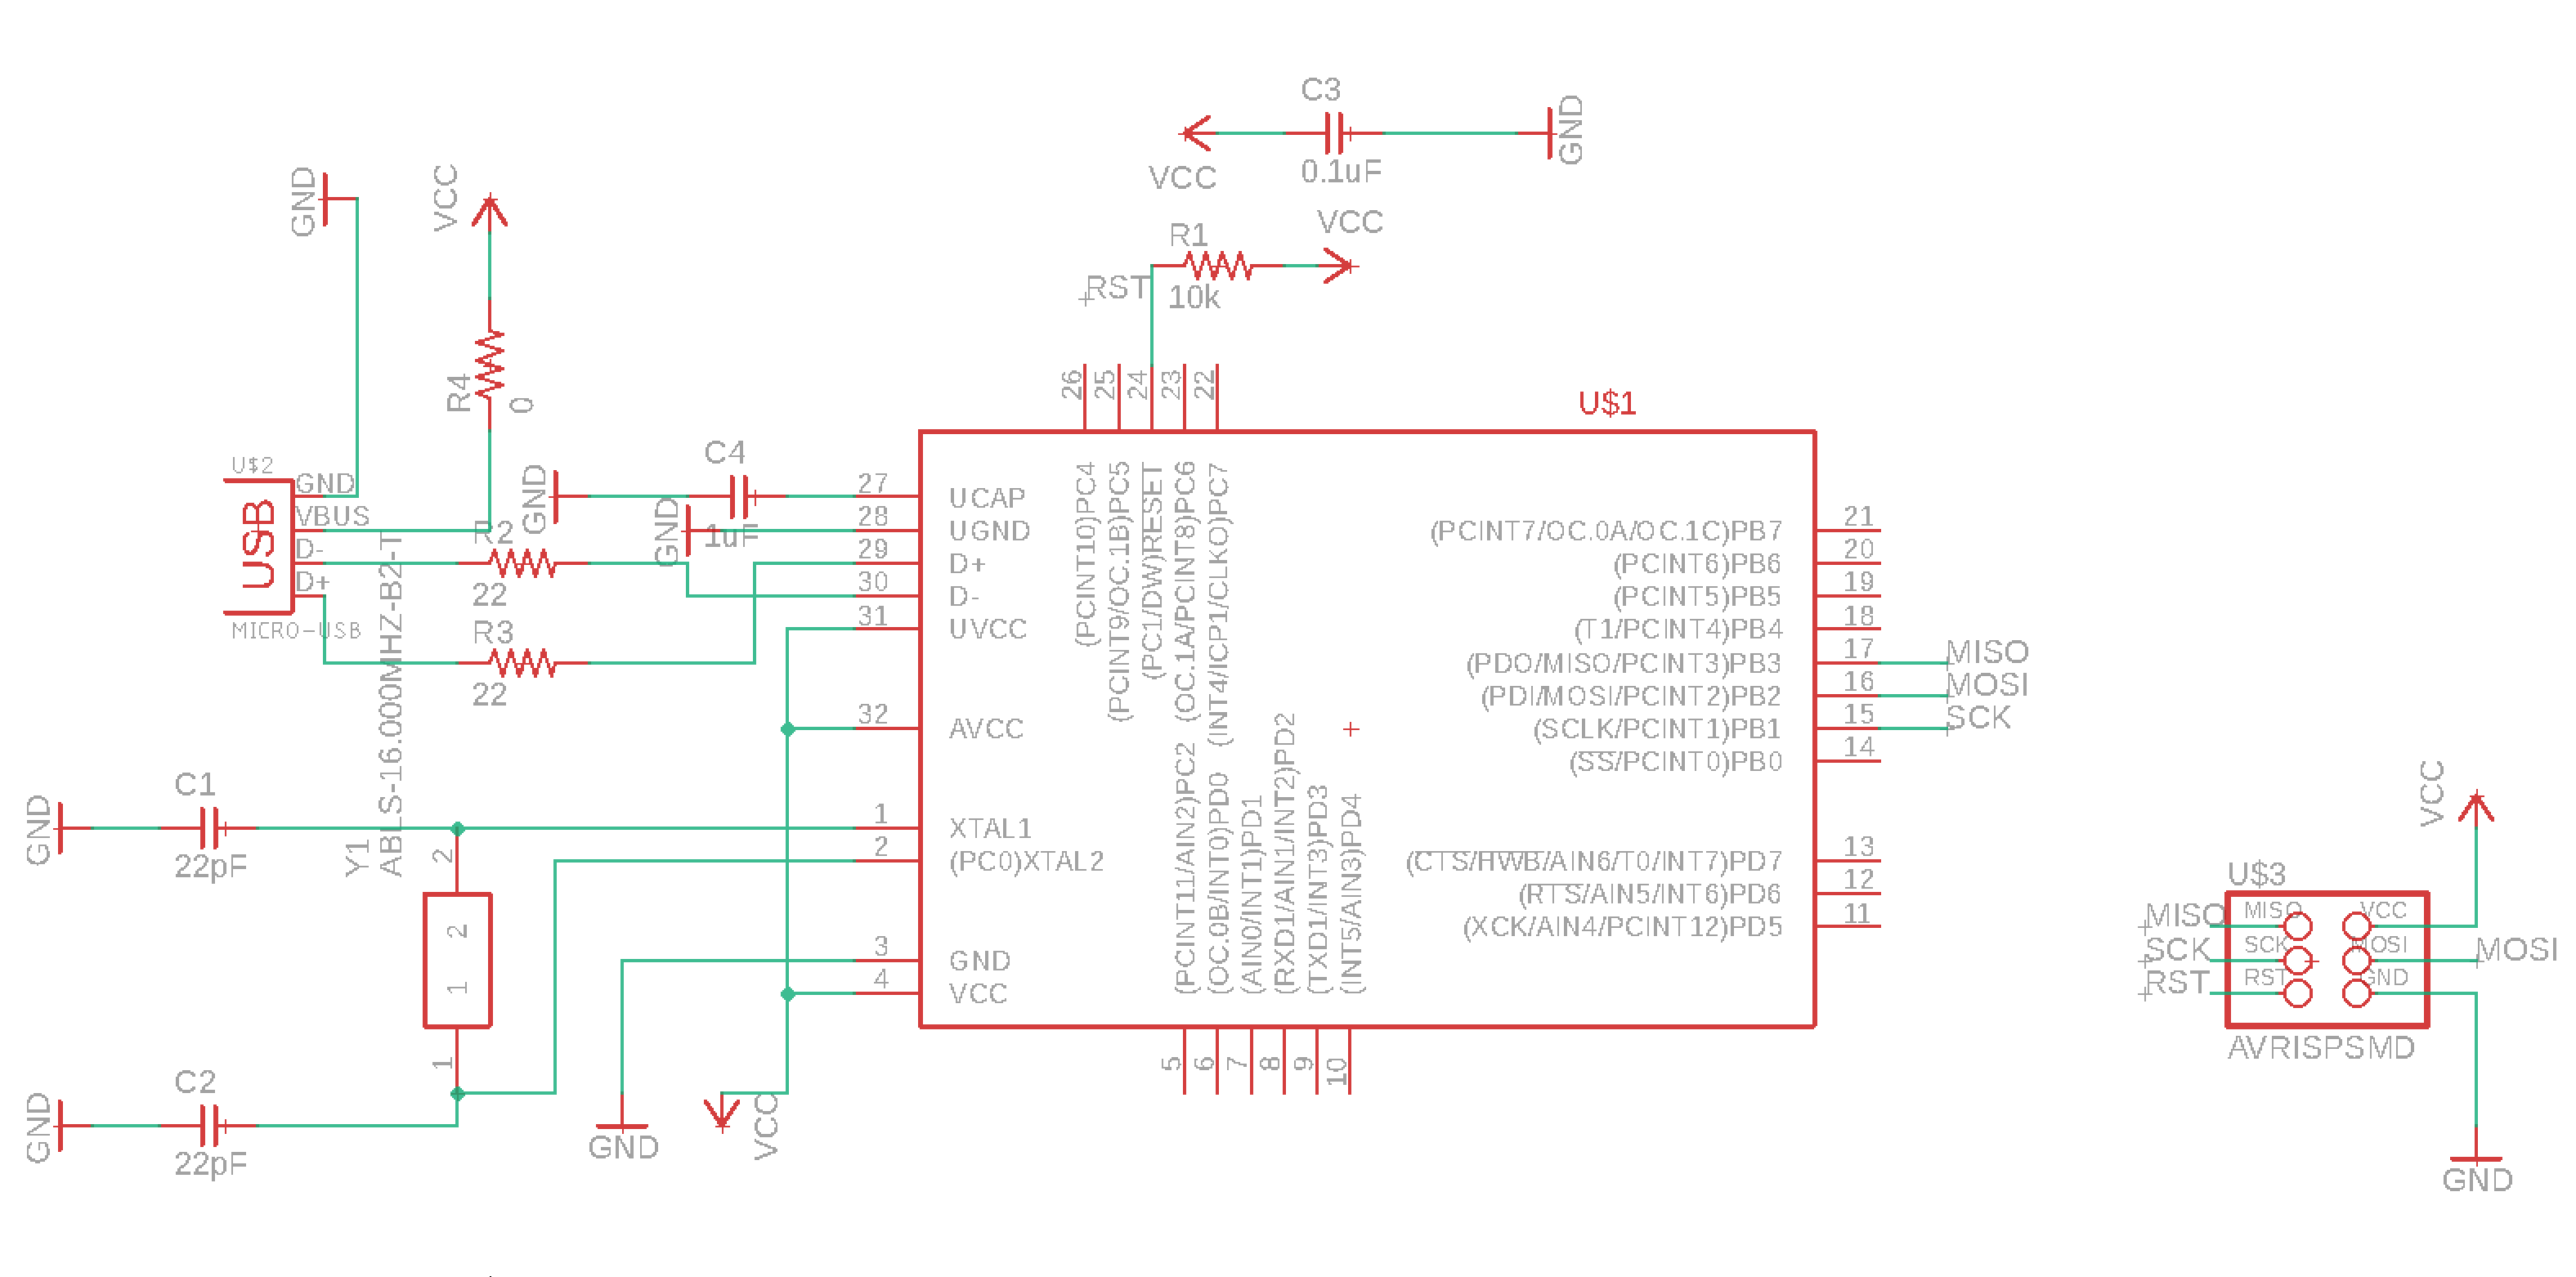
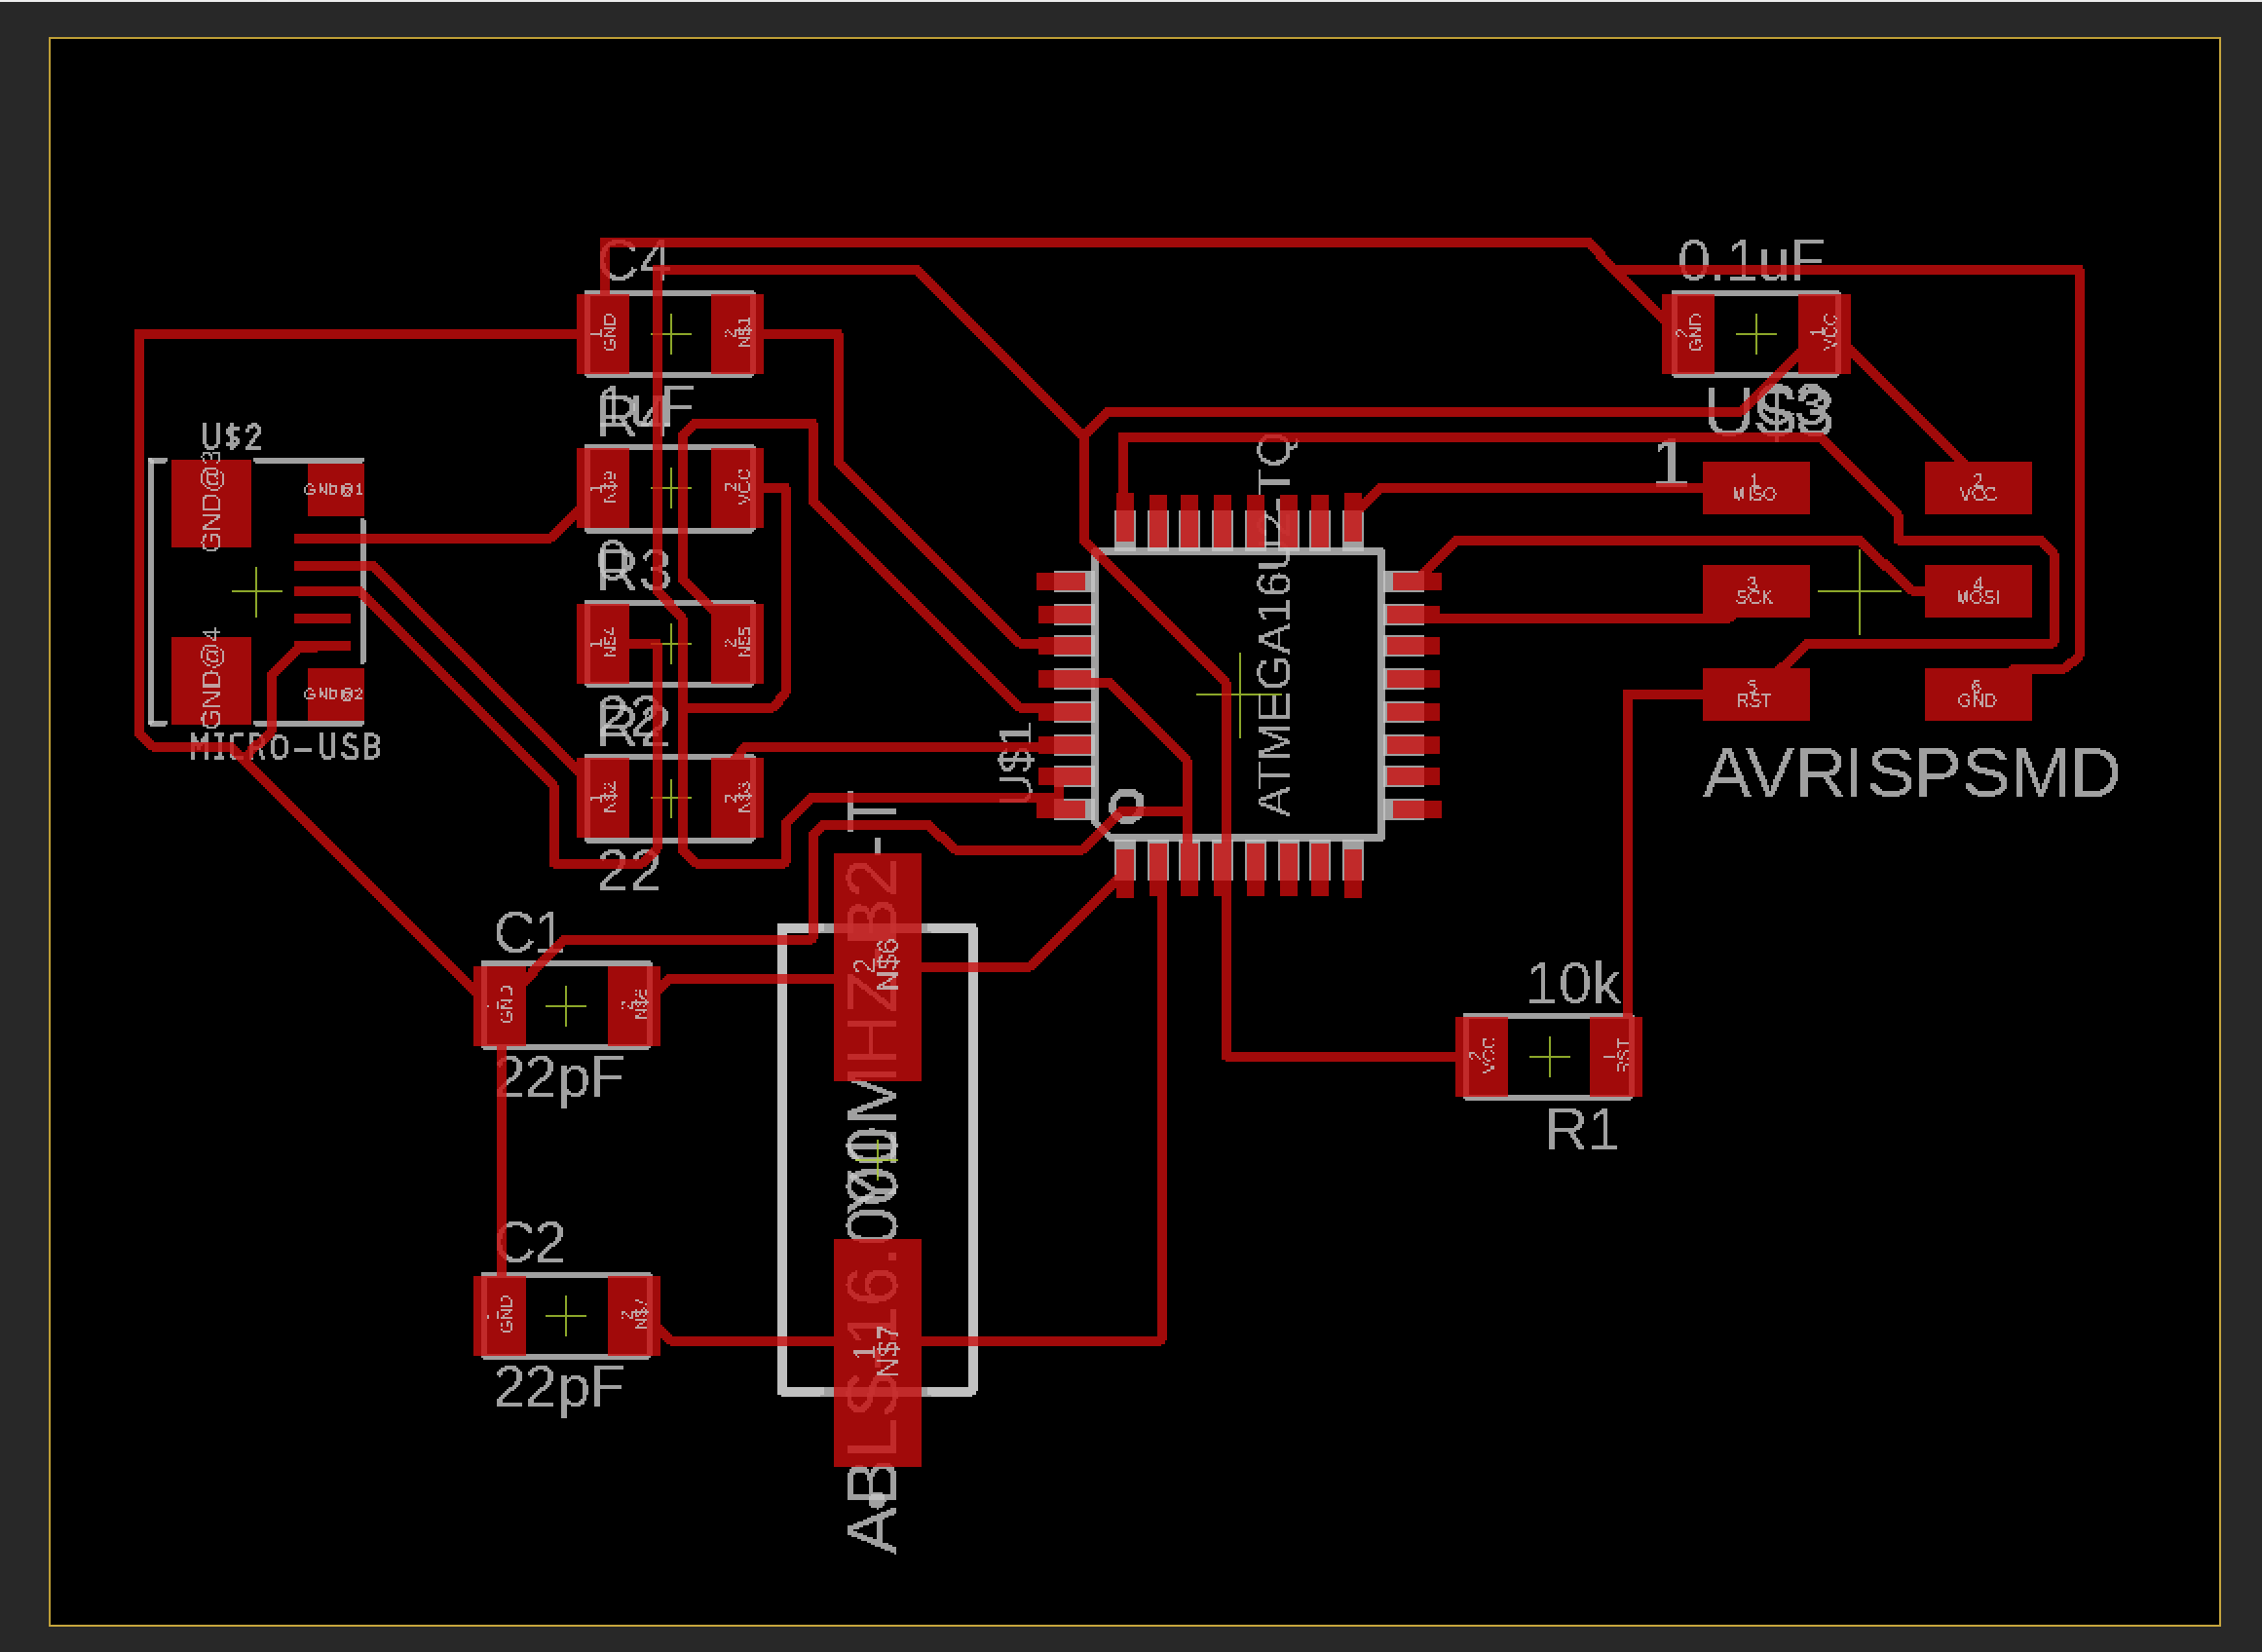
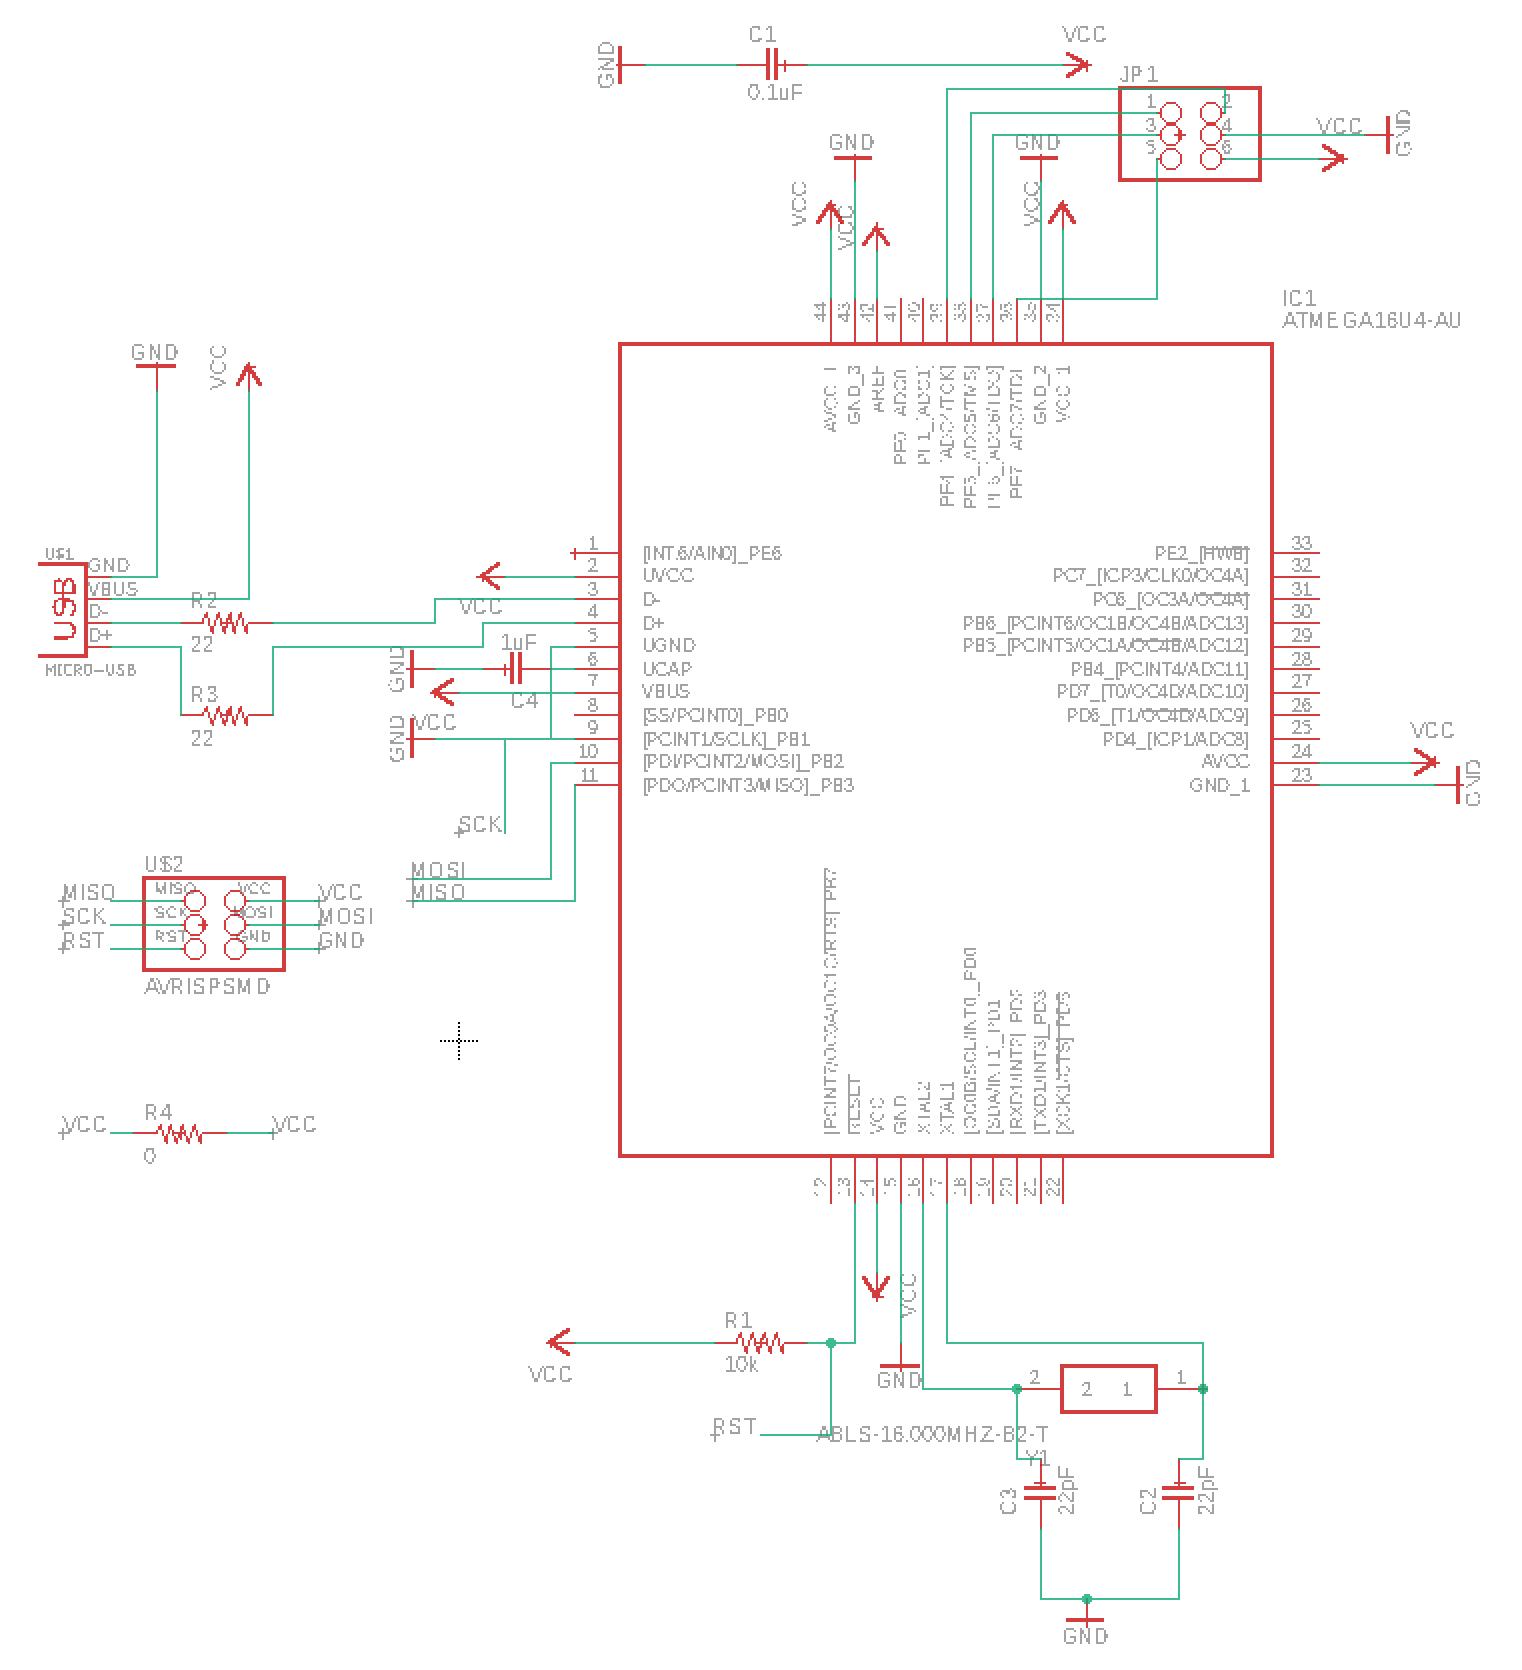
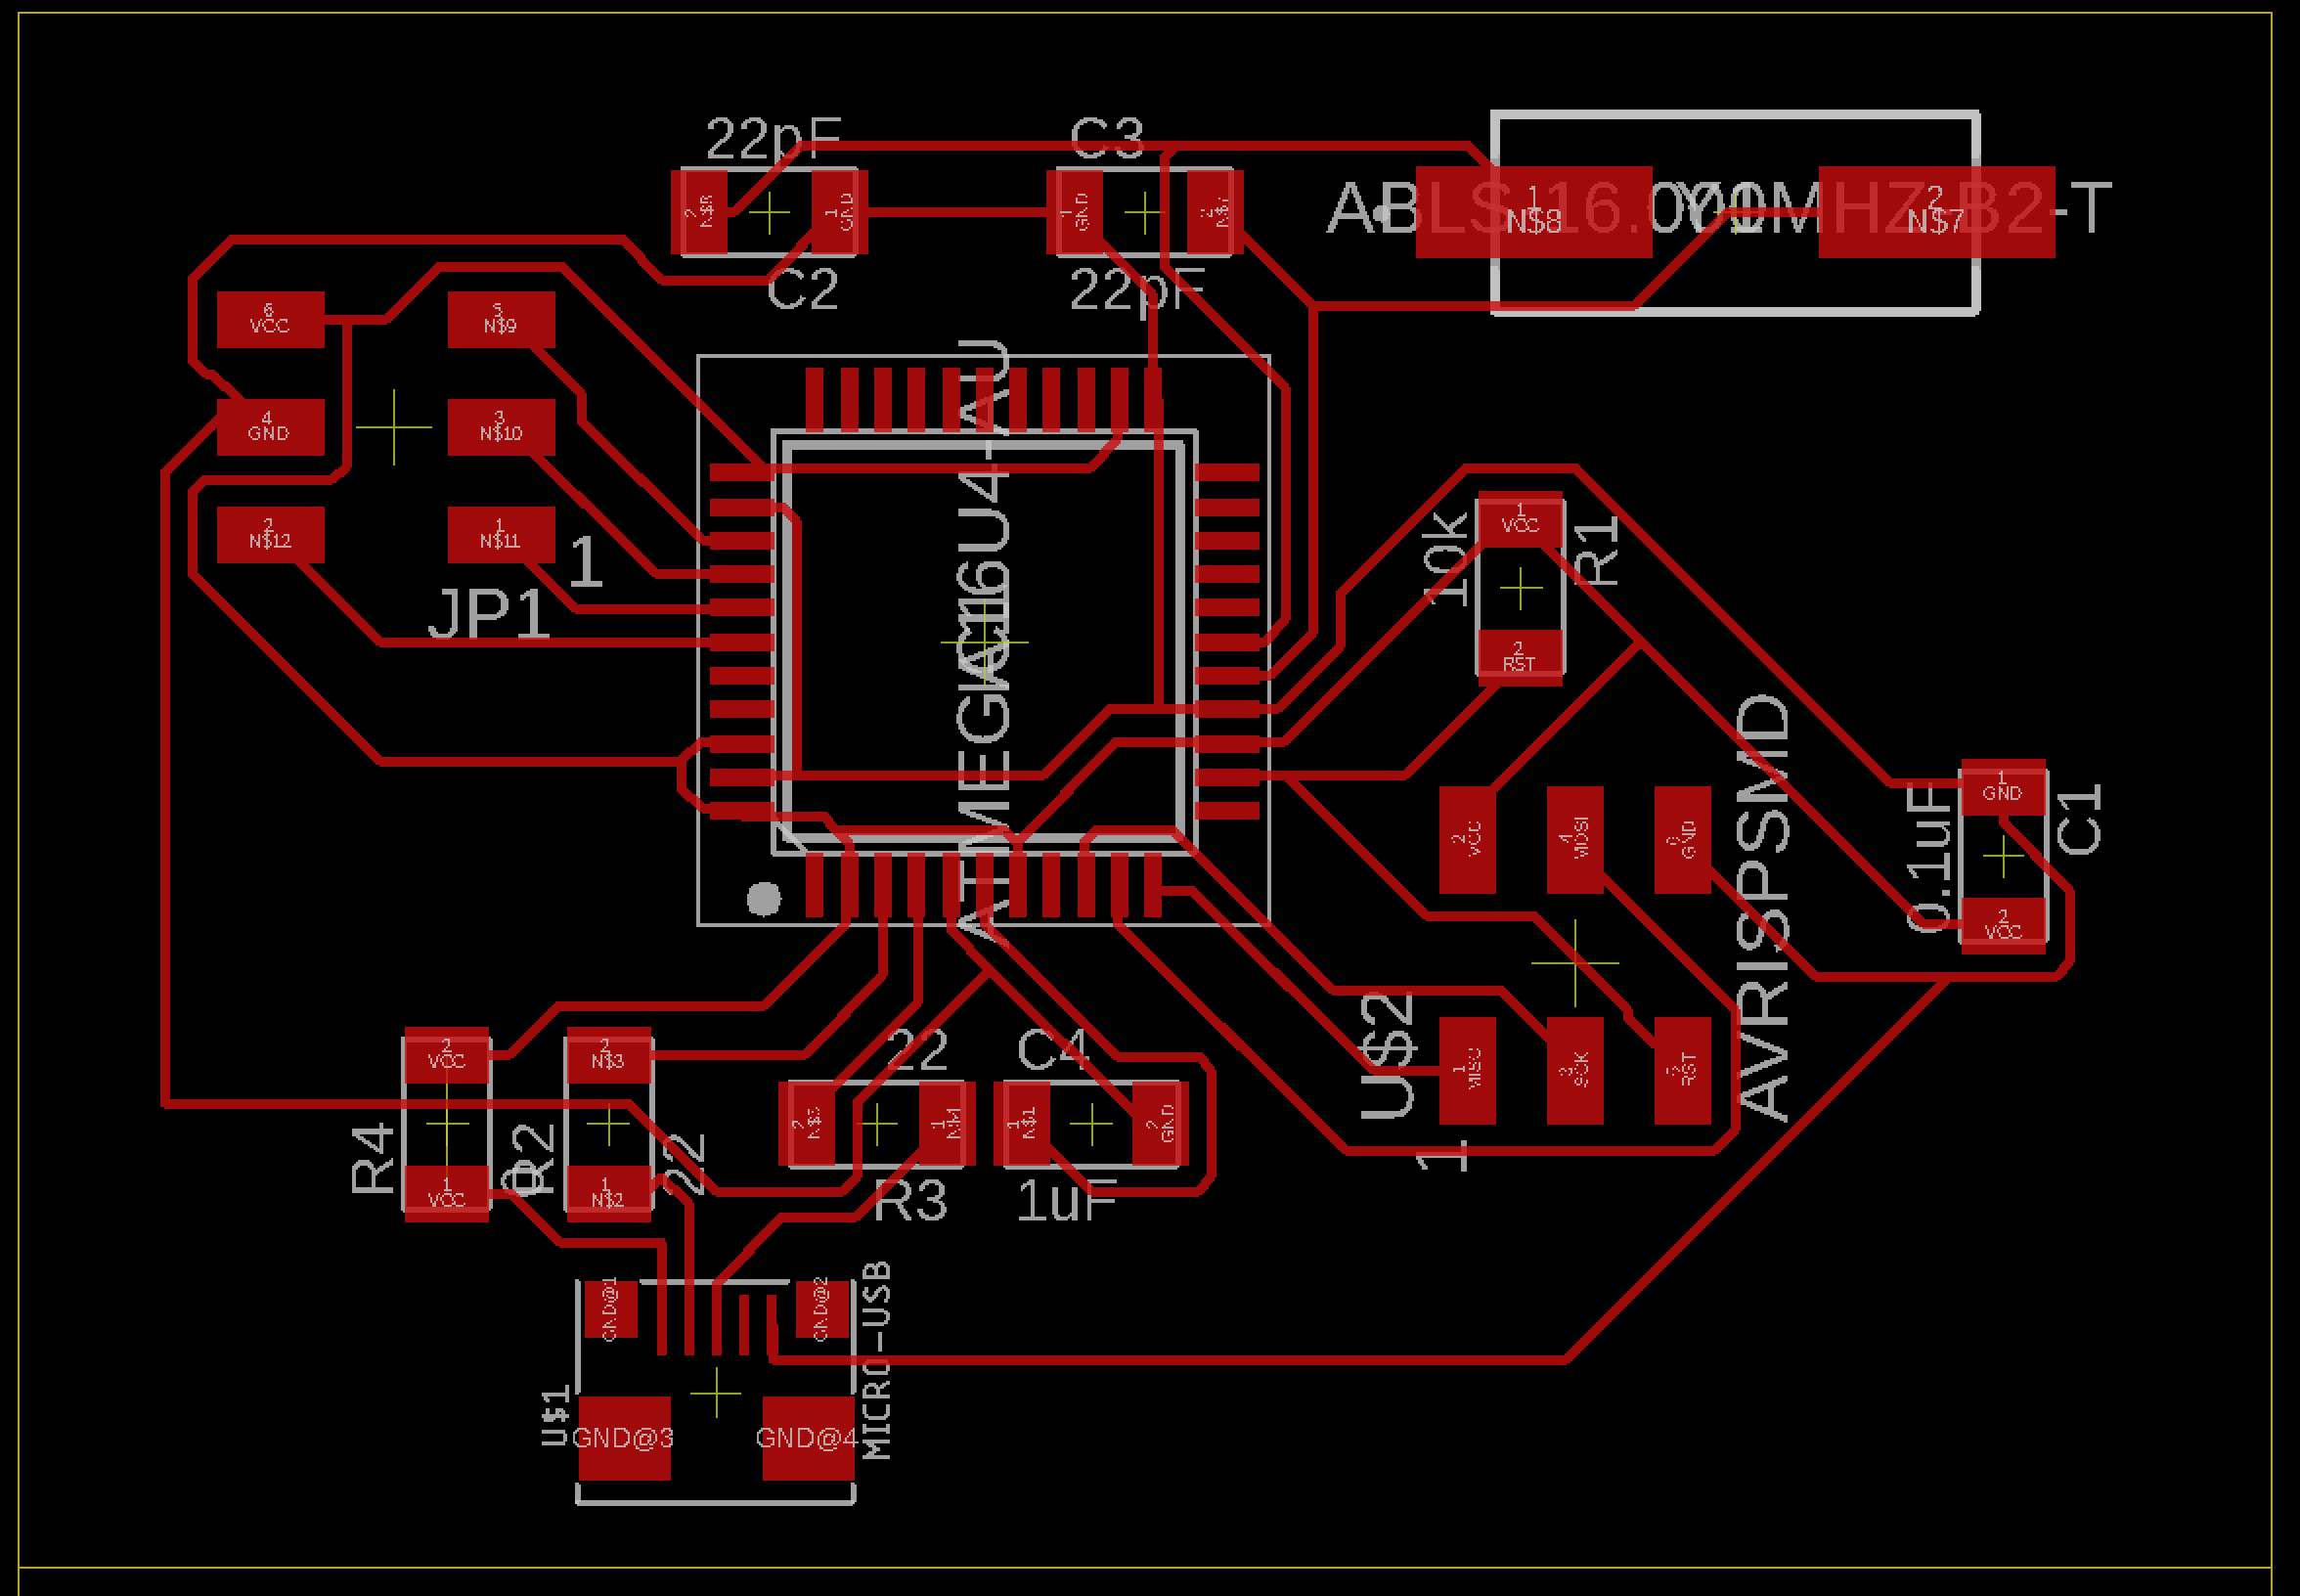
Here’s the schematic:
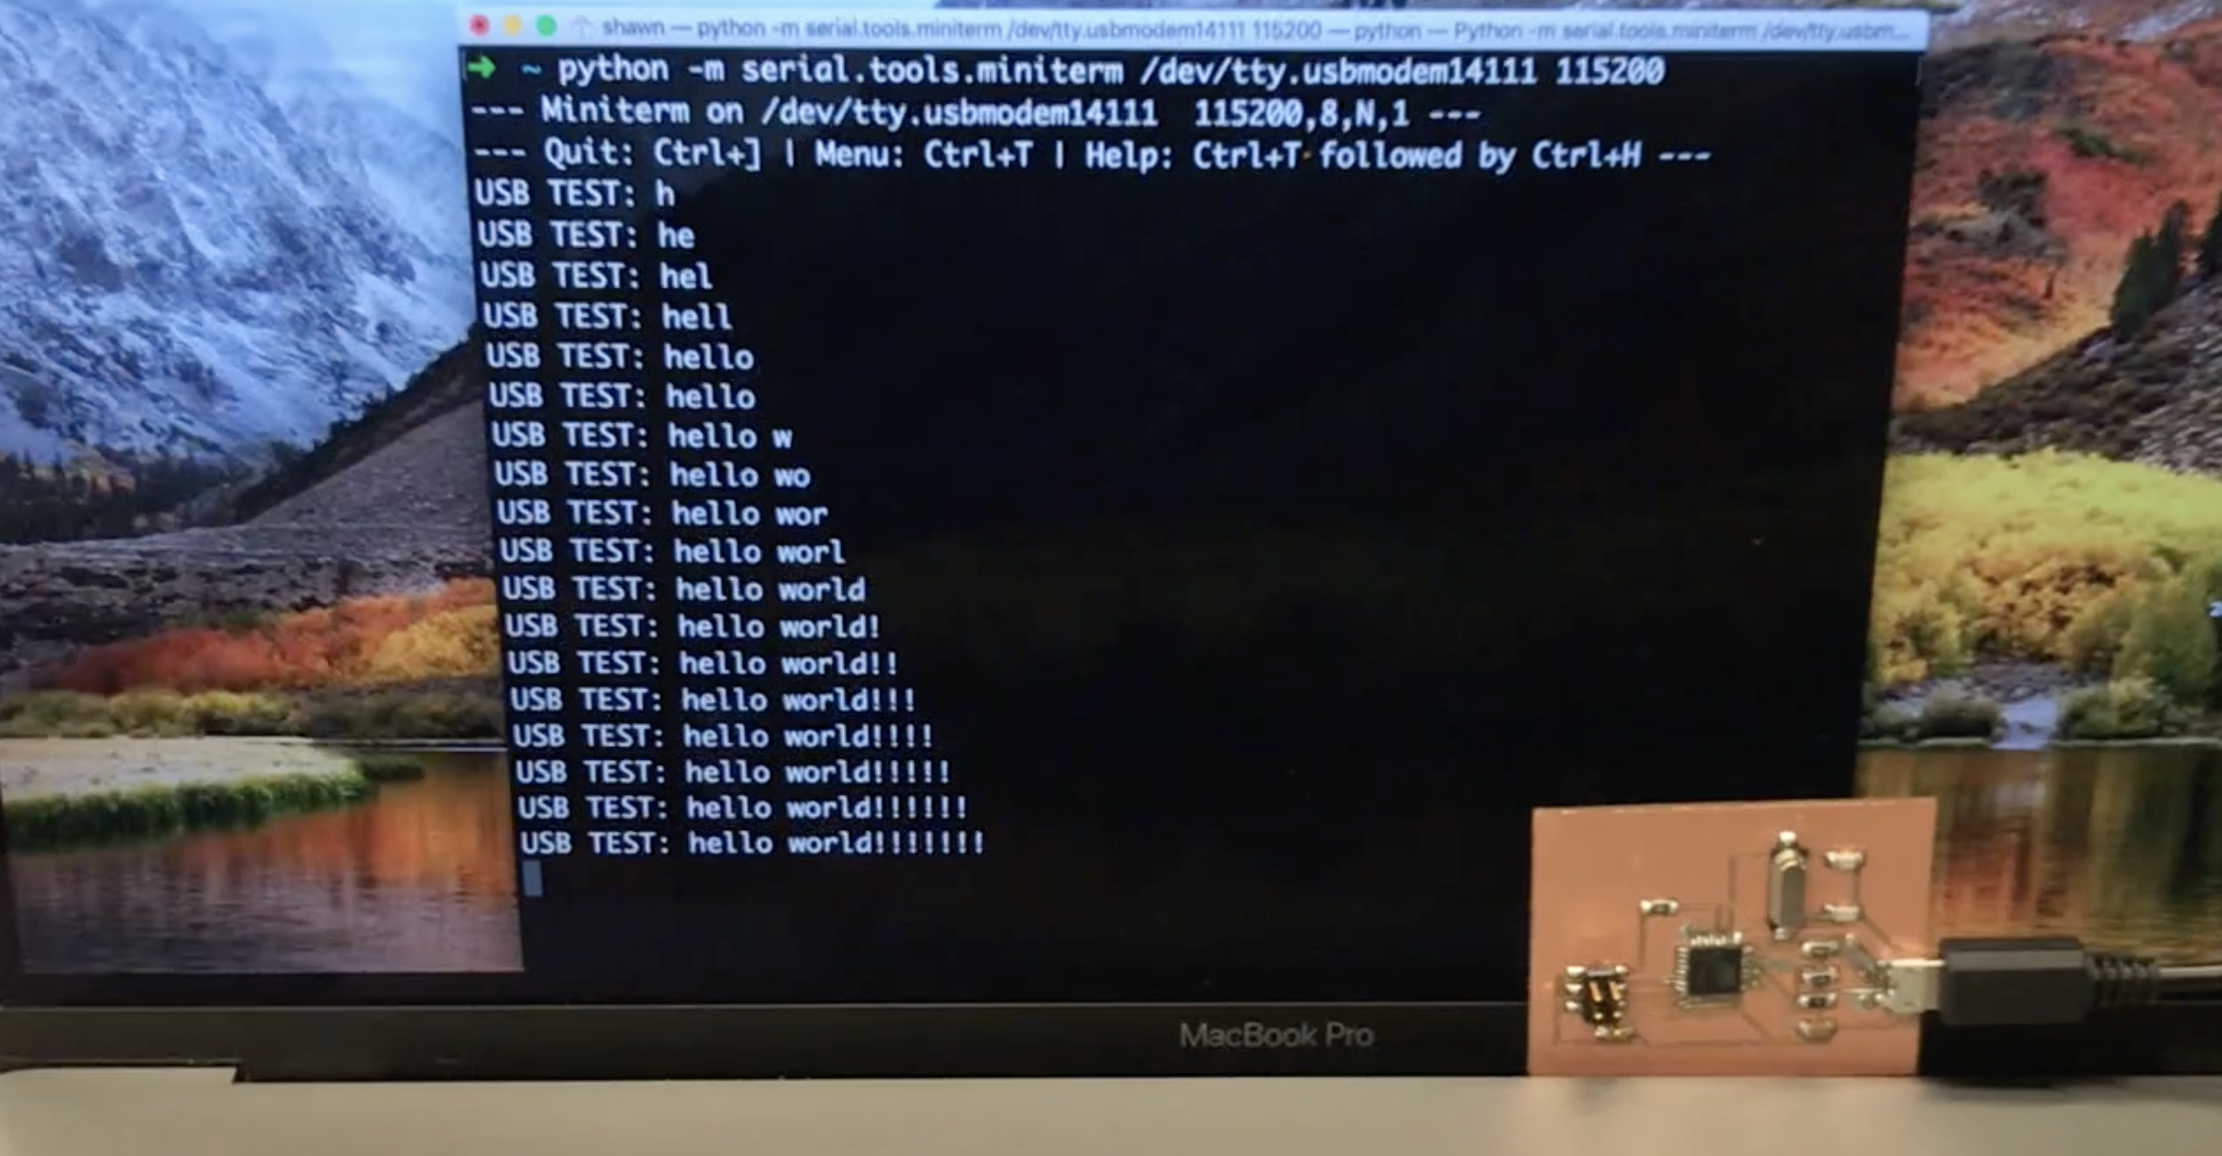
So I first tried the ATmega16U2 to test the virtual serial using LUFA USB driver. And write an echo helloworld for it.
It can communicate without FTDI cable!!!!! Yeah!!
ATmega16U4
Pietro Rustici’s documentation is very helpful.
Since the ATmega16U2 doesn’t have ADC, so I furthermore use the ATmega16U4. It has more pins (44 pins). And also works very well.
Also I tried the bootloader dfu-programmer. The good news is it works well (Don’t need AVRISP at all). The sad news is after the first time it program, it doesn’t jump into the bootloader automatically. Ben suggest there should be some way to put some pin down or using software to jump to it, will look into it later (If final project goes well…LOL).
Waterjet
Some waterjet samples in the CBA shop.
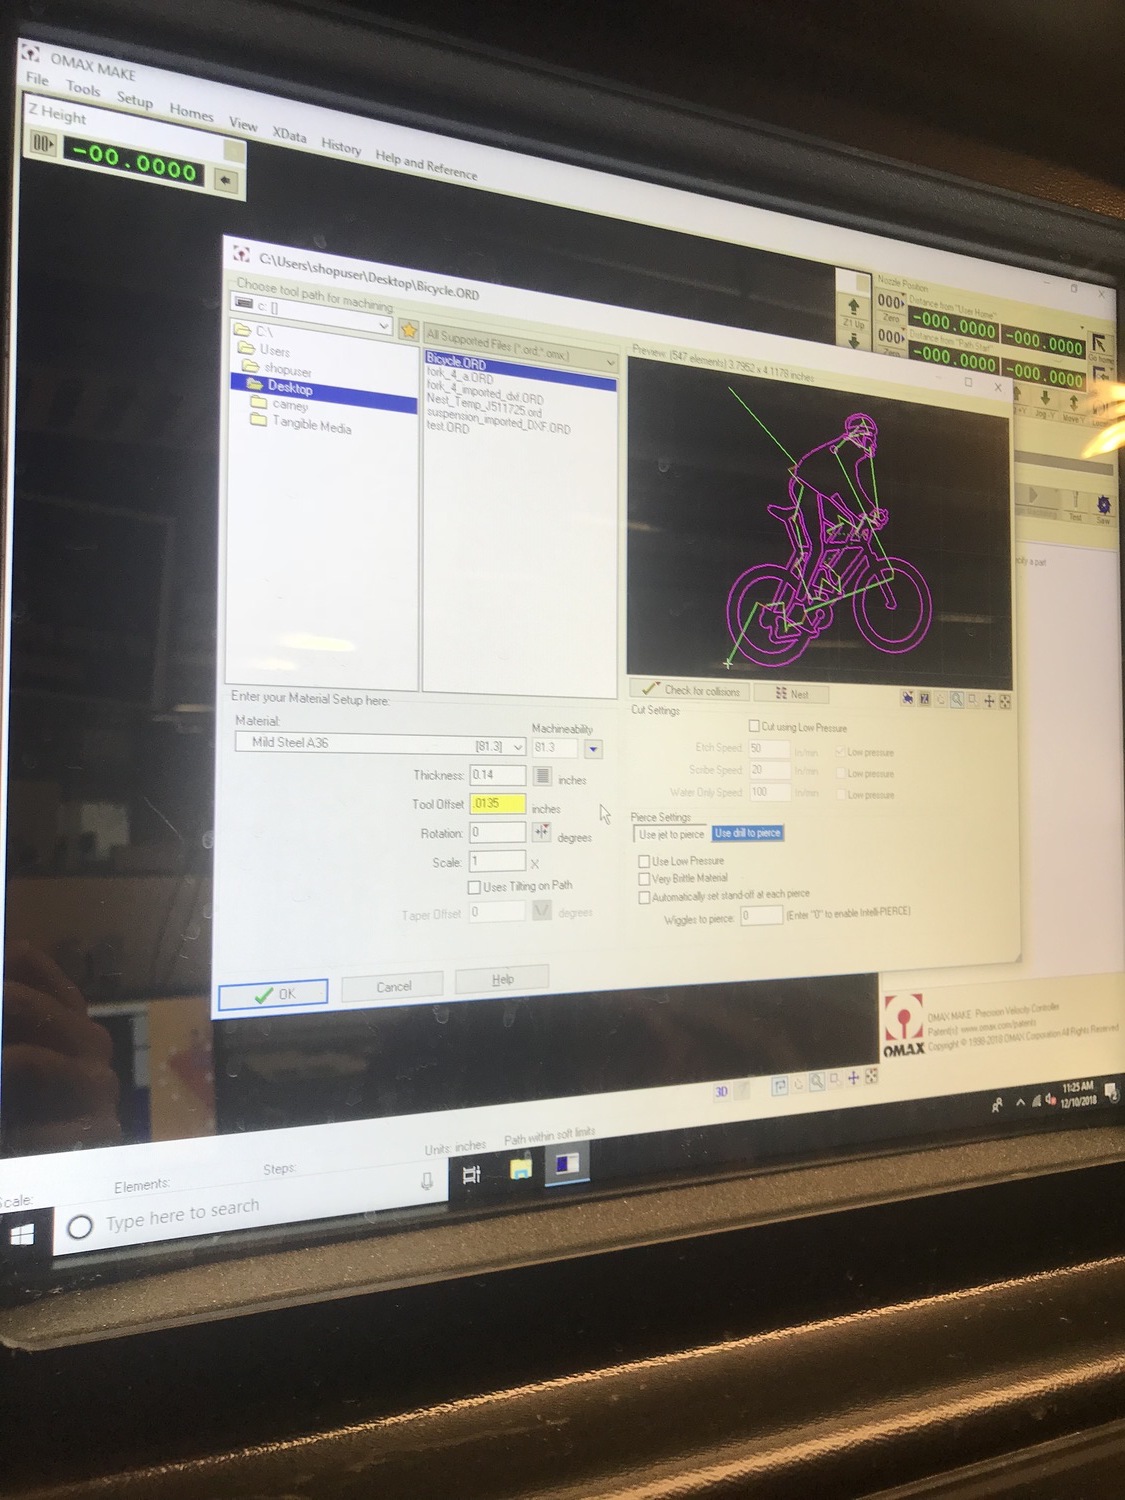
Omax settings
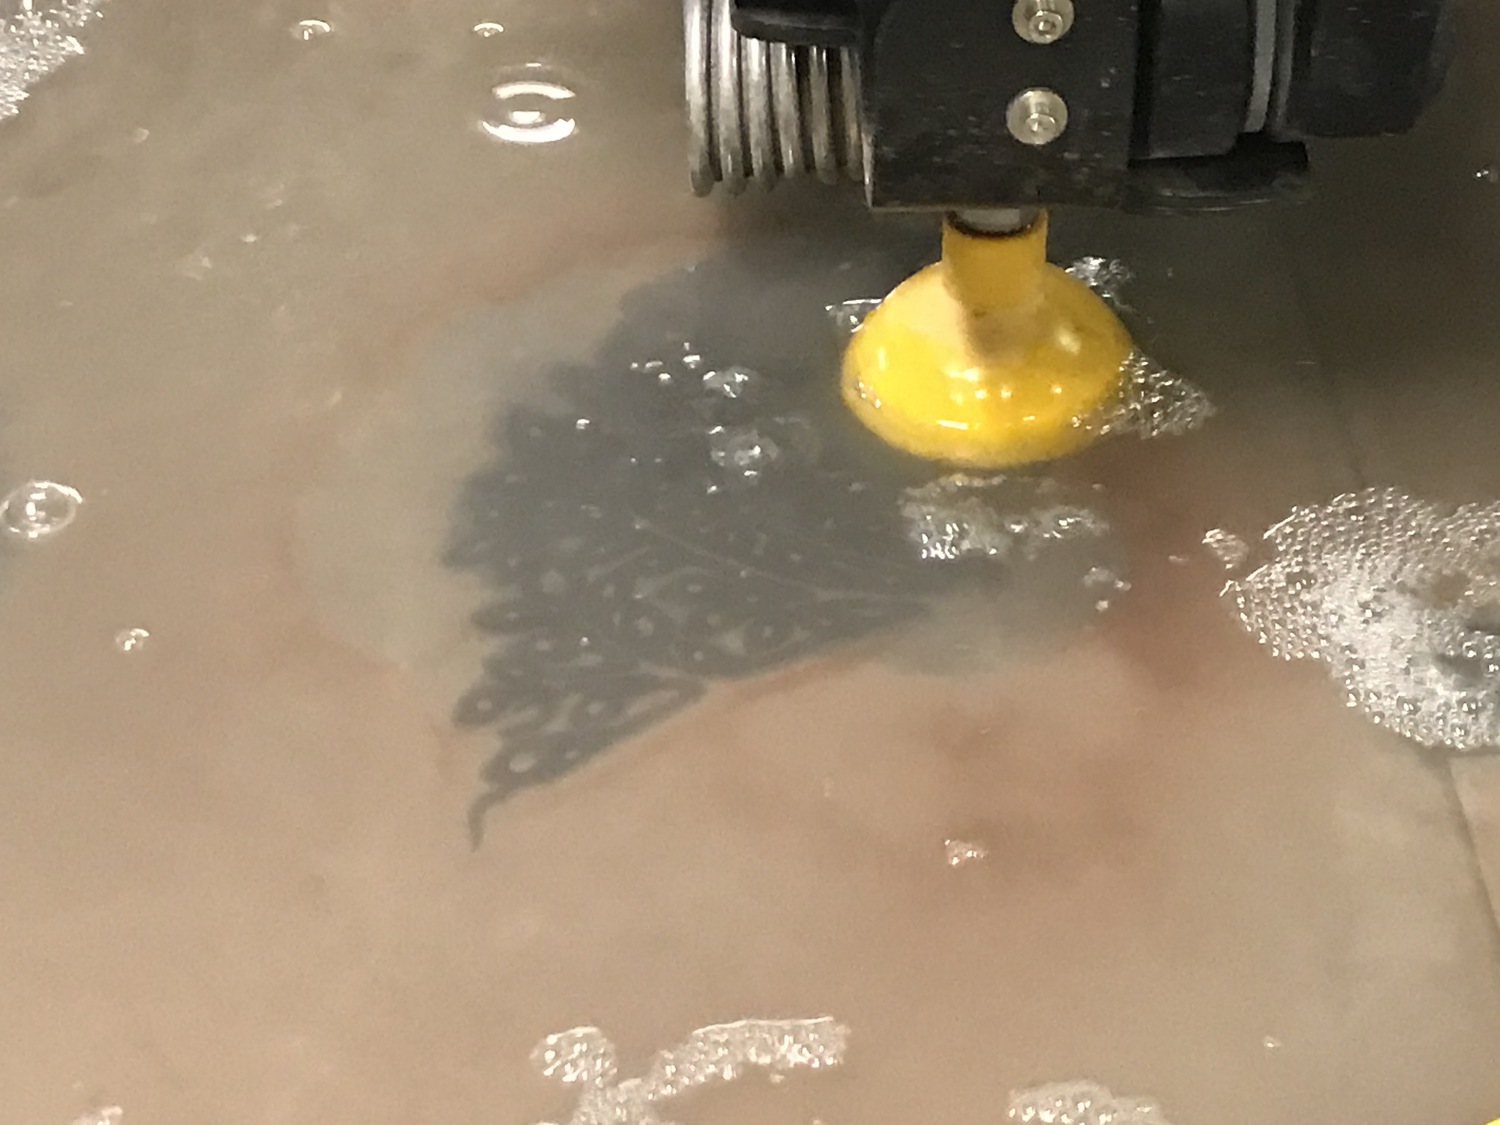
Waterjet working

Vectorize (PNG -> DXF)
STEP 1: PNG -> SVG
In mods,
program -> server program -> image -> vectorize
Choose no fill
STEP 2: SVG -> DXF
Making
The waterjet is cutting the mild steel.
Somehow there’s a small piece of steel is still connected.
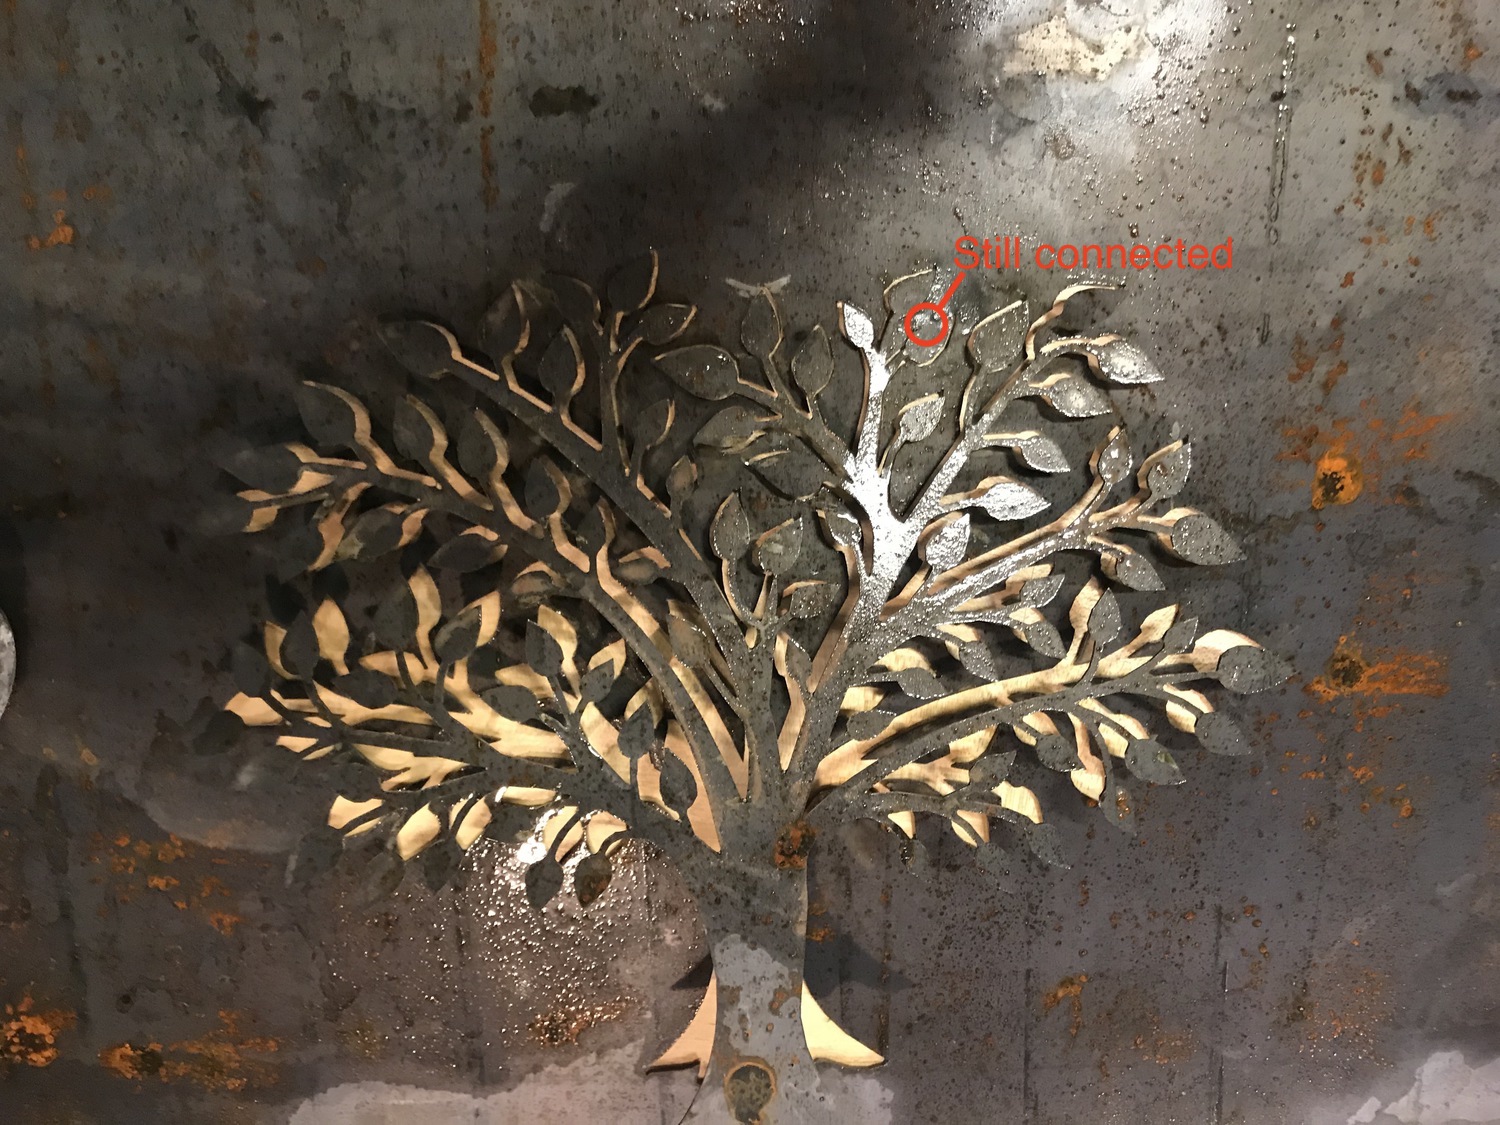
So John and I used Dremel, hammer, and rotate the tree. It finally pop out.
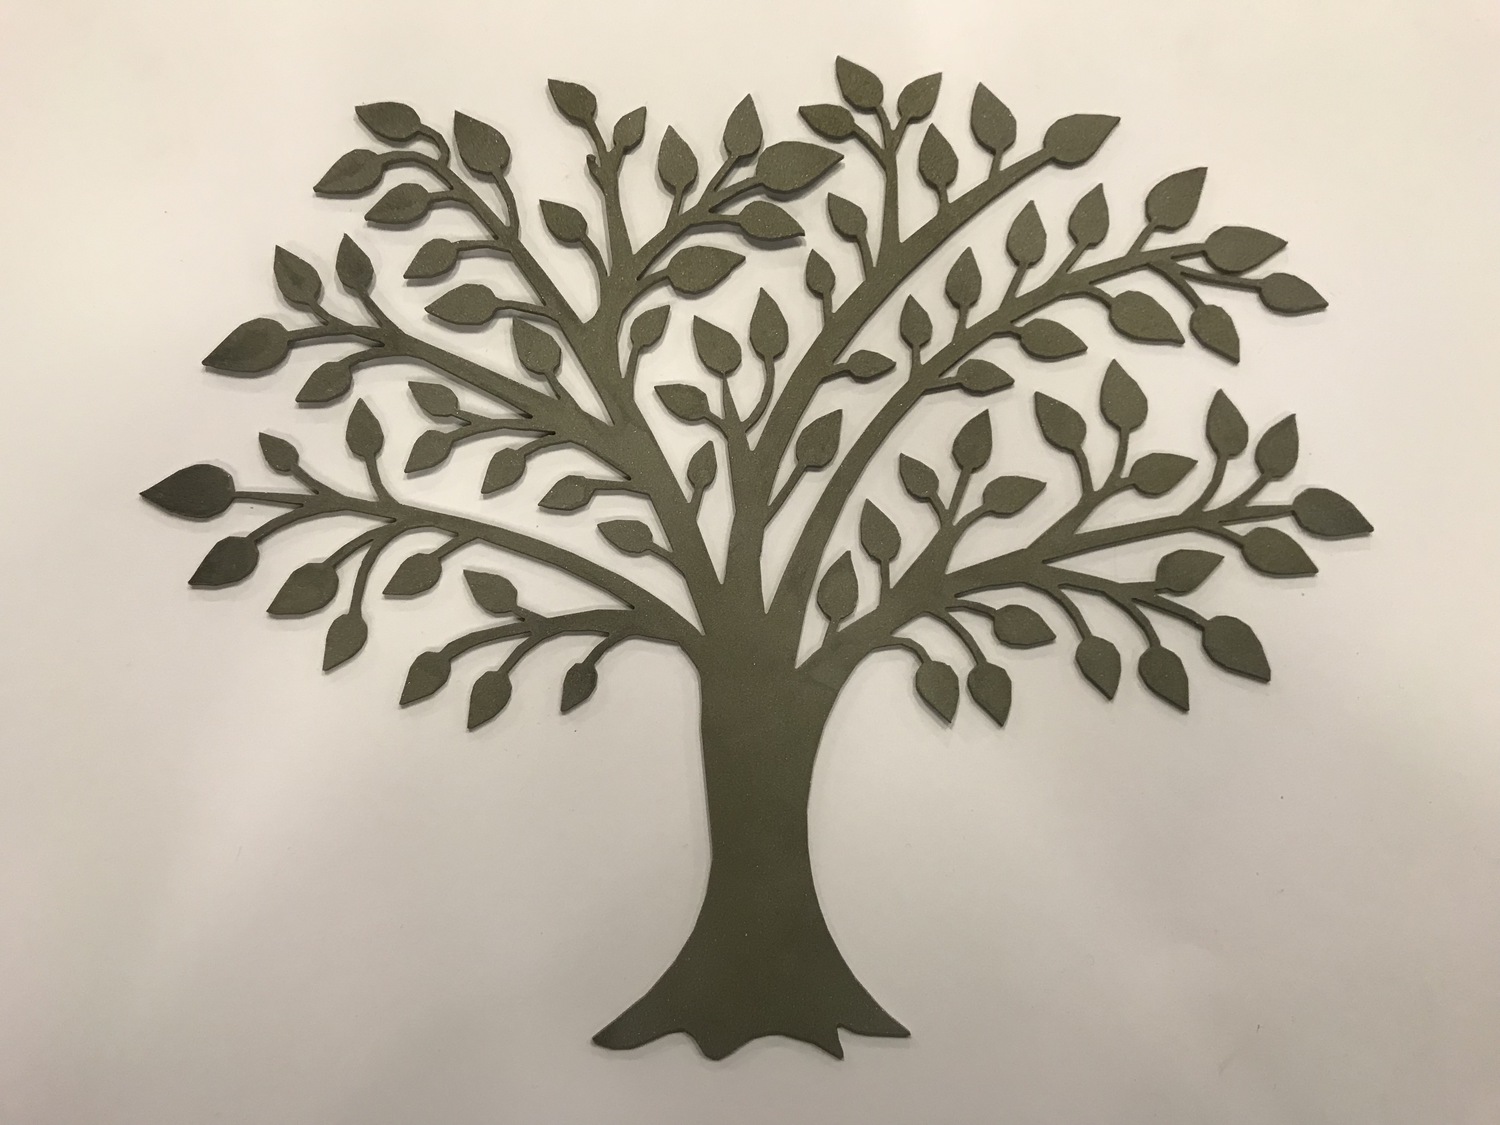
Tom taught me how to use the sandblast to make it shiny. It took about half an hour to sand it.
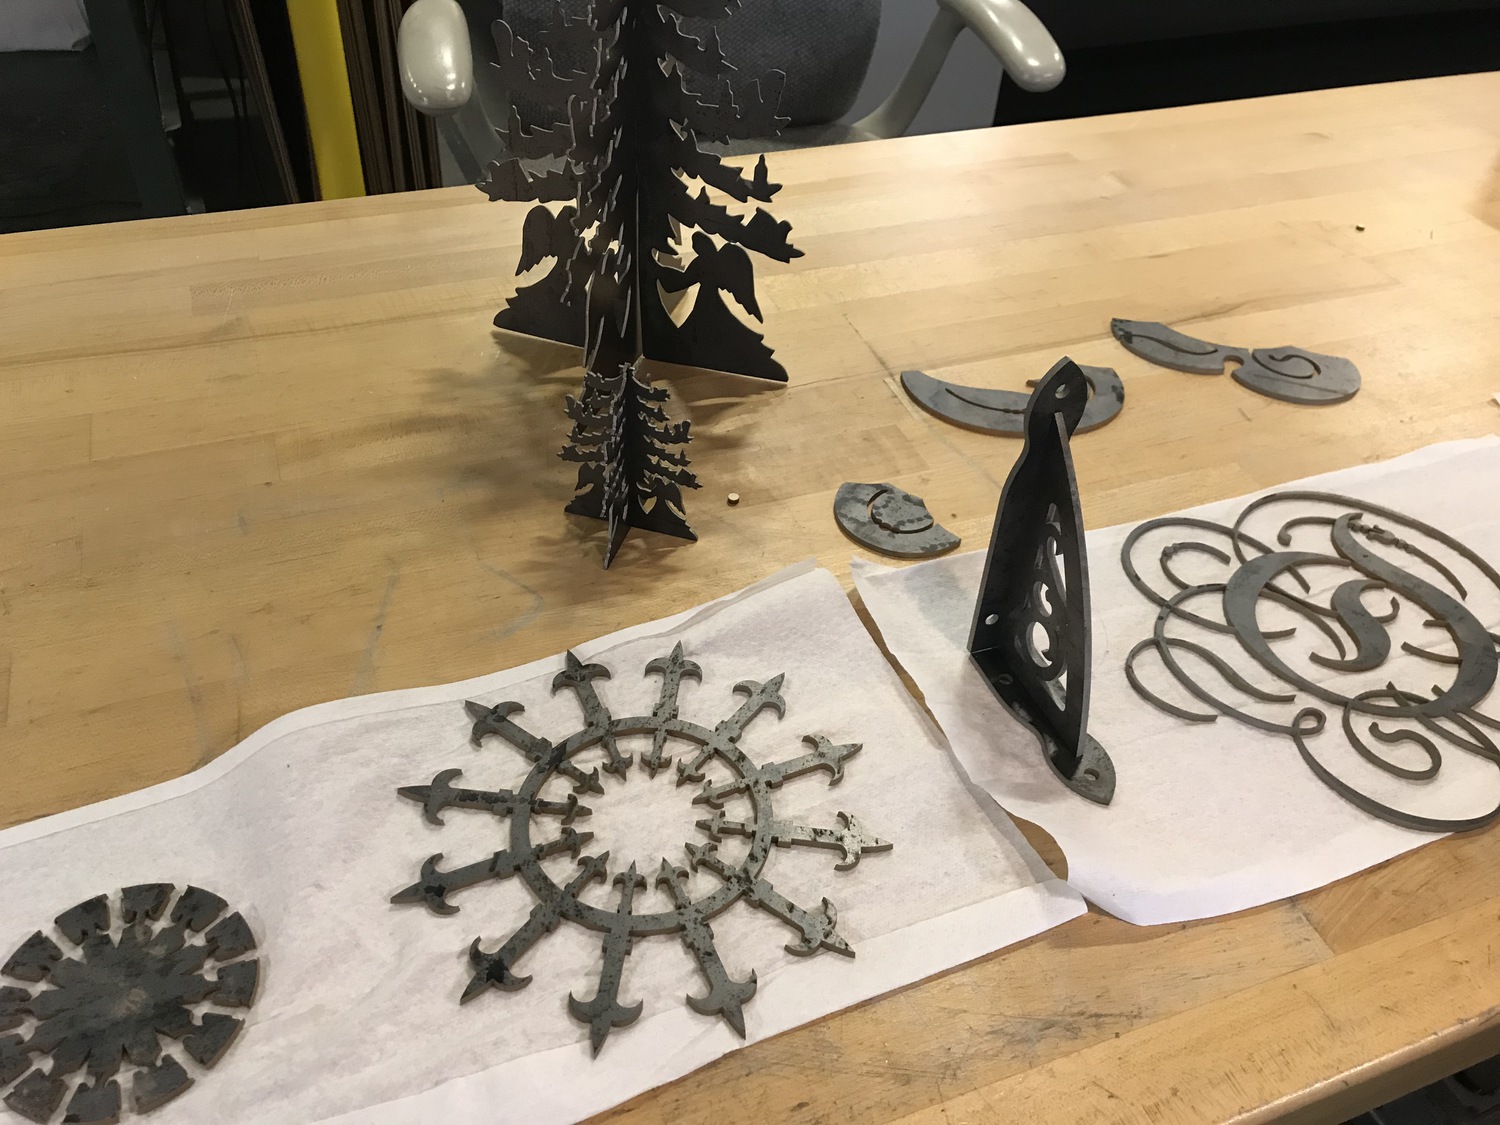
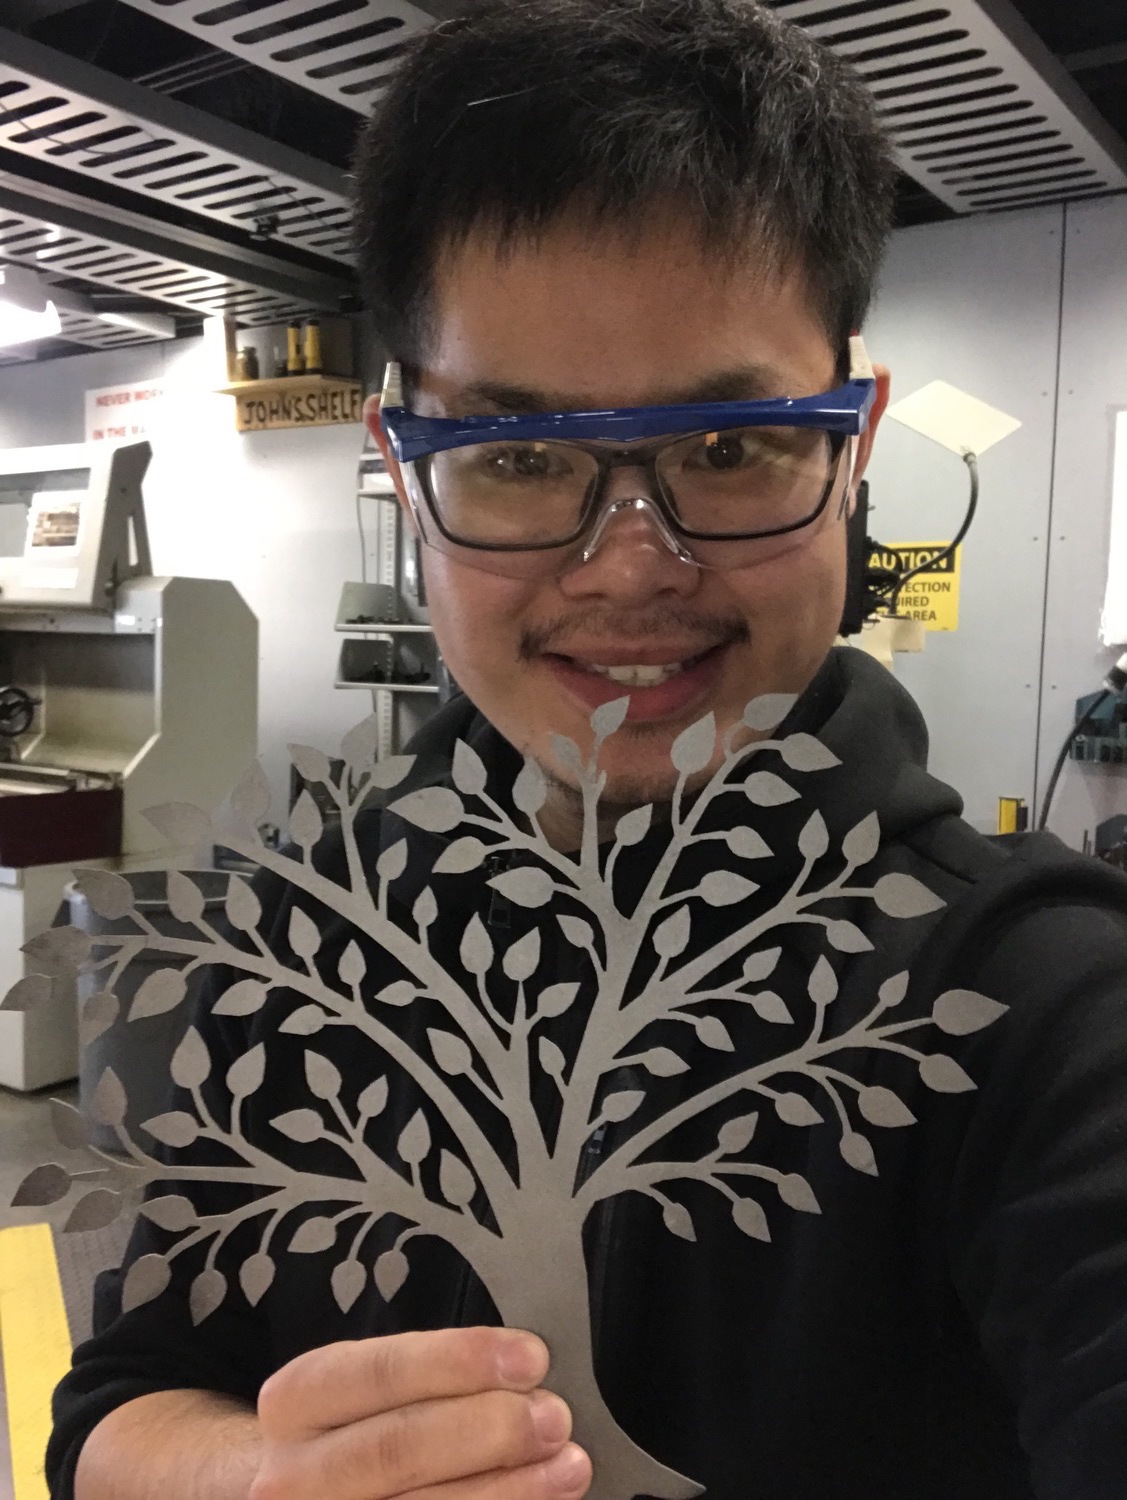
Here’s the final piece! Very beautiful!
Me & the tree :)
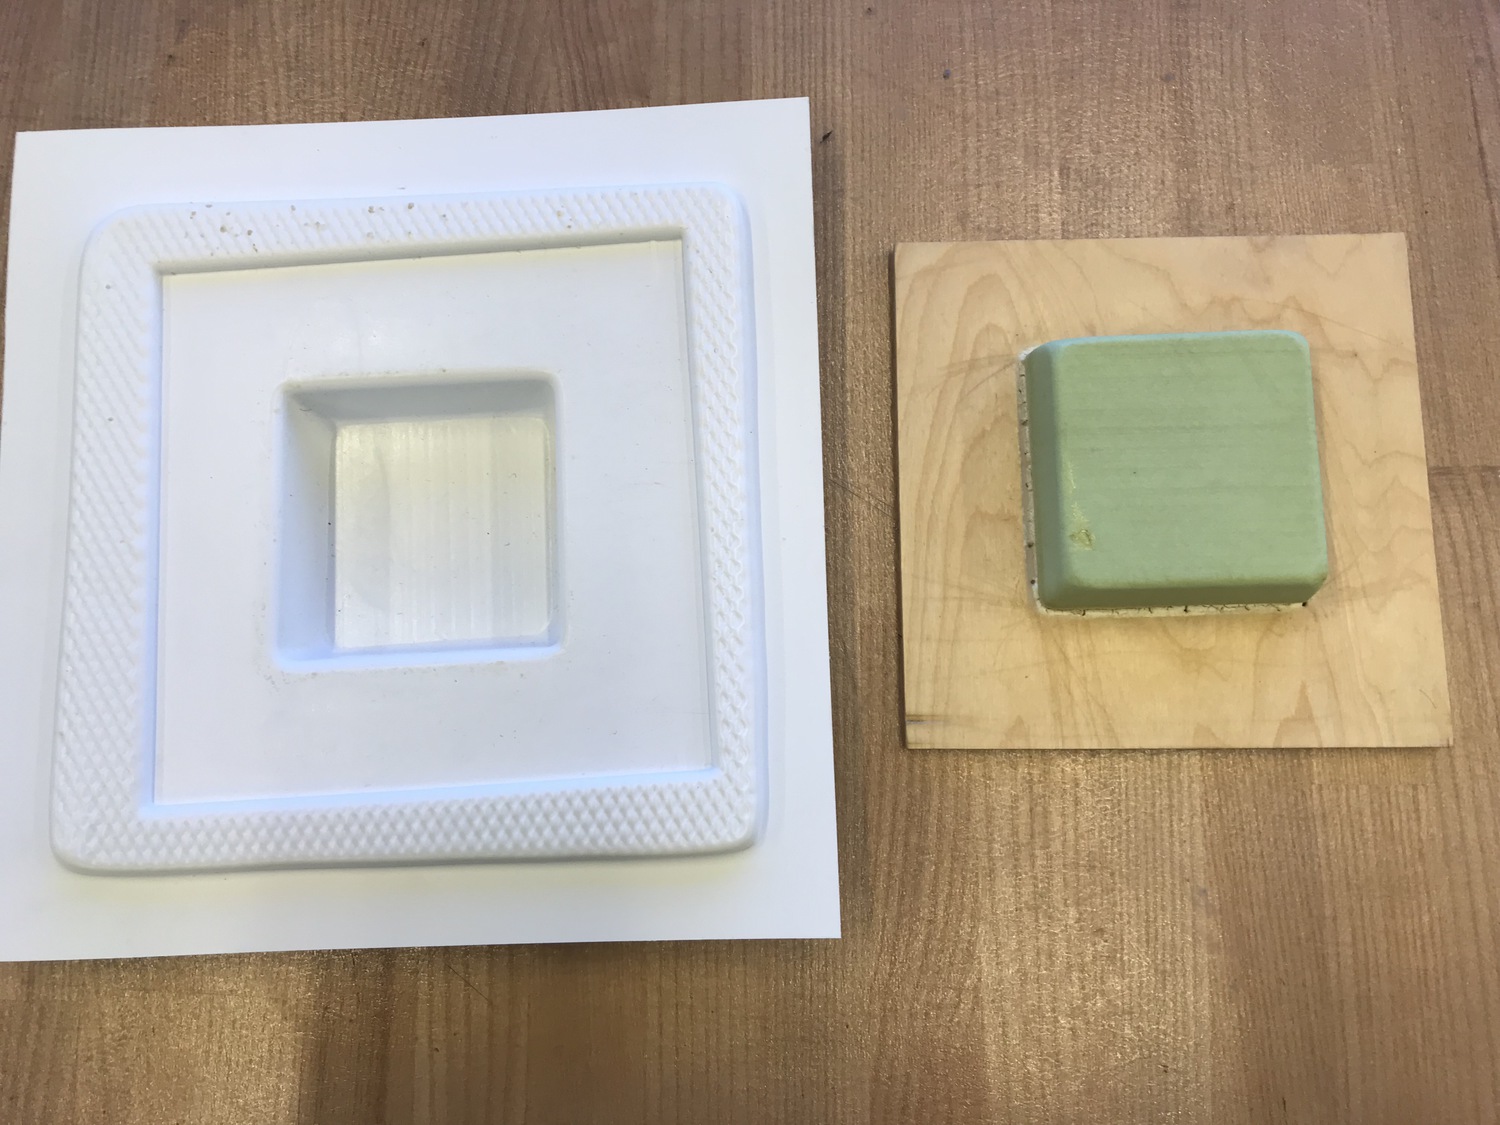
Vacuum Form
Zach prepared the positive part, and I learned to use the machine and make the negative part!
- Add some honey wax to the positive part
- Put the positive part downside the machine
- The heating time is set to 100s.
- Drag the heater bed to heat. And after 100s heating, push back the heater bed
- Click start vacuum flow icon. Then push the two pysical button (left and right) together to rise up the positive part.
- After ~10s, it’s already done, and iteratively click decrease flow icon, and decline the positive part icon.
- It’s done!