Assignment
-test the design rules for your 3D printer(s)
-design and 3D print an object (small, few cm3, limited by printer time) that could not be made subtractively
-3D scan an object (and optionally print it)
Goal
3D print on as many machines as possible.Steps
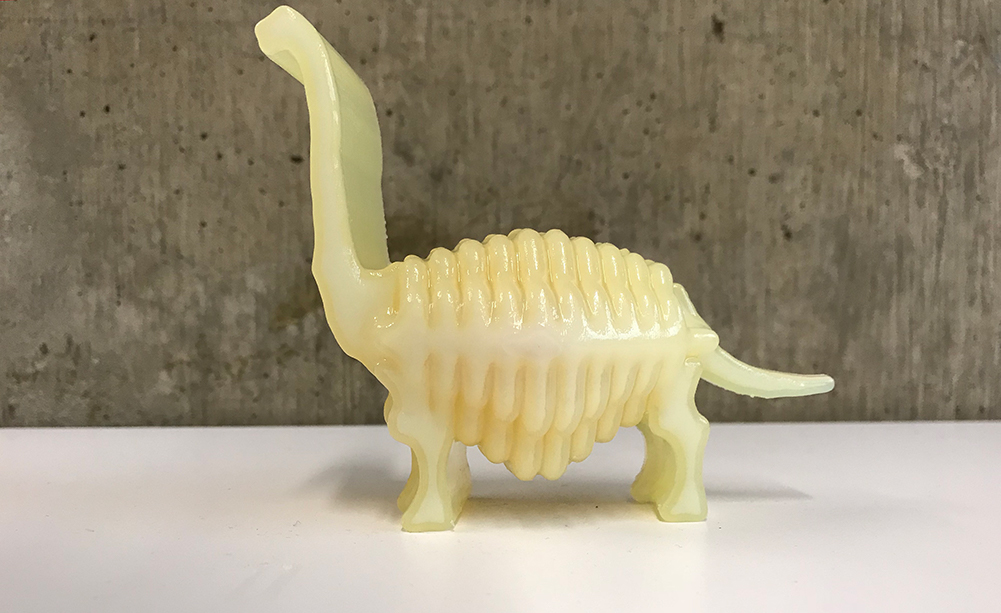
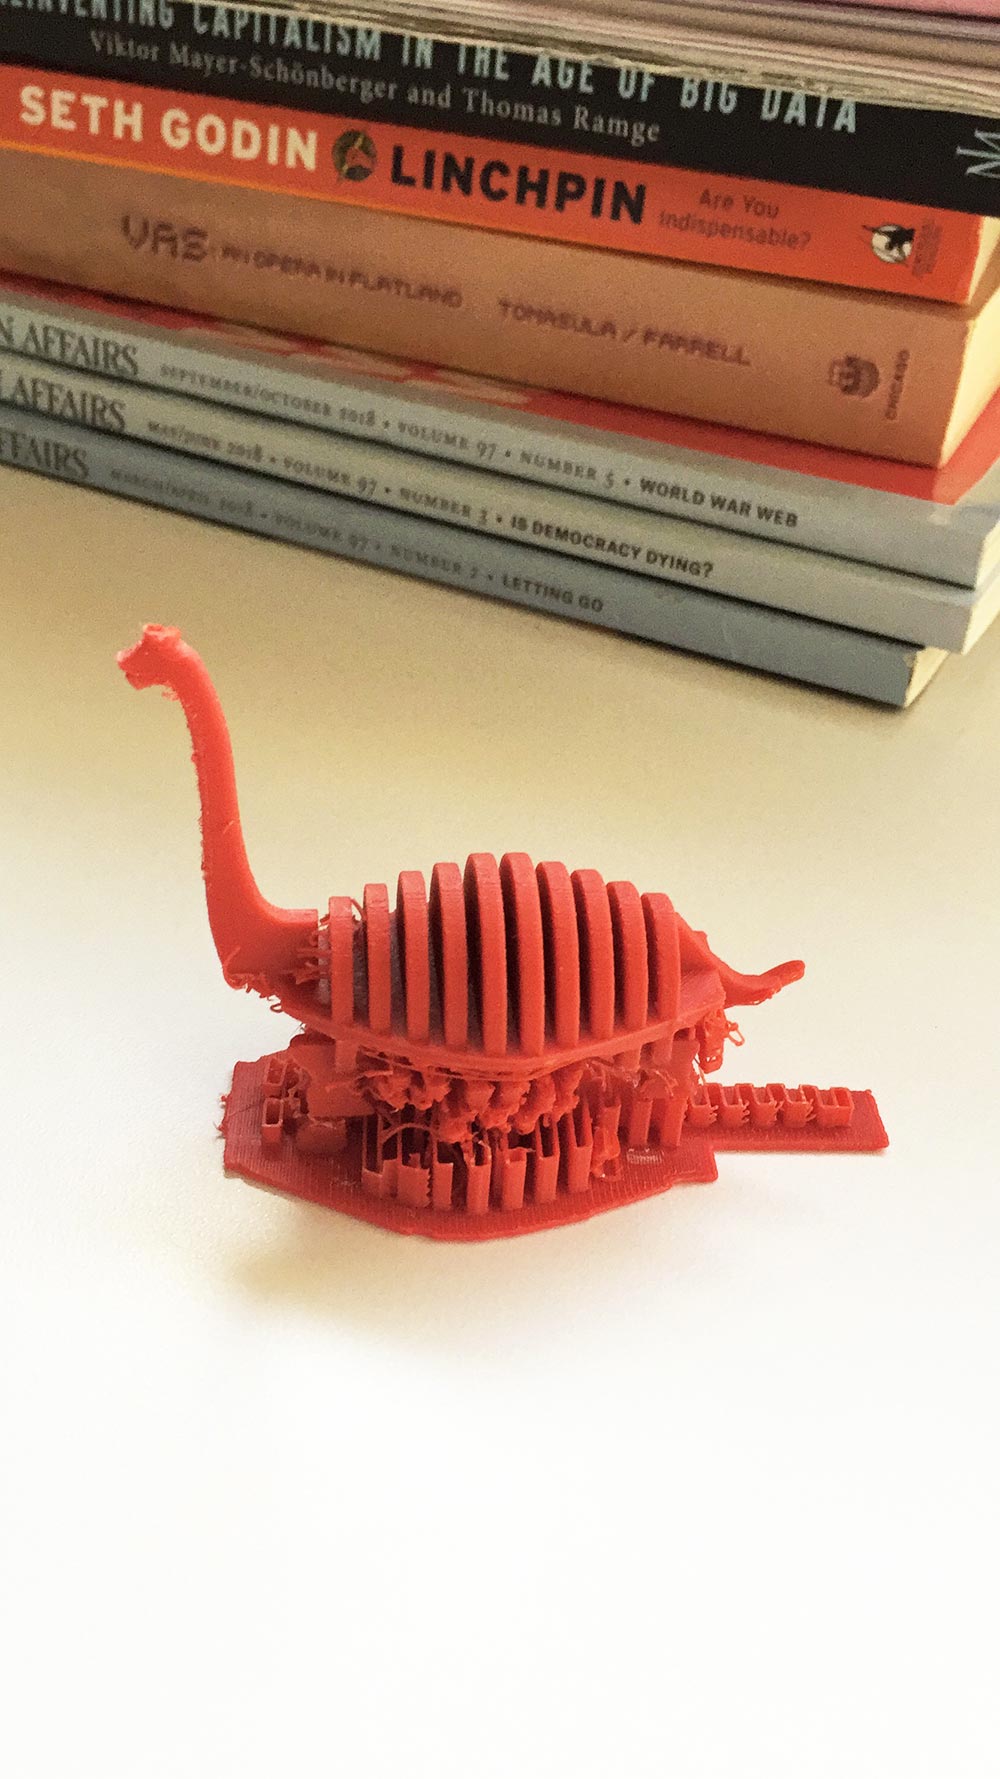
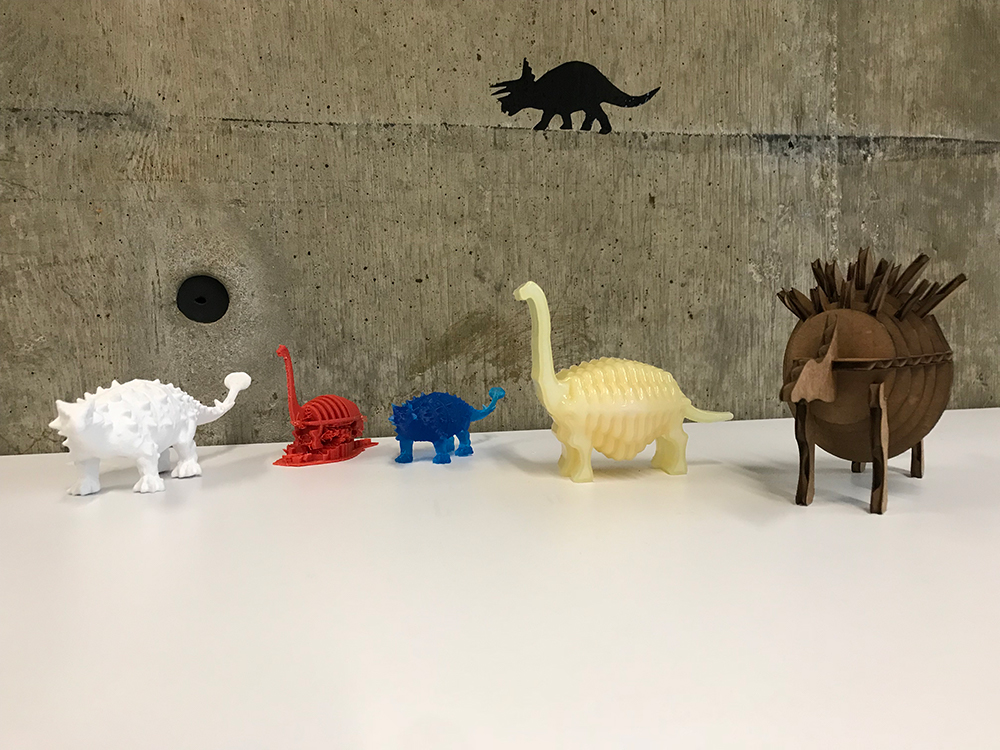
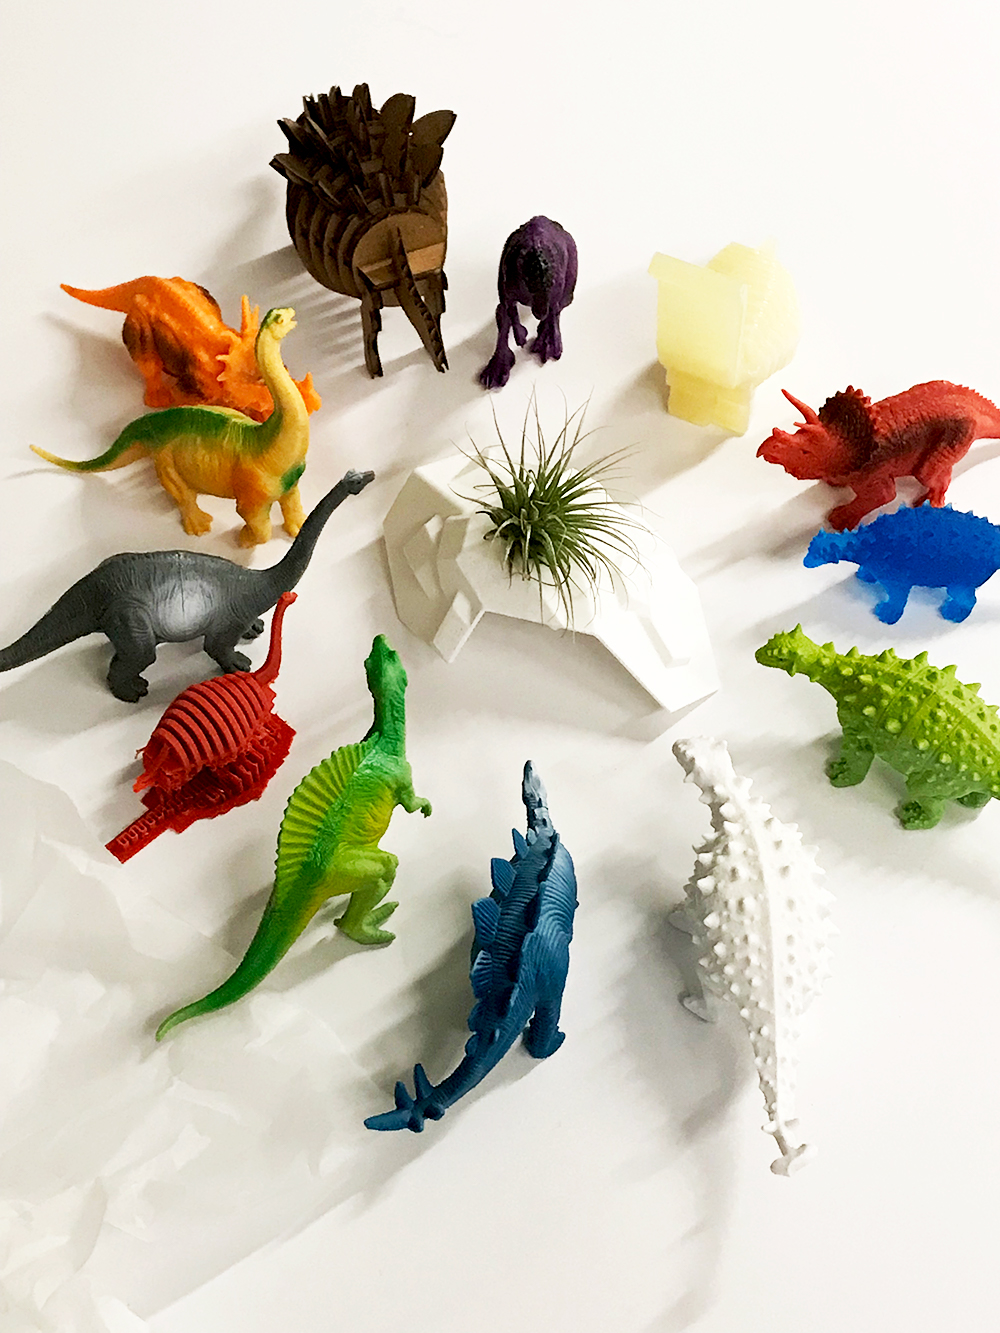
1. I started in Rhino/Grasshopper by modifying my original dinosaur (triceratops, ankylosaurs, stegosaurus, and brachiosaurs) designs. I wanted to utilize the GSD’s OBJECT 260 with two materials, having an inner bone structure and then an outer shell structure. I smoothed via Grasshopper and Weaverbird and struggled with naked edges in the mesh. I spent a huge amount of time modifying the file and was able to send to print. The FabLab at GSD was out of a second material for the OBJET, so I decided to print the ‘bones’ of my design with the harder white plastic. The file appeared to fail in the OBJET software, but there were no naked edges so I decided to send the print. The print with support material had a super cool, and kind of creepy, effect. I eventually took the support material off, but I quite liked the bones embedded!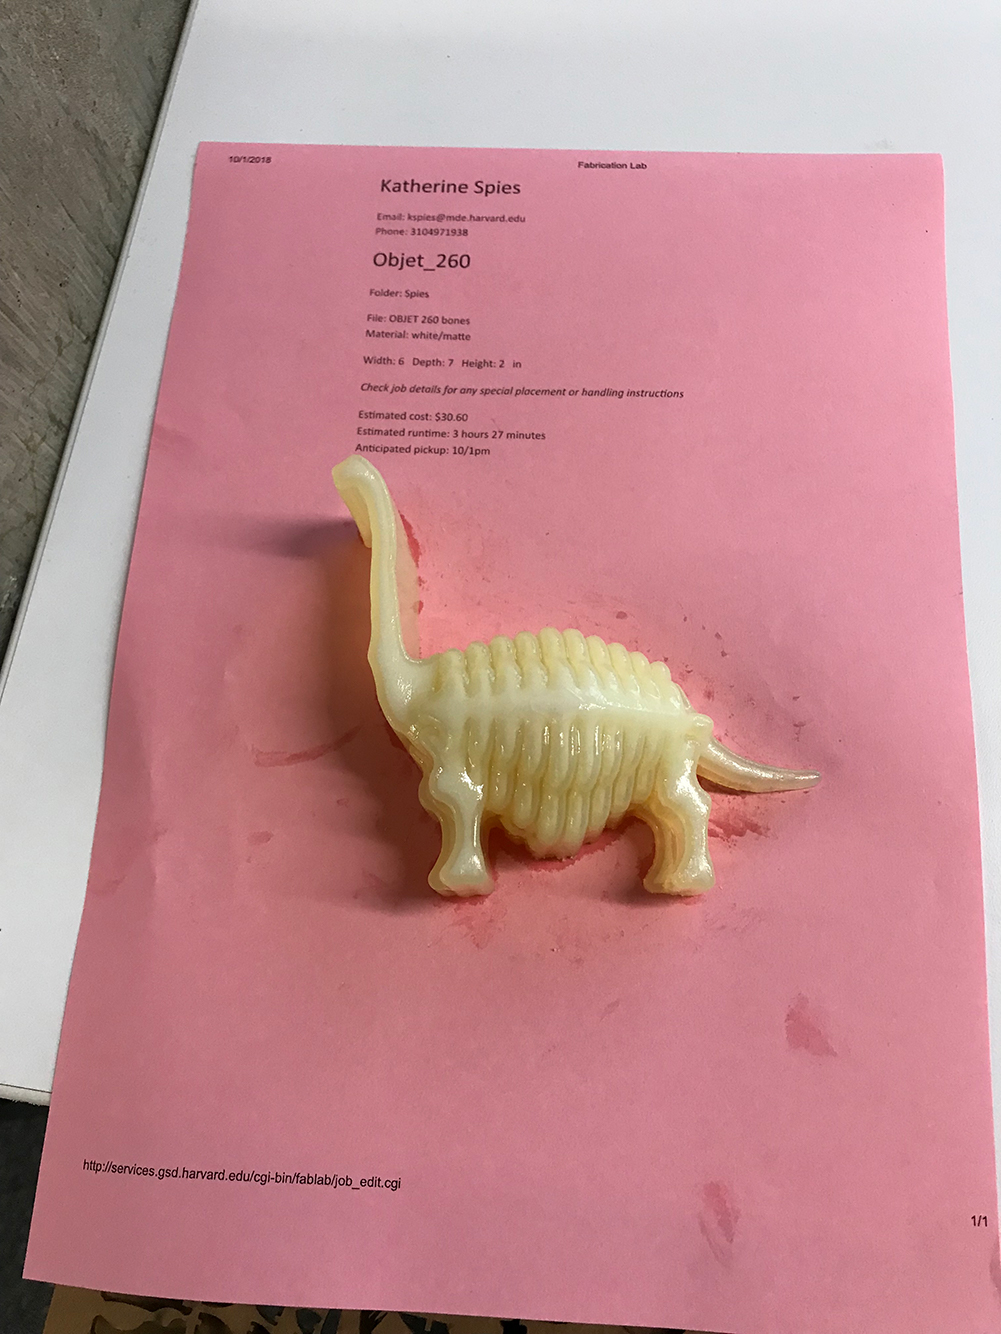
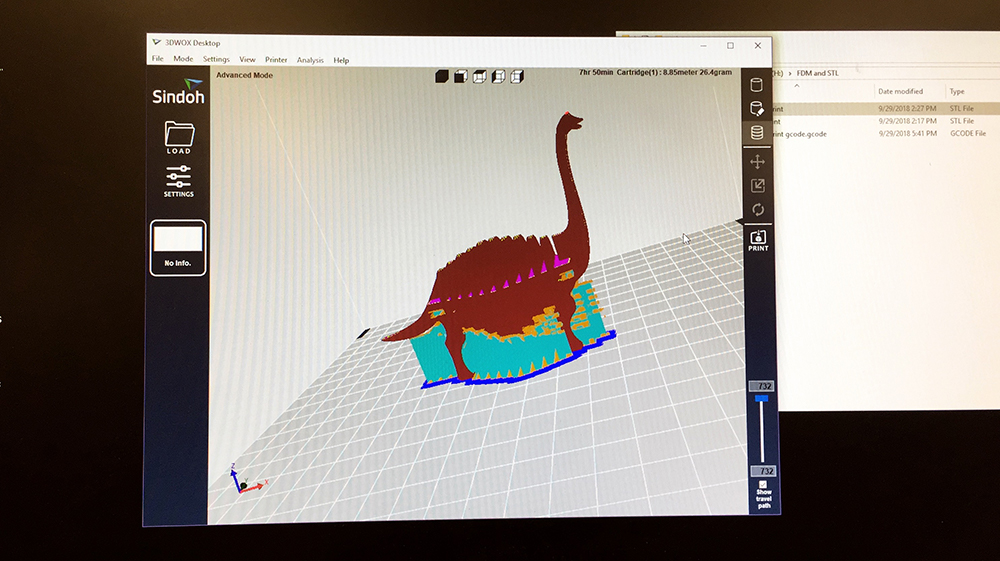
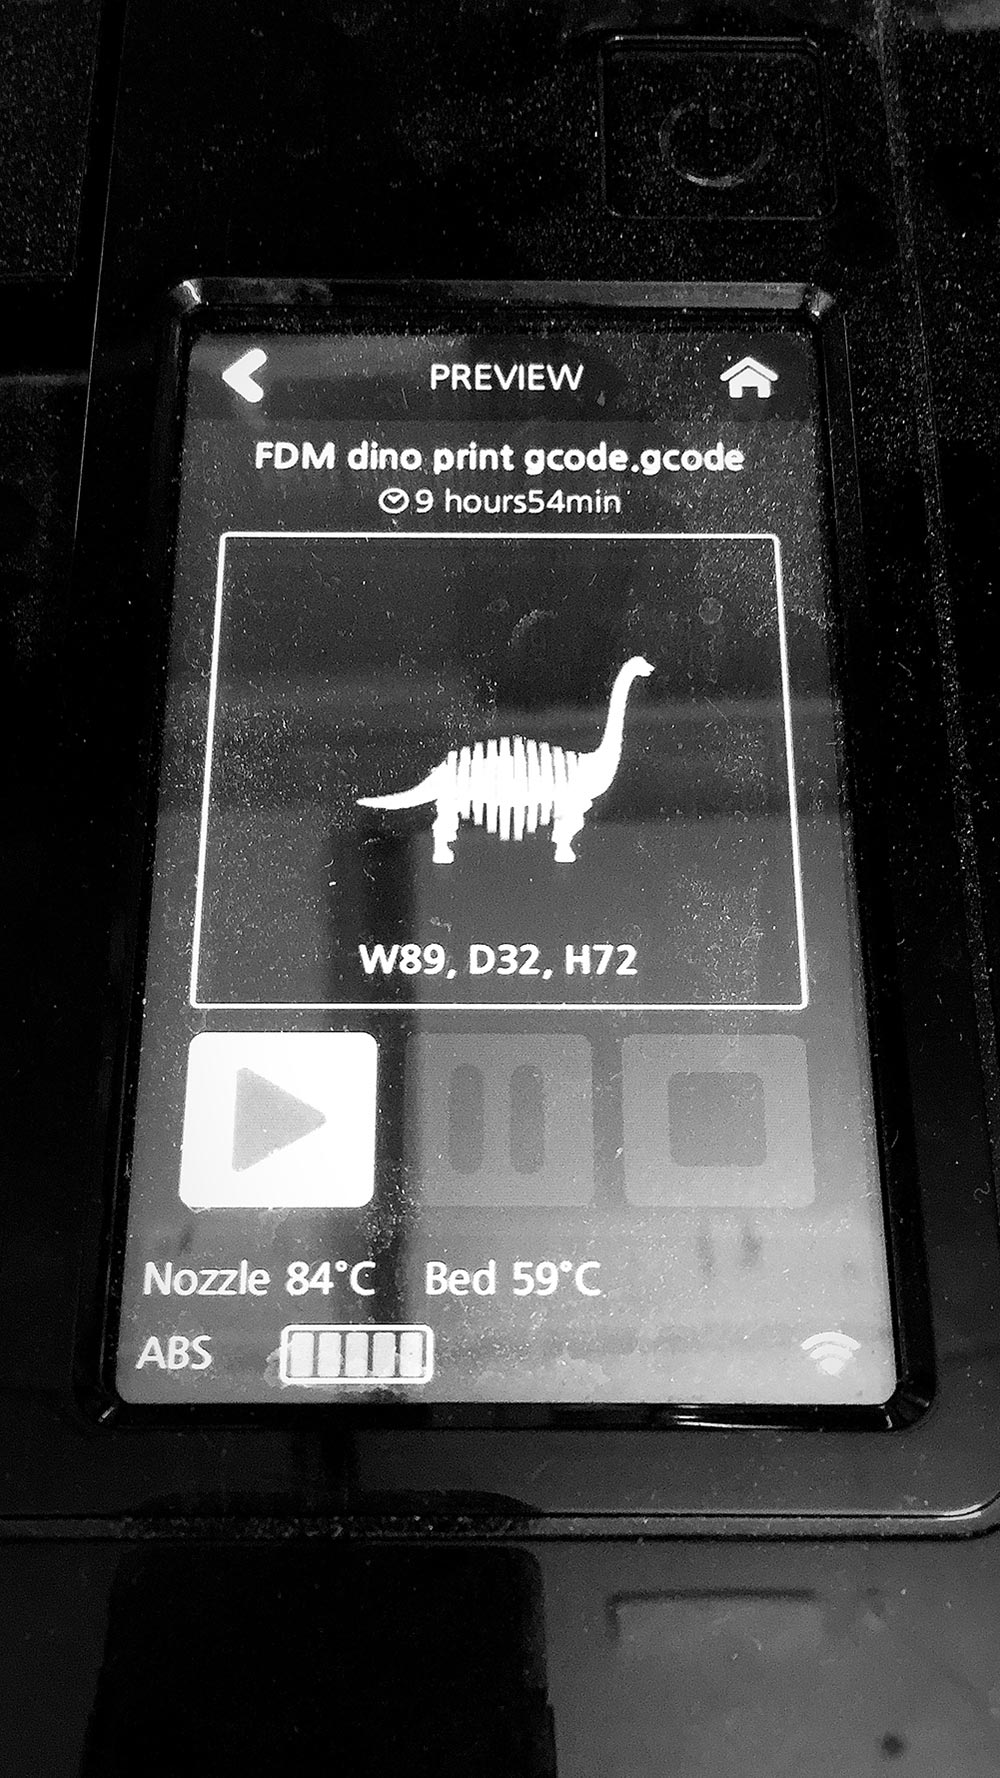
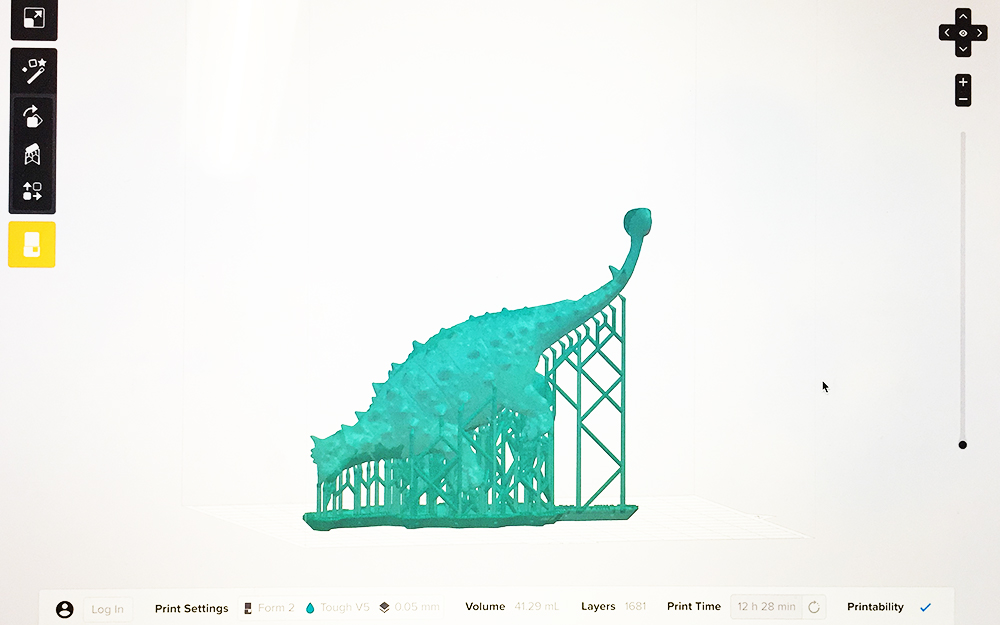
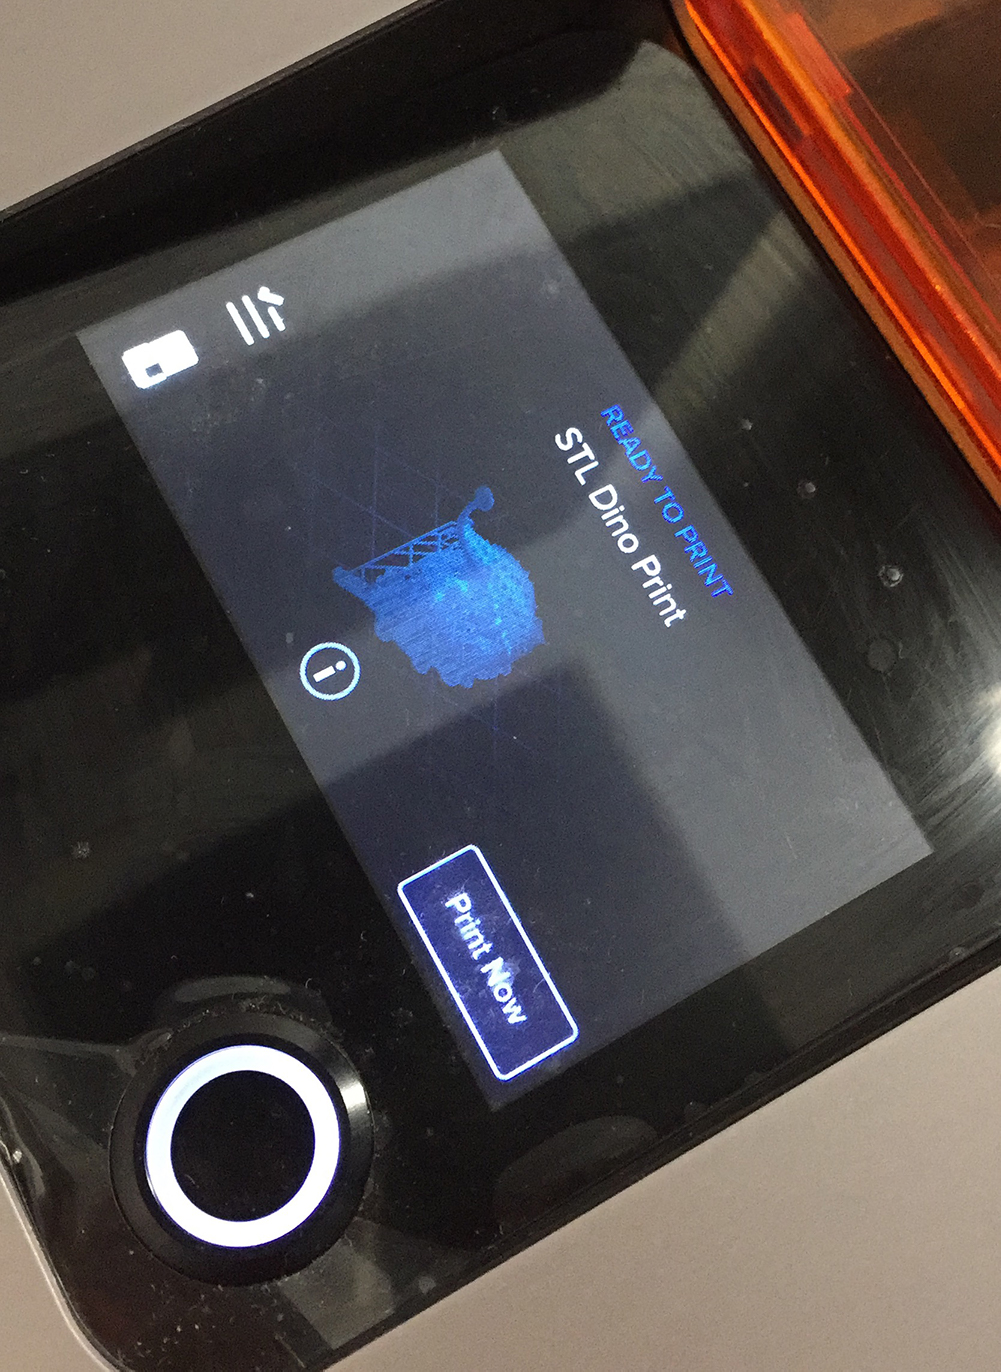
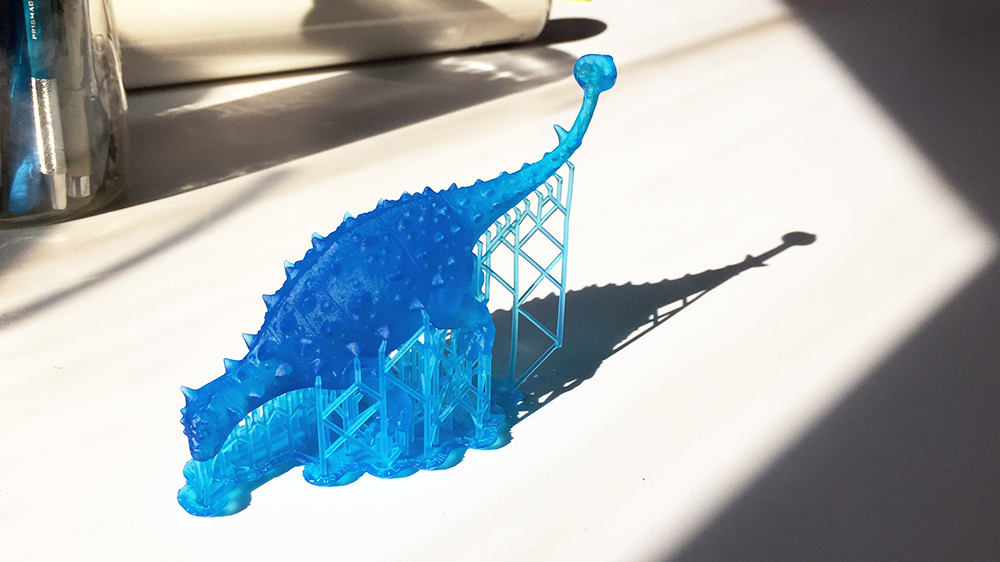
2. I next sent the parametric-esque brachiosaurs to the Sindoh. I spent an absurd amount of time adjusting settings in 3D Wox and ran a total of three prints, all of which failed. Converting to GCode within the software was easy. The first failed on the bottom, the second failed on top, the third was just a ball of material. I believe the issue was the support material under the belly of the dinosaur.
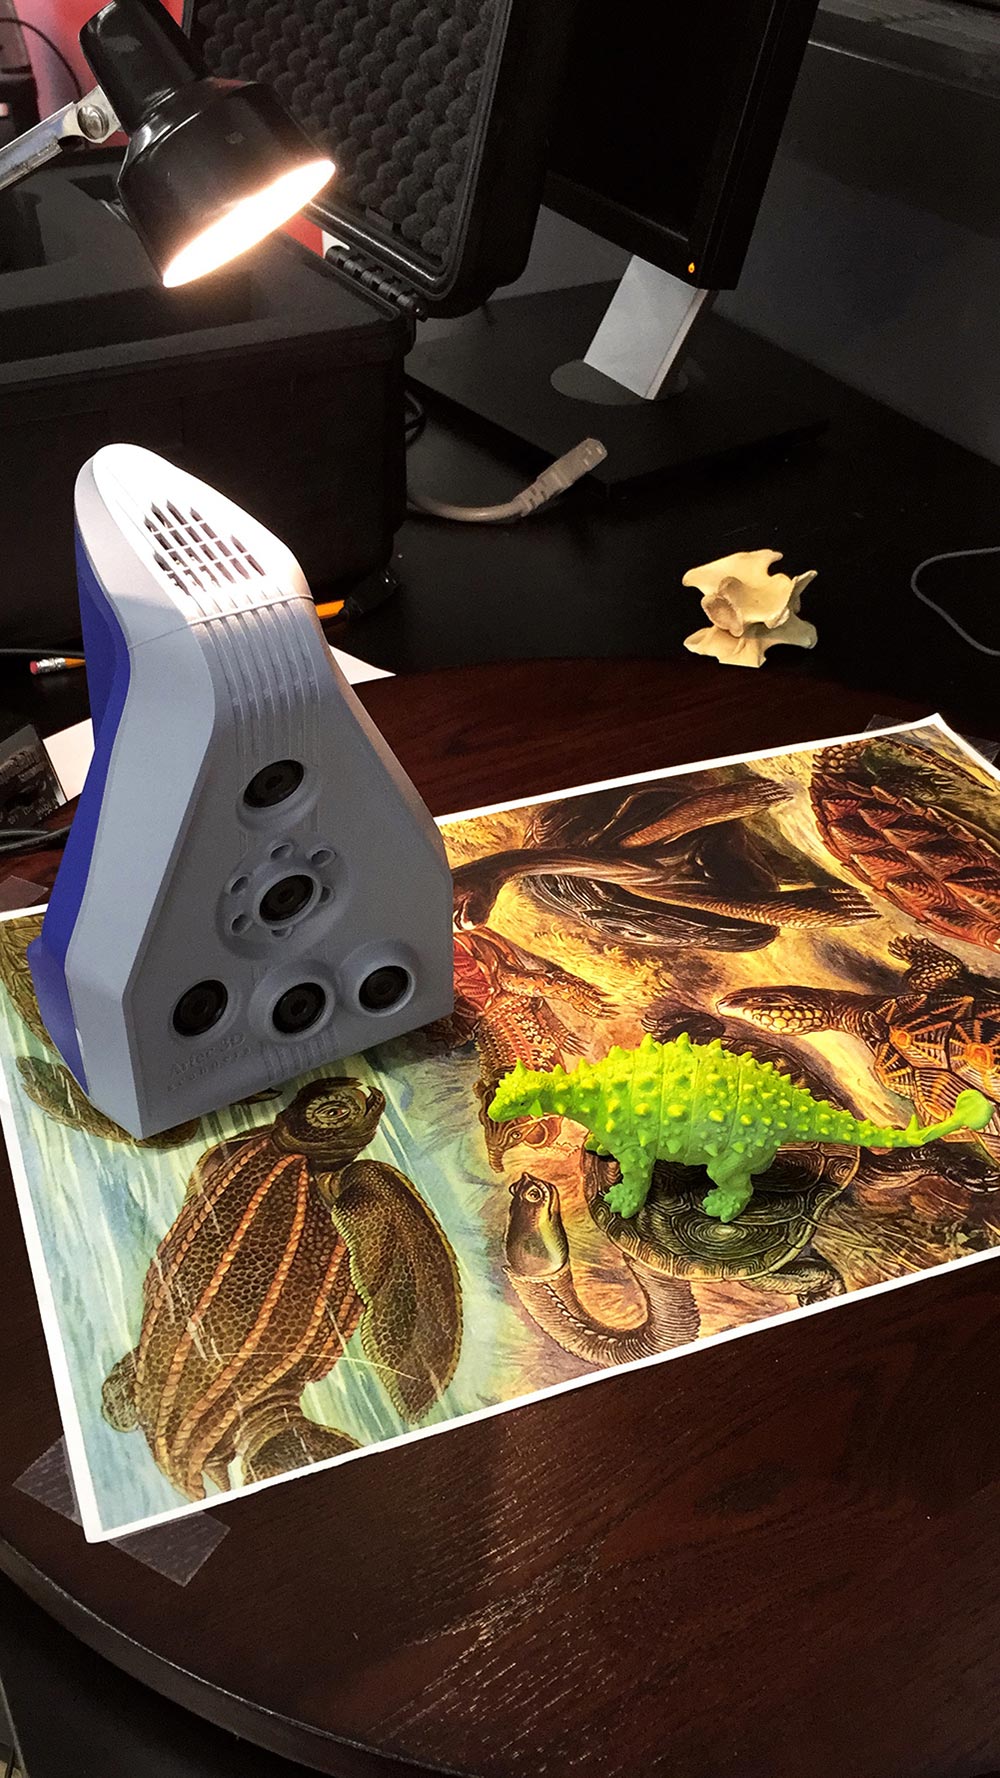
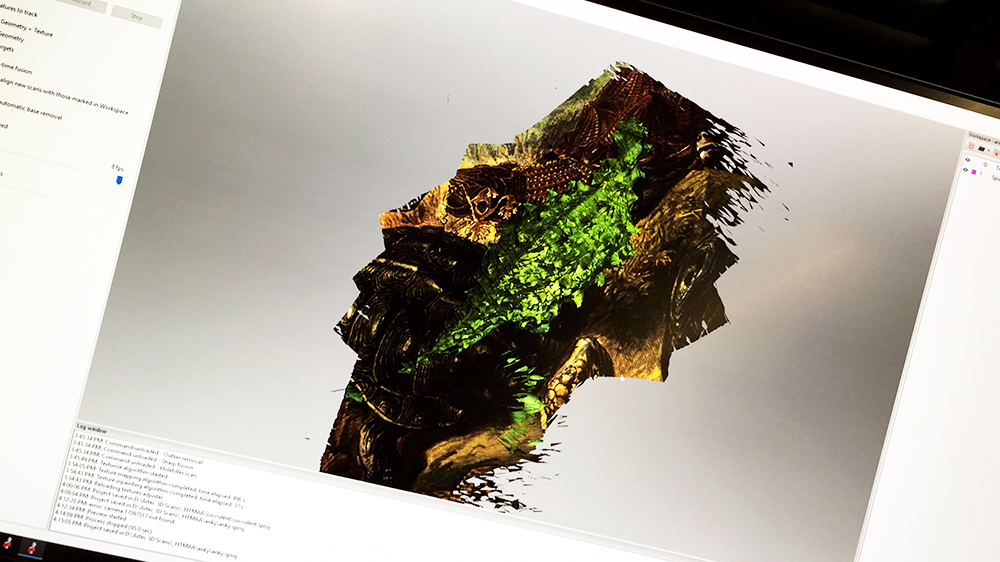
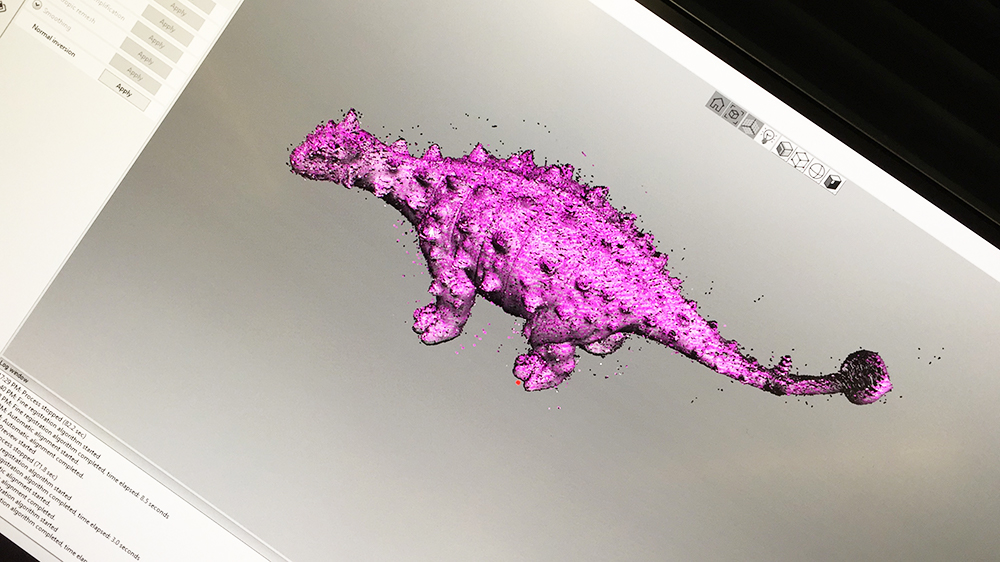
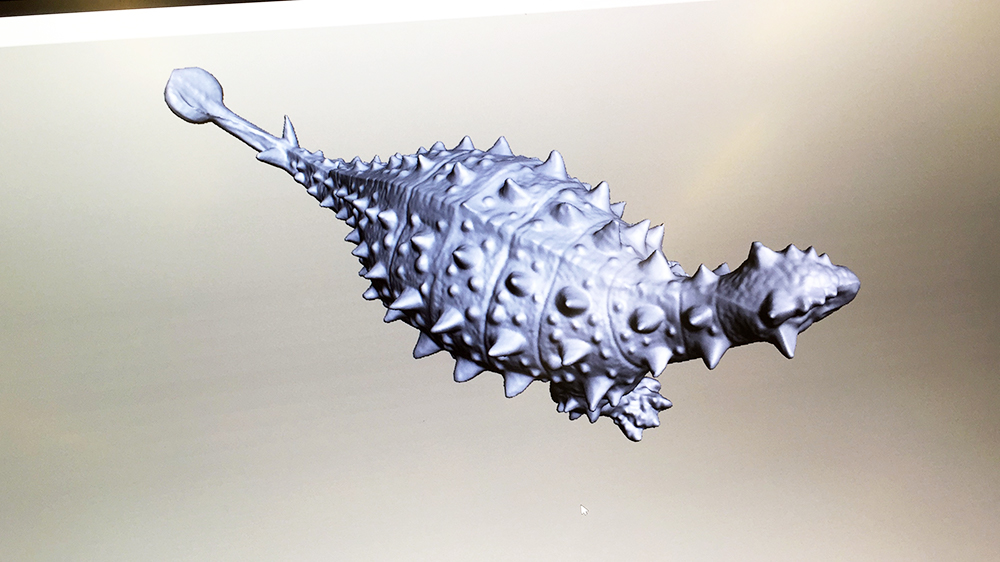
3. For the 3D scan I was lucky to use the Harvard History Department’s Artec 3D scanner, which must be the créme de la créme of scanners! My original plan was to scan one of the parametric dinos to print, but the shadowing within the slices is difficult for the scanner. I instead scanned an ankylosaurs I purchased in a dinosaur kit off of Amazon. In order to scan the ankylosaurs, I placed the model on a busy background mounted onto a lazy susan type spinner. I then started the scan while rotating the model in place. I used three total scans: two of the top and one of the bottom. Keeping the space between the scanner and the object is the key for optimizing the output, but let’s be honest, that’s not a lot to ask for detail in the output! A series of saves, cutoff plane selections, global registration, smooth fusion, fill holes, texture, and boom a .obj, .jpg, and .stl.
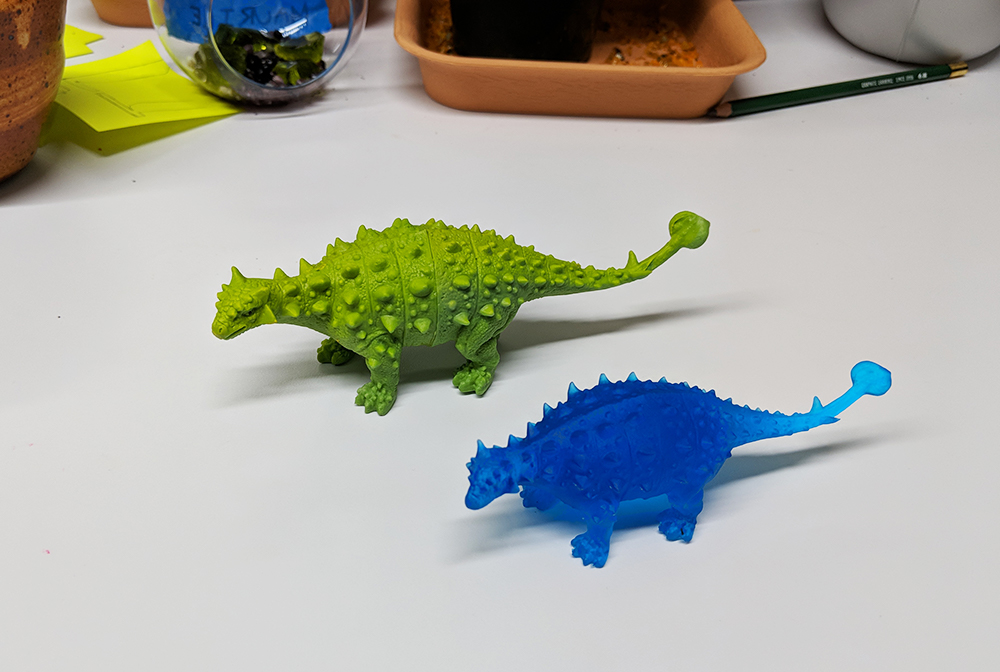
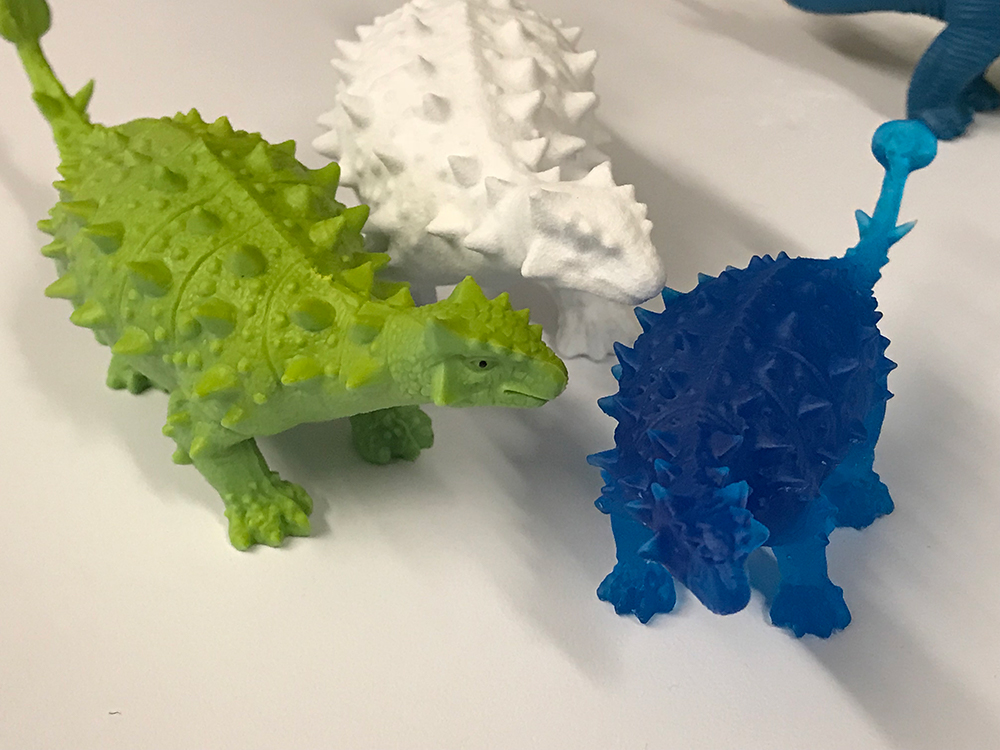
4. I used the 3D scan mesh to print the ankylosaurus on the Form2. I used the ToughV5 and 1681 layers later I had an amazing replica of the Amazon ankylosaurus. I really enjoy the PreForm user interface, especially the ability to visualize and adjust support structure.
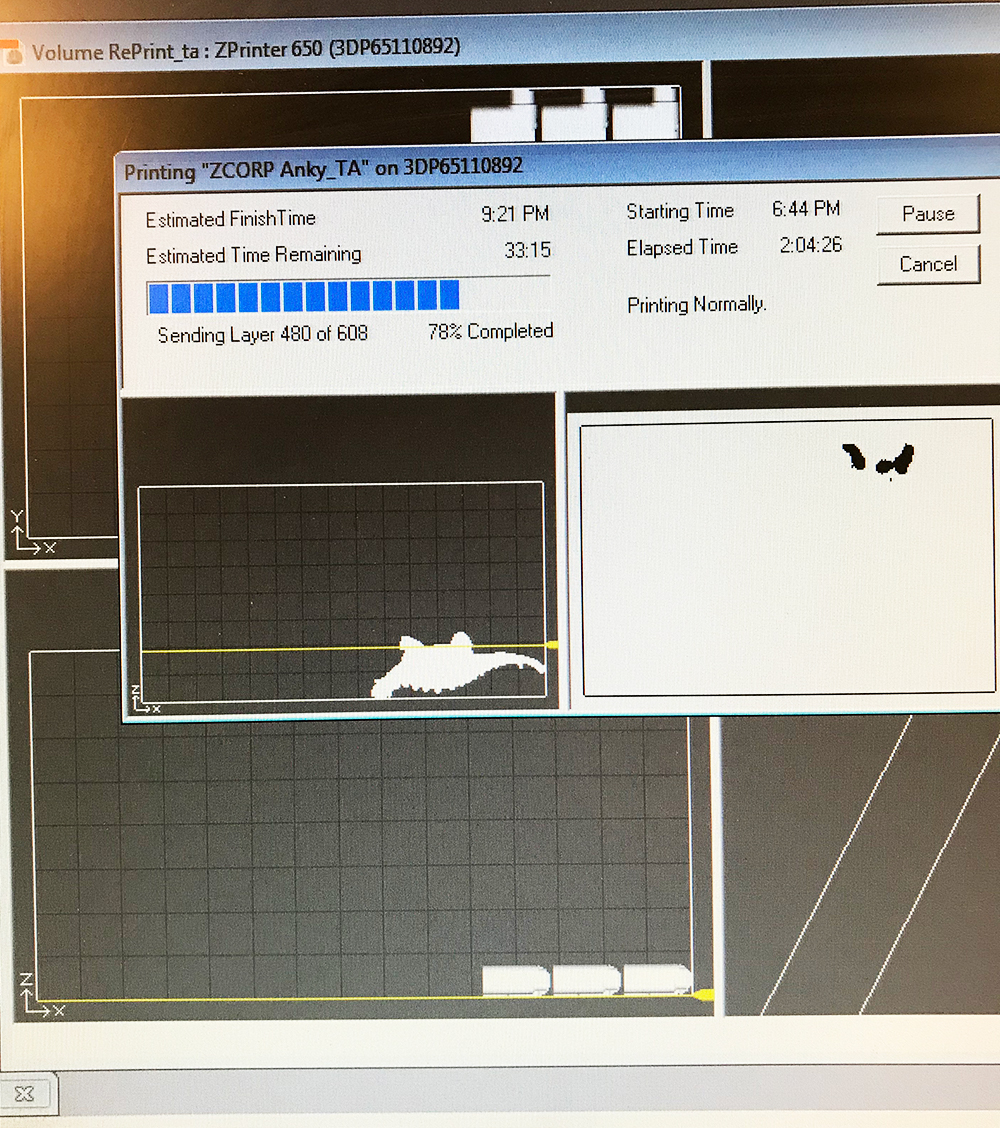
5. Lastly, I sent the 3D scan mesh to the ZCorp. The mesh was massive at about 45K, but the print came out beautifully. I chose not to post-process because I loved the simple, clean look of the white powder.

Struggles
3D print 3 ways felt like a success, but came with failures. FDM (Sindoh), STL (Form2 and OBJET 260), and Inkjet-Binder (ZCorp, no color).Tools
RhinoGrasshopper
Weaverbird
OBJET 260
Sindoh + 3D Wox
Form2 + PreForm
ZCorp
Artec 3D Scanner + Software
Source Files
Link to OBJET260 BonesLink to OBJET260 Skin
Link to Brachiosaurus FDM Print
Link to Anklyosaurus STL Print
Link to Anklyosaurus ZCORP Print