Assignment
-test runout, alignment, speeds, feeds, and toolpaths for your machine
-make something big
Goal
Create a new parametric dinosaur file for a 4'x4' Oriented Strand Board (OSB) Triceratops, focusing on robust design, as well as work flow from Rhino to ShopBot.Steps
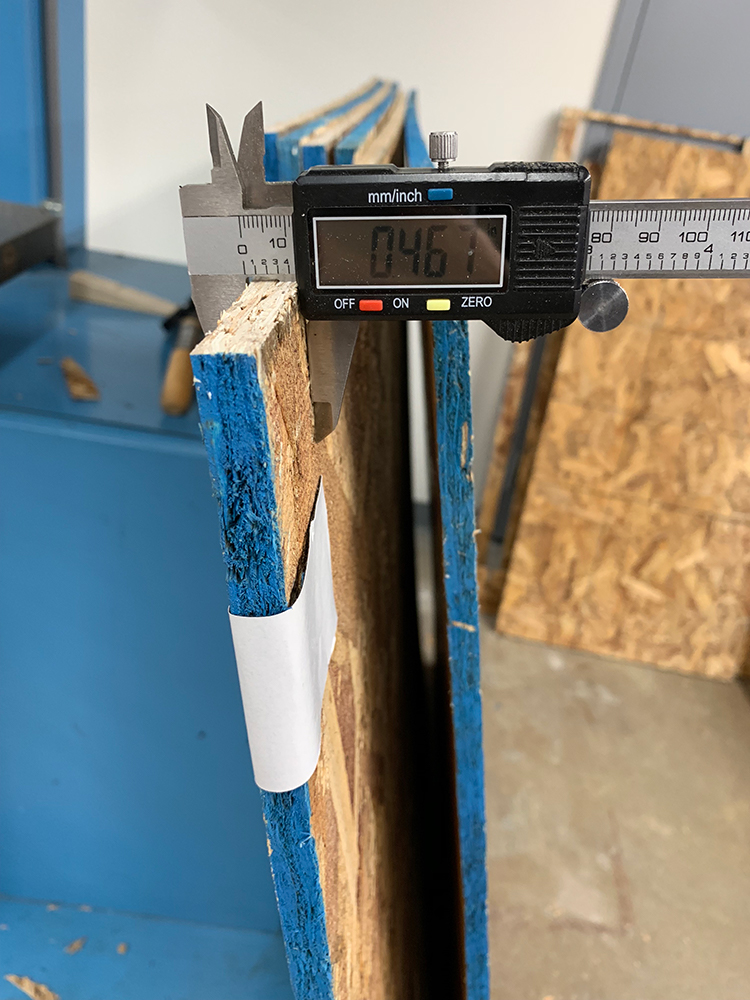
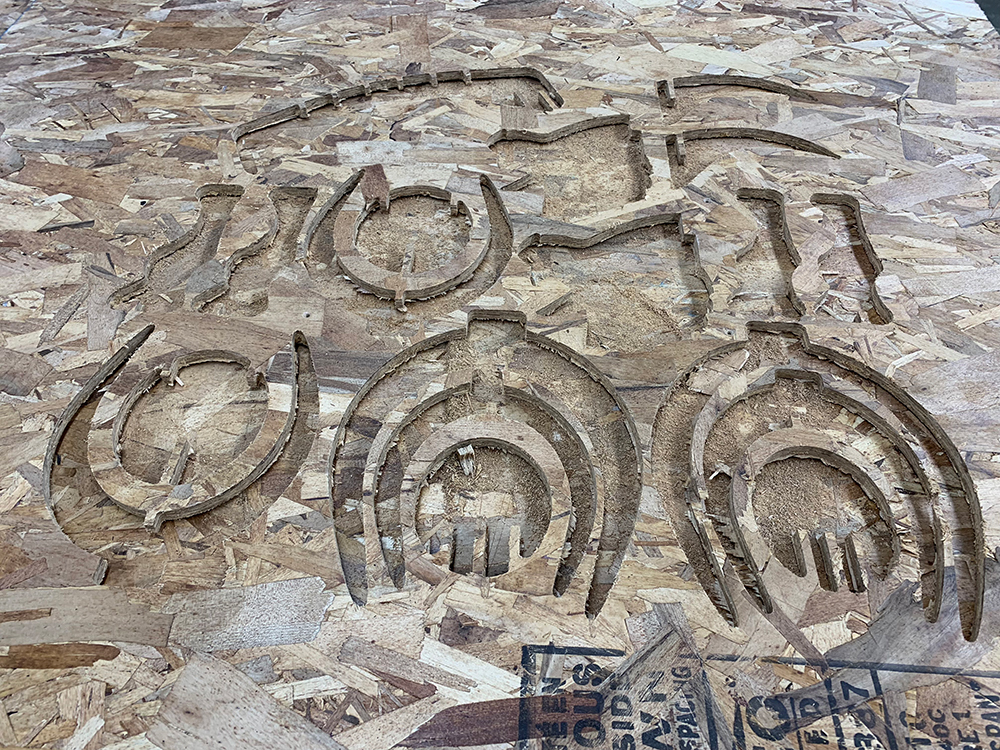
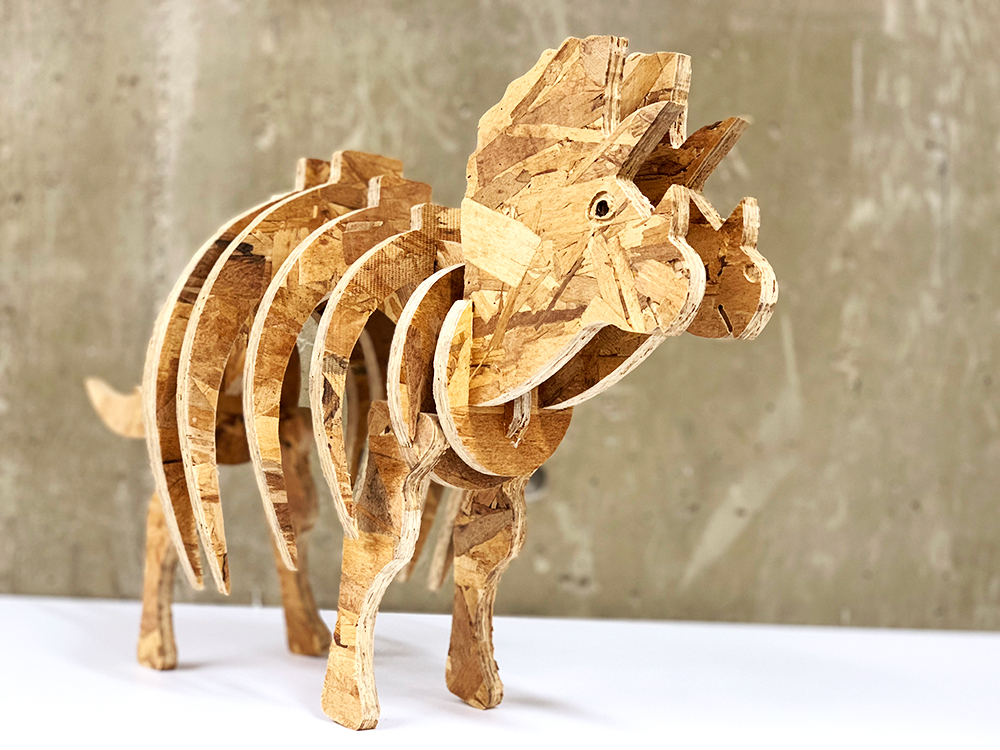
1. Dino of the week is the triceratops (plant eater from the Maastrichtian stage of the late Cretaceous period). I used the week one head and tail drawings from Illustrator, but then redrew the body components to have more of a spine, vice a center plate. I wanted gravity to assist in holding the design together. In Rhino I used Grasshopper to create the parametric aspects of the design. In retrospect, I made a mistake at this point and it affected my scaling in the end, more on this later. I ‘Baked, Filleted, UnrollSrf, and Make2D’ to then export as a .dxf.2. I imported my file into VCarve Pro and ensured the file fit the 4'x4' OSB board. On my first iteration I used a center origin, which fast forward, doesn't work for ShopBot, so back to this step! I at this point realized I had resized my file a number of times within VCarve and measured my slots and realized they did not work at the 4'x4' scaling for the thickness of the OSB. I had an hour reservation for the tool and so instead resized on VCarve for the slots to meet the average board width of 0.45 in.
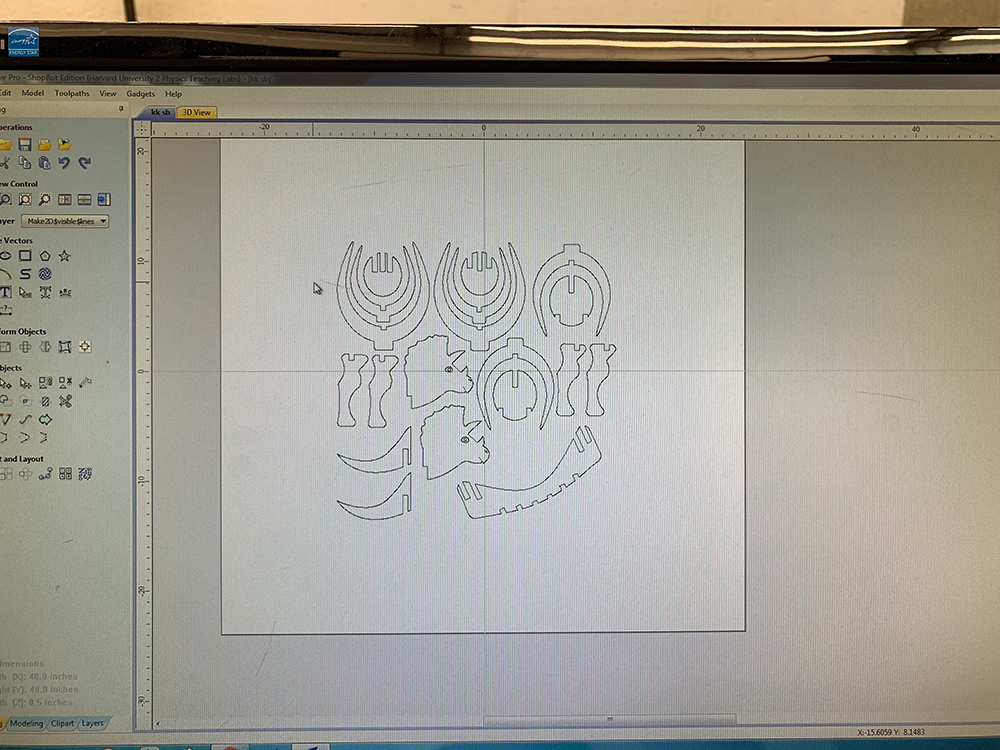
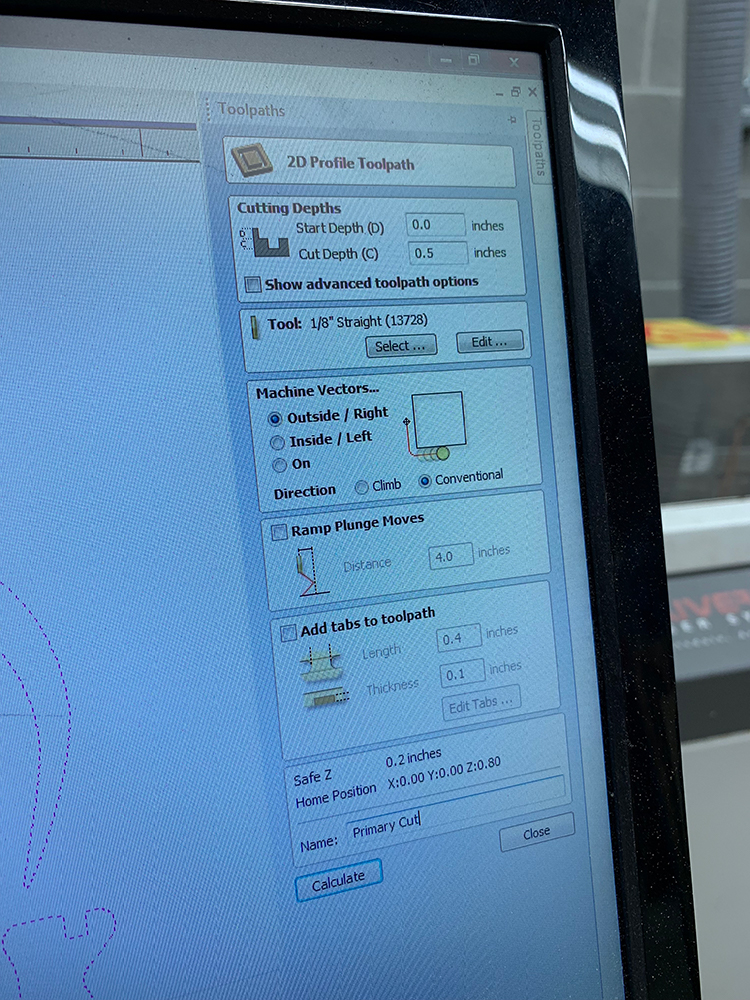
3. Toolpath Constraints: Cut = 0.50, Engrave = 0.15, Speed = 3 in/sec, Cut = 0.16", all at 18K RPM. I had a total of four files: Drill, Engrave (On Line), Eyeballs (Inside Line), and Primary Cut (Outside Line). I added tabs to the Primary Cut file by hand, just estimating where instability could occur.
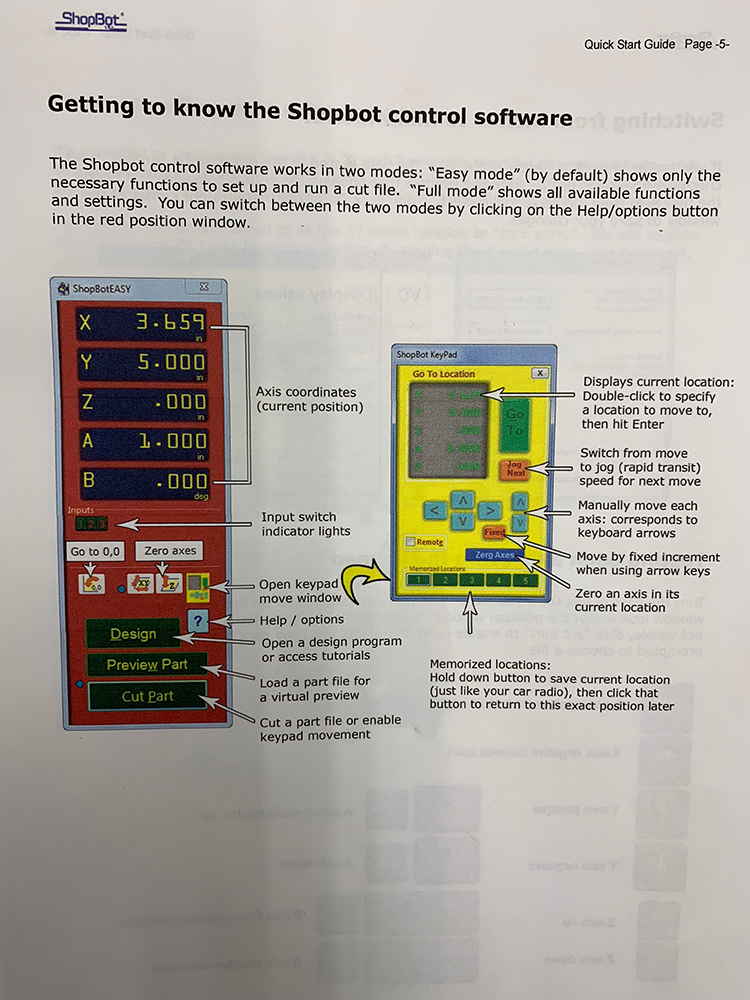
4. After re-sizing, re-origining, and re-calculating, I exported to .shp for the ShopBot software. On the ShopBot I began by laying the OSB board on the table and securing with 6 screws. I then loaded my .shp file and opened the software consoles. I found the ShopBot manual quite helpful for understanding the software, consoles, as well as the steps for executing the cut. First step, zeroing out the tool with extra attention on the Z-axis.
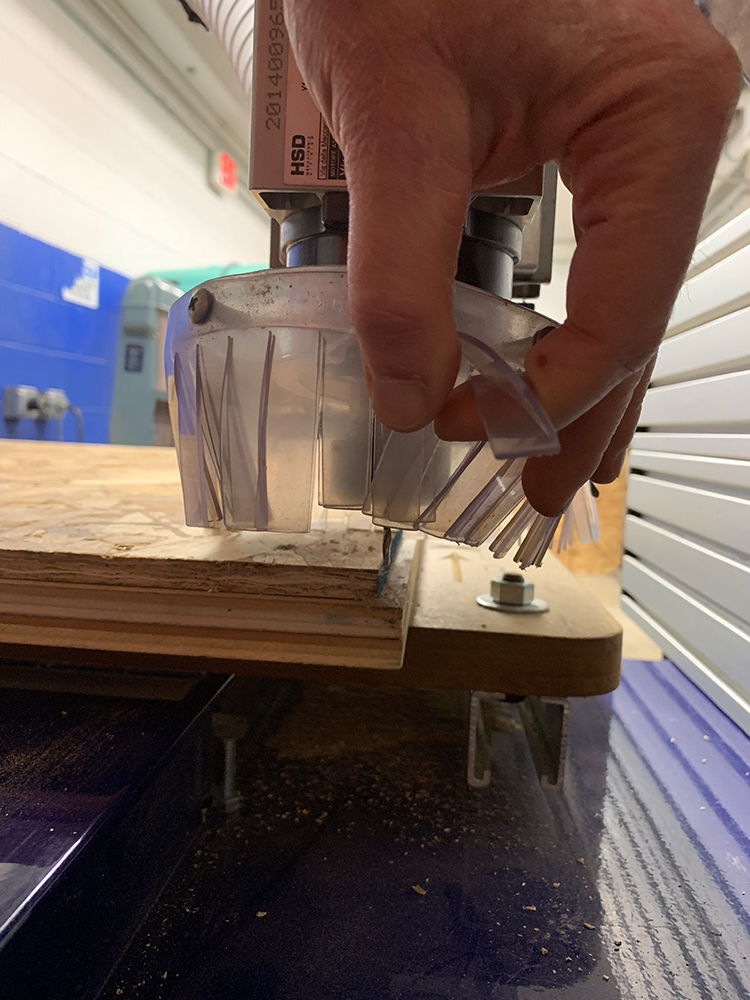
5. I started with my Drill file, added four more screws, then the Engrave file, then Eyeball, then the Primary cut. Prior to each start the spindle was initiated and then the vacuum was turned on. For each of the cuts, the first pass went to a depth of 0.167", the second pass to 0.333", and the final pass to 0.50”.
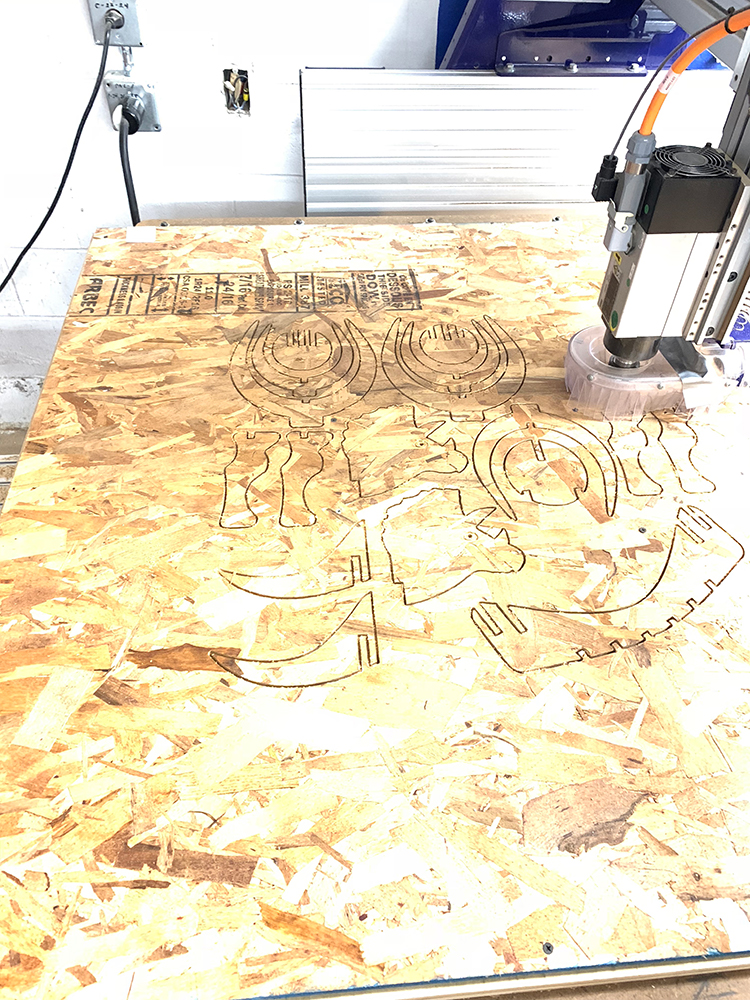
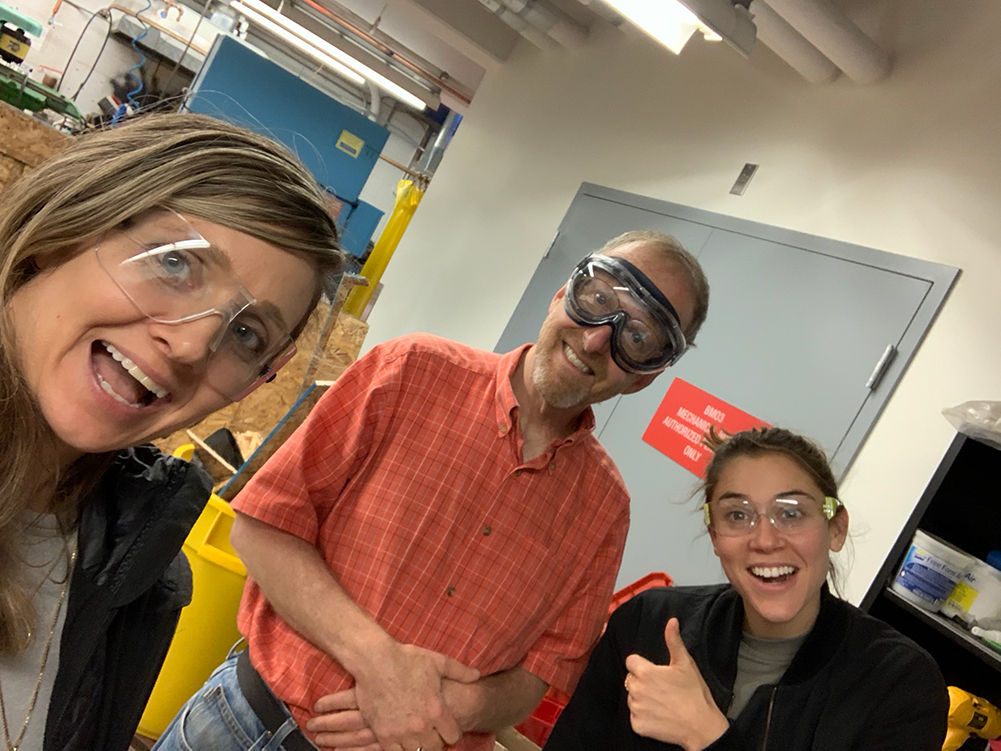
6. I unscrewed the board, removed the OSB from the ShopBot table, and vacuumed up. My cut was not as clean as I had hoped and I could have been tighter on the Z zeroing. I spent about 45 min cutting the pieces out of the OSB. Also, shout out to the Harvard Section, the most fun section! And Rob, keeping us all safe and on track!
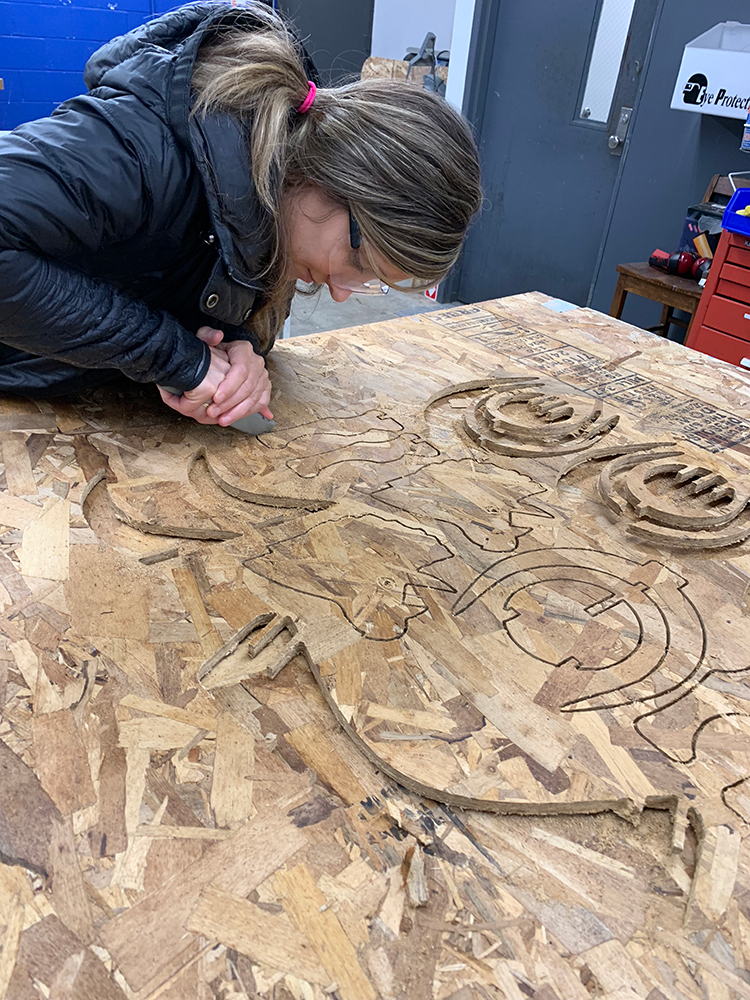
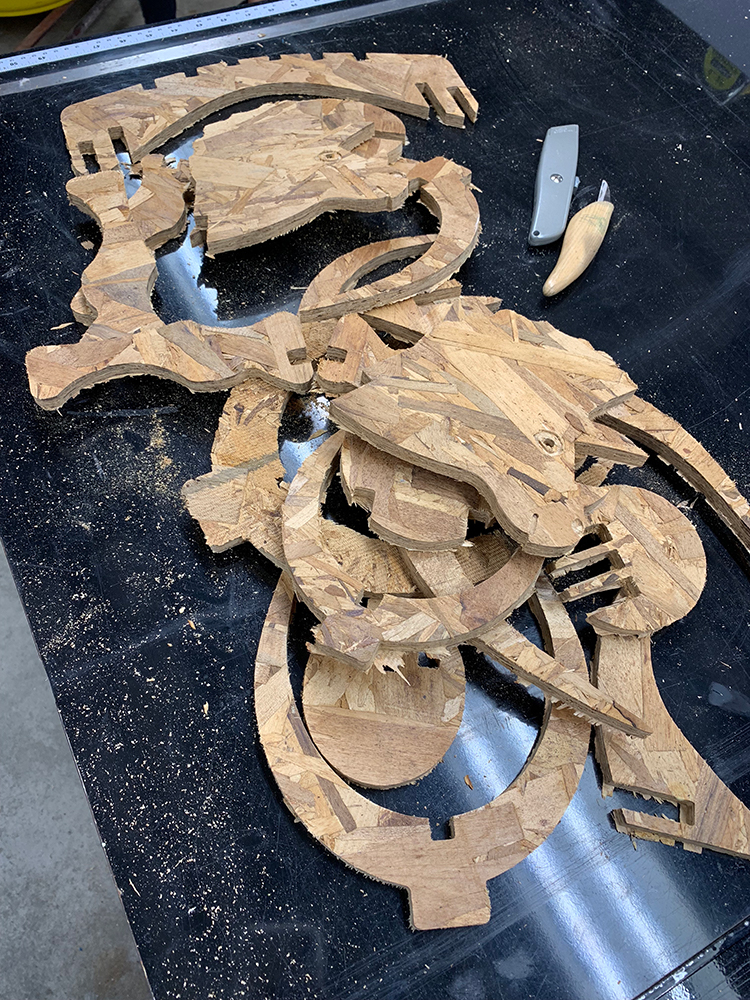
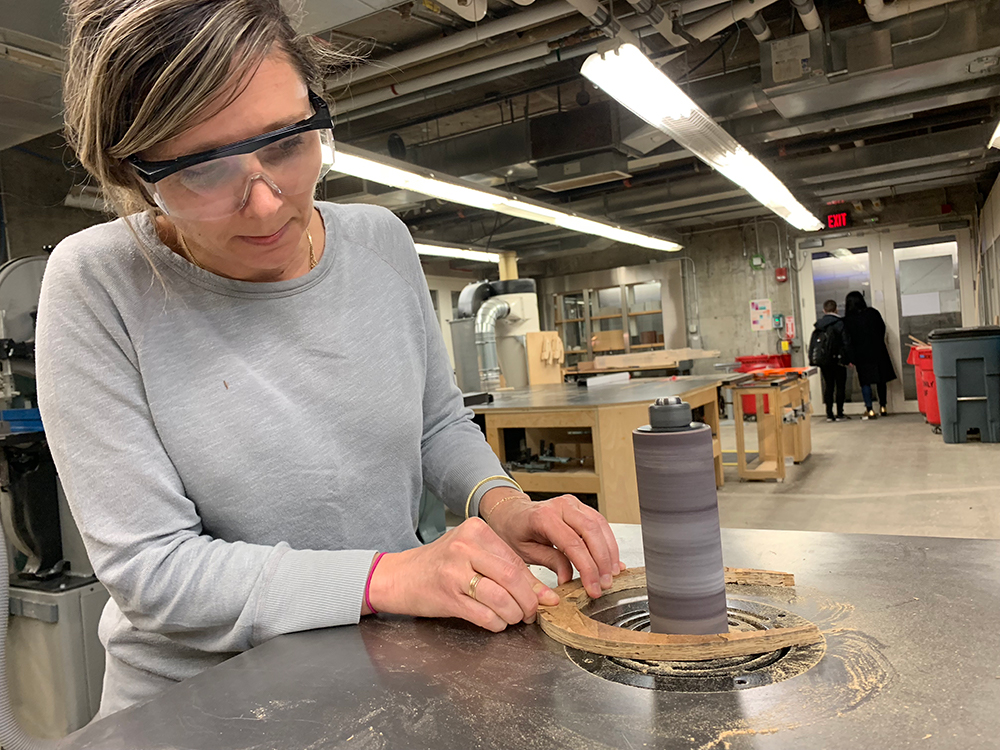
7. Time to clean up the cut! I started with a bench-top belt sander, then moved to an oscillating spindle sander, and finally to hand sanding with 200 grain paper.
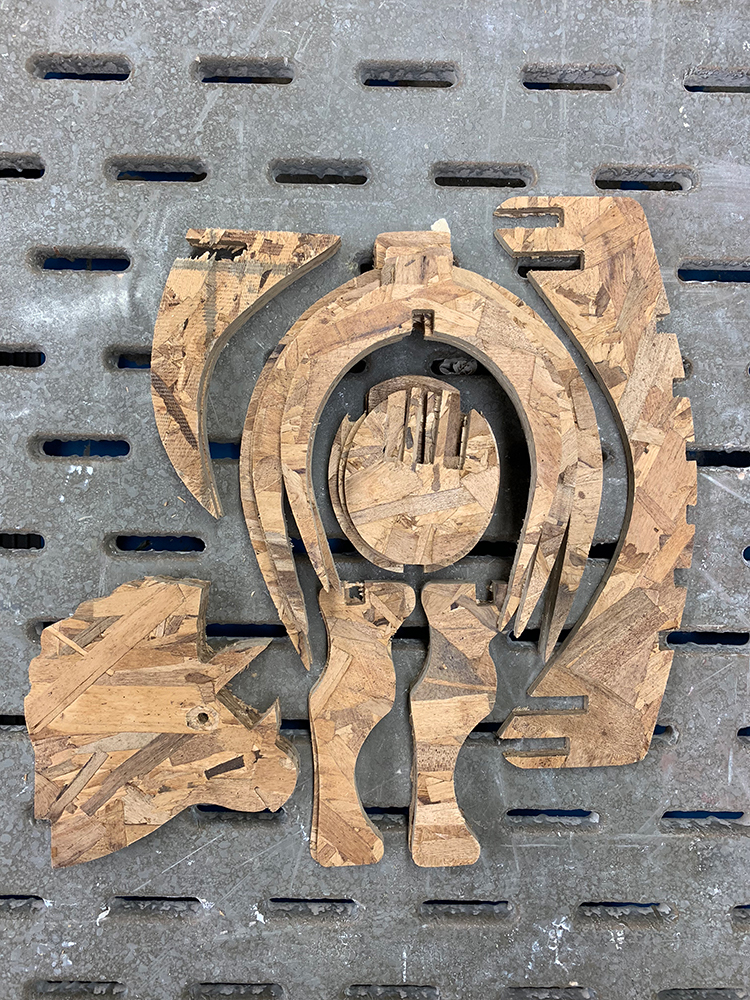
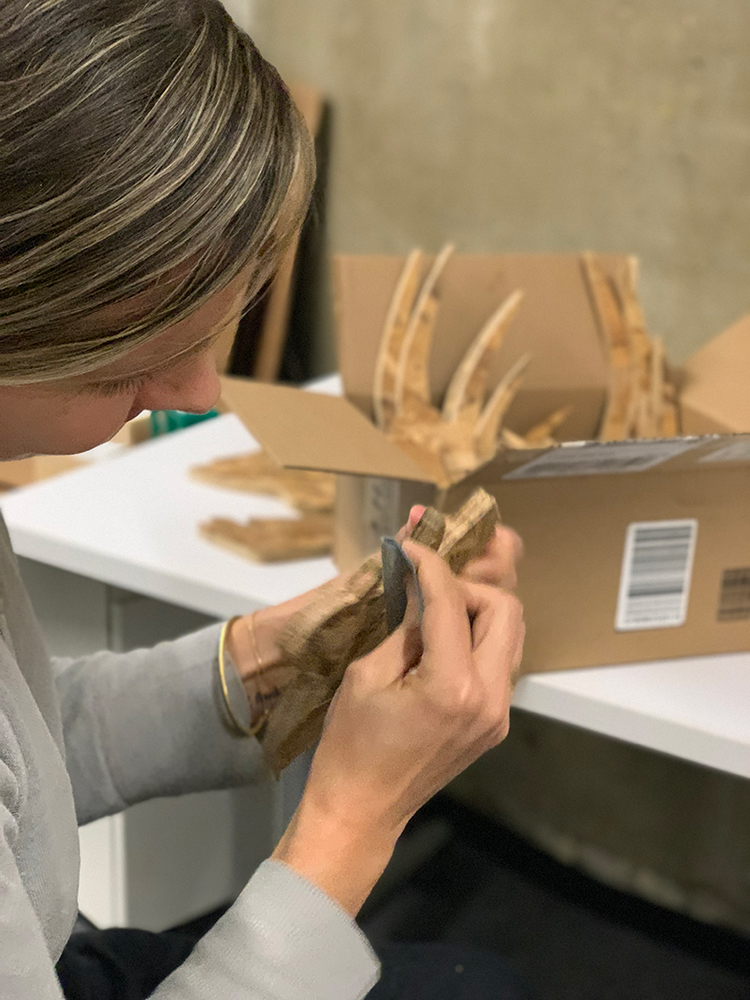
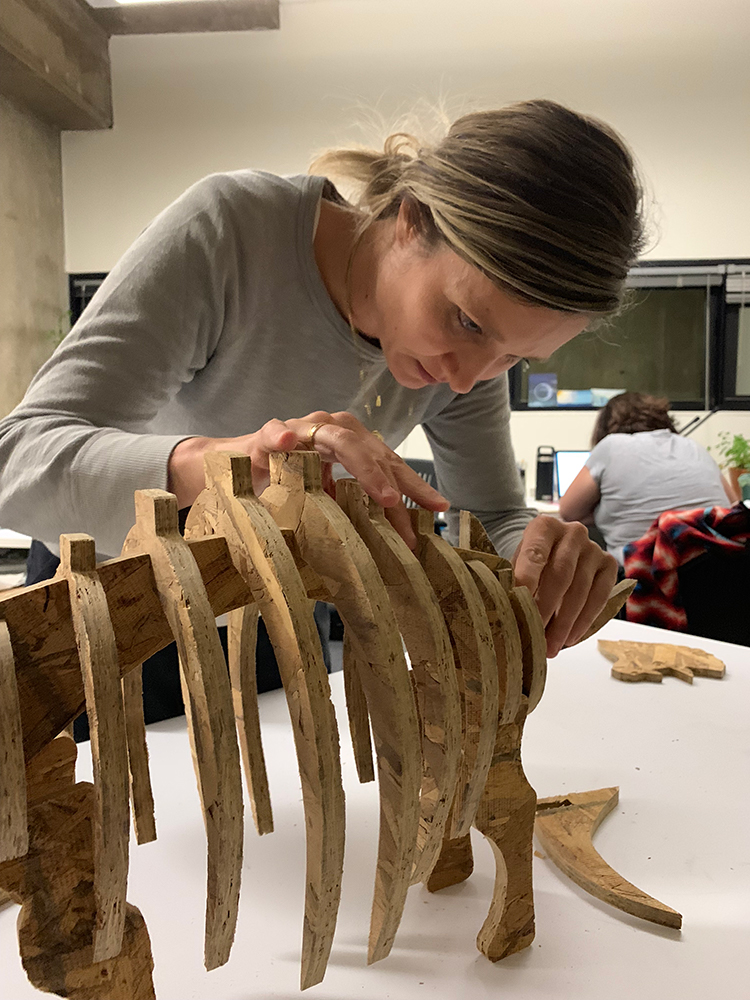
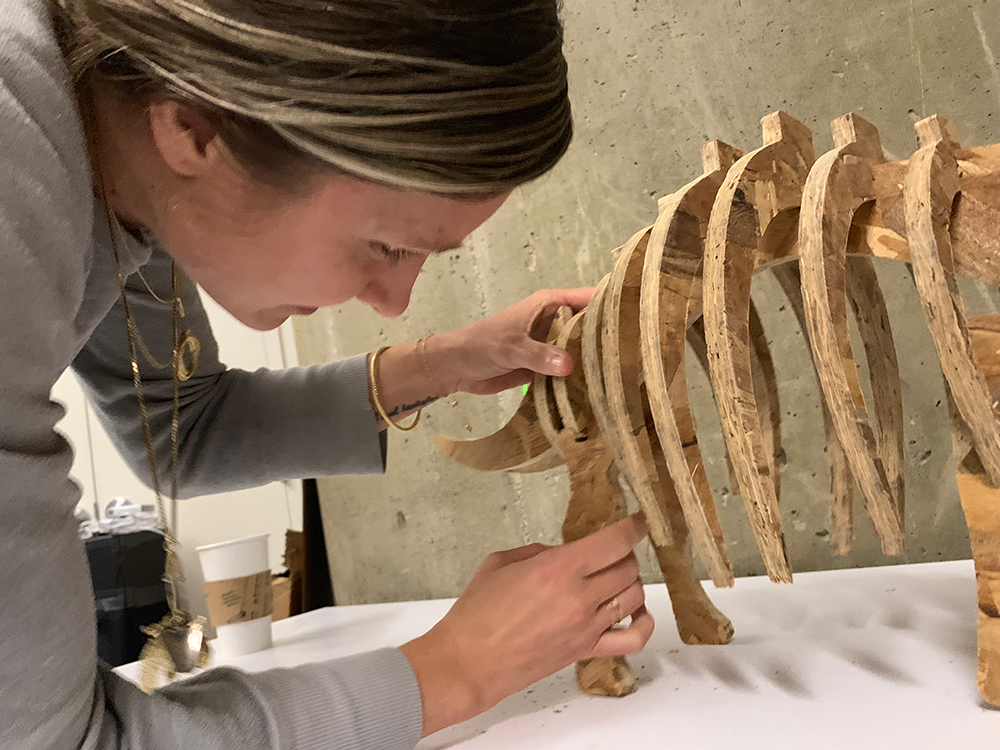
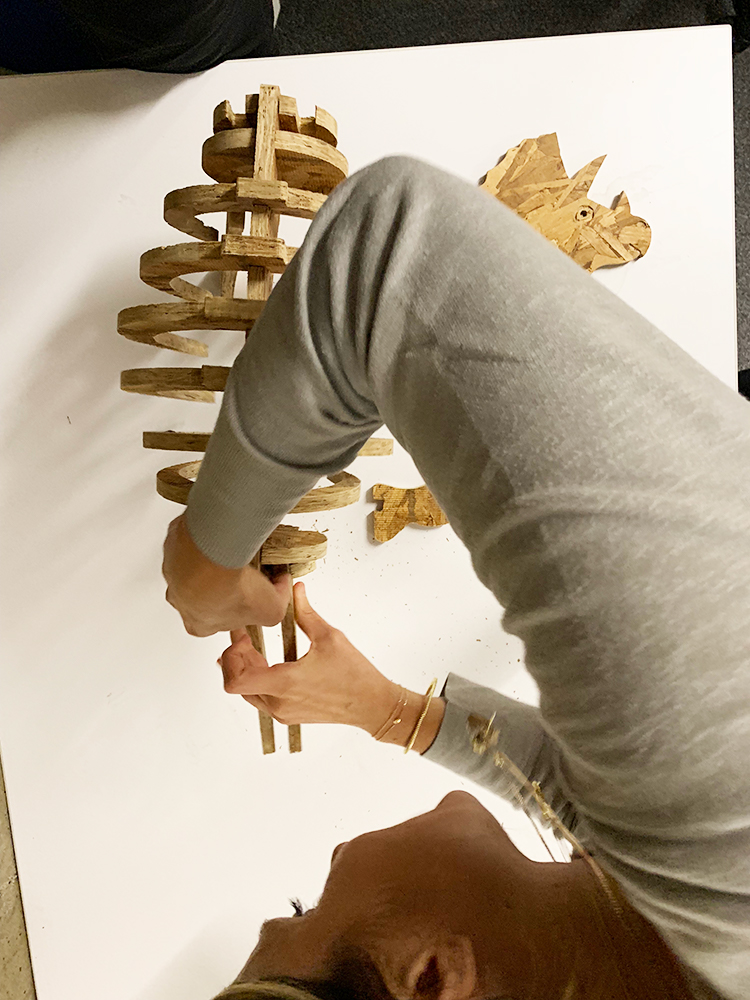
8. Assembly of the triceratops! Seamless and easy, until the two head pieces, which were a bit heavy, so I used wood glue, and then a couple of small nails to make sure they stay in place even in the presence of gravity (yay for nail guns). The primary point of the design was that gravity held the slotting in place, but the sanding degraded part of the 'hook' for the headpieces to the rib pieces.
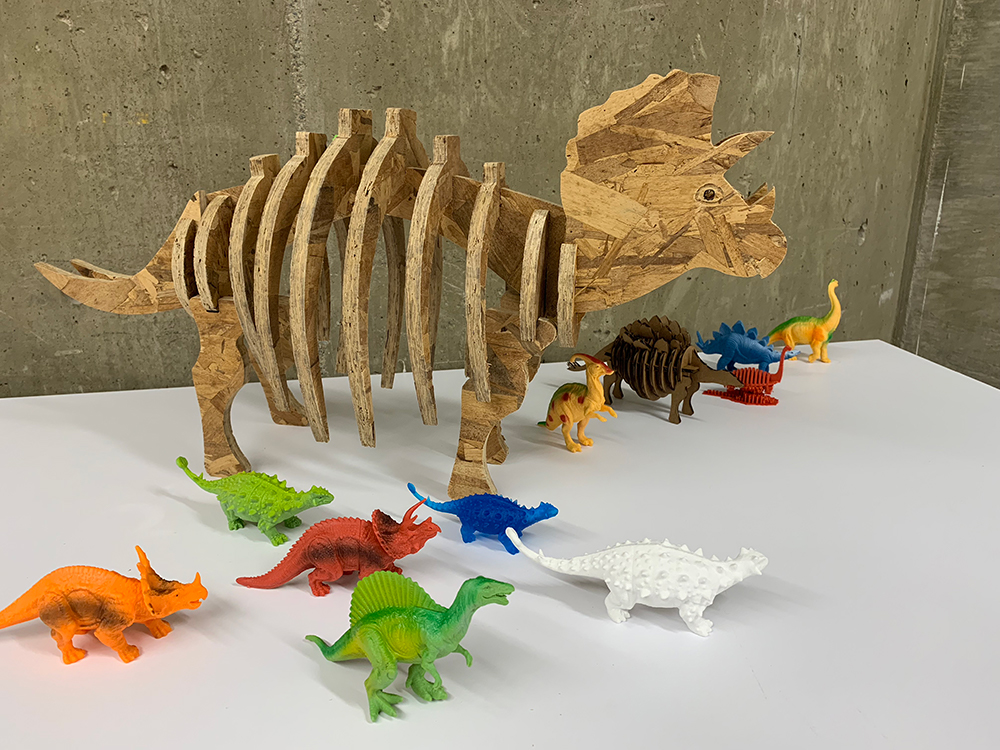
9. Assembling the dinosaur army!
Struggles
Setting the parameters in parametric design isn't hard, but if you mess it up, repeating the unroll, fillet, join, make2d, vcarve, toolpath, etc is painful. A script for this process would probably be the solution.Tools
IllustratorGrasshopper
Rhino
VCarve
ShopBot 48”x48”x8”
Bench-top Belt Sander
Oscillating Spindle Sander
200 grain Sand Paper
Nail Gun
Source Files
Link to Triceratops in RhinoLink to triceratops.dxf
Link to triceratops.crv