Molding+Casting Week08
how to make (almost) anything
Molding and Casting
Week 08
This week’s assignment was to design a 3D mold appropriate to the tooling and stock we were going to use to mill it and then to cast our object from it.
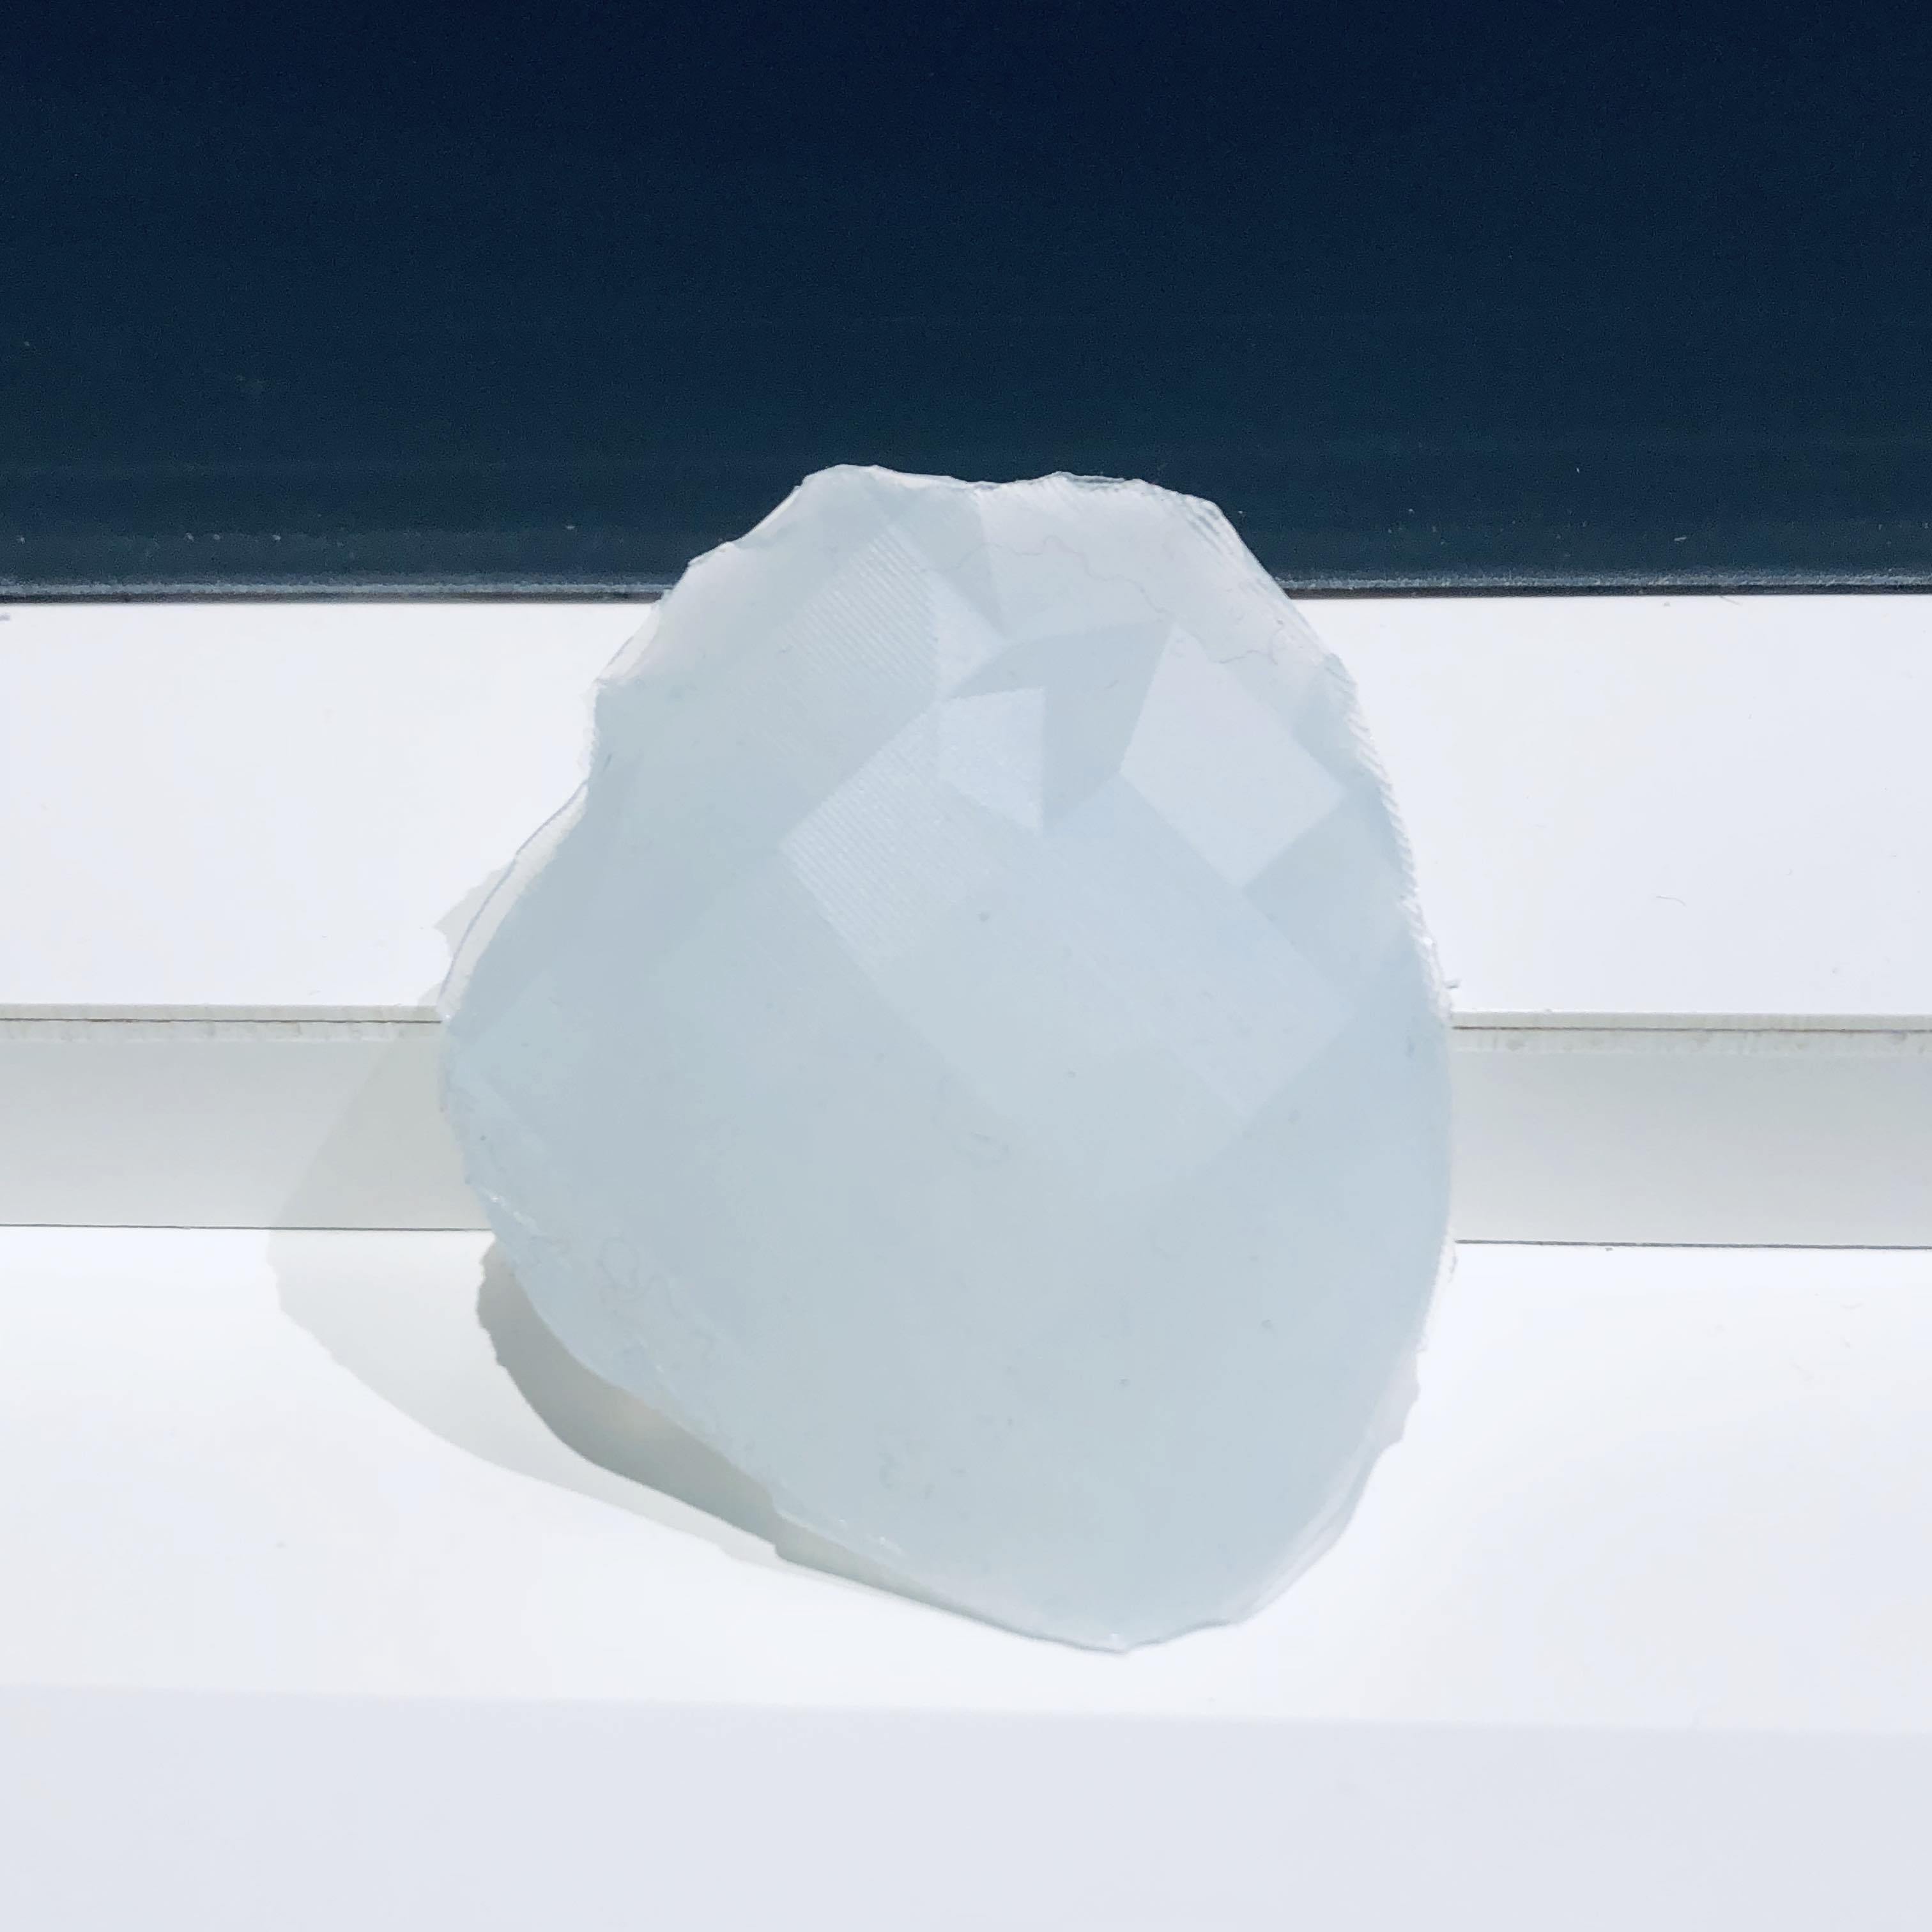
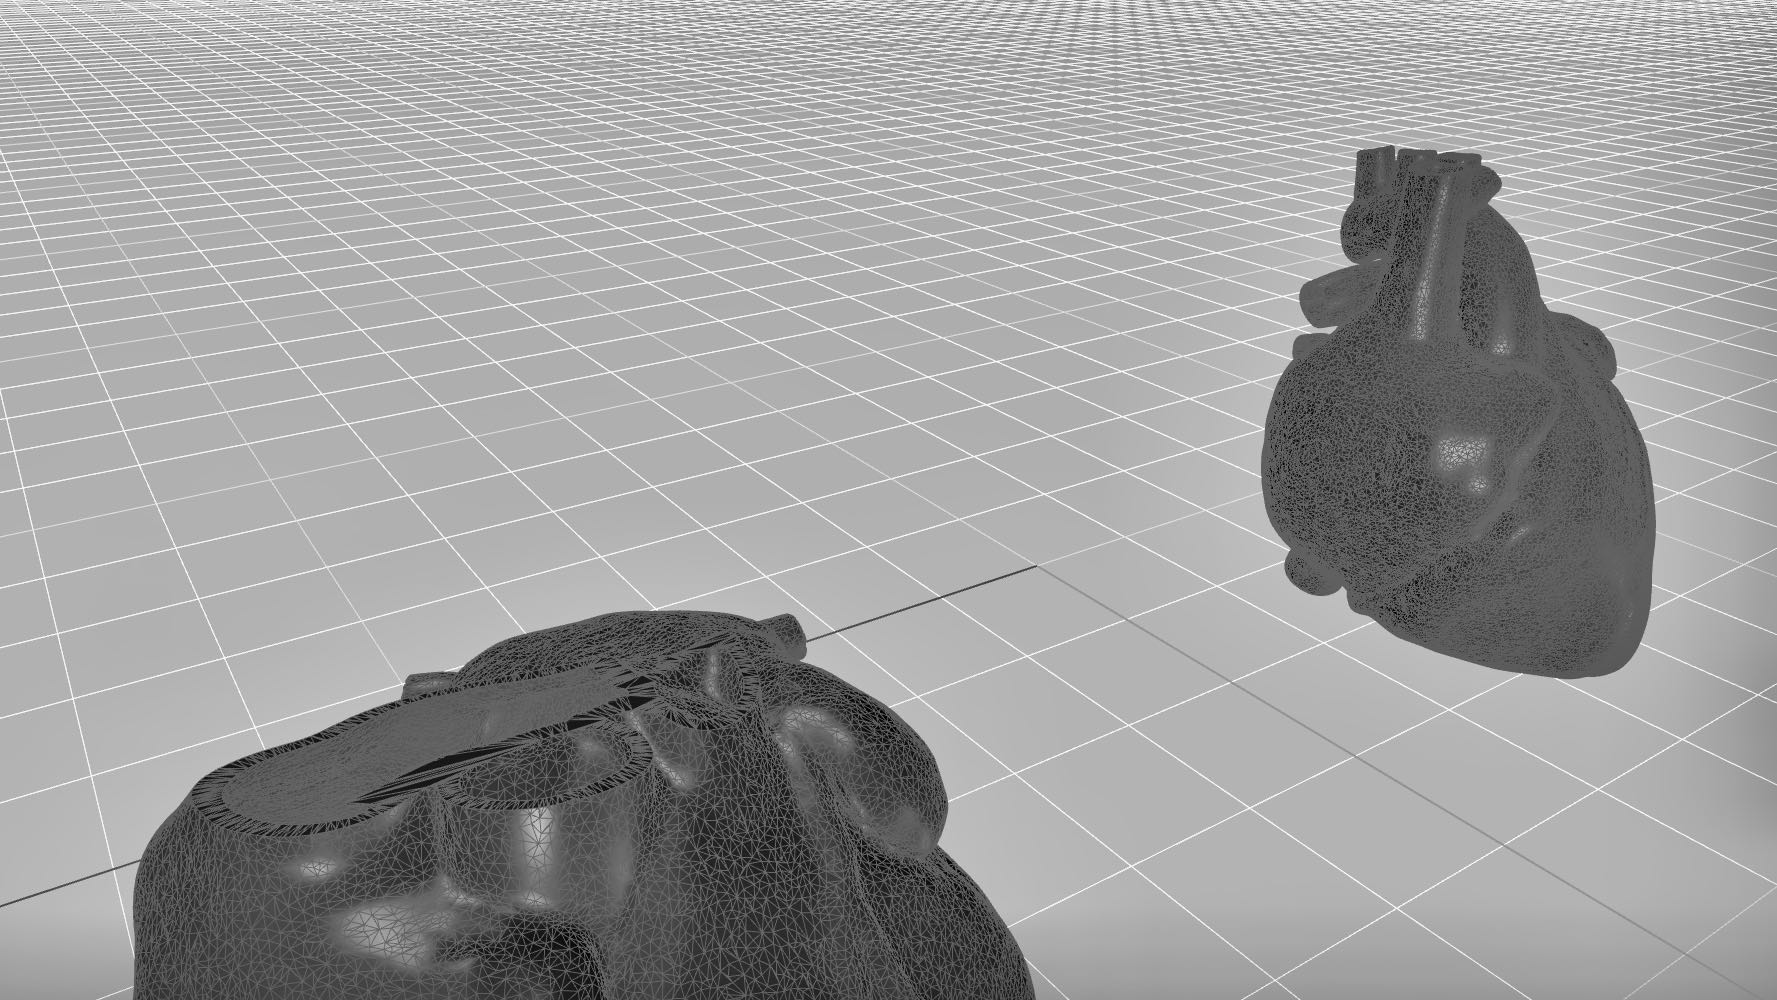
Since my final project deals with Instagram, I decided to cast and mold a silicon heart, but instead of working with the emoticon shape, I chose to work with the human organ. The CAD process for this took three work sessions with each session approaching the design solution very differently.
Session I: My initial approach was to import a 3D model of a heart from the web. While I found a stunning model, the entire design was a single mesh making not only editing but conversion into a solid model tedious. The first step I took was to use a cutting plane to trim the protruding veins and capillaries. Not very dexterous in Rhino, the best I could do was, more or less, to shave off the top. Next, I attempted to make a mesh sphere to fill in the hole, blending the seams using the control points. Unfortunately, when I followed the mesh-to-nurbs command, my object was unable to convert into a solid which affected my ability to use the boolean-difference command successfully.
Session II: My second attempt at modeling a heart began with my dropping a photo of another 3D model into my Rhino interface. I then worked in 2D in the top view and traced the outline of the heart using the interpolated curve tool. This worked well! I made two traces, one of the front side and one of the back side. Next, I stacked the traces in the perspective view and then created surfaces all around. But since the shape looked so flat and angular, I decided to abandon it.

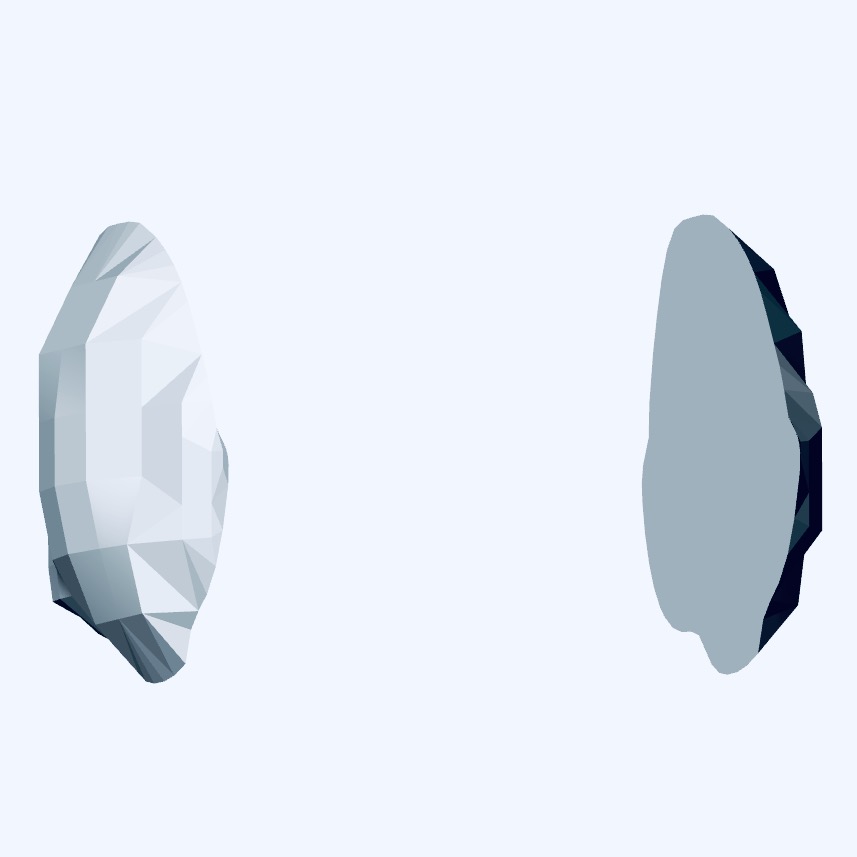
Session III: I returned to the 2D traces but with a new idea: to create from them a mesh surface that could be manipulated into a 3D shape using the control points. I did this per heart half, after which, I capped the mesh surface from below. The two shapes converted beautifully into solids allowing me to create my two molding blocks no problem.
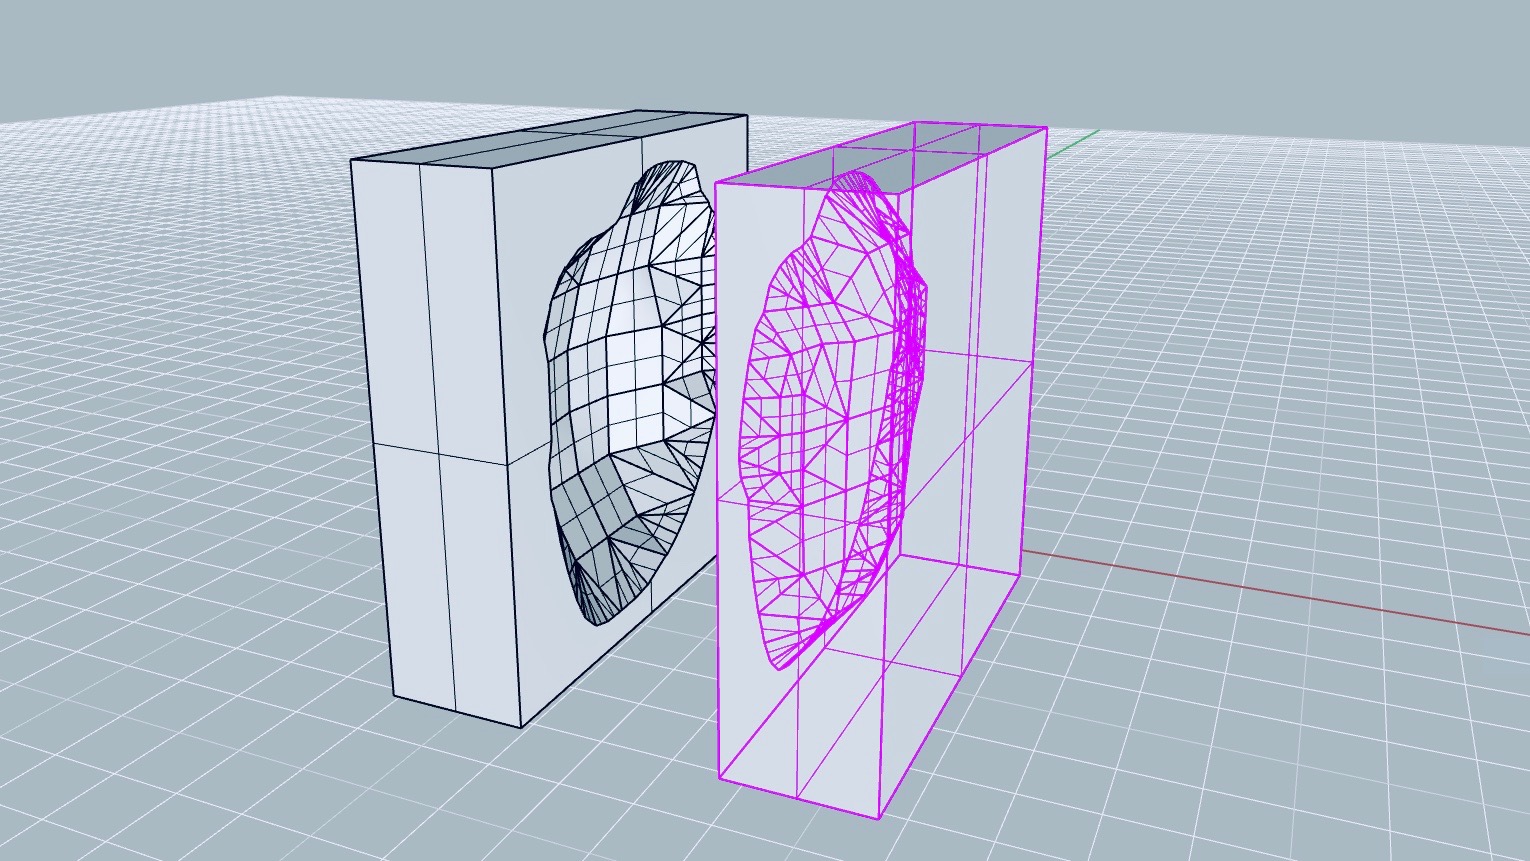
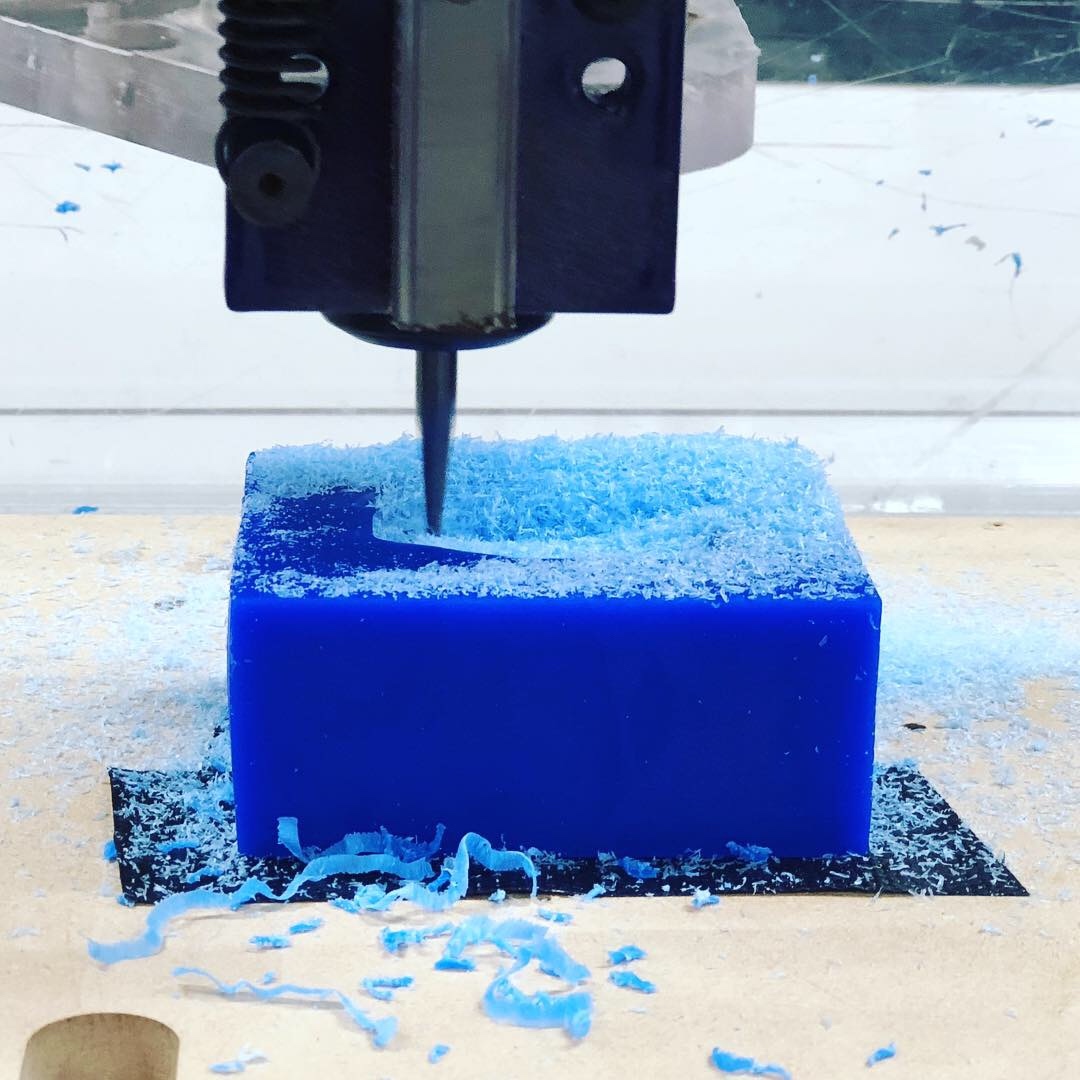
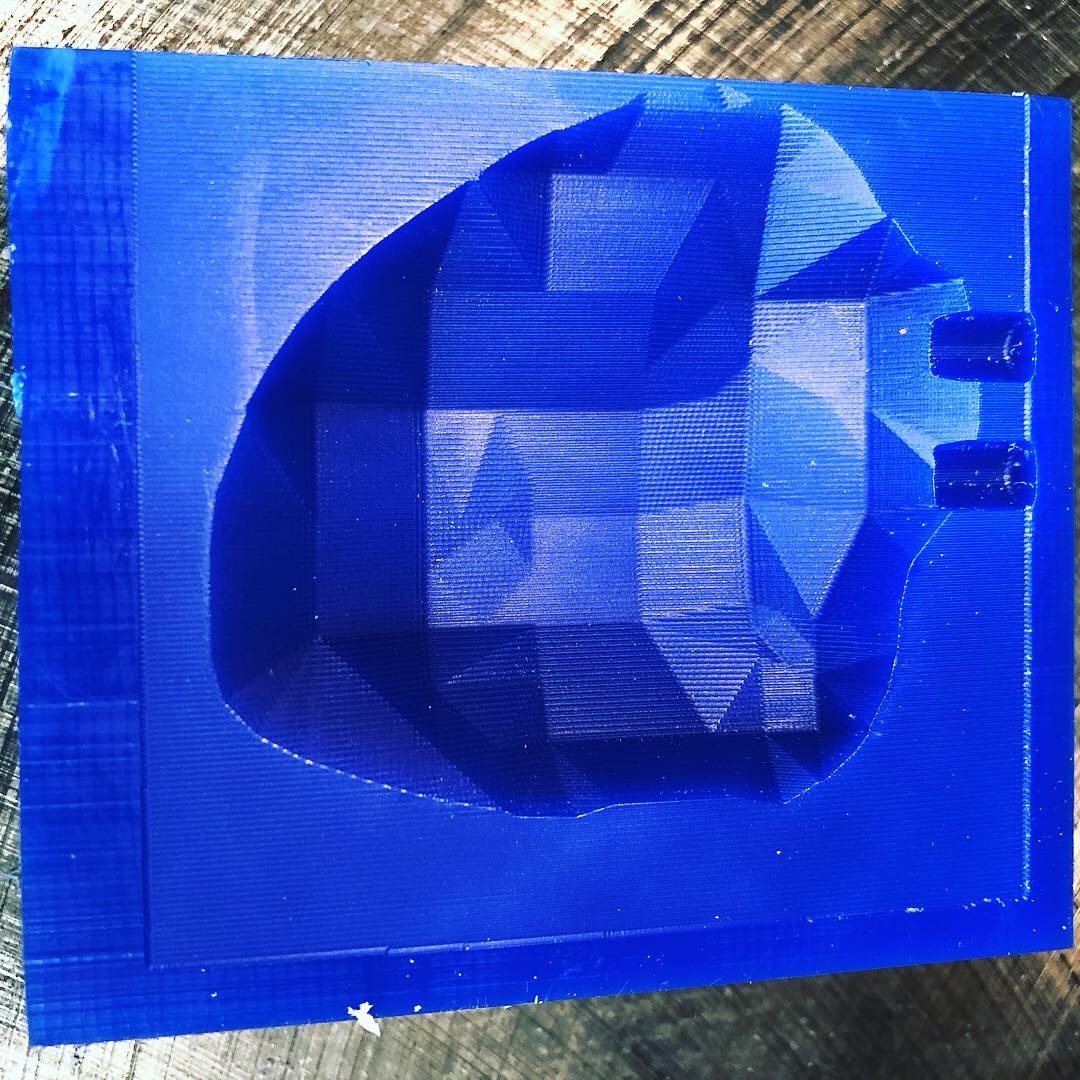
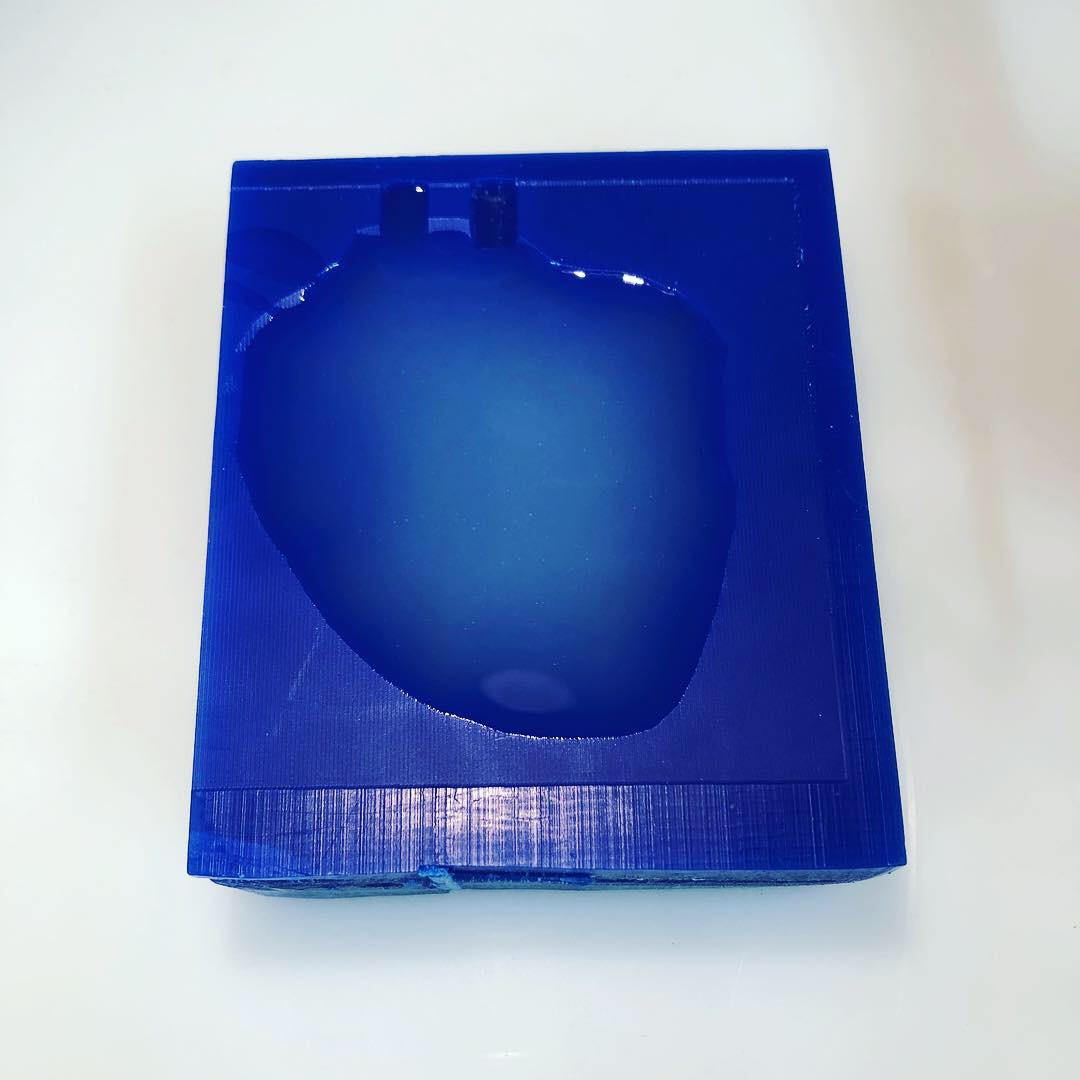
On the ShopBot, I used V-Carve to import my .stl file and to create the tool paths. For the rough cut, I used a 1/8 inch bit and for the finishing cut a 1/16 inch bit. Since I was working in silicone, a highly flexible material, and therefore did not require a pliable mold to assist with the dislodging of my object, I designed my negative mold to be directly cut into the wax block. I soon regretted this decision for the following reasons:
The wax blocks were not cut with the precise measurements we were given (3” x 3.5” x 1.5”). This was understandable since most in the class were designing positive-to-negative molds within the block (opposite to me). So though my model was centered in the material parameters in V-Carve, the edges were off. This led to the pouring and air-release valves to not reach the outside and since I had no way to pour the mixture in or align with certainty my two heart halves, I had to cast them one at a time. With a little bit of luck, all worked out. Turns out the Ecoflex 00-30 Silicone Rubber is slightly adhesive to itself allowing me to suction the two halves together post-production.