Interfaces Week12
how to make (almost) anything
Interface and Application
Week 12
This week’s assignment was to write an application that interfaces with an input and/or output device that you made in a previous week.
Interested in exploring Processing, I began by reading the following pages and documents:
Using Firmata On Arduino-Compatible Boards: Lab 4: Sensing: FSR & Photocells and Serial Communication with Processing: Connecting Arduino to Processing: Arduino Troubleshooting:
Getting Started with Processing by Casey Raes and Ben Fry (first 65 pages and chapter on Arduino)
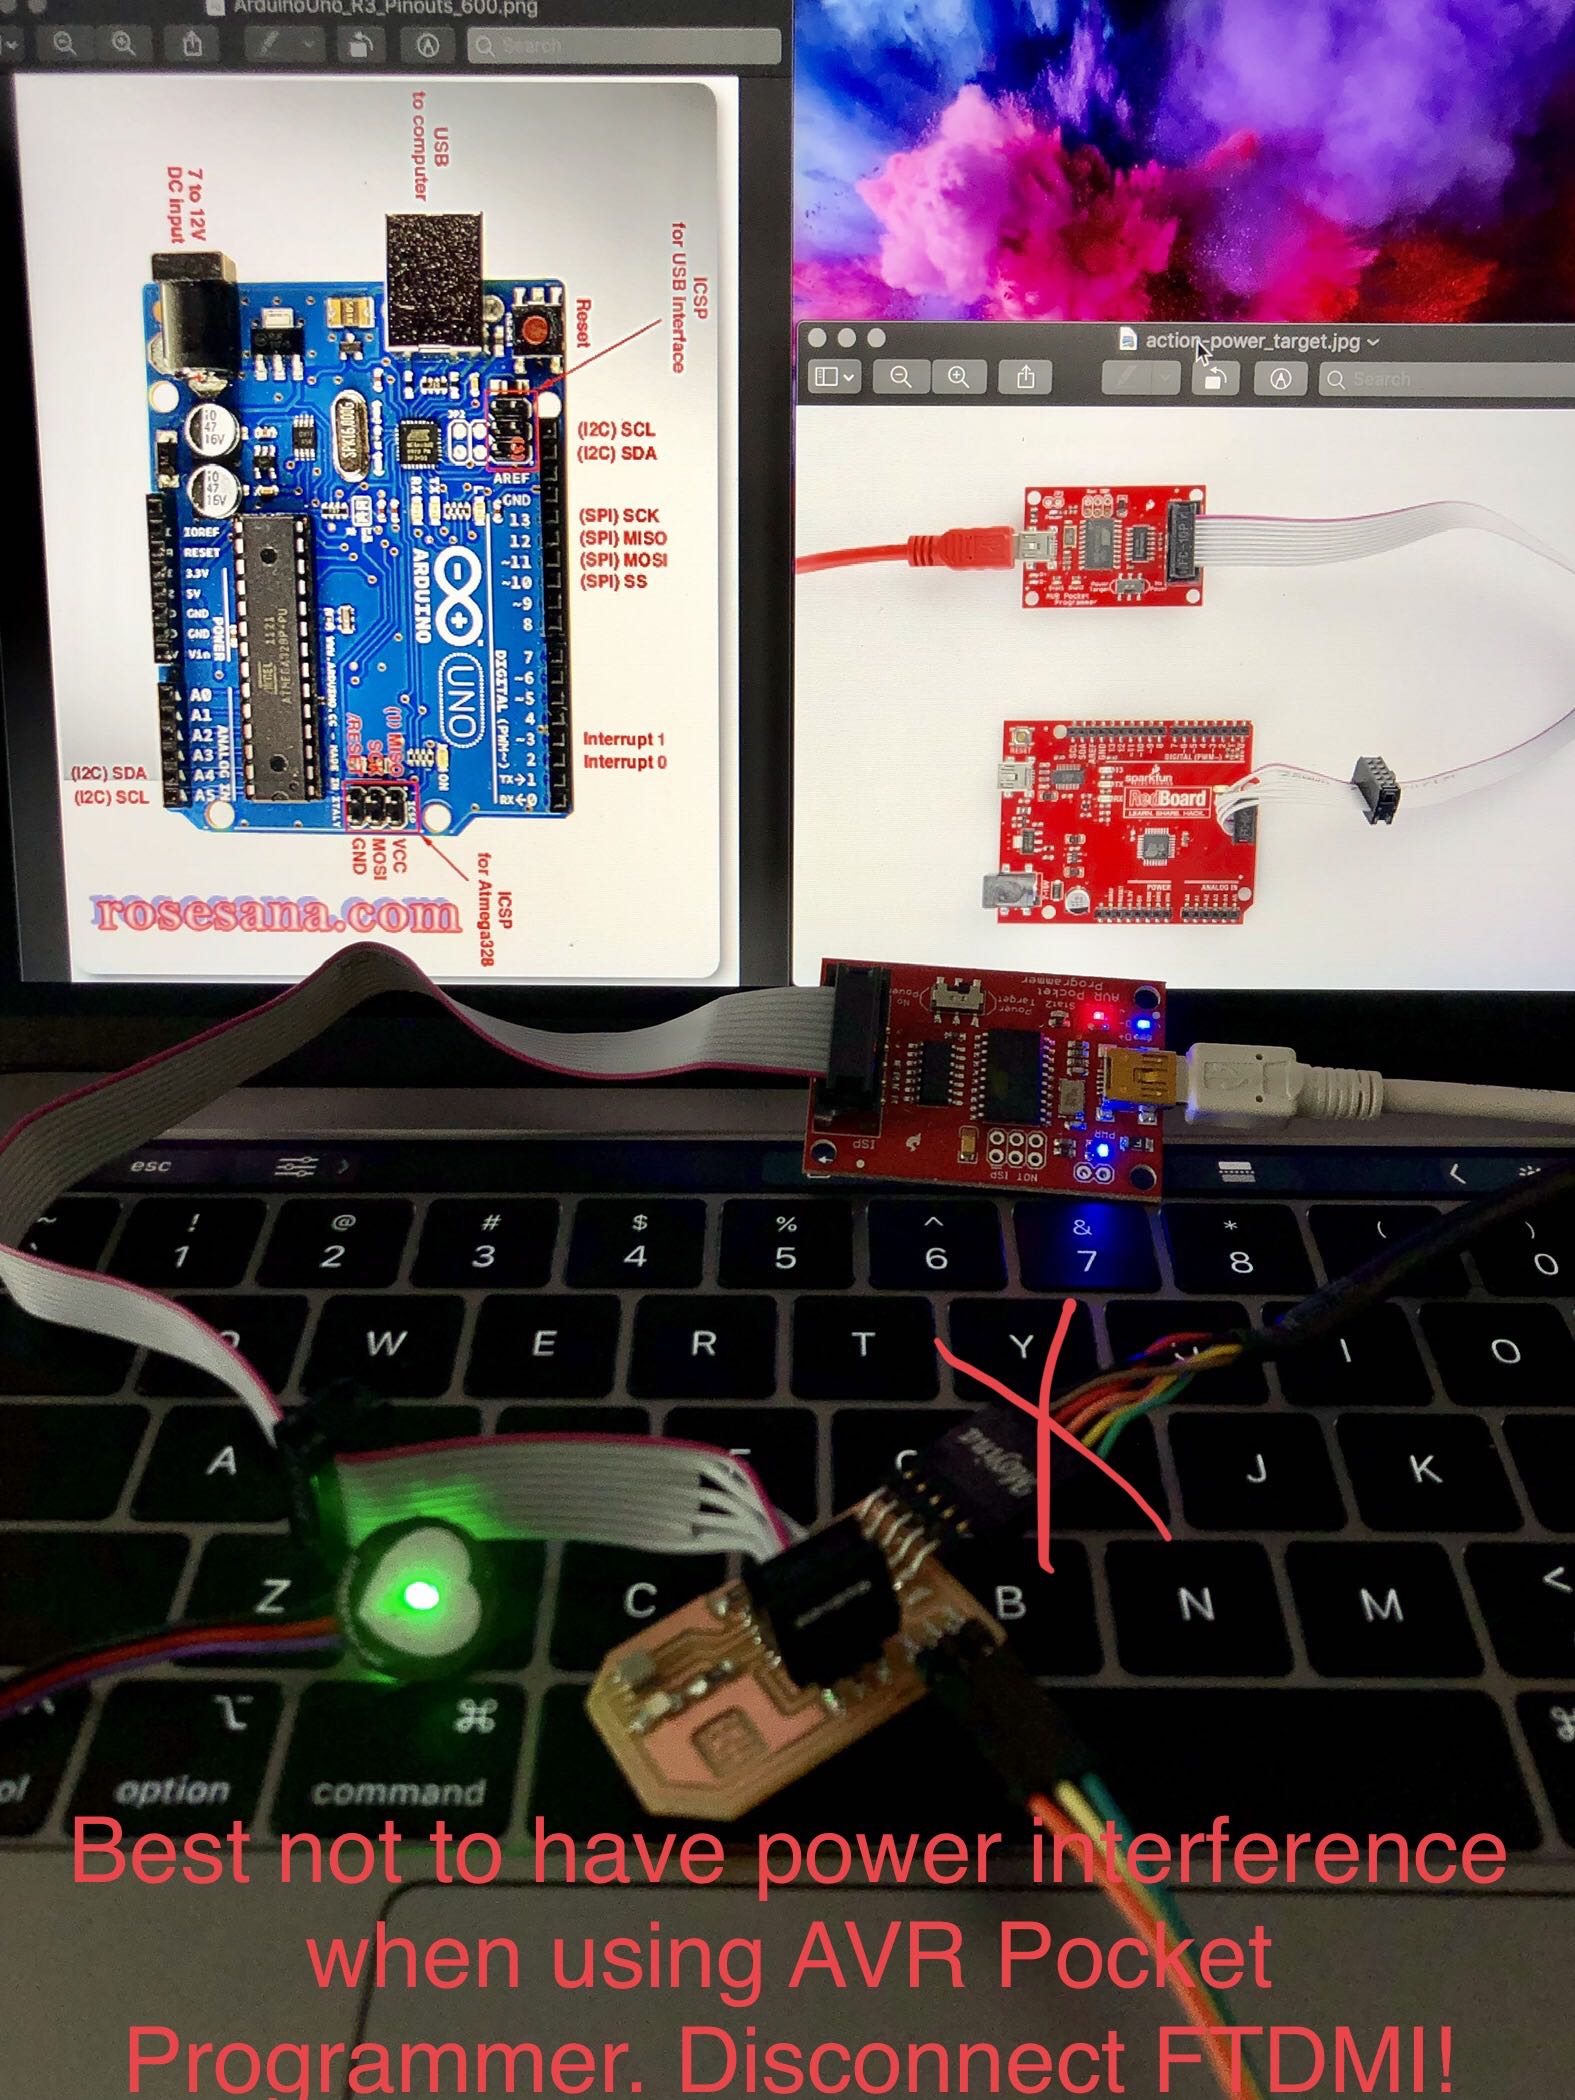
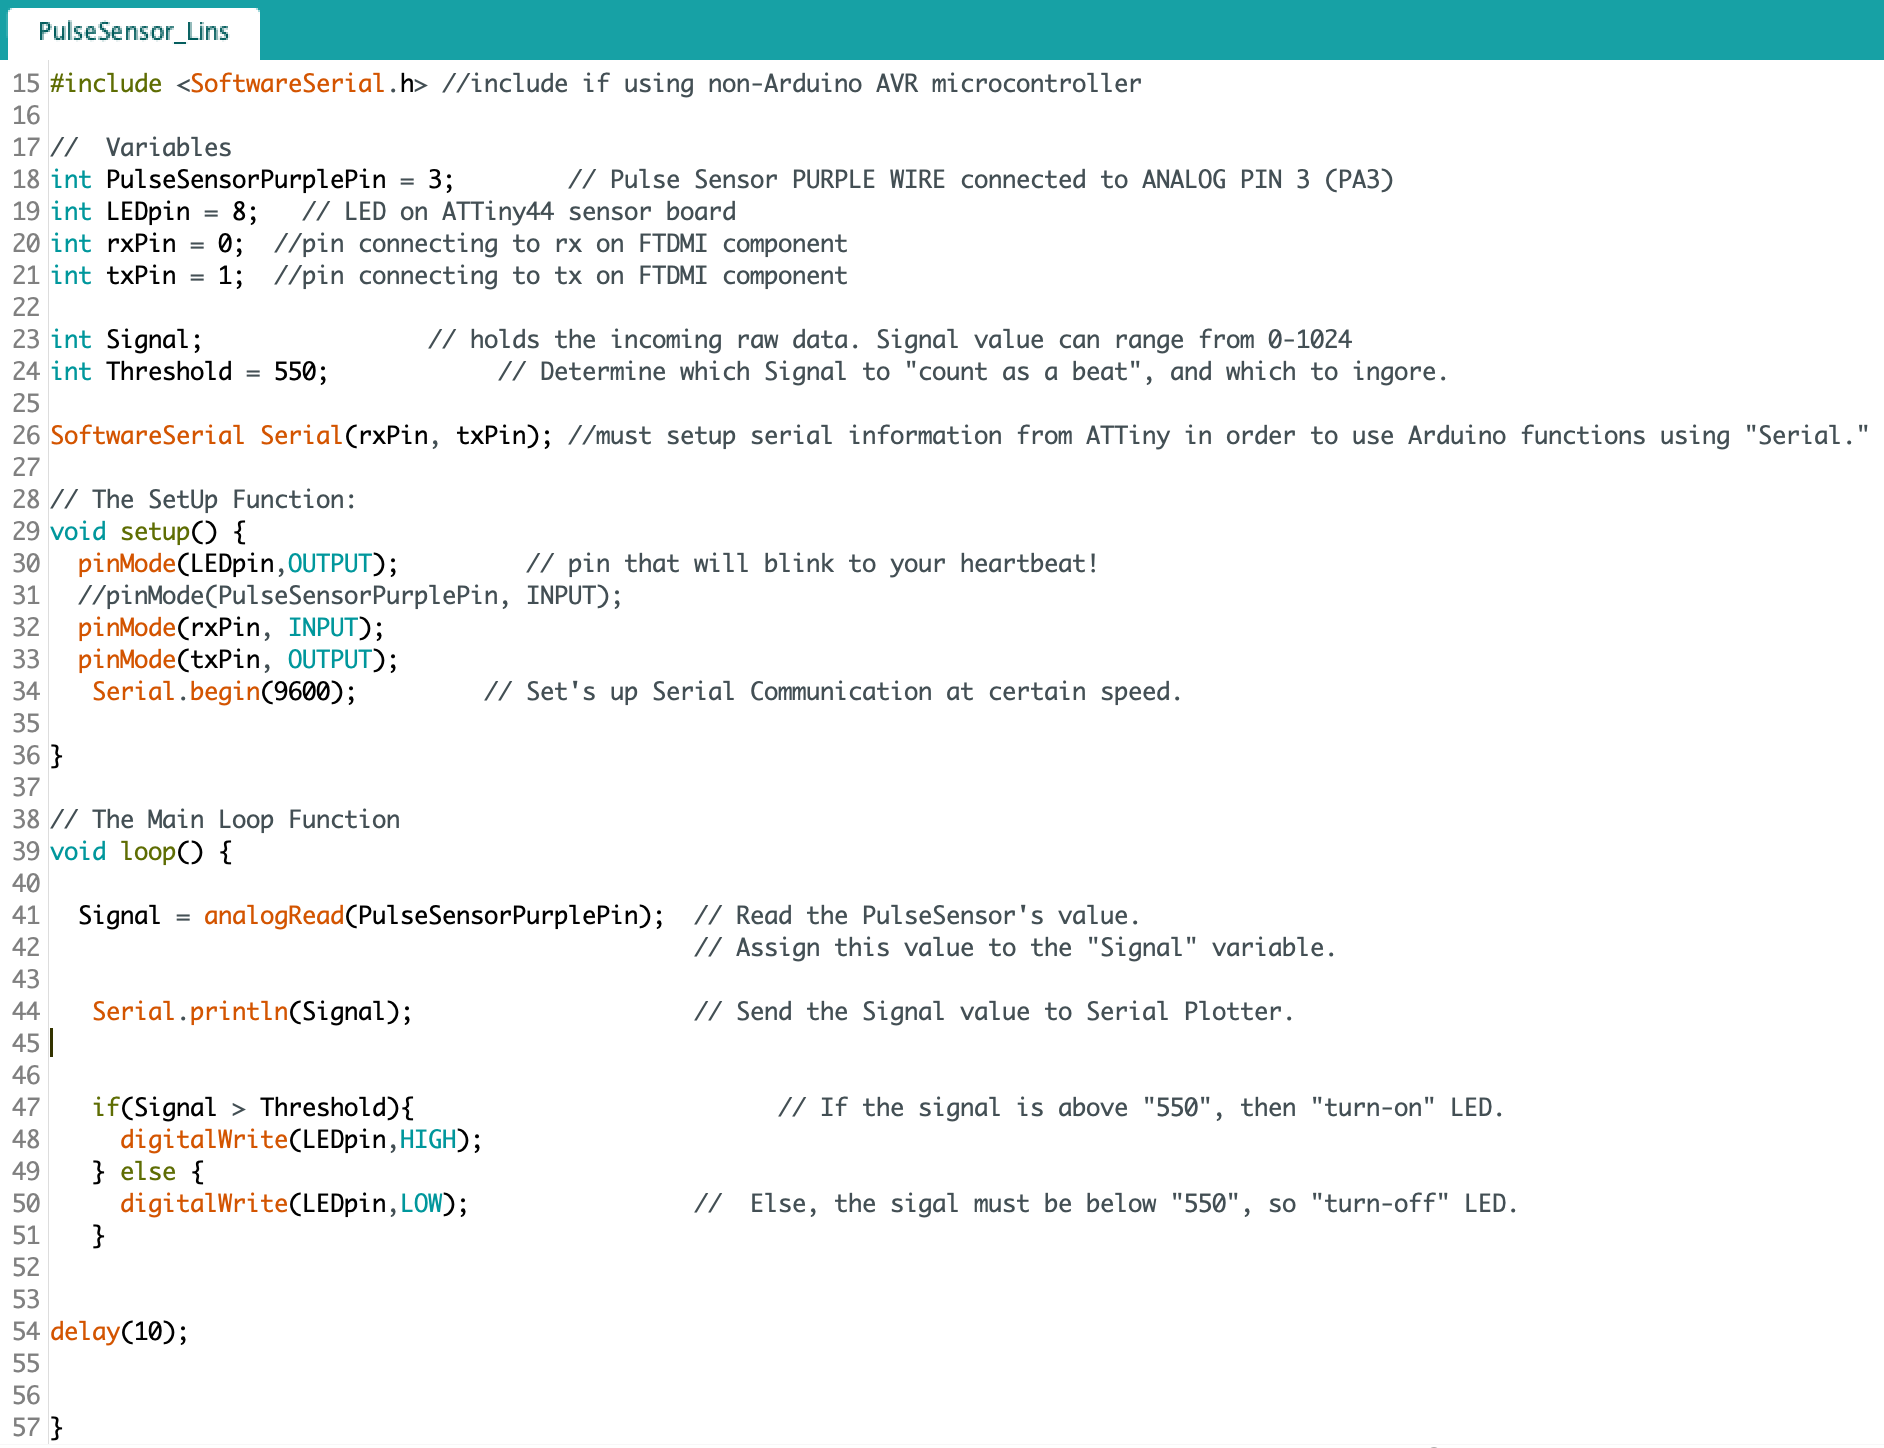
Synthesizing these readings, here is a summary of what I learned. Begin in the Arduino IDE. Make sure your program is set up to conduct serial communication, this includes importing the SoftwareSerial.h library and defining the rx and tx pins appropriately. I used the AVR Pocket Programmer which I ordered on Sparkfun. Make sure to orient the 2x3 header pin on your PCB with the Arduino board’s. I used the below photos to assist me in seeing where ground was on the Arduino 2x3 header pin and how the AVR Pocket Programmer’s chord was setup in relationship to it. The Programmer powers the PCB so do not use the FTDMI cable while programming it in order to prevent nasty voltage collisions. Once the Arduino sketch is uploaded, disconnect the Programmer and reconnect the PCB using the FTDMI cable. Under Tools, locate the serial port then open the serial monitor or serial plotter to make sure data is flowing. I forgot to mention, the code needs to include directions for what gets sent over serial. If this is working, close the serial monitor or plotter (do not close Arduino though) and open Processing.
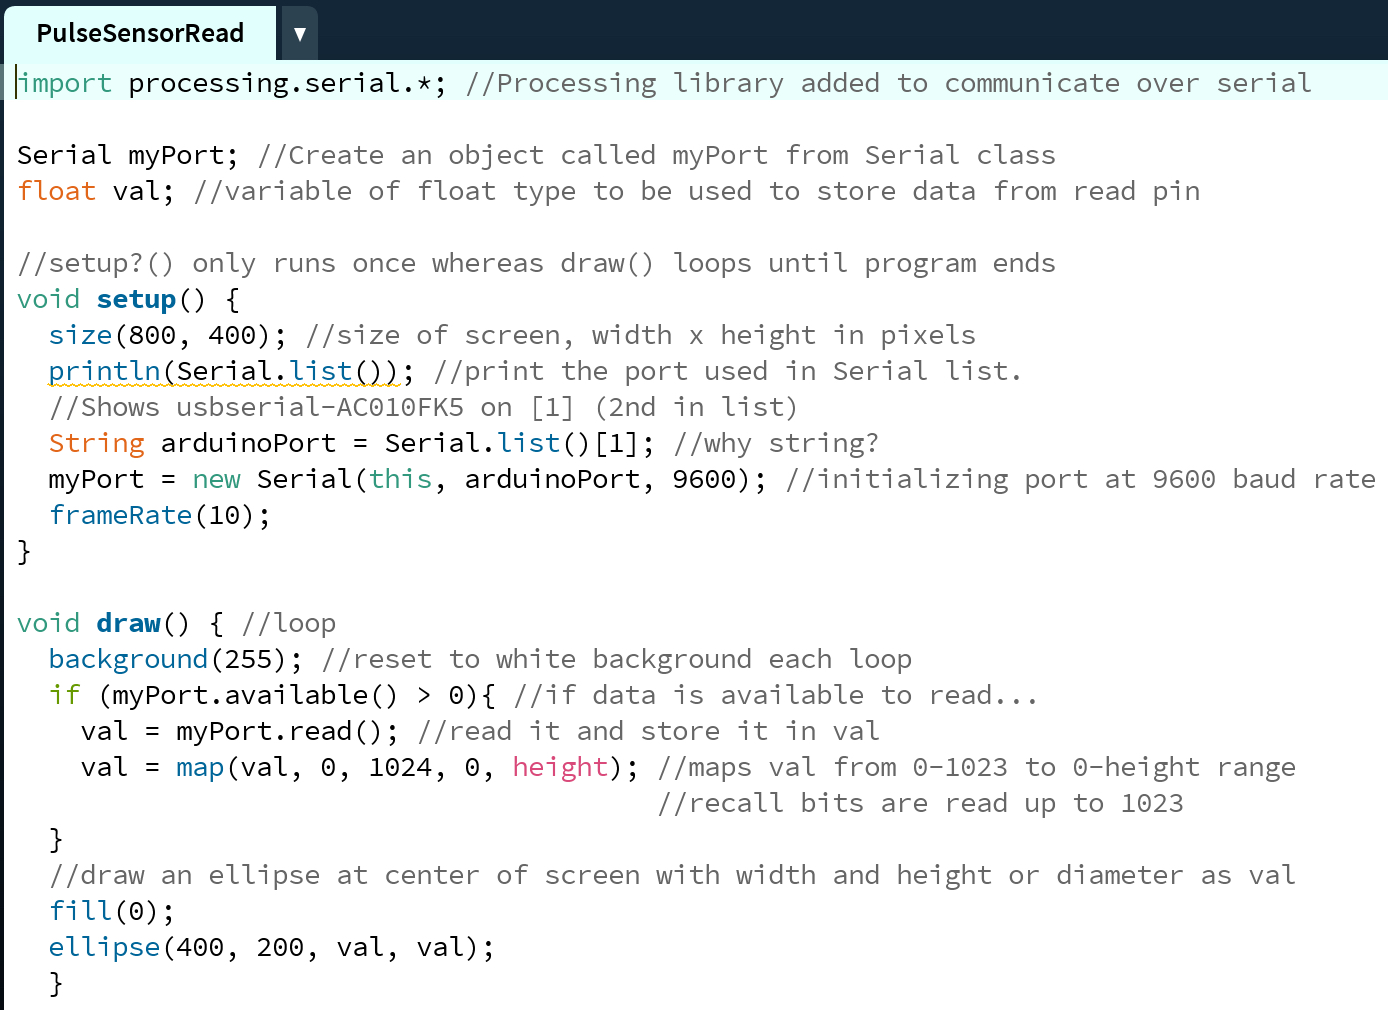
If you wanted to send directions to your board from Processing, such as “turn on LED”, you need to upload the Firmata sketch in Arduino first (see the first link above for a great tutorial on what Firmata is). Otherwise, simply import the processing.serial library then identify the serial port your PCB is connected to via the code. The comments in the below code should make clear how to do this. One tiny fix-it to the code that was essential was to clear the background each time the loop ran. Before doing this, the dot stayed the same size and never pulsated. This was accomplished by the line “background(255);”