Chris Lloyd
MAS.863/4.140/6.943
How To Make (almost) Anything
2019
Week 1: computer-aided design
This week, we I looked into several CAD software options. I chose to go with RHINO because I am in the Architecture Section of HTMAA and there seems to be the most support here for this program. It’s also required to operate the laser cutters and other tools in the architecture shop. MIT students can sign up for free with a student account.
I had no previous RHINO experience, so I went through some of the tutorials they provide online. For my final project, I will create portable heart rate monitor, so I will create a container for the heart rate display, which looks like a cartoon heart! Here is what is looked like and how I created it:

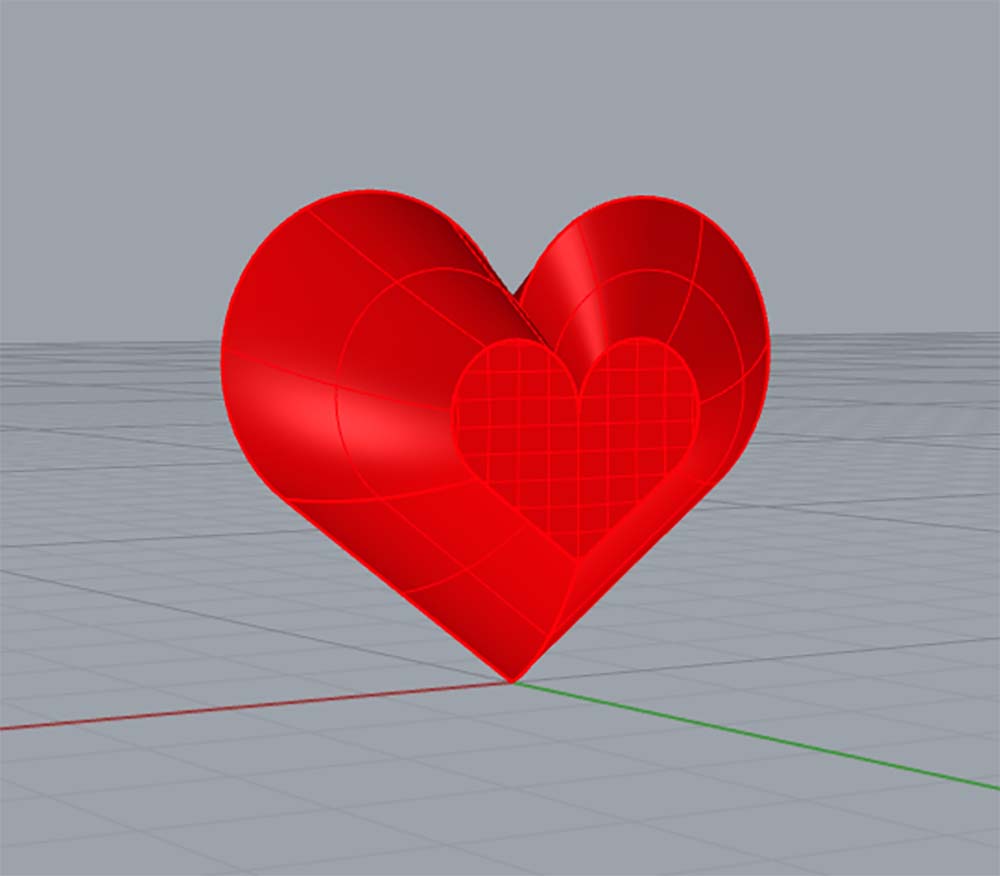
CAD File
I also thought it would be good to write down the most helpful commands that I used for reference later. Here they are.
| Circle | The Circle command draws a circle from a center location and a radius. | I created two tangential circles for the tops of the circles. |
| Polyline | The Polyline command draws a series of joined line or arc segment. | Create the bottom portion of the heart shape. |
| Trim | The Trim command cuts and deletes selected portions of an object at the intersection with another object. | Use the trim feature to create the heart shape and remove the center part. |
| Join | Join turns lines into polylines, curves into polycurves, surfaces and polysurfaces into polysurfaces or solids. | There are multiple separate curves. This command turned them all into one polycurve. |
| Scale | The Scale command changes the size of selected objects uniformly in the x-, y-, and z-directions. | I copied two additional versions of the heart and scaled each smaller. So it resulted in three hearts of different shapes. |
| Move | The Move command options control mouse operation for selecting and dragging. | I moved the hearts so the smallest was on the top and the largest was on the bottom. |
| Loft | The Loft command fits a surface through selected profile curves that define the surface shape. | I used the loft tool to create a surface that lofts between the three lines. |
| Rotate | The Rotate command rotates objects around an axis perpendicular to the current construction plane. | I copied the heart shape and rotated it to make the same surface on both sides. |
| EdgeSrf | The EdgeSrf command creates a surface from two, three, or four selected curves. | I filled in the center (smallest) polycurve hearts to close the shape. And voila! You have a heart! |
I wanted to further make changes to the design to create a secret heart locket that has two parts. A top that slides off laterally as if it were a puzzle piece.
Here are some of the additional commands I used to accomplish this design.
CAD File
| FilletCorner | The FilletCorners command rounds the corners of polycurves and polylines with arcs of a single specified radius. | I used this to create the puzzle connection between the bottom and top of the heart. |
| OffsetSurf | The OffsetSrf command copies a surface or polysurface so that locations on the copied surface are the same specified distance from the original surface. | To make a 3d printable design, I needed to create thickness to the object. ` |