Chris Lloyd
MAS.863/4.140/6.943
How To Make (almost) Anything
2019
Week 8: molding and casting
For this assignment, we were all given a 3" x 6" x 1.5" peice of machinable wax, in which to mill to cast a silicone mold that would cast an object made from plaster.

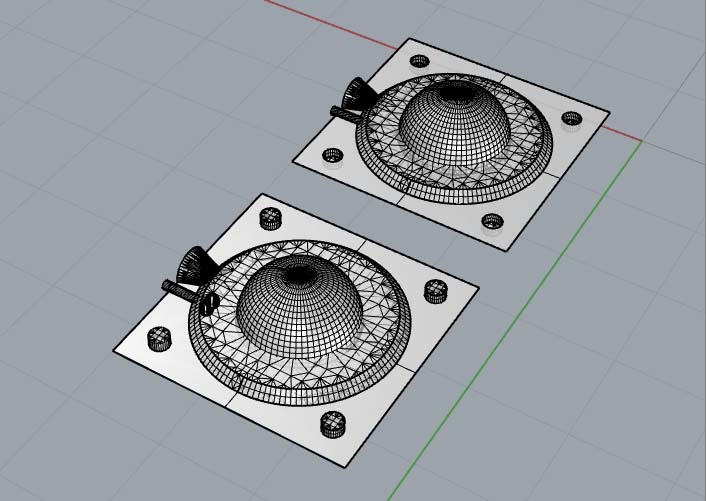
For my design, I took inspiration from Saturn, which allowed me to mill a somewhat simple geometry that included rounded and flat surfaces. In order to get the mold to stick together in the correct spot, I created multiple cylinders with opposite extrusions (-.1” and .1”) from the mold surface. I also created a cone to pour the plaster as well as an air hole (the second cylinder extruding from the saturn ring). I later realized that I didn’t put them on the right side to line up, but it didn’t matter. Air was still able to escape as I made the pour.
The next step was to create the tooling path in Mastercam to mill the wax. I ran into an issue where my geometry was breaking when I converted the file from RHINO to Mastercam. I was able to fix this by converting the rounded objects (sphere, cone, cylinders) into a polygon.
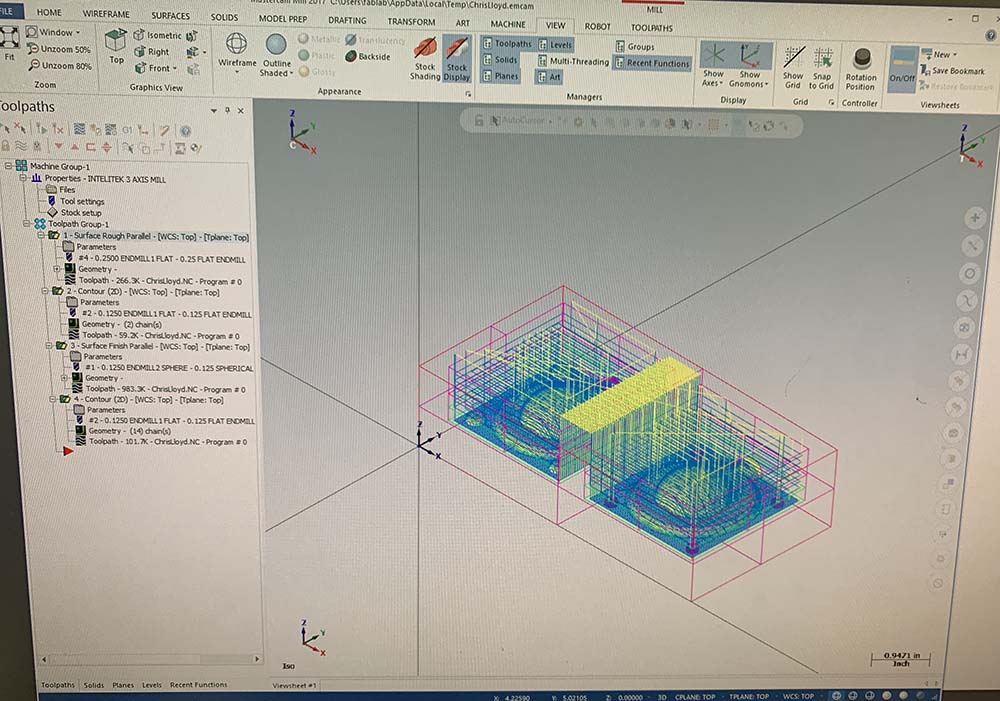
I ended up with four tool paths
- Rough cut with 1/4" flat end-mill
- Contour with 1/8" flat end-mill
- Surface finish cut with 1/8" flat end-mill
- Contour with 1/8" flat end-mill

I ultimately chose to finish the surface with a flat end-mill, partially because I'm lazy and didn't want to change the end-mill through the job, but also because the lines left by the mold looked nice with the design. I did two contour cuts. First the get the right container shape down to the level of Saturn's ring. And then later to finish the curves on Saturn's ring and around the cylinders that hold the mold in place.
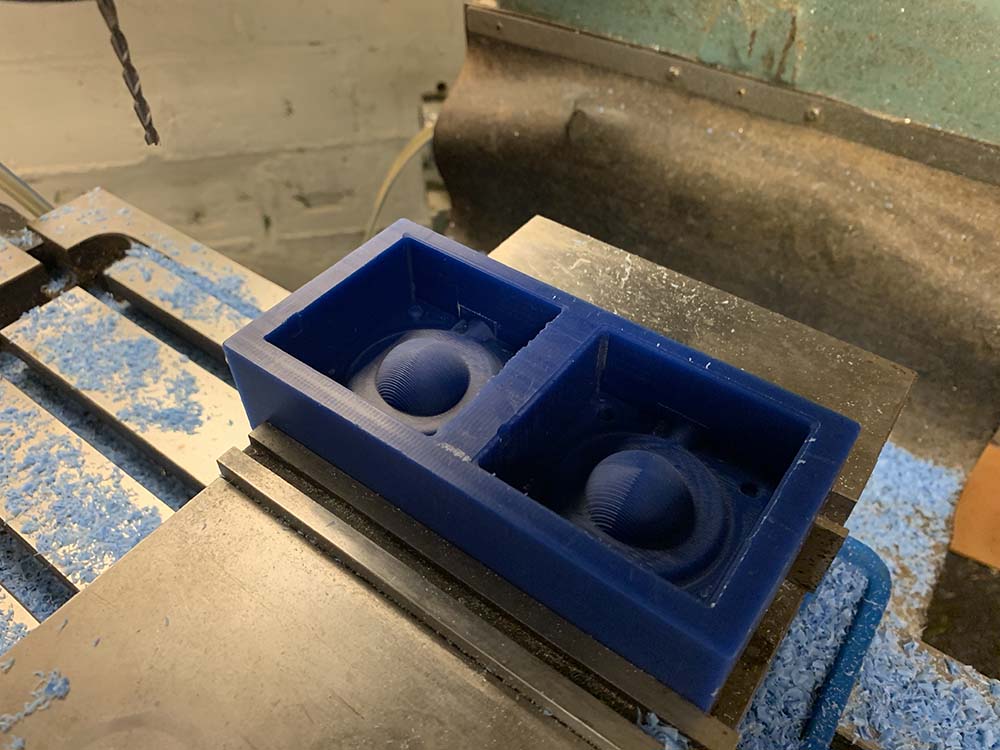
Next step was to fill the wax mold with the silicone mold mix. It’s important to use safety precautions when you are exposed to silicone mixes related to:
- Inhalation: it should be used in a well-ventilated space
- Use extreme caution to avoid contact with skin or eyes
- And of course, do not ingest.
The two components of the mix and be added approximately 1:1. I had some issues where there were air bubbles in my silicone mix, but fortunately they did not affect the surface. In the future, I will stir the mix with less vigor and use more side-to-side motion instead of up-down.

After approximately three hours, I came back to mix and pour the Drystone plaster. The plaster mix is about 3 parts water to 10 parts plaster mix. Drystone is a fine dust, so I used an inhalation mask, eye mask, and latex gloves to avoid any contact with the particles. Inhalation is probably the biggest risk associated with this material because it is made of fine particles.
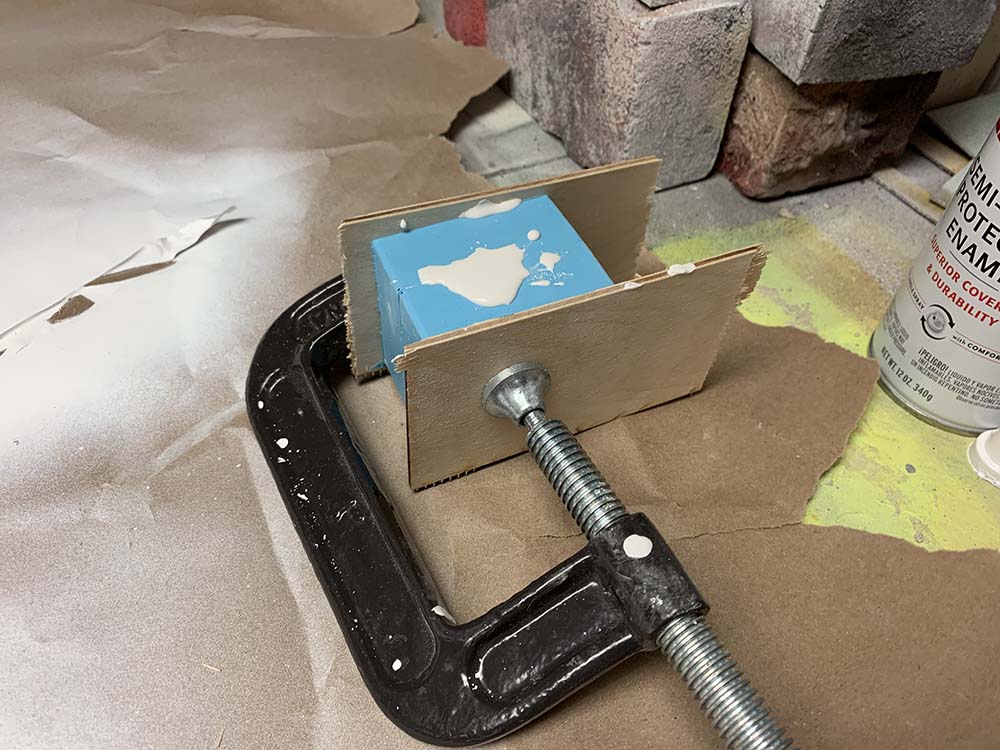
I poured the plaster into the mold, holding it together with a clamp between two pieces of particle board. I noticed that it was very easy for the clamp to manipulate the shape of the mold if I clamped too tightly, so I left it very loose to keep the integrity of the shape. I tried to turn the mold on every axis as I poured the initial plaster mix to cover the mold. As I poured the rest, I had to be patient as bubbles would form and prevent more mix from going in. Lightly tapping the side of the mold helped get the bubbles out.
I came back the next morning and was lucky enough to get a decent cast on my first try. The edges were really clean. I did notice some strange coloration and warping of the paster near the cone where I pour the fluid, but overall it turned out pretty accurate to the mold. I was able to easily break off the excess material.

Here is the final product!