Chris Lloyd
MAS.863/4.140/6.943
How To Make (almost) Anything
2019
Input Devices
The assignment this week was to measure something using a sensor from the Fab Lab library. I chose to measure motion using a pyroelectric (HC-SR501) sensor. These sensors detect differences in infrared light to detect motion through a field. To give an oversimplified explanation, there are two slots in the sensor--when there is no movement, the two slots are detecting the same amount of infrared light that is radiated from the room, outdoors anything else in the environment. When a body passes, it is detected in one slot first. This difference is what triggers the output of the sensor. As far I can know, there is a discrete on/off output of the sensor device.
I chose this sensor because I am interested in monitoring the sleep environment. Measuring movement might be an interesting way to track when sleep is disturbed. To get started, I looked around for some information on the sensor and found Henry's Bench blog to be really helpful, both for understanding the sensor and how program it using arduino. However, I ultimately used Neil's code.
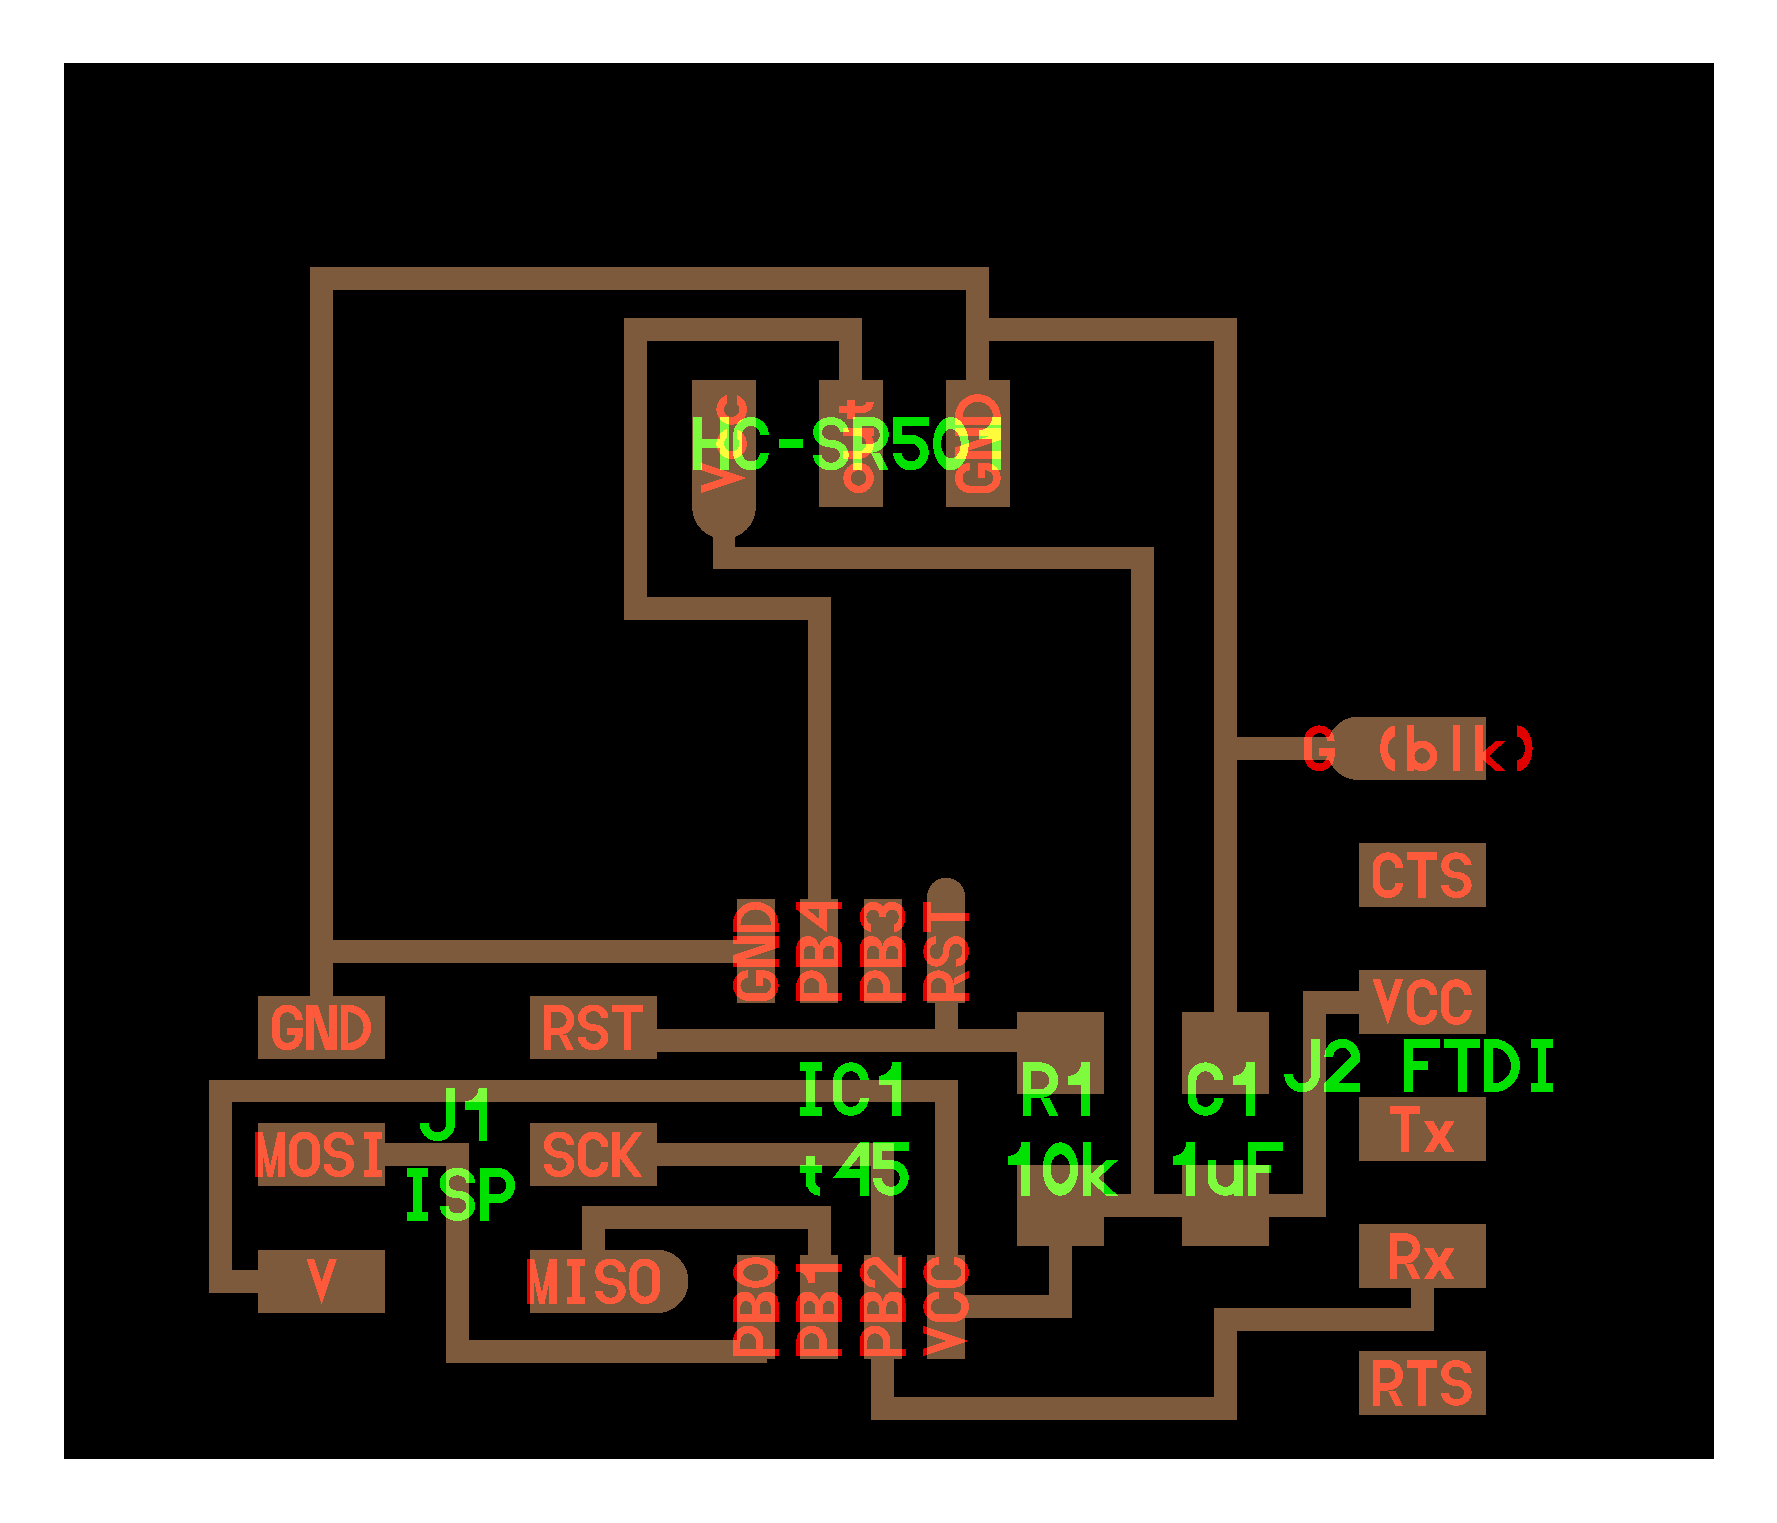
I used the standard hello.HC-SR501 board traces and outline to create my sensor. I milled the board using the SRM-20 in the architecture shop using MODS as I outlined in week three.

The board is pretty simple and requires the following components.

The only challenging part of soldering the board is getting the sensor to stick to it. The design is not structurally sound because I am relying on solder to hold the sensor to the board at a perpendicular angle. If I integrate this into my design, I will likely connect the sensor to the board with wires.


After soldering it together, it’s pretty obvious that that the HC-SR501 is more complicated than the board that I made so I did a bit more reading into it. It can detect motionat 110 degrees in front of the sensor and has adjustable delay
The range can be adjusted between 10 and 22 feet using the the top orange dial pictured below. Using the lower orange dial, you can control the time delay adjustment to determine how long the output will say something is in motion after it is triggered. These settings could come in handy depending on application.

I used Neil's makerfile and .py file to program the sensor to detect motion and display it on the screen. As you can see here, it works! However, I will note that there is a bit of a delay in triggering movement. At first, I thought this was controllable with the dial on the side of the sensor, but it appears to be how the device is programmed. I plan to raise an issue on this if I plan to use this sensor in my final project to make sure I am getting the most accurate reading from my device.