make something big
-----------------------------------------------------------------------
this week's assignment was to master computer-controlled machining and make something big out of osb (orient strand board).
i used another group of arch student's characterization of the machine due to time constraints of this week having to run both the arch and eecs section student's projects. however, i didn't really need the constraints, since when setting the characteristics of my board to be cut, i set it such that the machine milled inside or outside of the outline allowing for a couple thousands of an inch of extra material to be removed.
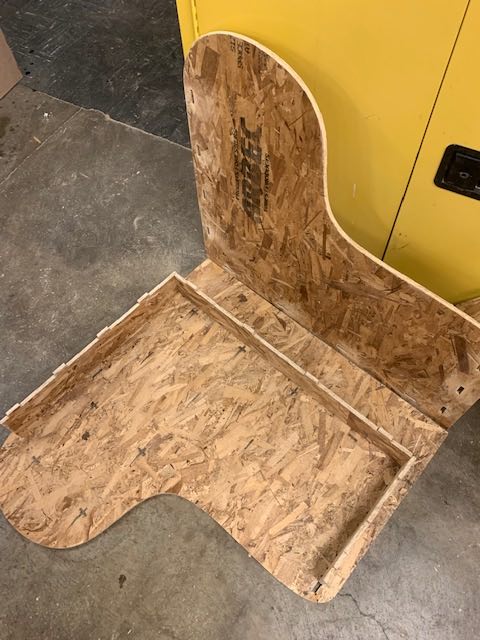
the first step was to create a rhino model of the object that i wanted to make. i wanted to make a standing desk, with the desk part in the shape of a piano, with a shelf inside for storage, and the piano keyboard part to jut out behind to act as a shelf. i found that the only way to do this in a way to ensure all the pieces fit on the 48"x96" piece of osb, was to sketch out dimensions and angles and general shapes before going into rhino.
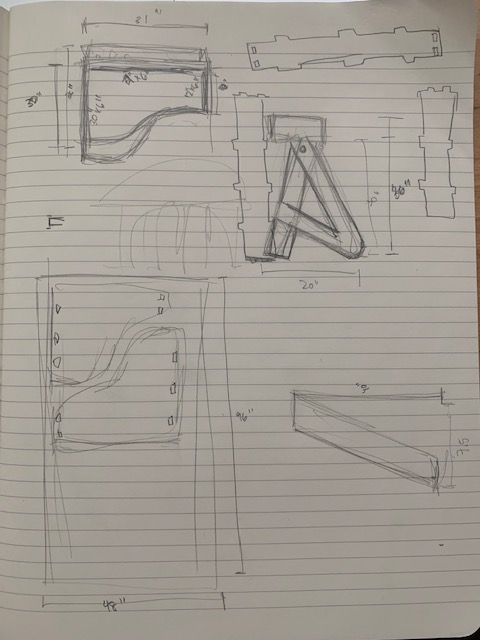
then, i drew out all the necessary pieces into rhino using grasshopper to parametrize the size of the press-fit holes. my grasshopper code got pretty crazy, since all the notches and holes were all parametrized using one number slider, but this was the way that made the most sense to me.
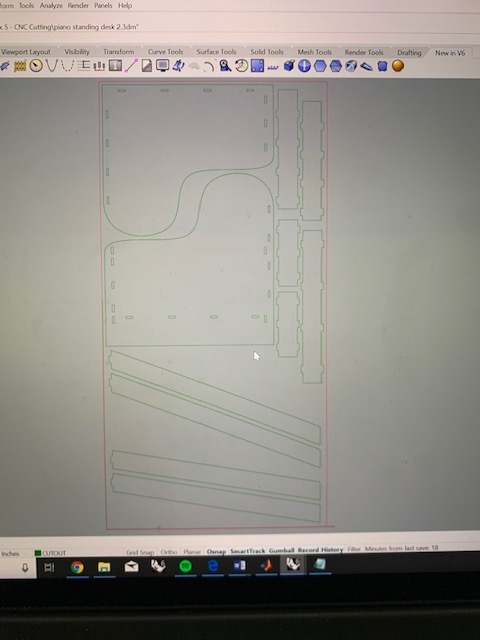
after getting the rhino model done, i went to N51 to get my drawing checked and merged into mastercam to then be translated into g-code for the CNC machine. the drawing was checked to be accurate, but i had to add in points for all the interior corner locations, which is the only way the machine will make that cut in the interior, otherwise the tool is rounded and will leave material in those corners. it is also important to ensure that in the rhino model, everything is in its own layer -- stock, cutout, pockets, and points.
then in mastercam, since the layers were already demarcated, the different cuts were assigned to different tools. the points were assigned to the standard drill. the pockets (which were just my smaller holes within the board) were assigned to the downcut, and the cutout (which were the biggest pieces) were assigned to the .375 tool. then, we assign direction to the toolpaths -- inside or outside -- depending on what we wanted. the holes were drilled inside, the cutouts were drilled outside.
we then double checked to make sure the tools were correct, at the correct depth of the osb boad, and then watched the run through of what the machine will cut out.
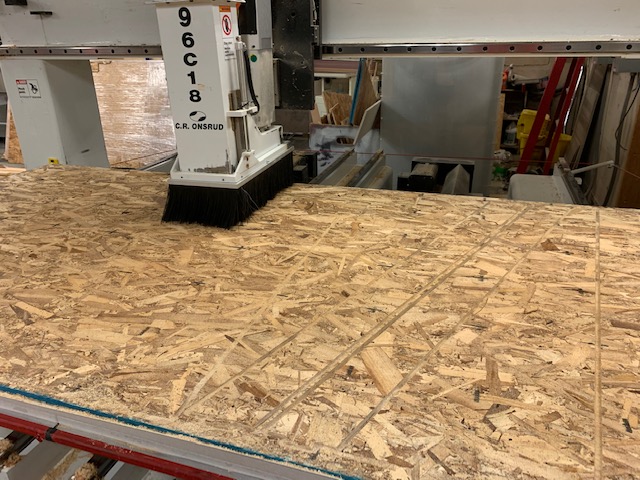
we transferred the mastercam into g-code and took it to the machine.
the machine needed to be warmed up.
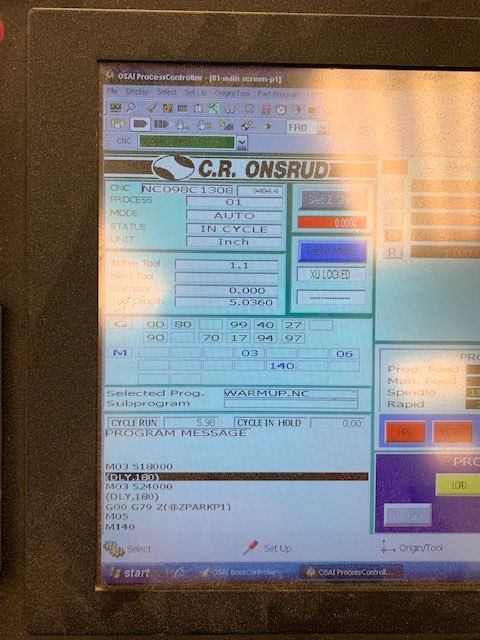
and then, my job was set to go!

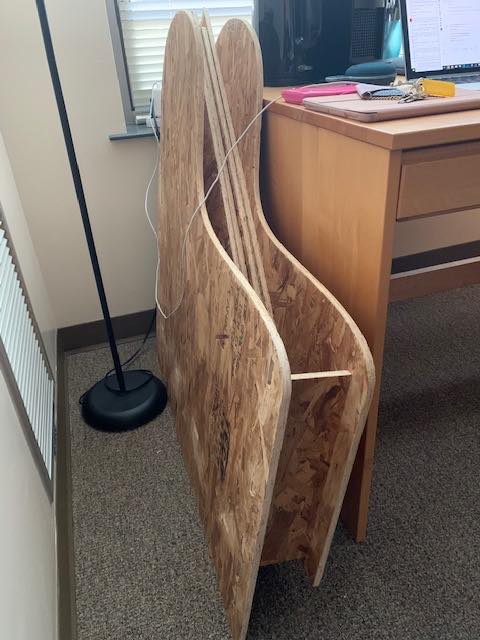
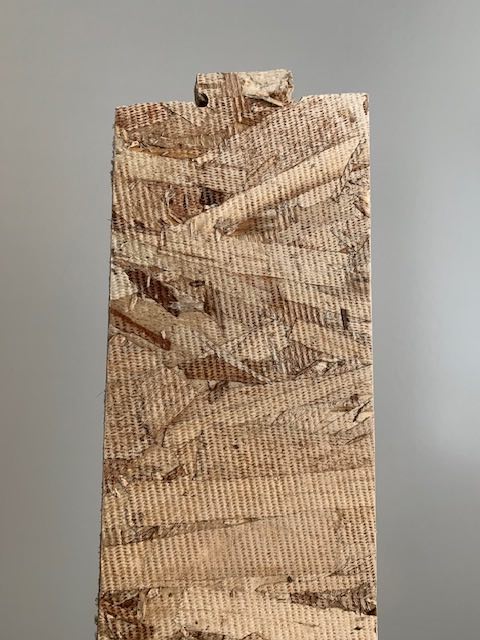
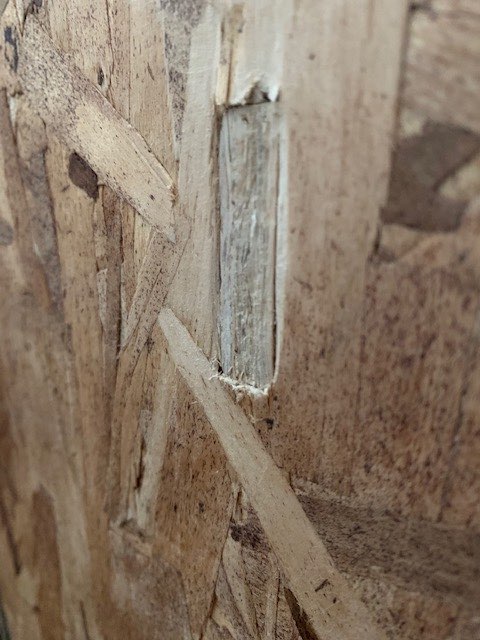
the pieces did not come out perfectly by a longshot. everything was jagged and a lot of sanding needed to get done. it was interesting that one side of the osb was much nicer and smooth than the other, i would have just figured both sides were rough.
i did a ton of sanding. things became much smoother.
then it was time to assemble. and the pieces fit!! i had an amazing pressfit connection. it was tight, and only with a little bit of help of a mallet would the pieces come apart.
in theory everything fits, but i think i had some structural problems with my design, because the top was too heavy to be supported by the bottom 4 legs. i was able to assemble the bottom structure, and it stands, but it definitely isn't very supportive.
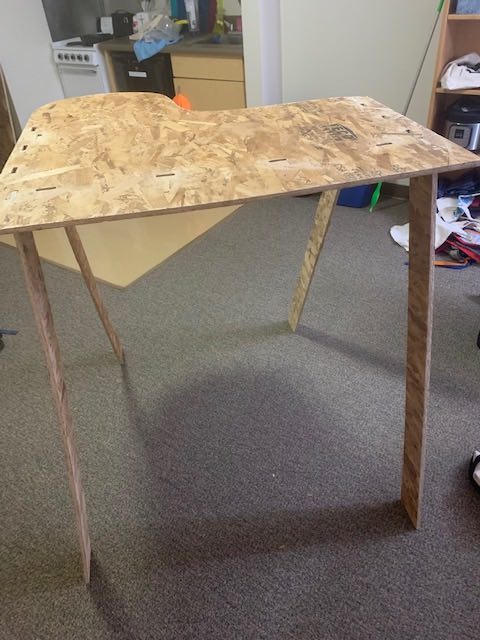
and the top looks great -- very piano-like (a paint job coming near it soon).
i think the next step is to figure out an alternative bottom, maybe something shorter will be more structurally sound, or just scrap the currect leg positions and go for something else. currently it is more of a desk accessary for more storage, which i am not complaining about.