acrylic
water jet / sandblasted plates :
water jet / sandblasted plates :
waterjet / sandblasting testing plate options :
This week we were asked to produce something via a fabrication process not covered. Unfortunately, this is a bad week for me - especially since my flight being delayed bit into this week,
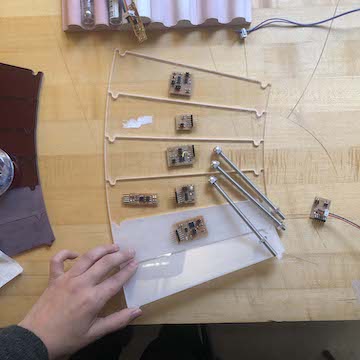
A couple of weeks ago, I asked Jung to train me on the water jet and I was able to cut some parts for my first (somewhat not finished / somewhat failed) prototype.
All of this material is shown on my final project tracking page, but I have added here to count for this assignment.
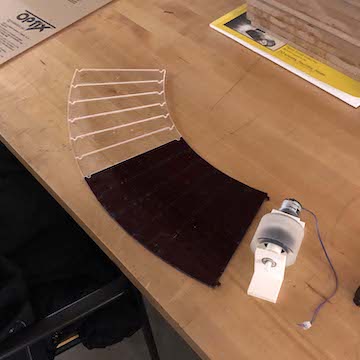
This ended up being an important thing I did. I initially had hopes to make this in aluminum, and discovered that was very expensive. I ended up milling the conveyor belt in plywood, which I absolutely hated, but when I was playing w the sandblasted plates, I discovered, I really loved the way they looked frosted and stacked.
Additionally, with clear plates and a clear housing, the insides of the belt would become visible, and so I really started to work on making this belt very visually pleasing inside and outside...
I wont actually be water jetting the plates / the entire belt.. I found that I didn't feel so comfortable cutting so many files on the waterjet because the holding down mechanism is kind of difficult to callibrate. You have to place these heavy bricks on the material, and I probably would have to stop the job and continue multiple times, and I probably will have around 12 sheets to cut.
After talking to Zain, I discovered I could mill my files. This, I think - I hope - simplifies a lot. I feel super comfortable in mastercam, and the plywood files went really smoothly.. I also think the tolerance is better on the cnc vs the waterjet. Some weird tolerance issues came up in the plate connection detail...
I anyways really enjoyed using the water jet and I hope I'll have the opportunity to become more comfortable with it.
This week we were asked to produce something via a fabrication process not covered. Unfortunately, this is a bad week for me - especially since my flight being delayed bit into this week,
A couple of weeks ago, I asked Jung to train me on the water jet and I was able to cut some parts for my first (somewhat not finished / somewhat failed) prototype.
All of this material is shown on my final project tracking page, but I have added here to count for this assignment.
This ended up being an important thing I did. I initially had hopes to make this in aluminum, and discovered that was very expensive. I ended up milling the conveyor belt in plywood, which I absolutely hated, but when I was playing w the sandblasted plates, I discovered, I really loved the way they looked frosted and stacked.
Additionally, with clear plates and a clear housing, the insides of the belt would become visible, and so I really started to work on making this belt very visually pleasing inside and outside...
I wont actually be water jetting the plates / the entire belt.. I found that I didn't feel so comfortable cutting so many files on the waterjet because the holding down mechanism is kind of difficult to callibrate. You have to place these heavy bricks on the material, and I probably would have to stop the job and continue multiple times, and I probably will have around 12 sheets to cut.
After talking to Zain, I discovered I could mill my files. This, I think - I hope - simplifies a lot. I feel super comfortable in mastercam, and the plywood files went really smoothly.. I also think the tolerance is better on the cnc vs the waterjet. Some weird tolerance issues came up in the plate connection detail...
I anyways really enjoyed using the water jet and I hope I'll have the opportunity to become more comfortable with it.
11 / 19 / 19 : waterjetting sum plates
water jetting :
Today I met with Jung to cut some tests I had prepared. I had previously received training on the OMAX but since I didnt cut a file, it didn't quite stick. Jung went over the basic set up and help me cut a couple of files. Most important things to note : When setting file up in OMAX layout, make sure you are cutting on the correct side of your lines / You need space for lead ins and outs / Acrylic should be noted on OMAX Make as low pressure + very brittle / Always set new z for material - note the difference between setting z and going to z / water level should be .5" above the material / you can pause the job and pull out cut material and restart job, but try to pause after lead out and before next lead in.
Today I met with Jung to cut some tests I had prepared. I had previously received training on the OMAX but since I didnt cut a file, it didn't quite stick. Jung went over the basic set up and help me cut a couple of files. Most important things to note : When setting file up in OMAX layout, make sure you are cutting on the correct side of your lines / You need space for lead ins and outs / Acrylic should be noted on OMAX Make as low pressure + very brittle / Always set new z for material - note the difference between setting z and going to z / water level should be .5" above the material / you can pause the job and pull out cut material and restart job, but try to pause after lead out and before next lead in.
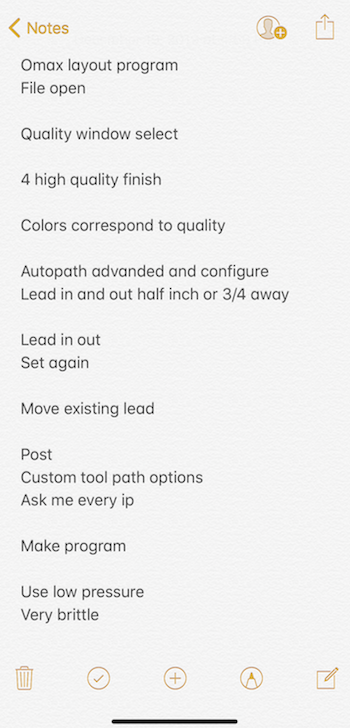
notes :
These are some notes I took, but probably not super helpful unless you're looking at the computer connected to the OMAX or are familiar with the process. This is only the second time I've ever done this so, I also still need to learn and become more comfortable with this machine.
These are some notes I took, but probably not super helpful unless you're looking at the computer connected to the OMAX or are familiar with the process. This is only the second time I've ever done this so, I also still need to learn and become more comfortable with this machine.

clean off before removing :
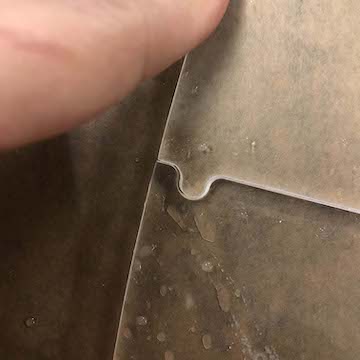
kerf ? :
It doesnt seem like there was much of a kerf. I will need to measure this, but I wonder if only in this rounded portion there was a weird kerf. Visually this part will be hidden under the lip of the belt, but I should make sure this wont affect overall tolerances.
It doesnt seem like there was much of a kerf. I will need to measure this, but I wonder if only in this rounded portion there was a weird kerf. Visually this part will be hidden under the lip of the belt, but I should make sure this wont affect overall tolerances.
clear and red plate tests :
I cut plate tests in clear and red. I think I mentioned before, but I like this idea of a customizable conveyor belt where whoever is using the belt might switch out plates to more meaningfully match their curated objects. Altec Plastics also had yellow, blue, mint green, bronze, as well as more opaque / non transparent colors.
I cut plate tests in clear and red. I think I mentioned before, but I like this idea of a customizable conveyor belt where whoever is using the belt might switch out plates to more meaningfully match their curated objects. Altec Plastics also had yellow, blue, mint green, bronze, as well as more opaque / non transparent colors.
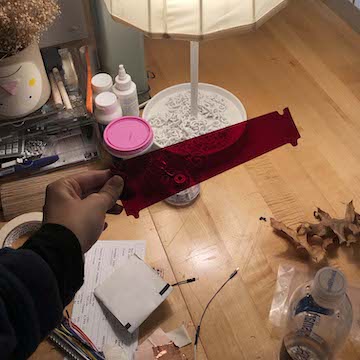
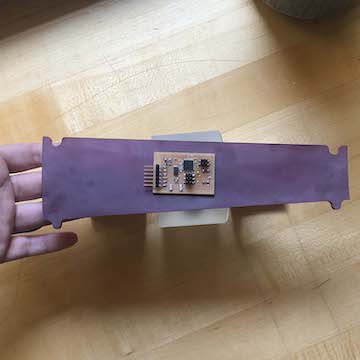
rich ruby red acrylic:
I love the red - it looks almost black when its sitting on the table, but with light, it turns a rich ruby red. I think this color is dark enough where you wouldn't soooo clearly see the motor below, but Jung mentioned I could sandblast the rest of it to create an opaque / non transparent look. I don't think the motor below would be visible then.
I love the red - it looks almost black when its sitting on the table, but with light, it turns a rich ruby red. I think this color is dark enough where you wouldn't soooo clearly see the motor below, but Jung mentioned I could sandblast the rest of it to create an opaque / non transparent look. I don't think the motor below would be visible then.

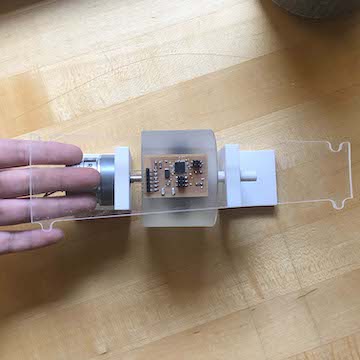
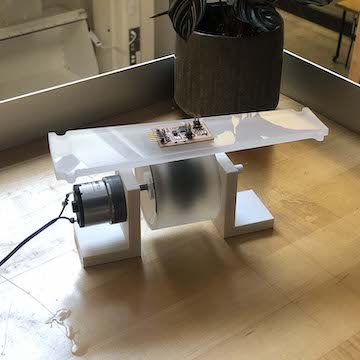
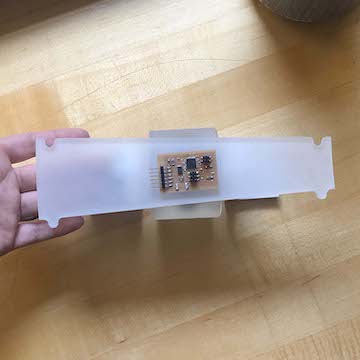
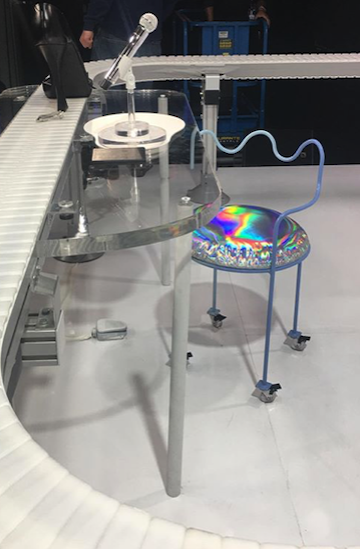
plate to motorized wheel in clear:
See, I don't love the complete transparency. The insides would have to be really special / beautiful for this to realllyyyy make sense. I think I will for sure sand blast the clear plates...
I suppose another option would be to add something right below the plates to hide the insides....
See, I don't love the complete transparency. The insides would have to be really special / beautiful for this to realllyyyy make sense. I think I will for sure sand blast the clear plates...
I suppose another option would be to add something right below the plates to hide the insides....
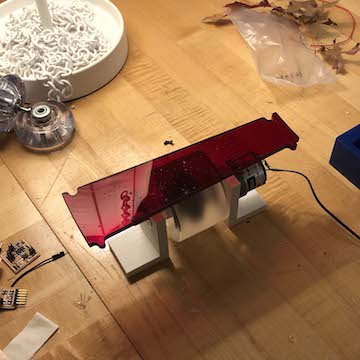
plate to motorized wheel in red :
Not as transparent / visible somehow...
Not as transparent / visible somehow...

sandblasted edges :
the edges of the plates are that opaque look I'm suggesting. You can't quite see through it. I think this might be a good option for the clear but maybe also the red plates.
I need to measure whether or not there was a kerf because that will create a gap of sorts. After measuring, it seems I need to offset the cut 1/128" to get a tighter tolerance...
Tomorrow I hope to set up the mill files in Mastercam and possibly mill after class or on Thursday morning...
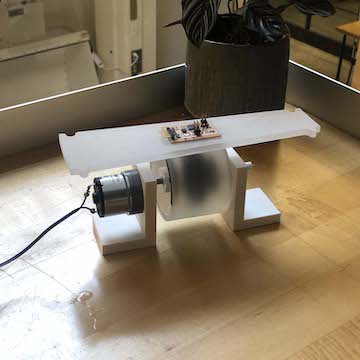
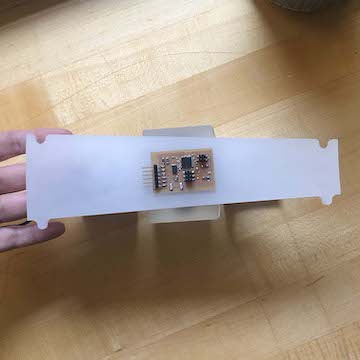
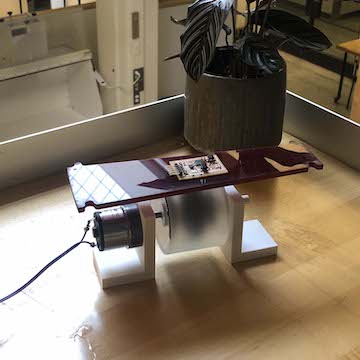
a moving plate :
for now it looks like the proportion of the wheel to the plate will work though - fingers crossed.
for now it looks like the proportion of the wheel to the plate will work though - fingers crossed.
11 / 20 / 19 : sandblasting plates
clear :

red :
Today I wanted to see if I could lose some transparency by sandblasting the plates I waterjet yesterday.
I really don't want complete transparency because the insides of the belt have not been designed to be super nice looking. I just think it would distract from the objects on the belt to be able to look into it.
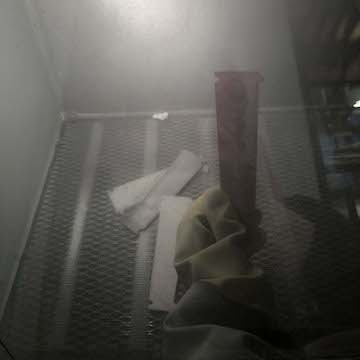
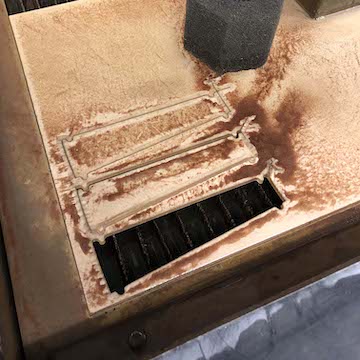
sandblaster :
The sandblaster is super easy to use. You flip a switch to turn on a light and vacuum and a push pedal controls the airflow. It is a bit difficult to look into the sandblaster as sand builds up on the glass. What looked like an even frost was quite uneven, once I was holding the piece in my hands.
To that end, I wasn't sure if the sandblaster was needing more sand because at some points it felt like there wasn't any frosting effect even though I was applying air flow to my piece.
In any case, I tried a couple of different tests. I tested both clear and red acrylic, and I tried frosting one side vs two sides. here are the results :
clear tests :
Bottom two plates are sandblasted. Bottom plate is only sandblasted on bottom side, thus top is still shiny / reflective.
Bottom two plates are sandblasted. Bottom plate is only sandblasted on bottom side, thus top is still shiny / reflective.
clear frosted two sides :
clear frosted two sides :
clear frosted one side :
clear frosted one side :

red frosted two sides :
red frosted two sides :
Here you can start to see uneven-ness I mentioned. I doooon't like the red frosted on both sides... The red acrylic is a super beautiful ruby red, but sandblasting makes the brilliant color kind of disappear...
Here you can start to see uneven-ness I mentioned. I doooon't like the red frosted on both sides... The red acrylic is a super beautiful ruby red, but sandblasting makes the brilliant color kind of disappear...
red frosted one side :
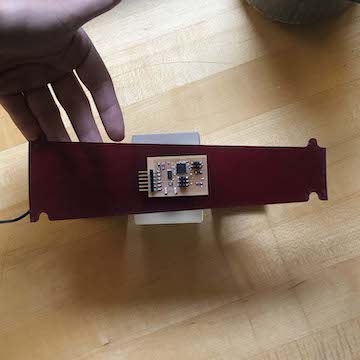
red frosted one side :
I like this far better than frosting both sides. Brilliance is still there but you cant see the motor component beneath...
This is super exciting development...!
I like this far better than frosting both sides. Brilliance is still there but you cant see the motor component beneath...
This is super exciting development...!
clear frosted two sides :
julio's plates for comparison :
I kind of like the frosted more than Julio's white plates...And this also is making me consider - should I just make the whole conveyor belt sandblasted acrylic???...
I kind of like the frosted more than Julio's white plates...And this also is making me consider - should I just make the whole conveyor belt sandblasted acrylic???...
stacked acrylic :
If I did that, the conveyor belt would have this kind of look - stacked sandblasted acrylic. I mean, it would definitely be very different.. Visually very beautiful?...
If I did that, the conveyor belt would have this kind of look - stacked sandblasted acrylic. I mean, it would definitely be very different.. Visually very beautiful?...
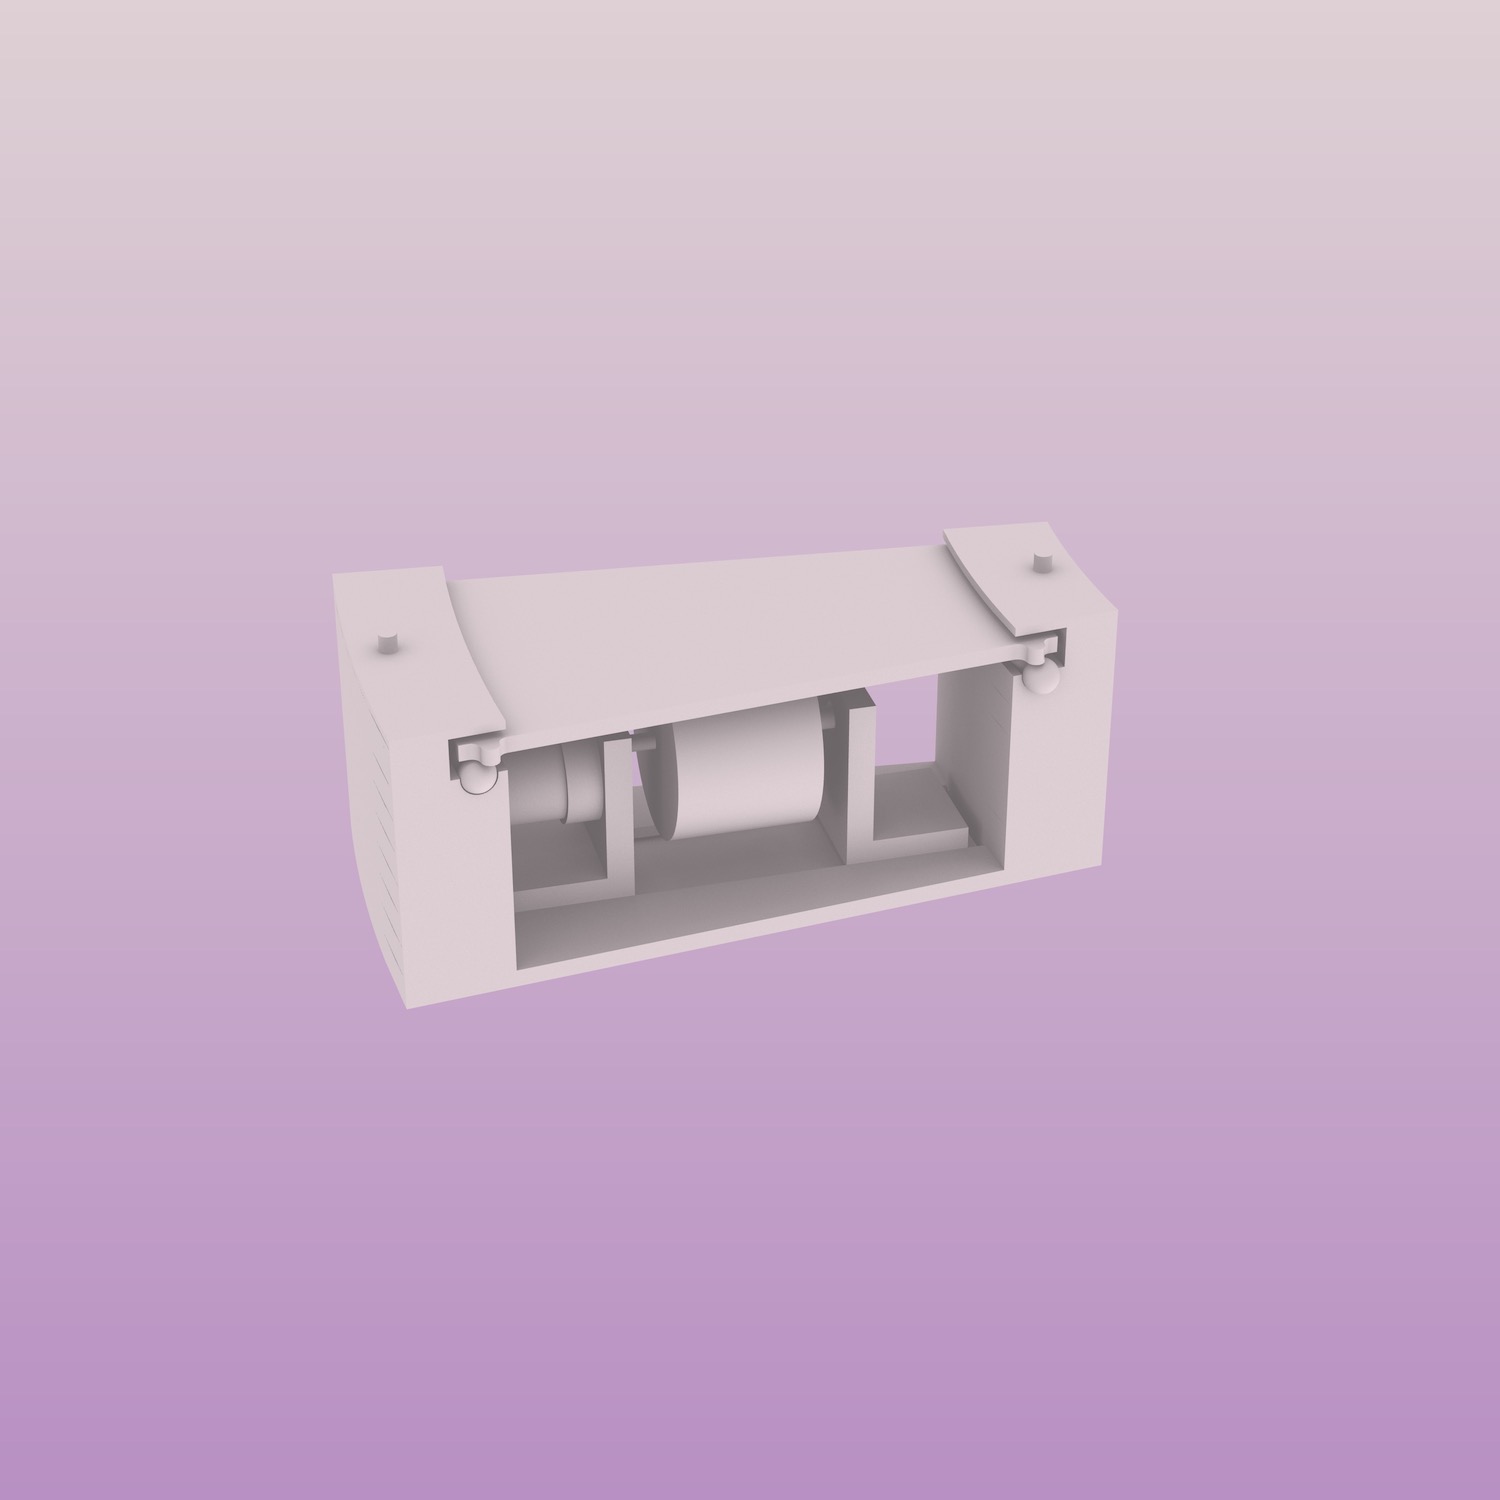
chunk model ? (approx 10" x 5") :
I'm thinking I should make some chunk models that would show what the belt would look like in diff materials - one in acrylic, one in aluminum. Would be nice and not as expensive if I just make a chunk big enough to include motor... It might also point me in a particular direction, like, it might clarify what material I want to invest in.
Anyways - I will be trying to mill my cut file tonight or tomorrow morning out of plywood. I prepped the Mastercam this morning. More soon!