this week's focus was on 3d printing and 3d scanning. i used an artec 3d scanner to scan someone and have them scan me. i used fusion 360 to process the mesh file generated and to design my own sketch. i then used prusaslicer to generate g-codes from imported .stl files and loaded those g-codes into a prusa 3d printer.
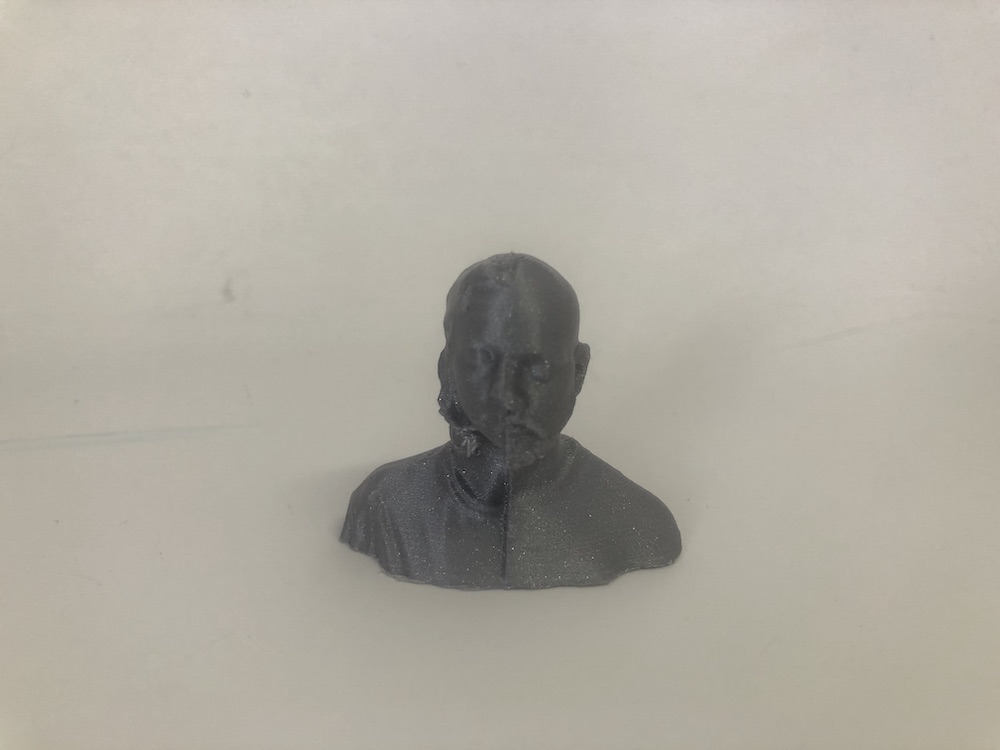
to use the 3d scanner i connected it to a power source and to a computer that contains the artec studio application. i clicked the scan button and then preview to focus on the subject. once i got an inital focus, i hit record and then went around the subject to scan a virtual bust of them. one of the things that i really liked about the scanner was how forgiving it was. if i lost the subject's focus, i could just refocus the scanner and pick up from where i left off. after i got the 360 scan of the subject, i cleaned up the scan by filling the empty whole from the bottom and exported the file as a .stl file.
i imported the stl file into fusion 360 and got to cleaning it some more. i smoothed any rough edges that needed to be smoothed by using the mesh/modify/erase and fill command. i then used a mesh/modify/plane cut to create a smooth bottom of the bust. i scanned myself and my partner and combined us into one bust but using the same mesh/modify/plane cut command vertically down the middle of each of our busts, lining them up and using mesh/modify/merge bodies to merge two separate meshes into one.

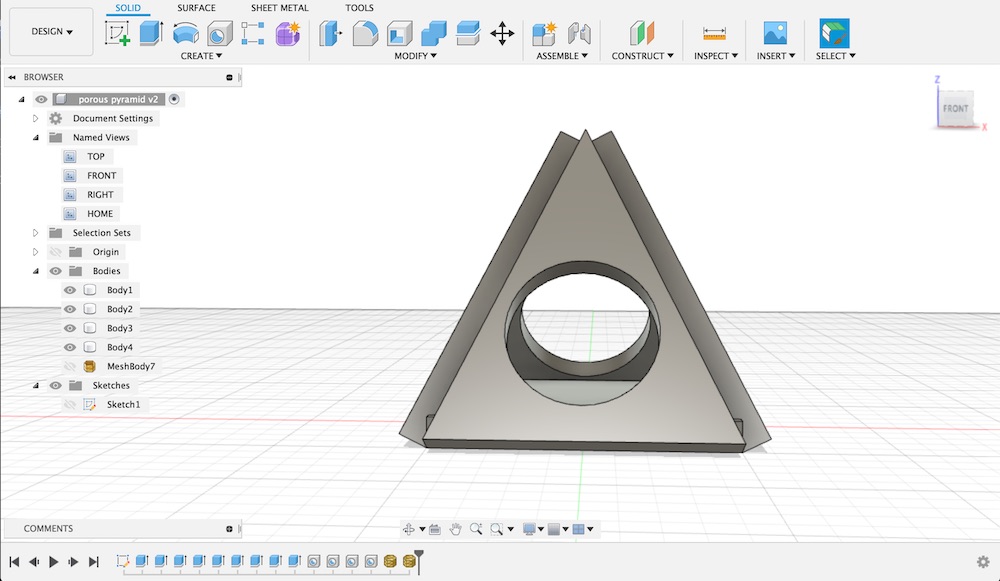
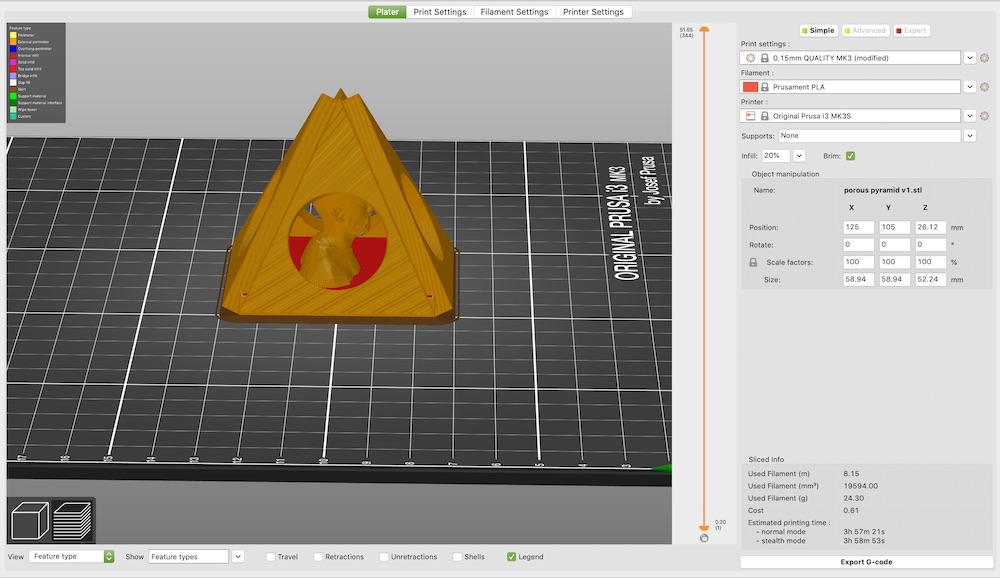
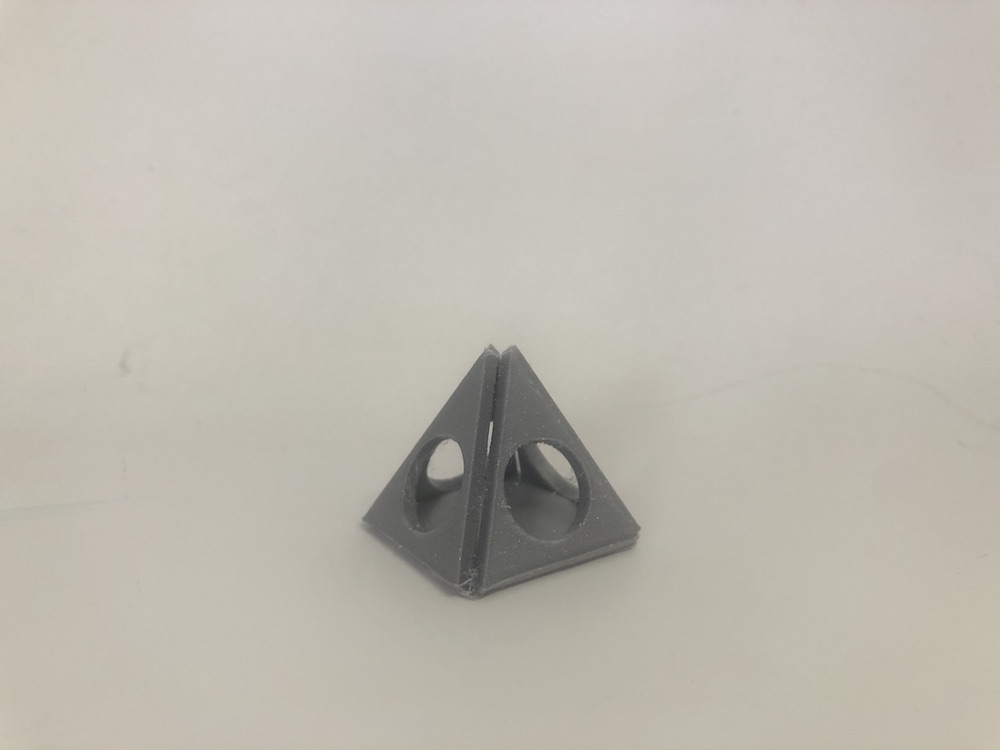
i then had to design something that could not be made subtractively and since this was my first time using fusion 360, i wanted to do it from scratch to see what it had to offer. one of the things i needed to get used to that differed from autocad was that i could type a command like i can in autocad because fusion uses hot keys instead to trigger a command. after getting used to that, i explored the options i had. i decided i wanted to place a bust of myself into a pyramid that you could see through. i started by creating a sketch and creating a square at the x, y origin. then i created a line from the center of that square vertically that i used as an anchor for the pyramid's edges. i deleted the vertical line and then extruded, using the solid/extrude command, each plane by 5mm. i then created a hole in the center of each triangular place that was 5mm thick and that was my pyramid.
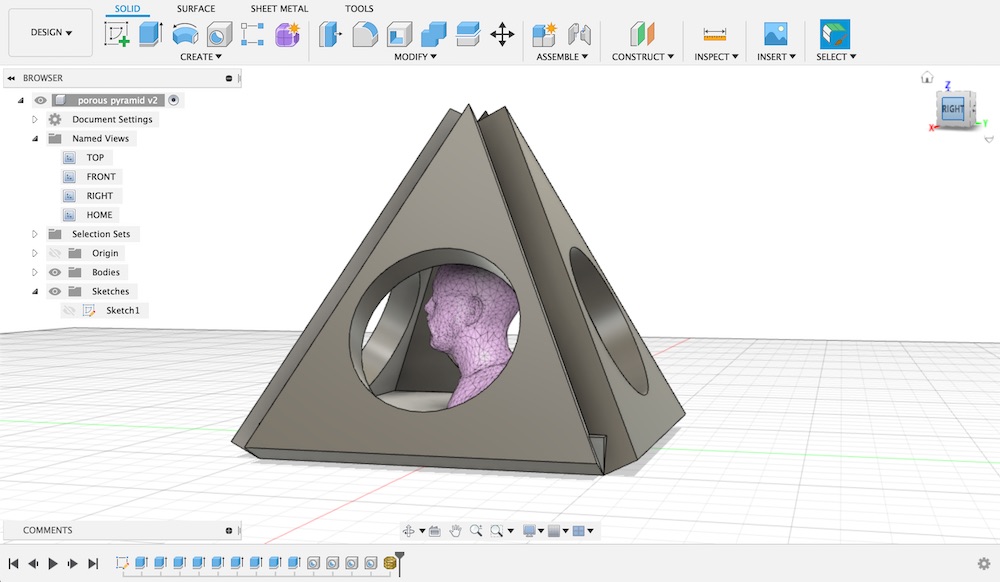
i now had a project with my bust as a mesh and another project with a solid body. in order to combine the two i imported the mesh file into the project that contained the solid object by going first using the solid/create/create mesh command and then the mesh/insert mesh command. it then asked me to pick a mesh file and i chose the one that contained my bust. after the mesh got inserted i clicked the finish mesh button and i now had the two things i wanted. they were not scaled properly so i scaled the mesh file. by default, scalinga mesh object isn't enabled so i had to go to preferences -> preview and checking off the box "mesh workspace". this then allowed me to right click on the mesh and click edit. i then used the mesh/modify/scale command to scale the bust approriately so that it fit inside the pyramid. once the scale was right, i hid two adjecent faces of the pyramids to place the bust in and i centered it based on the holes from the remaining two faces.
to then generate the g-code i selected all of the bodies and meshes and click 3d print under file. i chose a custom print utility, prusaslicer, and after clicking ok, it launched the application.
after the app launched, i left all the defaults execept for the infill i made 20% and checked of the brim box.

i then clicked the generate g-code button in the bottom right and then clicked the export g-code button to save the gcode into an sd card. in the sd card i increased the temps for "set bed temp" and "wait for bed temp" to S65 using a text editor.
i then took the sd card and inserted into the prusa 3d printer. the printer loaded it and using it's interface i chose the print i had just saved. i didn't have any completely horizontal overhangs so the print worked.
my first print was of the two busts combined into one.
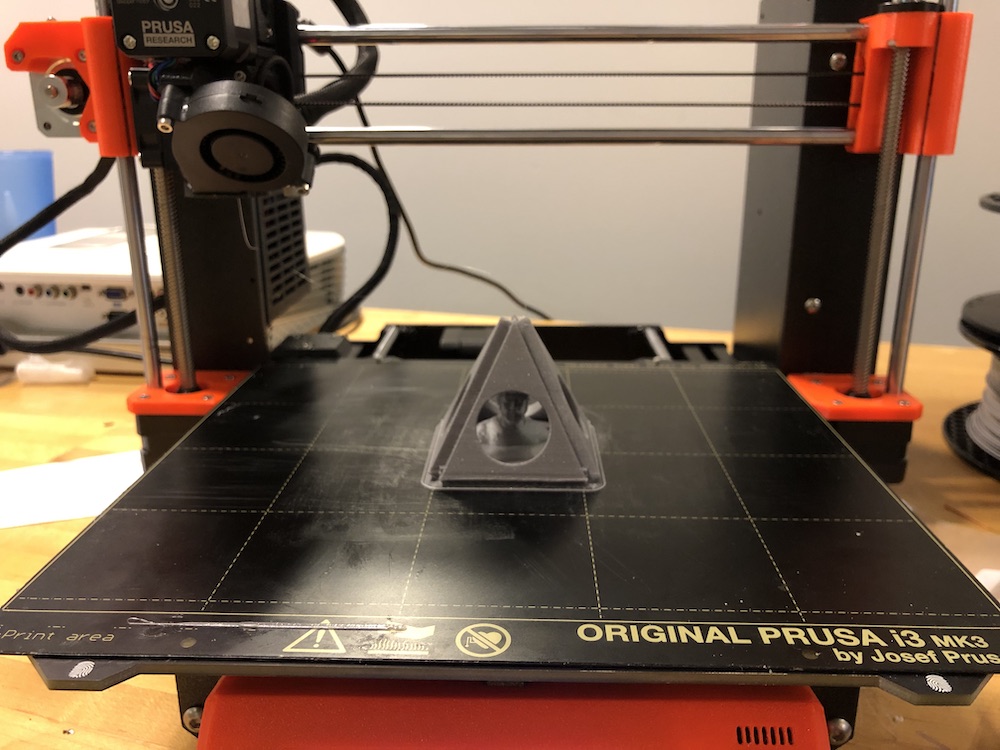
my second print was of the porous pyramid to see how it would come out.
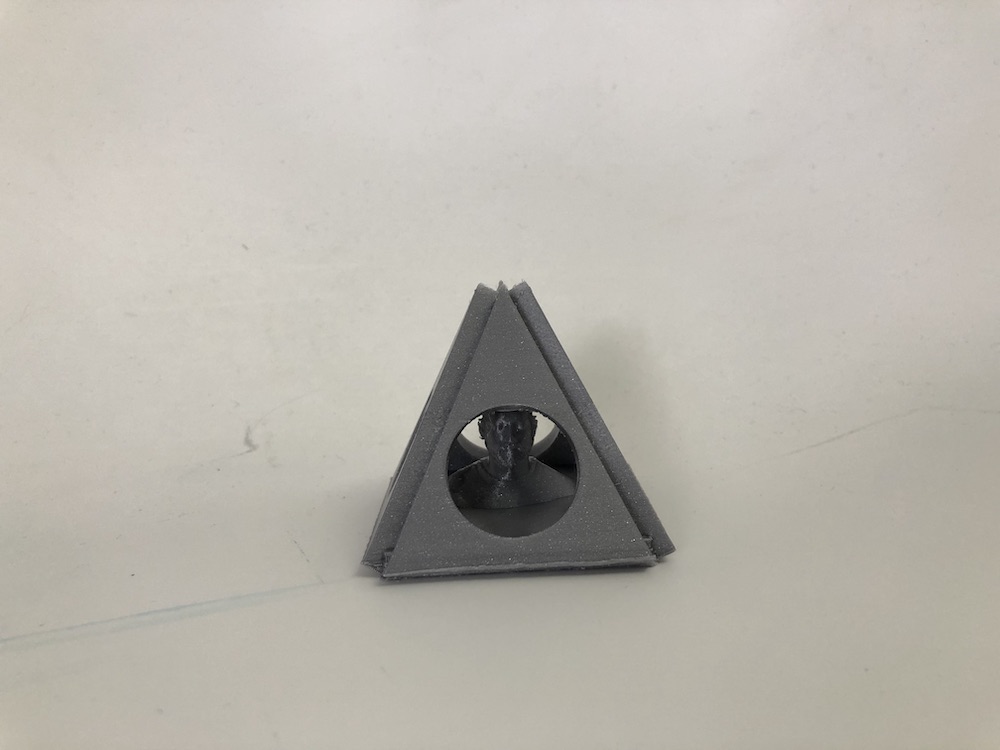
my last print was of my bust inside the porous pyramid.