this week we learned about computer-controlled machining and how to use the cba's shopbot to mill "something big".
during class, neil showed us a chair from alex, a previous student of his, that curved beautifully and i wanted to do something similar to those. wanting more examples i looked online and found a company called dukta flexible wood that did what that chair did and more. it was really facinating and i wish i had more time to try out those milling patterns, but i only used alex's chair as a refenrence.

using that pattern as an inspiration, i decided i wanted to make a cofee table (bench?) that instead of having a four legs, it would have to curved legs. where the curvatures were made by the milled out pattern on the wood.

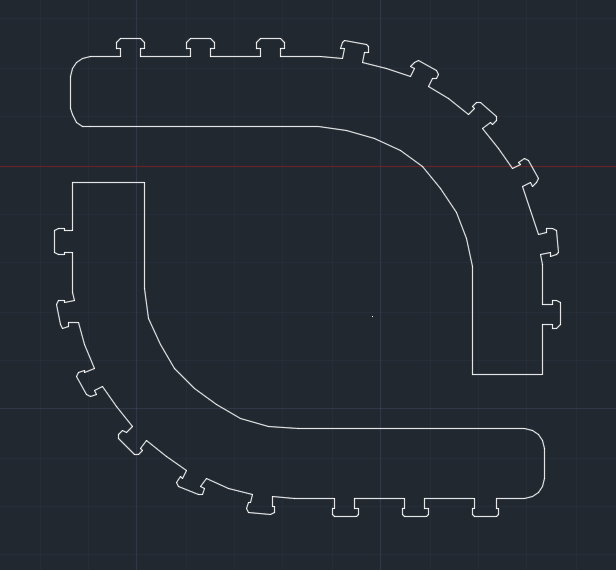
the first thing that i wanted to conceptulize was how to not use any glue, screws or nails for this. i had a rough idea on how i'd create the curves for the table top, but i didn't really know how to interlock them with the two frames i wanted to make. i looked at alex's chair and after some pondering, i assumed that the chair frame had T's that interlcked with the curved wood.
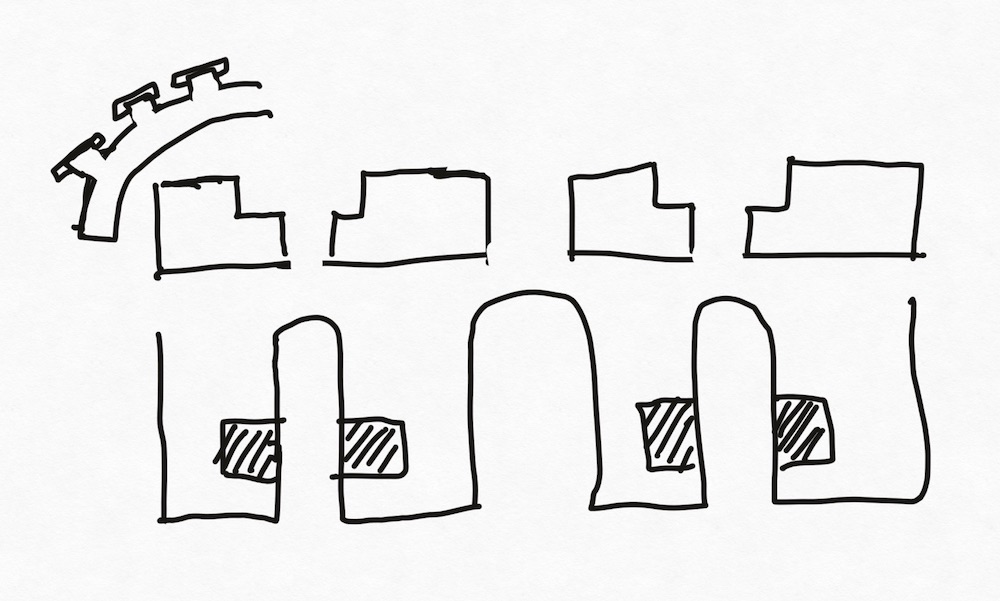
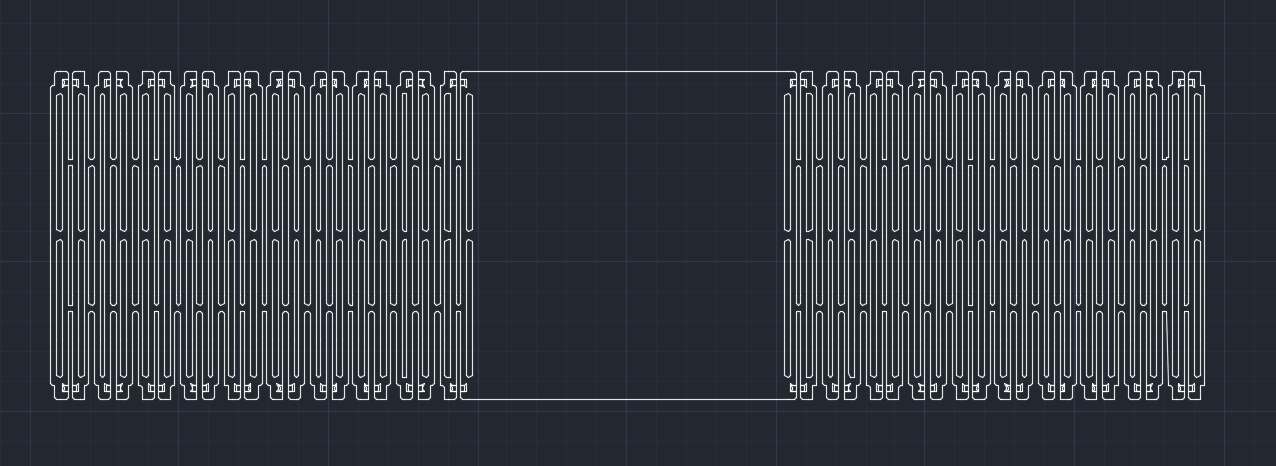
using autocad to start my design (sorry neil) decided to make one of legs for the coffee table. i noticed that the height of the gaps were the same as the height of the wood in the pattern. since i bought 3/4" (~1.9cm) birch plywood for the table top, i wanted those heights to be about half of the thickness of the wood and i chose 0.9cm. i bought 1/2" (~1.27cm) burch plywood for the frame so i made sure to make the width of the T's that size. unlike pressfit, i made the mesaurements exact since i would be pulling the curving wood to fit onto the T's and the elasticity of the wood would hold it together.
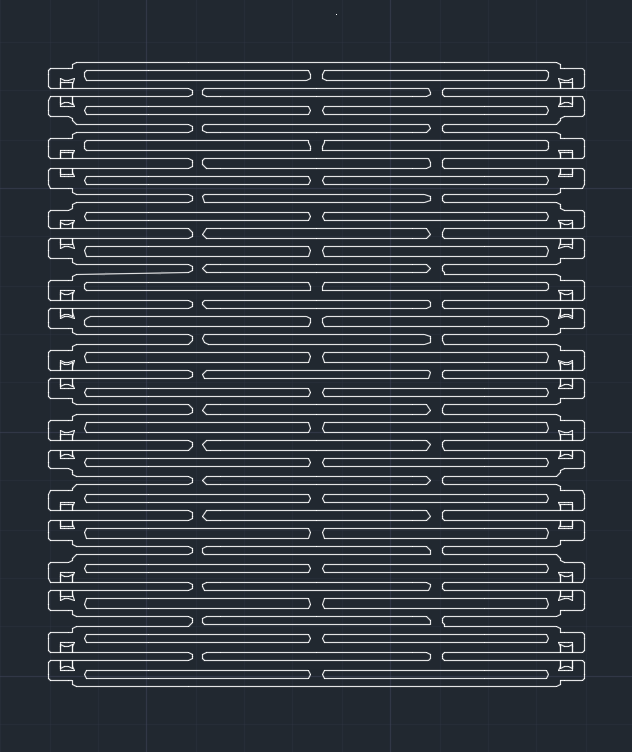
i then exported the file as a .dxf file and uploaded it onto vcarve pro where i joined all of the lines together and chose the milling paths. i used an outside cut for all of the lines except for the inner ovals in the curving wood, where i chose inner cuts.
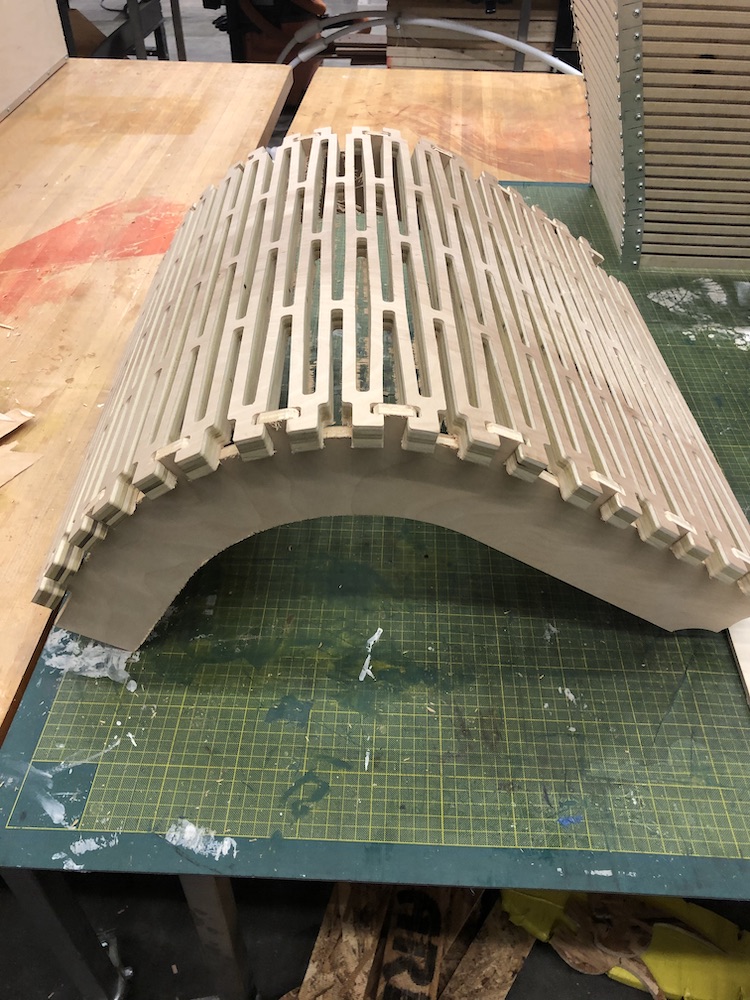
the prototype came out very well and i was happy that i wasn't going to have to try another prototype considering the curving wood took at least one hour to mill.
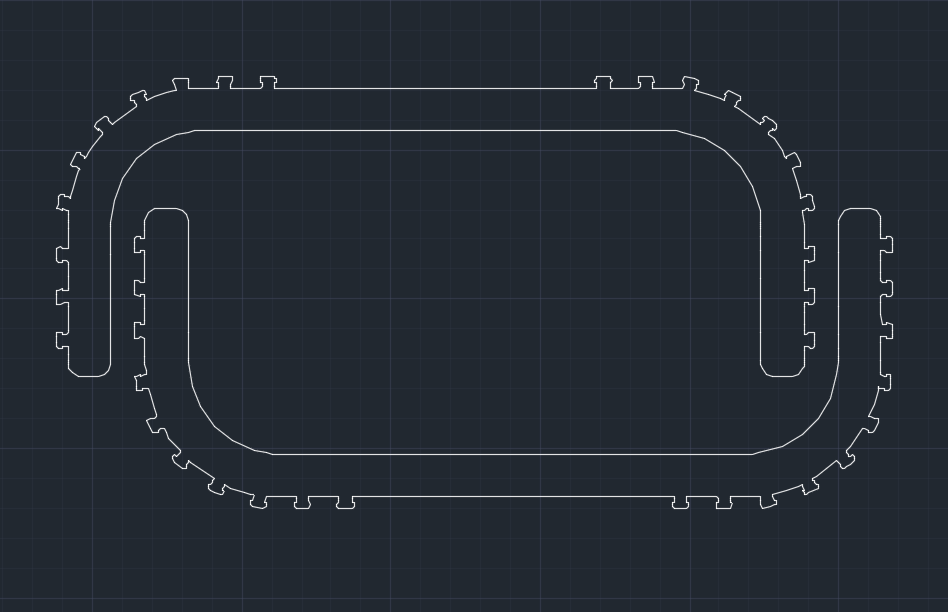
once i knew that the curving worked and that the interlocking worked as well, i designed out the complete coffee table.
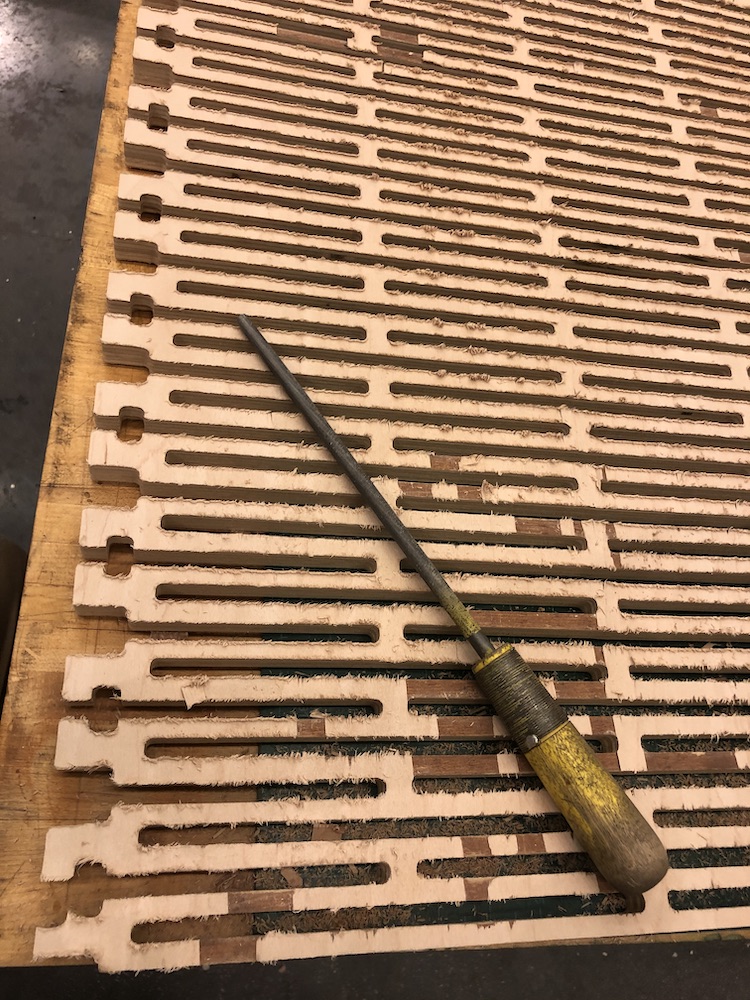
after about four hours of milling i got the parts milled out and then i had to sand. because the underside of the table top and frame were frayed from the downward-cutting mill. i first tried with the file seen in the image bellow, but quickly realized i needed soemthing more efficient so i went with a power sander.
i then started assemblying it.
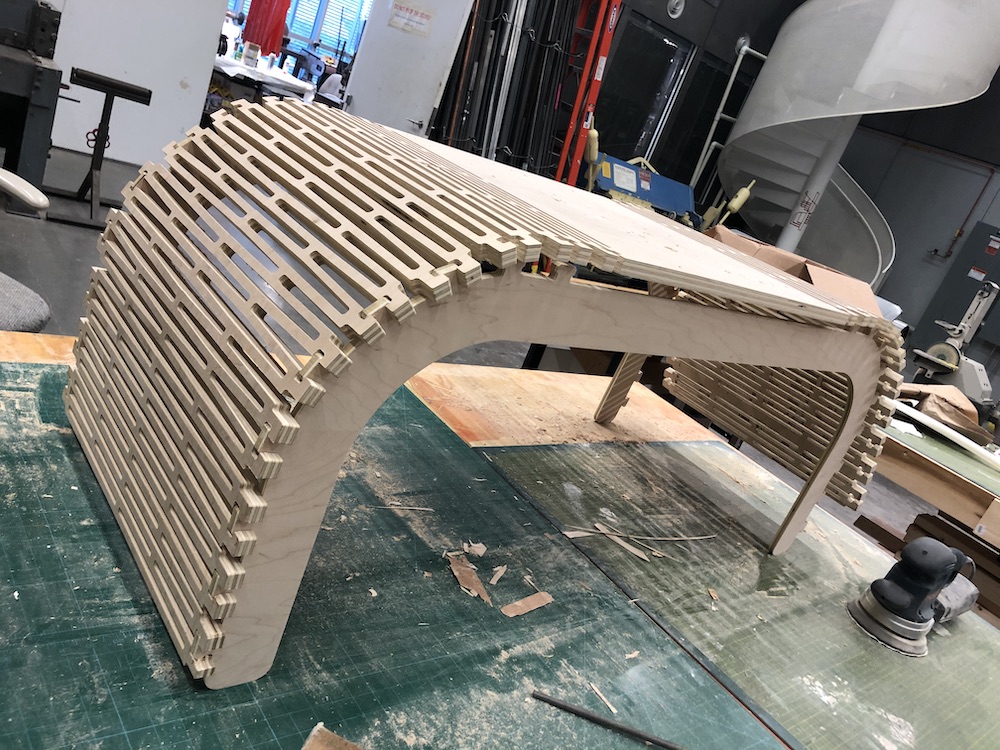
to then get this final product:
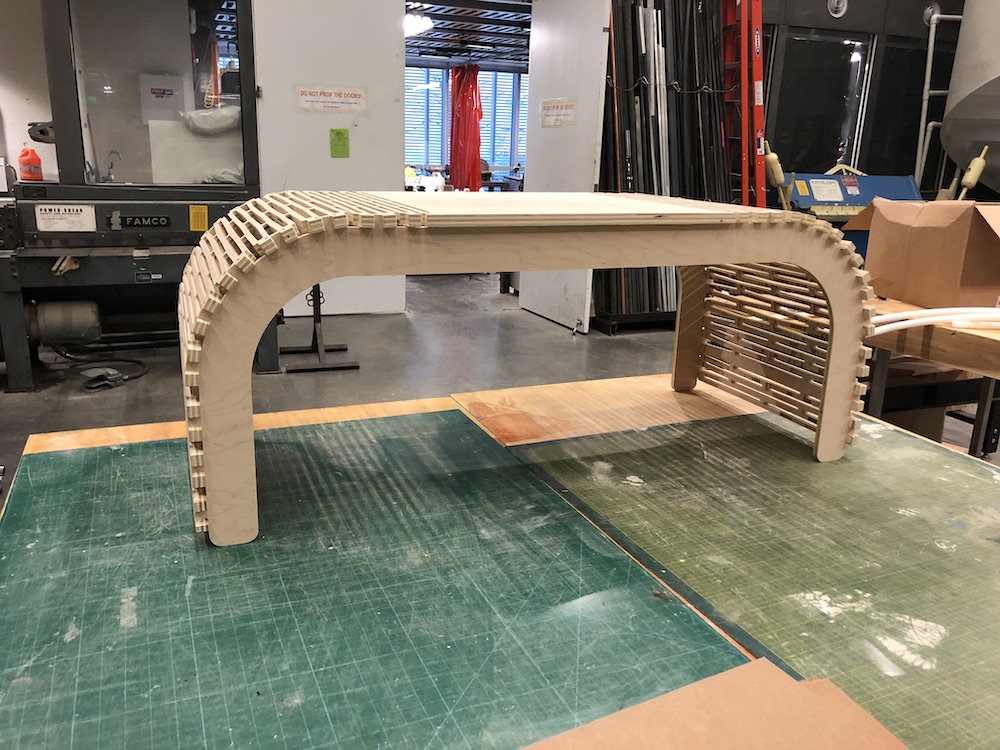
in the future i would use 1/2" plywood for the table top instead of 3/4". i would also like to stain it and use nicer wood. i would also like to experiment with the different designs i saw from dukta flexible wood.