
See video here.
I have a couple of odd interests when it comes to making art.
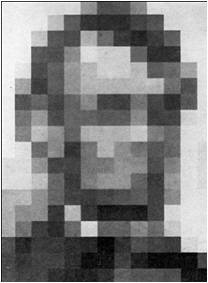
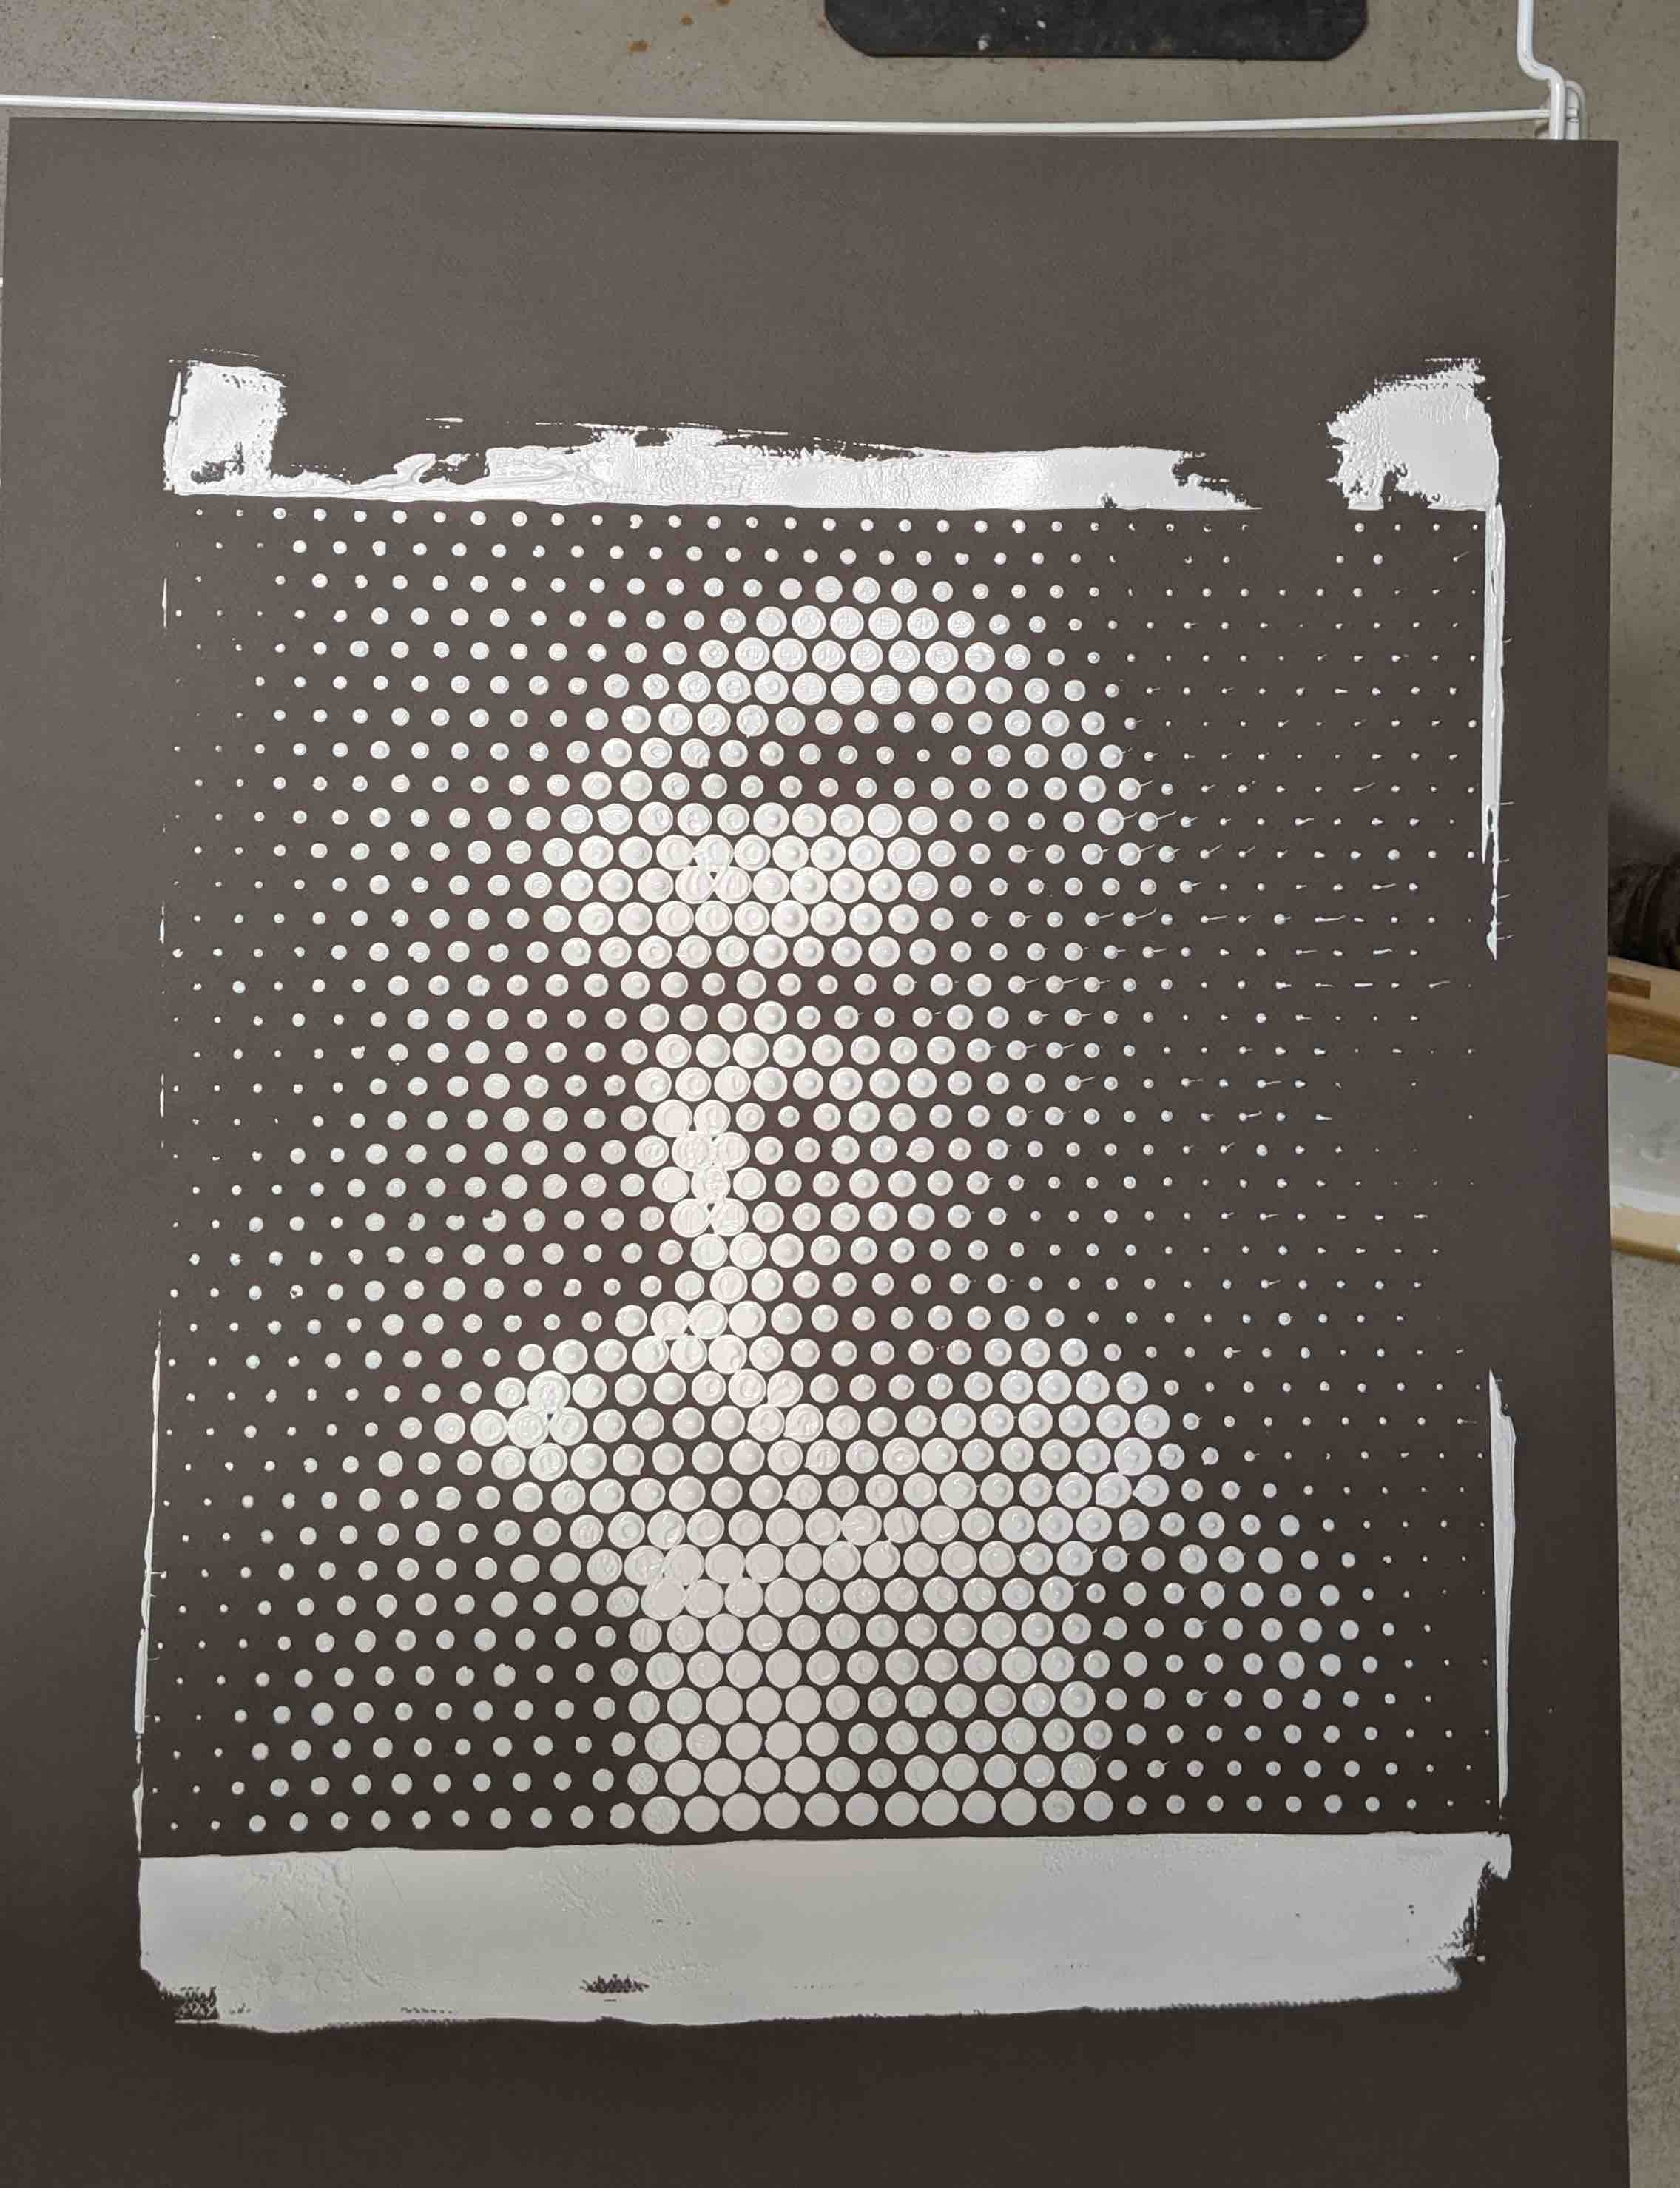
First, I'm interested in low resolution, high precision art. Some of Chuck Close's work comes to mind here, as does this iamge of Abraham Lincon by Salvidor Dali.
| |
One reason I like images like this is that up close they actually communicate farily well how I see the world. I am vision impaired, and have a condition called keratonus, which is a deformation of the surface of the cornea. With special lenses (which are in full HTM(A)A style cast with the equivalent of OOMOO from the surface of my eye, 3D scanned, and then CNC milled) I can see fine for 16 hours out of the day. The other eight hours the world looks like the 17x version of double vision.
I find the visual effects of low resultion art to be similar, close up, to how I see naturally. And there are interesting moments of moving back to see images pop into sharpness, while decomposing closer up. You can get a sense of this with these halftones I put together:
 |
 |
 |
 |
The other major interest I have in art is action an guesture in line and markings, things that that capture energy and expressive fluidity. While I'd always intended to think that Jackson Pollock wasn't much of an artist, I got schooled one day at the Gugenheim in Venice. I had a sketchbook with me and was doing some studies of different paintings there, and thought it would be a big joke to sit down and draw a copy Pollock's Alchemy:

I sat down on the floor and worked away at it for about an hour, with tourists occasionally peering over my shoulder to see what the heck I was scribbling. At the end, the joke was on me when I looked down and saw that what was in my sketchbook was clearly the most visually interesting thing I'd done.
You might also notice I tend more towards monochromatic images. My eyes are weird in a different way, which is that they have different color balances, with left eye being quite warm bias and right eye being quite cool bias. I have no idea why, but trying to get any sort of emotive quality into hue leaves me frustrated and wondering which of my eyes is "correct". And I really like greytones and deep shadows on their own merit.
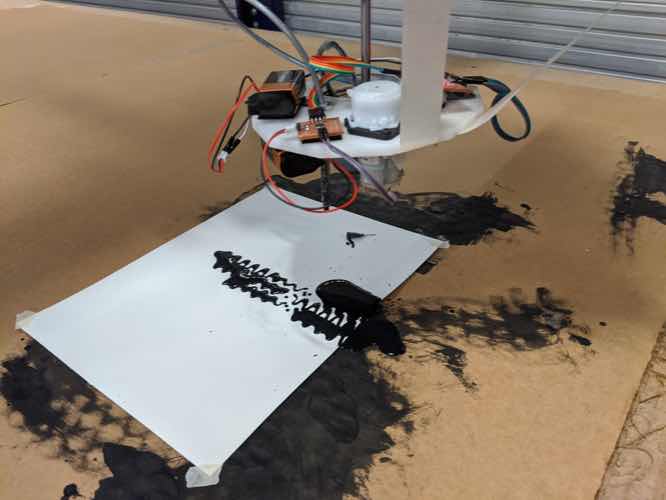
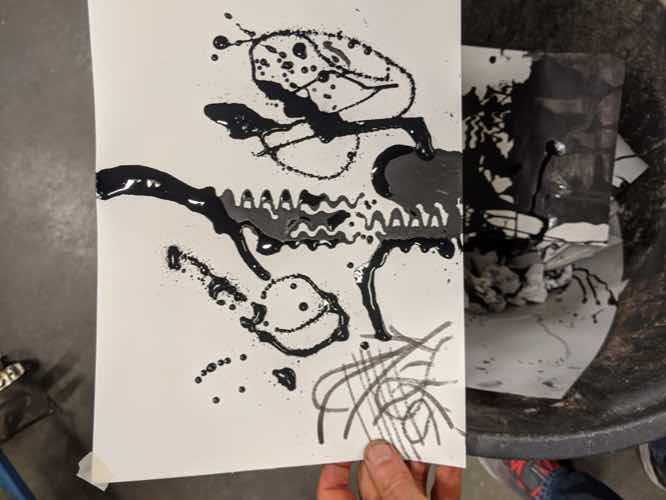
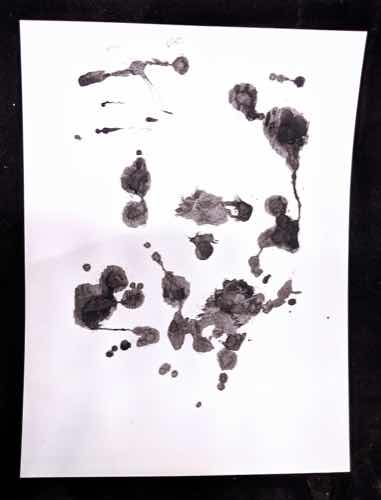
Anyway, one interesting thing about low resolution art is that if you want to do it well, it actually needs to be fairly high precision if the visual effects are going to add up properly from far away. That is, it's important to get local mean values right, even if local variance is high. You can push local variance well with energetic line and marks. All of which is to say that life is too short for manual pointilism, and I'd like to make a machine that can deliver paint in a chaotic-yet-precise way.
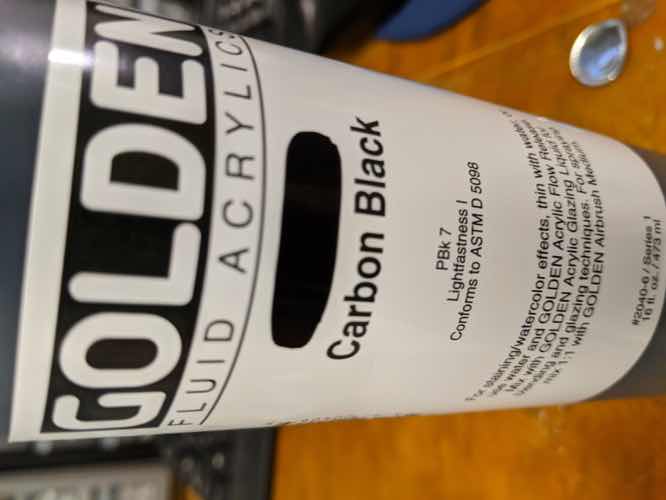
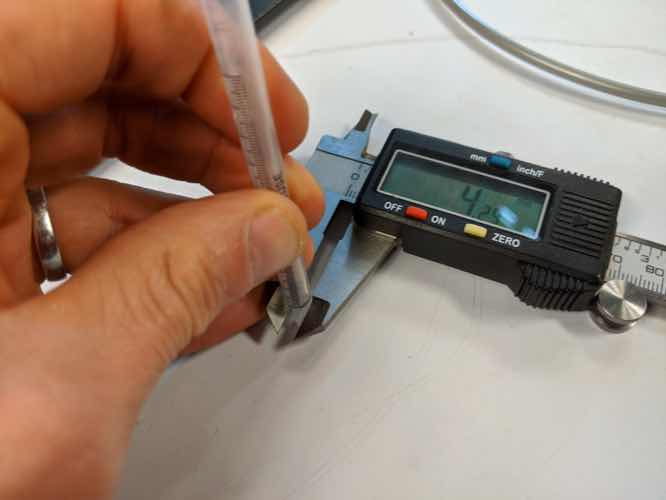
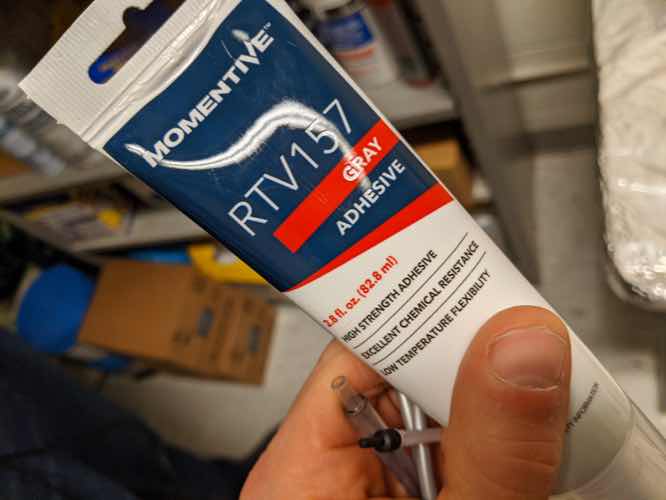
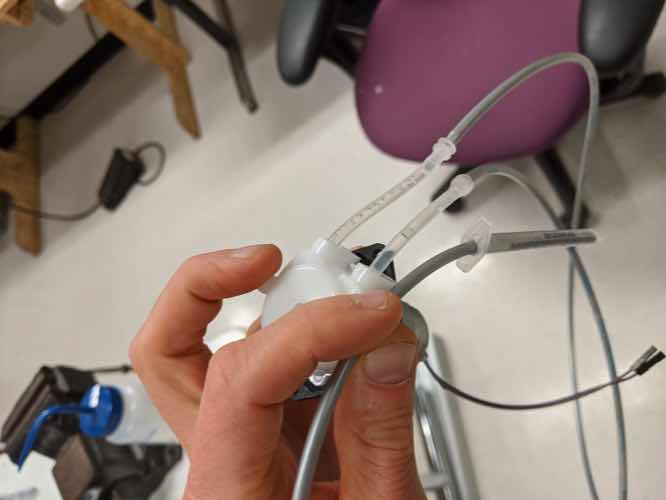
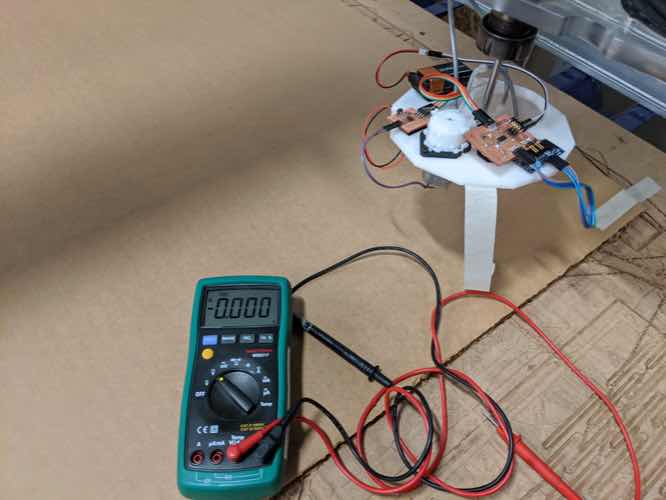
The end effector spits paint (high flow acrylic, diluted 1:1 with water) when brought within 6cm of the work surface. This allows the module to communicate in a platform independent way with whatever device or structure is moving it.
I had excellent and useful discussions with Sam, who provided some background on a Zund-based airbrush he had made (link). These discussions emphasized the benefits of being completely isolated and platform independent.
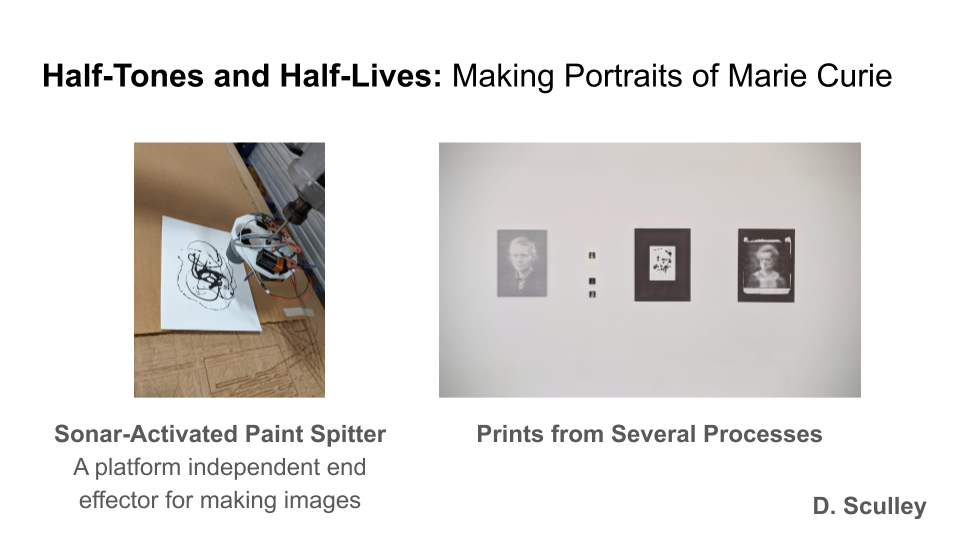
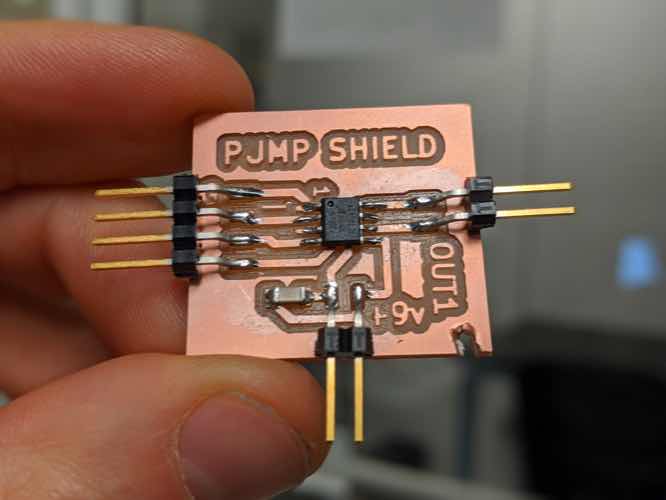
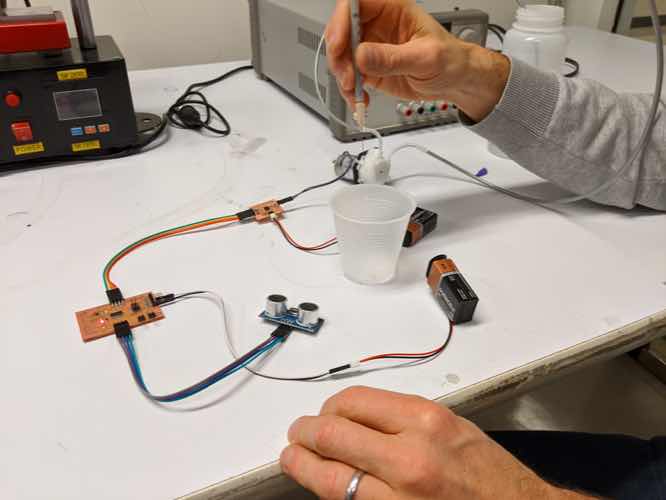
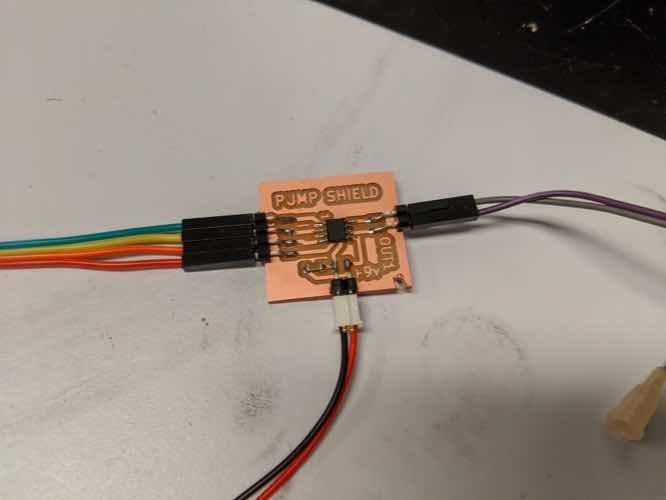
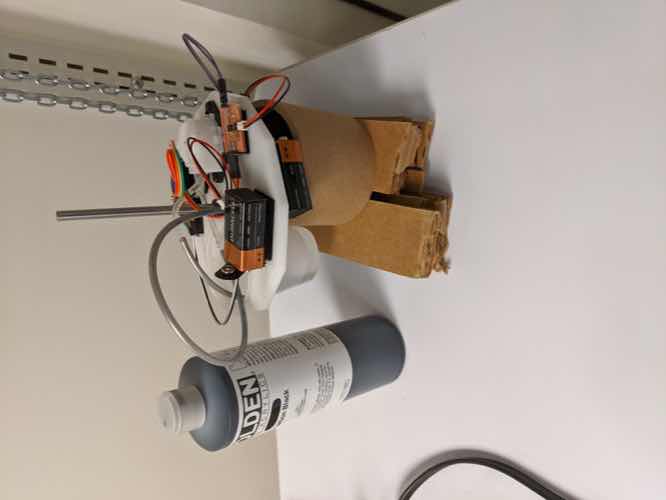
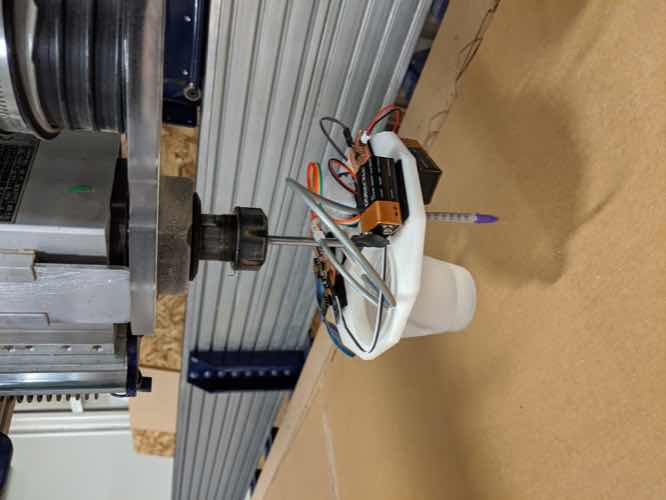
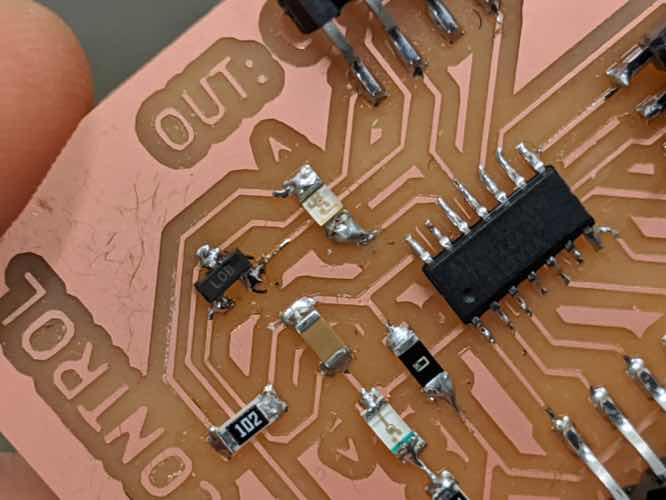
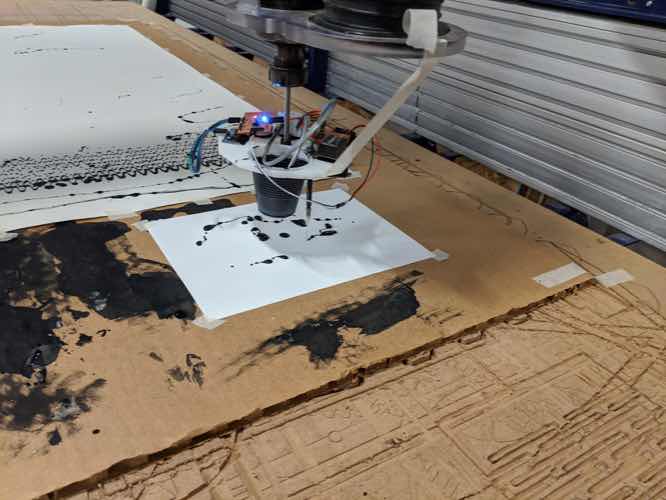
For the end effector, I designed a control board for the sonar module, a shield / H-Bridge board for the pump, a chassis that attaches via 1/4" shaft to ShopBot or other driver, a syringe-based delivery, inkwell and plumbing, and a wide variety of halftone based images.
For the end effector, the boards, chassis, delivery head, plumbing, and all prints were made.
The end effector required milling, soldering, laser cutting, CNC machining (ShopBot), and iamge processing. Other prints required molding, casting, 3D milling, vinyl cutting, silk screening, block printing, Zund CNC, and application programming.
I gained a much deeper understanding of how halftone images work at scale, resolution, contrast, and material.
I proved to myself that creating images via CNC painting has promise and the results are visually appealing (although more work is needed to develop a reliable process.)
The main evaluation is in the final end product and the visual effects achieved. I feel these are largely successful.
For the end effector, additional key criteria are reliability and precision. Unfortunately, although the mechism is functional at a base level, success has not been shown robustly on either of these dimenions.
At this point, I have a sonar activated paint spitter that does a good job of creating a local, one bit network with whatever mechanism is driving it by reading the z-axis height and turning on. However, I haven't yet gotten it to deliver the level of precision or reliability that would make it a practical tool.
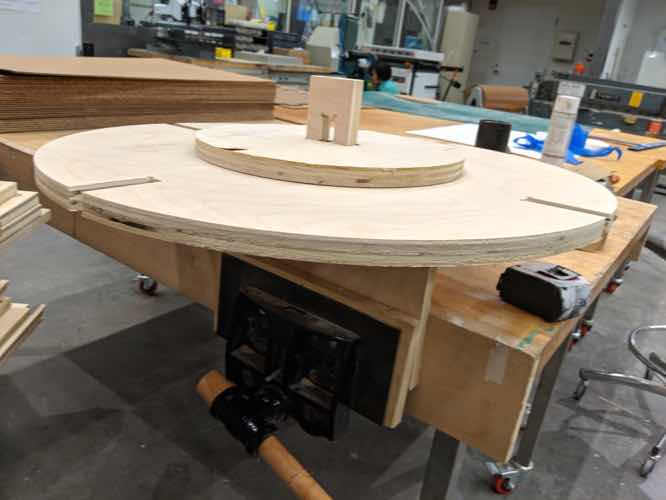
My initial plan had been to make a Foucault pendulum, with an end effector on the pendulum bob that can output paint on demand. This turned out to be infeasible for the present time due to lack of cieling height. So I decided to work on the end effector, and to do so in a platform indepenent way.
This section could, as they say, use more words. For the time being, see the video here, so at least there's music.


Here are notes on the pendulum idea which was shelved in favor of just working on the end effector.
The motion of the pendulum is intended to add a bit of chaos and action to the marks.
One nice thing about this is that the pendulum bob will be above every (x, y) point in the work surface over the course of its full cycle, but with motion control only ever given along one axis.
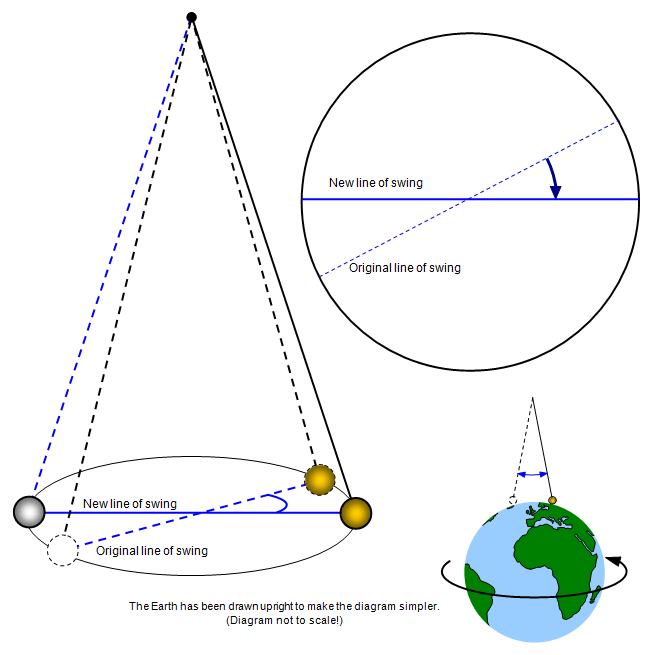
Fun fact: since we are not at the pole, it would normally take about 40 hourse to complete a full revolution for a Foucault pendulum, rather than 24. But since we can do work on both sides of the swing, we can get by with a speedy 20 hours per job.
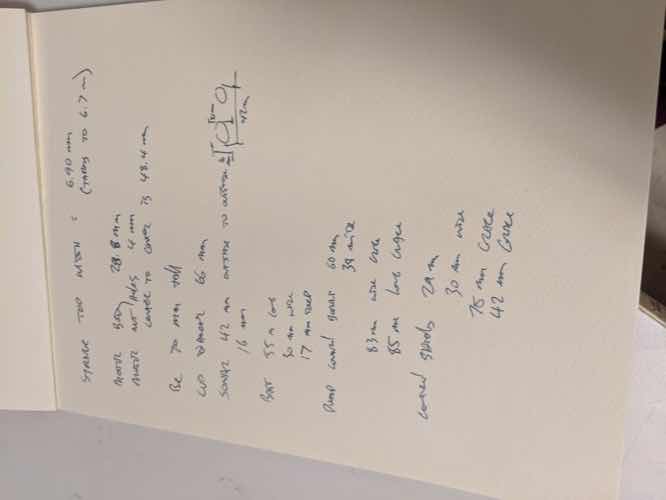
I'm aiming for a pendulum structure about 4m tall, so that the period of the pendulum is about 4 seconds. For a 1m wide work surface, this also means that vertical displacement won't be too large.
The pendulum itself needs to be able to swing freely, and also to rotate freely so that the Earth's rotation can provide a rotational traverse across the work surface.
In an ideal world, I'd have a space with night tall cieling and use that as support.
I've also attempted a first version of the pendulum structure as part of "Make Something Big" week using 3/4 inch plywood.


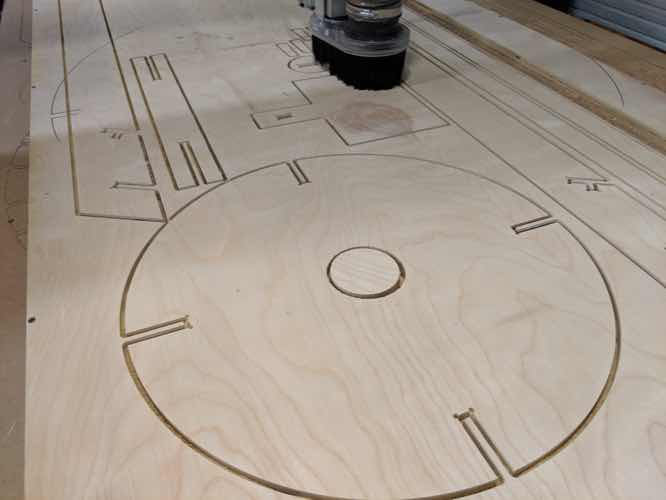
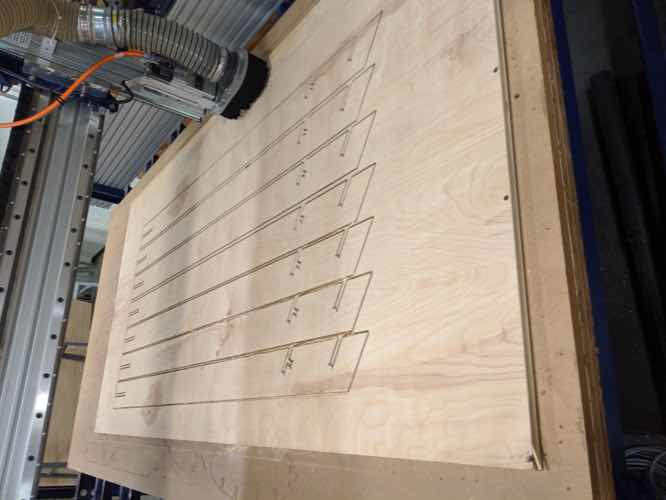
This was intended to be put together in two levels. Here's the top level, which looked okay:

But the full thing was unweildy when assembled.

My updated thought here is to allow the lengs to be detachable but hinged at the top connector, so that the structure can be assembled on the floor, then raised vertically, and then legs fanned out like a camera tripod (but probably with 5 legs).
The main things are that are needed here are that the pendulum arm can swing and rotate freely. My first attempt here was to try and use metal bearings inside milled plywood, but this had too much friction.
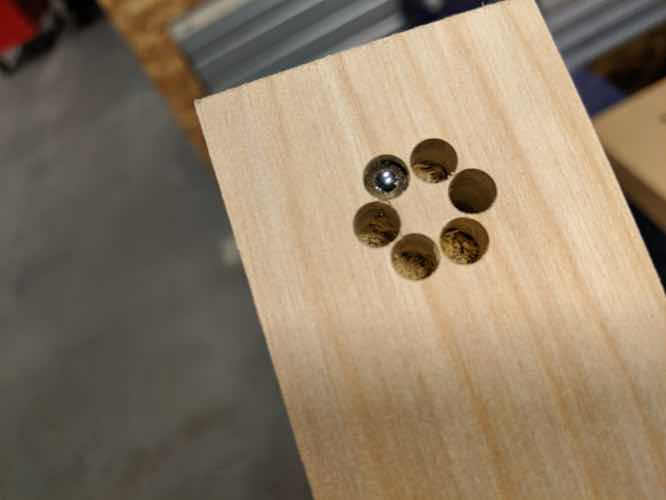
For the swinging axis, I'll change to more of a pivot mechanism. For the rotation axis, I'll first experiment with larger bearings (more like 1 inch than 1/4 inch), but ideas here are welcome.
Contrary to the imprssion given by science museums, Foucault pendulums need to be given a small push every swing to make up for loss of energy due to air resistance, etc. This is commonly done by an electromagnet that fires for a brief moment at the edge of each swing. But it could also be done by well placed solenoids.
I initially experimented with making a large-ish ball point pen-like end effector, but got worried about the amount of downward force needed for this to work well.
My current plan is to deliver paint in small bursts using a peristaltic pump. I played with this in Output Devices week. This avoids the need to keep the end effector perpendicular to the work surface, which is nice, and also eliminates worry about drag.

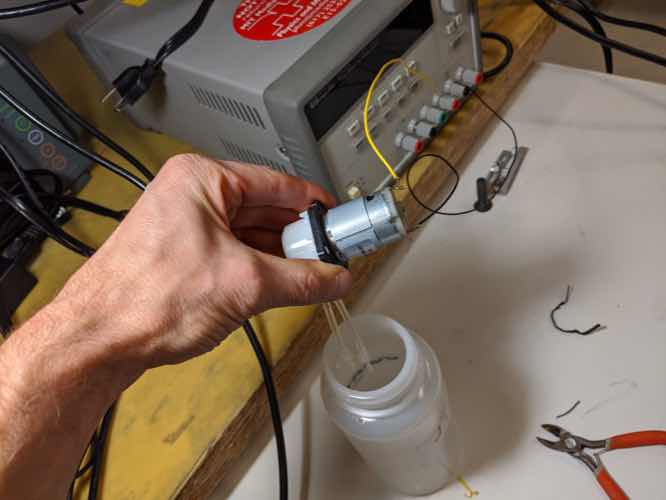
The paint will be high-flow acrylic.
For esthetics, I'd really like to go as minimal on position sensing as I can.
Given that the earth's rotation is pretty consistent, I am hoping to get by without an explicit angle sensor, and instead use just timing information to compute where we must be rotationally. For accurate timing, will use a resonator.
Although the period of a pendulum is essentially determined only by length of the arm, the amplitude or velocity are variable. So I'll need something here. I was initially thinking of an accelerometer and played with one in input devices. But now I'm thinking of going a little bit more minimalist and using a step response mechanism with liquid inside, something like this example from the course docs:

Finally, I've been using some of the weekly projects to explore things visually a bit more in the space of low resolution / high precision.
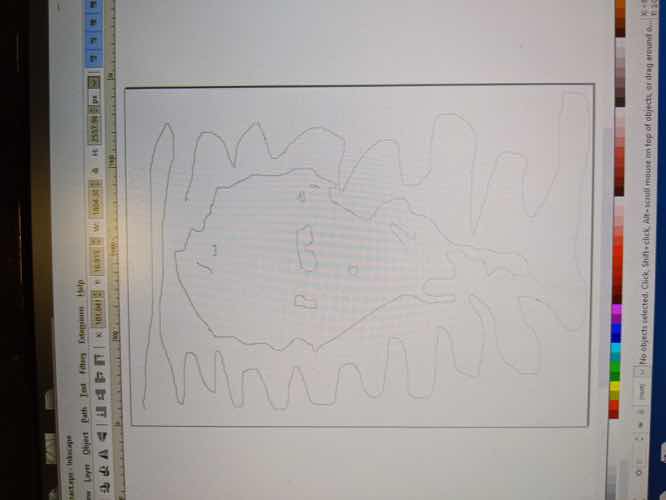
I wrote some python code for this in github: image_to_svg.py
Here's one using the vinyl cutter and a silkscreen printing process:
Here is an inked halftone cast in hydrostone:
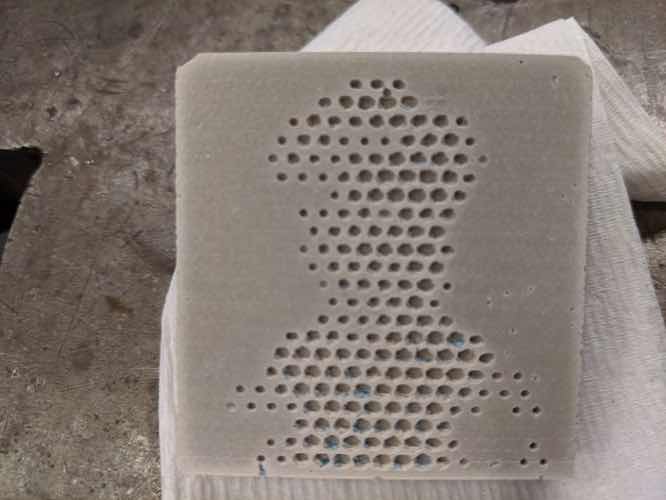
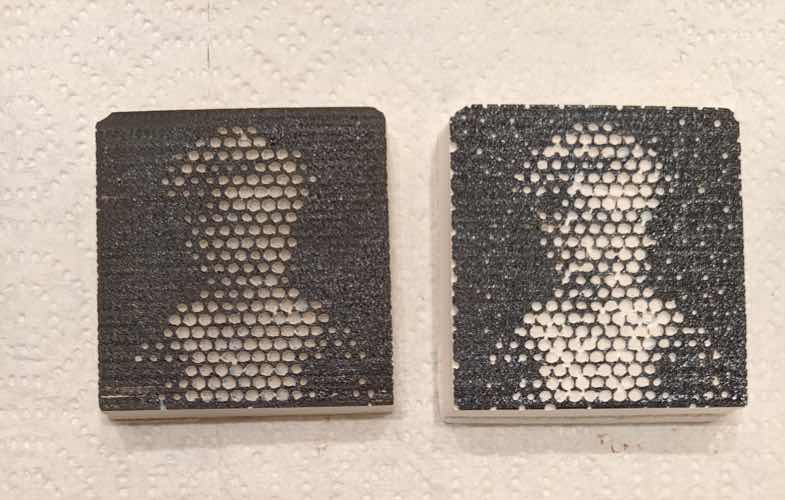
And here's a print pulled from the hydrostone:

The biggest challenge here for me so far has been scoping appropriately to the alloted time, so it's good to have a way to reduce scope if needed.
The main thought for scope reduction would be to just do the paint-delivery end effector, and then hook it up to the ShopBot to make prints. In this case, I still need a way to tell the end effector where it is in space -- first thought for this would be to attach a range sensor to it and have the ShopBot raise and lower to trigger release / stop release of paint.