For this week's project, I joined the Large Scale Cutting group and learned to use the Zund. Patricia and Jiri's excellent introduction and step by step instructions have been well documented on the wiki, so I won't repeat them here. But I am very appreciative of the time they took on Friday.
My assignment for myself was: Draw something big.
Because I only had Friday to work, I needed to be relatively self contained and quick this week. (Rest of the time I'm away at the NeurIPS conference, and will unfortunately have to miss class on Wednesday.)
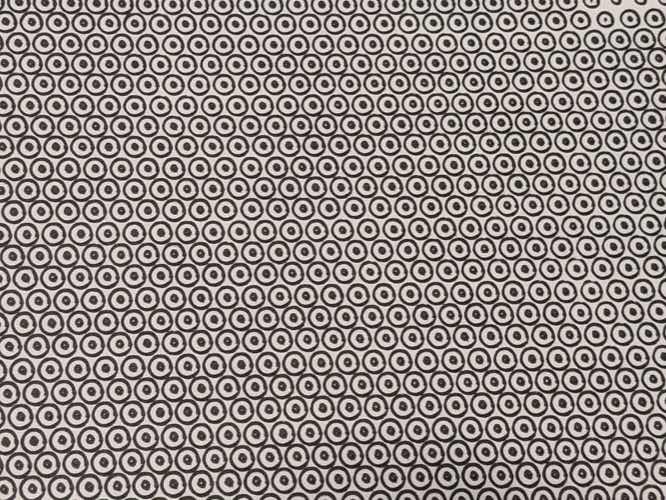
My initial thought had been to use the Zund's cutting tool to do a very large scale halftone image on a 4x8 foot piece of cardboard. I prepared this SVG file to use:
 However, because my
first halftone file used small tight circles, I was warned away from this by
Jiri who suggested that tight circles might break the blade. I did modify my
image conversion script to output squares, since the Zund blades like striaght
lines, but Jiri also pointed me to the drawing module.
However, because my
first halftone file used small tight circles, I was warned away from this by
Jiri who suggested that tight circles might break the blade. I did modify my
image conversion script to output squares, since the Zund blades like striaght
lines, but Jiri also pointed me to the drawing module.
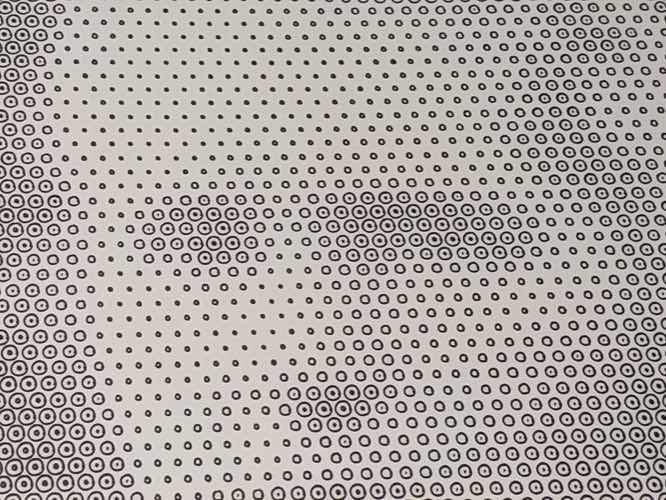
So I decided to create an image that would work well with that. Jiri reminded me that the Zund doesn't have a rastering mode, so I needed to rewrite my scripts to output lines enough to fill in as needed. I decided to do this with concentric circles to create halftones, leaving a bit of space between each concentric circle to create a little bullseye effect.
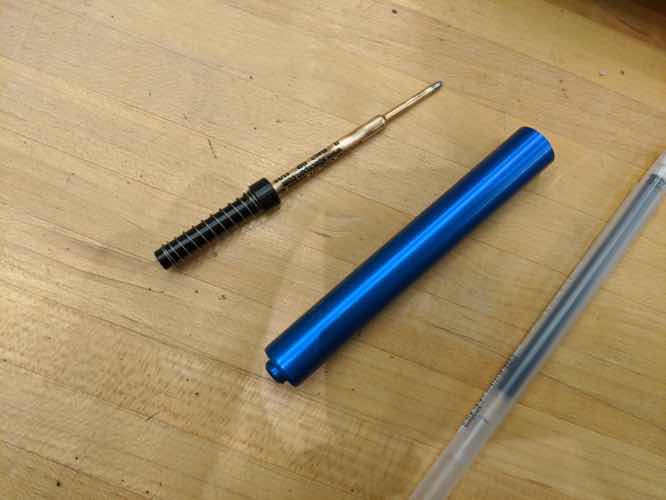
The tool itself -- modestly named the Universal Drawing Tool by the good people of Zund -- used a ball-point pen insert and had limited ink capacity that I didn't want to exhaust. (And the ink itself was relatively low quality.) So I decided to rig in an alternate pen.
I brought in several thickness Faber Castle Ink Brush pens and some artist ballpoint pens. I chose one ballpoint pen and one brush pen with SB thickness as a reasonable first ones to try.
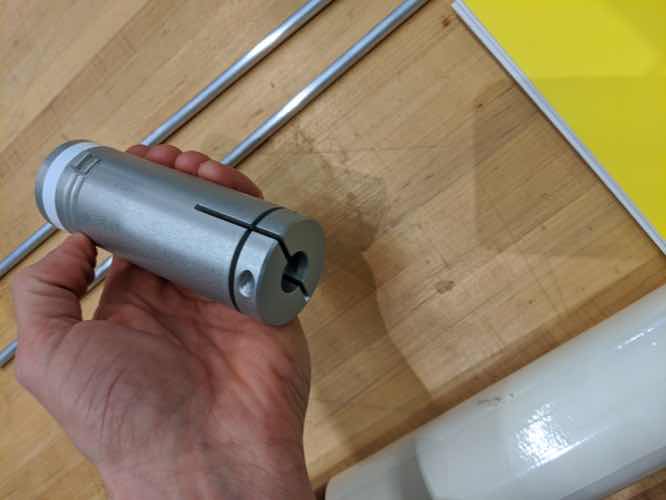
The Universal Drawing Tool module holder
The shaft for the Universal Drawing Tool was 14mm. The pen I wanted to use measured 9mm in diameter.
For this initial trial, I used duct tape to build up the shaft width accordingly, which seemed to work fine. A more robust long term solution would be to 3D print either an adapter tube or a separate module holder with the appropriate joint width.

Ah, duct tape.
At this point I was ready to start trials, using the SB pen.
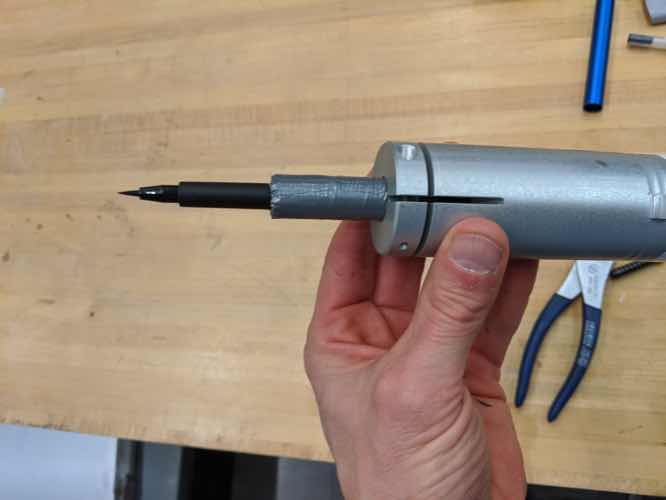
Faber Castle Brush Pen SB ready to go
Jiri was kind enough to work with me during these trials. First step was to insert the module.

The Zund configuration maintains specified information about both the tool and the material. First, we had to tell the software that the tool we were using was a drawing tool, but that the Z-offset would be set manually.
We did a first try by eye.
We then needed to tell the Zund about the material. There was no configuration option for paper, so first we tried telling it that it was aluminum foil. But then the Zund software was smart enough to say that we couldn't enter drawing mode on that material. We then specified cardboard of 1mm thickness, thinking we could use additional configurations to tell the tool to operate at -1mm. However, while this would have been possible in "cutting" mode, in "drawing" mode the tool said we could only draw on the surface. We then tried setting the thickness to 0mm, but the software complained that this is impossible.
At this point, Alfonso showed us to configure a custom material, and we created a Paper material with 0.1mm, the minimum allowed.
I created a small test pattern by deleting all but a small corner of my design.
We put down a test sheet of paper, aligned, and then enabled the VAC which held the paper remarkably well.

But our first test run drew only in the air, a fraction of a milimeter above the material.
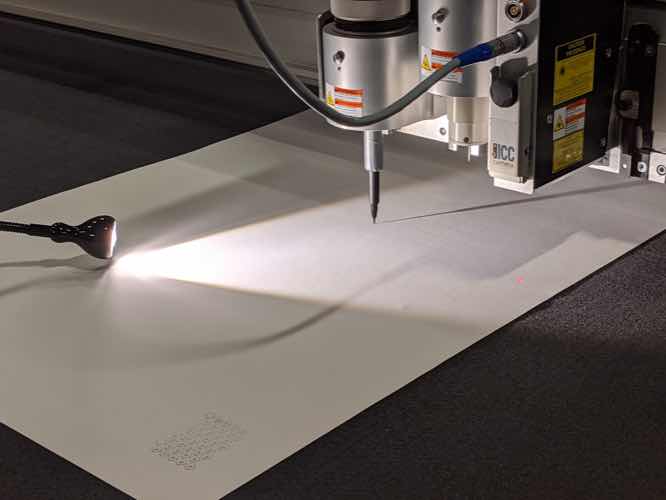
Alfonso then showed us a neat trick to set the Z axis by putting a light directly horizonal to the work surface, and lowering the pen until the pen tip barely touched its own shadow.
Our first attempt with this worked, but was extremely faint.
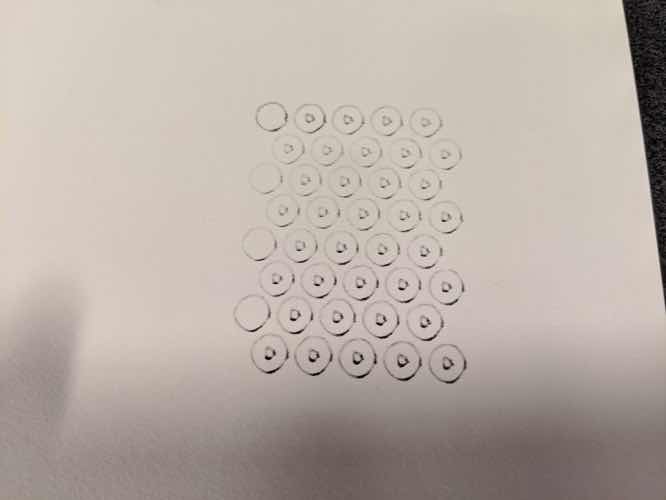
We then decided to just adjust the Z axis further down to increase the downward pressure on the pen, slightly. The pen tip itself was a soft brush, and so provided enough elasticity on its own with needing a separate mechanism to accommodate the pressure.
Weran a series of tests until we found a setting that worked well. Lowering Z about another 0.6mm seemed to be about right. We also tested the speed, and found that 200mm/s gave slightly faint lines but 100mm/s was ok.
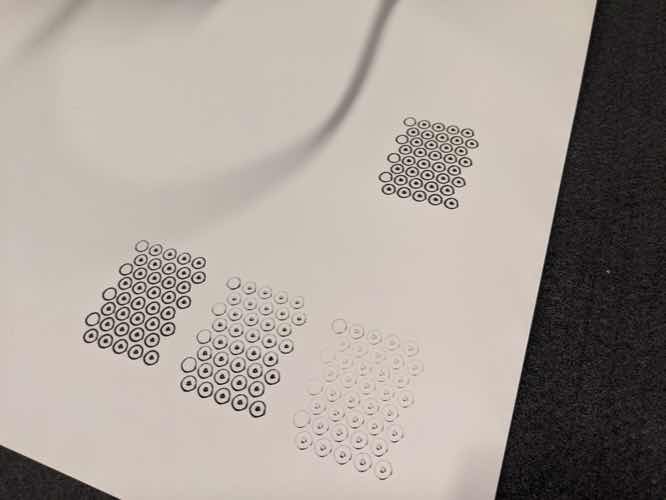
In retrospect, we also thought that perhaps some of the initial faintness was due to just the pen never having been used and the nib being dry. In the future, I would draw with the pen slightly to get ink flowing before use.
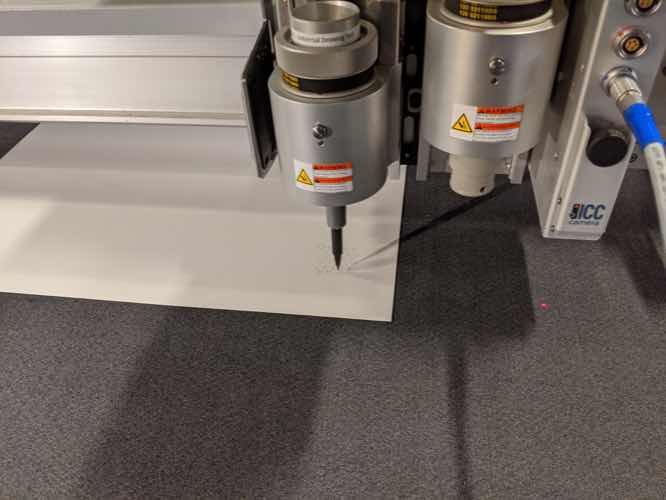
We then ran the full drawing.

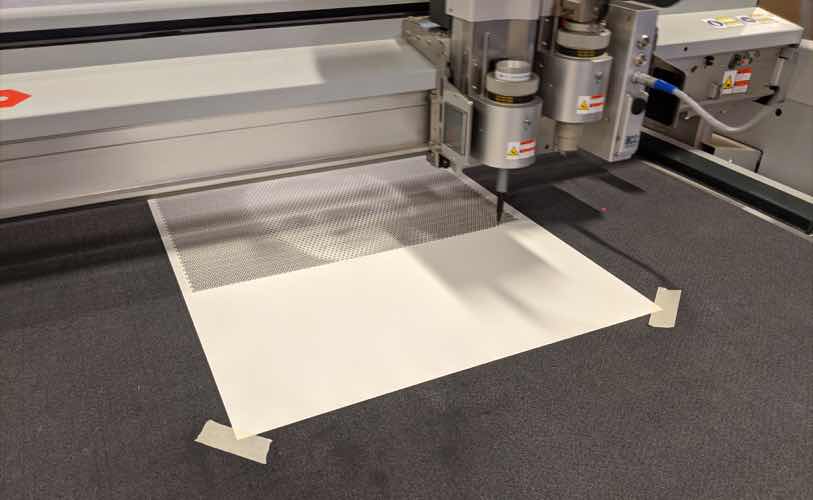
Drawing in progress...
Overall drawing time was about 85 minutes. (Thanks to those who kindly waited for this to finish on Friday.)
The end result gave the visual effect I was hoping for. The level of detail in the individual marks was very satisfying, as was the view from further back.

Thanks, again, to Jiri, Patricia, and Alfoso for their help on this.