CAD'ding
Re-designing my final project.
For this week, I decided that I wanted to get a start on my final project by casting the
housing for the wearable I want to make. More on the idea and other steps towards the final project
here. In my first CAD desgins of my final project, I had represented the wearable
as a wristband with the two ends of the wristband connected in a loop.
This worked great for a first model, but I realized that it wasn't an ideal shape to cast, so I re-designed it
with the wrist strap lying flat. 
Workflow for this week:
There are a few different steps, so here's a list to keep track:
Step 1: mill a block of wax. This will be used to make the mold. Step 2: make the mold. The two most available (and friendly) materials are Oomoo and Moldmax, both silicones. Step 3: cast the object. In my case, I decided to make my final product of this week an Oomoo prototype of my final project. I'm not sure if Oomoo is the right material to make my actual final project out of, but if it turns out to be a nice material for a wearable, maybe I'll just stick with it for the final. Because my final product for this week is Oomoo, I will cast Oomoo into Oomoo, which kind of freaks me out, but Graham showed me a very clean example of this working well, so I'm hopeful.
Step 1: Milling the wax block
Using the desktop Shopbot
Like week 6, this week's machine is a Shopbot. Unlike week 6, this one is small and cute and fits on a table top!
I started by glueing my wax block onto a piece of OSB using a hot glue gun. I then screwed the wood layer onto
the sacrificial bed of the Shopbot, to keep the wax in one spot. It took me a little while to figure out the
toolpath for the mill, not because of the software, but because it took me some time to realize that I should
mill the underside of my wearable, so that the indent on the back (to accomodate a board and a power source) would
be picked up in the mold. I then imported the toolpath file into the Shopbot software and let the machine do its thing.
 partway through milling the wax block
Step 2: Making the mold
First experiences with Oomoo
For this step, I used Oomoo, which is a silicone product and comes in two parts: Part A and Part B.
When mixed together in equal volumes (and mixed for three minutes), a chemical reaction occurs
that allows it to form to the shape of the container it's poured into. I mixed the Oomoo, and decided to
remove any air bubbles that formed from the mixing by putting it into a negative-pressure space to bring
any bubbles to the surface before I poured it into the mold. Previous examples (seen during training)
seemed like this worked better than de-gassing after pouring, as there's a smaller chance of making a mess.
After this, I poured the Oomoo into the mold in a thin stream, which helped any residual air bubbles pop as
the material filled the mold. The Oomoo apparently takes 75 minutes to cure, so I left and came back later,
but in reality, it seemed more like two hours before I felt that I could remove the Oomoo from the wax block.
Anyways, the mold got made!
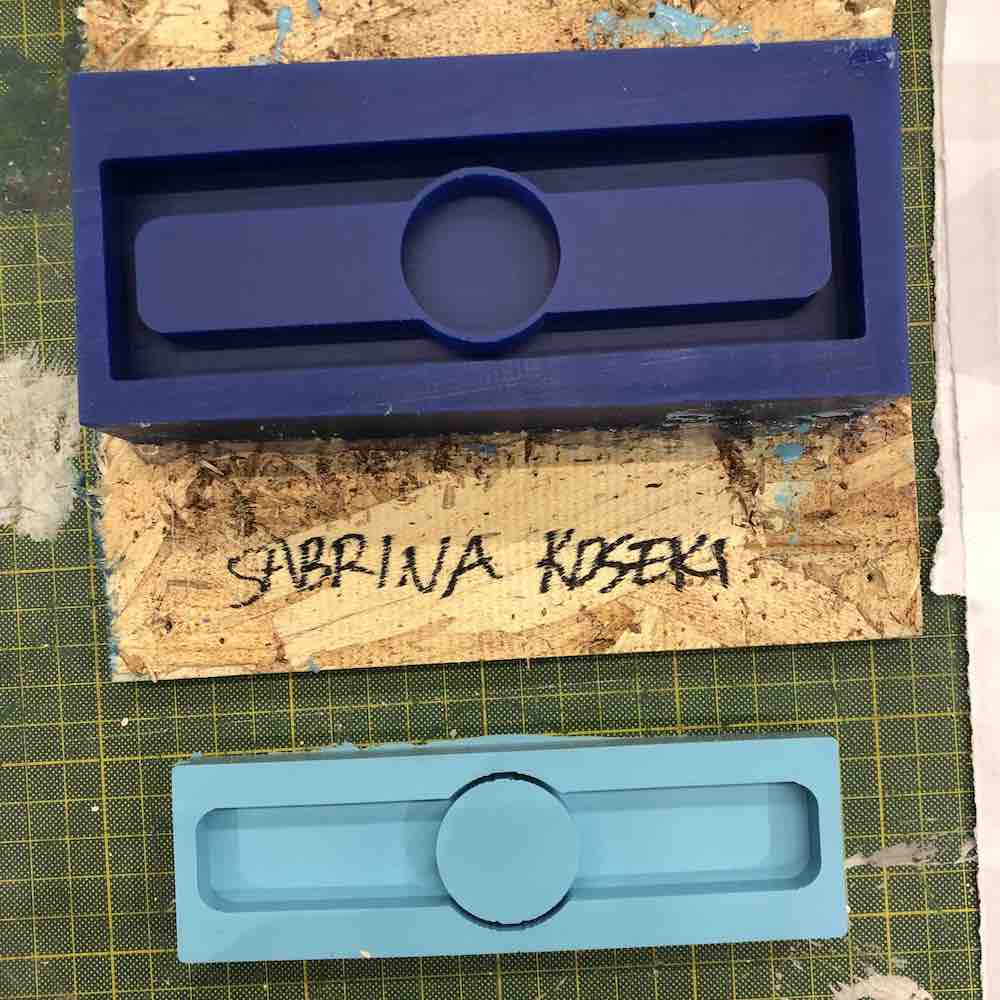 the finished mold: it came out nicely, with few air bubbles!
Step 3: Cast the object
Pouring Ooomoo into Oomoo
For the next step, I decided to cast Oomoo into my Oomoo mold of the wearable. I'd talked to Graham about
it, and saw an example of Oomoo-Oomoo casts working very cleanly, so I thought I'd give it a try. The setup
steps were the same as above: mix equal volumes of the two parts for three minutes, de-gas, pour, and wait.
There was one extra step, though, which was to spray a mold release agent (a silicone spray) into the mold
before I poured the fresh Oomoo into it. This was supposed to make it easier to remove my wearable from the mold,
which was a concern because it was casting a soft material into a soft mold.
Unfortunately, after coming back a couple of hours later, I found that (despite the silicone spray)
the mold had fused to the Oomoo that I'd poured into it. To make matters worse, the mold ripped when I was
trying to unmold the wearable. Darn.
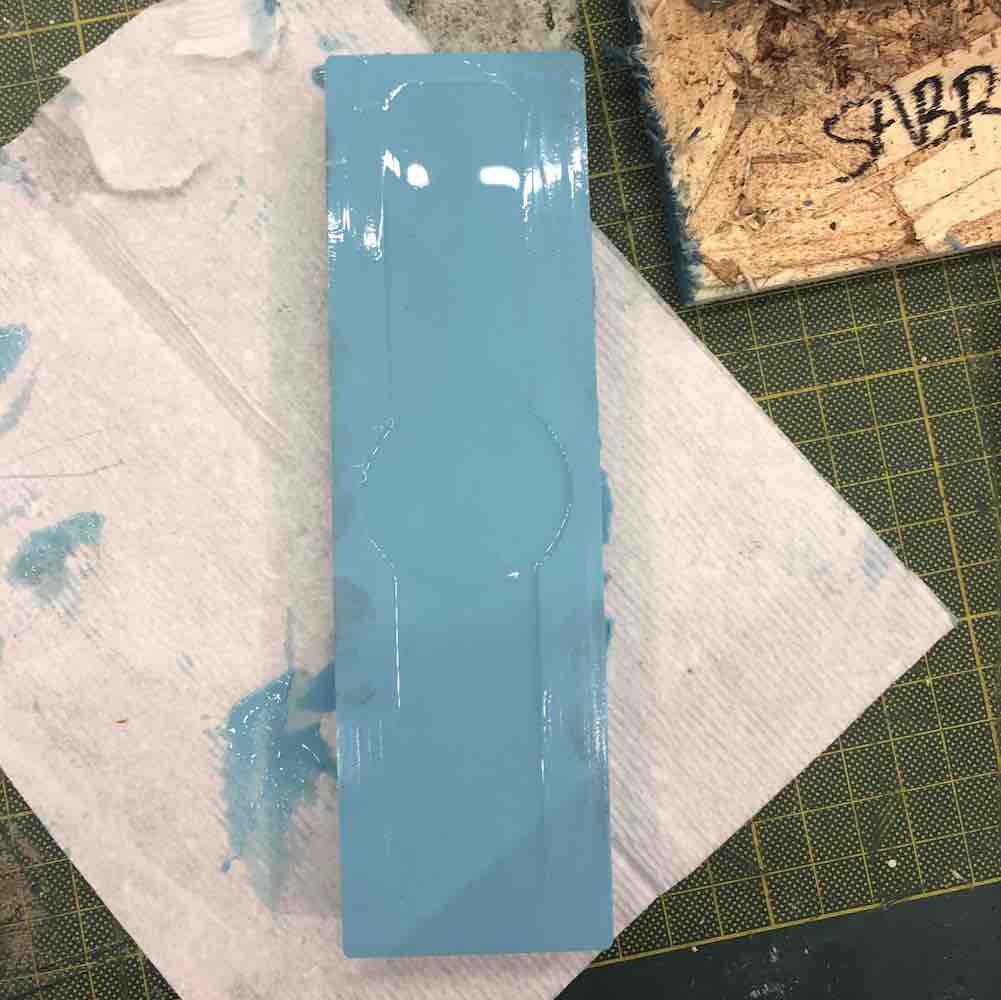 pouring the Oomoo went without a hitch
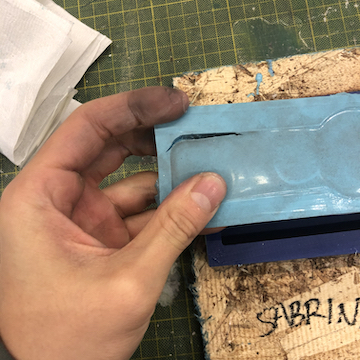 the wearable would not budge when I tried to unmold it, and I unfortunately ripped the mold while trying.
Next steps and troubleshooting
It doesn't work!!!
Sadly, making the body of my final project was a bit of a failure. I'm still figuring out why the Oomoo refused to release from the mold, but I'm thinking that the mold might not have been completely dry before I poured the fresh Oomoo in (even though it looked and felt cured). Another possibility is that I poured too much Oomoo into the mold, and that some extra Oomoo leaked over the top edge of my mold, gluing everything together. This seems pretty unlikely, but for the sake of being thorough, I'll probably let my next mold sit for 24 hours and pour less material inside. Another thing I might try is making the mold out of Moldmax, which seems a little stiffer than Oomoo (and is just a different material, so it might work better).