This week we learned about computer-controlled machining. One can consider this section a natural extension of the learnings from cutting week and electronics production week. In those cases, we were mostly concerned with 2D (or 2D-ish) subtractive machining on relatively small substrates using an auto-generated toolpath. Our machine of choice this week is the 60x120" ShopBot CNC router, which (a) is much larger than the SRM-20 or Epilog; (b) is far more dangerous than previous machines I've used in the class; and (c) requires quite a bit more planning to set up cuts. Following a familiar pattern, our assignments were twofold: (a) characterize the ShopBot by testing runout, feeds/speeds, and toolpaths; and (b) make something big.
Thanks Tom for teaching us how to use the ShopBot!
I tend to wear safety glasses whenever I'm in the shop, because I quite frequently find myself jumping up and running over to do something potentially hazardous like soldering or drilling. Sometimes choosing to wear PPE is a matter of personal preference; for instance, most folks don't wear specs while soldering. Assembling an apparatus is another example; simple press-fits are safe enough, but it's worth donning the gear if you're going to gently bash things together.
Other times PPE isn't an option. The ShopBot is one of those times. Unlike the SRM-20 and the Epilog, the working bits of the ShopBot are exposed to the user, and the spindle is quite a bit more powerful. Broken end mills quickly turn into projectiles. Wear your safety glasses!
machine characterization
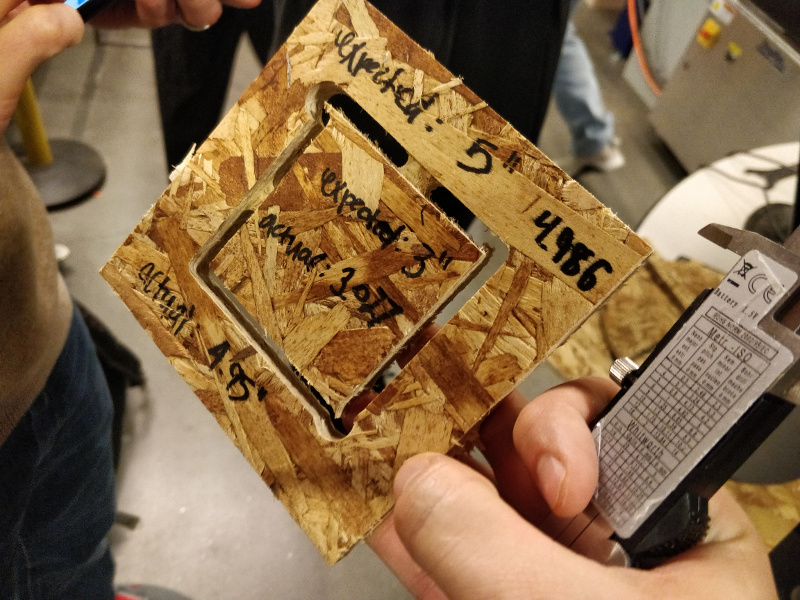
We had a fairly large group for machine characterization this week. This was good, because we all came with ideas and helped troubleshoot when stuff went wrong, but also meant we had to be extra careful to ensure we worked safetly around the machine. Alfonso is building a wind tunnel for his final project and brought a design to cut out of 1/2" OSB that we could measure. We also designed few known shapes to check, including a 5" square with a 3" internal cut and a number of longer thinner pieces. We used VCarvePro to set up the pocket cuts as follows:
1/4" up-cutting two flute end mill
two passes to 0.55" depth (vs ~0.47" OSB thickness)
two 1/2" wide, 1/4" tall tabs per piece
10,000 RPM spindle speed
120 inches per minute cut XY, 60 inches per minute Z
There was plenty of room on the test OSB that was already secured to the machine bed, so we set the start point and ran the job:
[command: ffmpeg -i VID_20191008_181749.mp4 -filter:v "scale=800:-1" -ss 00:00:00.0 -t 00:00:05.0 -c:a copy out.mp4]
Despite the flakiness of the material, this produced a surprisingly clean result:
I also measured the outer diameter of the end mill using the same set of calipers. Test data:
item
nominal
meausured
outer box width
5.000"
4.986"
inner box width
3.000"
3.027"
tool diameter
0.25"
0.247"
My calipers should probably only be trusted out to +/- 0.01", so this suggests a spindle runout of around 0.02", far less than the OSB thickness tolerance of +/- 0.05" (or worse).
make something big
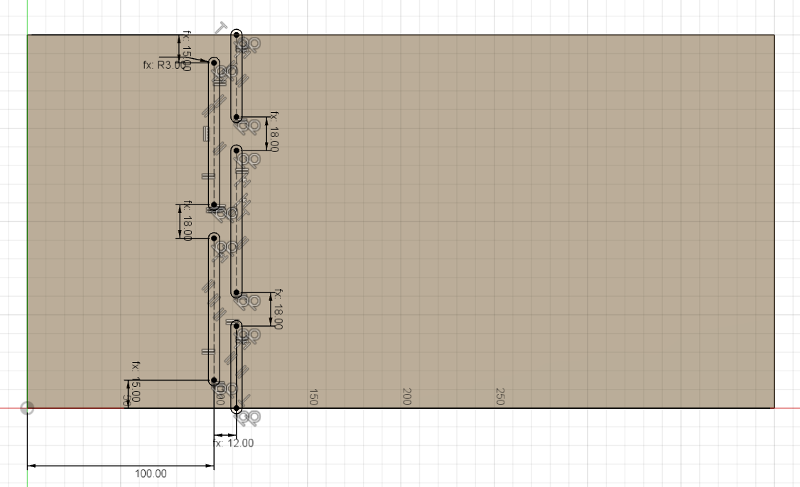
I initially intended to build a chair. The design would be elegant, sturdy, delicate, robust, curvy, delightful... such ambition. But at some point the week started to slip away, and I realized that my (somewhat) familiar design workflow wasn't well suited for the organic curves I wanted to make. Someday, probably soon, I'll dip my toe in Rhino/Grasshopper and spend some time learning Blender. But for now, I decided to build a plywood box using 6mm birch plywood. Since I still wanted a bit of curviness in the design, I started by cutting out a few test coupons to get a feel for the material's flexibility. I drew a parametric sketch of one flexure segment in Fusion 360:
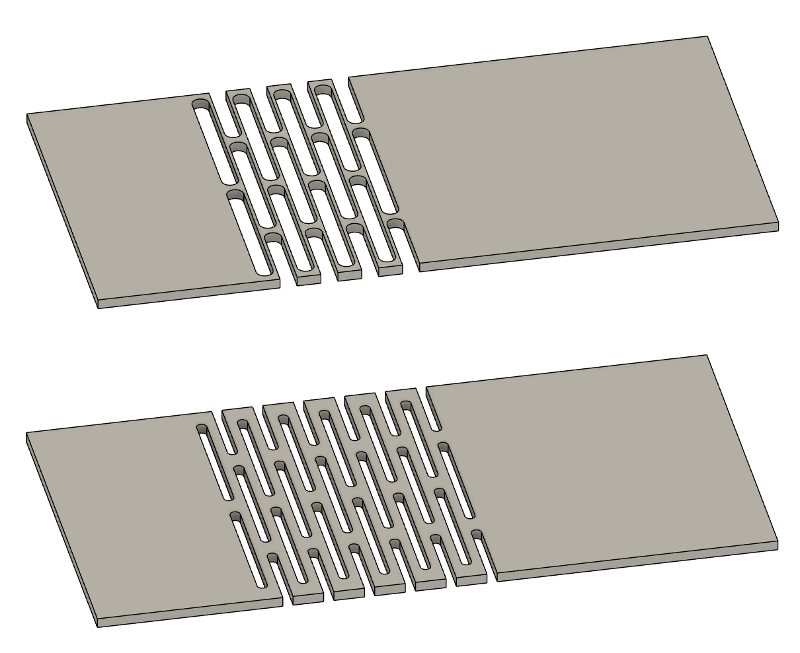
Then I arrayed the flexure feature across the part, coming up with two sets of parameters to test:
The two designs shown above have the following parameters:
test piece
slot radius
web width
slot spacing
flexure copies
top
4 mm
10 mm
12 mm
5
bottom
1.75 mm
8 mm
7 mm
8
I used the ShopBot to machine both pieces using a 1/8" down-cutting double-flute end mill at 12,000 RPM, with the other conditions identical to the previous tests. The bottom test piece performed quite well:
[command: ffmpeg -i VID_20191014_105902.mp4 -filter:v "scale=800:-1" -c:a copy out.mp4]
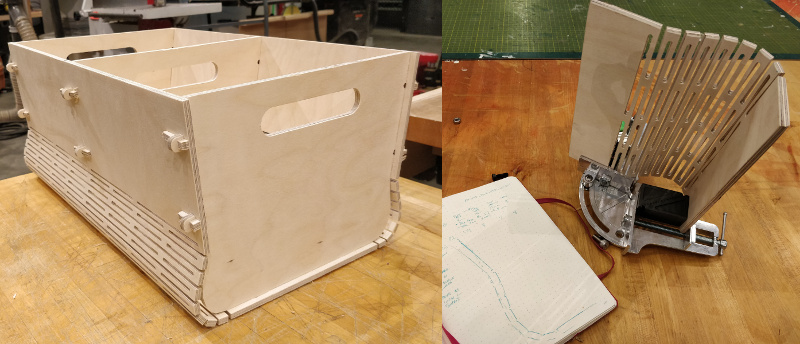
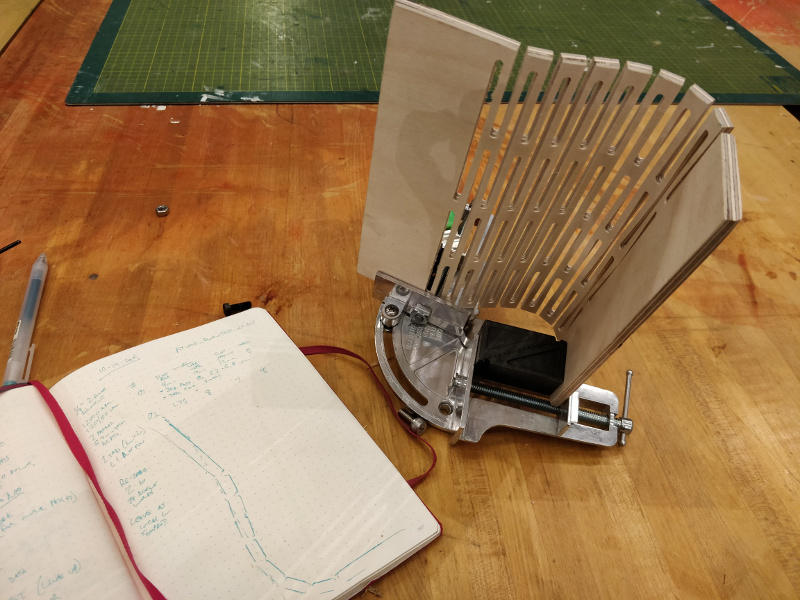
I used an adjustable angle clamp and a few spacer blocks to mock up the curved part of the box and traced the profile onto a notebook sheet:
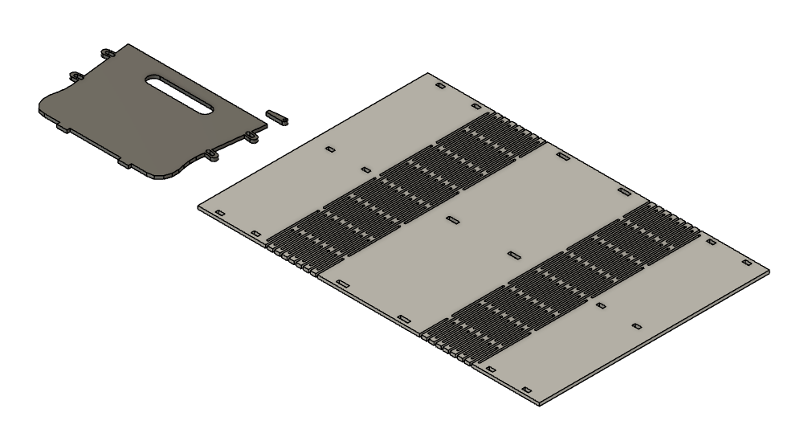
Then I modeled the wrap-around side panel, the end panel, and a securing wedge in Fusion 360:
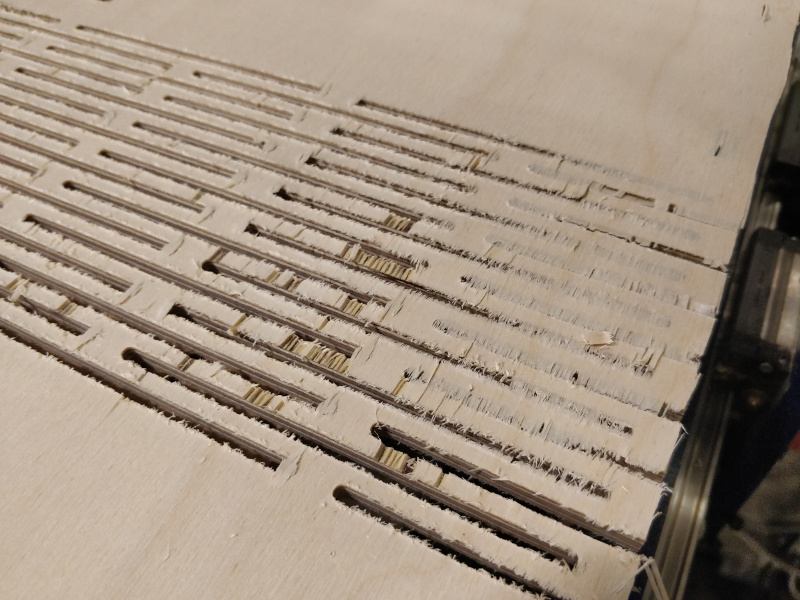
I set the ShopBot to mill to 6.8 mm depth; however, my material likely flexed a bit and I ended up with a few uncut webs:
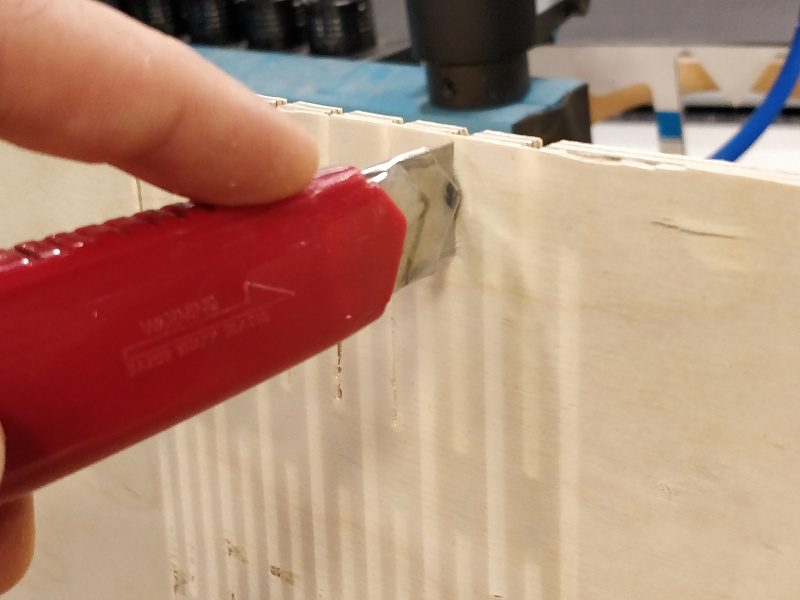
Machine time was at a premium, so rather than re-run the job I cut the excess material away with a razor:
This worked well enough but took some time. I used the shop's belt sander to clean the box up a bit more, then assembled it using the wedges to secure the sides:
Overall, I'm happy with the outcome. The box will fit nicely on the cart I designed it for, and I have sufficient material to make a few more similar containers. For the next iteration, I'll update a few things: (a) tighten up the clamps so there isn't as much of a gap between the flexure and the end plates; (b) extend the wedge holes a bit so the wedges can be larger (and less likely to split); and (c) adjust the ShopBot machining parameters for a better cut, probably by increasing the number of passes and dialing up the depth a bit.
 This week we learned about computer-controlled machining. One can consider this section a natural extension of the learnings from cutting week and electronics production week. In those cases, we were mostly concerned with 2D (or 2D-ish) subtractive machining on relatively small substrates using an auto-generated toolpath. Our machine of choice this week is the 60x120" ShopBot CNC router, which (a) is much larger than the SRM-20 or Epilog; (b) is far more dangerous than previous machines I've used in the class; and (c) requires quite a bit more planning to set up cuts. Following a familiar pattern, our assignments were twofold: (a) characterize the ShopBot by testing runout, feeds/speeds, and toolpaths; and (b) make something big.
Thanks Tom for teaching us how to use the ShopBot!
This week we learned about computer-controlled machining. One can consider this section a natural extension of the learnings from cutting week and electronics production week. In those cases, we were mostly concerned with 2D (or 2D-ish) subtractive machining on relatively small substrates using an auto-generated toolpath. Our machine of choice this week is the 60x120" ShopBot CNC router, which (a) is much larger than the SRM-20 or Epilog; (b) is far more dangerous than previous machines I've used in the class; and (c) requires quite a bit more planning to set up cuts. Following a familiar pattern, our assignments were twofold: (a) characterize the ShopBot by testing runout, feeds/speeds, and toolpaths; and (b) make something big.
Thanks Tom for teaching us how to use the ShopBot!
 I also measured the outer diameter of the end mill using the same set of calipers. Test data:
 Then I arrayed the flexure feature across the part, coming up with two sets of parameters to test:
 The two designs shown above have the following parameters:
 Then I modeled the wrap-around side panel, the end panel, and a securing wedge in Fusion 360:
 I set the ShopBot to mill to 6.8 mm depth; however, my material likely flexed a bit and I ended up with a few uncut webs:
 Machine time was at a premium, so rather than re-run the job I cut the excess material away with a razor:
 This worked well enough but took some time. I used the shop's belt sander to clean the box up a bit more, then assembled it using the wedges to secure the sides:
 Overall, I'm happy with the outcome. The box will fit nicely on the cart I designed it for, and I have sufficient material to make a few more similar containers. For the next iteration, I'll update a few things: (a) tighten up the clamps so there isn't as much of a gap between the flexure and the end plates; (b) extend the wedge holes a bit so the wedges can be larger (and less likely to split); and (c) adjust the ShopBot machining parameters for a better cut, probably by increasing the number of passes and dialing up the depth a bit.