Group Assignment
Our TA, Anthony, introduced us to the two milling machines in the EDS lab. The first milling machine could mill PCB boards to make double layered circuits. It took an Eagle file of the board as the input and milled the PCB. The second milling machine, SRM-20, milled one layered PCB boards. This machine could be operated using the MOD application. All it required was a black and white PNG image of the circuit. The MODs application generated the milling sketch based on the PNG image which the milling machine took as a reference and milled the copper off the PCB board to produce clean circuits. There were mills which could cut with different precisions, we used the 1/32 inch and 1/64 inch mills, 1/64 inch to mill circuit diagrams and 1/32 inch to cut out along the board exterior.
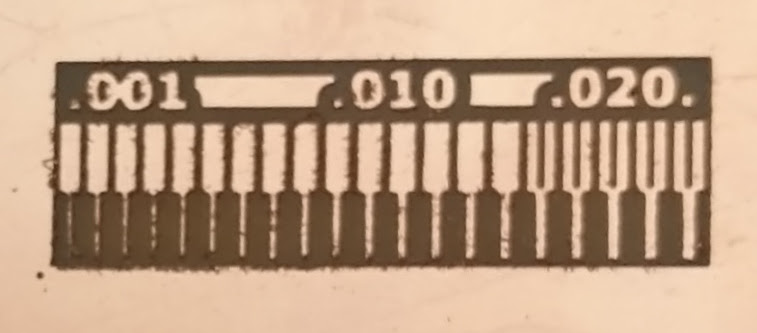 PCB milling at different precisions
FabTinyISP Programmer
Milling the PCB
Using the PNG images given on Brian's FabTinyISP Tutorial, I milled out the PCB board following the procedure similar to the group project.
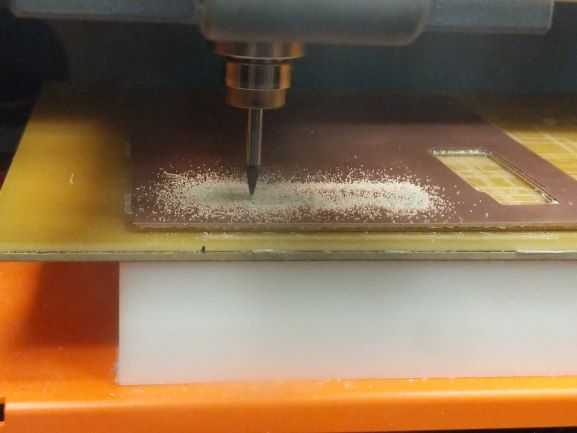 PCB Milling in Action
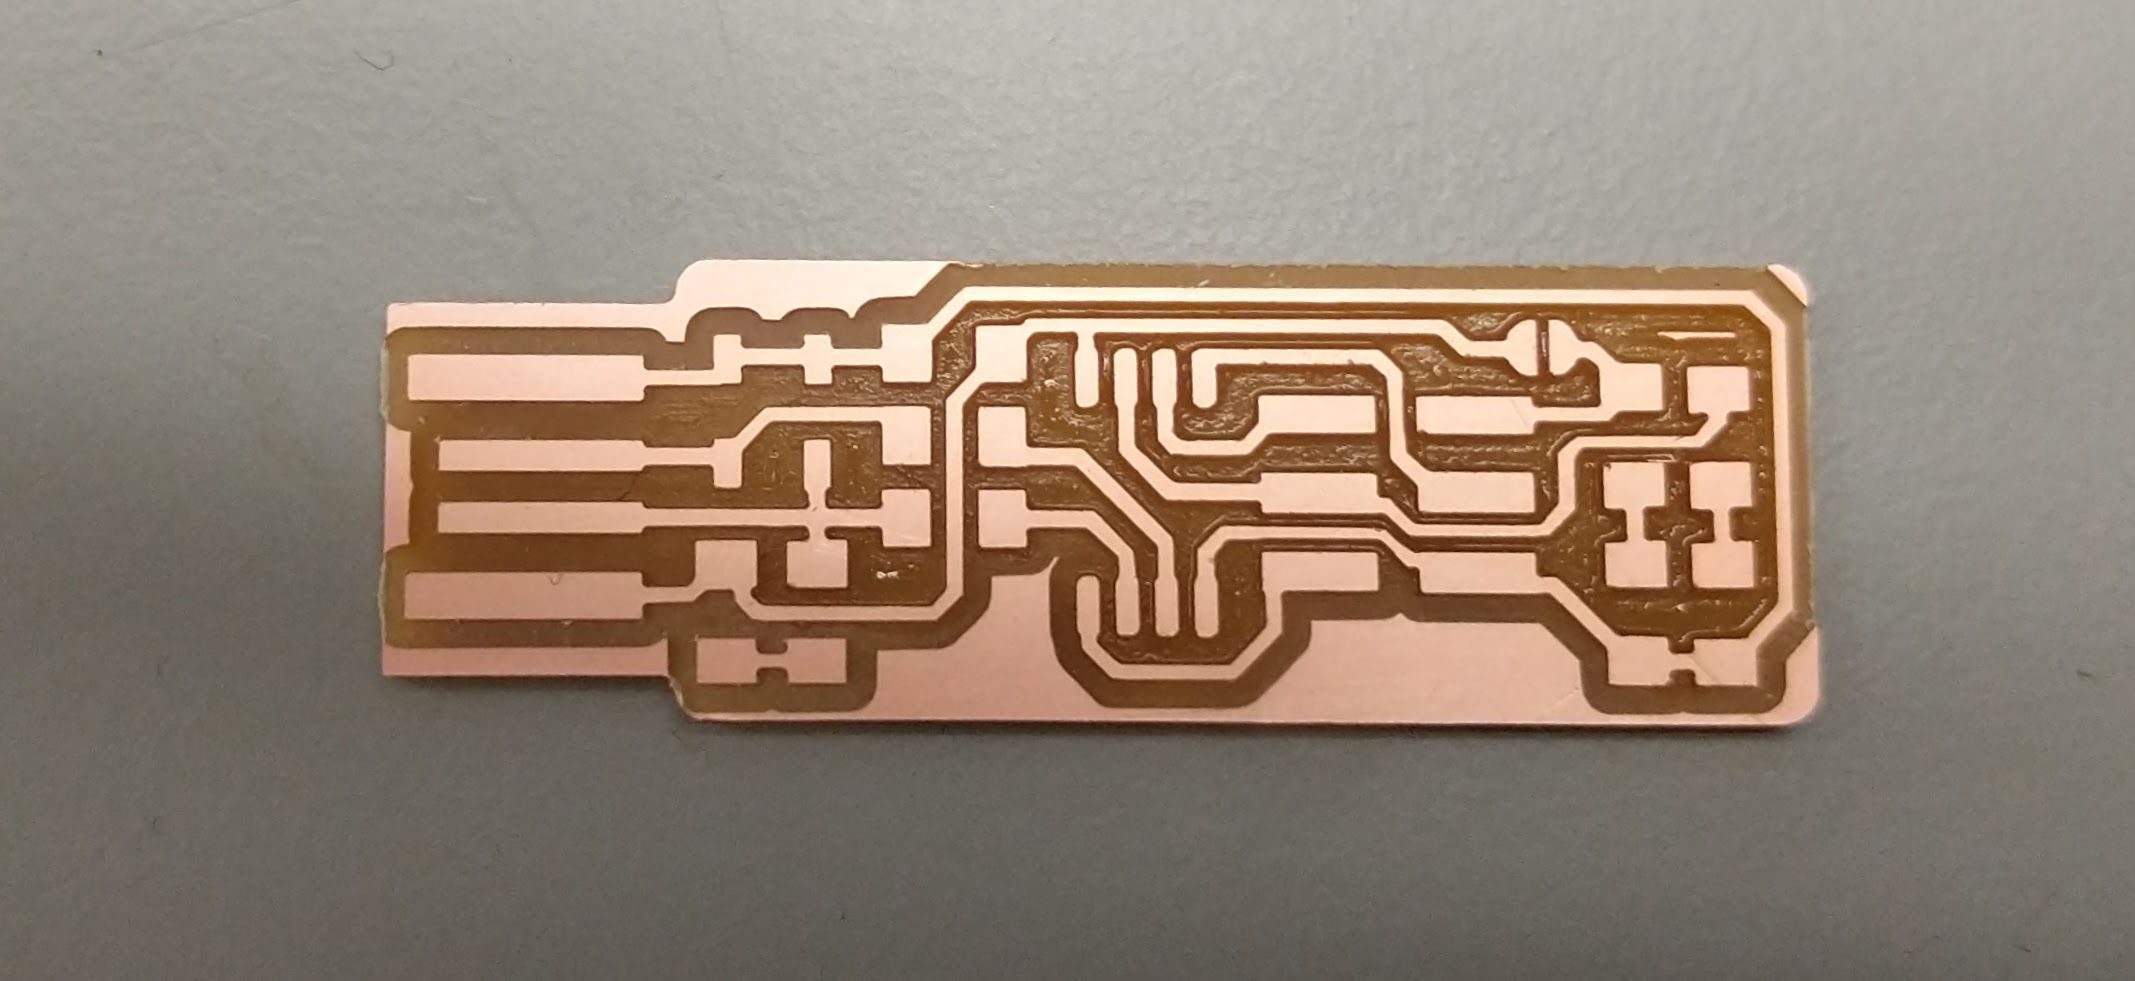 Milled FabTinyISP
Soldering Chips on PCB
To make the ISP programmer, I got the chips for making the PCB, an ATTiny 45 (microprocessor), few resistors of different resistances, two 3.3 volt Zener diodes, a 100 nano Farad capacitor and a couple of LEDs. All the components required to build the PCB are listed on Brian's FabTinyISP Tutorial page. I went ahead and soldered each component one by one using the soldering iron. The soldering process was not easy in the beginning as the small chips would not stay in one place and get displaced as I tried to solder them. However, after soldering a few components, I got the hang of it, and soon enough I was done.
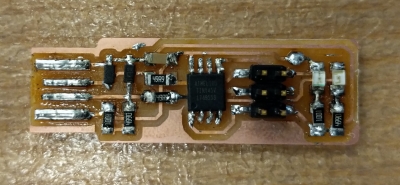 Soldered Board
Programming the Programmer
I have a Windows computer and programming the ISP through my Windows computer looked like a sufficiently challenging task. Also, I needed another programmer itself to program my ISP device. Luckily, our TA, Anthony, had already setup a computer with Linux on it to program the ISPs. There was also a programmer ISP already available there. I hooked up my ISP into another USB port, connected it to the programmer using the ISP connector and then ran the commands mentioned in the tutorial to program my ISP.
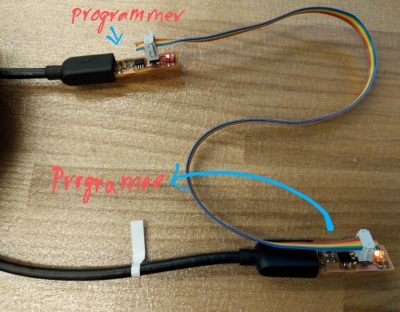 Programming my ISP using Programmed ISP/span>
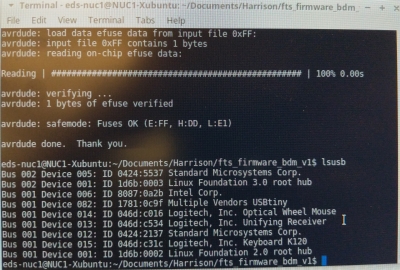 Programming Success
Testing the ISP Programmer
To test my newly made ISP programmer, I used my programmer to program an unprogrammed ISP. It worked!