Before you start reading, I want to give a shout out to the awesome EECS section. I learned
so many things from these guys, and am glad that I got to spend the time working with
them. Here is to many more long nights and ridiculous projects in the future!
Final Project - Canine Wheelchair
Week 01 - Procrastination
Honestly Week 01 is a little bare. I did some work on figuring out if it was plausible to create a
wheelchair for Belle. Did I have access to the material? Would the material I had access to be good enough?
I drew a couple sketches to try to decide what size it needed to be, and Belle waited calmly as I
measured her.
Of course I put the drawings someplace safe and am currently in the process of finding them...
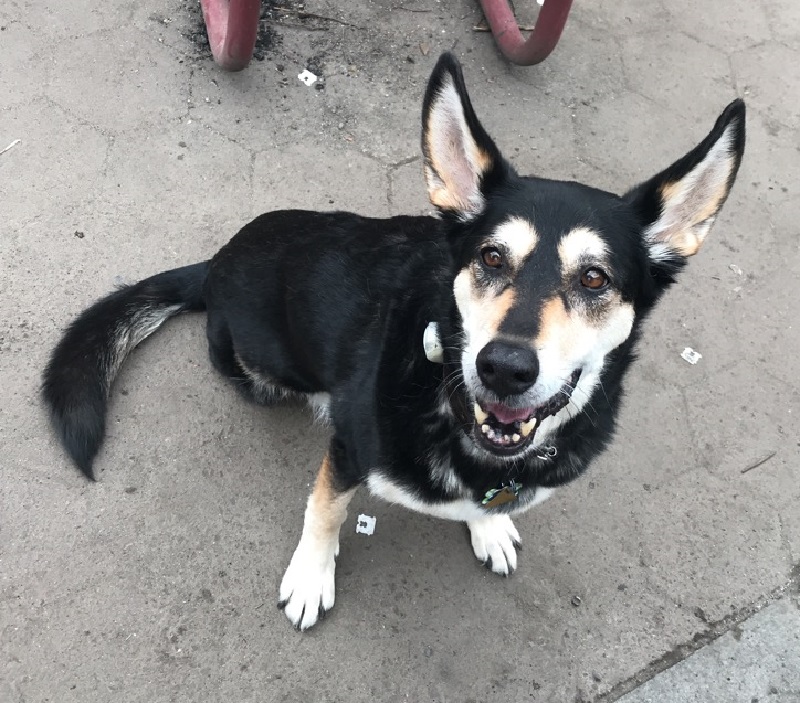
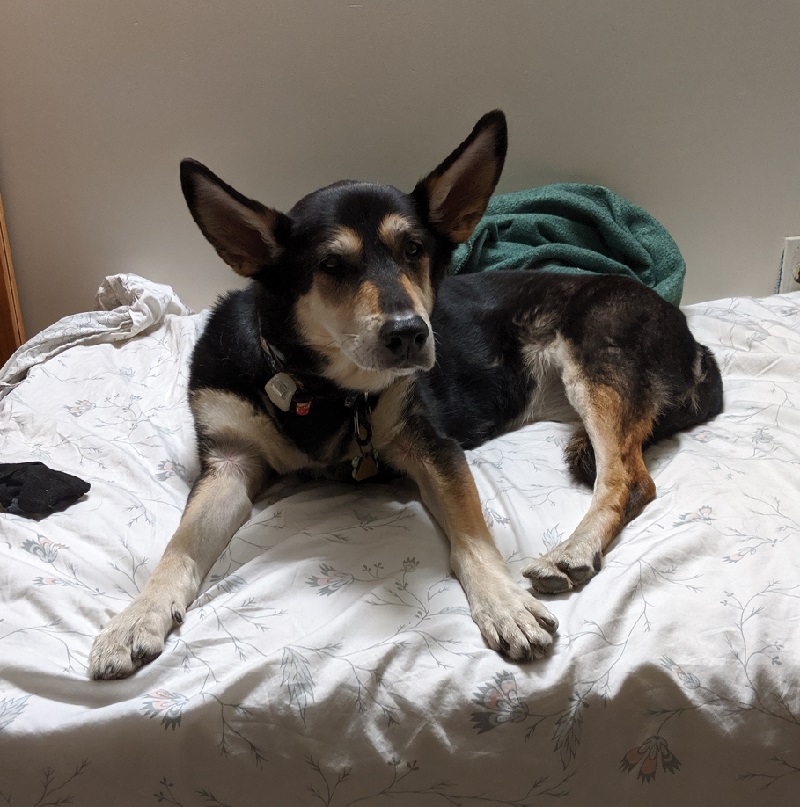
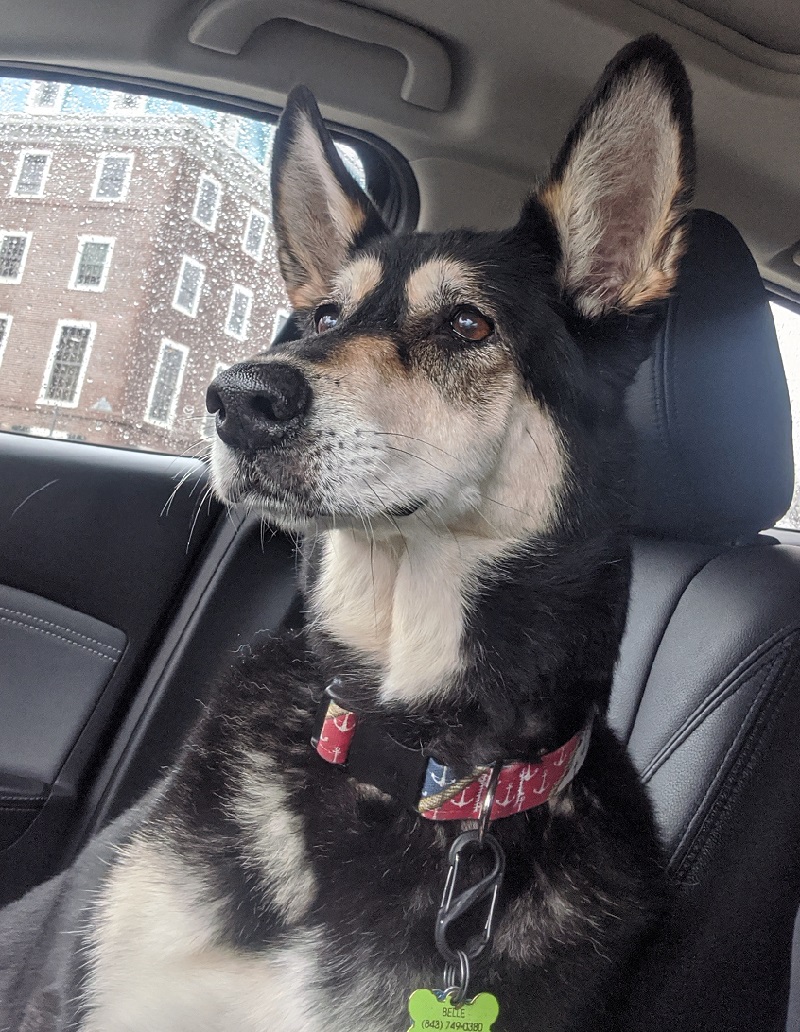
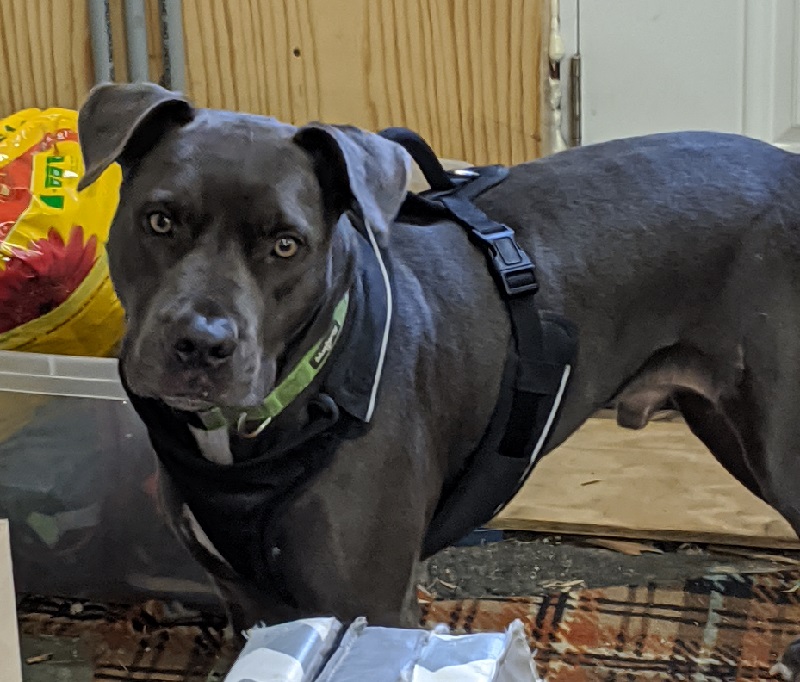
Who is Belle?
This is Belle!
Week 02 - Cutting
I ended up cutting out all the fabric for compositing the wheelchair.
This week was laser cutting/engraving which really did not have a straight forward application to
a wheelchair (yes I could engrave something in it, but I am pretty sure PVC is on the "do not laser cut" list).
Instead I started considering how I might bring the rotational motion from the wheels and turn that into
electrical energy to operate some type of circuit on the wheelchair.
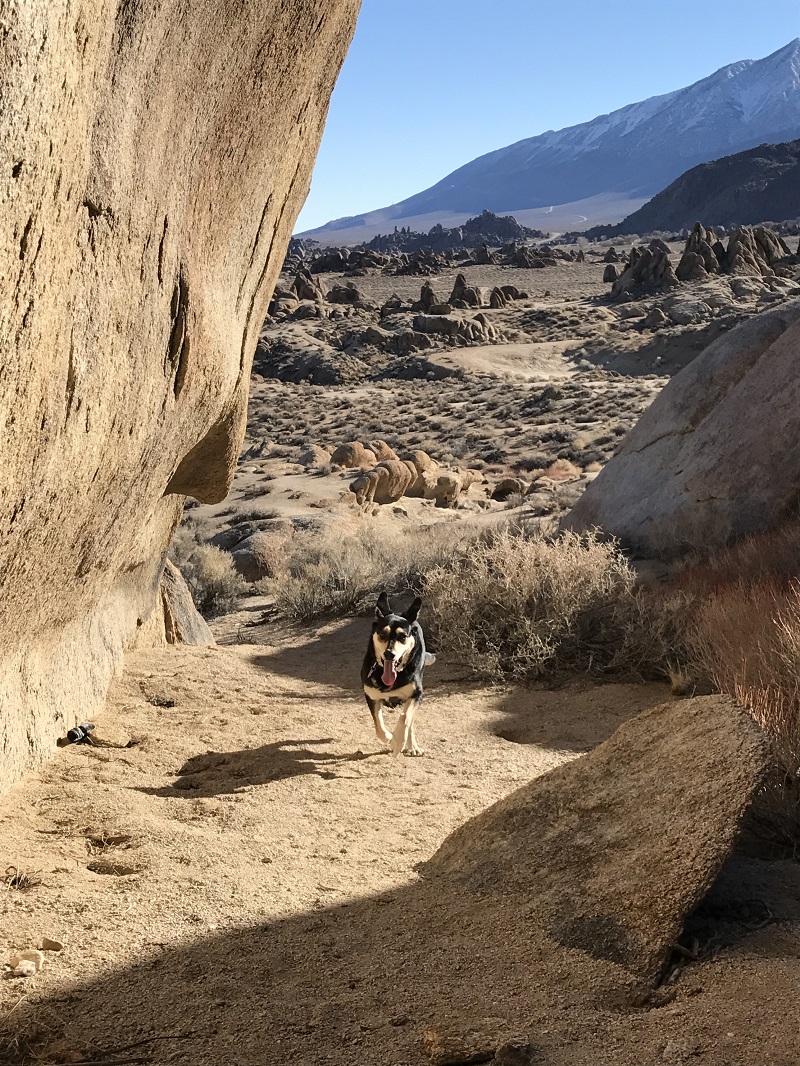
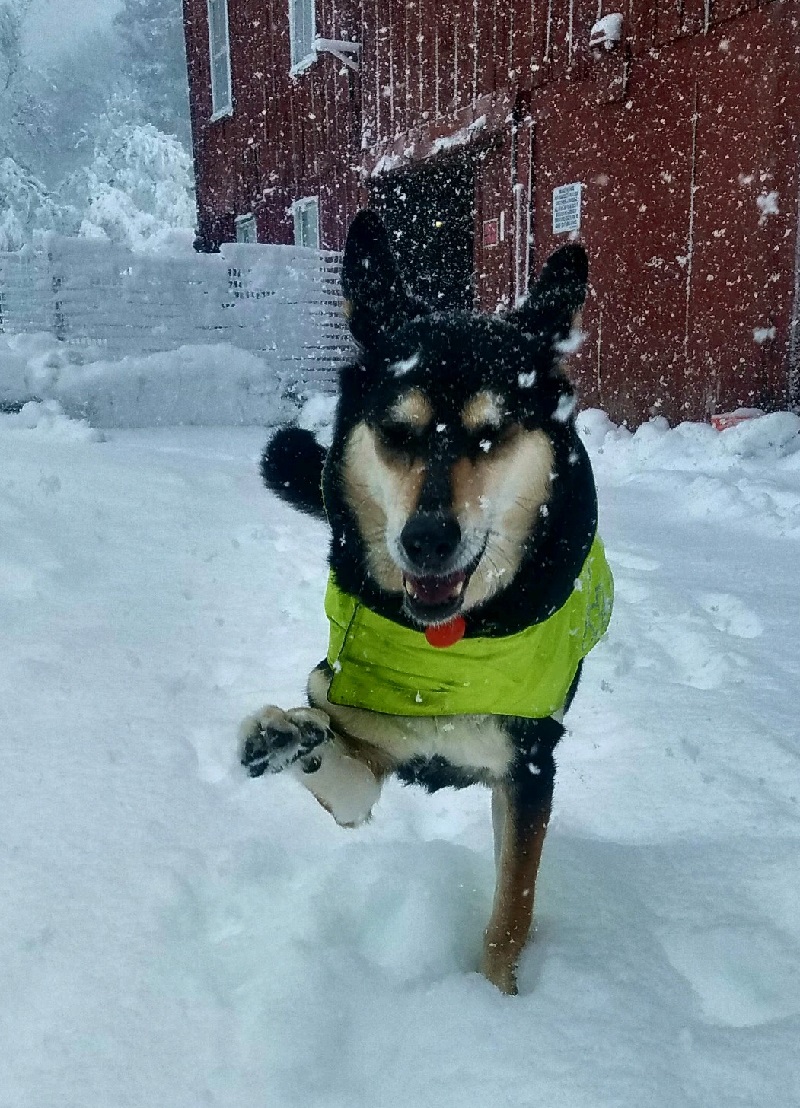
I use to take Belle everywhere with me. Hikes, bikes, etc. But she is a little bit older now.
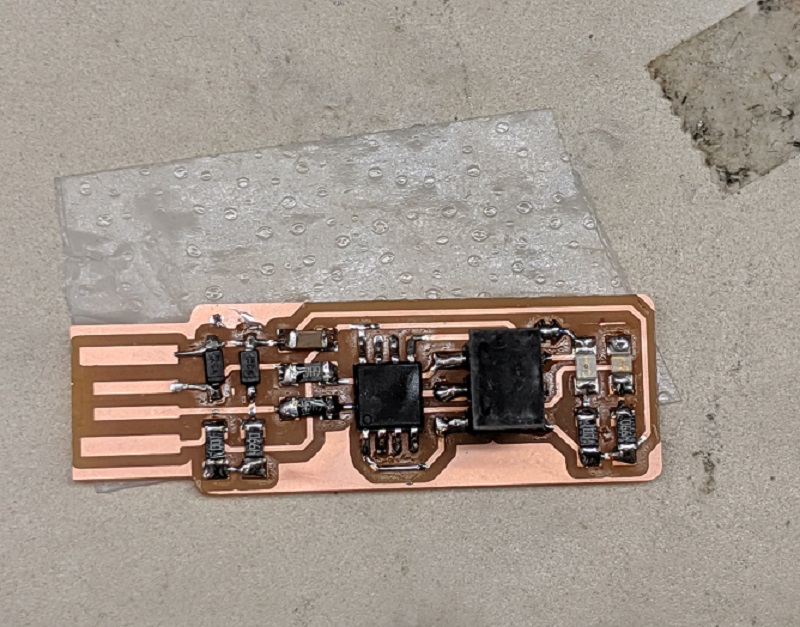
Week 03 - Electronics Production
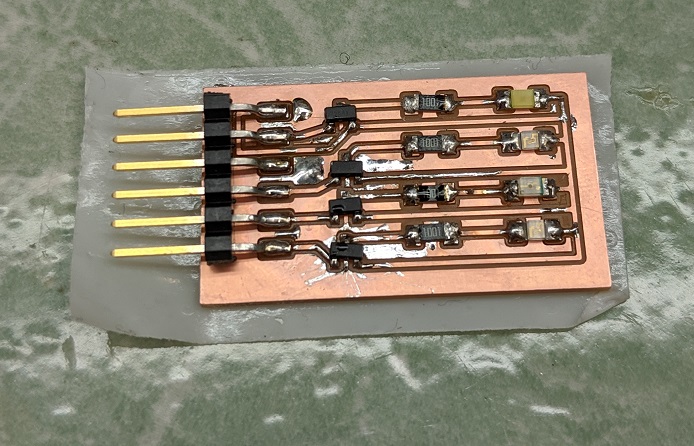
Electronics were everywhere! I used so many different iterations of boards to complete this project.
I am extremely happy that we learned how to do this early on!
This board isn't complete, but to see the process please go to Week 03.
This was a good week to learn skills that I will definitly need for my final project.
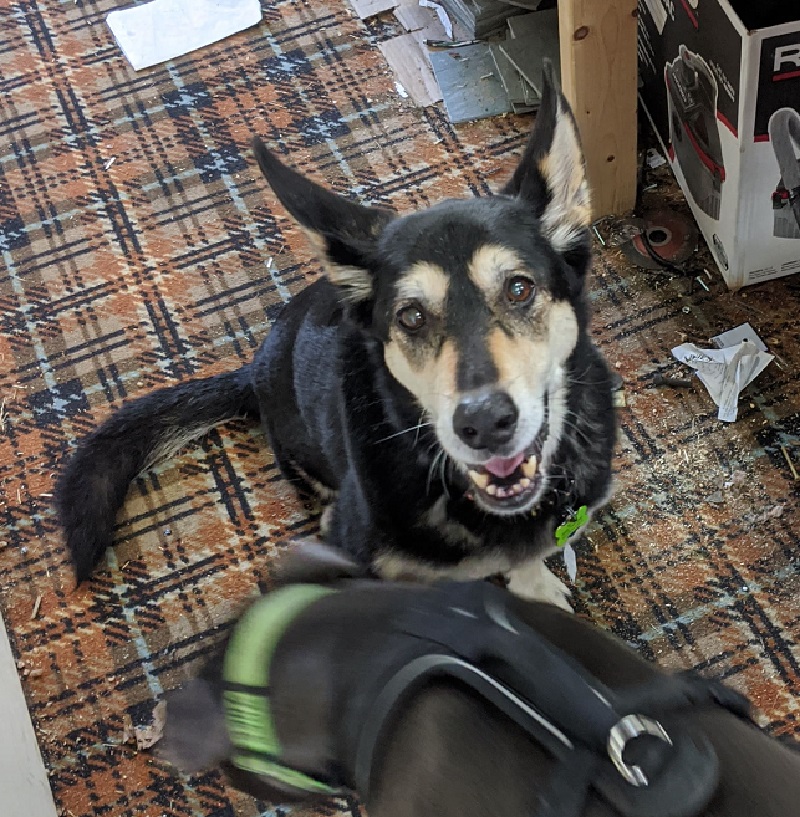
Belle loves the cool weather and going to the barn.
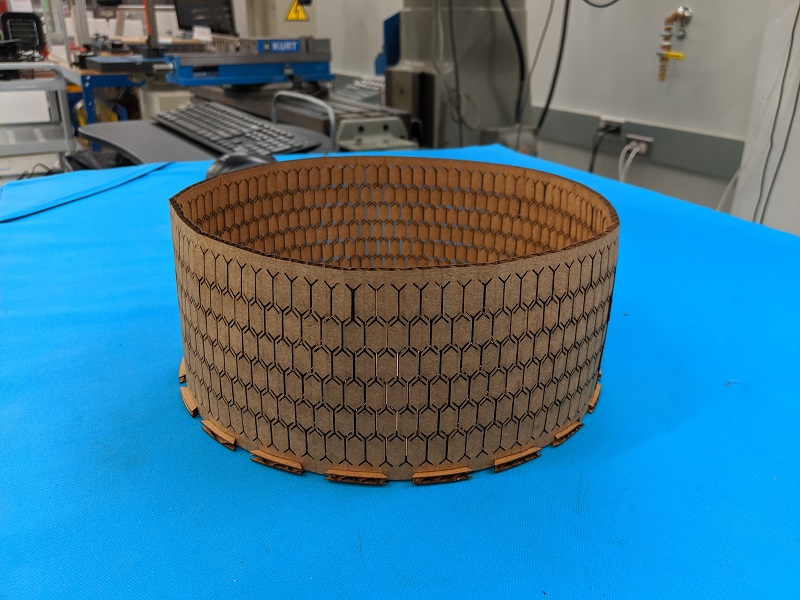
Week 04 - Scanning and Printing
Week 04 skills allowed me to design and 3D print clips to secure the tires to the wheelchair.
3D scanning and printing would have been a great week to make something related to my project,
however, I could not think of anything that would be relevant. So, instead I made something that
I thought was cool.
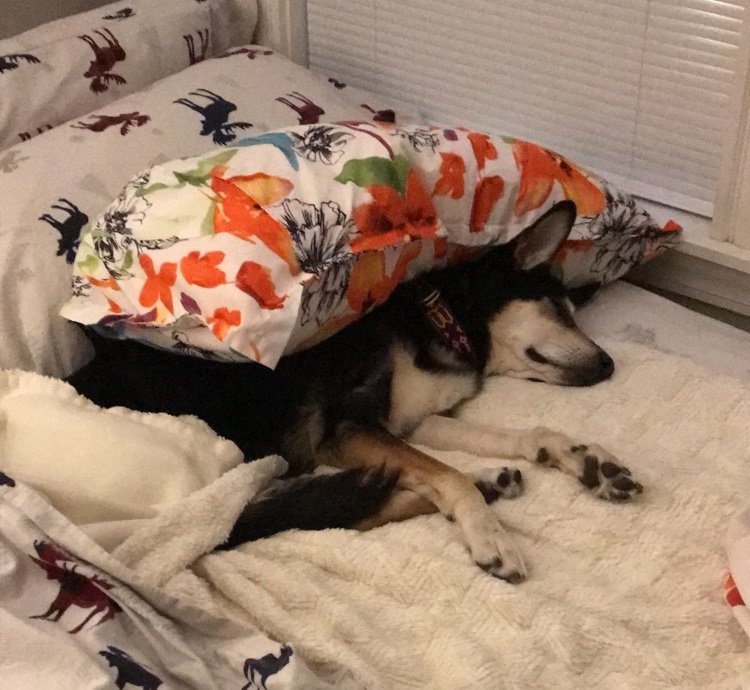
When she isn't walking around she finds the cosiest places to lay.
Week 05 - Electronics Design
Electronics were huge in my final project.
This week we started looking at embedded programming. With a push-button and a LED
I was waiting for a programmable board. Much of this board will be used as a concept for
my final project.
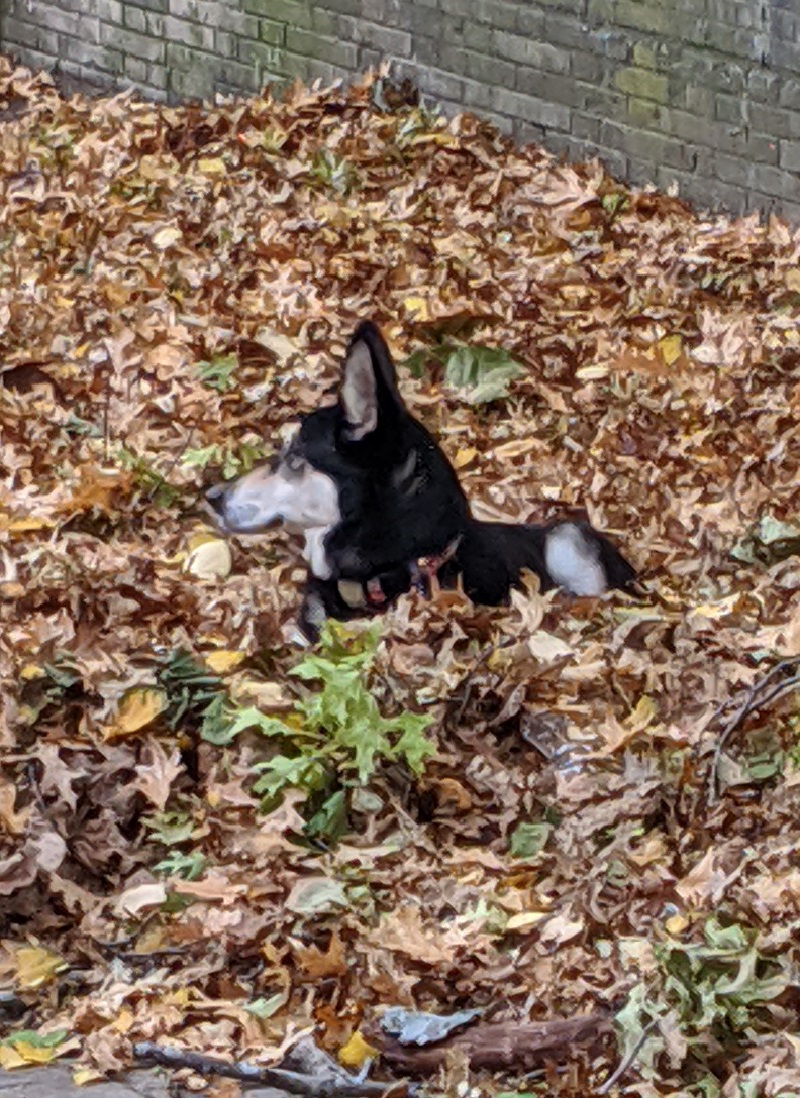
Belle much prefers the outdoors, even the piles of fallen leaves make a good place for her to lay down.
Week 06 - Computer-Controlled Machining
I used this week to catch up on work, and explore another shop.
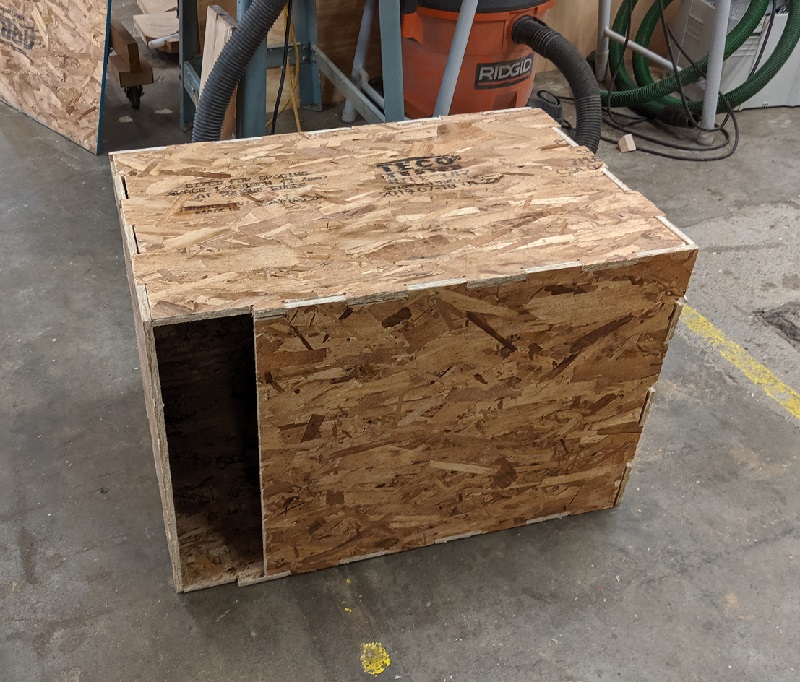
There wasn't much I could make for a wheelchair during Make Something Big Week. Instead, I made a cat house
for my mother's front porch. The family cats are indoor-outdoor cats, but sometimes they get out on a cold
morning and are stuck outside until my mom gets home from work. By throwing some wool in there, the cats can
curl up and stay warm!
I woke Miss Belle up from a nap, whoops!
Week 07 - Embedded Programming
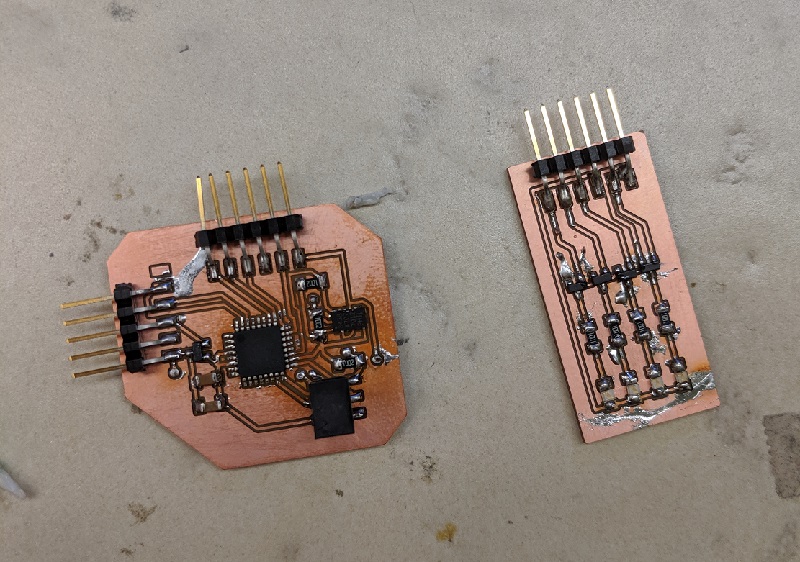
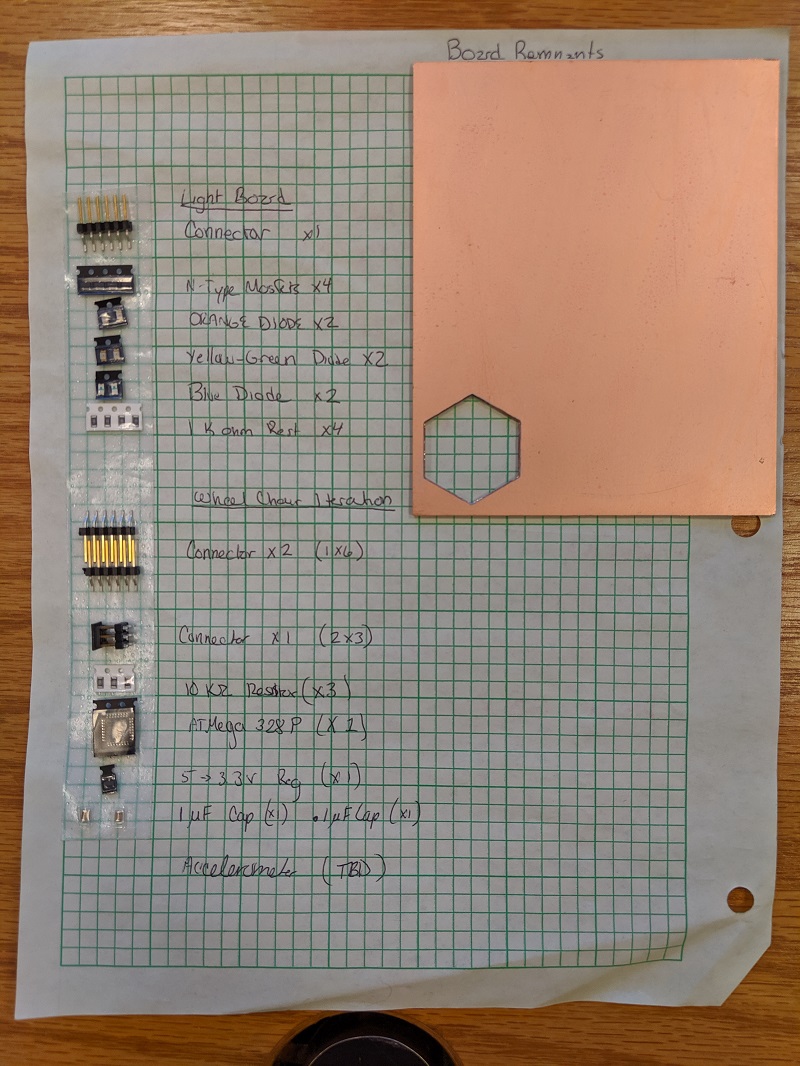
MOSFET adventure time!
The goal for this week was to get a firm grasp on the boards for my final project. I ended
up only making a light board for testing. I did find out that my MOSFETs were incorrectly traced, so
for the next iteration I will ensure this is corrected.
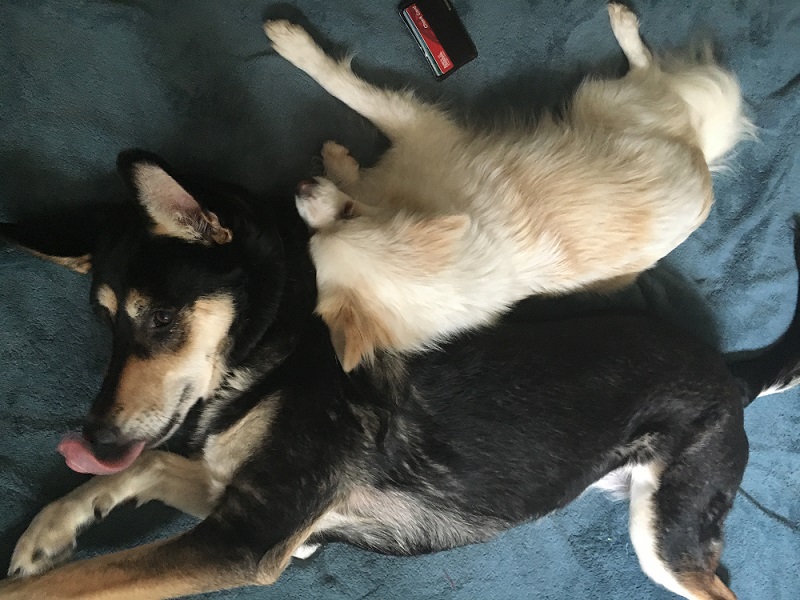
Belle always finds the most comfortable spot, and then she watches me like a hawk.
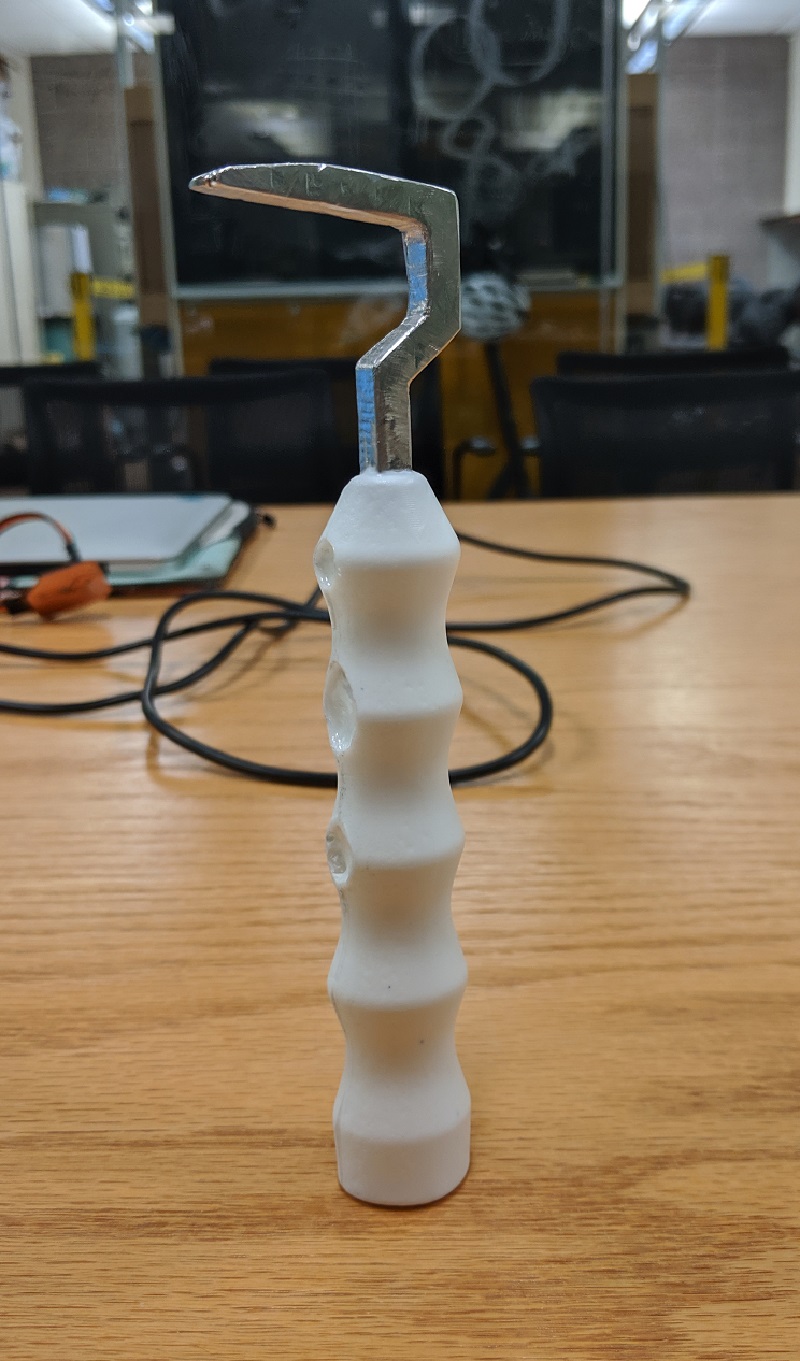
Week 08 - Molding and Casting
In hindsight I could have made frames for Belle's lights.
I had considered making a wheel for Belle's wheelchair, but being a 50 lbs dog, the
wheel would have to be quite large and would use up too many resources. So instead I made
something that I would use on a weekly basis. A hoofpick!
Belle couldn't smile any more! These adventures are ones I will remember!
Week 09 - Input Devices
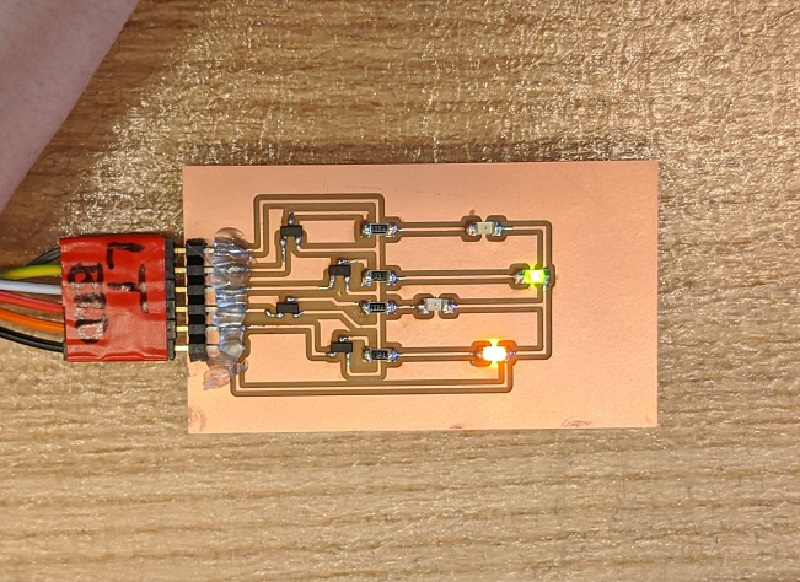
This was a huge week for progress on the wheelchair!
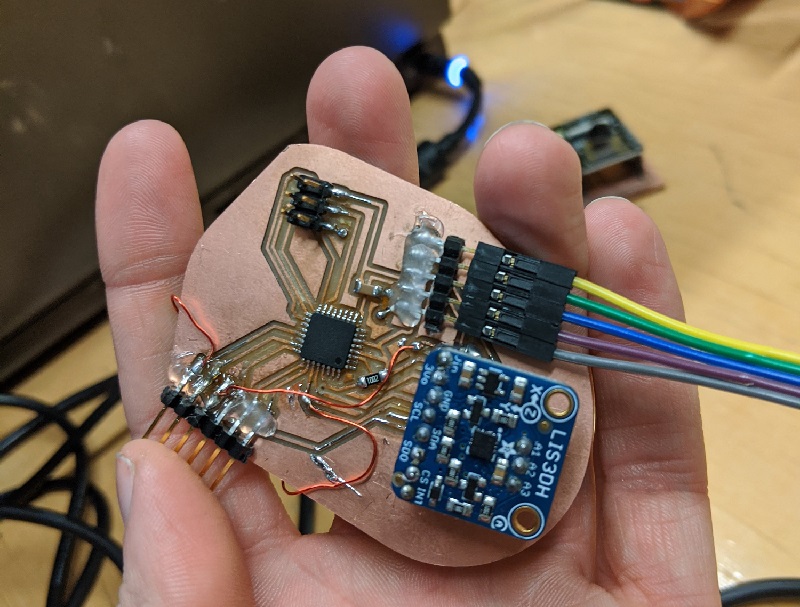
This board will end up sensing the acceleration changes that the wheelchair undergoes while
Belle is running around. It will throw lights on if she slows down or turns.
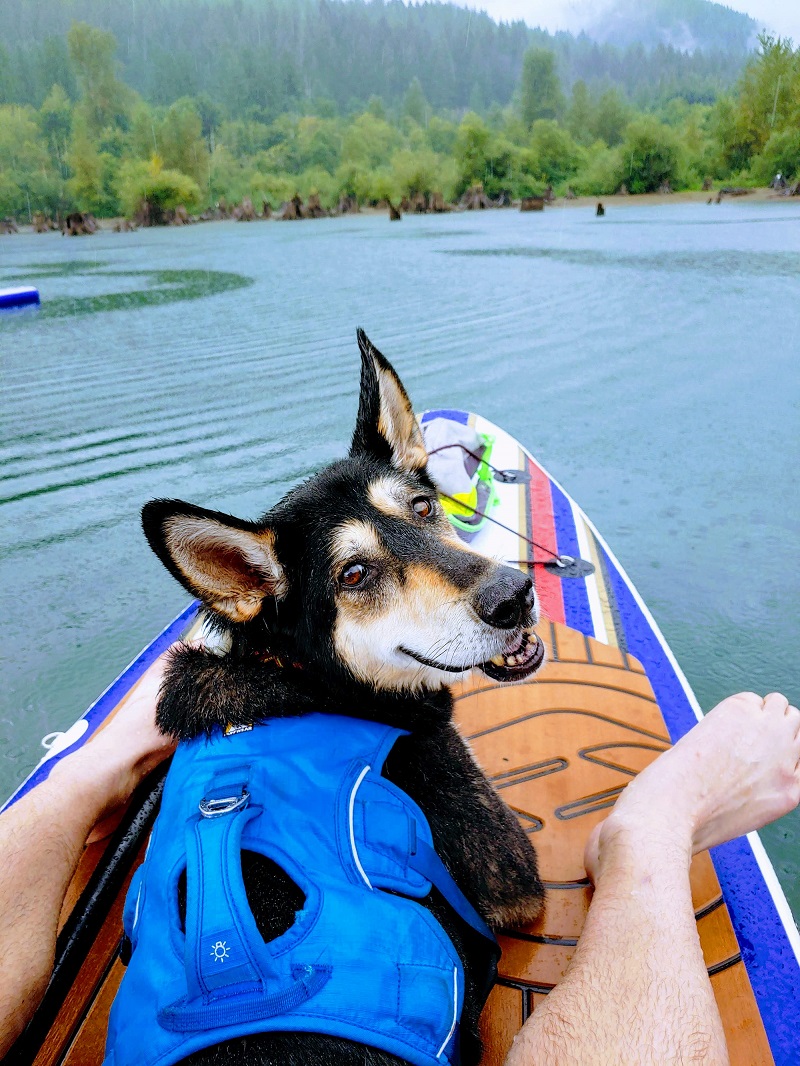
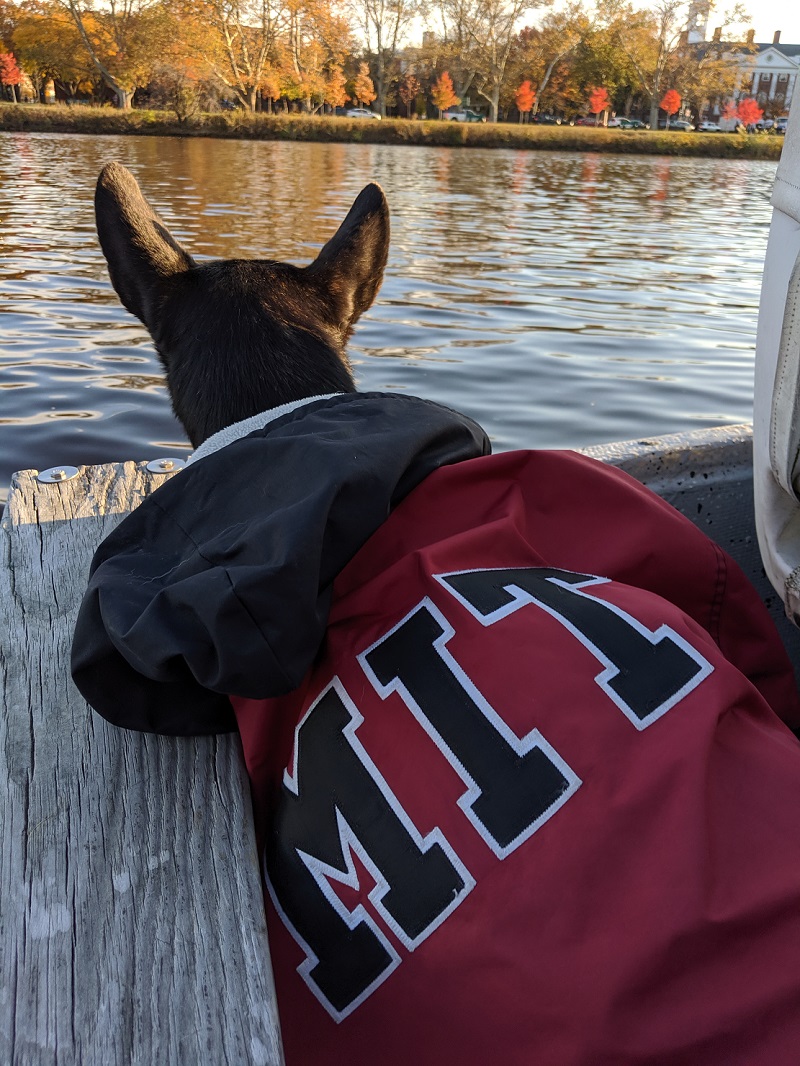
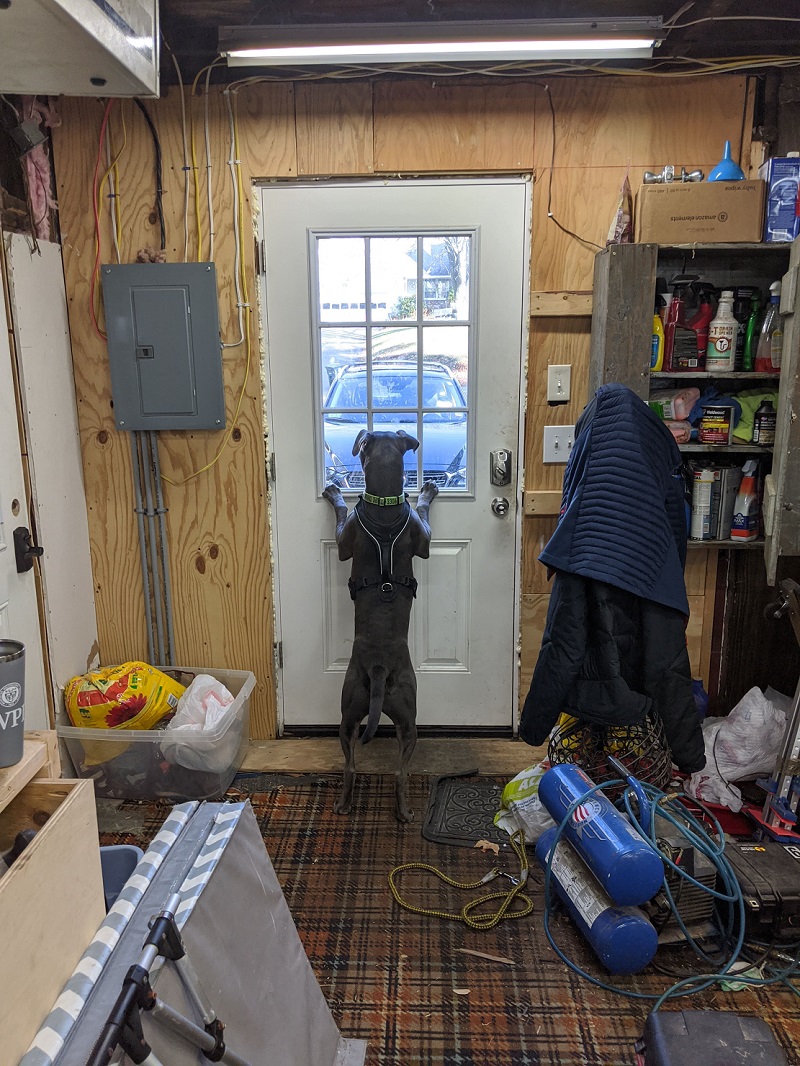
Belle comes to rowing with me every so often. Yes she has fallen into the Charles, yes she can swim
even with the missing leg.
Week 10 - Output Devices
Another critical week for wheelchair progress. Without lights, the project isn't final project worthy.
I've been extremely behind due to the performance that I am in. "The One You feed." So now
I am trying to desperately get caught up. I was able to collect much of the supplies that
I will need for the chassis. This includes PVC pipe of 3/4" diameter, PVC primer and cement,
and PVC joints and wheel connectors. In another iteration of the wheelchair board I am attempting
to make something clean and concise. If you view the Week 10 tab you will be able to see where I started
realizing the errors I had previously designed into my board.
Belle was initially a foster dog. I couldn't give her up and I ended up adopting
her. The rescue was worried that they had lost a foster home. But, alas they did not and Belle
made so many friends during the next few months!
Week 11 - Networking and Communications
A camera for Belle's wheelchair so I can see where she is? I think yes!
There were many options for this week. I could add GPS to the wheelchair or
some other communication. Steps maybe, by looking at the accelorometer data, and using
a bypass filter. Anything is really the limit. I am waiting for the long weekend
to come to a conclusion. In the meantime I was able to work on the chassis of the wheelchair.
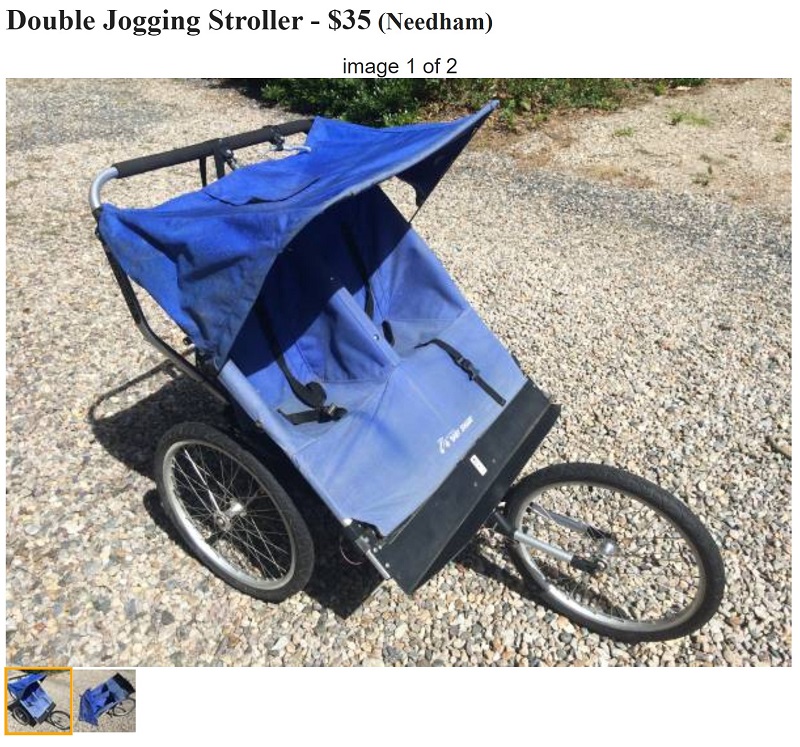
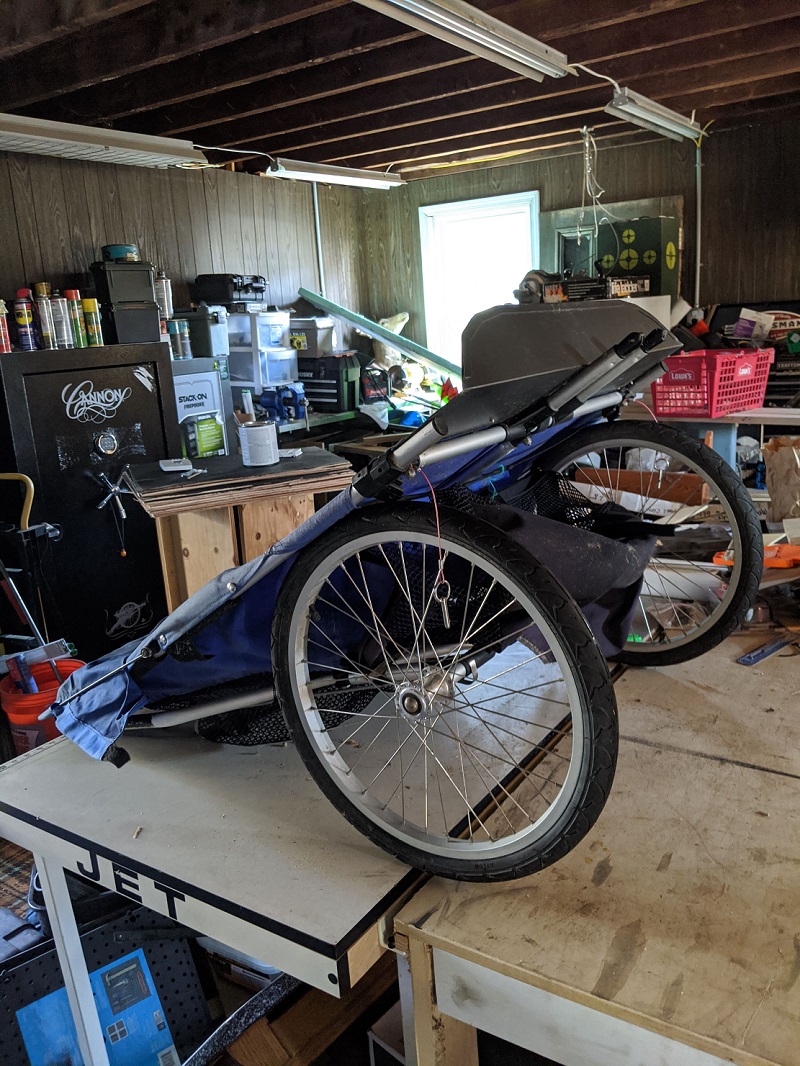
I ended getting wheels off of a stroller from a kind man on Craigslist. This saved me
about $50. YAY! But the next thing was determining how to connect the wheels.
Week 12 - Mechanical Machine Design
This is where all the real fun began!
I was able to pull the stroller apart, but this left me with a question on
how to connect the wheels. They came off and had a connector that I wasn't
prepared for dealing with.
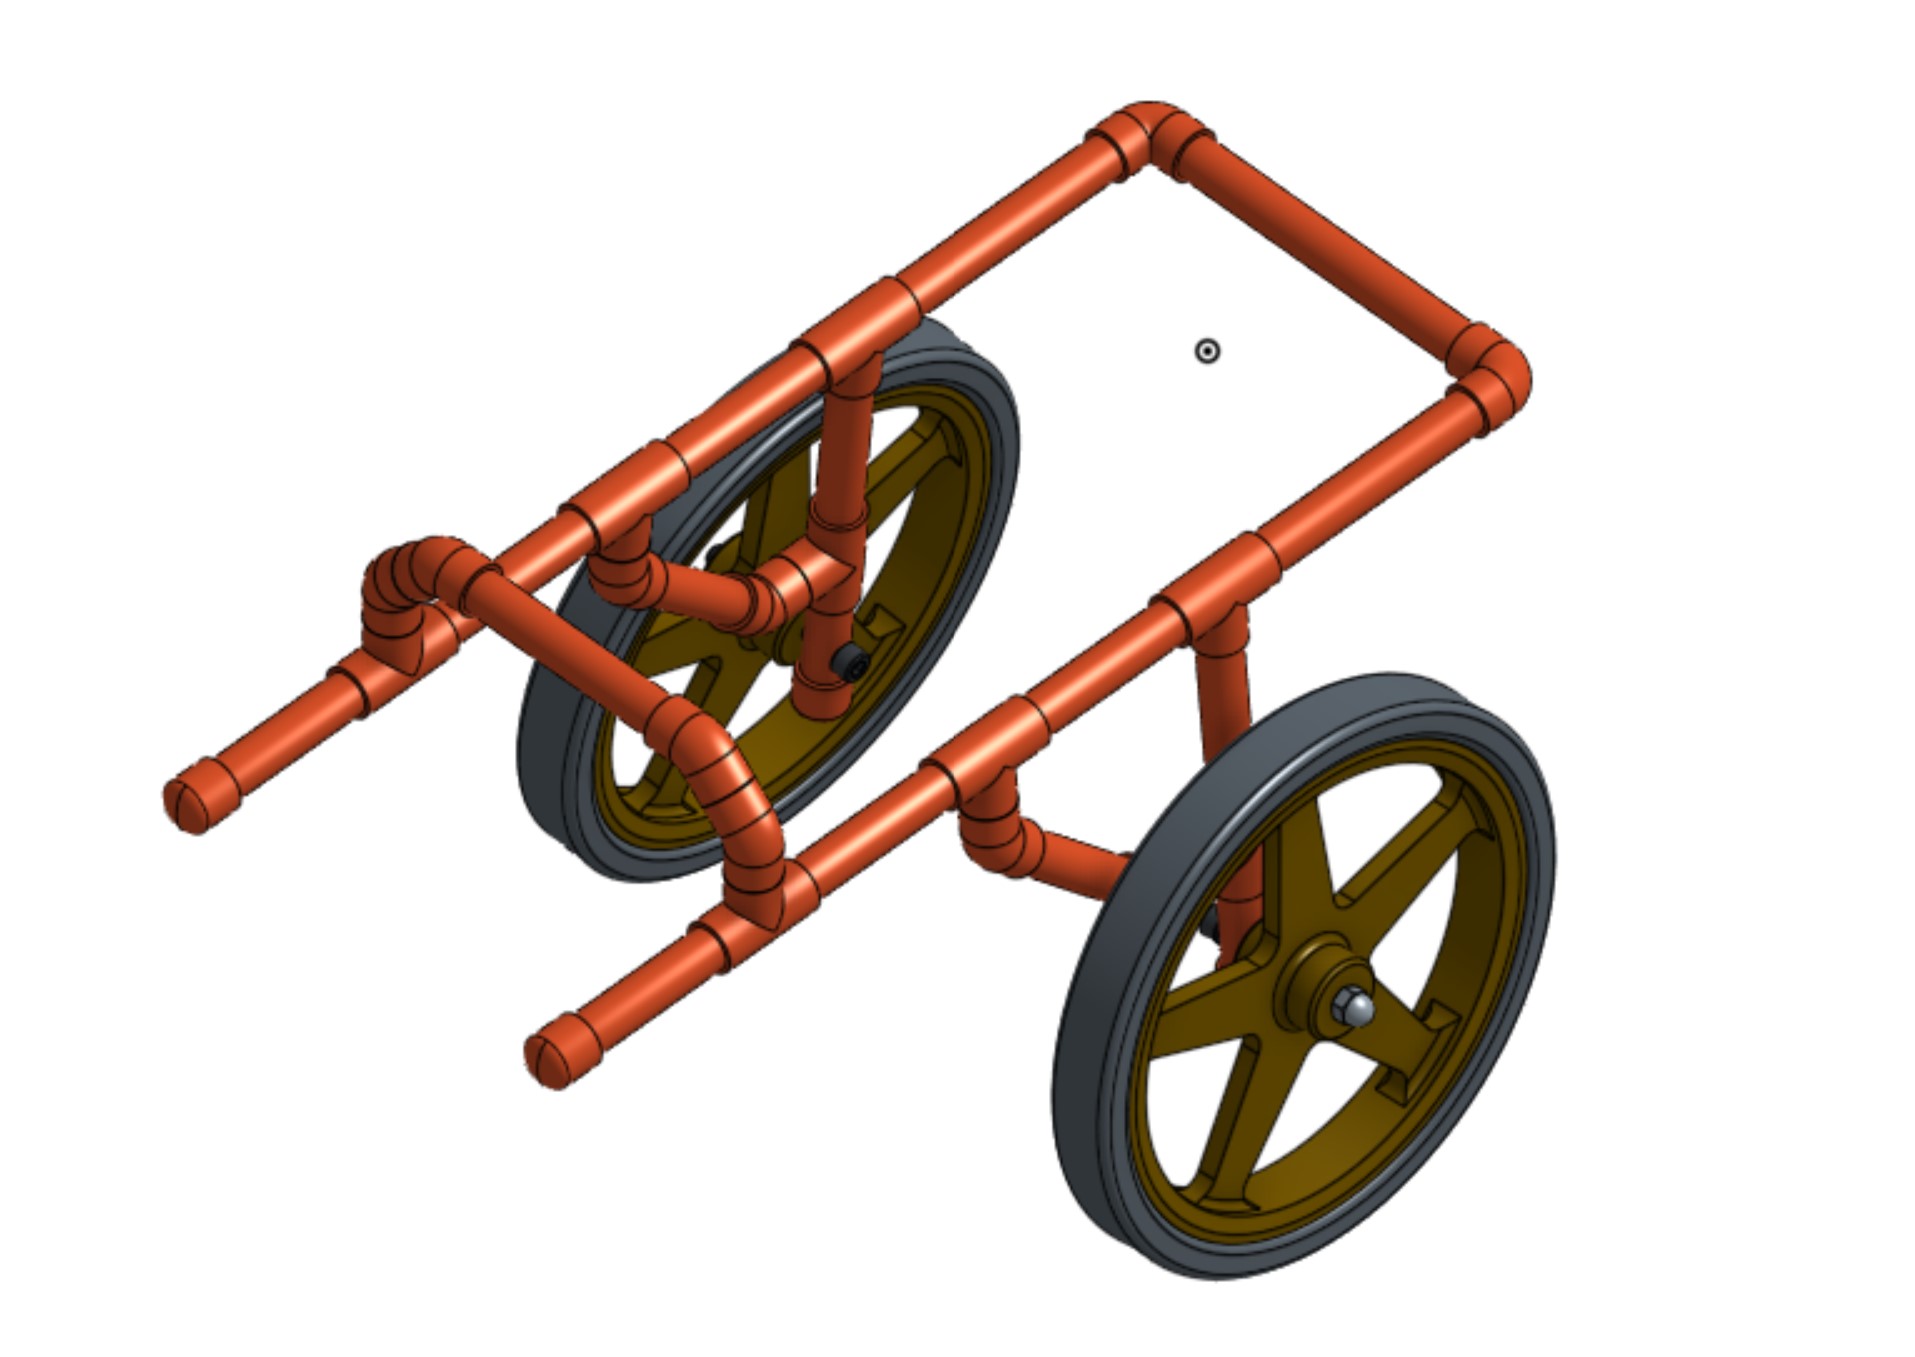
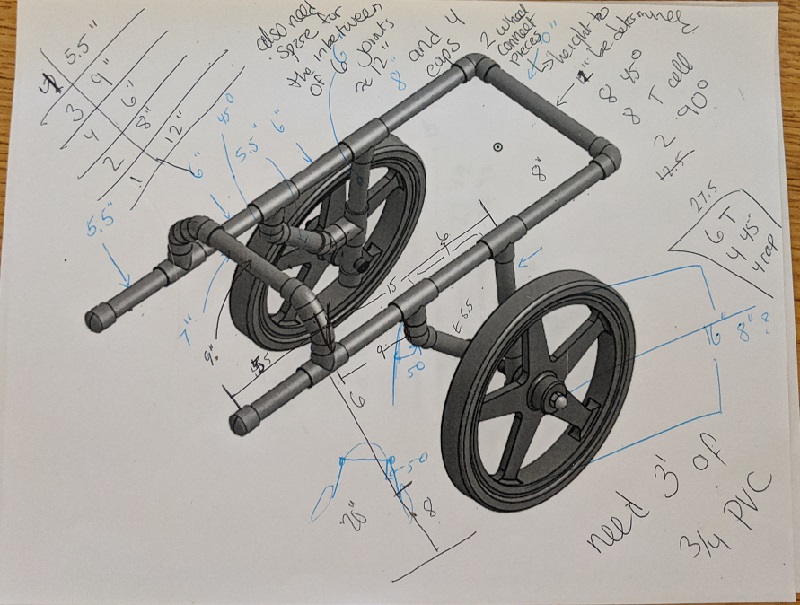
I wanted a pretty basic initial design for Belle's wheelchair.
Through a few youtube videos I was fortunate enough to find one that
was meant for larger dogs. The initial CAD gave a bunch of measurements.
This is what I had been waiting for, numbers! I can do ratios and proportions
to guestimate what size Bell would need. The blue text was the original measurements
that were given. From there I started adding a few inches here and there. I made
everything a bit too large. I plan on needing to adjust the size once the wheels
are determined.
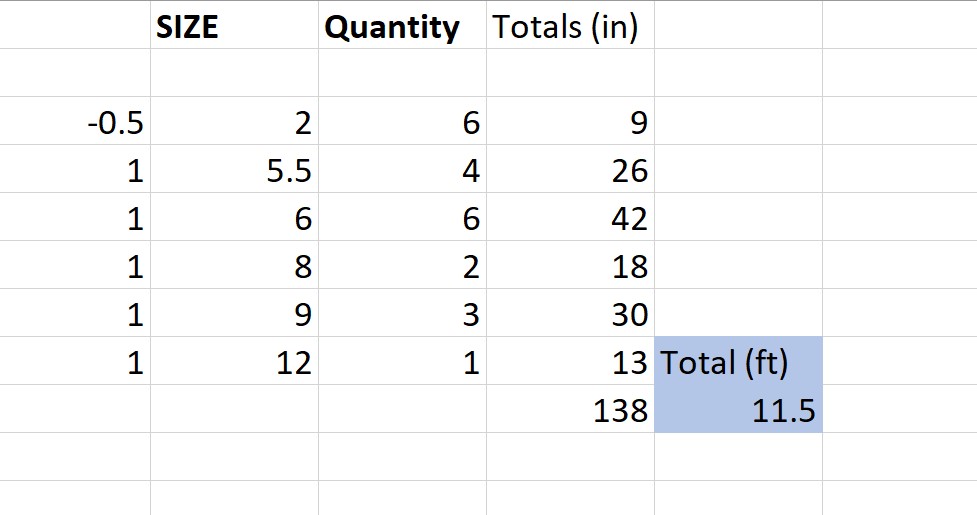
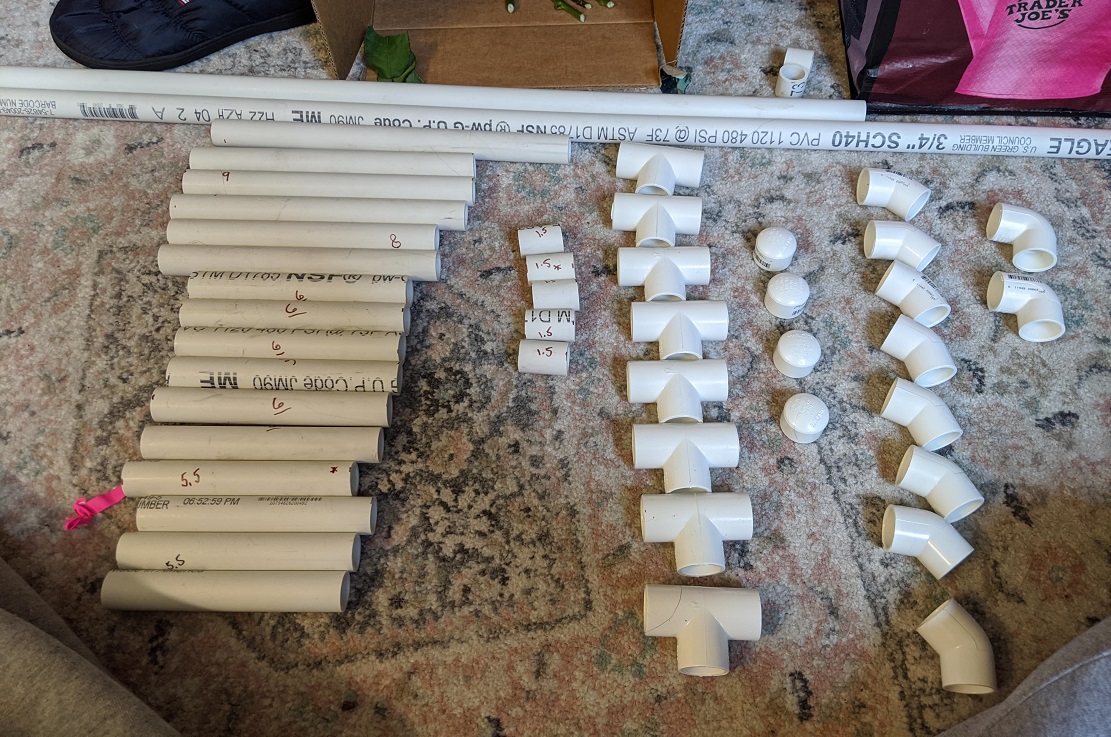
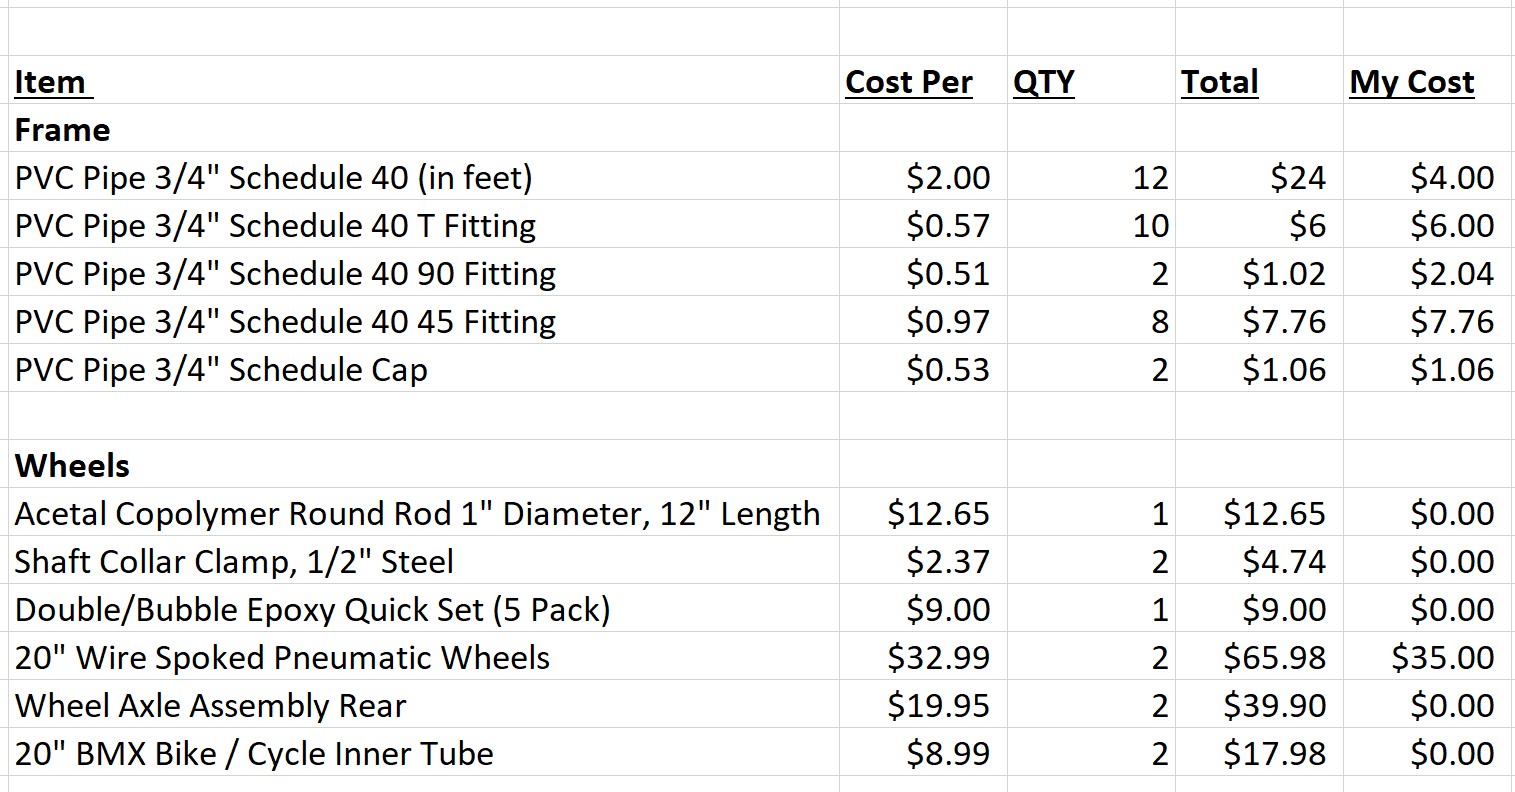
As a safety check I redid the math with Excel to ensure I bought the correct amount of
PVC piping.
-The first column is how much slack was added to the pieces (let's call this A).
-The SIZE took in account the original wheelchair.
-Quantity is how much of each I needed.
-Totals(in) = sum((A+SIZE)*Quantity)
-Total (ft) = 11.5 of PVC
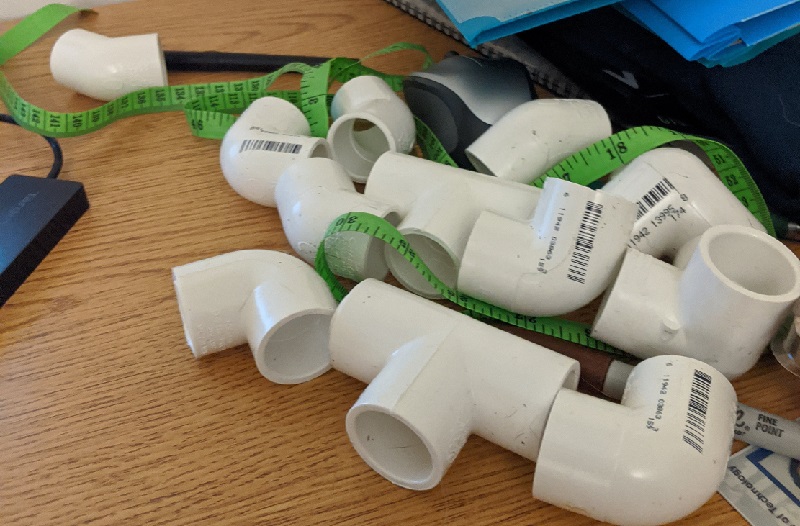
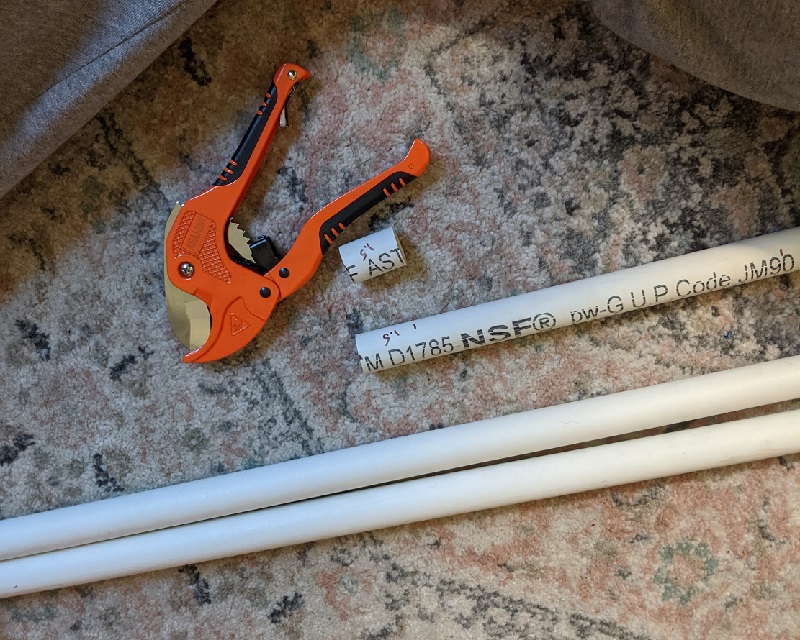
Belle and I were on a mission to collect all the pieces we needed.
PVC joints, piping, and cutters made their way to my dorm (no worries,
I kept the HAZMAT items in an isolated area...)
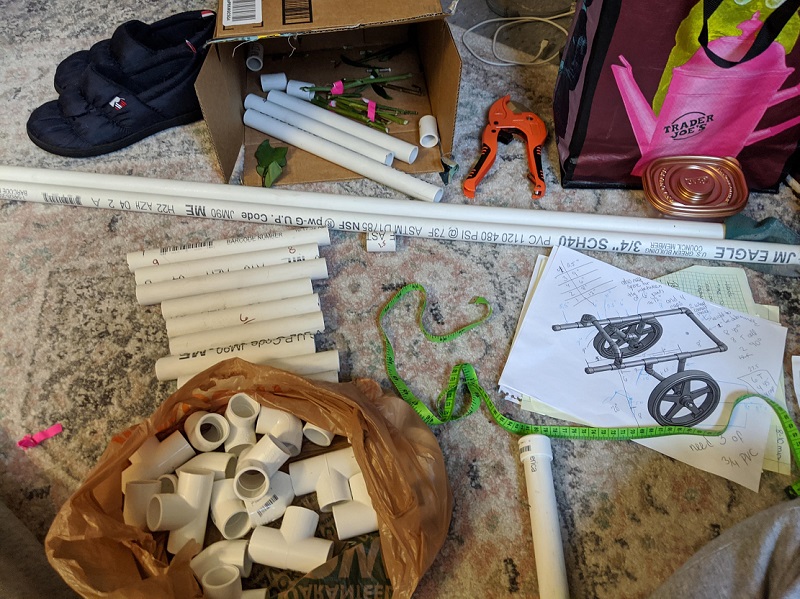
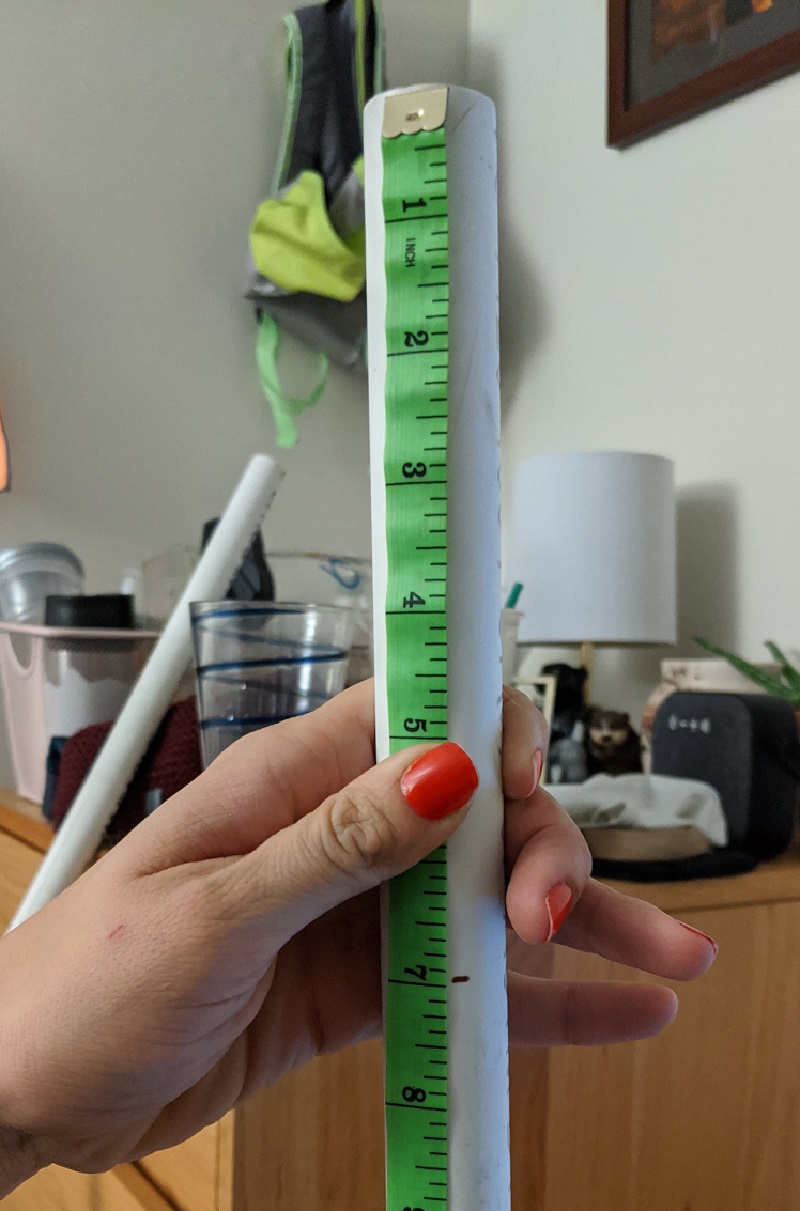
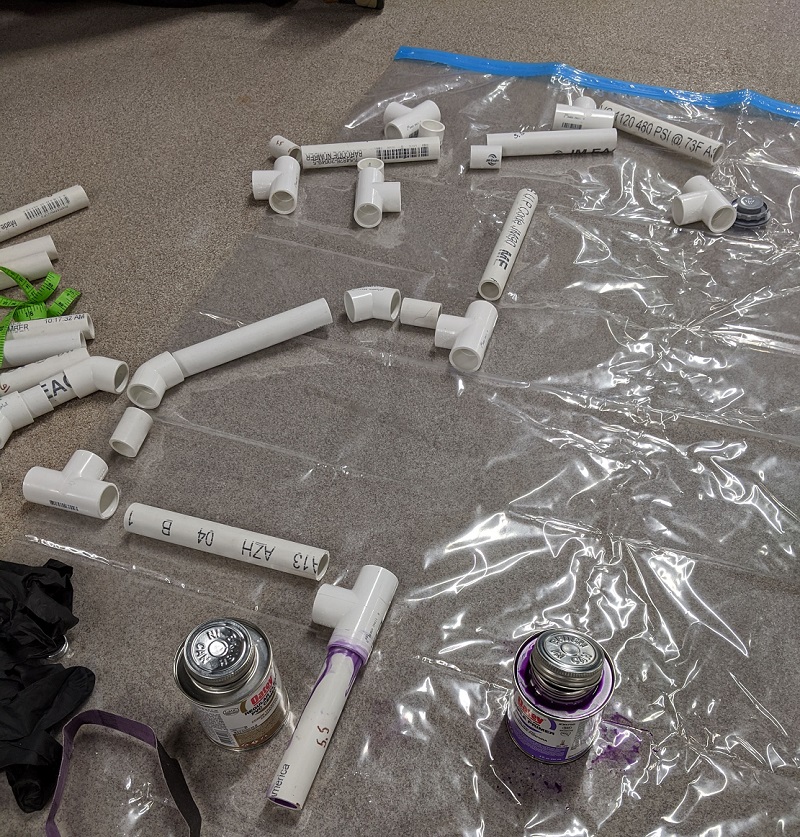
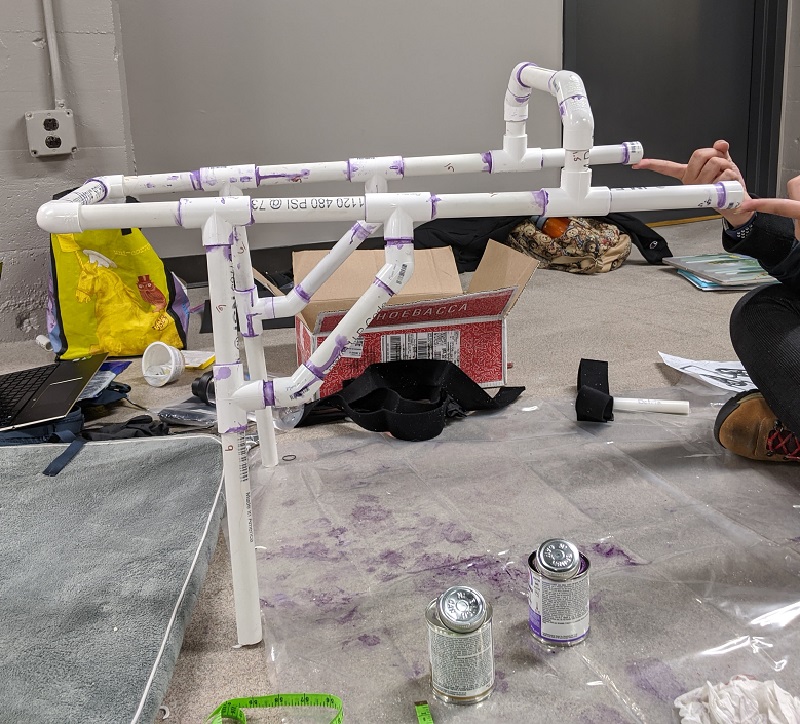
With my wicked precise measuring tool, I made "exact" cuts to ensure maximum
stability with the cart. I ensured that I had enough joints to make a single unit.
Even the end caps play a roll (teehee) in all this.
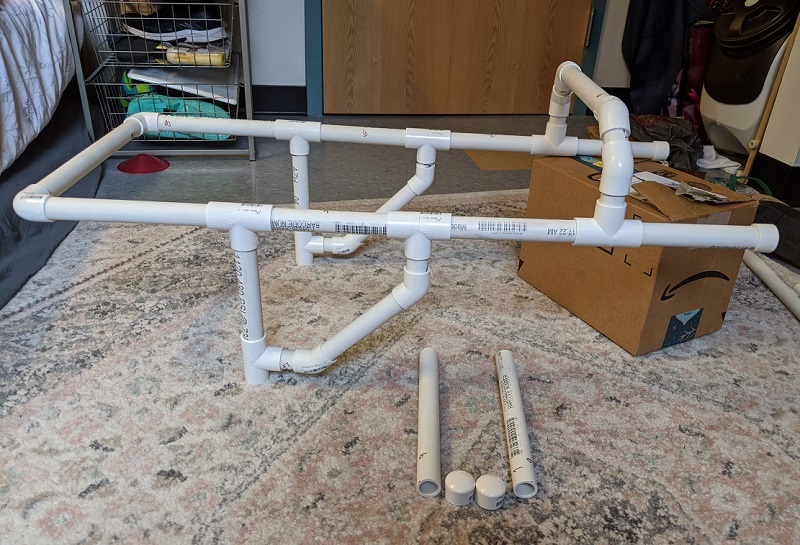
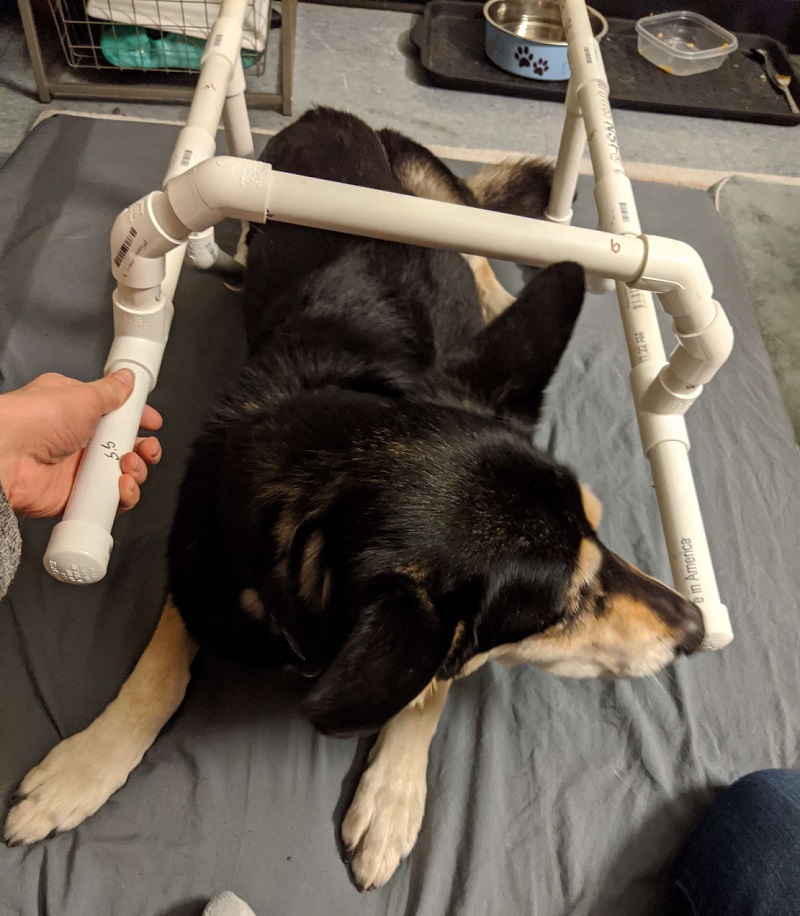
Far from secure, the chassis is really taking shape! I am waiting to glue it
together until I fully size it to Belle.
Belle really enjoys car rides, but was super hyped for this one in particular.
It is as if she knew that we were on our way to pick up wheels for her!
The stroller has been well loved, but that is exactly what we were looking for!
The polite gentleman who sold it to us was a Vietnam Veteran. He was shocked that
I was a veteran myself and that I was building a wheelchair for my dog. Who would
have thunk it!
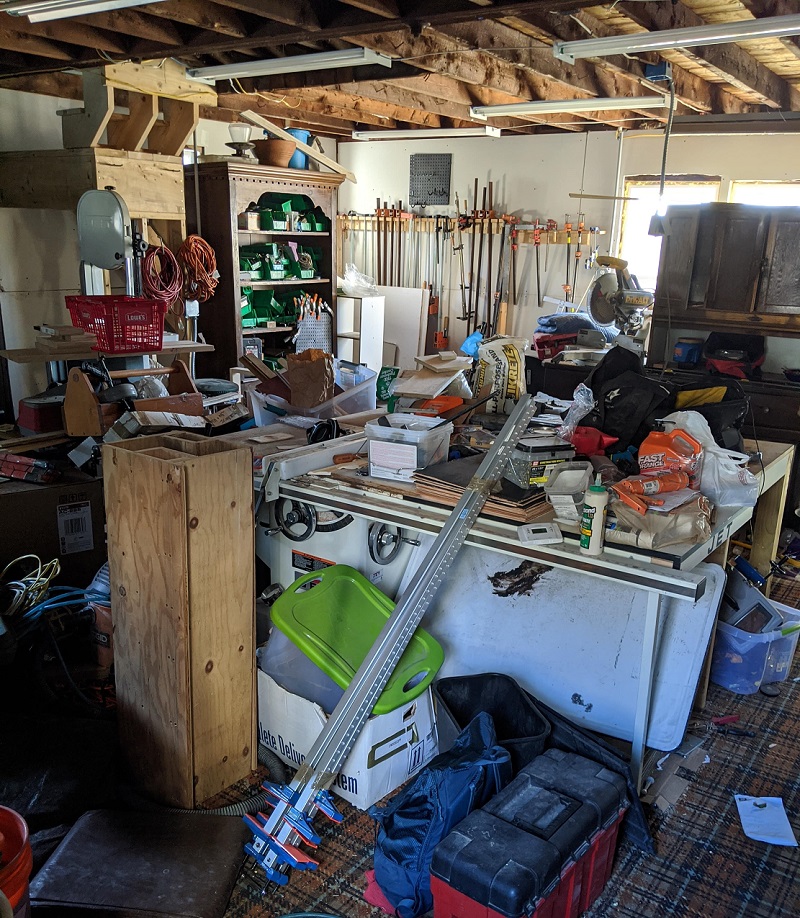
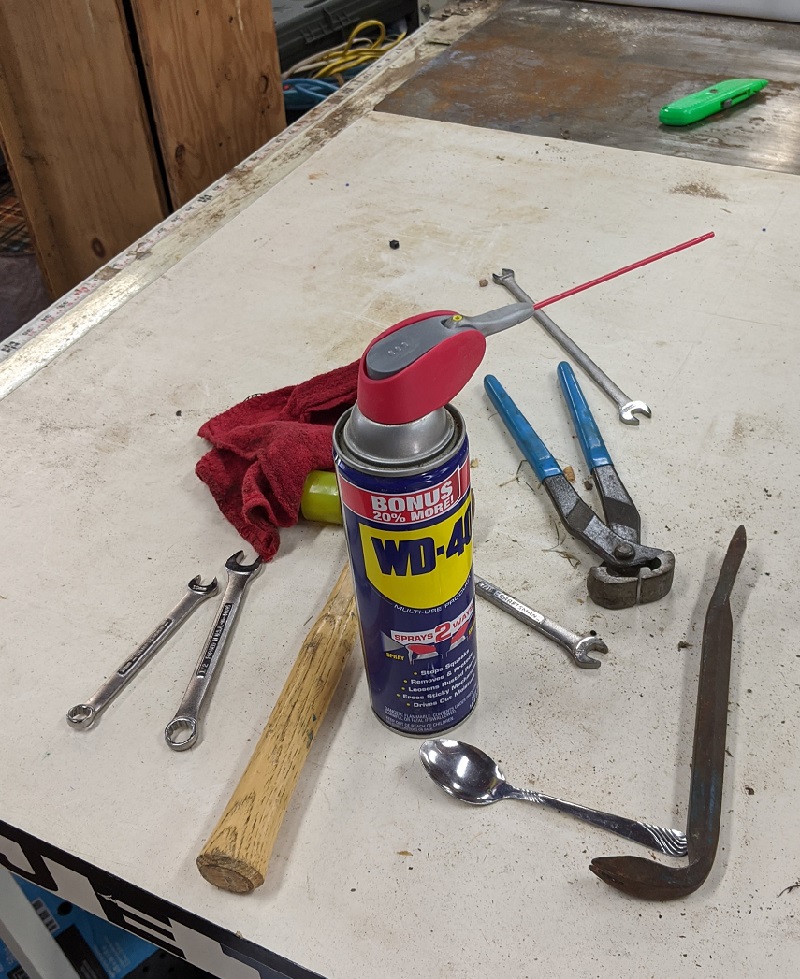
Now I needed tools. I knew where they all existed, however, where they were in
my father's workshop was a mystery to me. After he passed away, we kept his shop,
but not quite up to his standards.
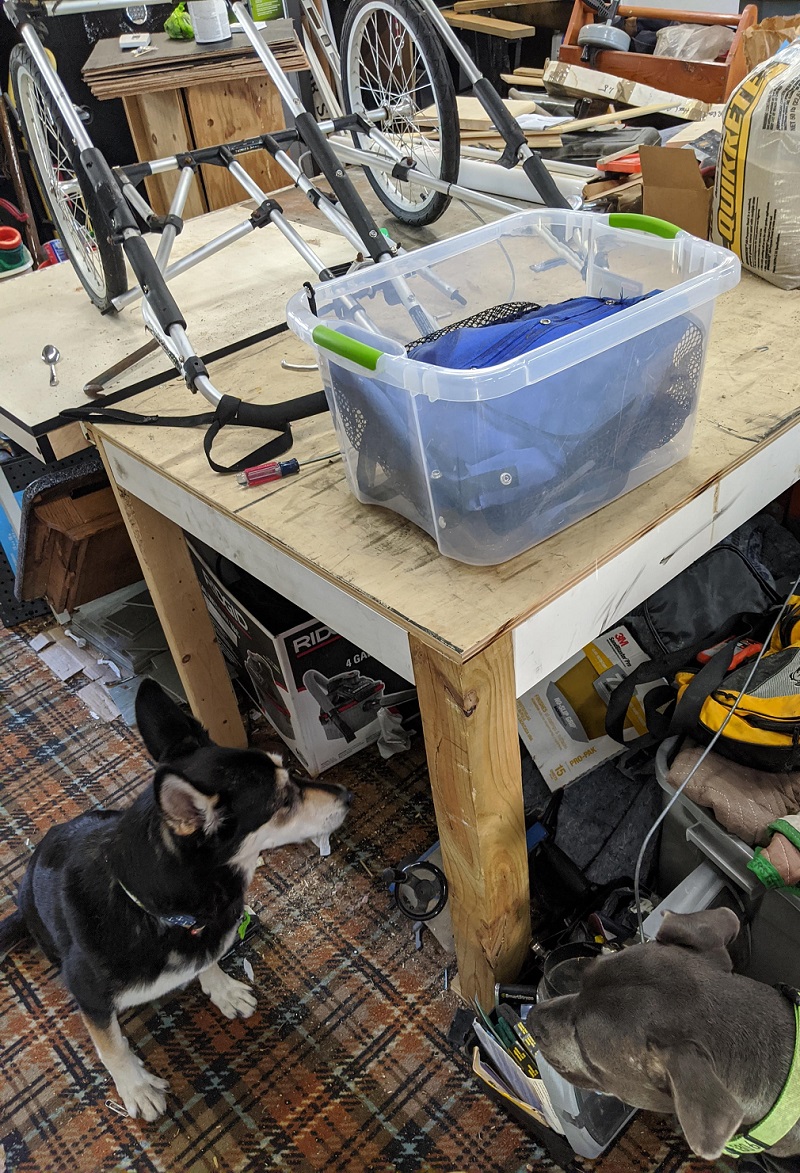
But, I had some helpers in cleaning and organizing the chaos!
Scratch that, one helper! Primo was too busy looking out the window.
With stroller and tools in hand, the puzzle of taking apart the contraption
was about to begin. What was my plan going into this? Get it into as many small
parts as possible. And it begins!
Now that all the heavy lifting is complete, the pups decided they wanted to
help. I pulled off the fabric, the brakeline, and separated the levels of the
stroller. As I worked, I was sure to put as many of the small pieces into the
tub as possible. That included my wallet....... which I then couldn't find
for the whole week. Fortunately, I have great friends who let me transfer them
money for cash, I had just filled up my gas tank, and Google Pay has stored my
information. But, back to the project, I almost had the wheels off the stroller.
Turns out that the rear tires are removed by lifting a single lever. It took
me longer than I would like to admit to figure that out. But look at these!
For $35 I had gotten what would have originally cost $70+.
Week 13 - Interface and Application Programming
Ideally I would have created an app that would allow me to track Belle. I
wanted to use the accelerometer to show generally which "ways" she had travelled, but
instead I was feeling a bit crafty with a color mixing app.
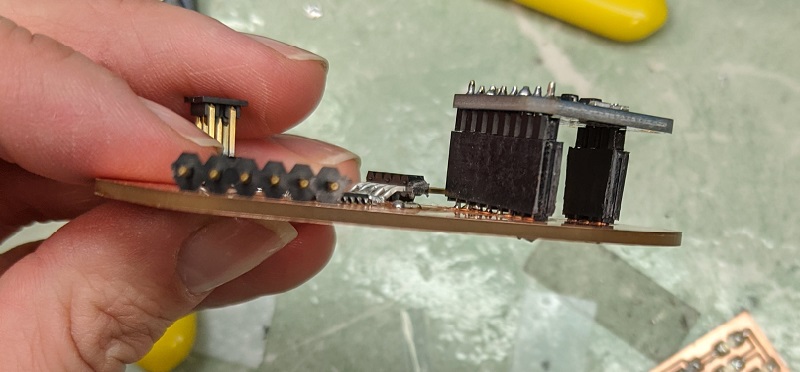
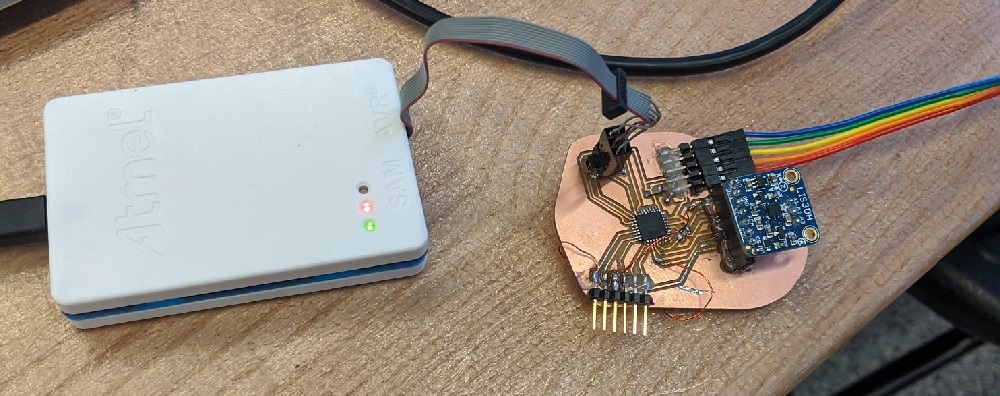
My little acccelerometer board worked fairly well with little tweaking neccessary.
I liked that I could pull the accelerometer off when needed. It also had a 3.3V
regulator so I could pull that off of the original board design.
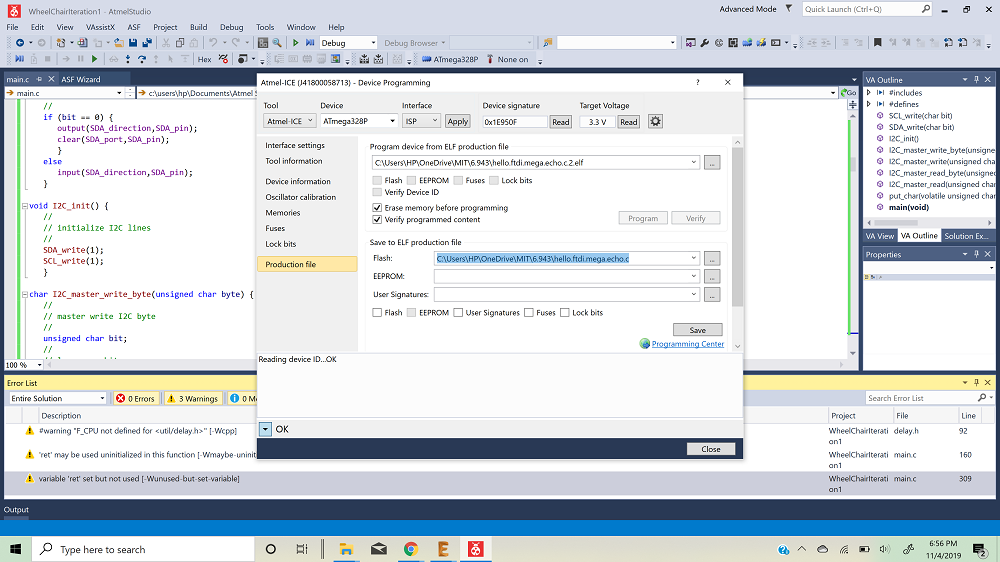
I always made sure that my board was pulling the correct voltage in Atmel. This was my first step to checking
that everything was ok prior to programming it in Arduino.
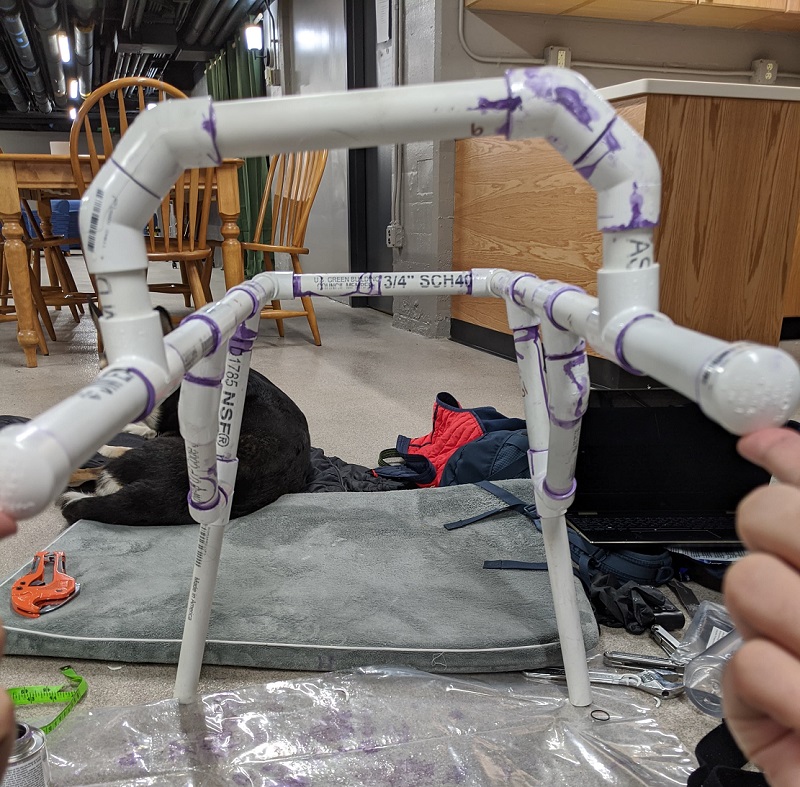
Belle was an absolute champ when it came to sizing and fitting!
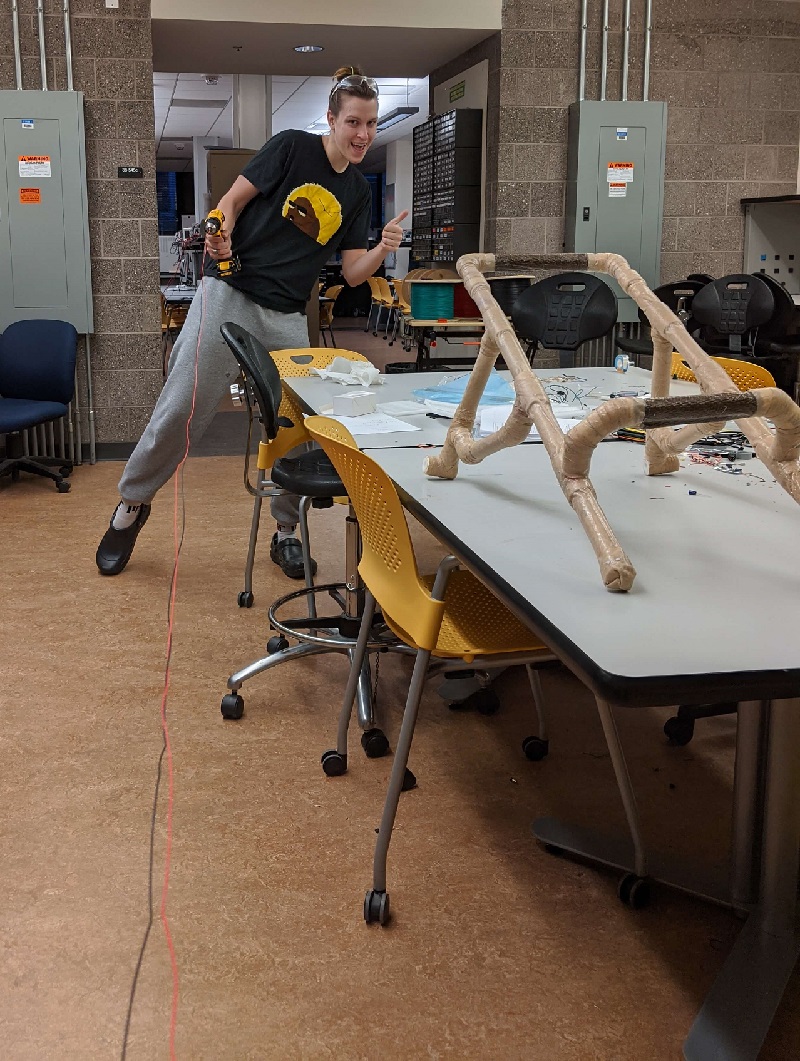
Taken all apart I never thought it would go back together again!
I set all the pieces in their place and I knew I was on an adventure for the
permanant fusion of the PVC pipes.
Primer, Glue, Press, Repeat!
I attempted to do the 5 degree angle slant on both pieces by evenly spreading them over
a cylindrical item (a water bottle).
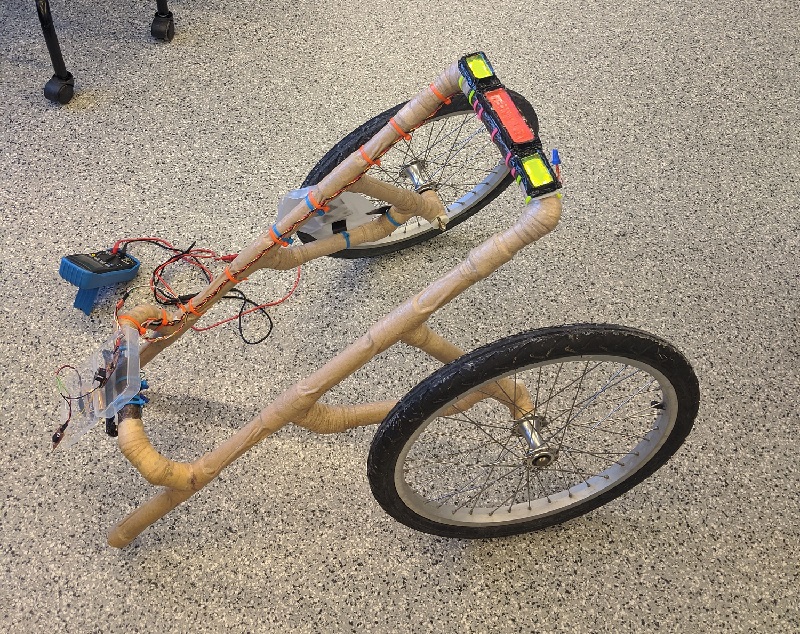
And it's put together with only a slight wonky twist to it!
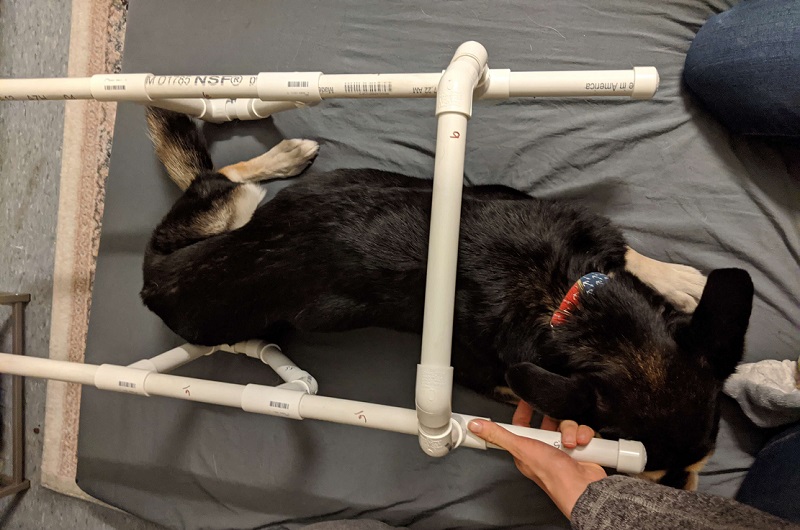
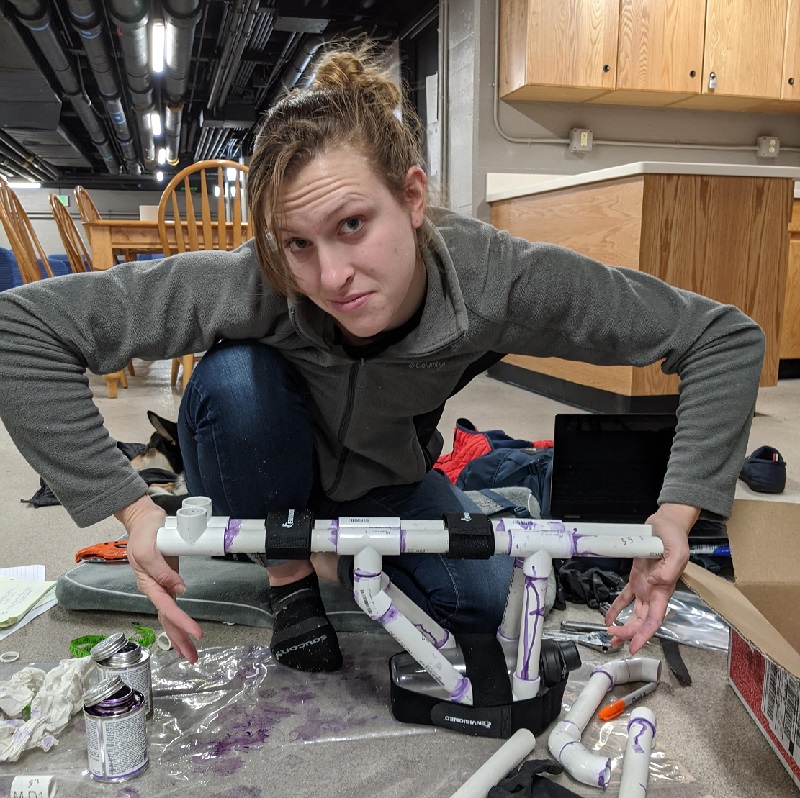
Week 14 - Wildcard
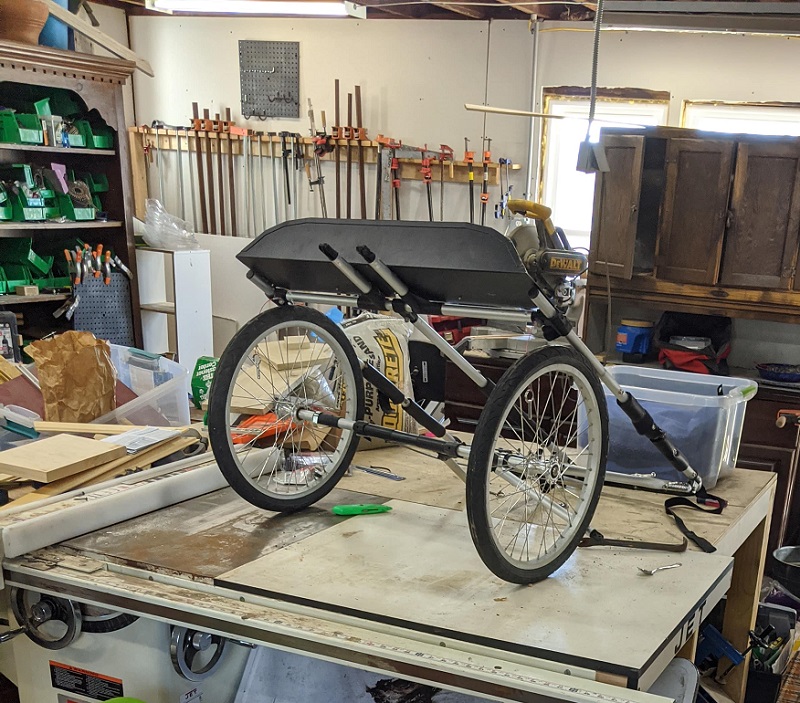
This was the week I was waiting for! Finally the physical structure could
come together completely!
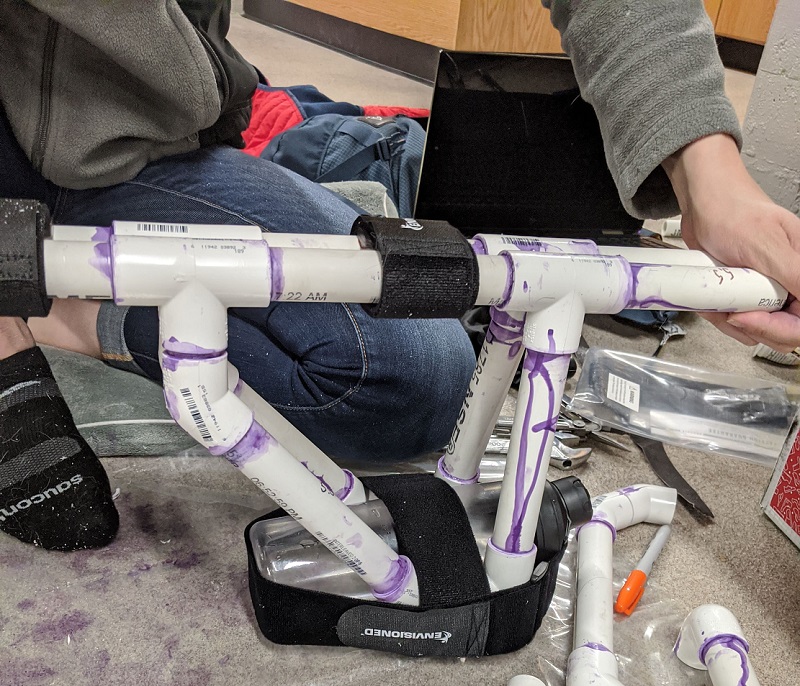
For this week I had quite a bit to do. One of the major items I had been fretting about
was the wheel attachment. The stroller wheels were wonderful, but how was I going to implement
them into the wheelchair?
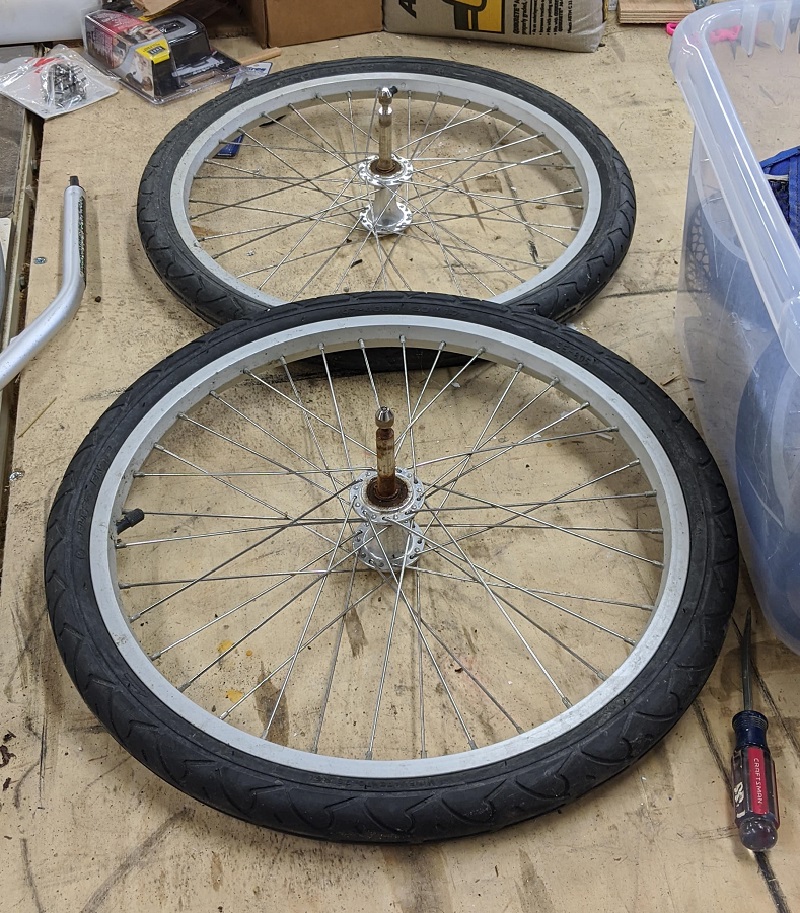
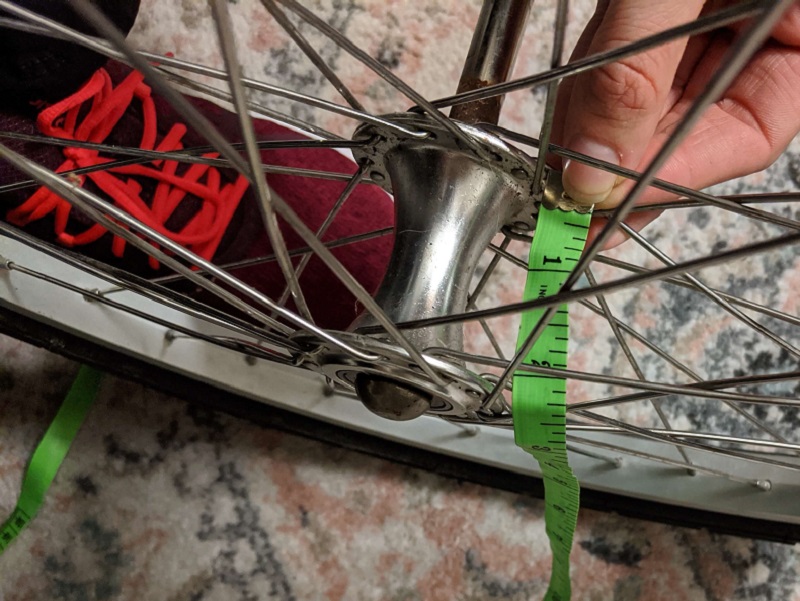
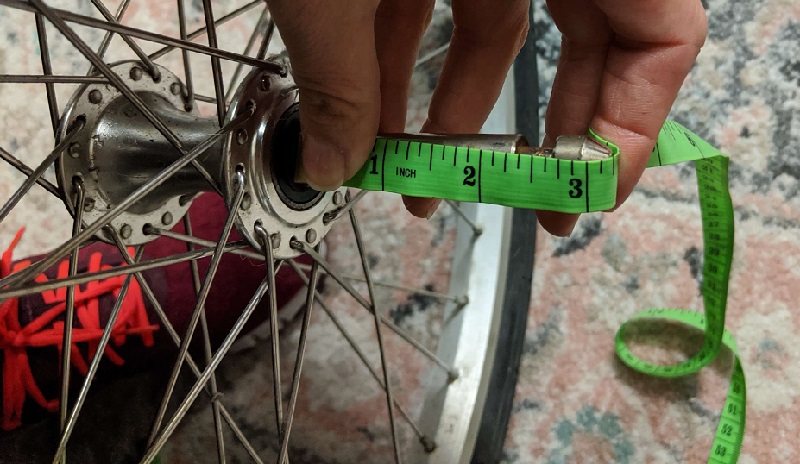
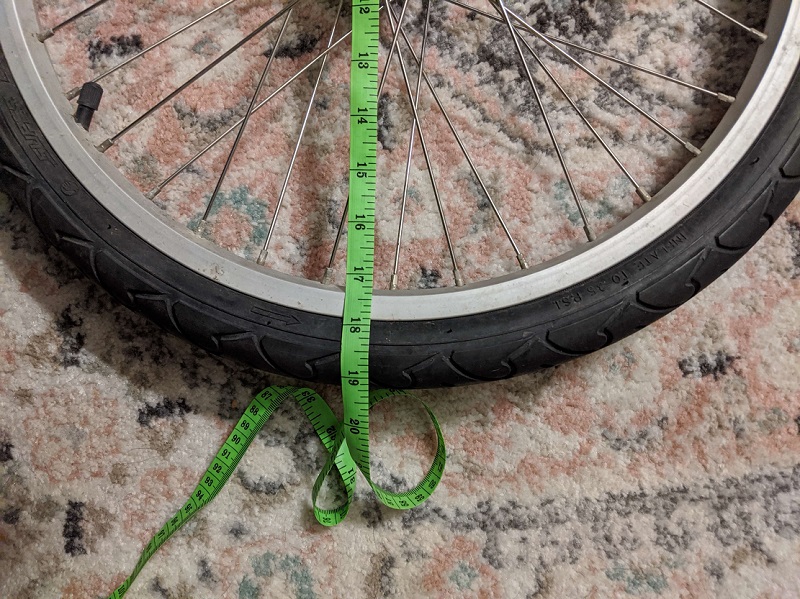
I started with measuring the tires. Not only did I need to know their true height
but I also needed to see the connection/pin size. This would later become extremely useful
information.
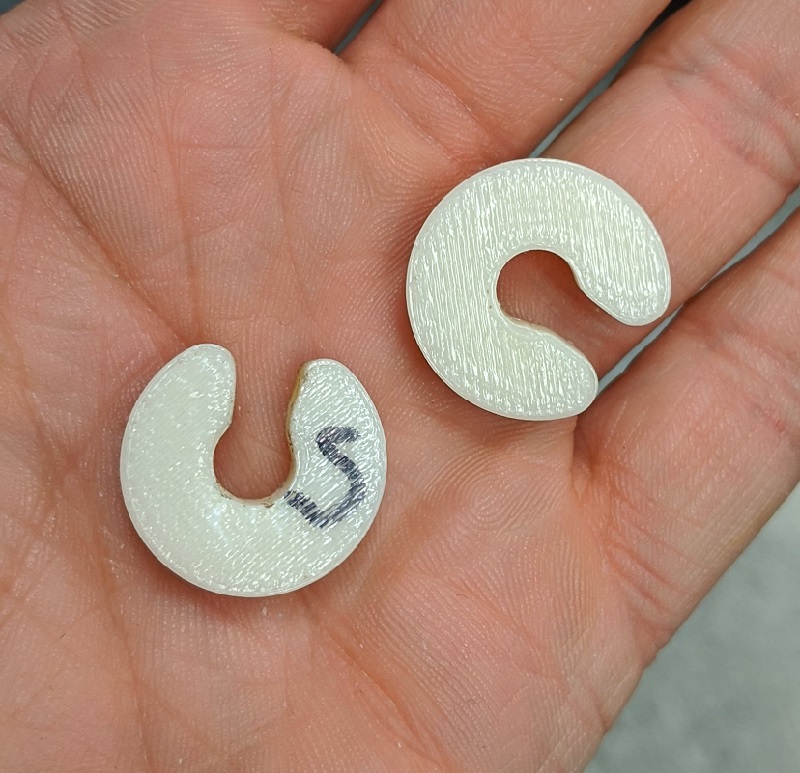
I was able to 3D print some clips to hold the wheels onto the wheelchair. I did some testing with
density of the material, but overall this was just a prototype. I ended up with clips that were about
an inch in diameter. This allowed for equal pressure from the PVC piping to be evenly applied.
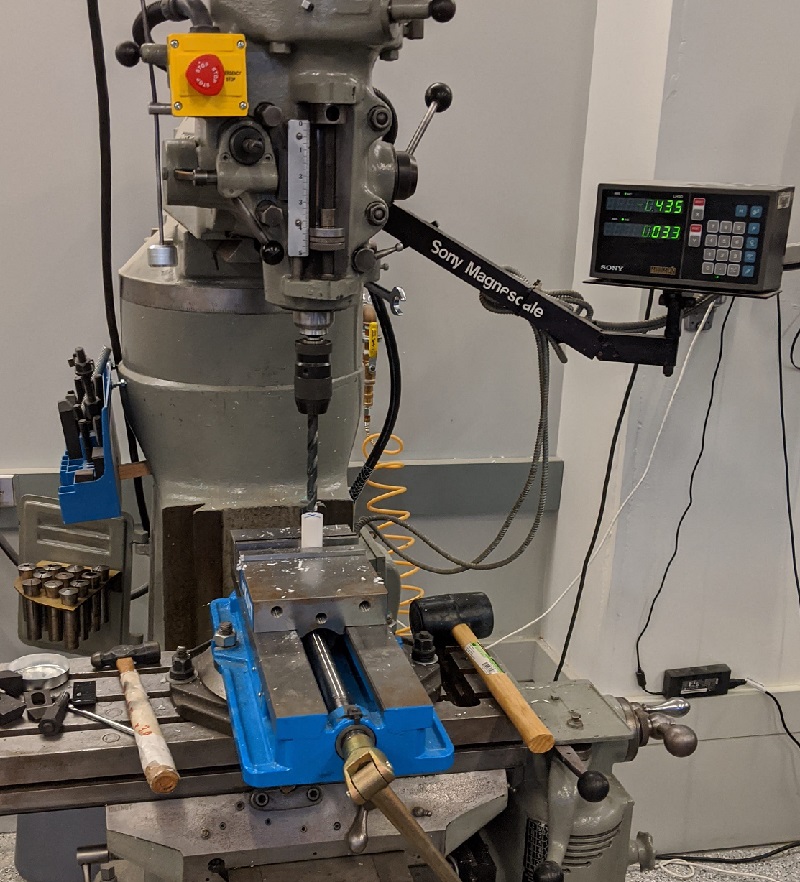
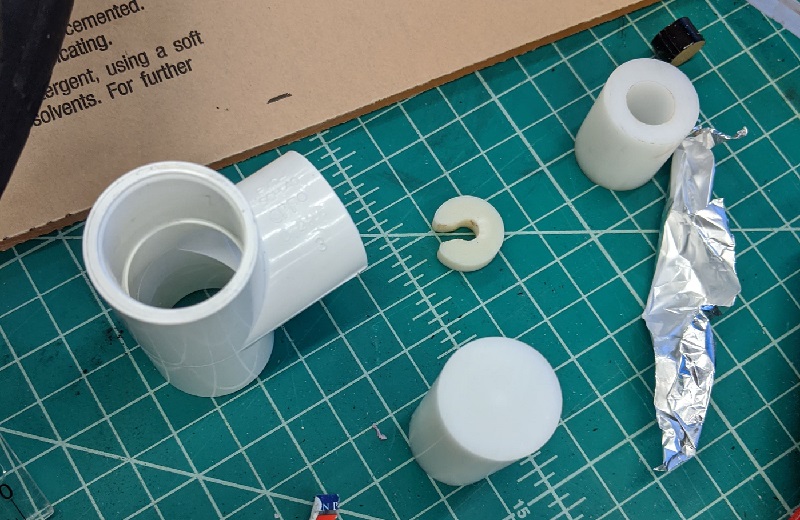
We started the Delrin by estimating the center. I then drilled a 1/2" diameter hole through the
center. This piece was then inserted into the PVC fitting. It was a surprisingly good press fit not only with the
fitting, but also with the axle! I did use epoxy to secure the Delrin into the fitting.
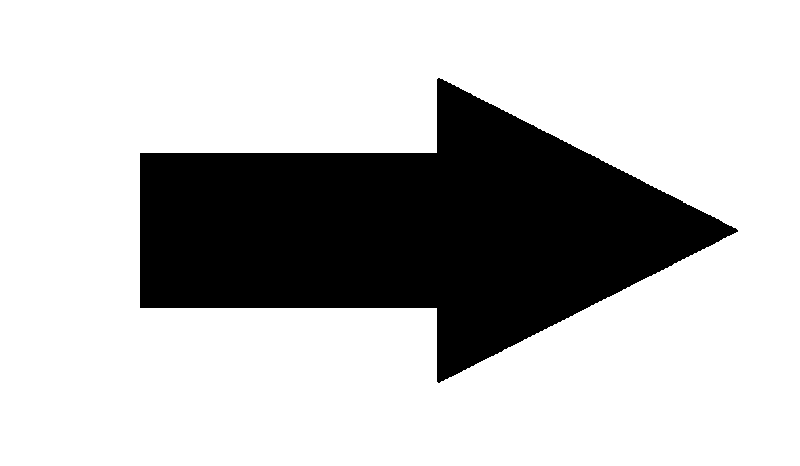
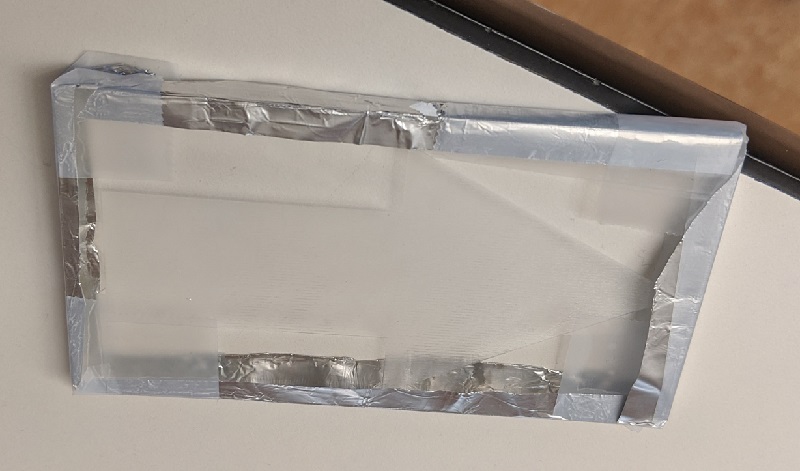
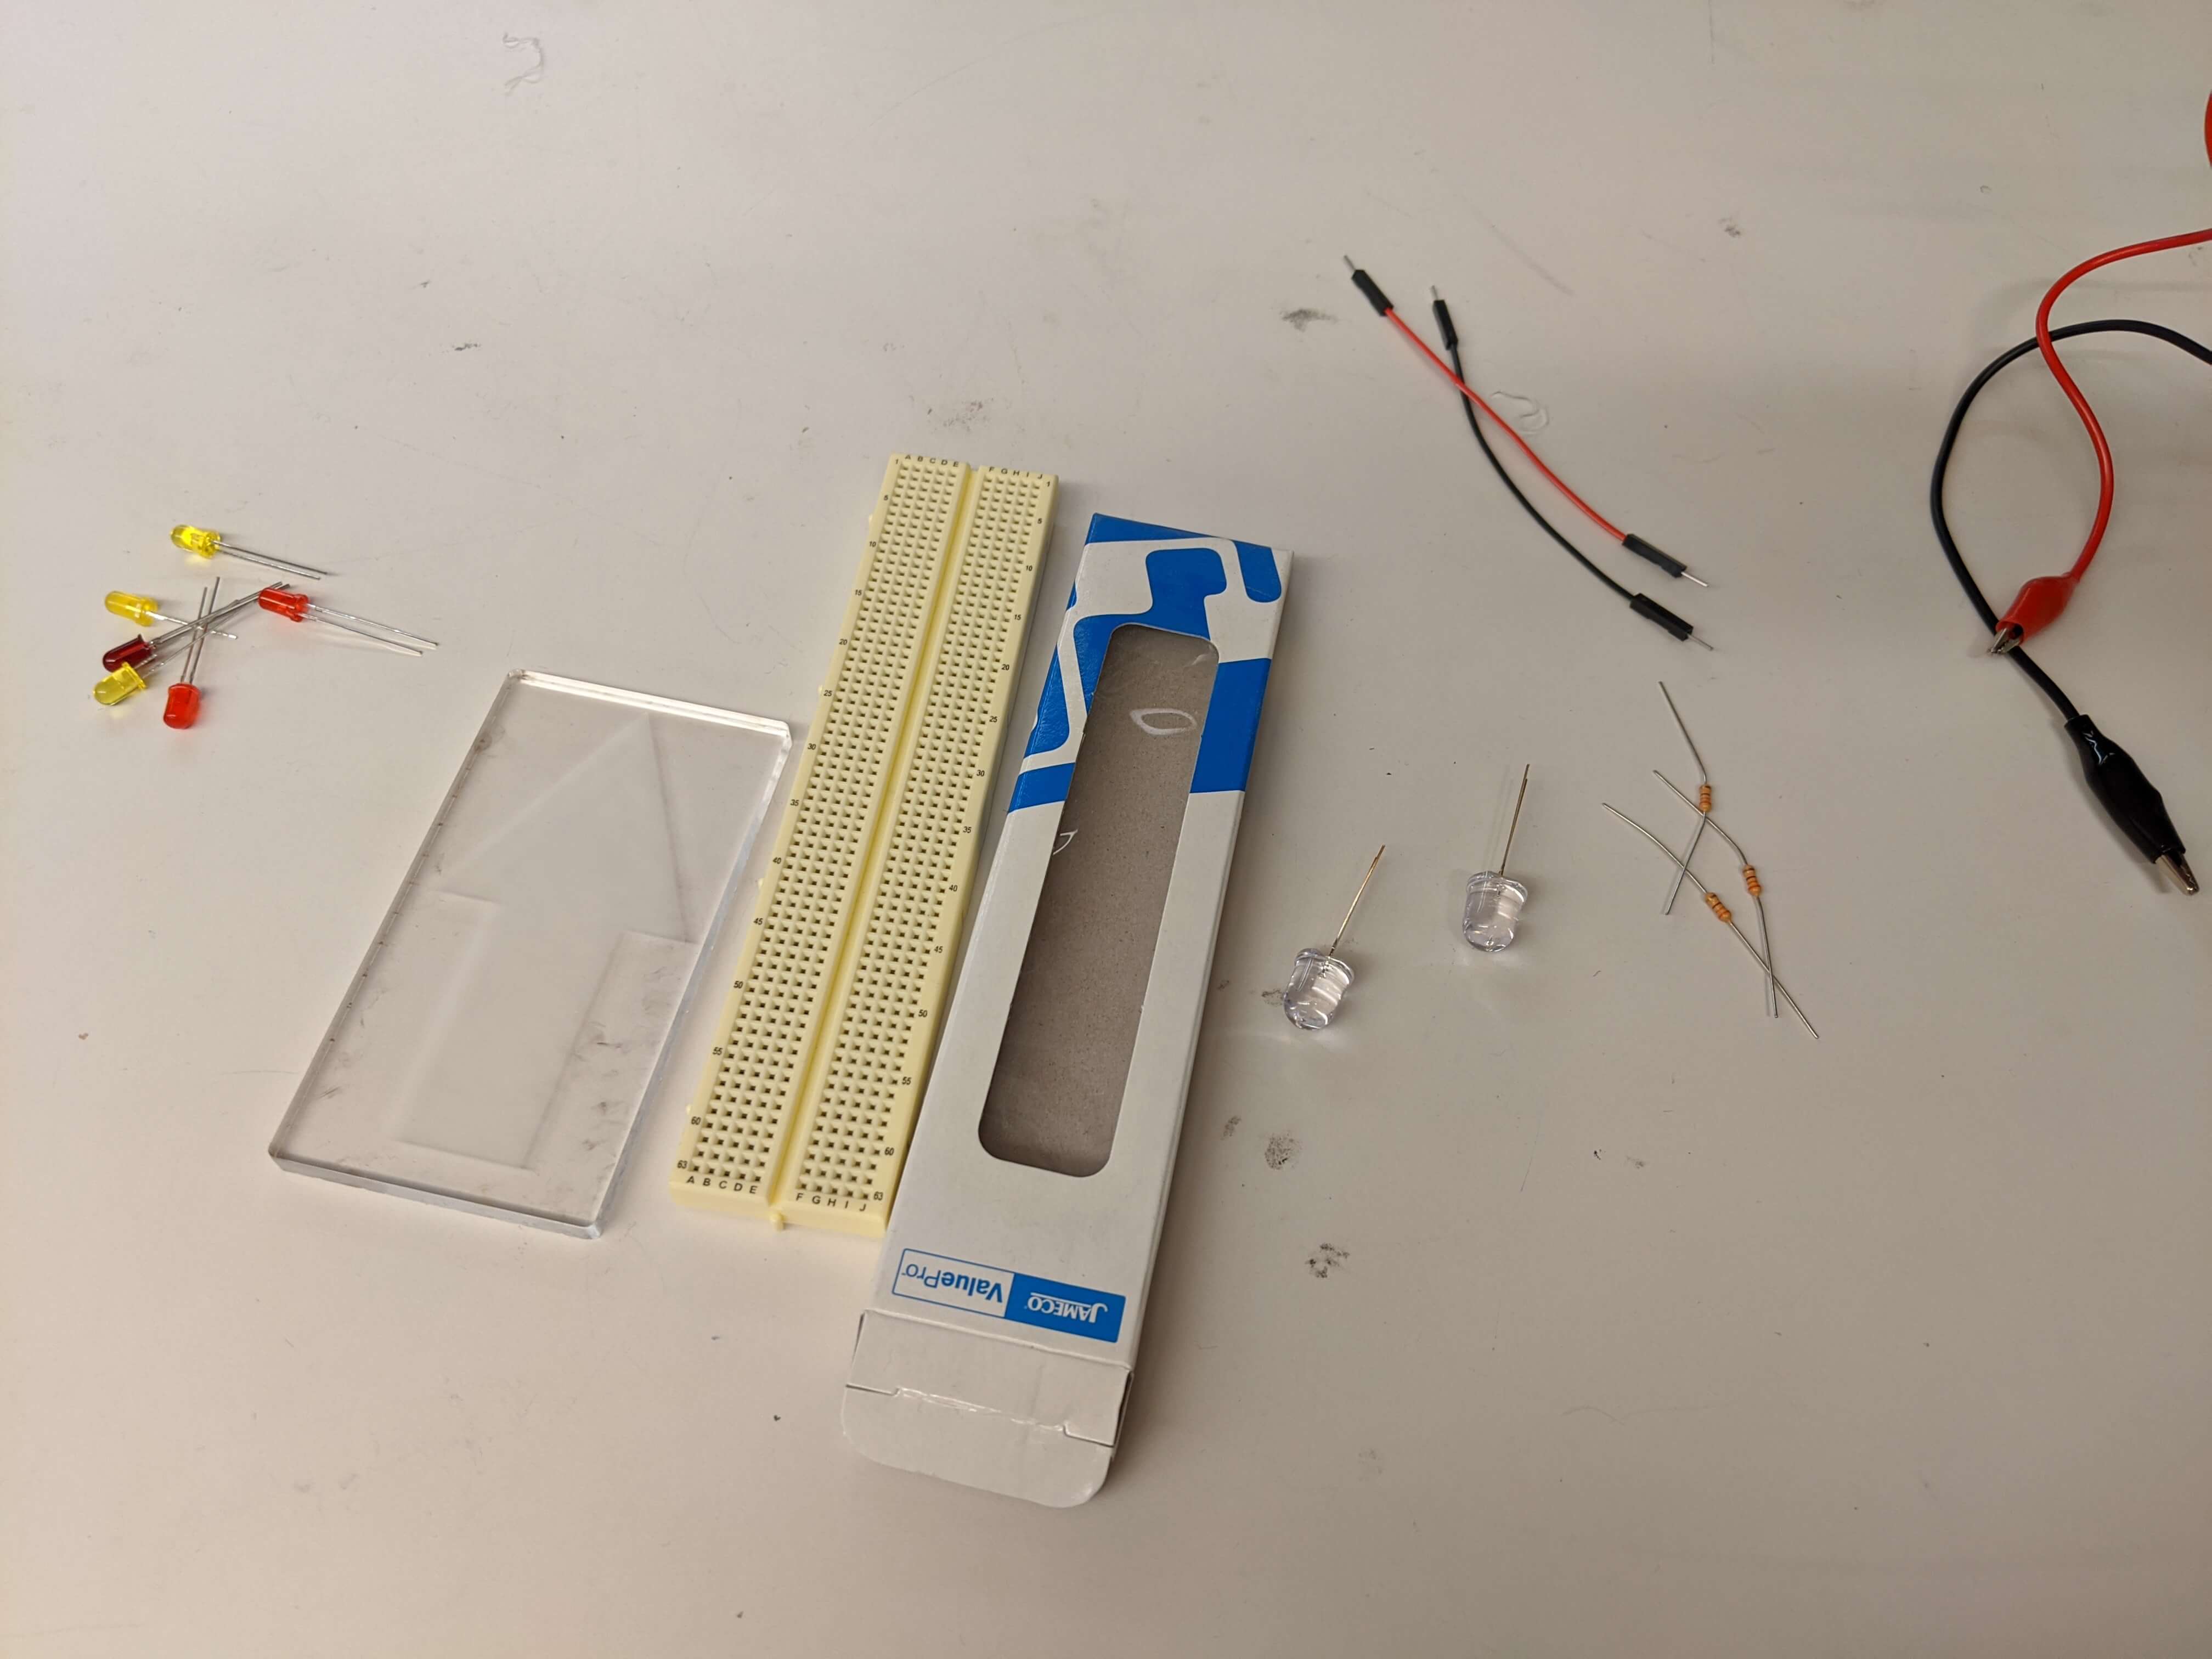
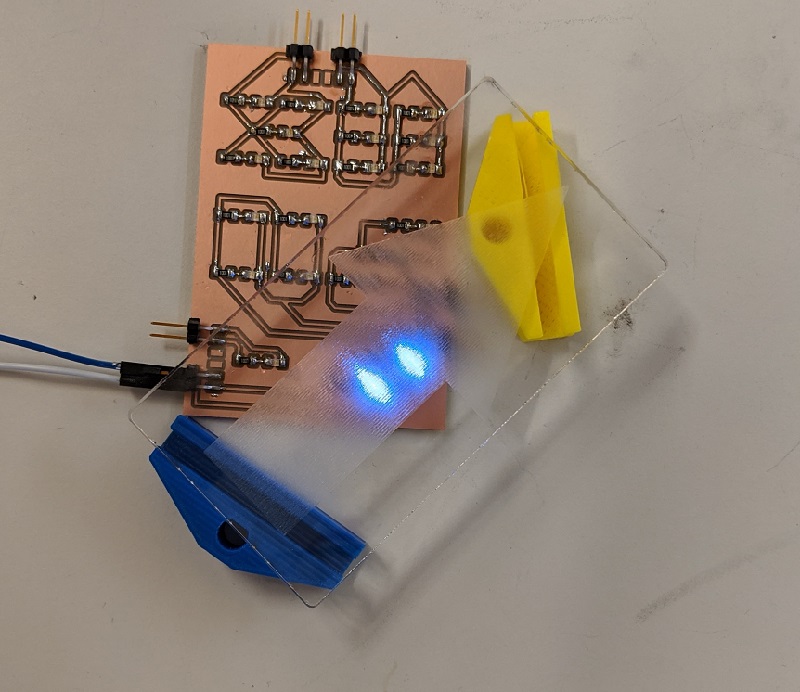
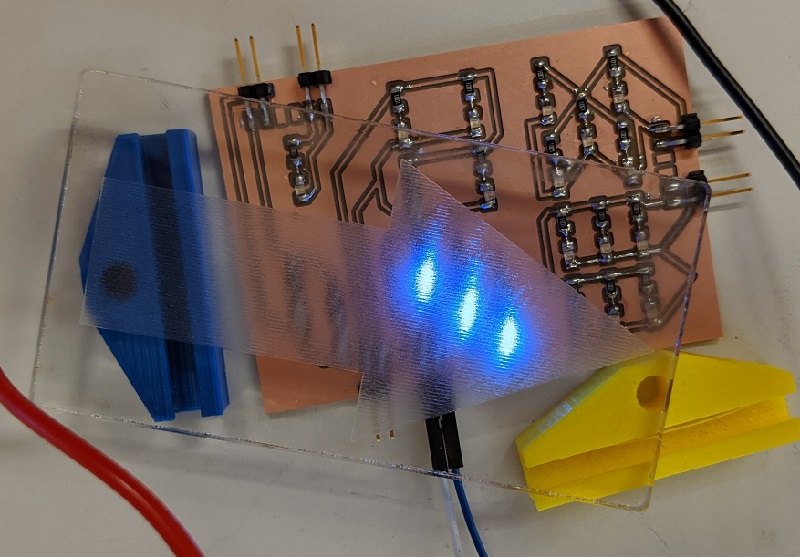
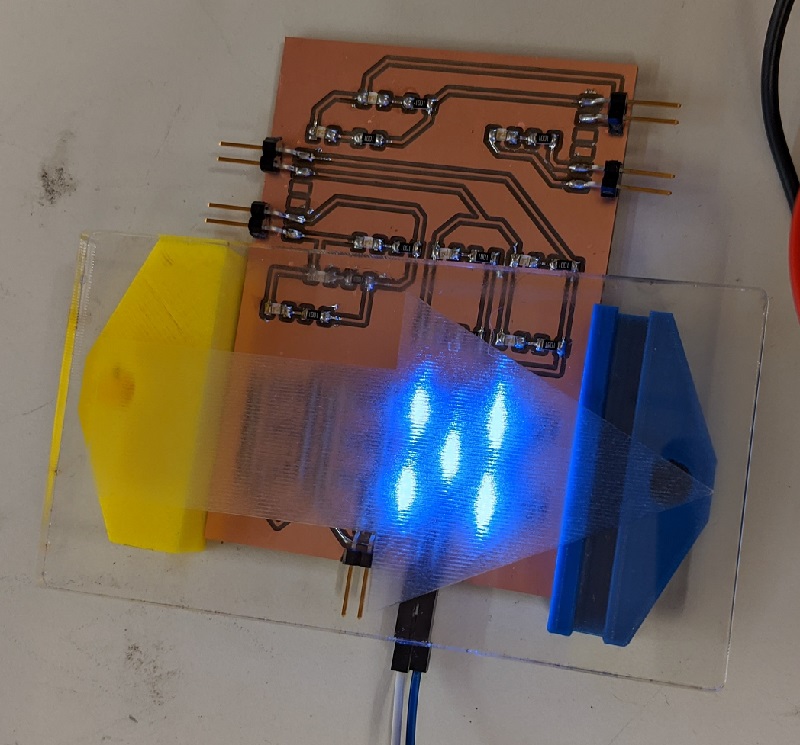
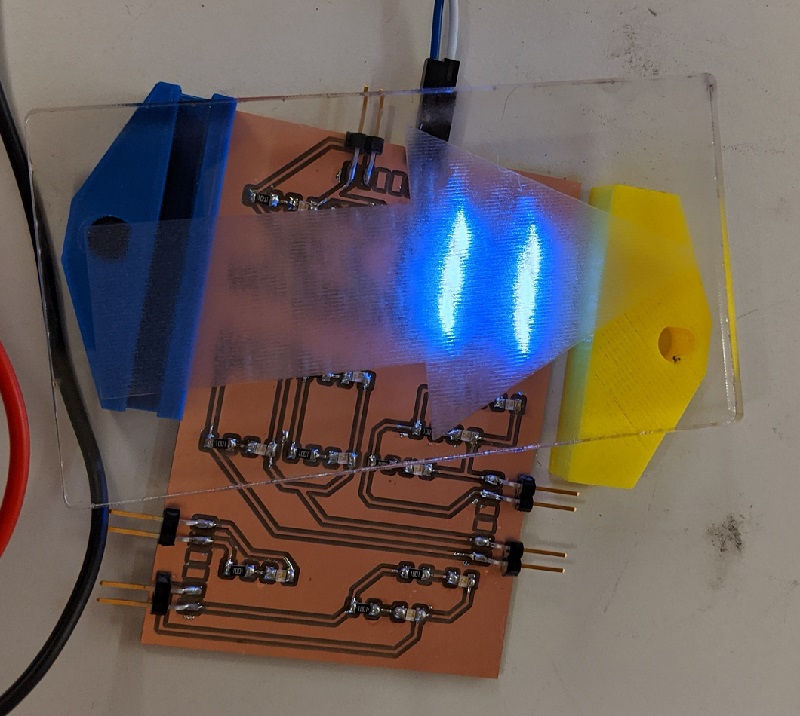
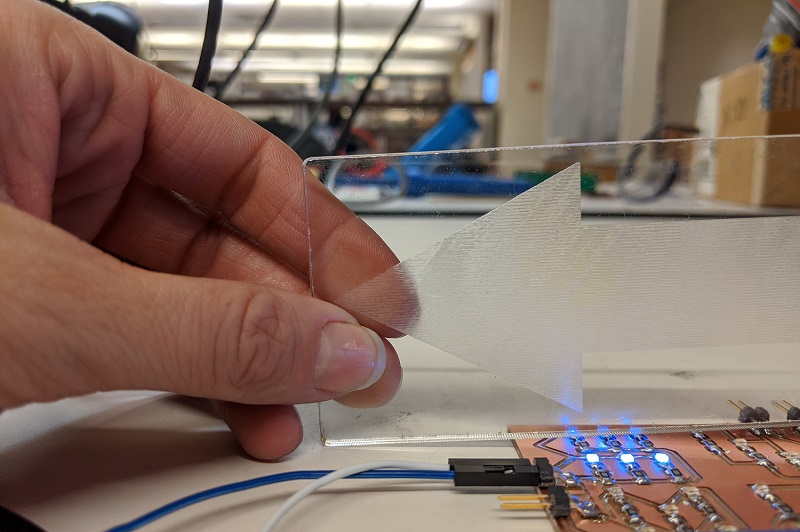
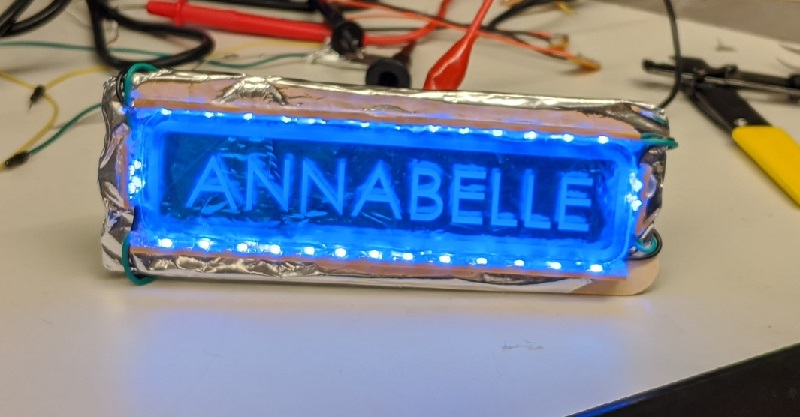
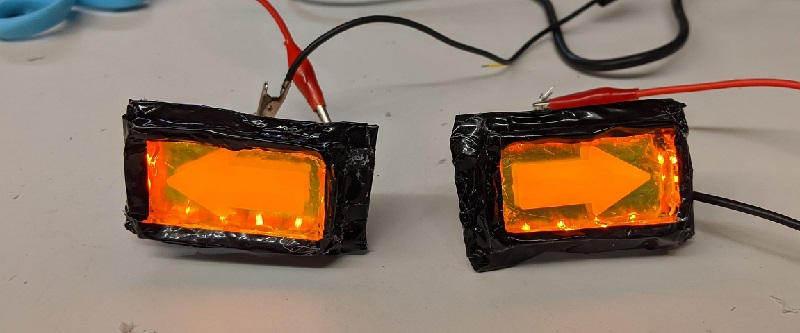
Taking a simple arrow, I was able to etch a test light for exploring LED options.
I hoped that wrapping it in foil would allow for some light srefraction internally.
I set up a breadboard to represent my LEDs in parallel. Unfortunately this test was not successful,
and I moved on to other testing ideas.
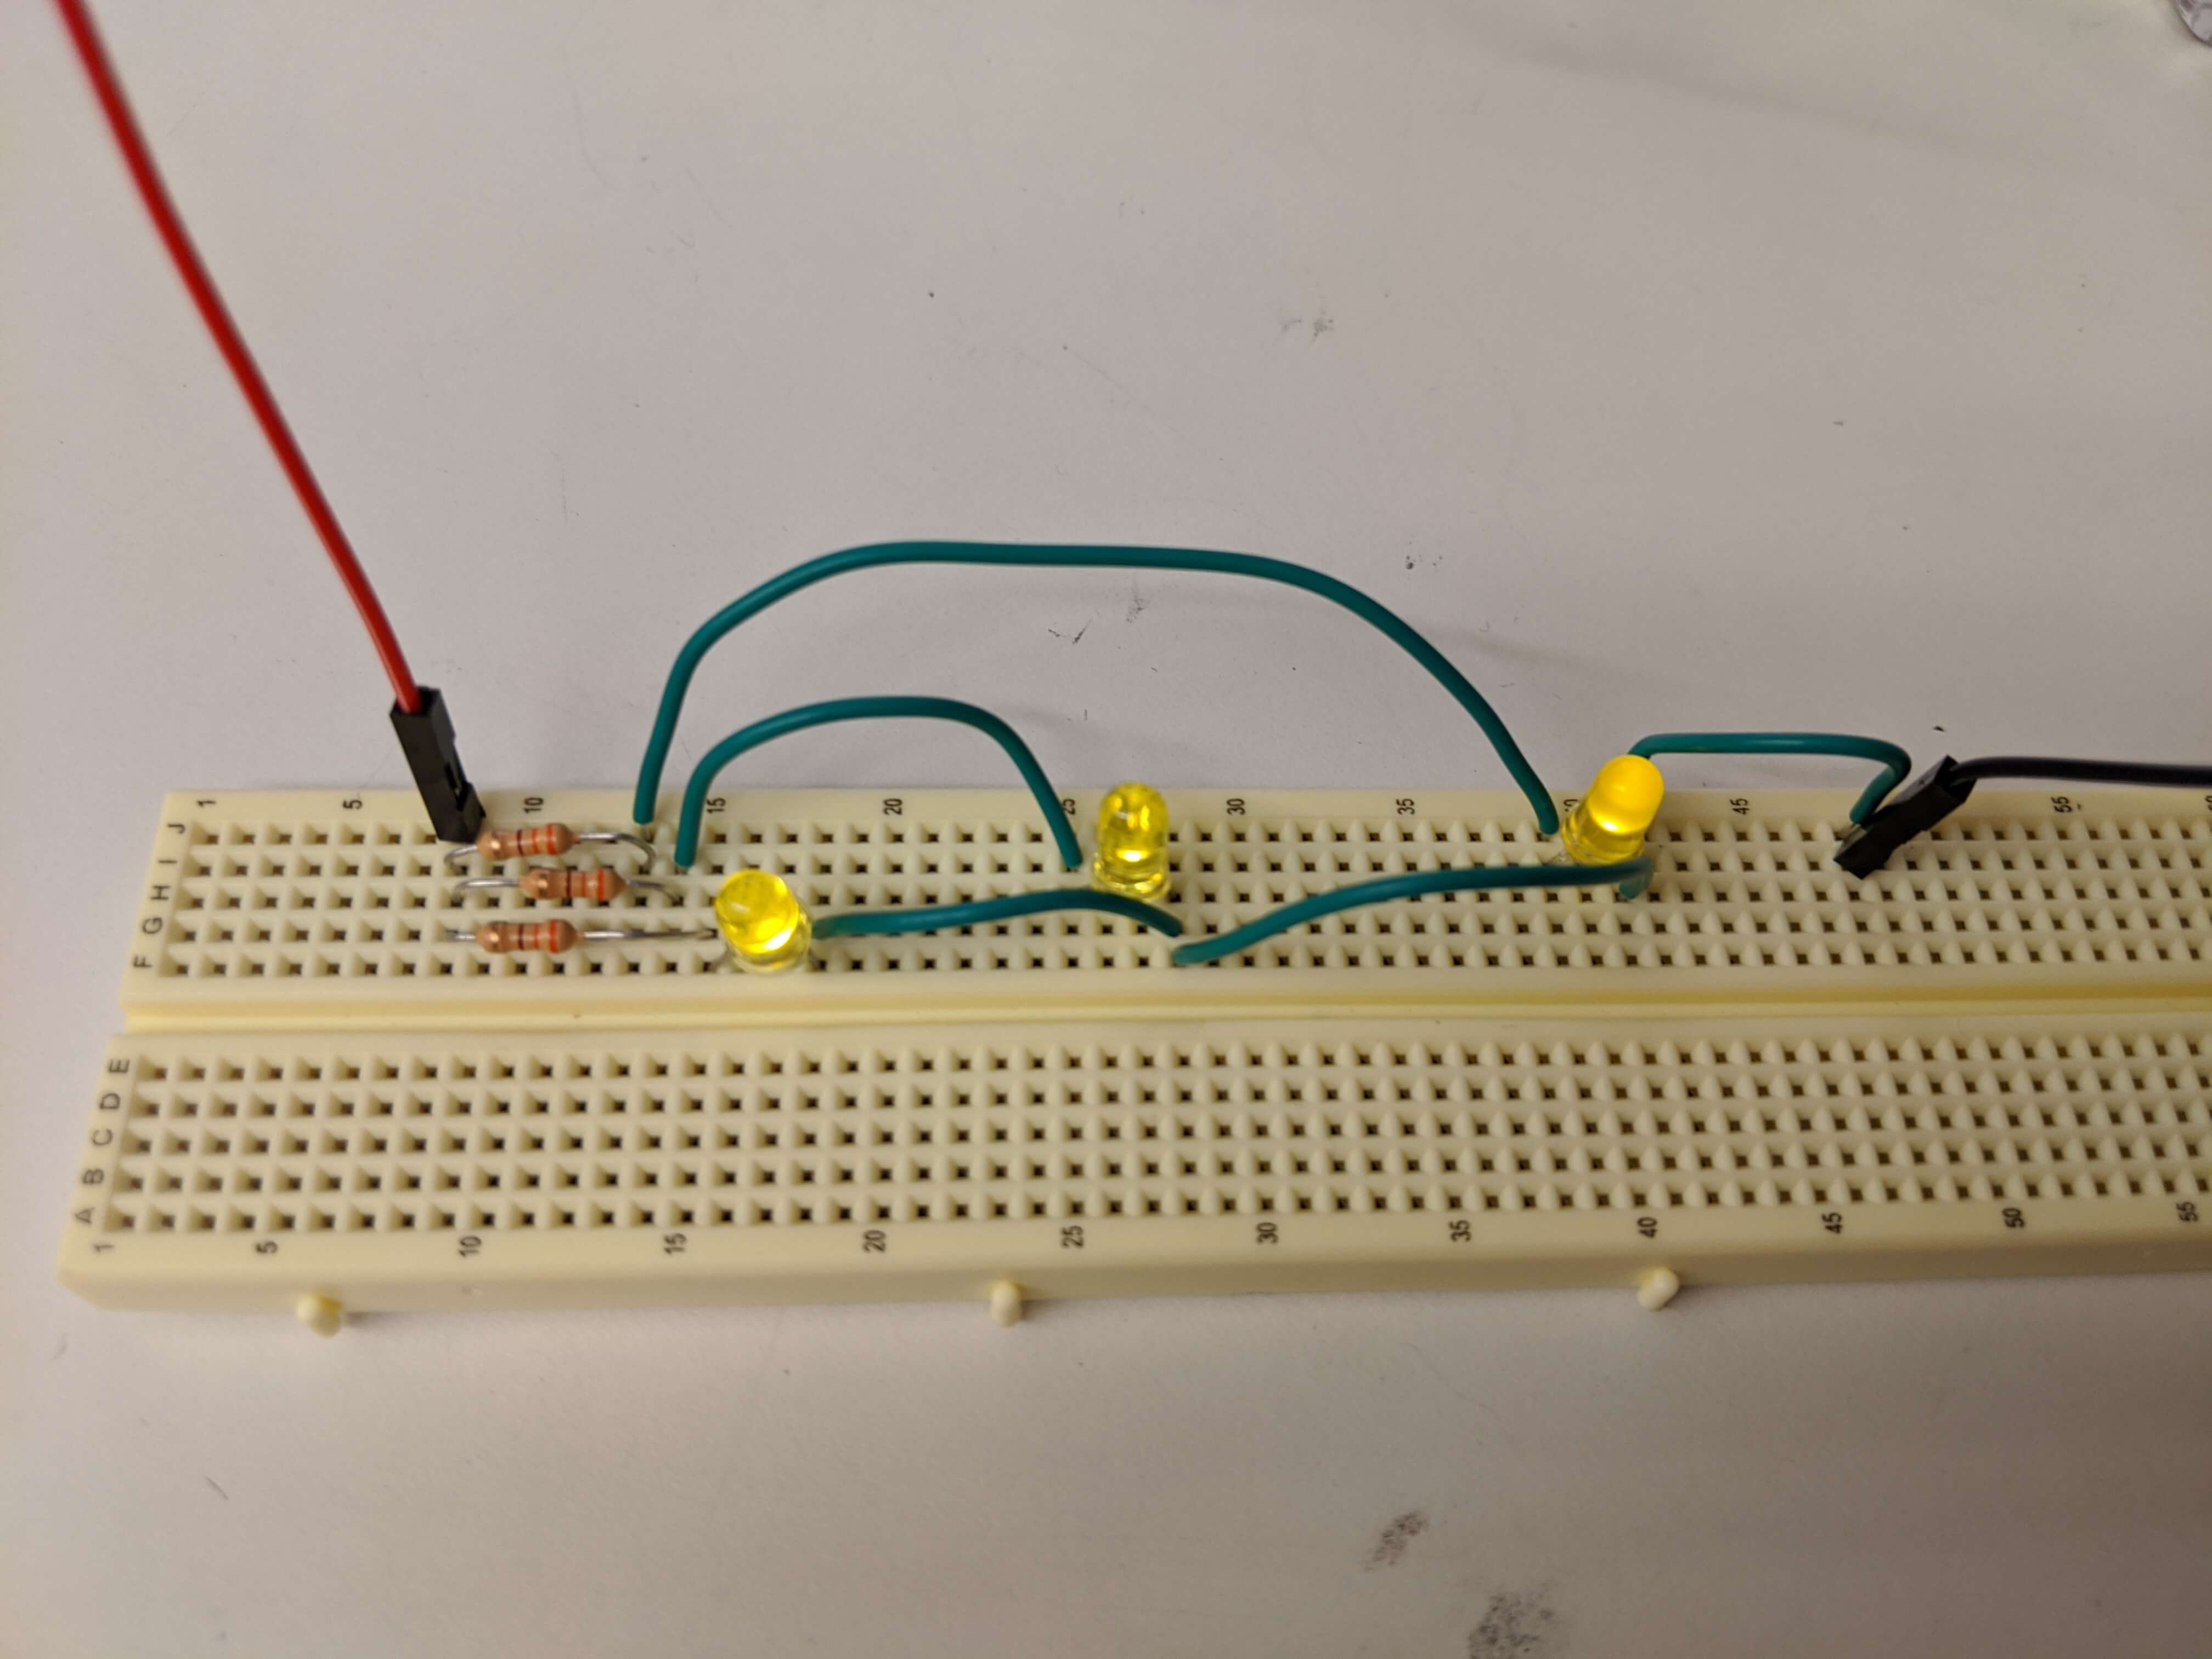
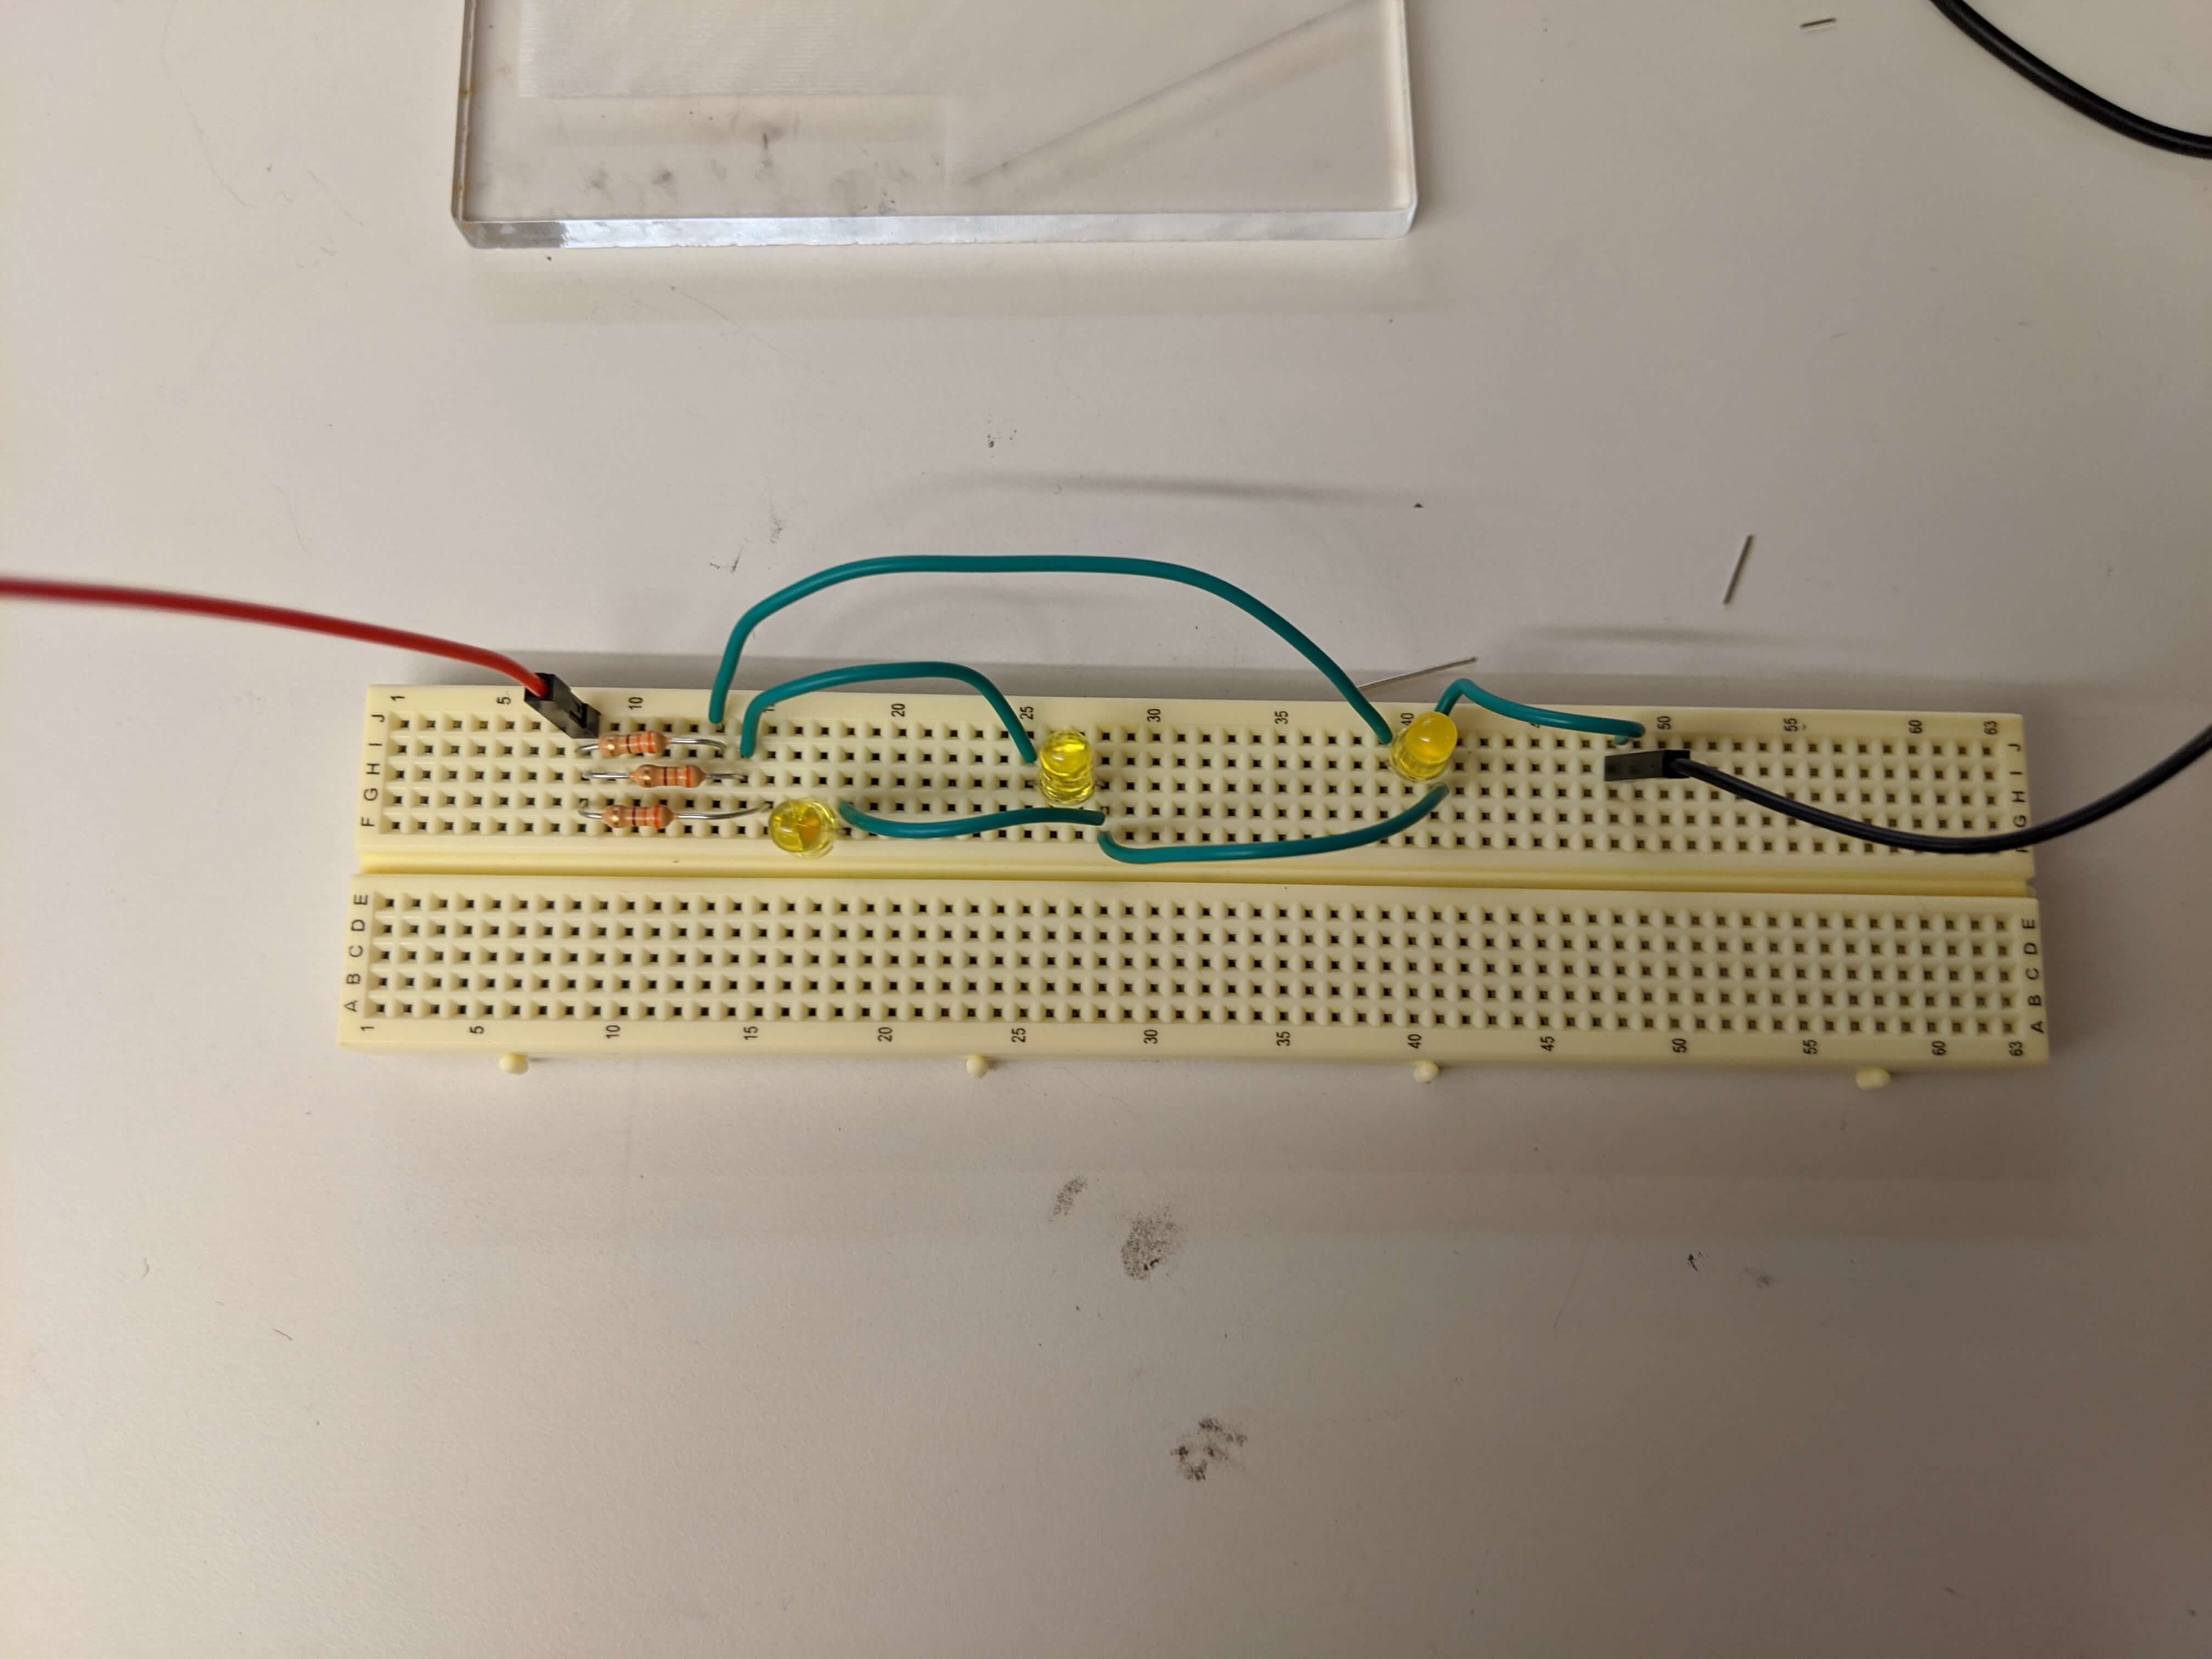
I set up a light board that would apply different densities of light. Each section
of lighting represented a side of the die. This really didn't yield great results either.
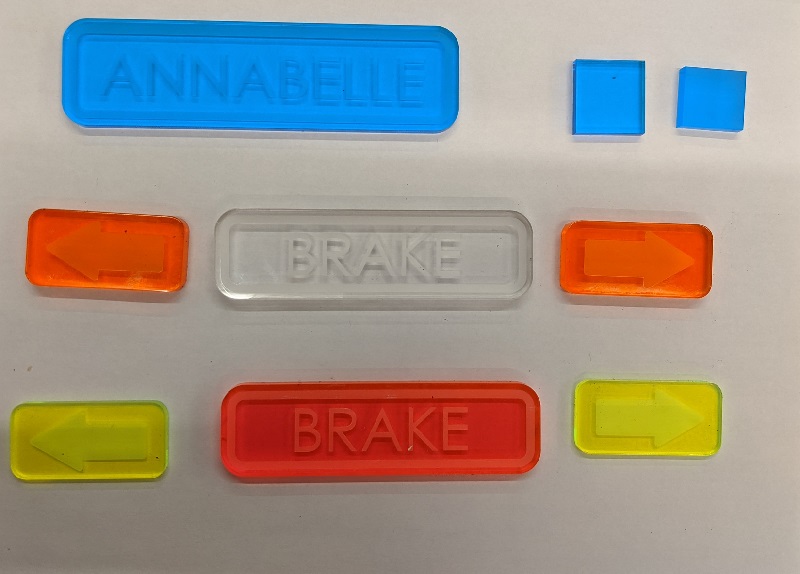
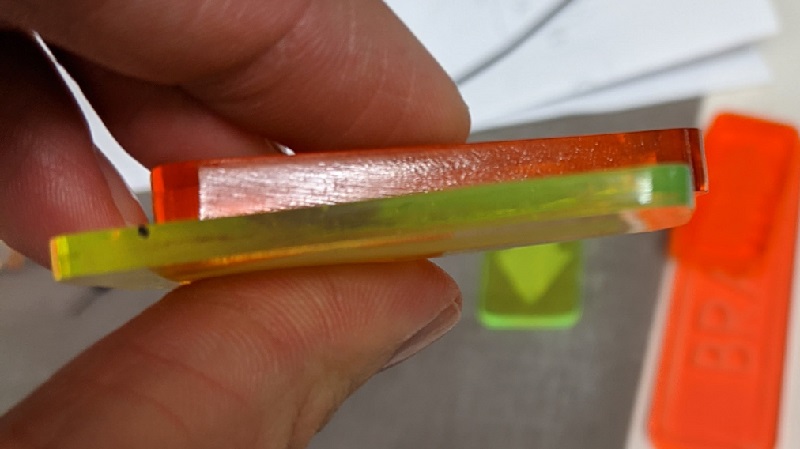
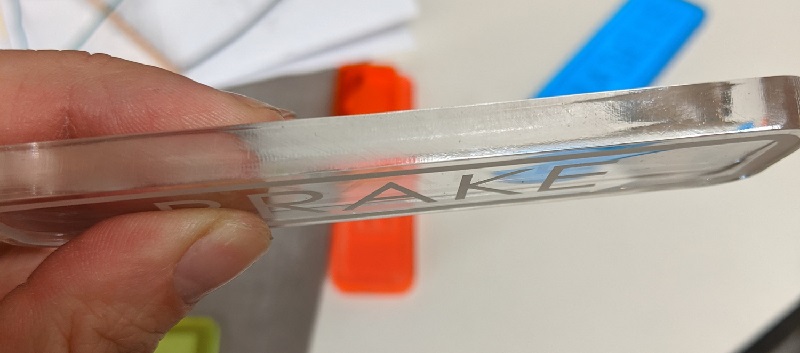
So I continued on with my mission. Ultimately, I tried to emulate the design of the sign as you
enter EDS. Basically acrylic with LEDs on all sides.
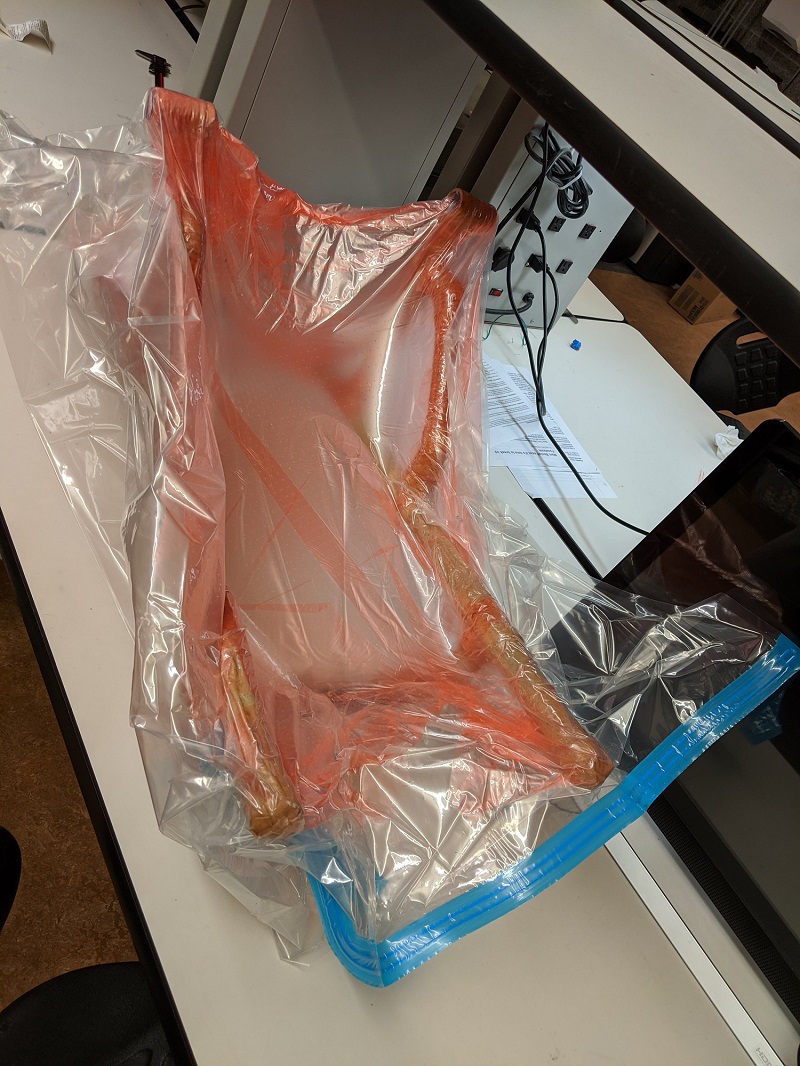
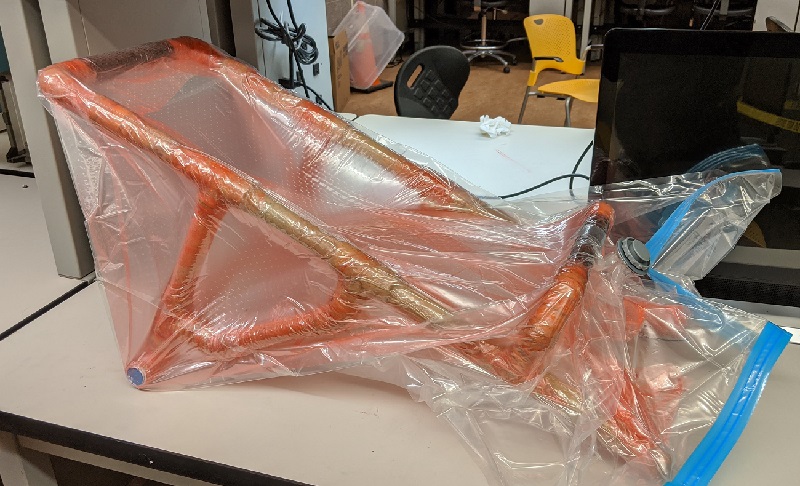
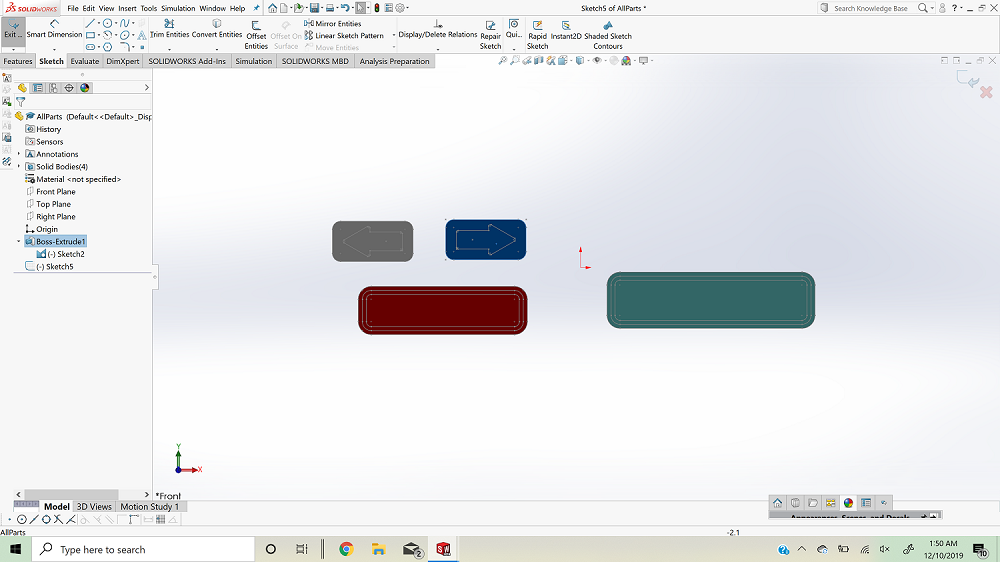
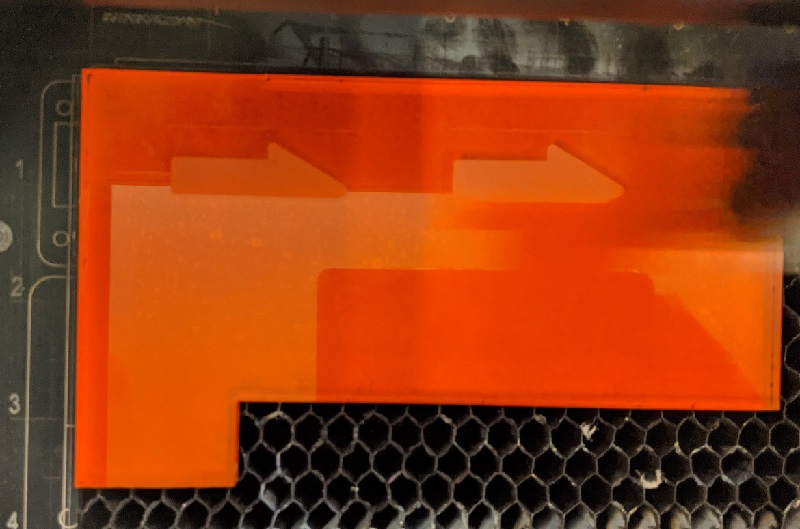
From some CAD drawings to real life acrylic pieces, I was making tangible progress!
After laser cutting and engraving I was able to heat gun the edges to allow for a greater
amount of light to enter into the acrylic.
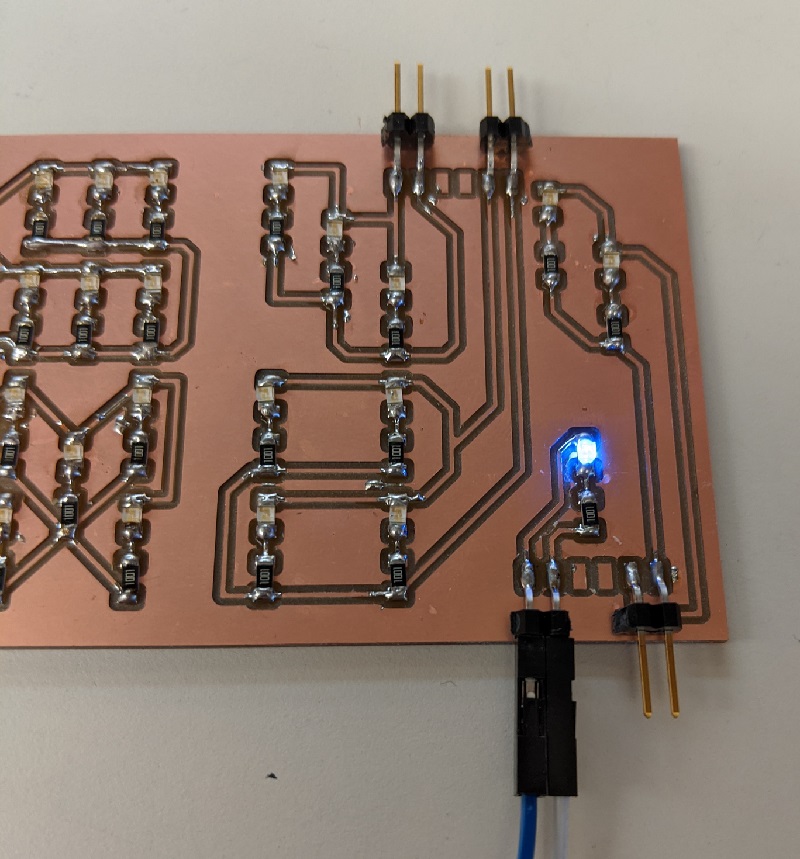
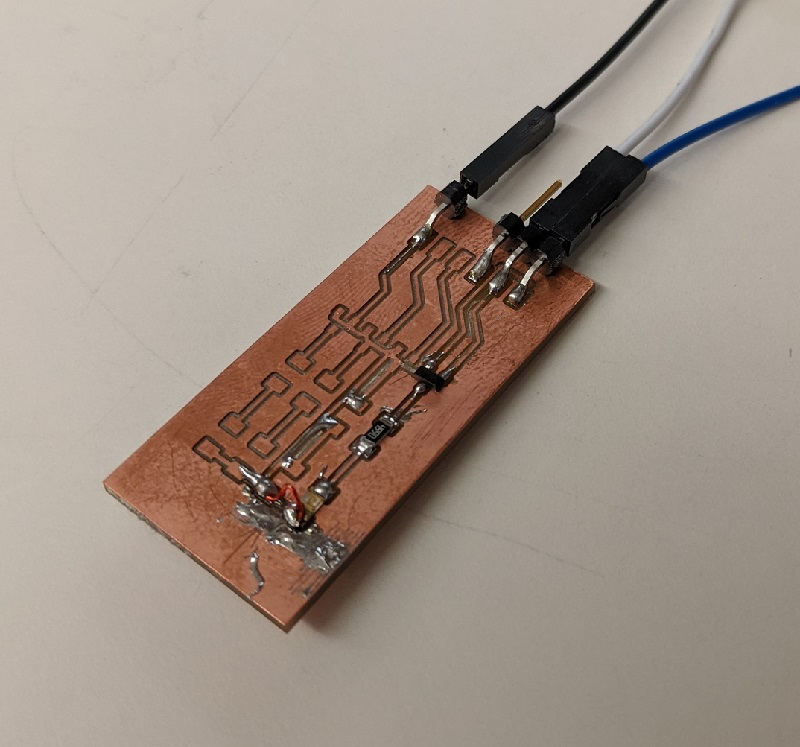
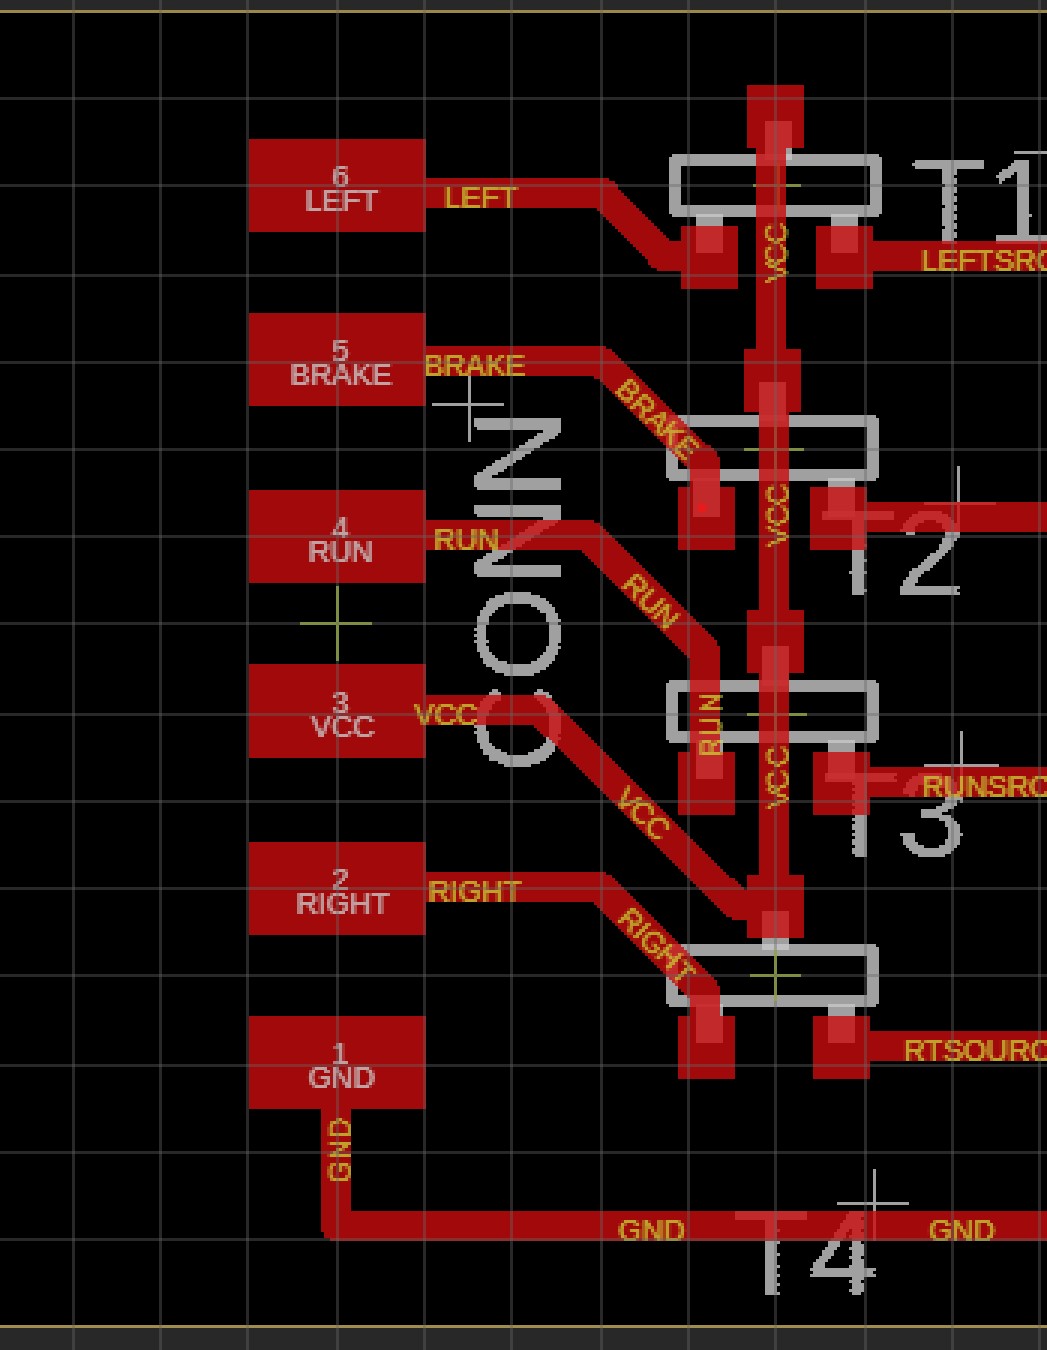
After a few minor adjustments and tests, we were able to determine that P-Type
MOSFETs would be the proper MOSFET to use. After hooking the new board up to Belle's
Accelorometer Adventure Board, we were about to see some actual signals being sent!
Initially my code was set to keep the lights in once they were in. I did end up
changing this in the code very shortly after this by giving each light a clearing condition.
The boards work!
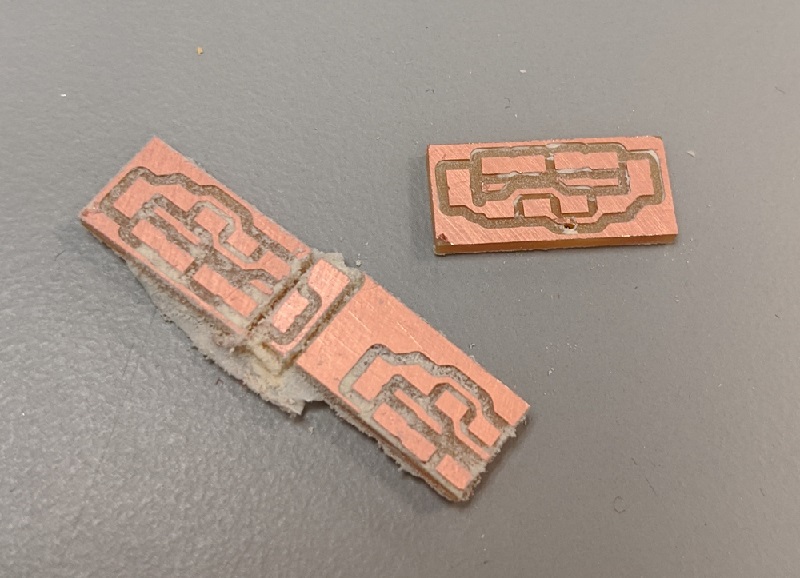
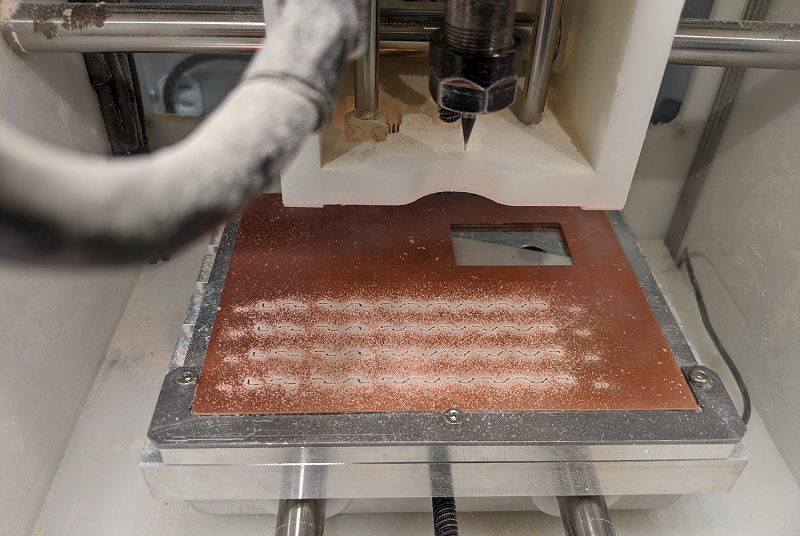
I am usually the queen of taping things down (so much so that I rip traces off).
But when it came to milling an excessive number of light boards, I missed a few. I observed
a few leave the platform, and then one got stuck. I stopped the machine, cleared the position, and
attempted to start back up from where I was. It did not continue with accuracy, so I milled a few more.
I begun my own little production line!
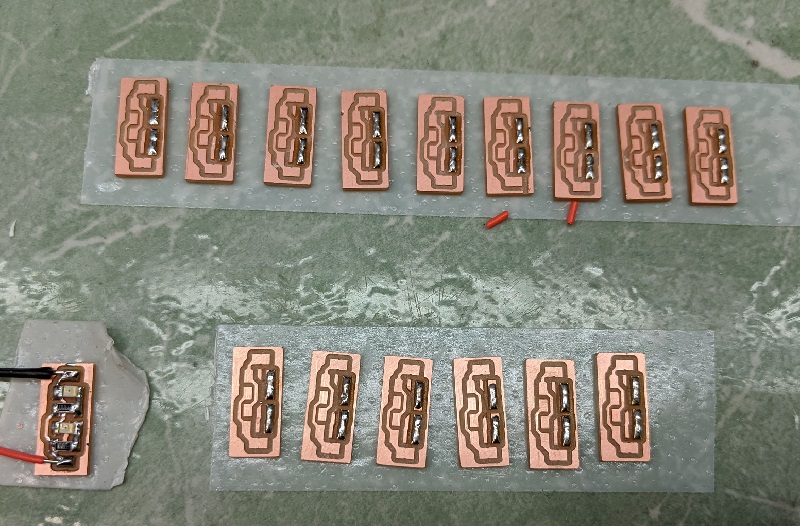
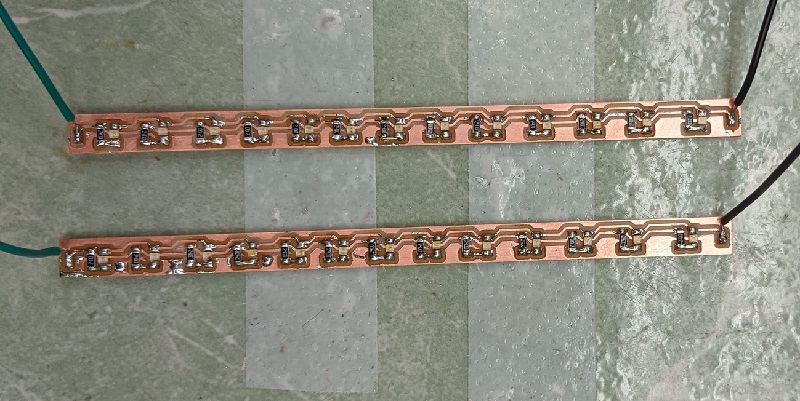
I used a ridiculous number of LEDs when it came to the boards. My solution to this
was to pull off as many as I could from my pre-existing boards.
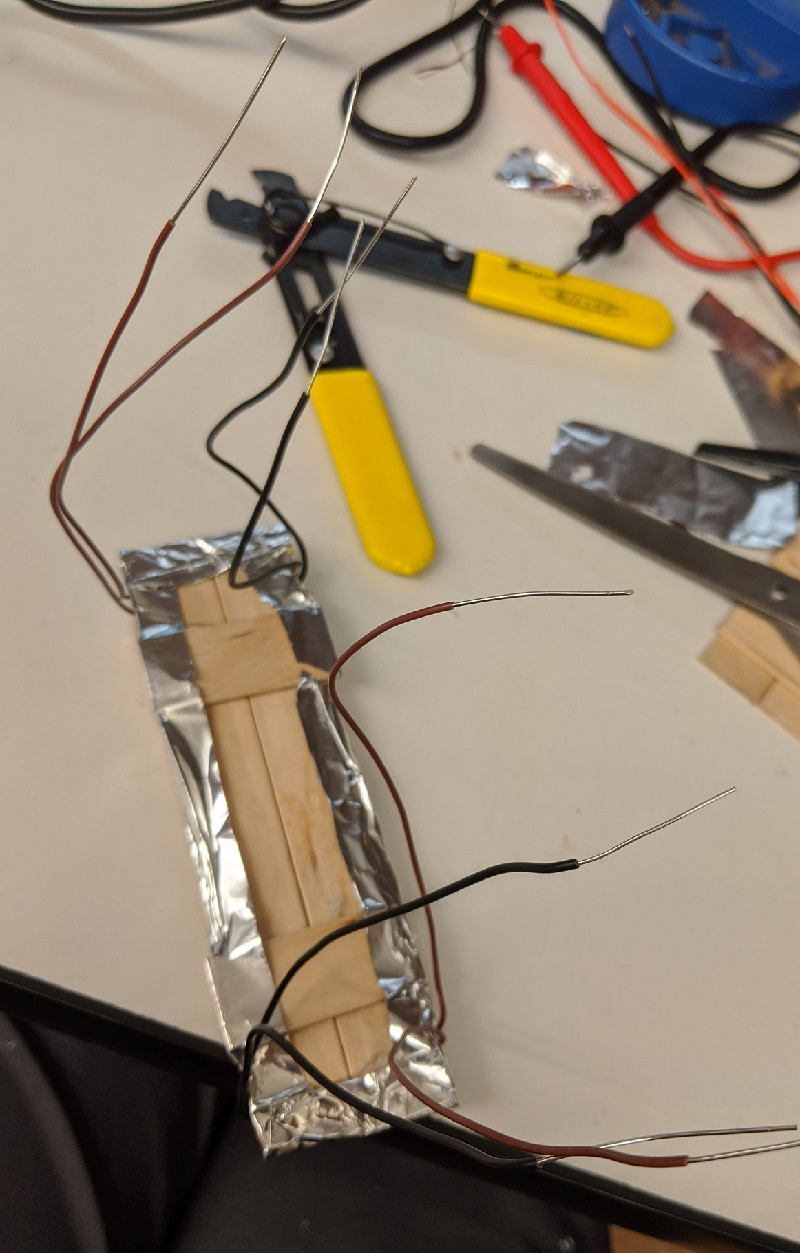
Crunch time was really starting. I used whatever resources were around me. The short list
is: foil, popsicle sticks, and wiring. I quite enjoyed planning and putting these together
from scratch.
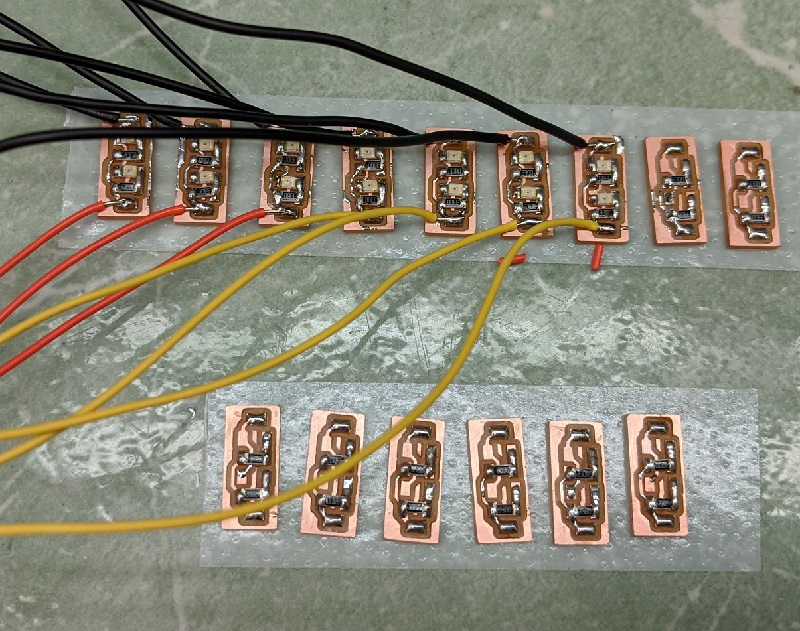
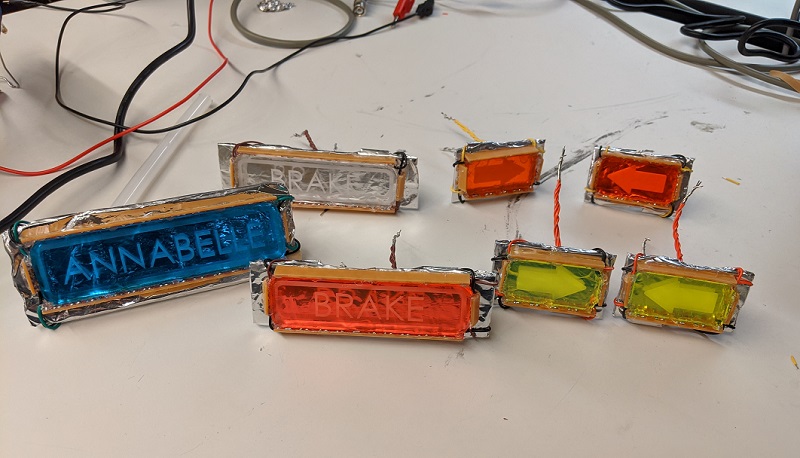
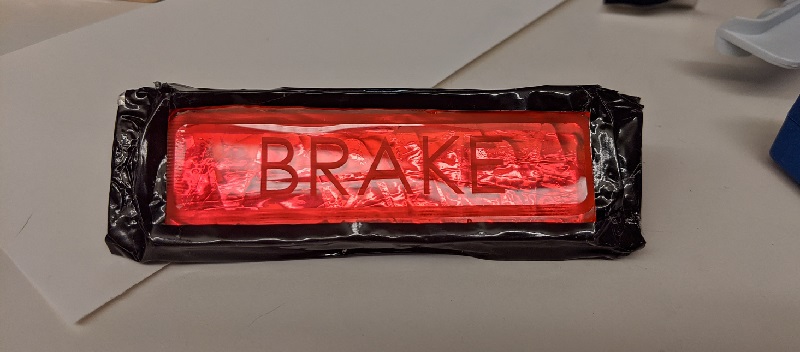
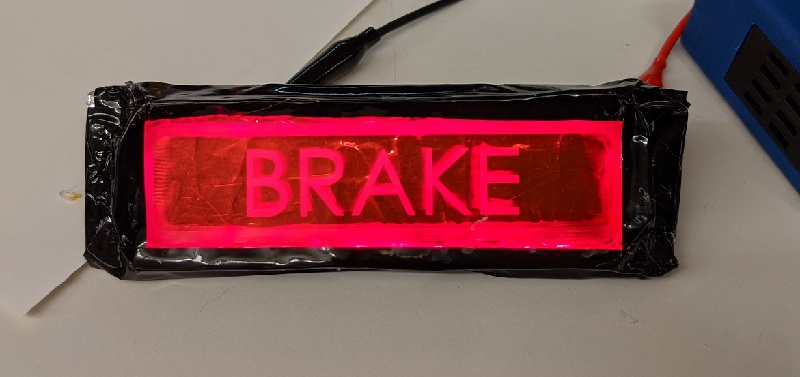
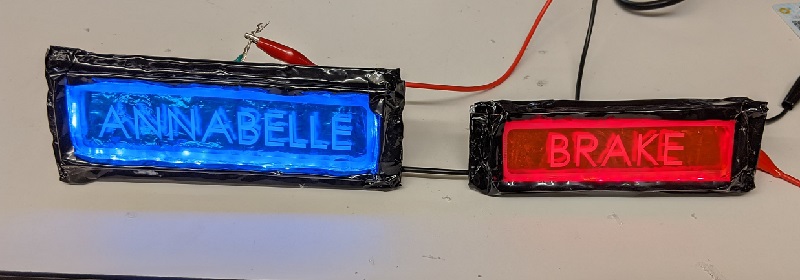
I was pleasantly surprised when all my lights shown fairly bright!
I was able to use vinyl set on foil to make the frames for the light. This added structure
support, and made the lights more presentable. If I had more time, the light frames would have
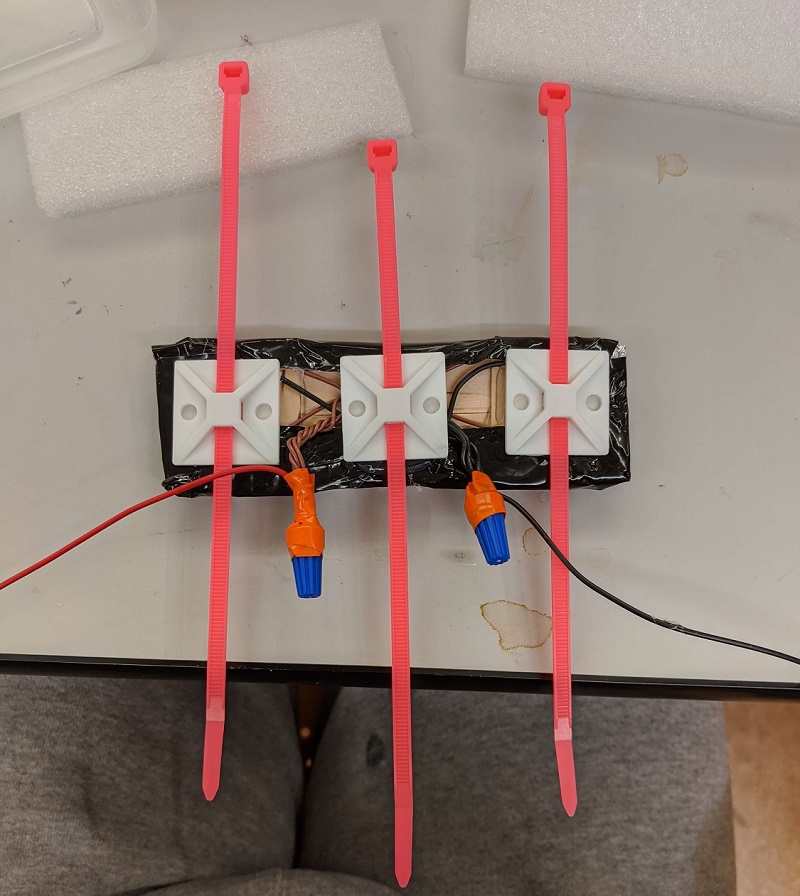
been 3D printed. I twisted all the wires together using twist caps as I knew I would be making
changes with the connections.
Overall I am quite pleased with the lights. I would have changed a few things to
make them look more professional, but this is what I made. I guess the professional
portion was (almost) there.
Anywhere that had exposed wires was taped securely. Next I zip tied the lights on
using brackets and hot glue. To connect these I used a hand held drill to twist the wire at
even intervals.
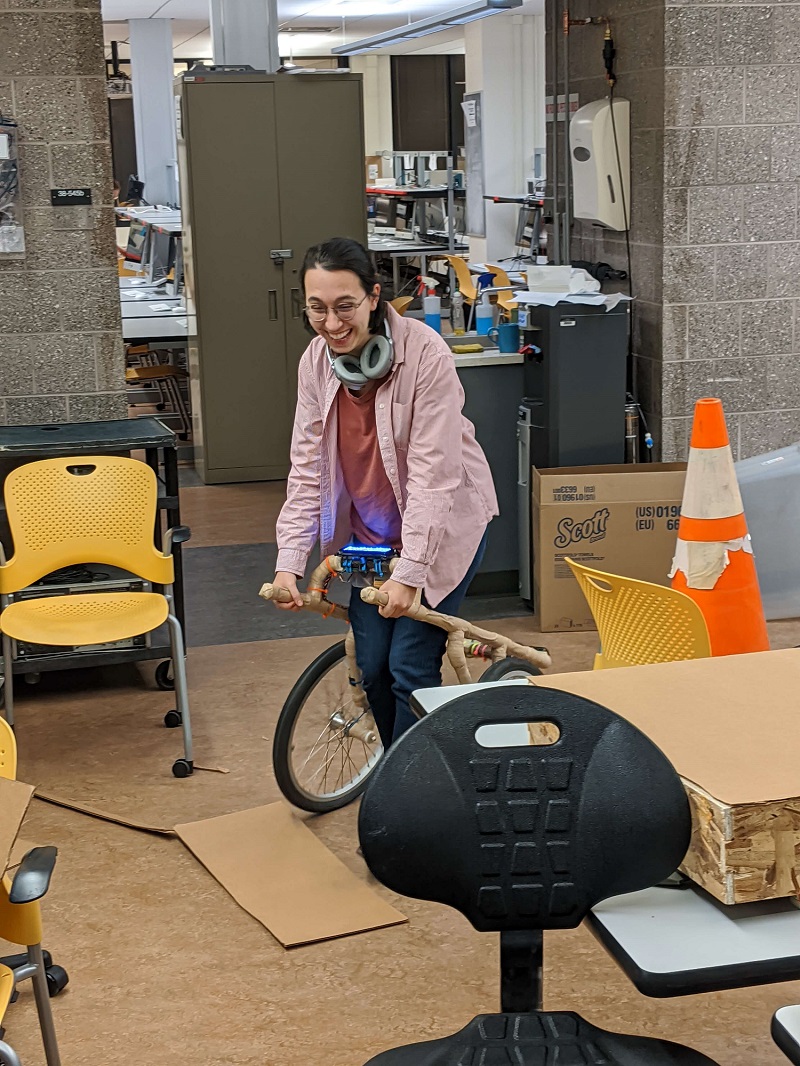
IT WORKS! For now... Hannah was a fantastic test subject!
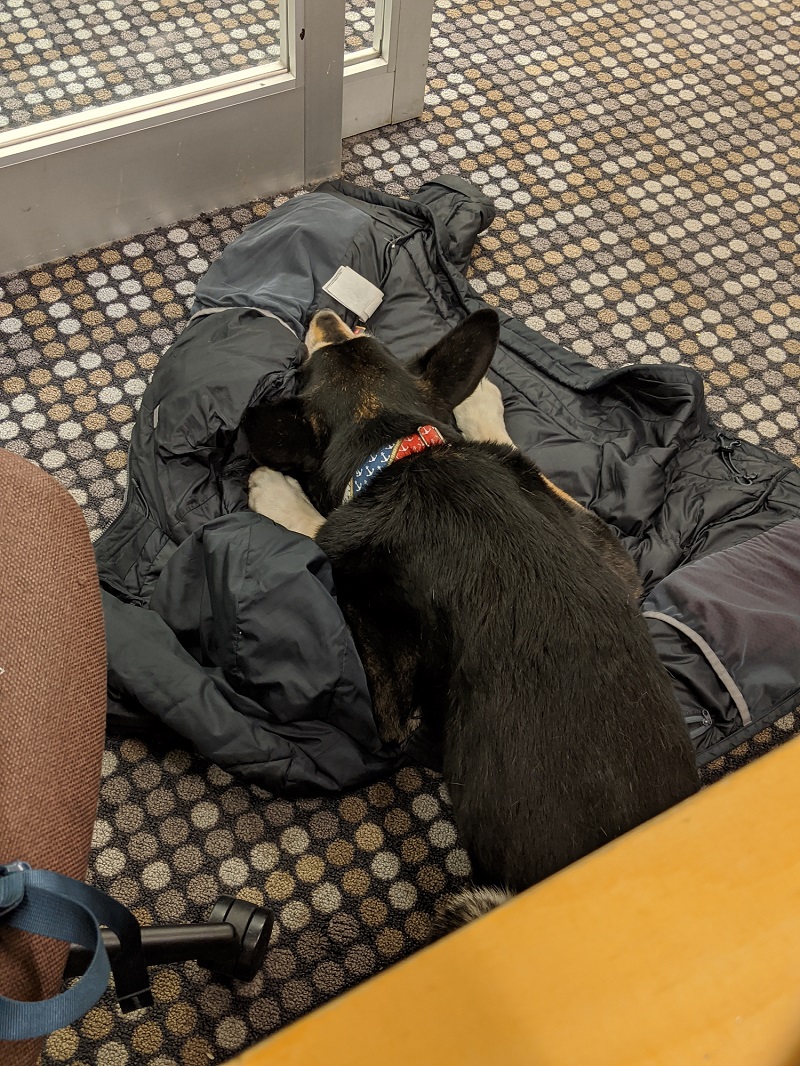
Even Belle gets tired as I am documenting things!
Week 15+ - Debugging and Playing
Because challenges and therefor growth never really stops.
The wheelchair worked like a charm at the Final Presentation, however,
midway through the open house things went astray. So the following morning after
shop clean-up anthony and I spent maybe 7 hours debugging this fault to being a
unaccessible rivet. Here are a couple photos of the chaos.
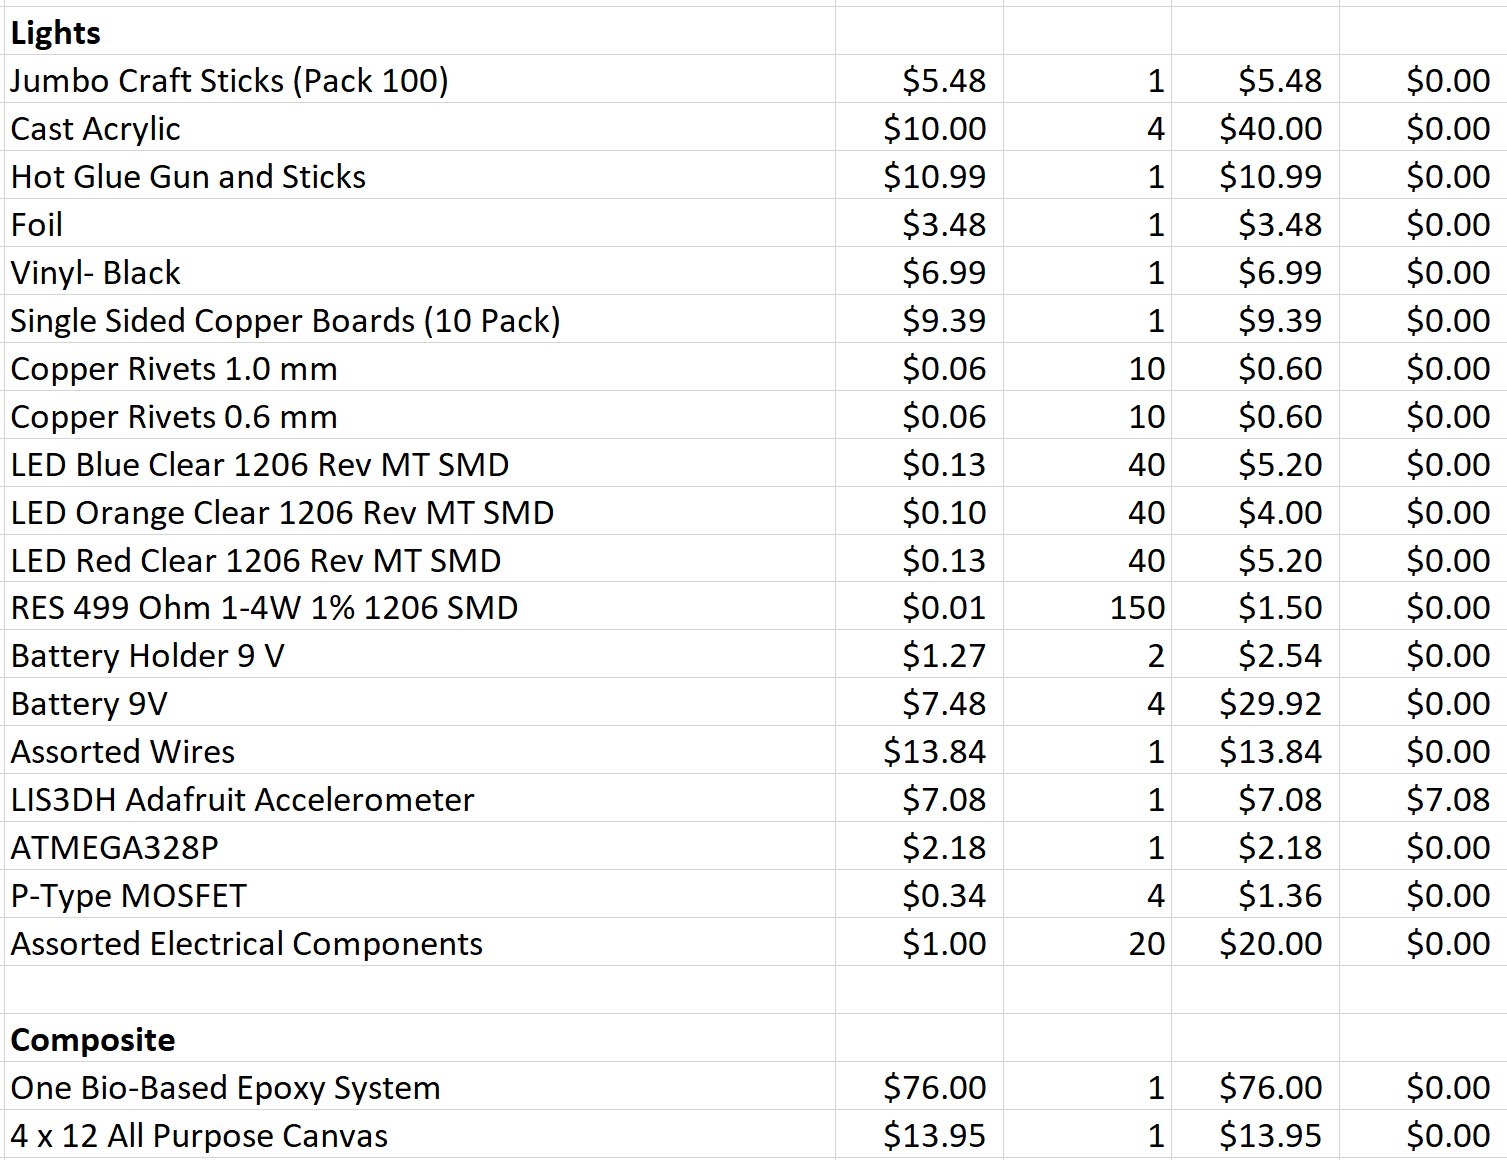
And now for the budget....
Belle has yet to get use to the wheelchair and I am hoping for a nice warm day
where her and I can go to a large field and let her figure out her new set of legs. Please
standby for photos and videos!