Week 02
Computer Controlled Cutting
Group Assignment
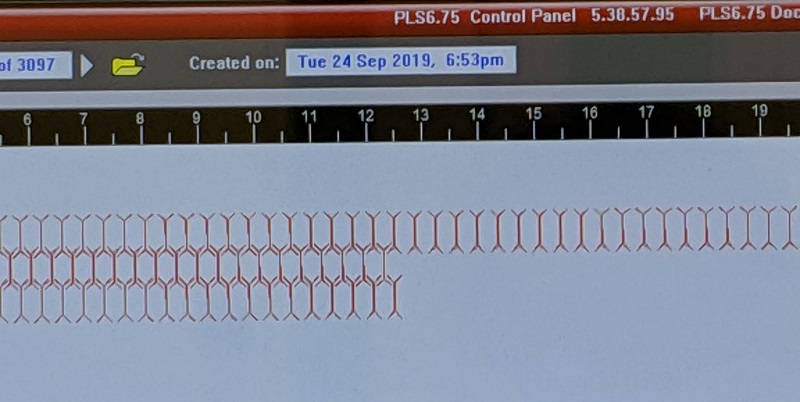
For the group assignment we jumped right in. Using simple shapes and letters we tested red hairline vector cutting, blue vector engraving, and black raster engraving. We played around to see what power, speed, and other settings would create.

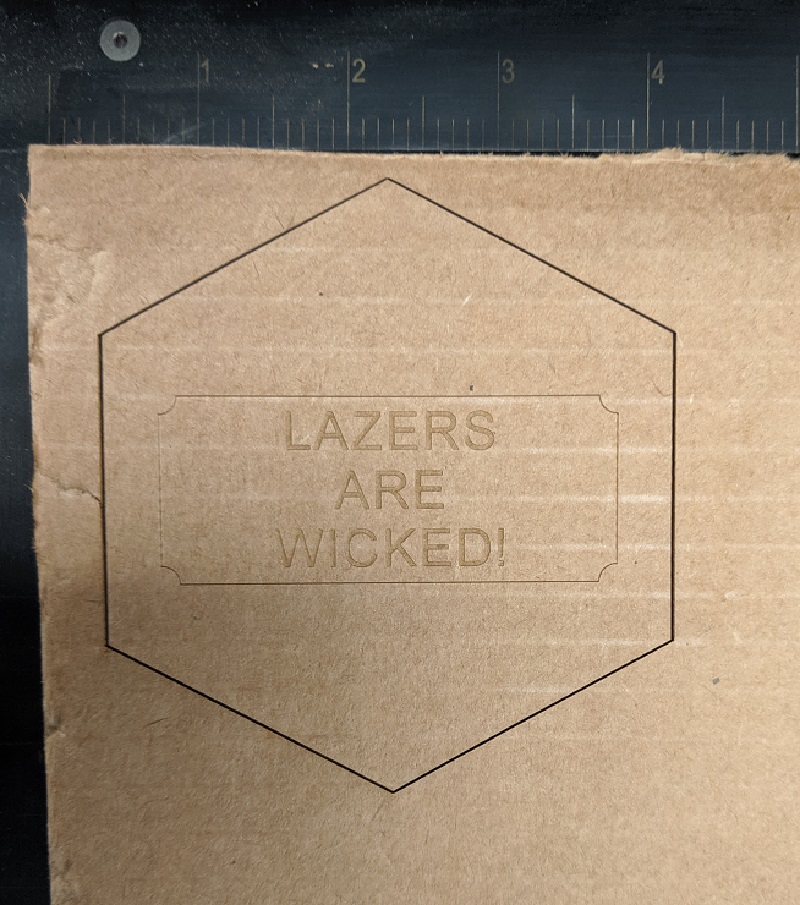
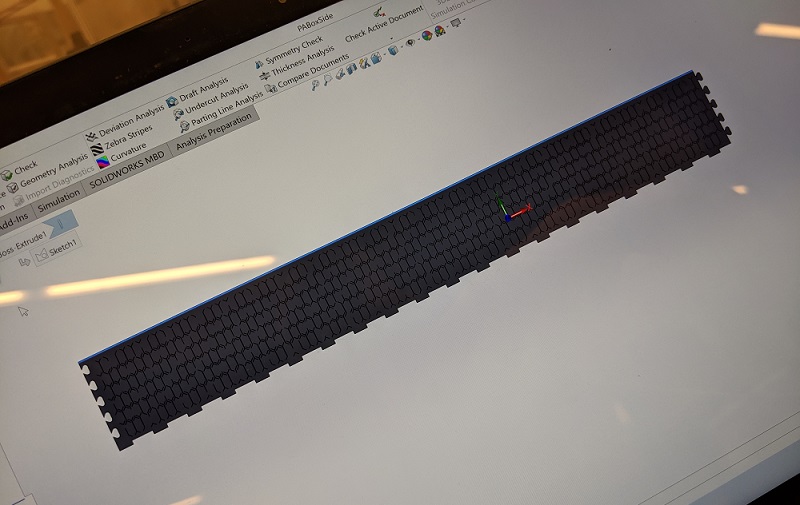
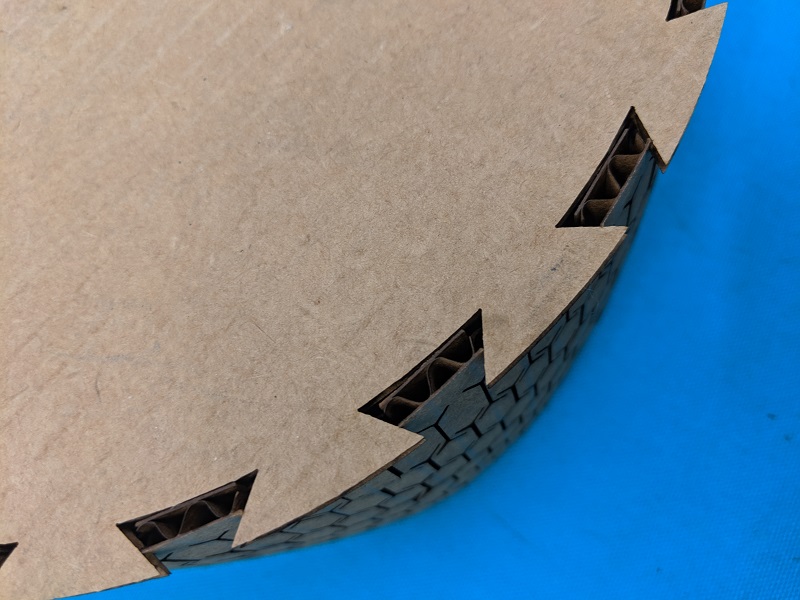
In the image above you can see the final product. We found that we had to lower our SPEED from 16% to 13% to cut all the way through the material's thickness. The MATERIAL THICKNESS was about 0.167", so we set the Material Thickness to 0.177" Our initial MATERIAL setting was Balsa Wood. (Eventually for my product I used Mat.) By lowering the laser's speed it was allowed to travel over the material slower, and therefore able to cut deeper per a given amount of time. We used FOCUS view prior to cutting to ensure the drawing referenced a section of the cardboard. Joints are where KERF (0.005" per the machine's website) comes into play significantly. If the JOINTS are made too tightly, they will not slide into one another, but too widely and the pieces will never stay together. This makes press fit difficult. The FOCAL LENGTH that worked for us was 2.0" and the DEPTH OF FOCUS was ±0.2004.
Vinyl Cutting
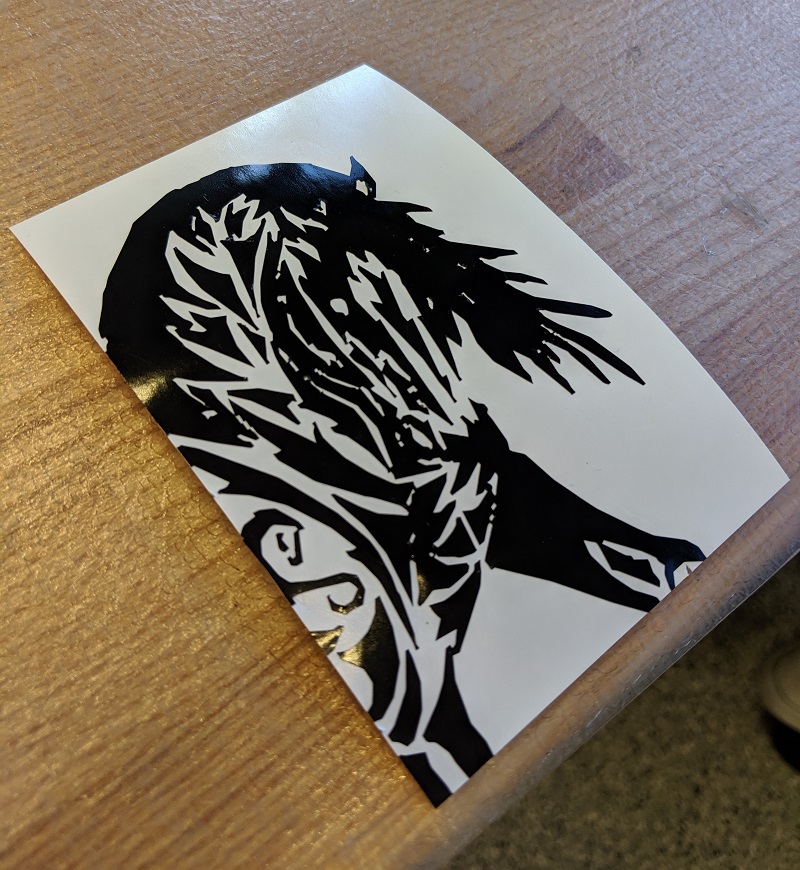
I had no idea what I was going to do for vinyl cutting, but as always I under-estimated the amount of time I would need to spend on it. I chose a tribal horse tattoo to cut. I have always wanted a tattoo, but I am too afraid that once I start I will just keep getting them. Back to actual class type stuff though.
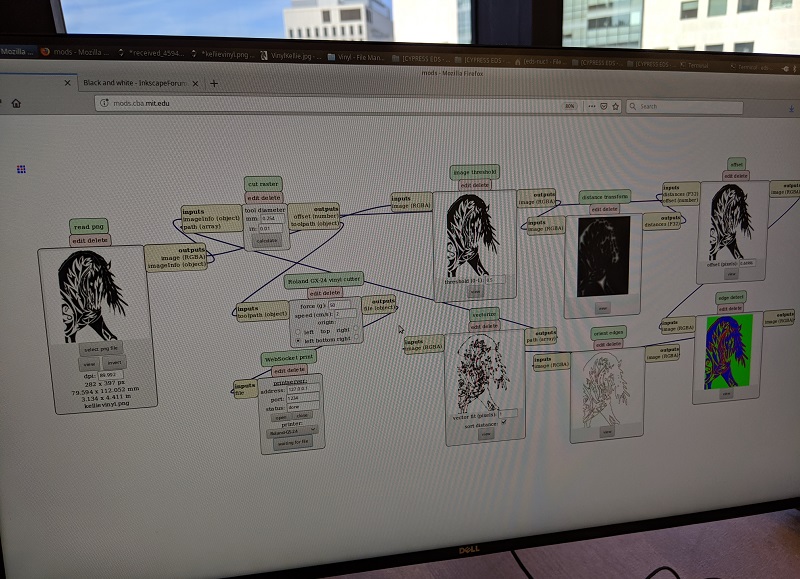
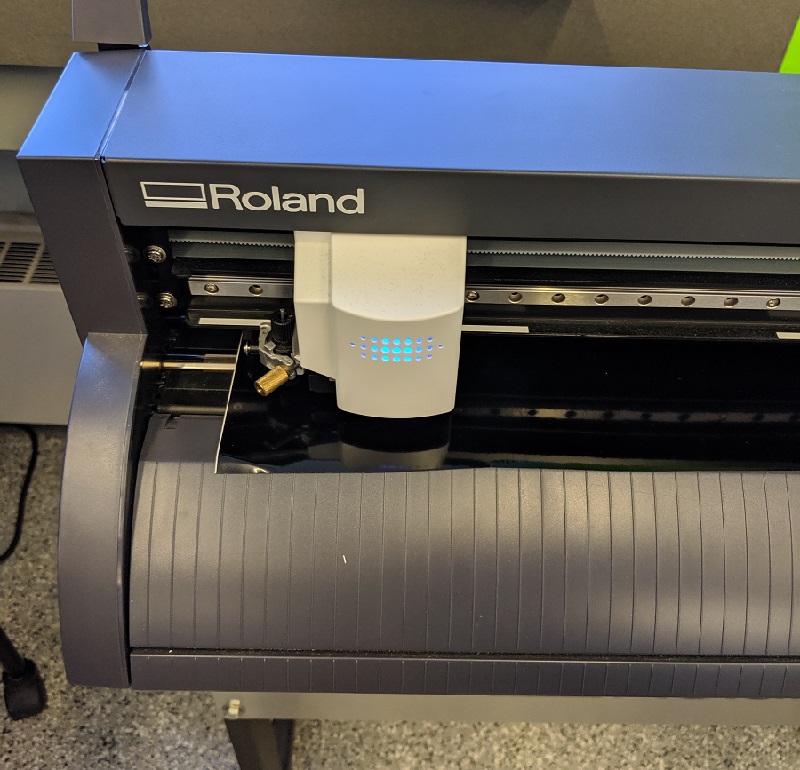
After finding the origin on the Roland Cutter, it was time to feed the vinyl roll. The machine itself was fairly self-explanatory.
Weeding
Growing up I hung out in the garden with my mom weeding. But, this is a whole different skill. Using a couple different tweezers and far too much of my daily patience, I was able to fully weed my horse.

The next step was to just keep weeding, so that is what I did.
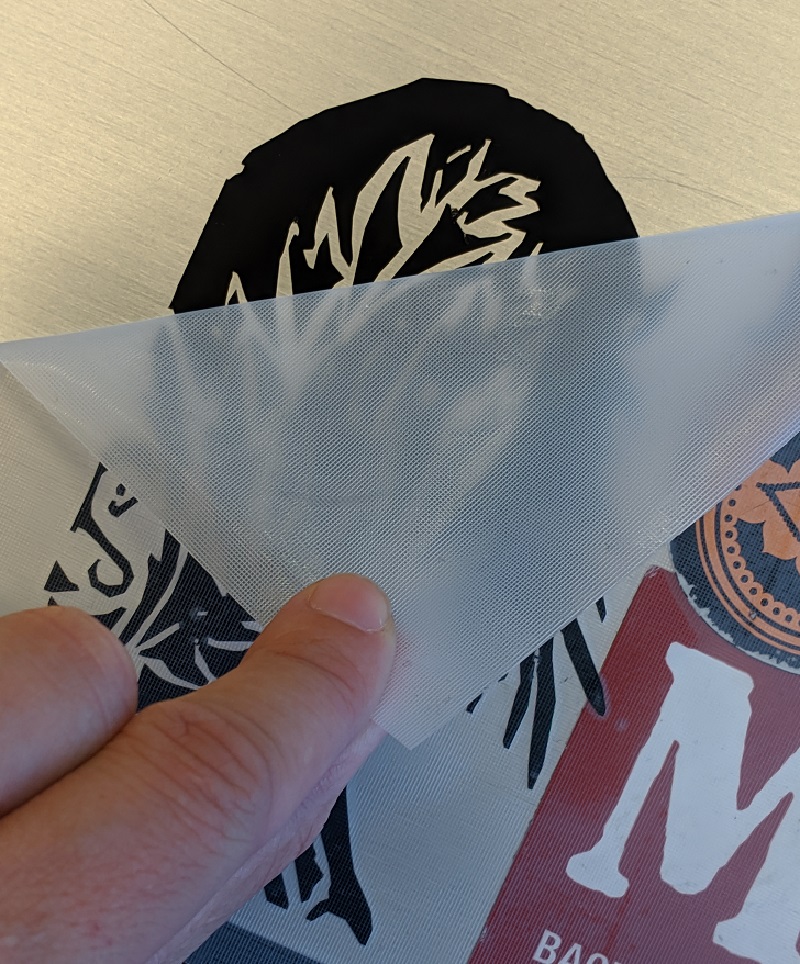
Embossed Adhesive
Next I had to place the embossed adhesive on to ensure a smooth transition over to the laptop. I definitely took my time to ensure that the vinyl was readily attached to the transfer material.


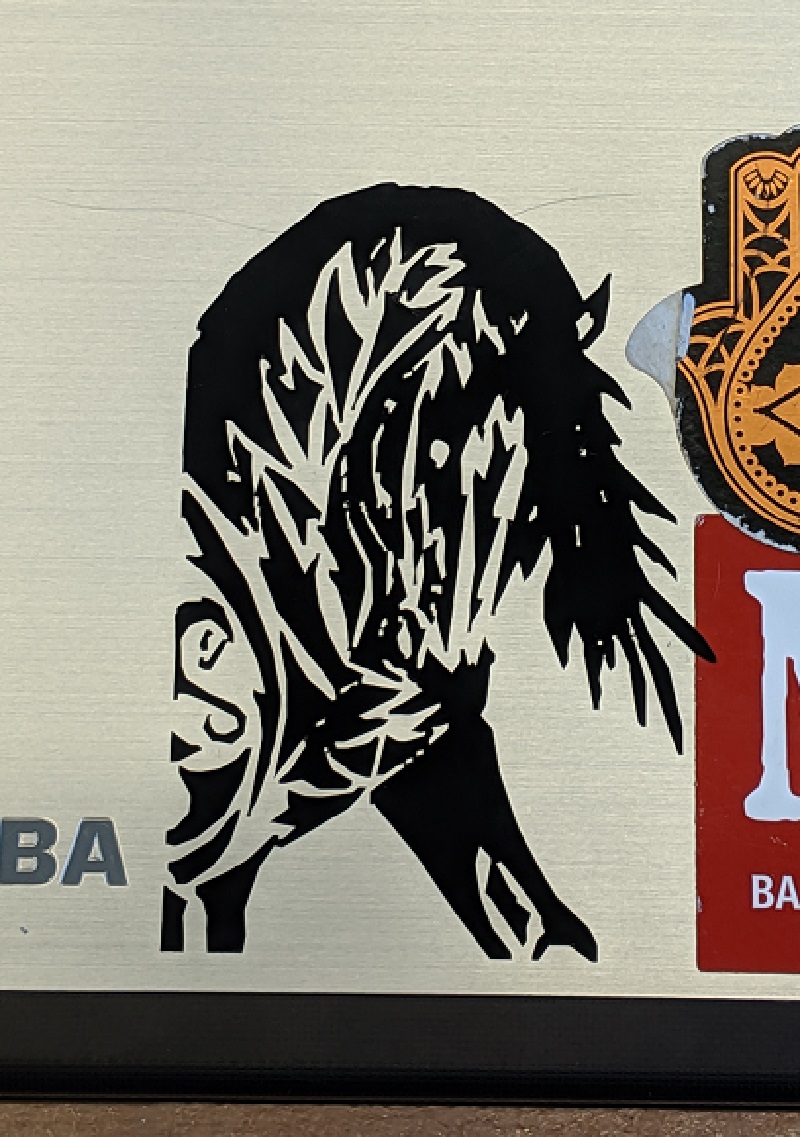
The next step was to transfer the design to the laptop. I have been slowly adding stickers to my old laptop, and I found the perfect spot for the horse. I slowly peeled back the adhesive and with growing anticipation watched my design stick firmly.
End Result
Parametric Design with Laser Cutting
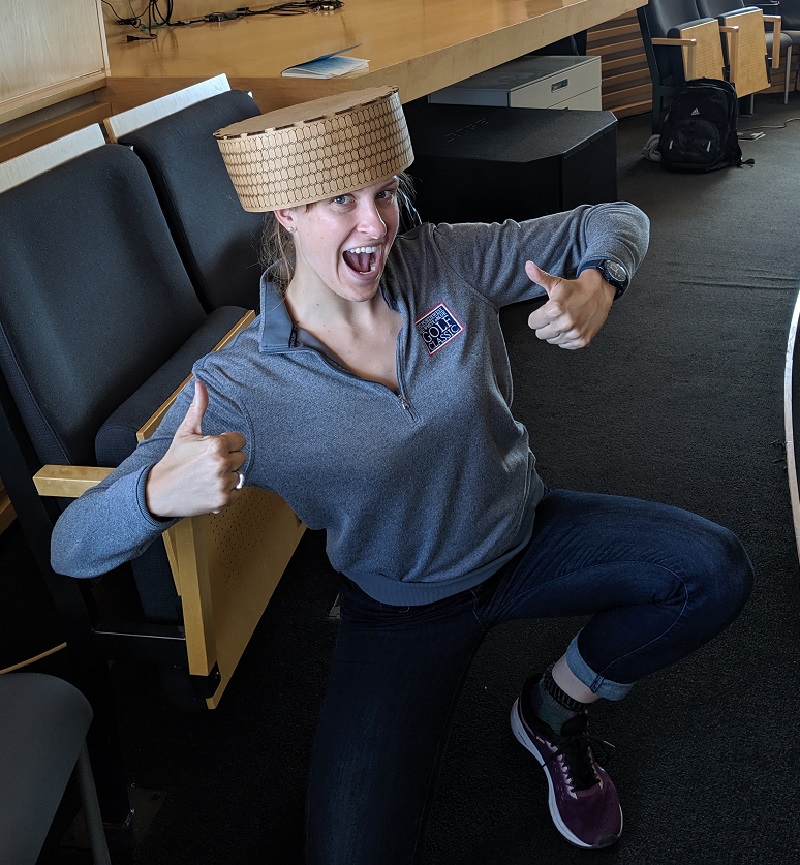
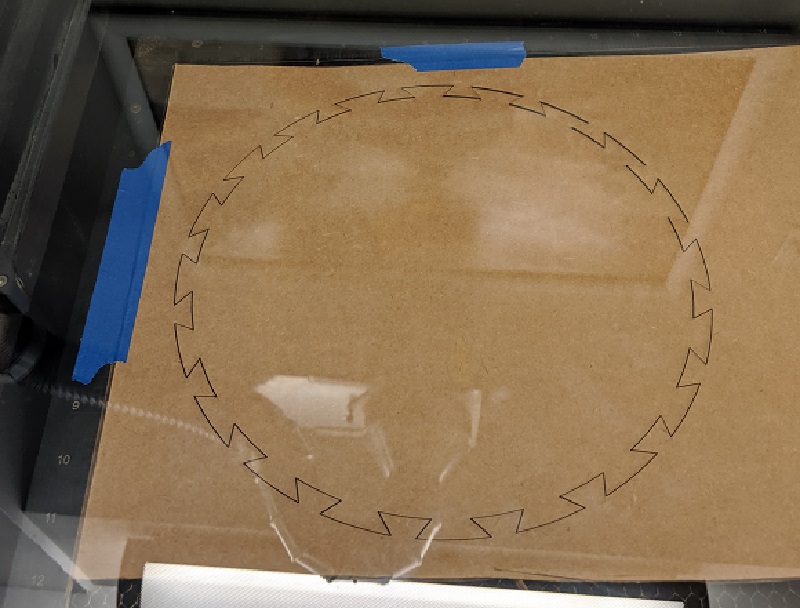
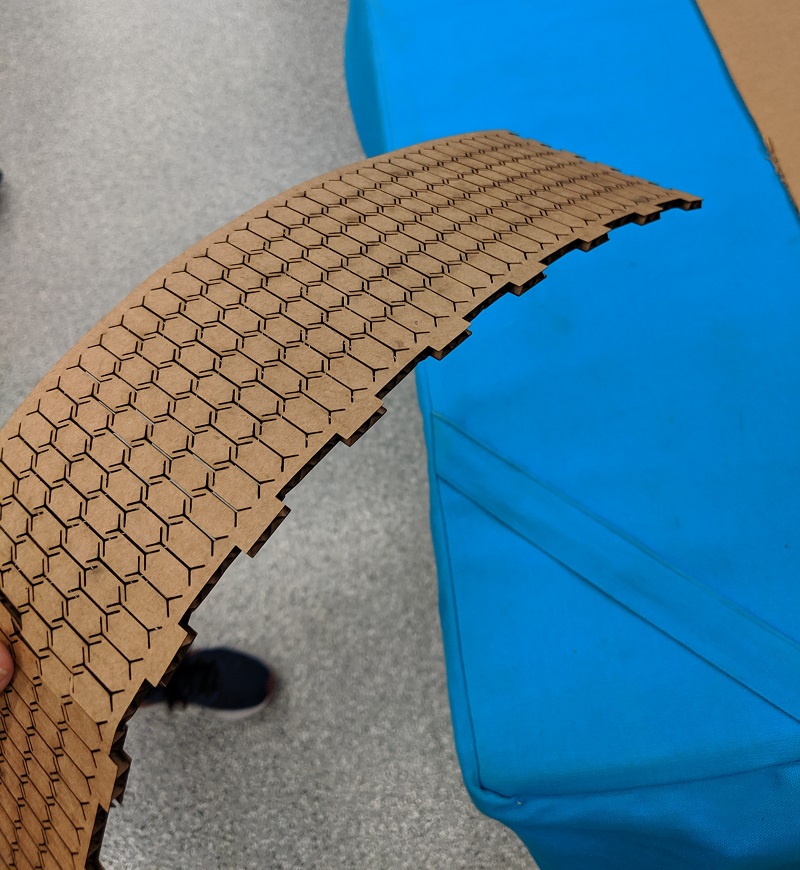
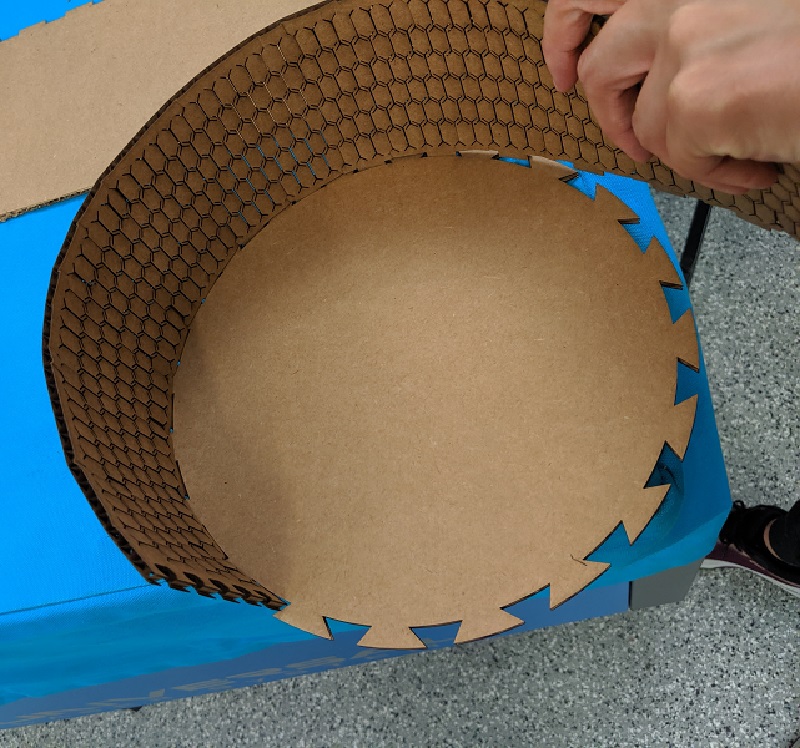
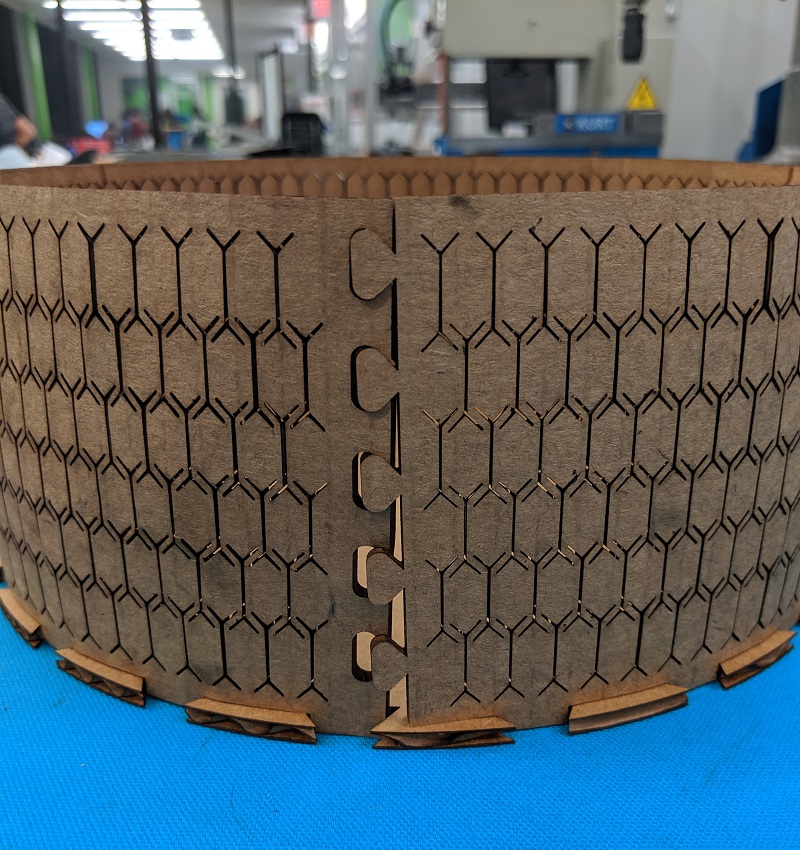
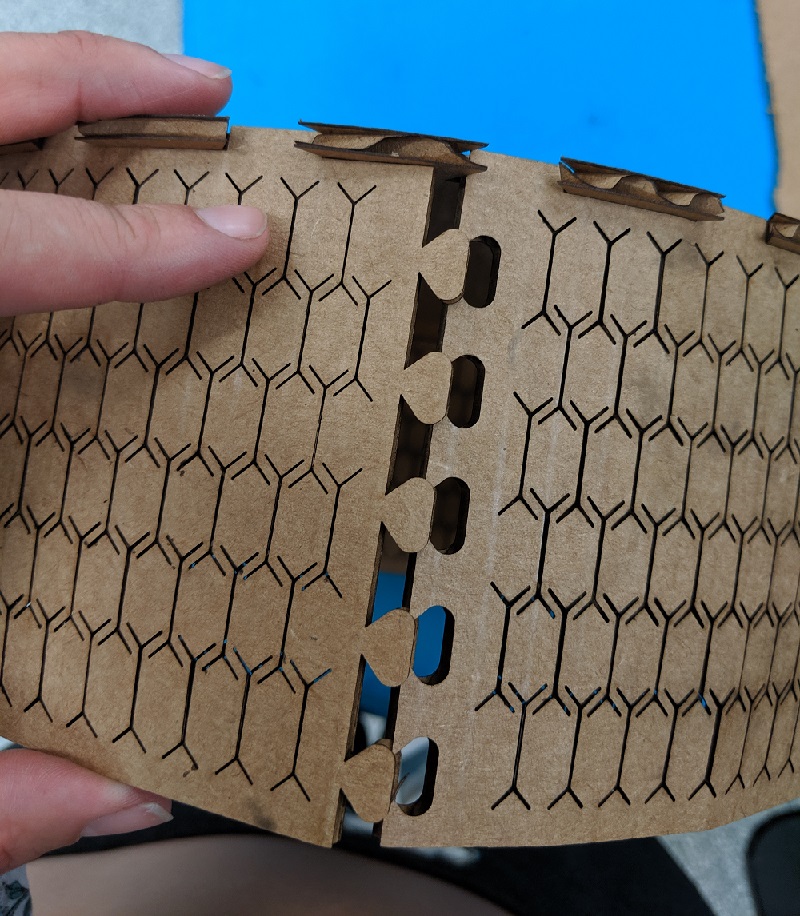
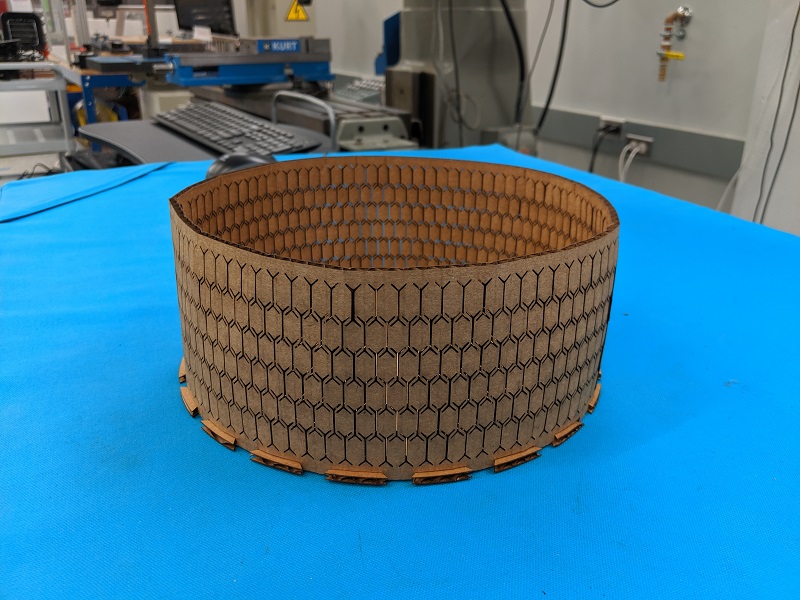
I got to play with a different type of laser this past summer, but I was just as excited to continue with lasers! I had the worst time deciding what I wanted to make. I eventually decided on a box. But, to mix things up a little bit I decided a hat box would be nice. What I didn't realize was that the hinges I needed to incorporate would be a ridiculous use of time. As such, I didn't make a lid. This meant that I didn't make a hat box, but instead a box hat.
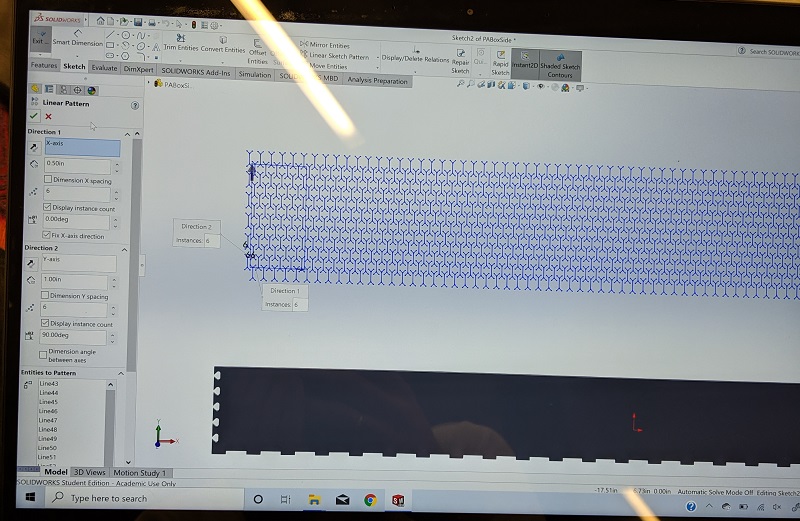
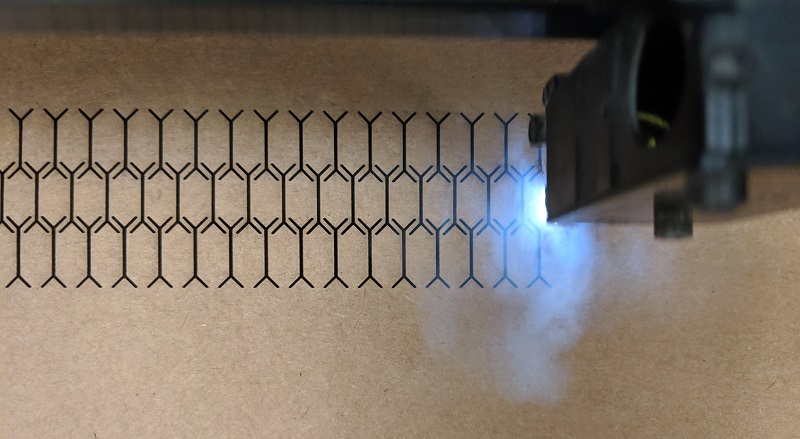
The process for getting a drawing typically isn't that bad. But, when you start adding thousands of features, the computer doesn't quite keep up. I ended up spending a lot of time waiting on my computer run changes.
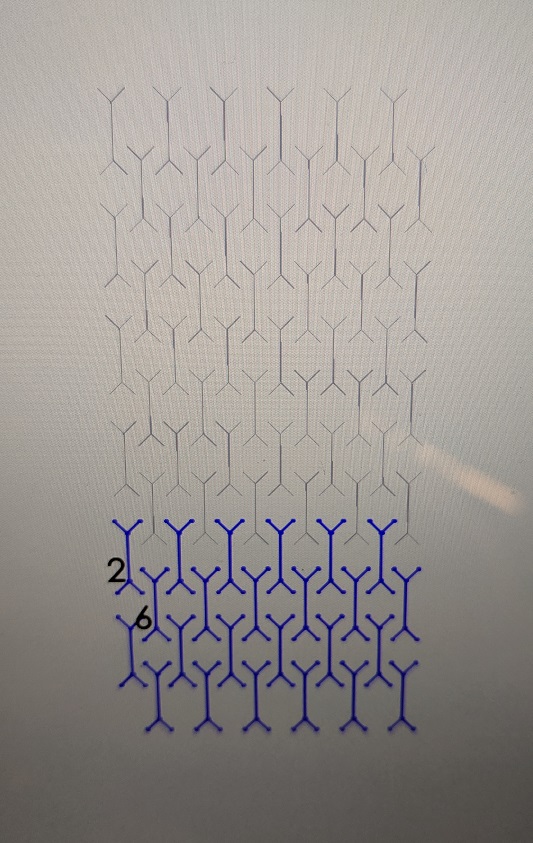
I tried to approach drawing the pattern from a few different ways. I tried on a 2D pattern and sending a linear pattern to the right/left and up/down. But that made it almost impossible to change any other parametric items on the drawing. So instead, using a 3D model, I extruded through the material to make the hinges. In 3D the adjustments were easier to accomplish.
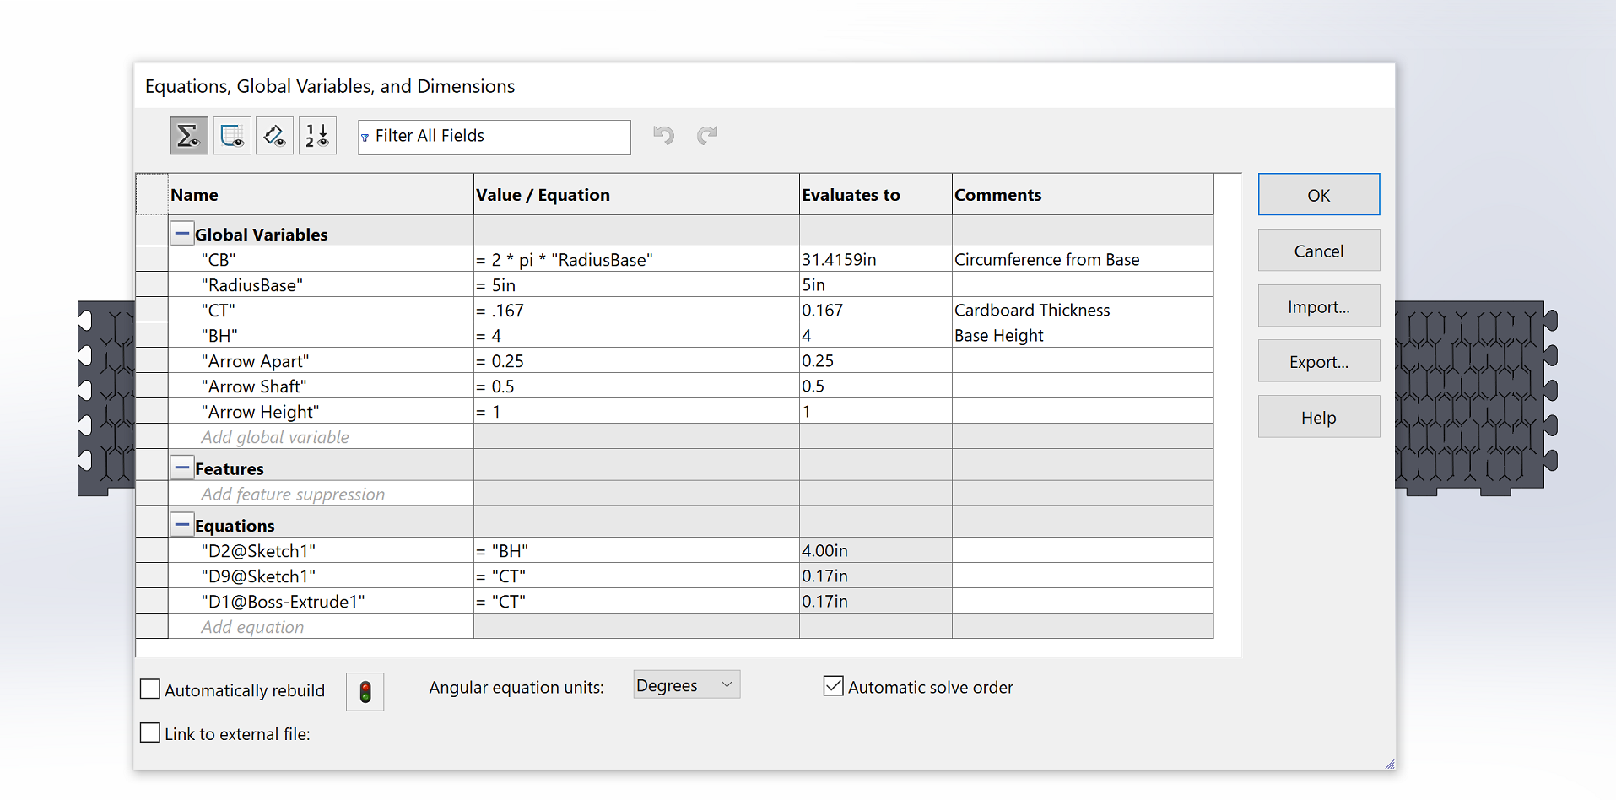
The next few steps involved loading the drawing into the computer that runs the cutter. After adjusting the settings to Mat 9% power, and ensuring that my 31.7" drawing was centered into the machine, things were about to finally happen. After ensuring focus, bed height, and compressor running, it was go time!


Summing Things Up
I learned a bunch this week, my main victory was working on the website. I am slowly getting all of my stuff caught up. Losing my laptop (repairs) for that first week was not great timing. Overall I learned a ton about SolidWorks and I learned how to adapt my initials plans as needed and in a timely manner.