week one
computer-controlled cutting and websites
laser cutter
kerf = ~0.028"
- finding kerf: to find kerf, we laser cut squares of cardboard and measured the difference between the intended height and width (1"x1") and the measured heights and widths of the squares (1"-around 0.972")
joint clearance = 0.159"
- finding joint clearance: thickness of cardboard 0.187"-kerf 0.028"
focus = use the focusing tool on 0.187" thickness cardboard
As for speed, power, and rate, we started by using the given settings for soft wood>balsa, but decided to lower the speed from 15% to 10% so that the cardboard would surely cut all the way through.
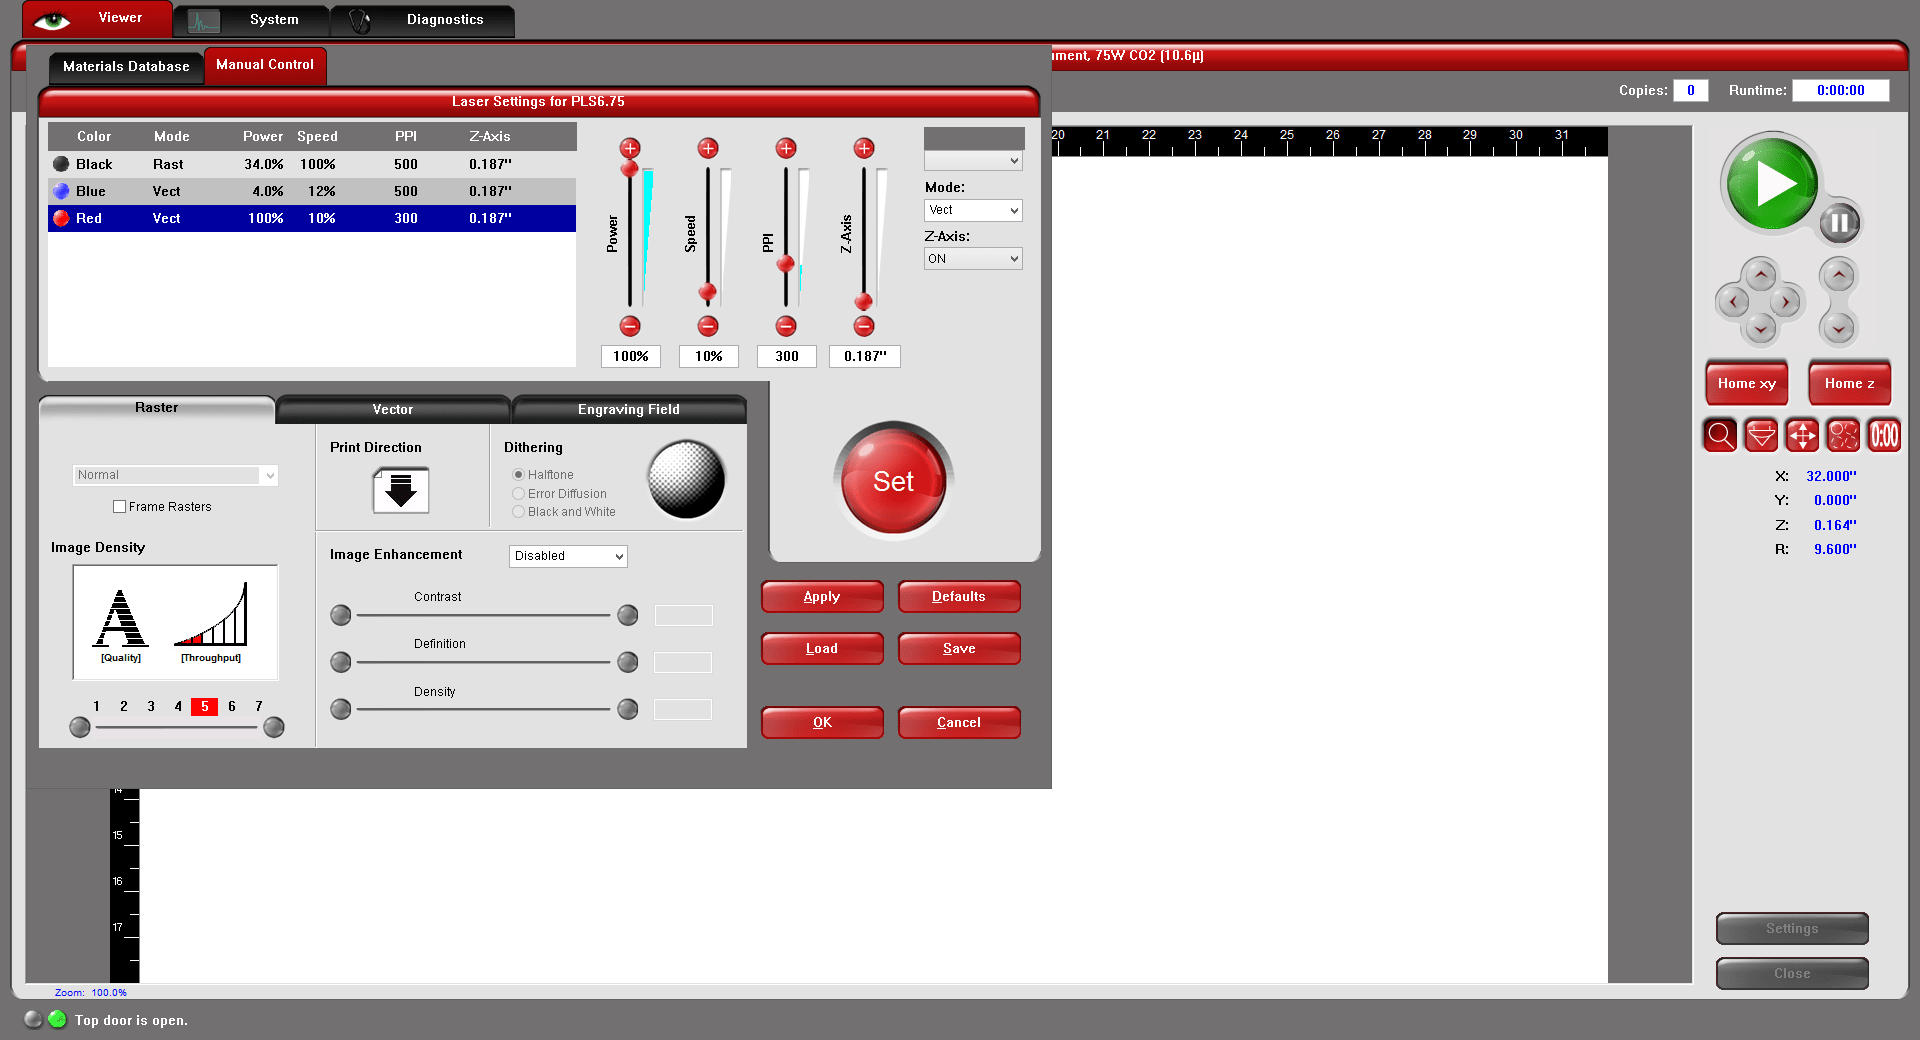
settings used for laser cutting the cardboard
These settings worked well, so we decided to make some door signs! I wanted to cut one of the Chinese characters in my name. Its got quite a few strokes and is not something that I would ever consider cutting by hand, so it was great that I had the laser cutter do it for me! The problem that I encountered with this one is not accounting for the left hand side of the character. Because that part is essentially a box with the line through it, some details were lost, as the box was entirely cut out.
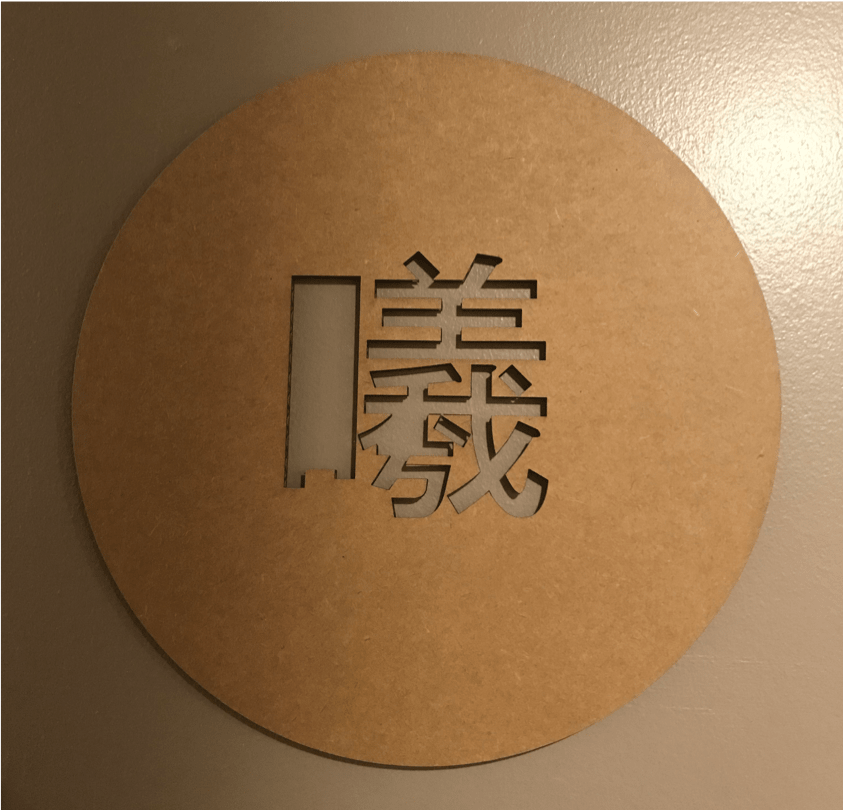
laser-cut door sign
Next time, it would be better to set the lines so that only the negative space is cut out completely and the surrounding box is made using a deeper cut that doesn't go all the way through the material.
videos: laser cutter characterization door sign
construction kit
videos: detailed CAD process of the construction kit roll-E rolling
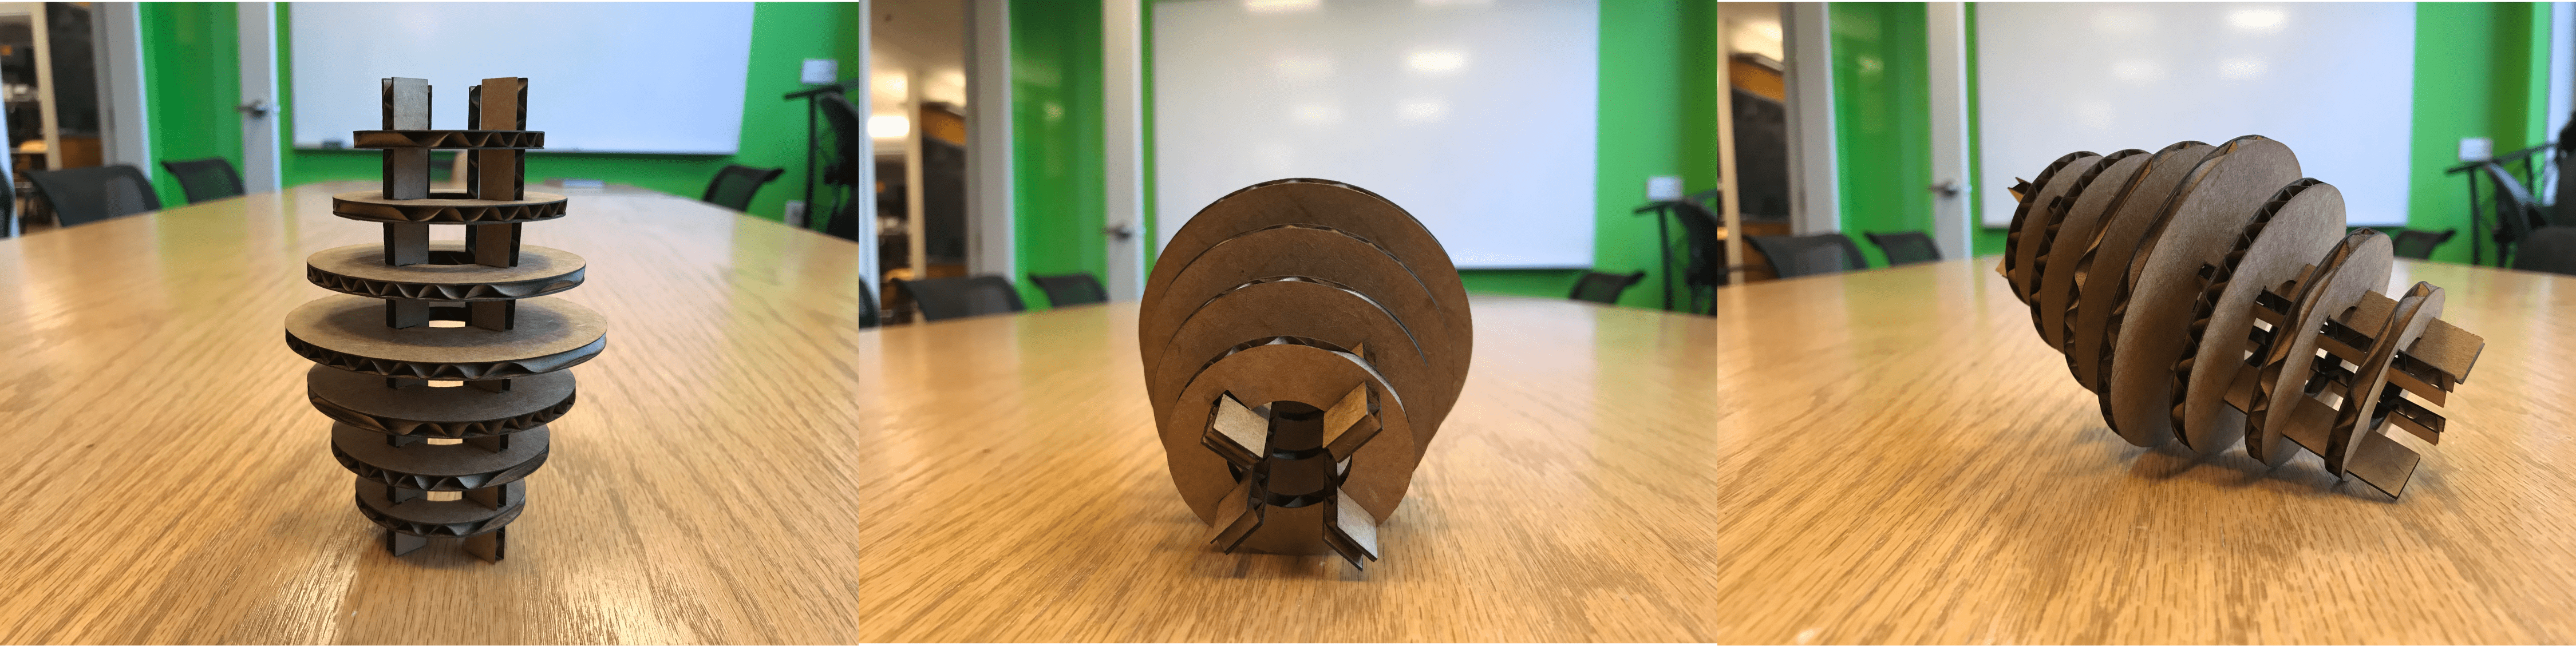
roll-E
I was inspired by lanterns and wanted to make something that could both roll around in an interesting way and also stand up on its own. My final construction kit, roll-E, consisted of:
rings of varying outside radii (made by offsetting 0.5" radius inner circle by 0.5", 0.75", 1", and 1.25")
rib pieces that could be used to connect the rings to each other
the construction kit

bonus: roll-E can make all sorts of shapes!
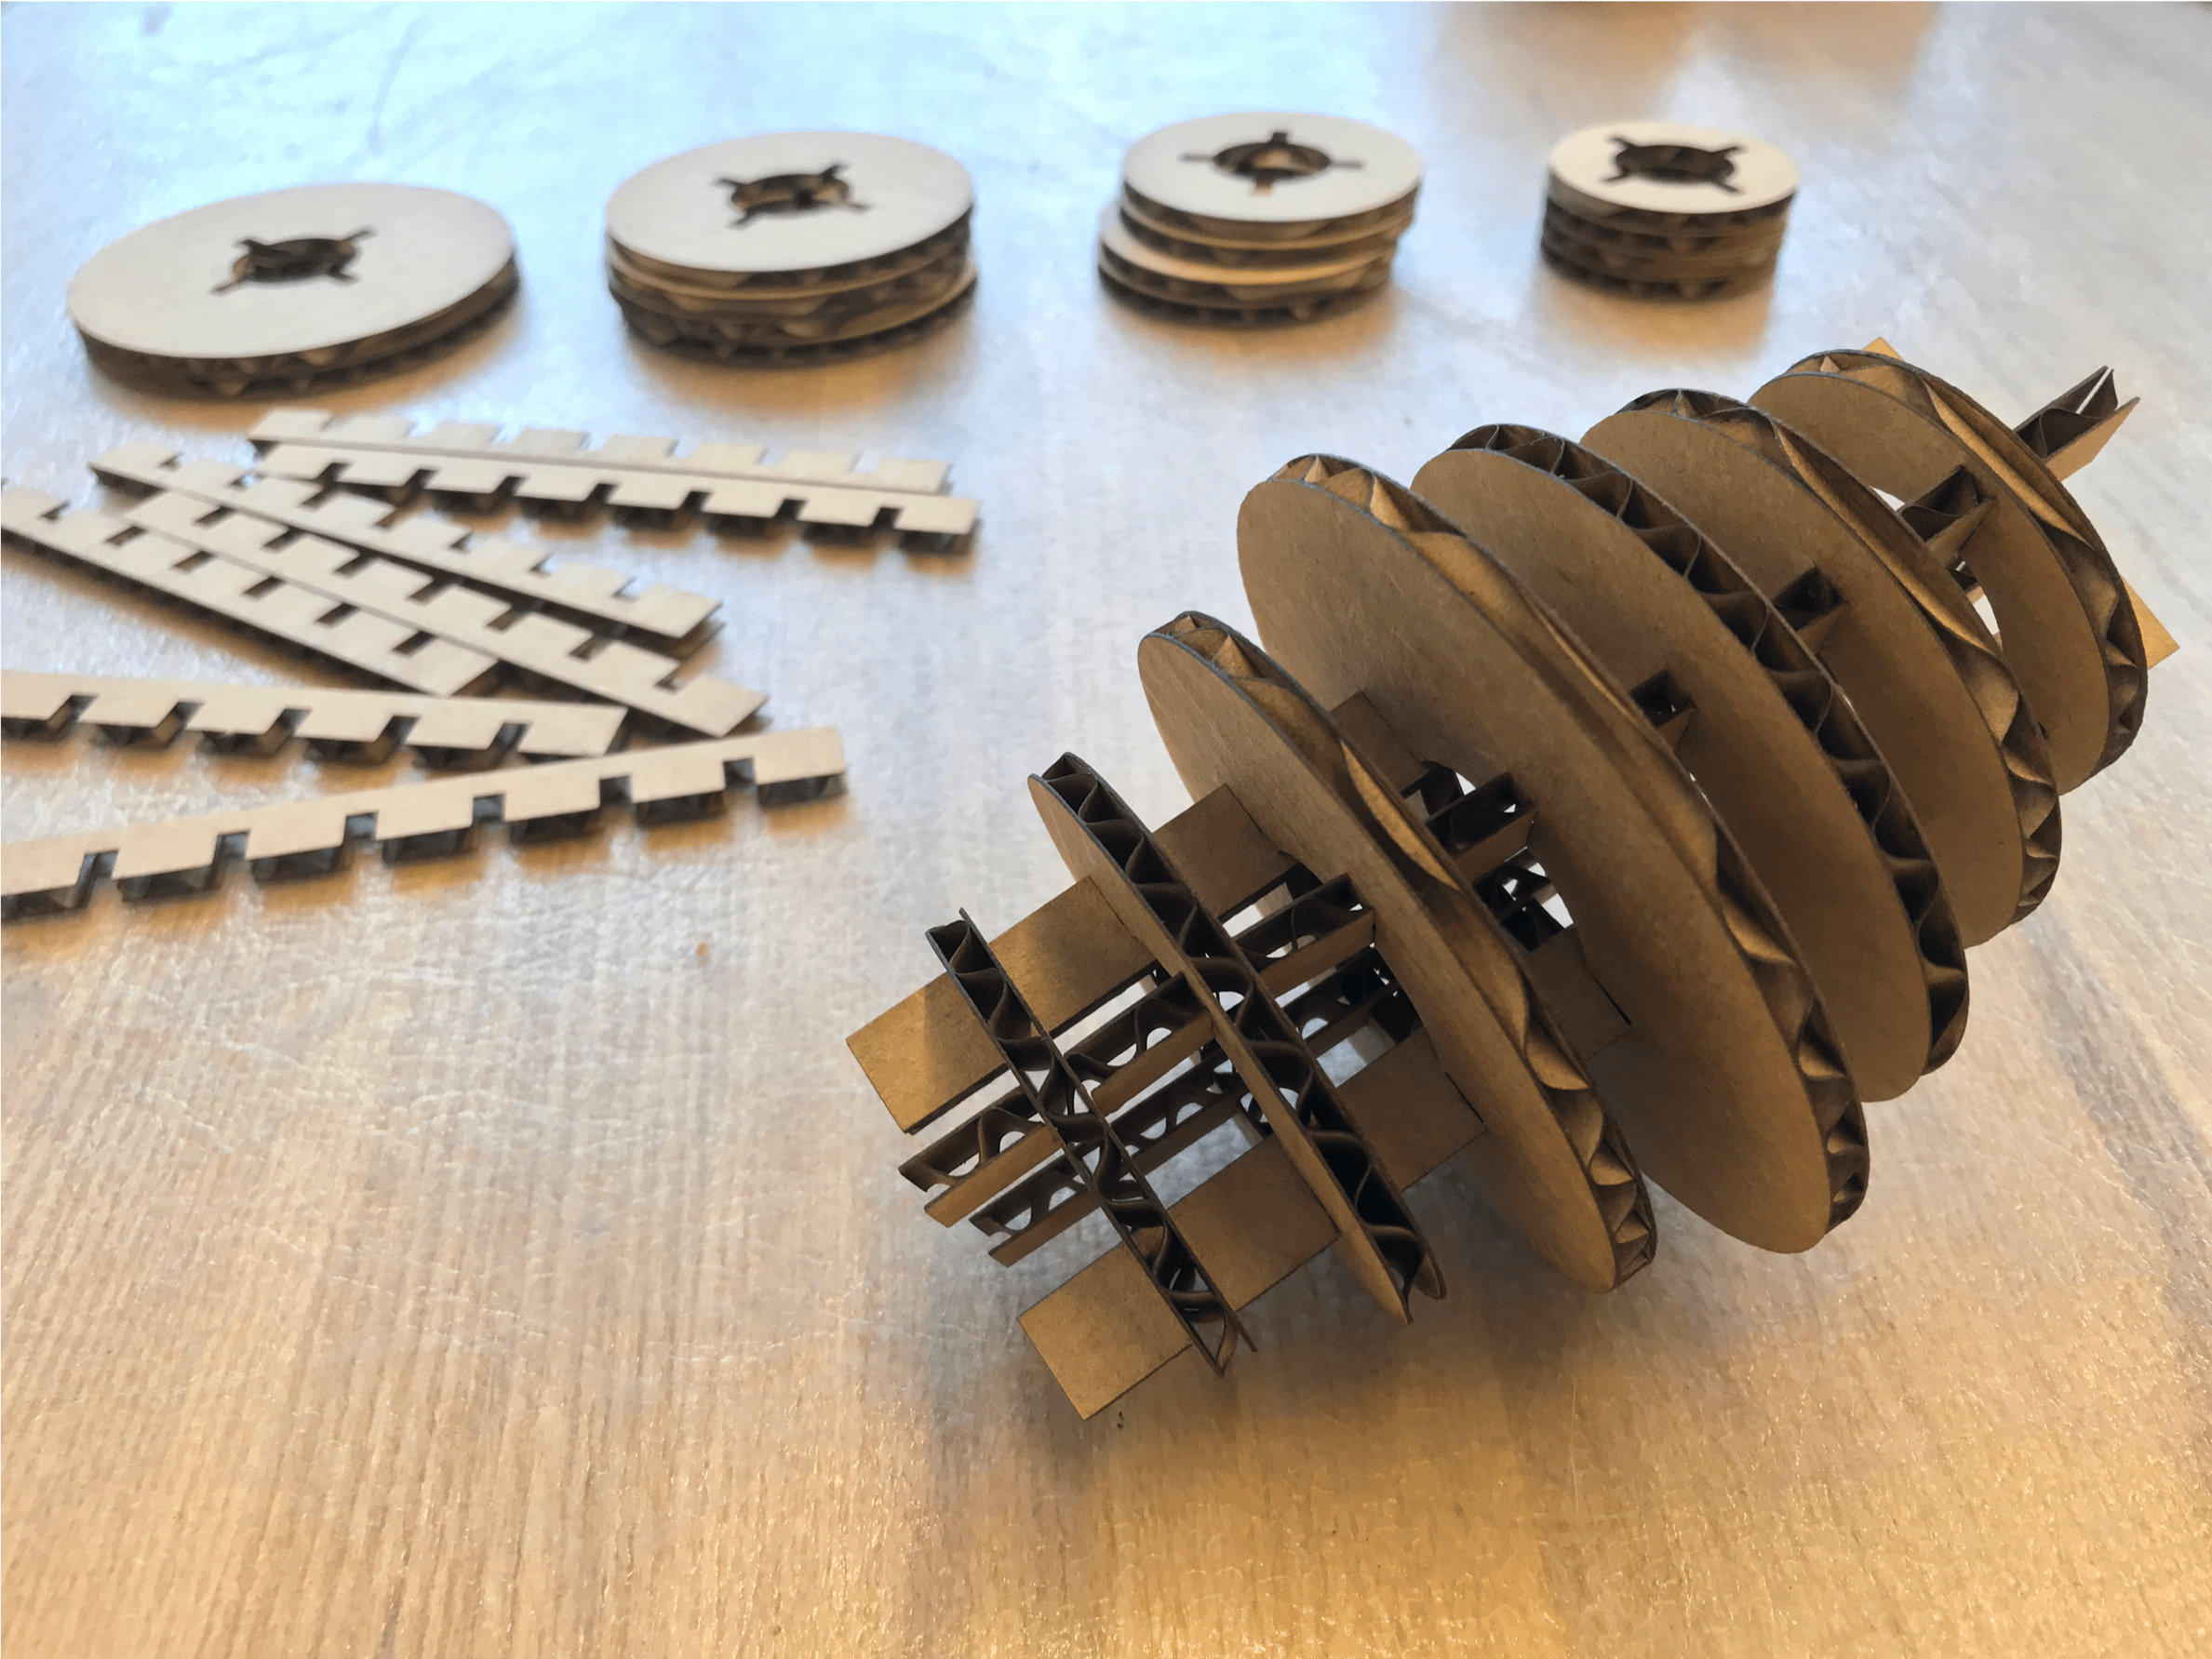
The biggest challenge that I ran into was the actual assembly of the pieces. Because I didn't use a chamfer on the joints, it was more difficult to press fit the rings to the ribs. Additionally, because I wanted the outer form to be spherical, the rib pieces pressfit to the inside of the rings. I have small hands, and still struggled at times (especially since there wasn't any flexibility in the joints).
At the beginning, for whatever reason (read: dumb mistake), I miscalculated the width of the notches that should be used. Though assembly of roll-E isn't the easiest, the too-small joints definitely made the process worse. The ribs bent all over the place, and once one side of the rings were pressed into the rib, the other side would promptly dislodge itself.
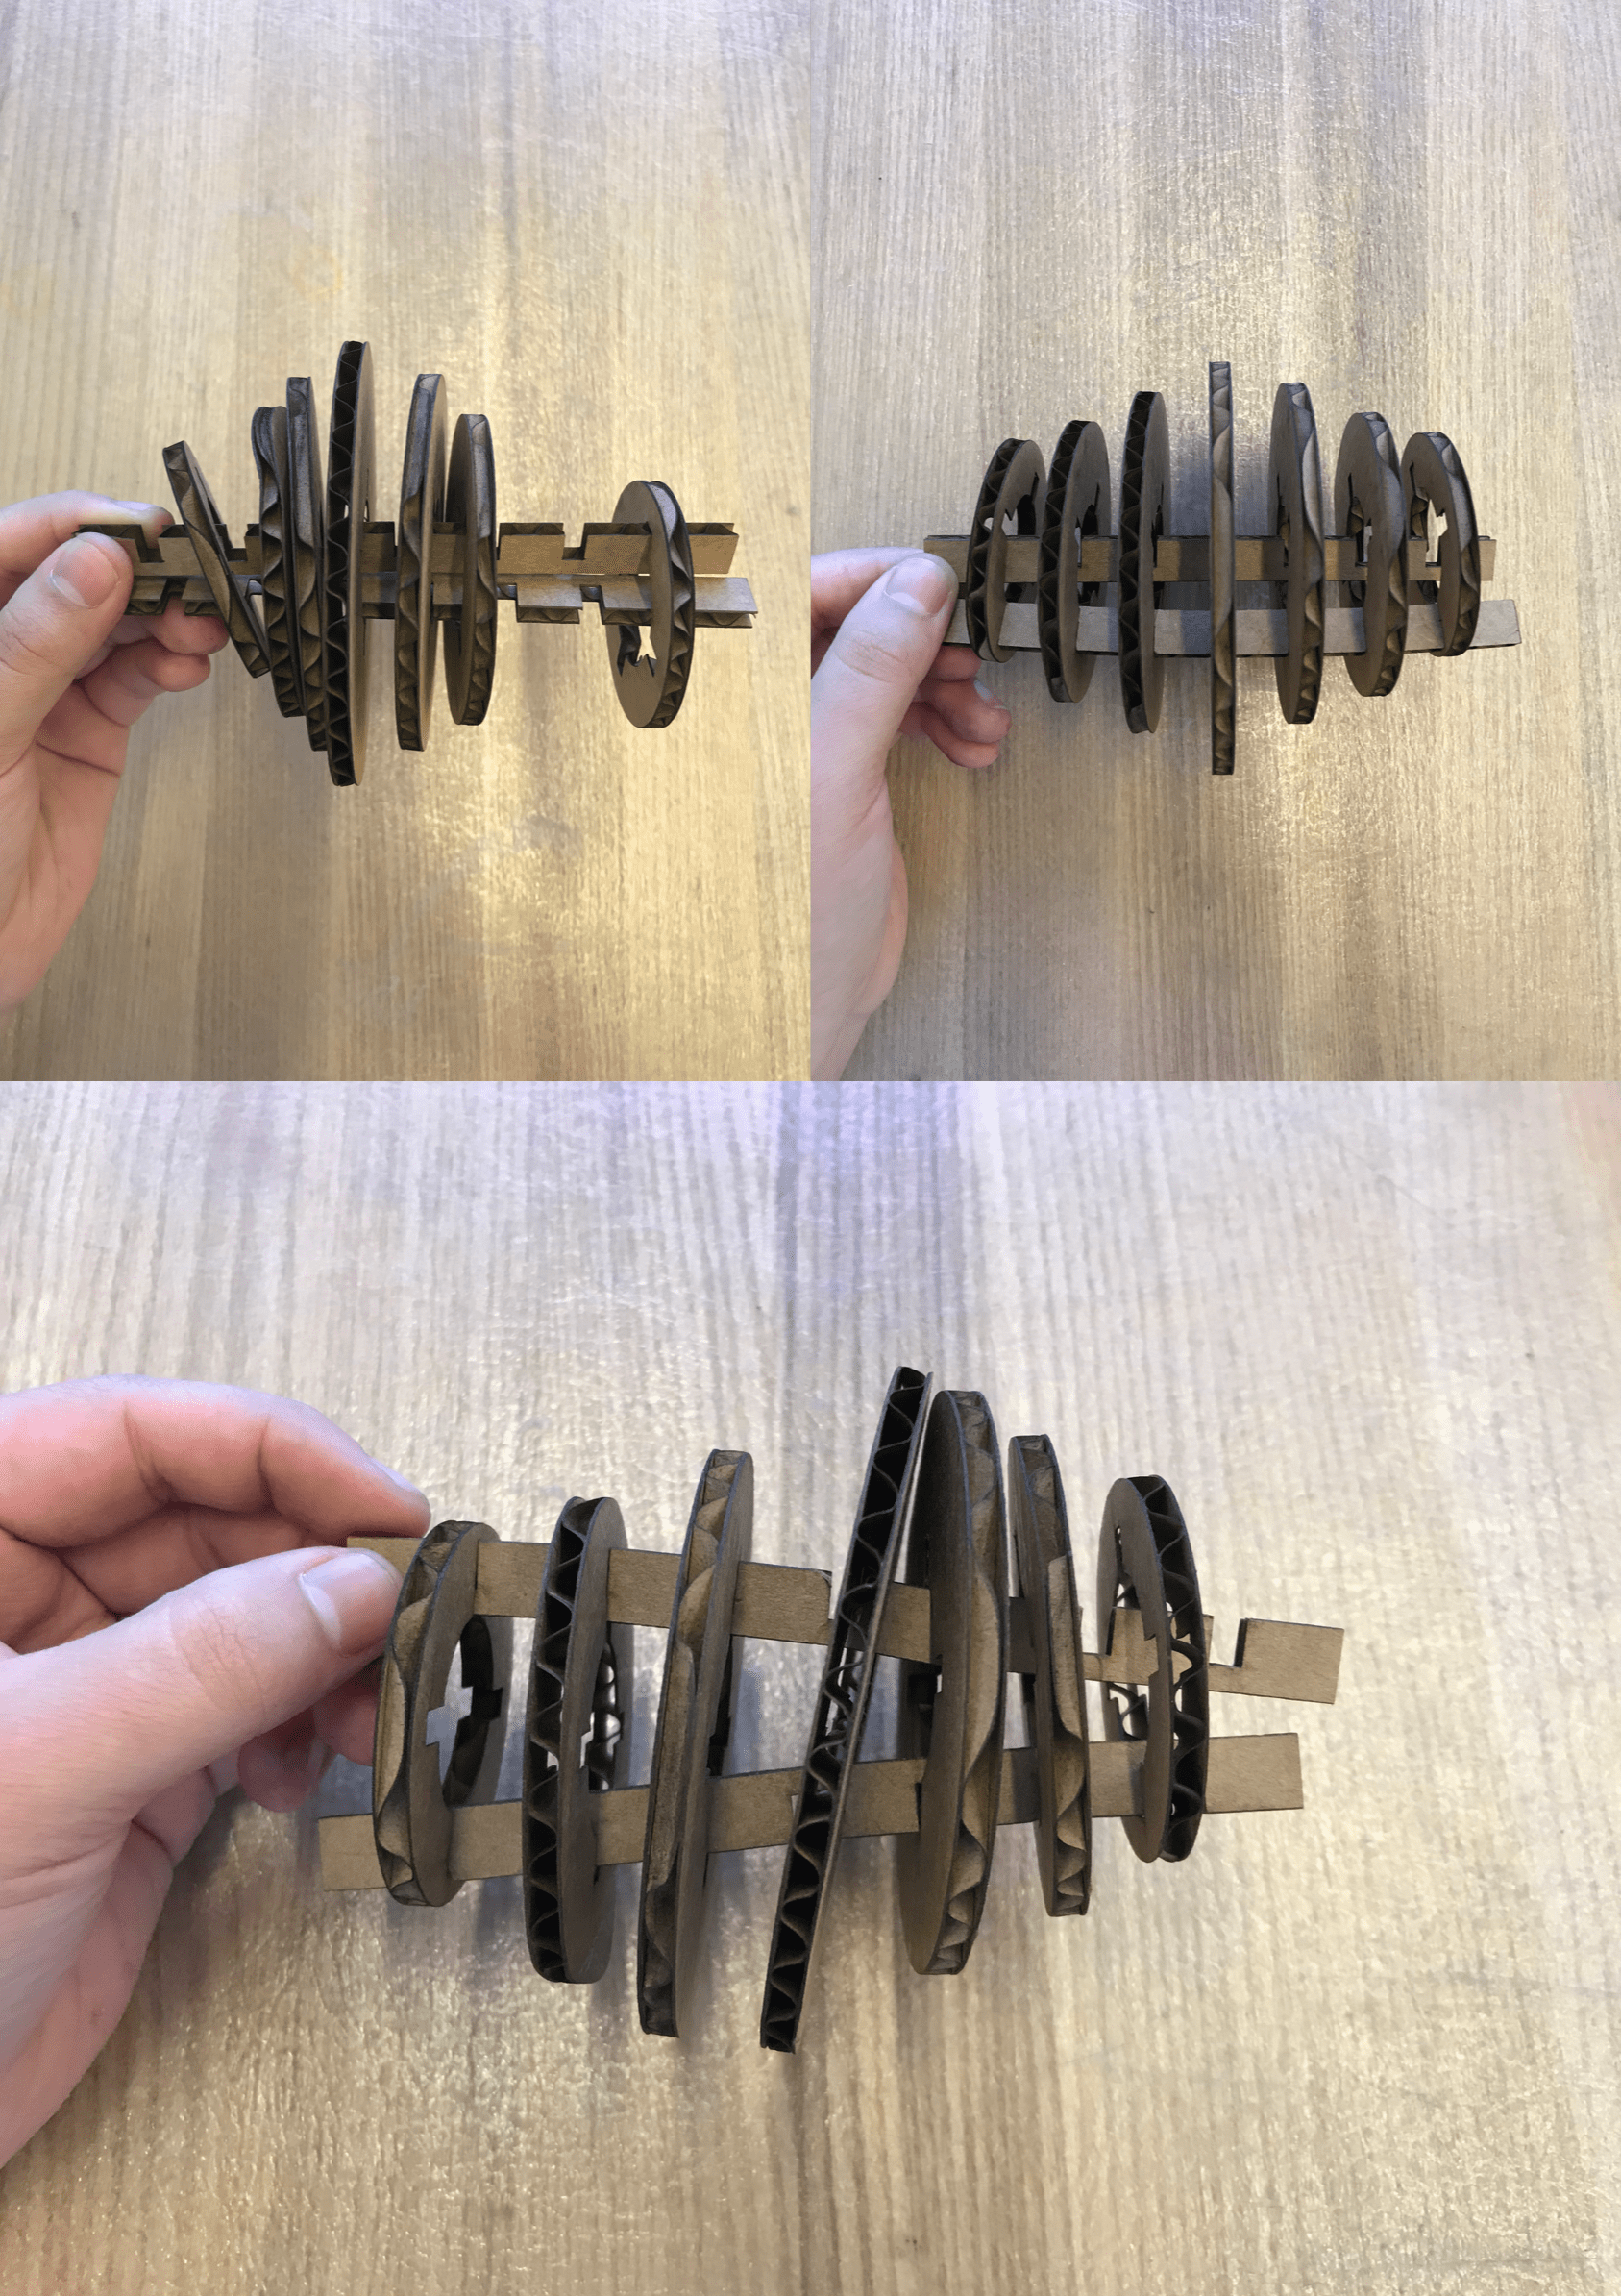
first iteration of roll-E
The silver lining: I used parametric design. Instead of painstakingly going back to modify numbers and probably a lot of relations, I just changed the value I had originally set for global variable "width" from 0.152" to 0.159" (thickness of the cardboard 0.187"-kerf 0.028"=0.159").
After using 0.159" as the width of my joints, roll-E was much easier to assemble, and I decided to make some final modifications (more details in the CAD video) and laser cut the entirety of my construction kit!
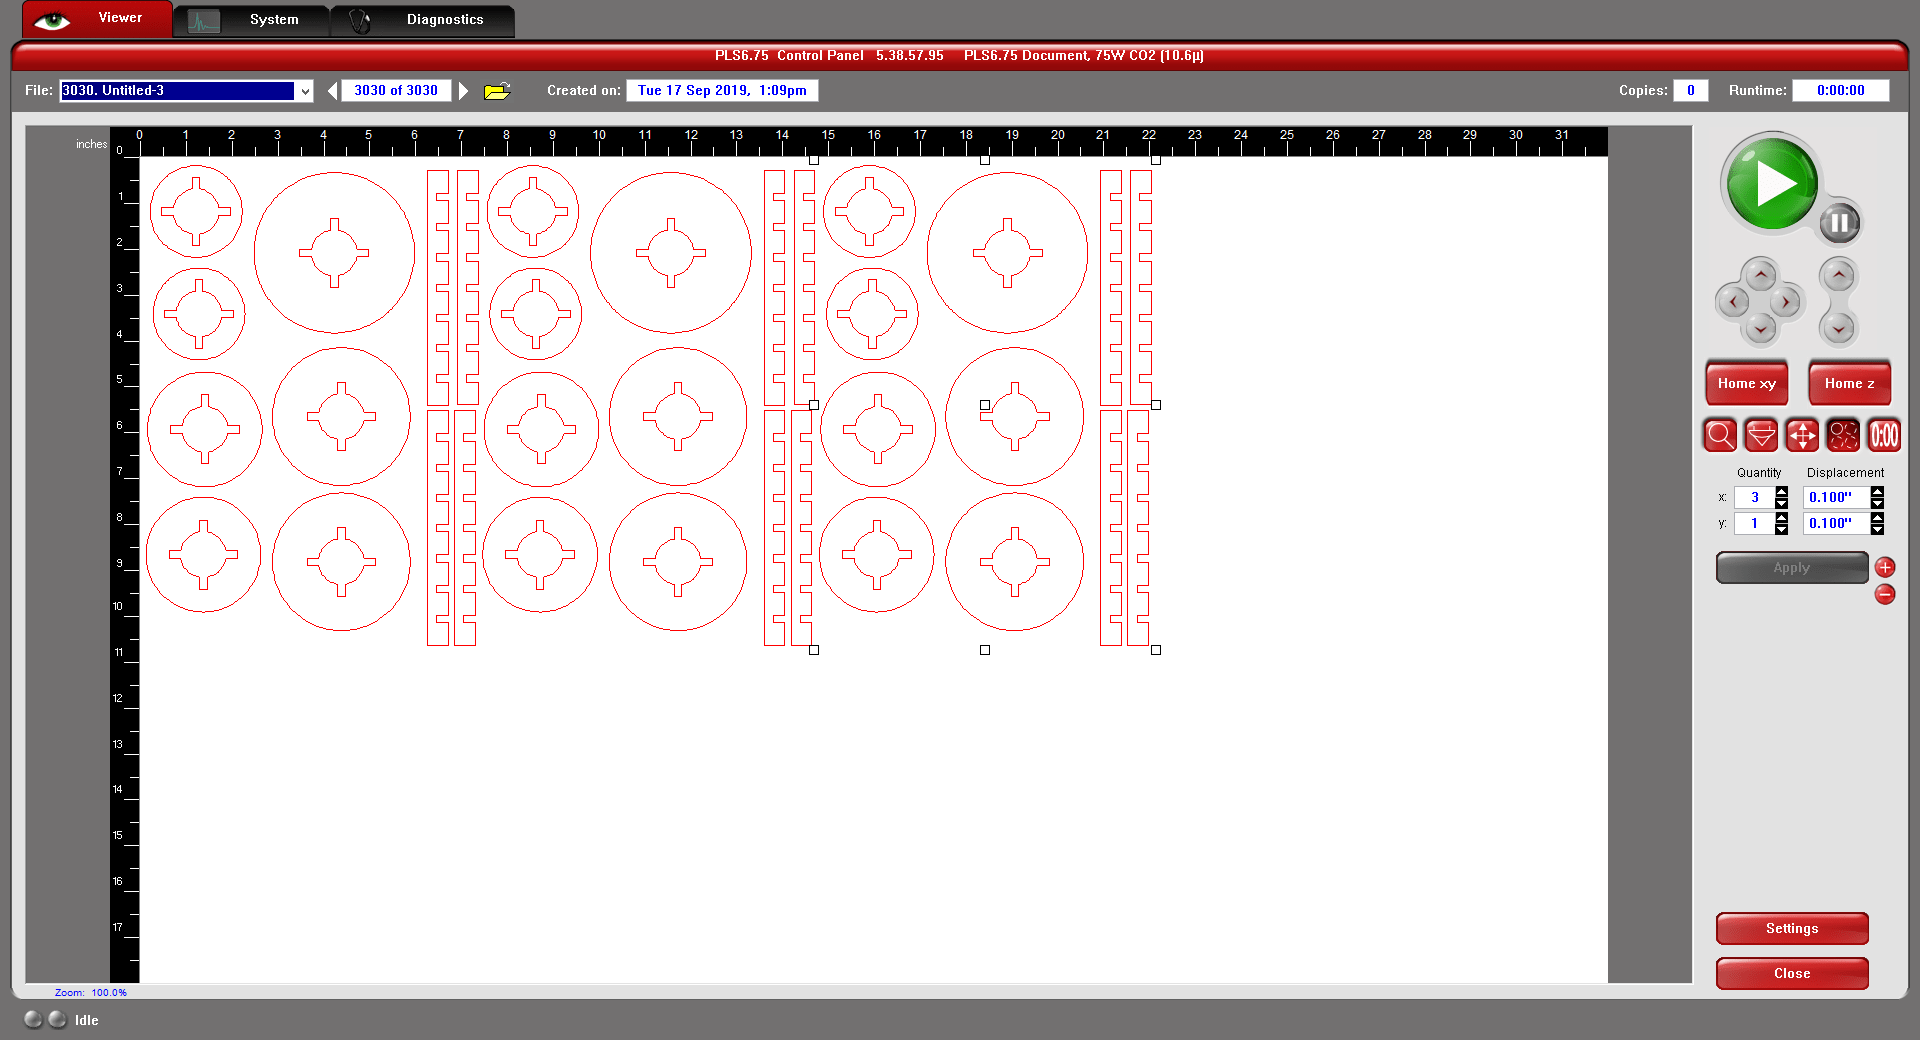
final laser cutter run of kit 1
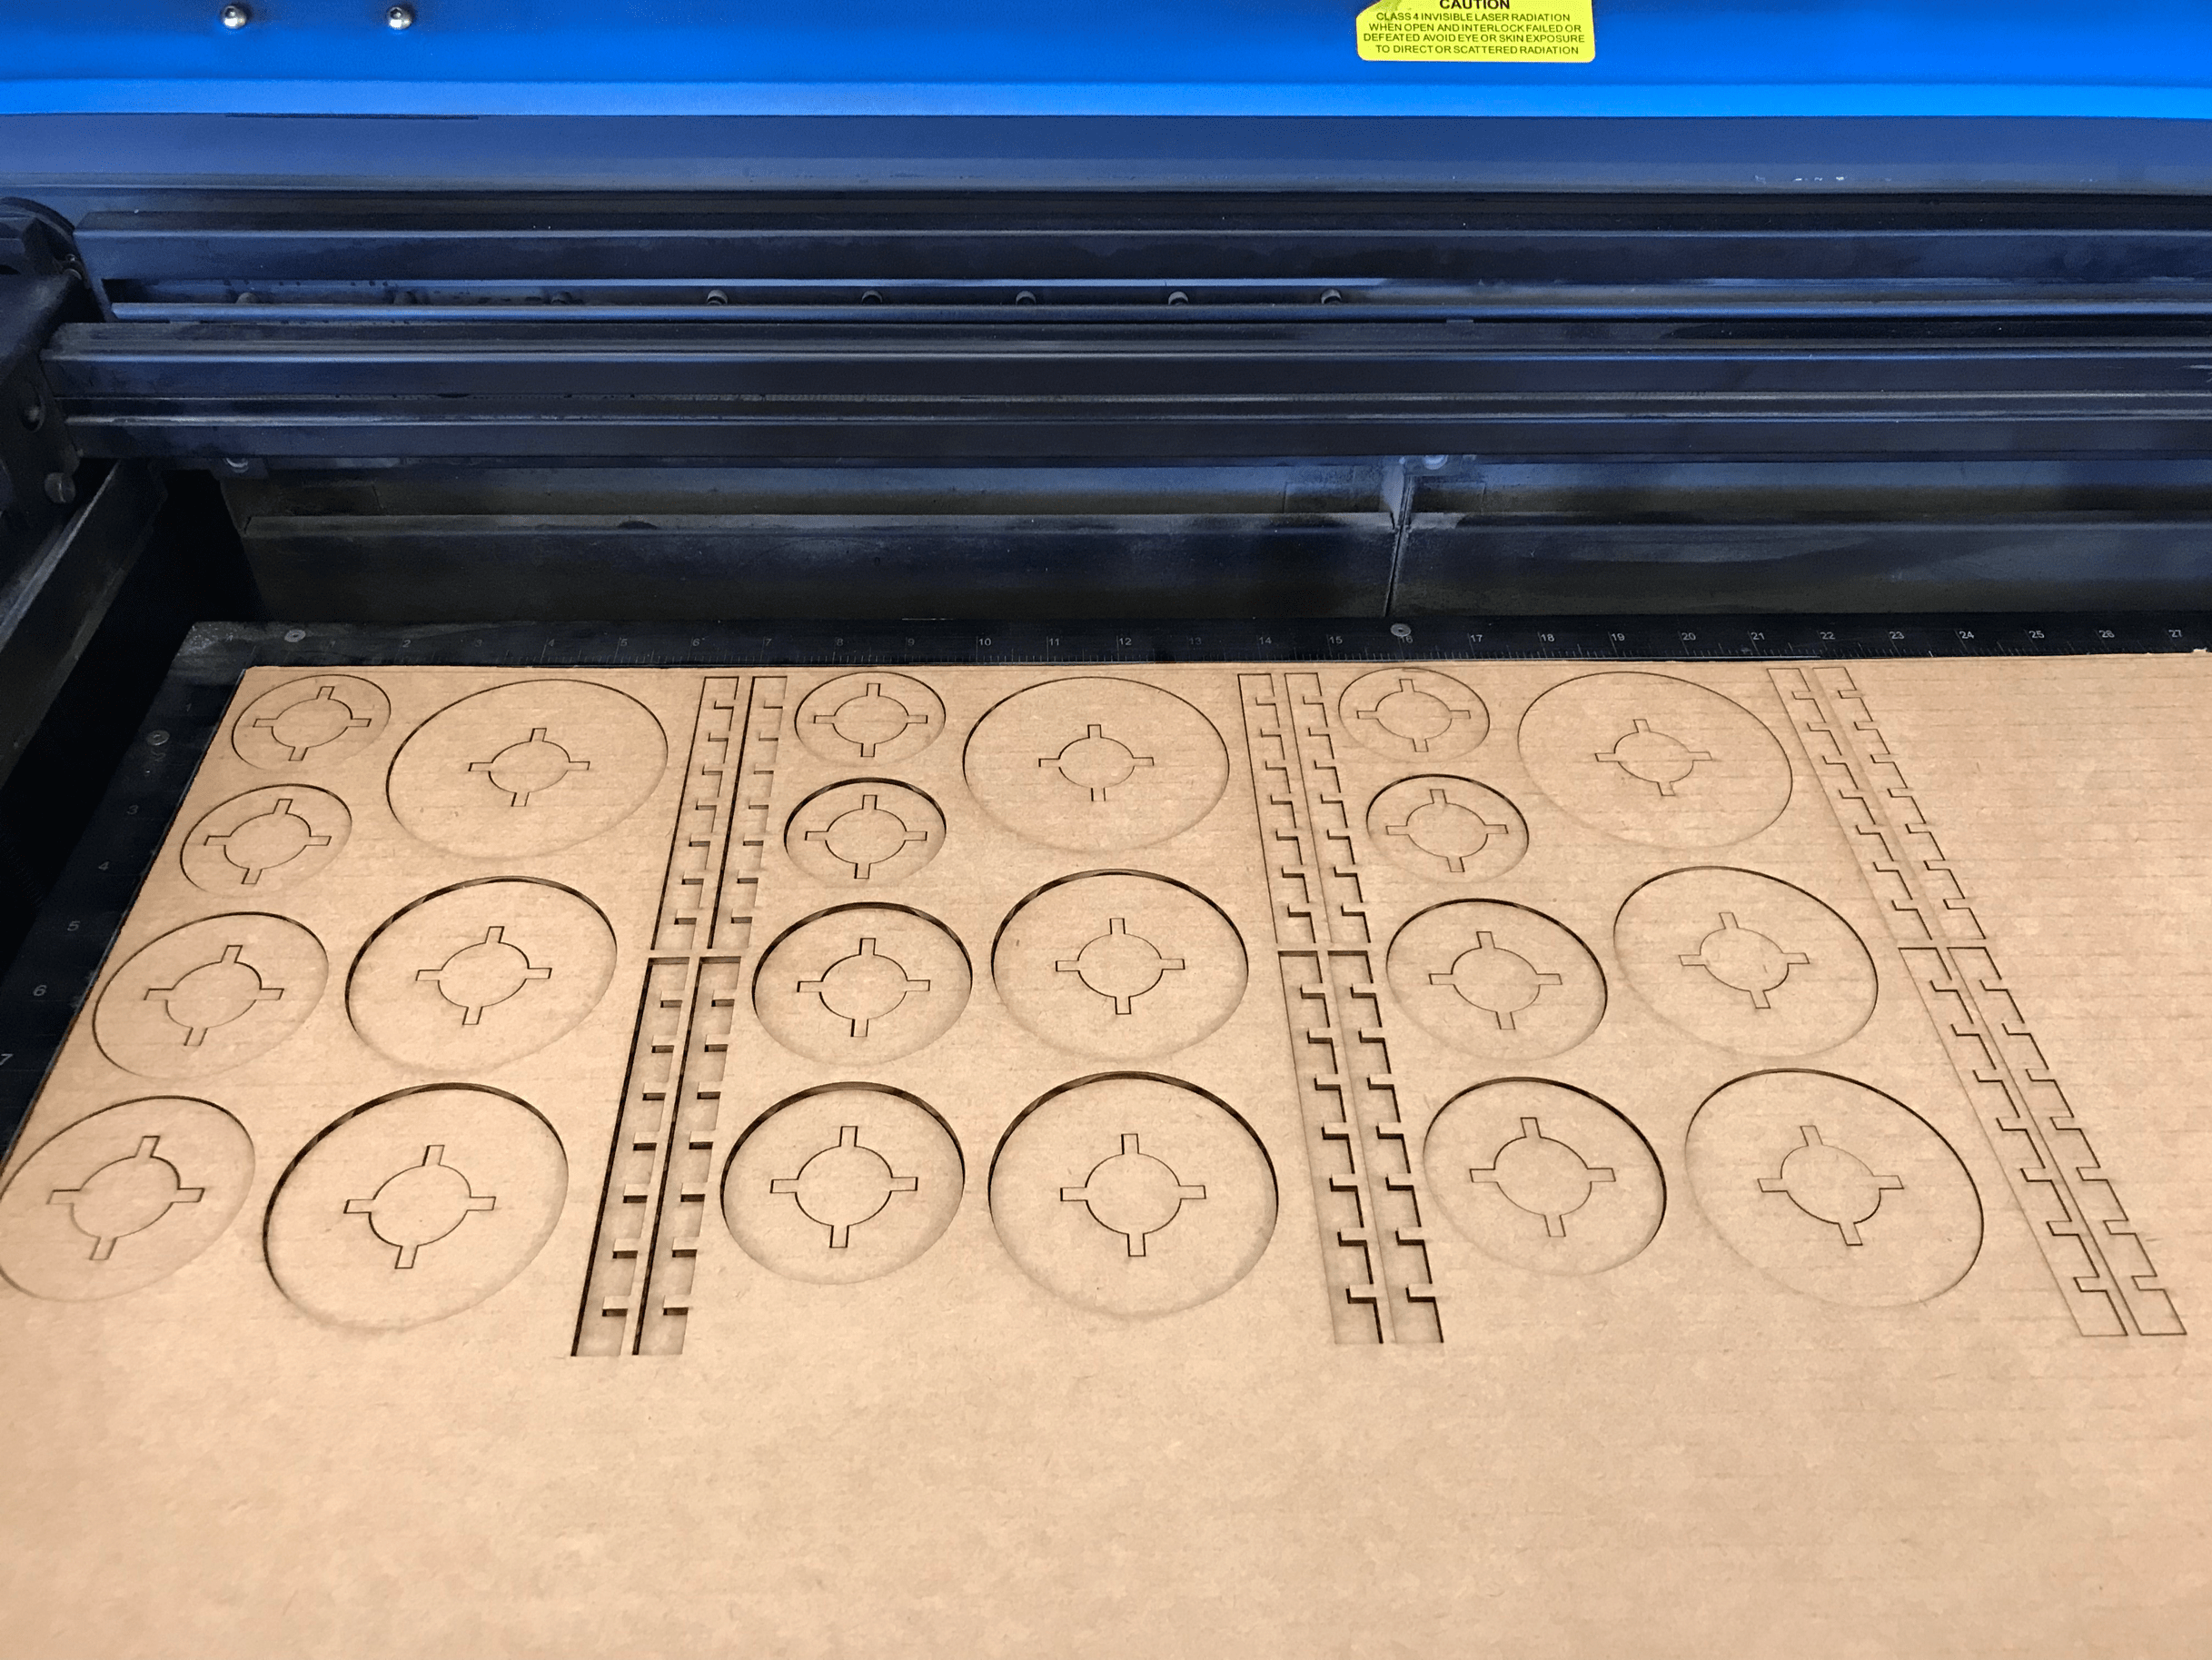
final laser cutter run of kit 2
vinyl cutting
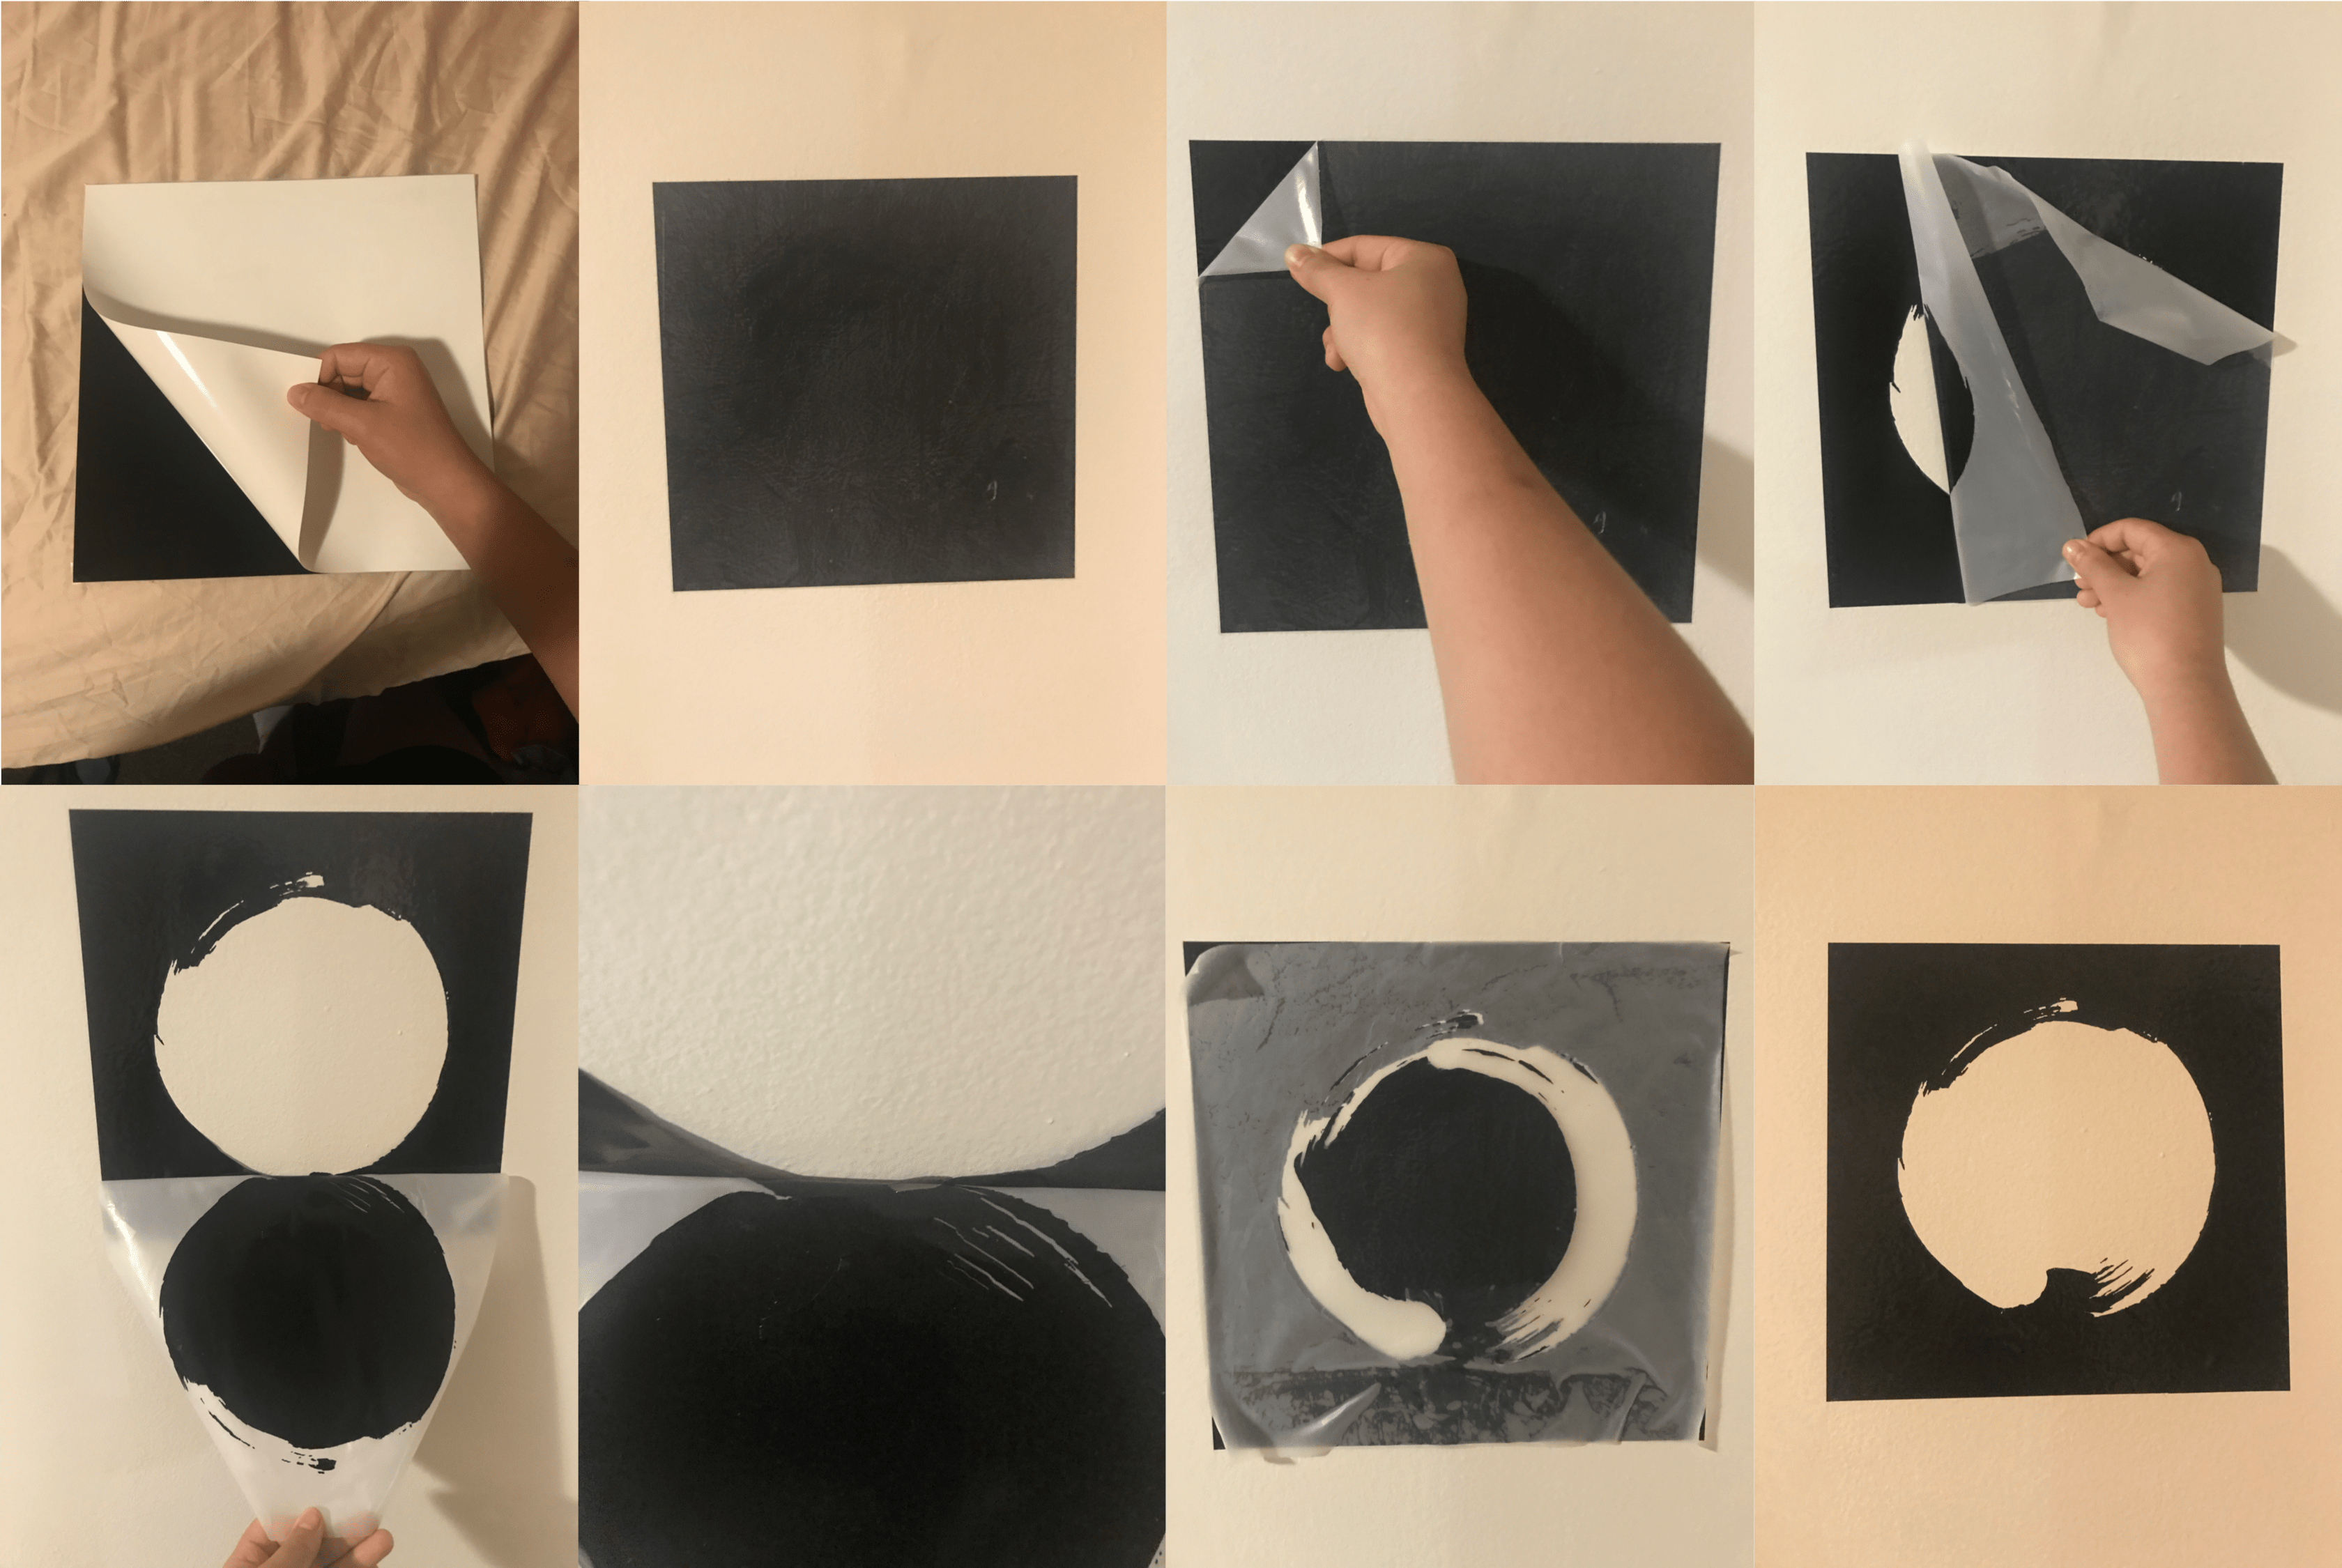
Over the summer, I went to an art exhibit in Shanghai and learned about the "enso" for the first time. Enso (which literally means "circle" in Japanese) is a circle that is freely-drawn in a brushstroke to express a moment when the mind is free to let the body create. I really like this concept and thought it could be cool to try to vinyl cut a wall decal of the enso.
I first found an image online and put it through mods, sending it to the vinyl cutter.
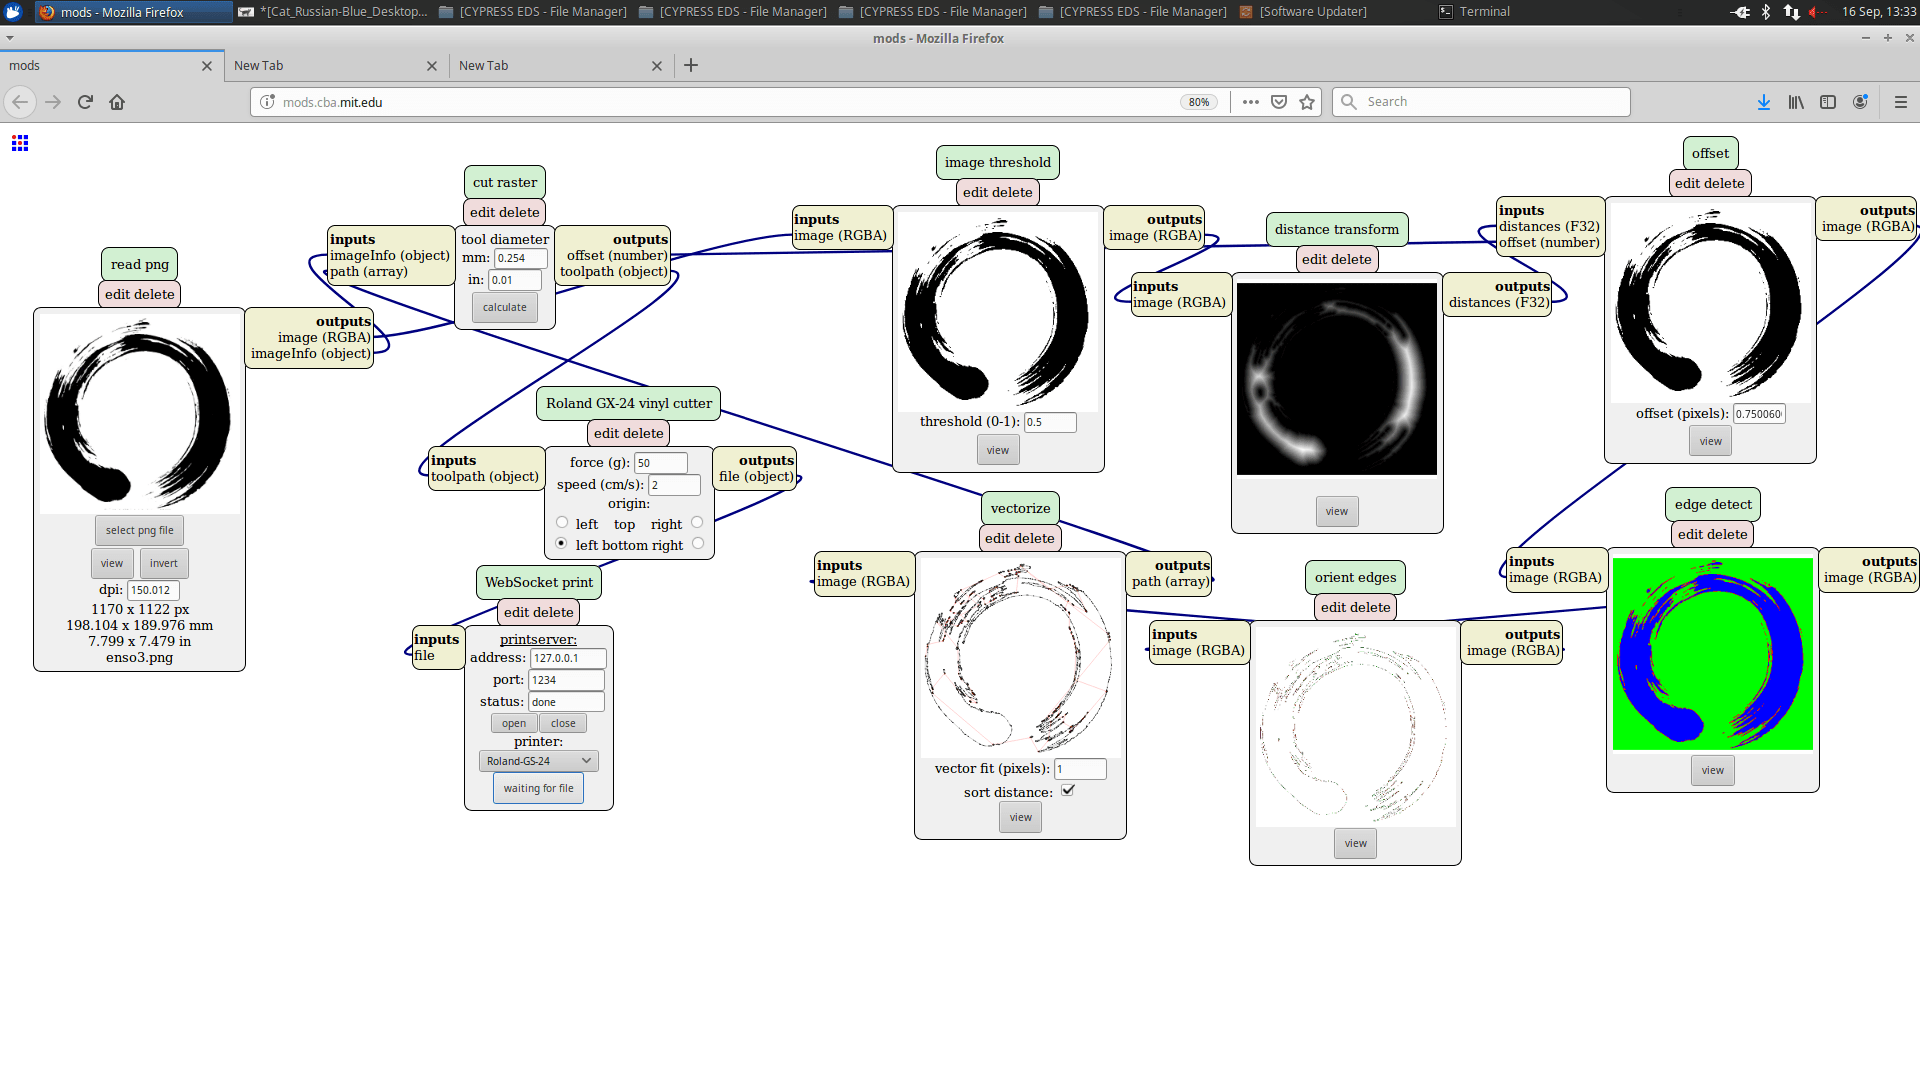
mods used for vinyl cutting
After the vinyl was cut, I squared off the edges and placed transfer paper on top. Because I wanted to put the vinyl sticker on my wall, I sandwiched the piece between cardboard so it would stay flat as I carried it home.
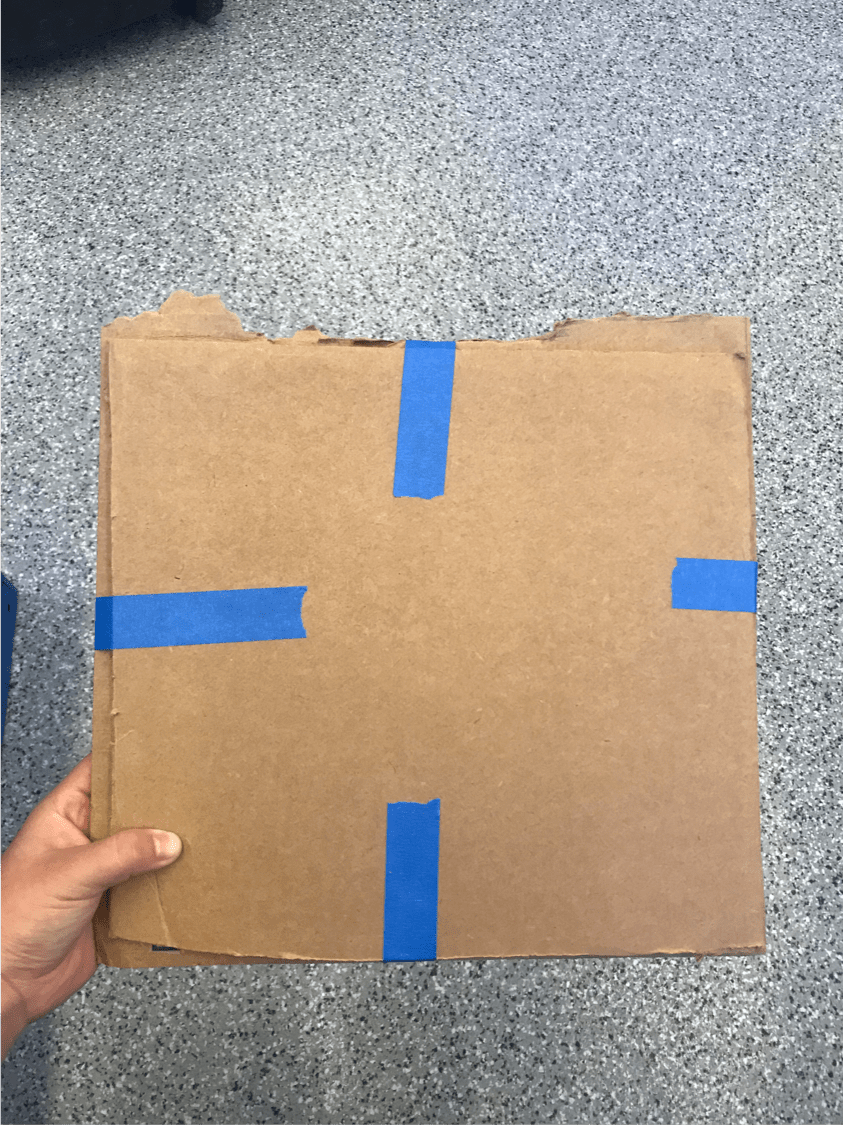
how I carried the vinyl sticker home
When I got home after classes and eating food and probably some other stuff, I finally started putting the decal. As you could see from the process picture below, it didn't go quite as planned.
I chose to weed the vinyl after it was stuck on my wall after peeling off the transfer paper, but to my surprise, the transfer paper started peeling off pieces for me (both pieces I would've needed to peel away and pieces that I wanted to stay). Also, it's not a ring like the reference image. But, I honestly don't mind and would even say that I prefer the way it turned out (interesting play of blank space)!
The problems encountered with the transfer paper were most likely due to me leaving it on the vinyl for many, many hours before trying to peel it off. Definitely good to know for next time...
process of stickering my wall