This week began with the task of programming my ATtiny44 microcontroller via the Arduino software. While Brian Plancher went back and forth with us on the ups and downs of programming in C vs. Arduino, I chose the Arduino path due to ease of use and general simplicity. As my final project may involve other common Arduino functionality, that too helped to guide the decision.
I made use of my homemade USBtinyISP (in-system programmer), the ATtiny 44 microcontroller from two weeks ago, and a power source.
Rob recommended the highlowtech article, which was a fantastic source of information. It can be found at: http://highlowtech.org/?p=1695. I first downloaded the Arduino program, then installed the ATtiny package by David Mellis. This now provided support for the ATtiny within the Arduino software. I was using the version 1.8.5.
From here, I selected the ATtiny44 with external 20MHz clock. The interface for this was slightly different than shown in the guide, however, was still very intuitive given that the options were directly below in the Tools menu. I then connected the USBtinyISP to the Harvard Science Center 102 desktop computer with the 6-pin cable to the ATtiny44 microcontroller.
In order to first test the ATtiny44 and simultaneously re-confirm its functionality, I used the blink example file. The diagram referenced was very helpful in identifying how to assign functionality to varying pins. One LED in my case was linked to Pin 3, so the predefined values were changed to 3 in the blink example file. The video is shown.
I also encountered a series of issues when trying to repeat this process on my MacBook Pro Retina 15inch (2013) model. Based on previous class discussion, it seems as though this may be due to the type of USB connection being used and what era or version the USB was derived from.
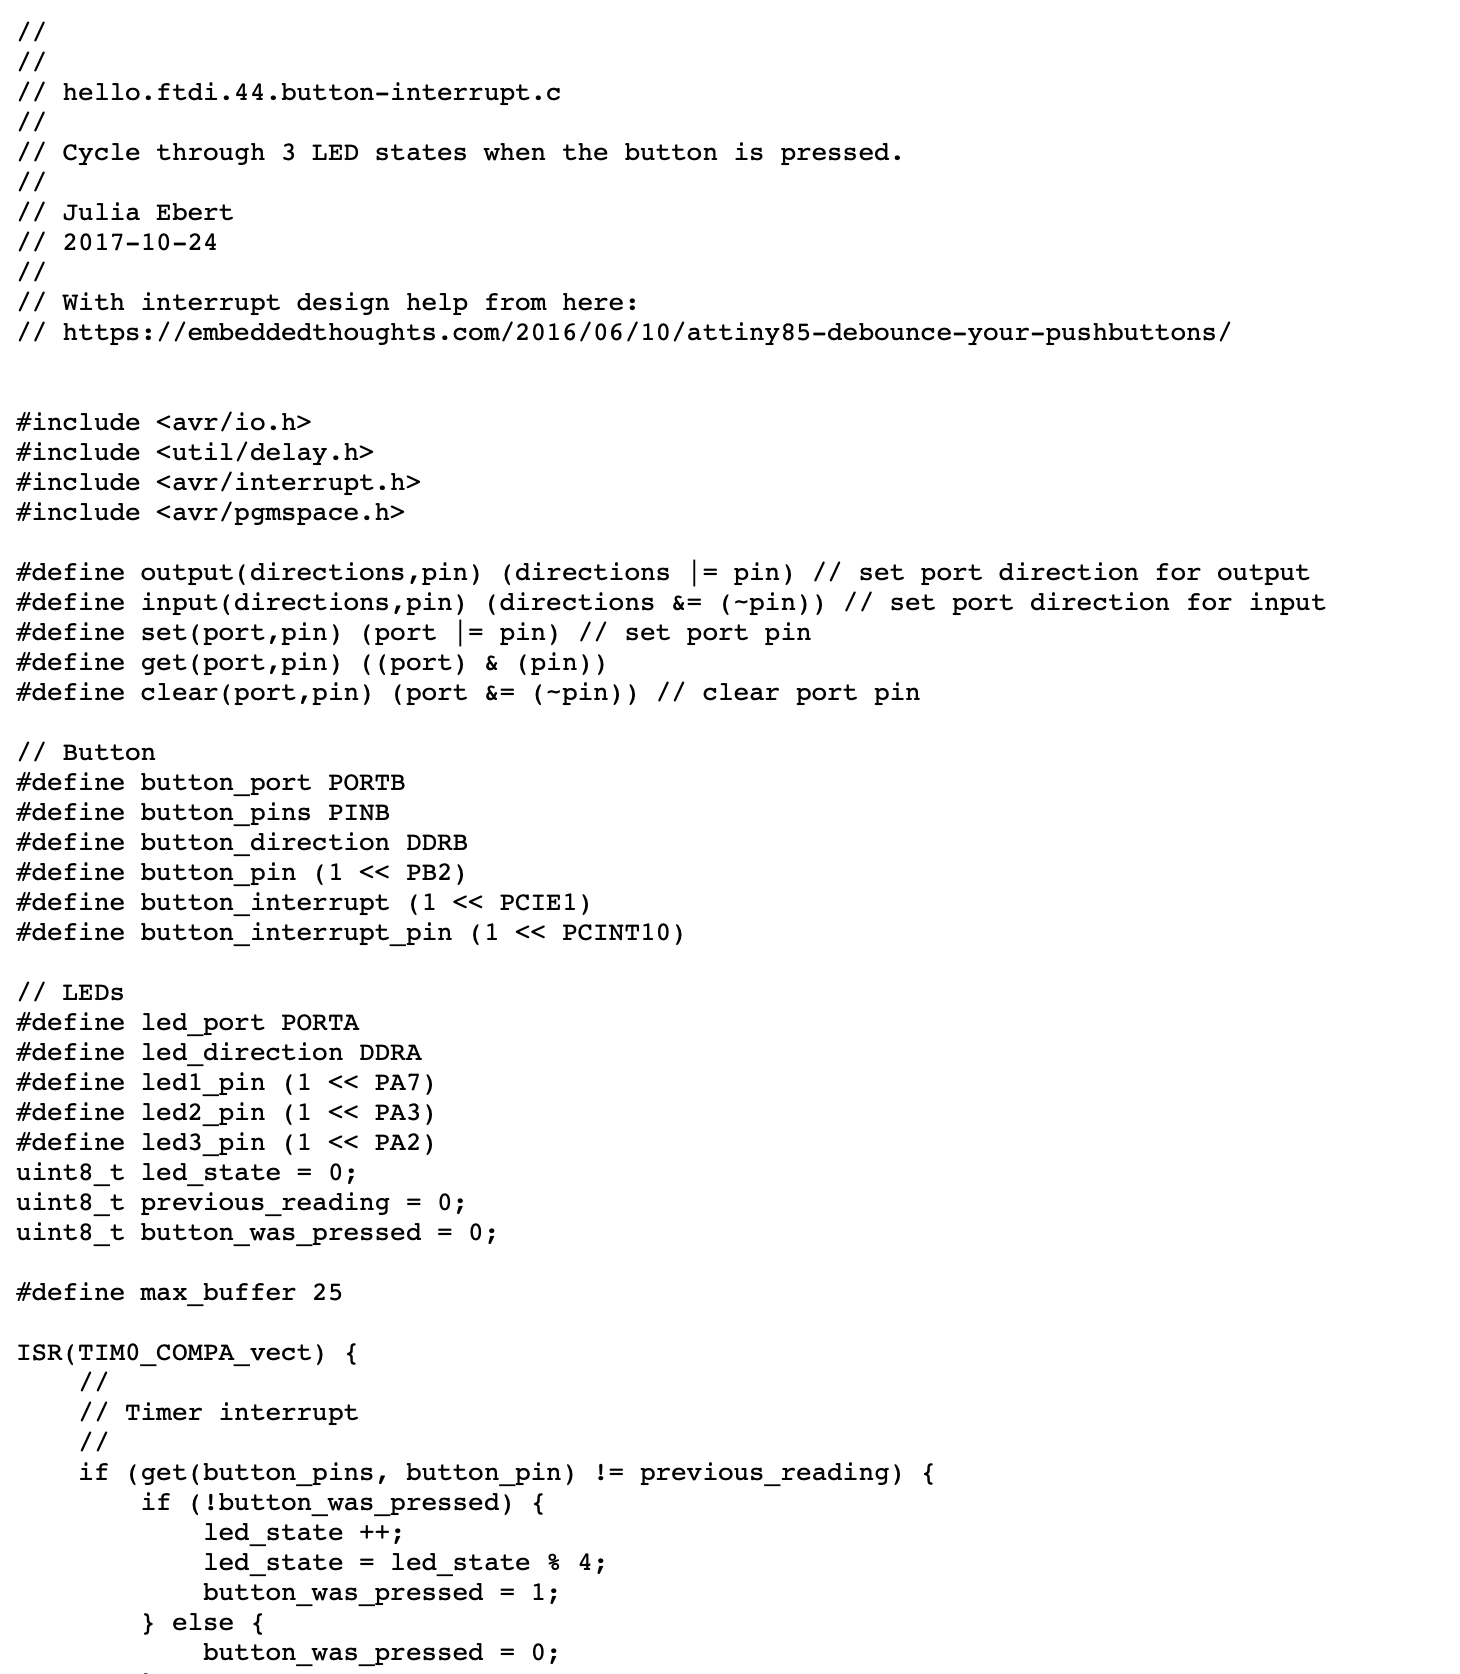
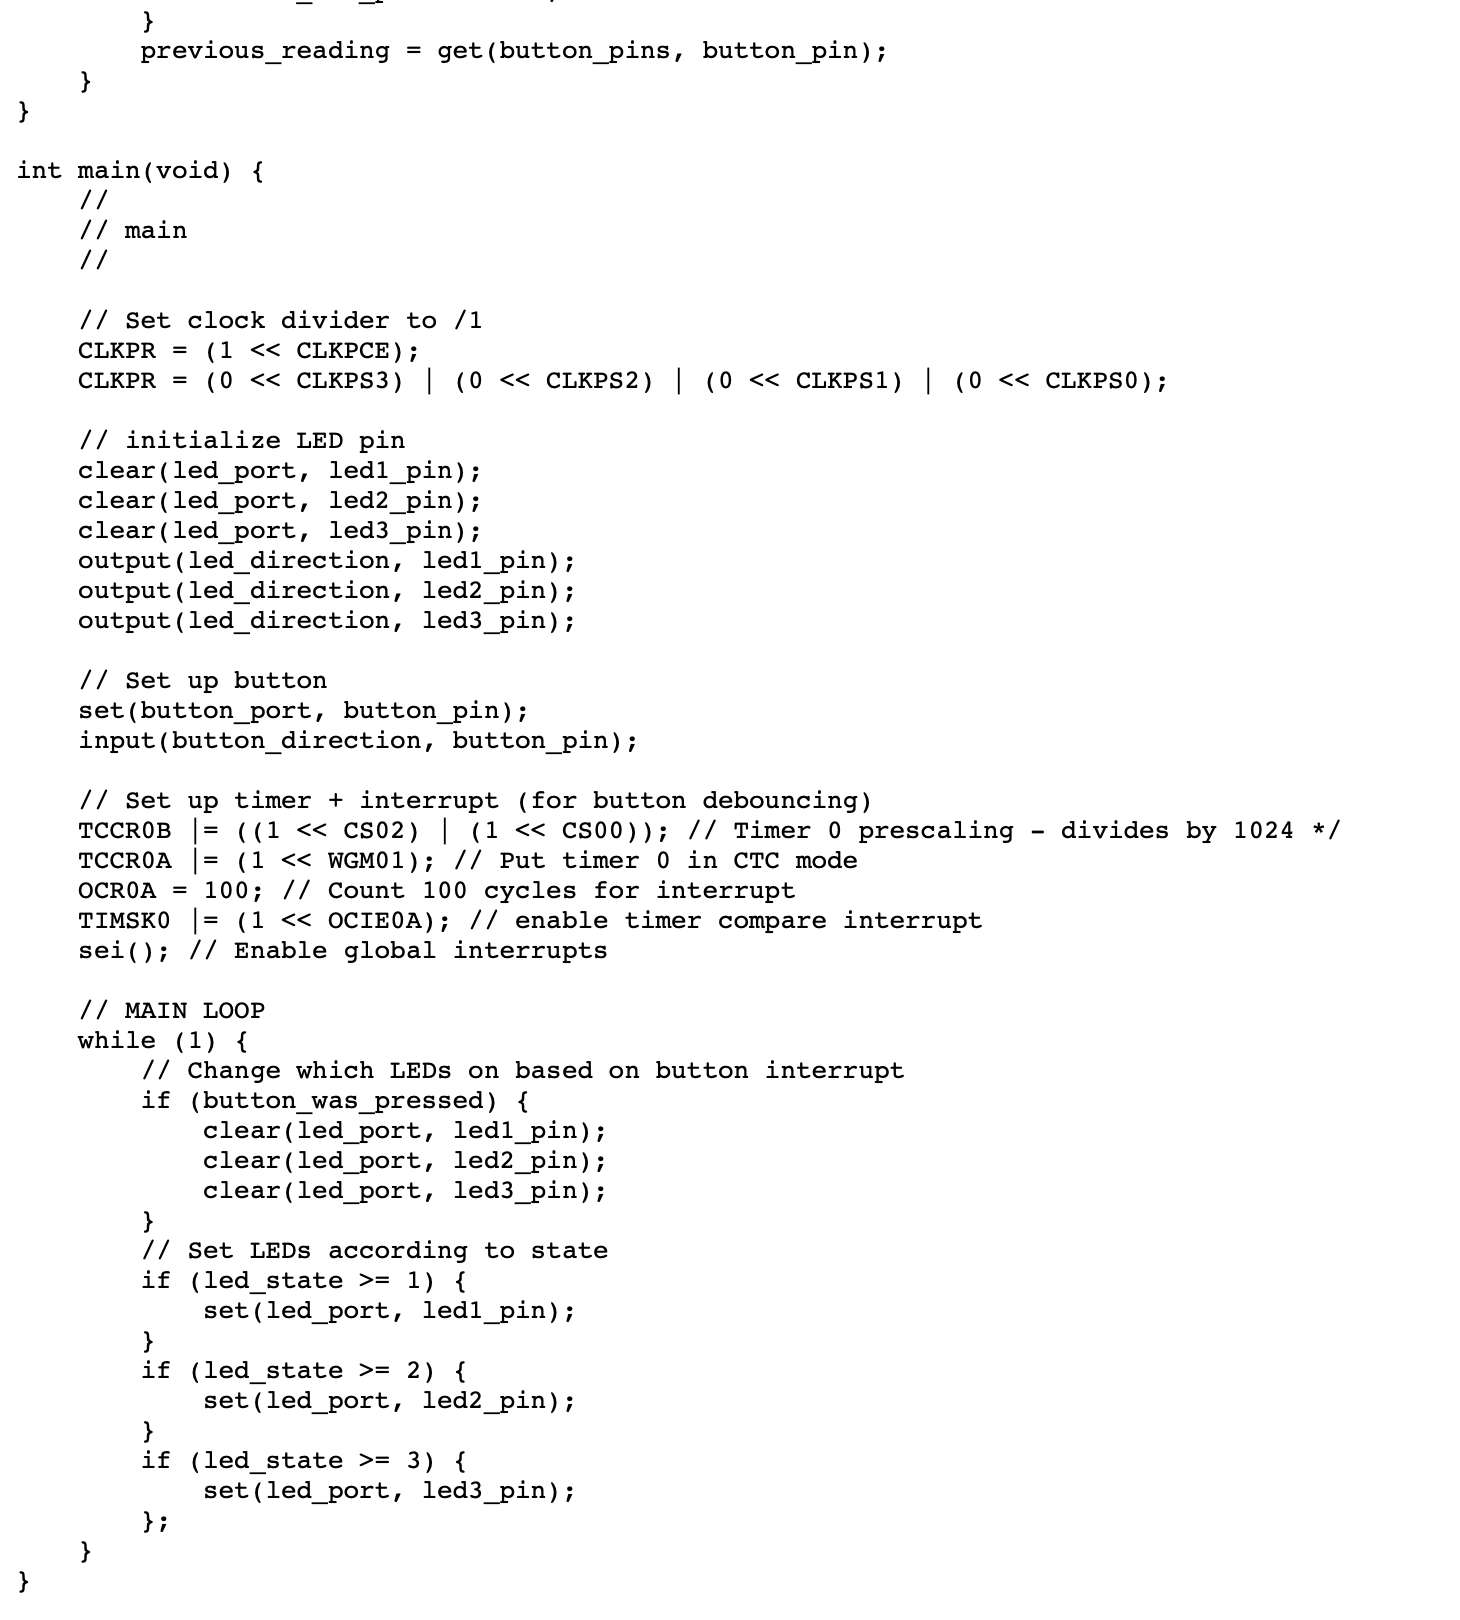
Julia Ebert has been a rockstar in the How To Make world for the Harvard section. Her pages and code examples have been fabulous, so I referenced her previously developed code this week, which was used to create a sequence of lit LED's (the board I've got has 3), triggered by the pushbotton on our boards.
As a final series of exercises, I spoke with Rob Hart about getting past my fears of programming and working with Arduino or C code. In order to more clearly understand the changes that I was making and how they affected the programming, I chose to extract previously developed code from students in last year's class. I then modified multiple levels of functionality within their programming such as timing, which LED's signals were being sent to, and how a sequence of blinks was organized. Video below shows the fun of this experimentation.