Week 7: Molding and Casting
This week's assignment is to design a mold around the stock and tooling that you'll be using, mill it, and use it to cast parts.
Design
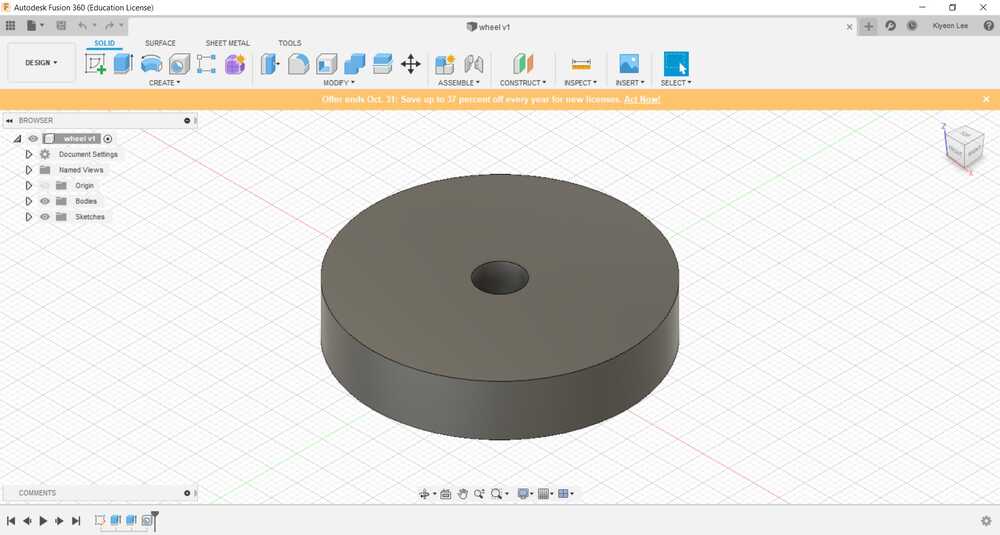
In Fusion 360, I first created the wheel design. I created a circle with a diameter of 50 mm and extruded it to a height of 10 mm. Then, I cut a hole in the middle with a diameter of around 5 mm, which matches the diameter of a metal dowel that I may connect it with. Then, I saved and imported the STL file to Aspire software.
Molding
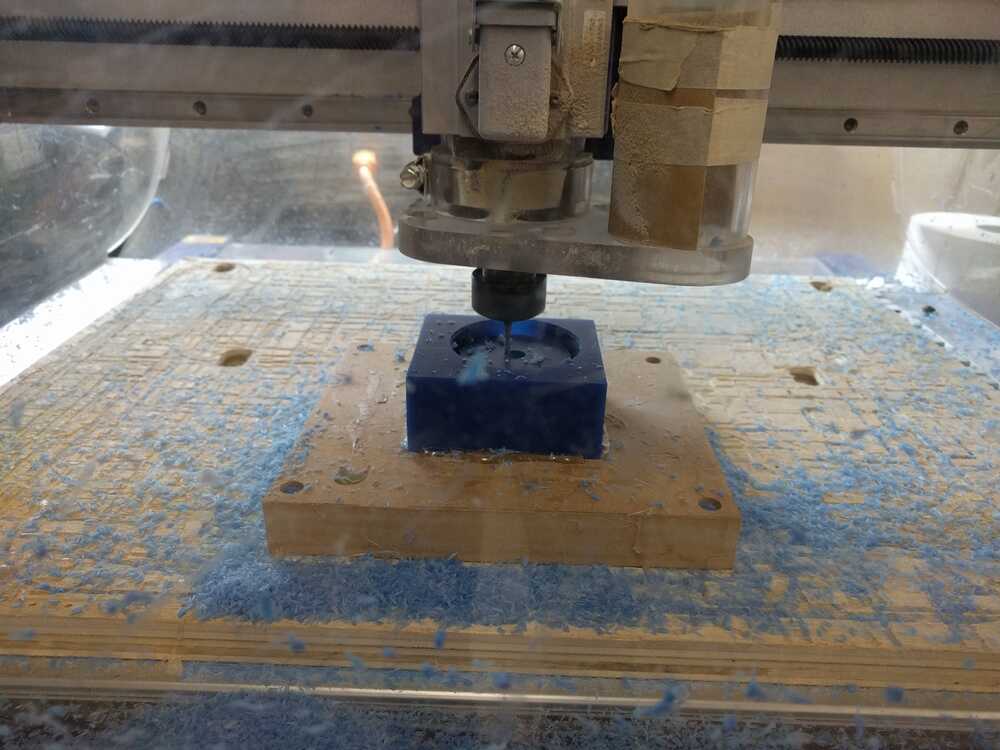
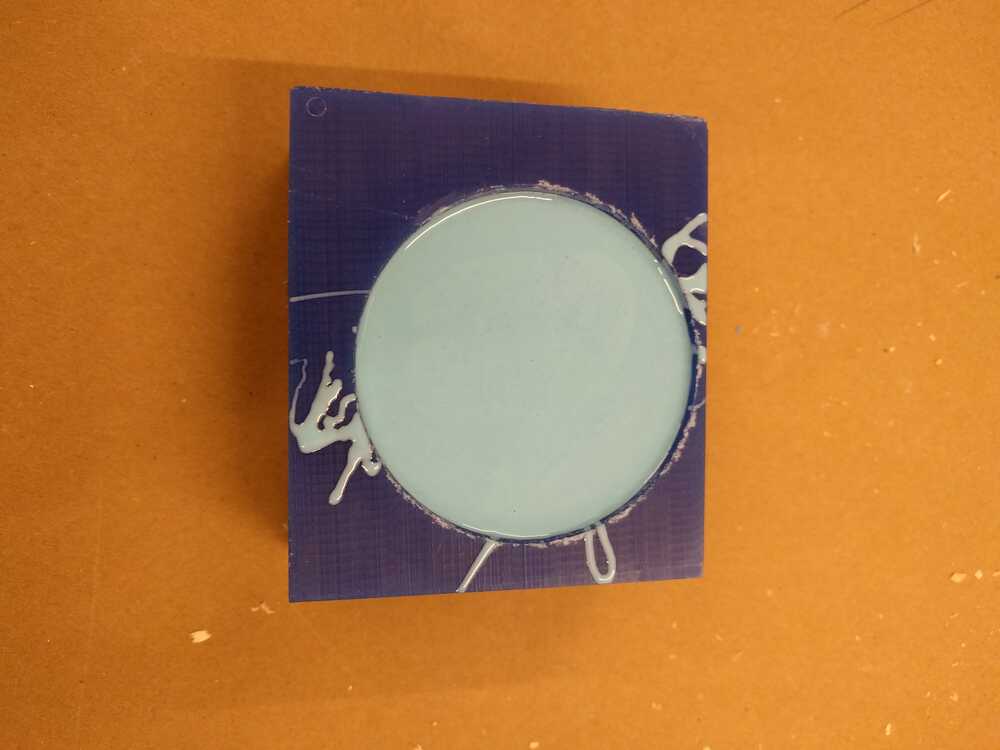
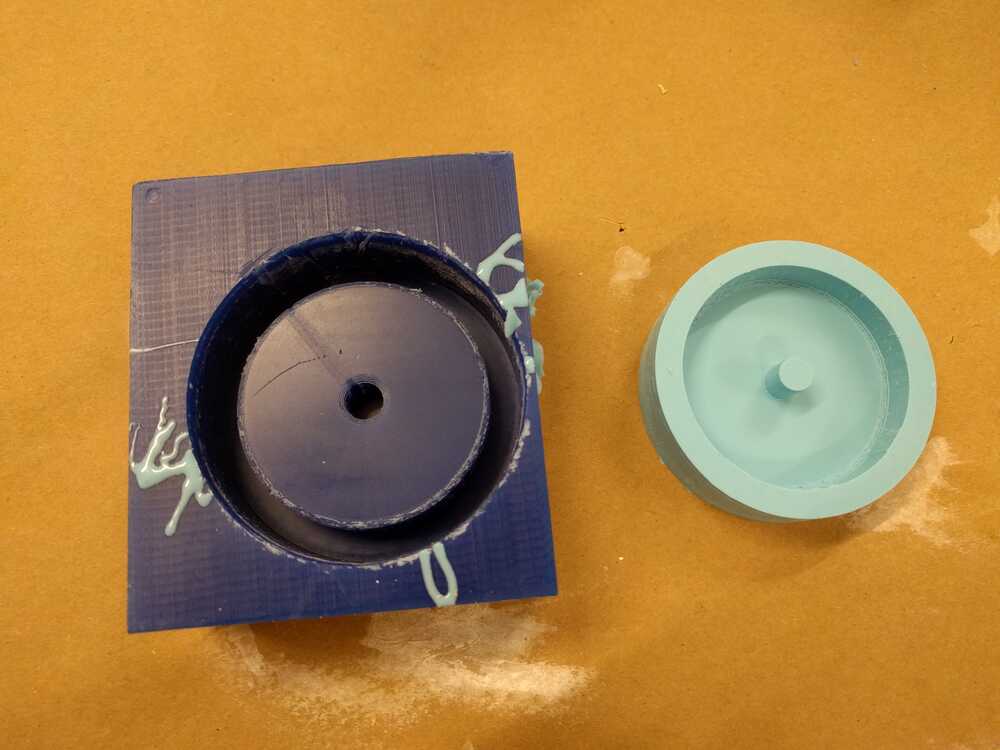
Basically I followed Kevin’s detailed instructions here. Since I had a symmetrical shape, I did not need to create two different sides of an object with two layers and add holes around the shape to connect the two sides. I added the chute and vent path and observed the 3D Toolpath. It starts with rough cut and finishes with finer soft cut. Zero the machine and do air cut before cutting.
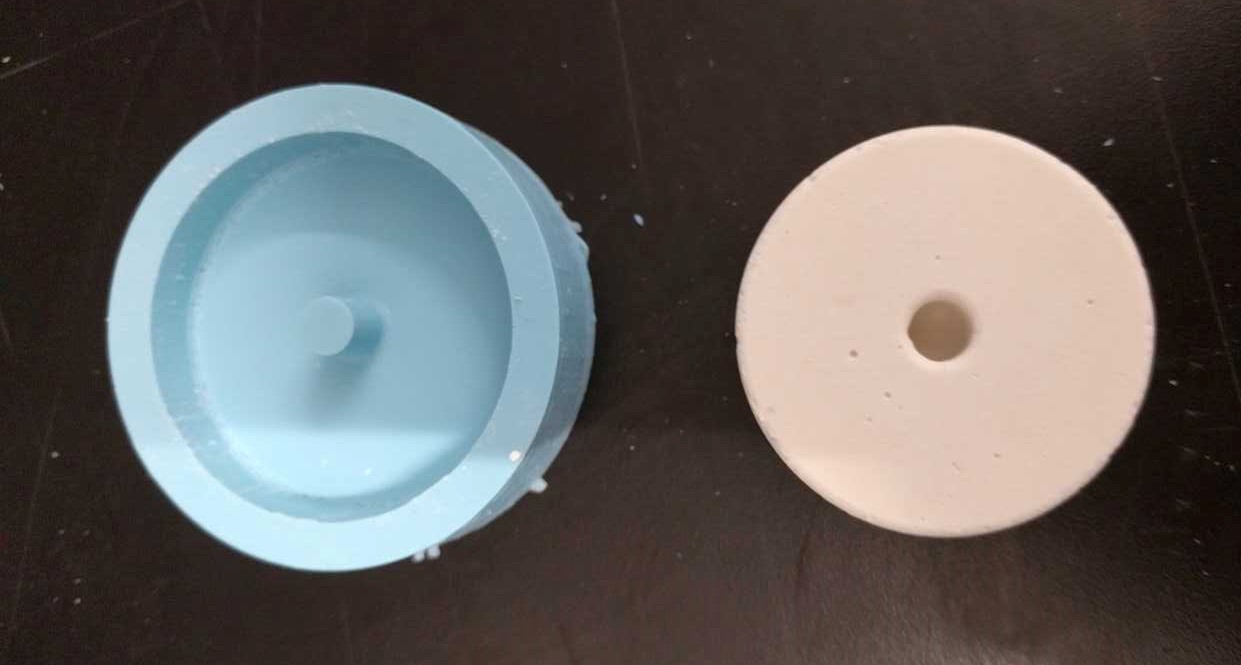
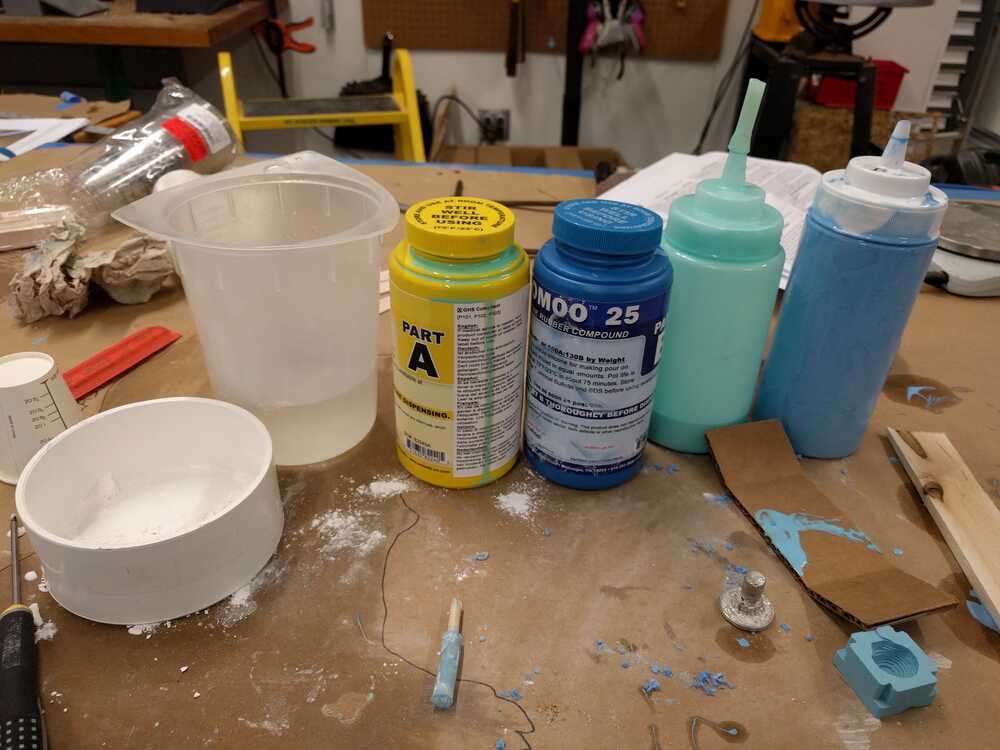
After milling the positive mold, mix Oomoo silicone with another ingredient and avoid bubbles. Then pour this into the negative mold to make the negative mold. With this one mold I made, I can easily make many casts, like having made the printing press letters I can print many Bibles.
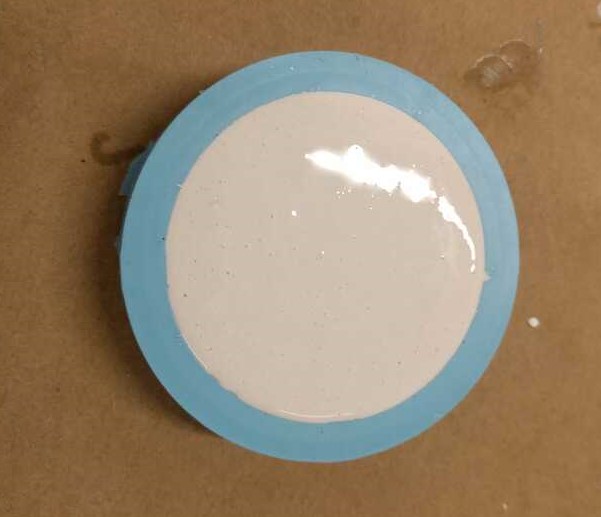
Casting
To cast the object, I poured in Drystone into my mold. Within a couple hours, I pulled out a wheel! As Drystone seems fragile and breakable if dropped from a height of a foot. Thus, it probably is not good material for a car wheel that may travel through rough terrain. Instead of Drystone (which is cheap), I can use other materials including metal and chocolate (use food-safe mold material).