This week, we learned how to perform forward and reverse transforms between digital models and three-dimensional objects using 3D printing and scanning.
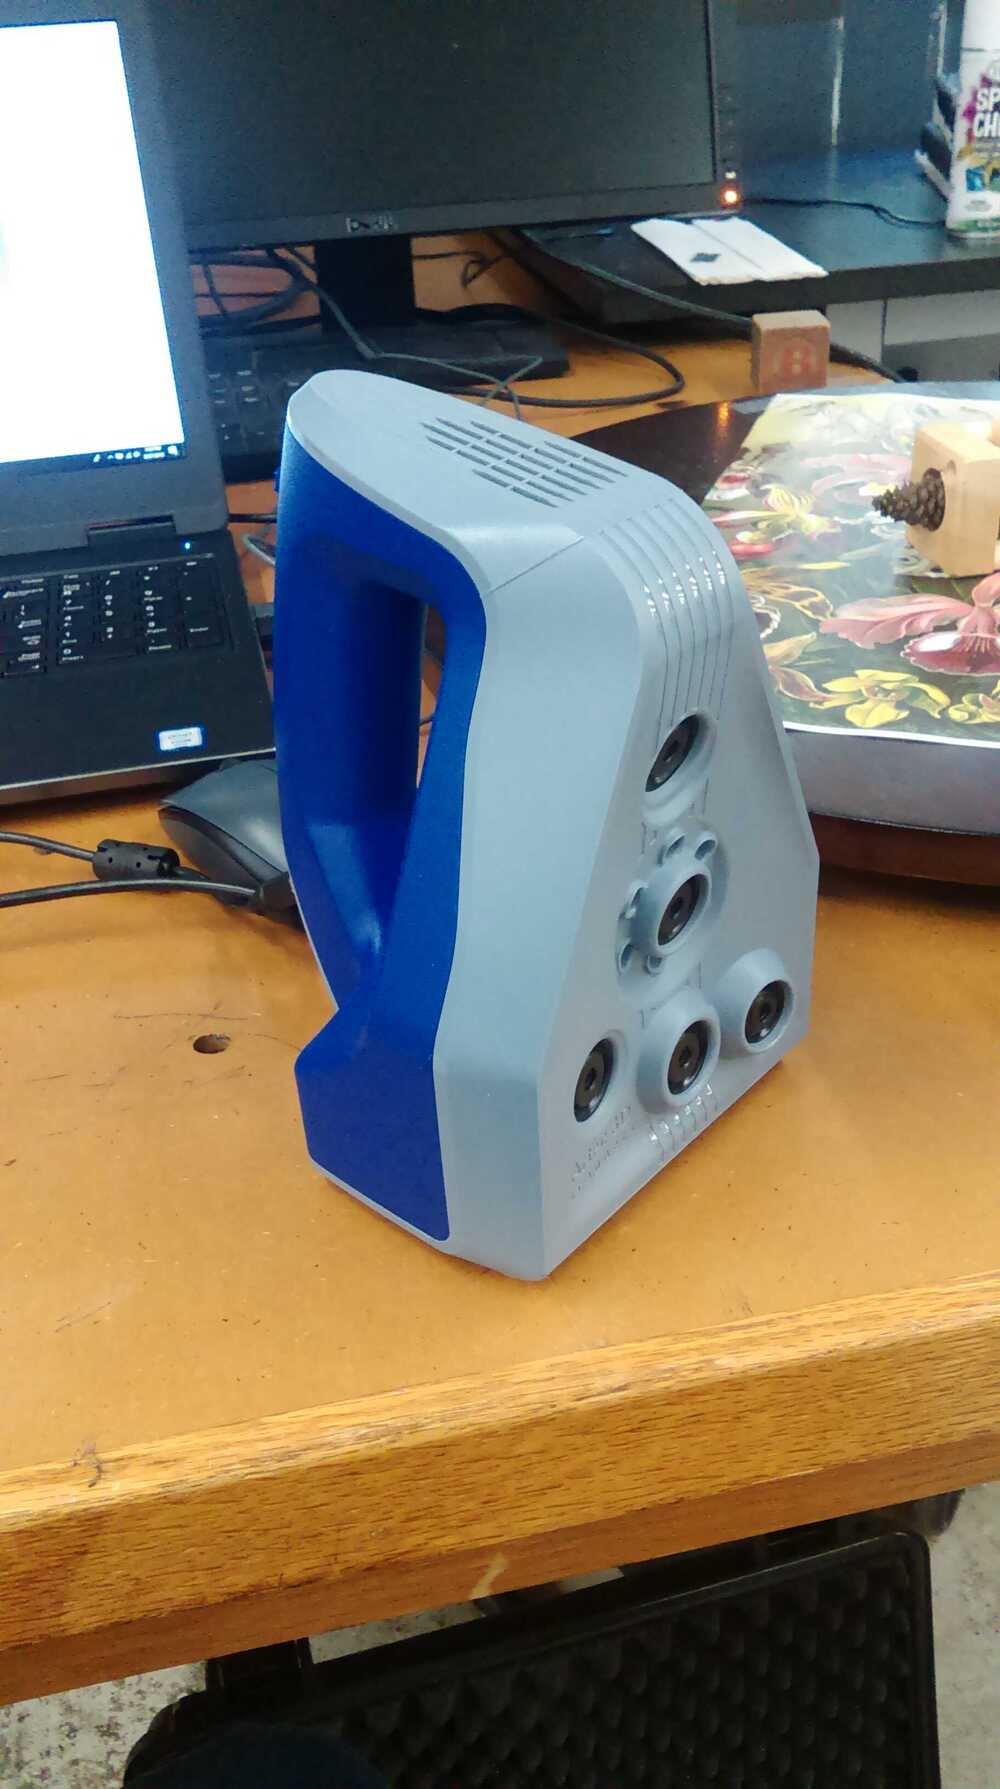
For this part of the week's project, I got to use a $25,000 Artec Space Spider industrial metrology scanner based on blue-light patterned illumination combined with high-resolution surface texture imaging.
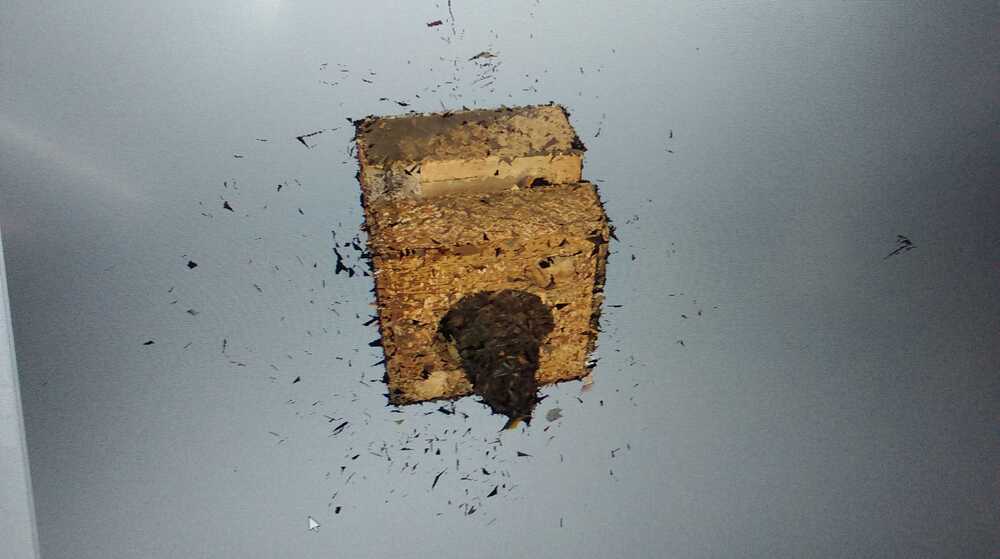
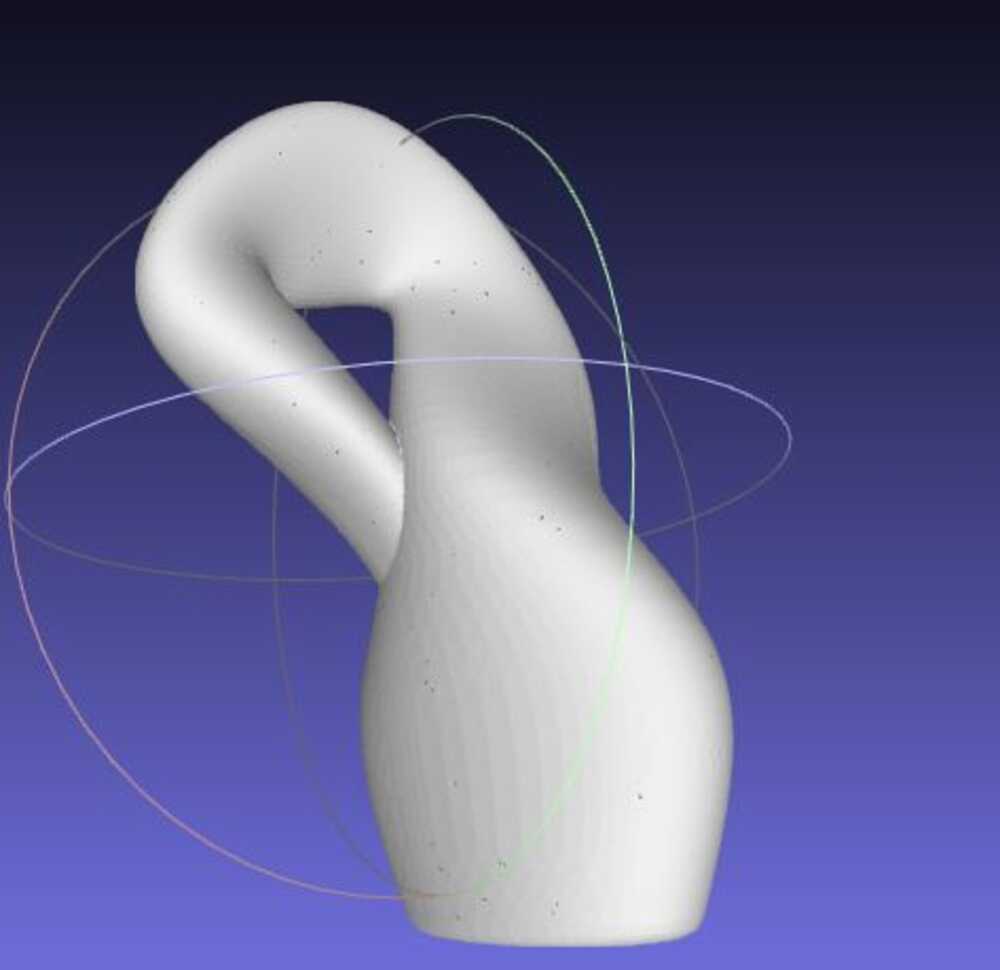
I decided to test the machine's texture and spatial capabilities by scanning a handmade wooden pencil holder that included a couple of interesting matte textures and some complex geometry.
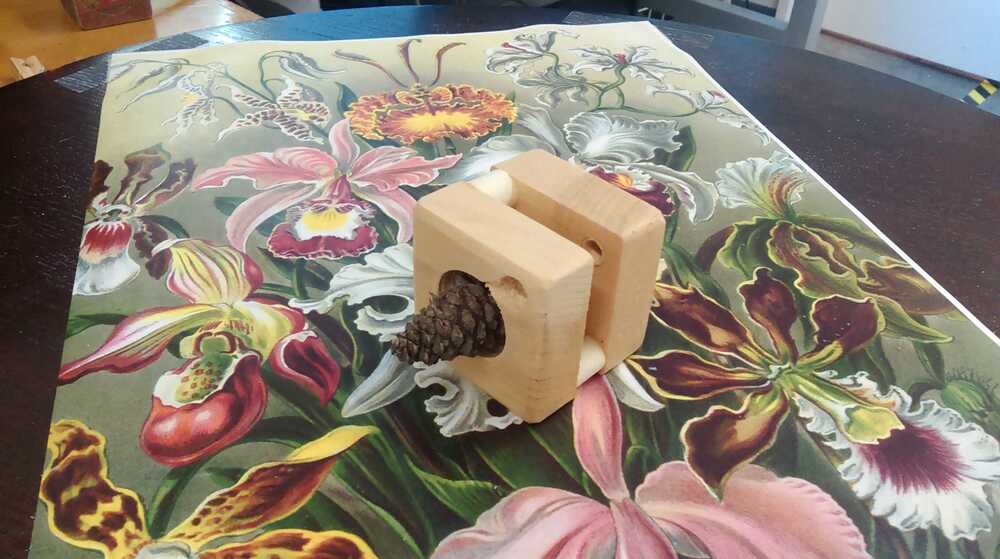
Because of the geometric complexity, I had to use 6 scans to cover as much of the object as possible.
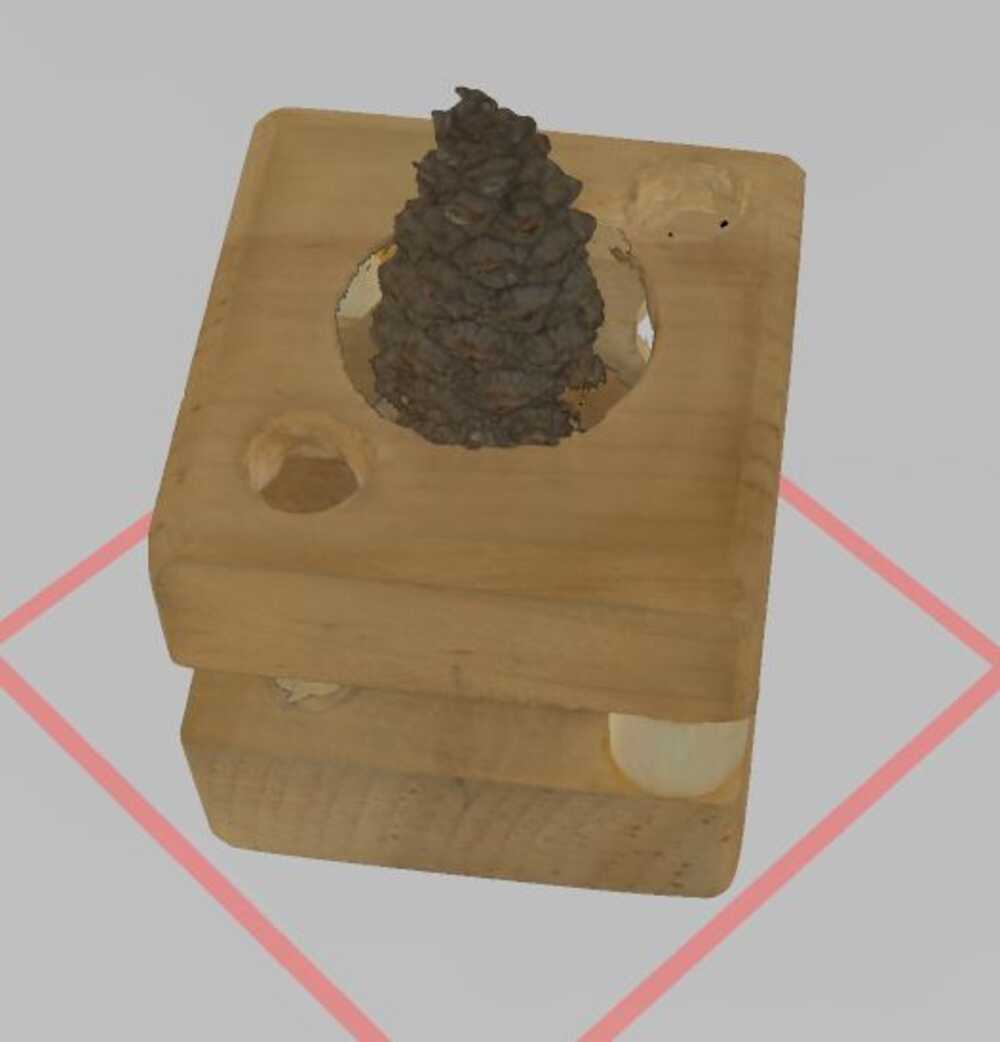
All of the effort, however, led to a beautiful result in a very high-resolution, and high-fidelity 3D model of the pencil holder.
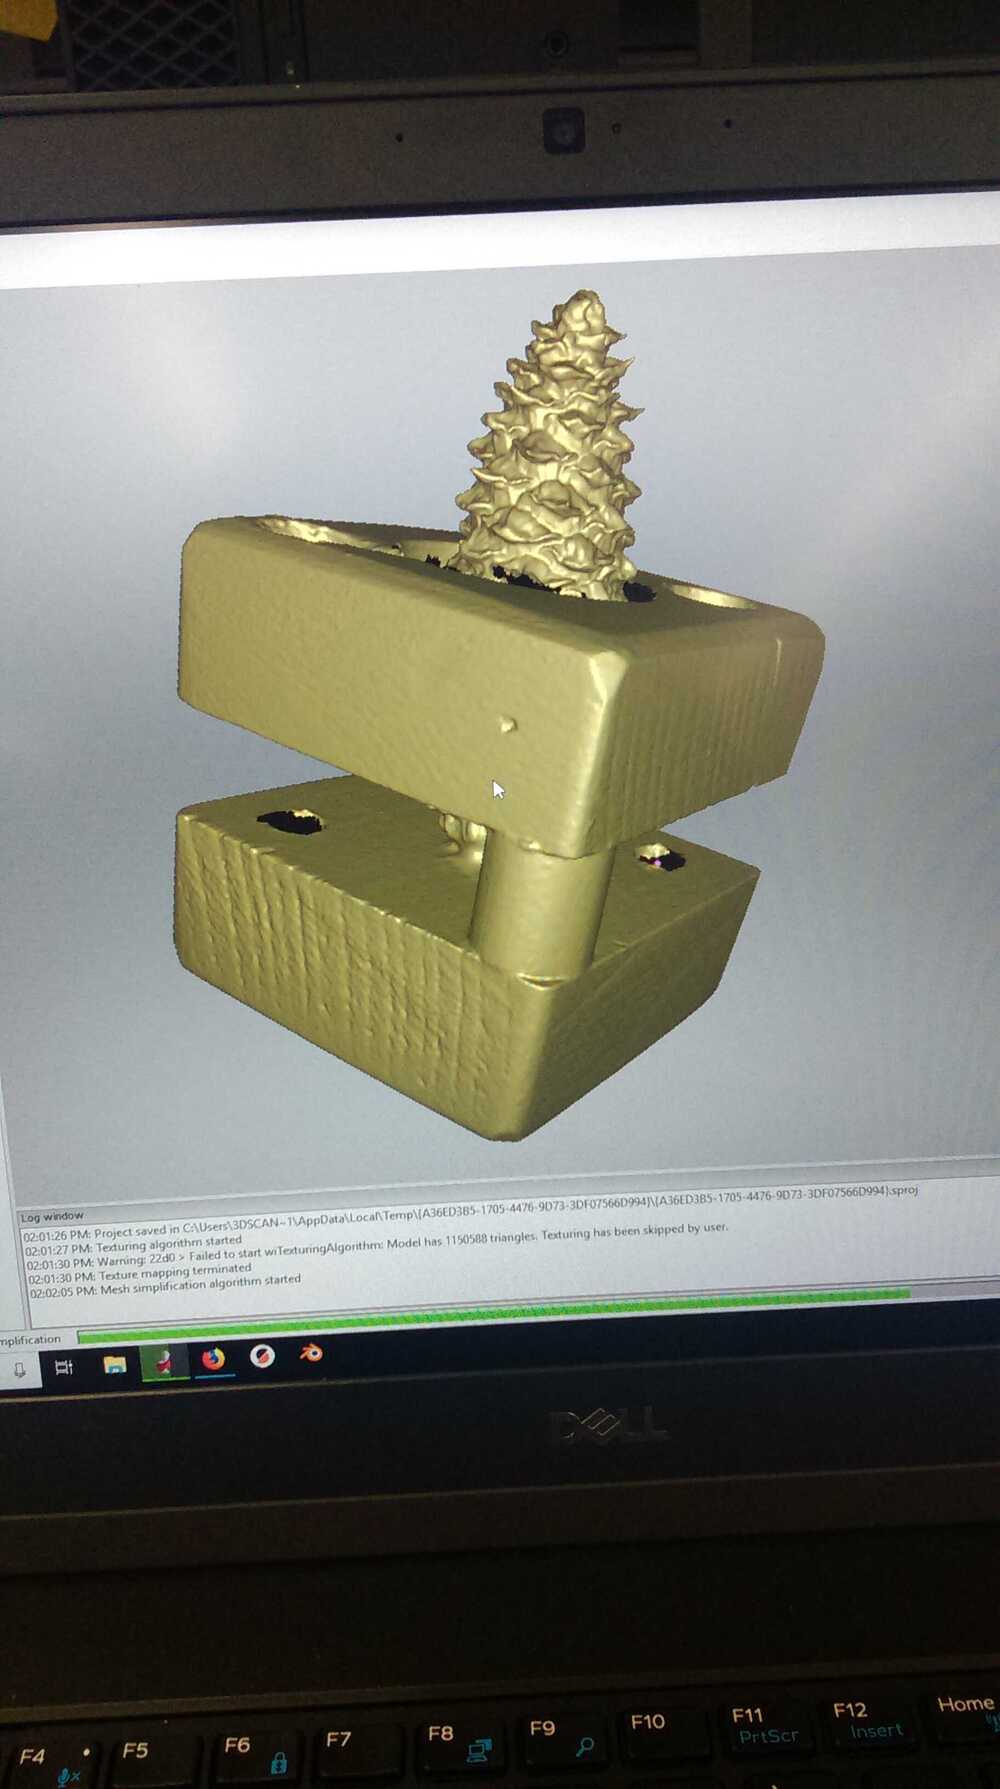
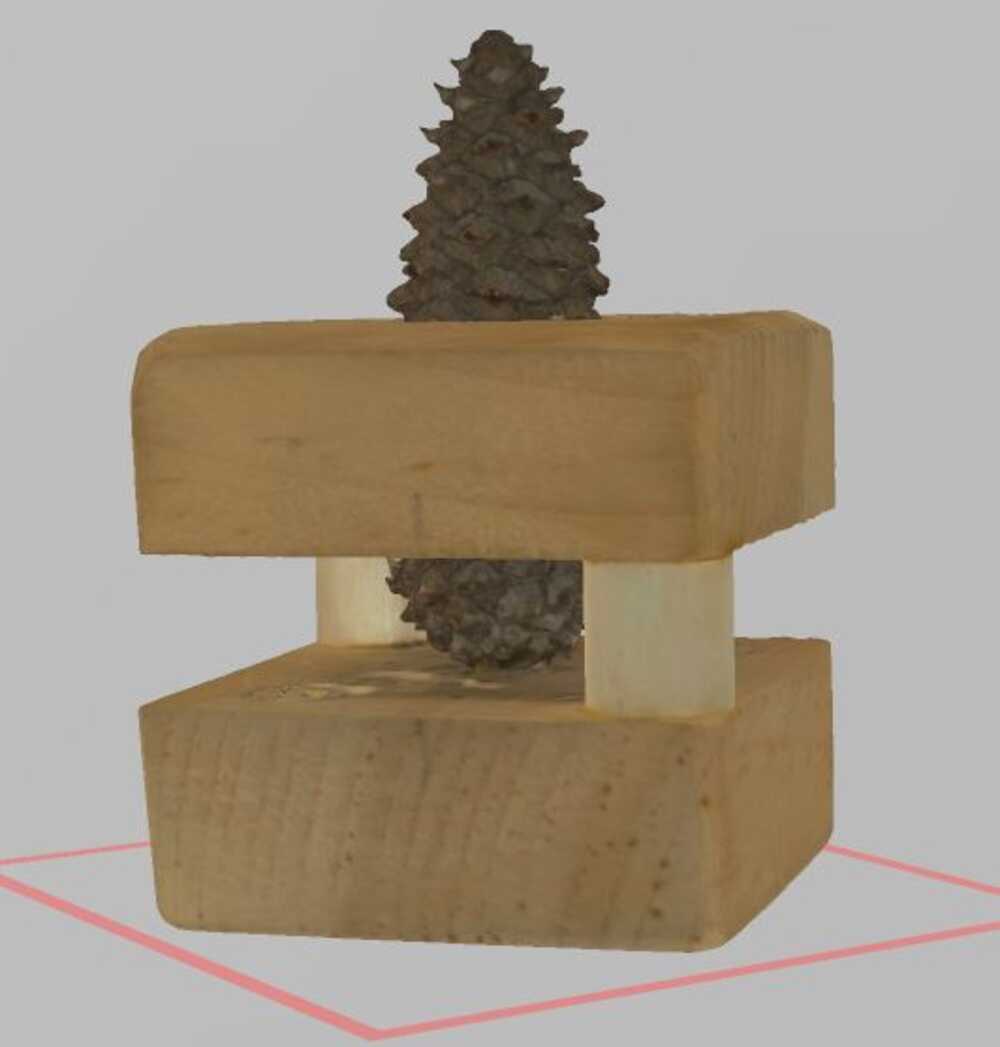
Unfortunately, however, the scanner couldn't see very far into the holes and gaps in the structure, so the mesh ended up incomplete. I was able to patch some of the holes using the tools in the scanner software, but other holes were simply too large for automatic patching, so I left them as evidence of the limitations of 3D scanning.
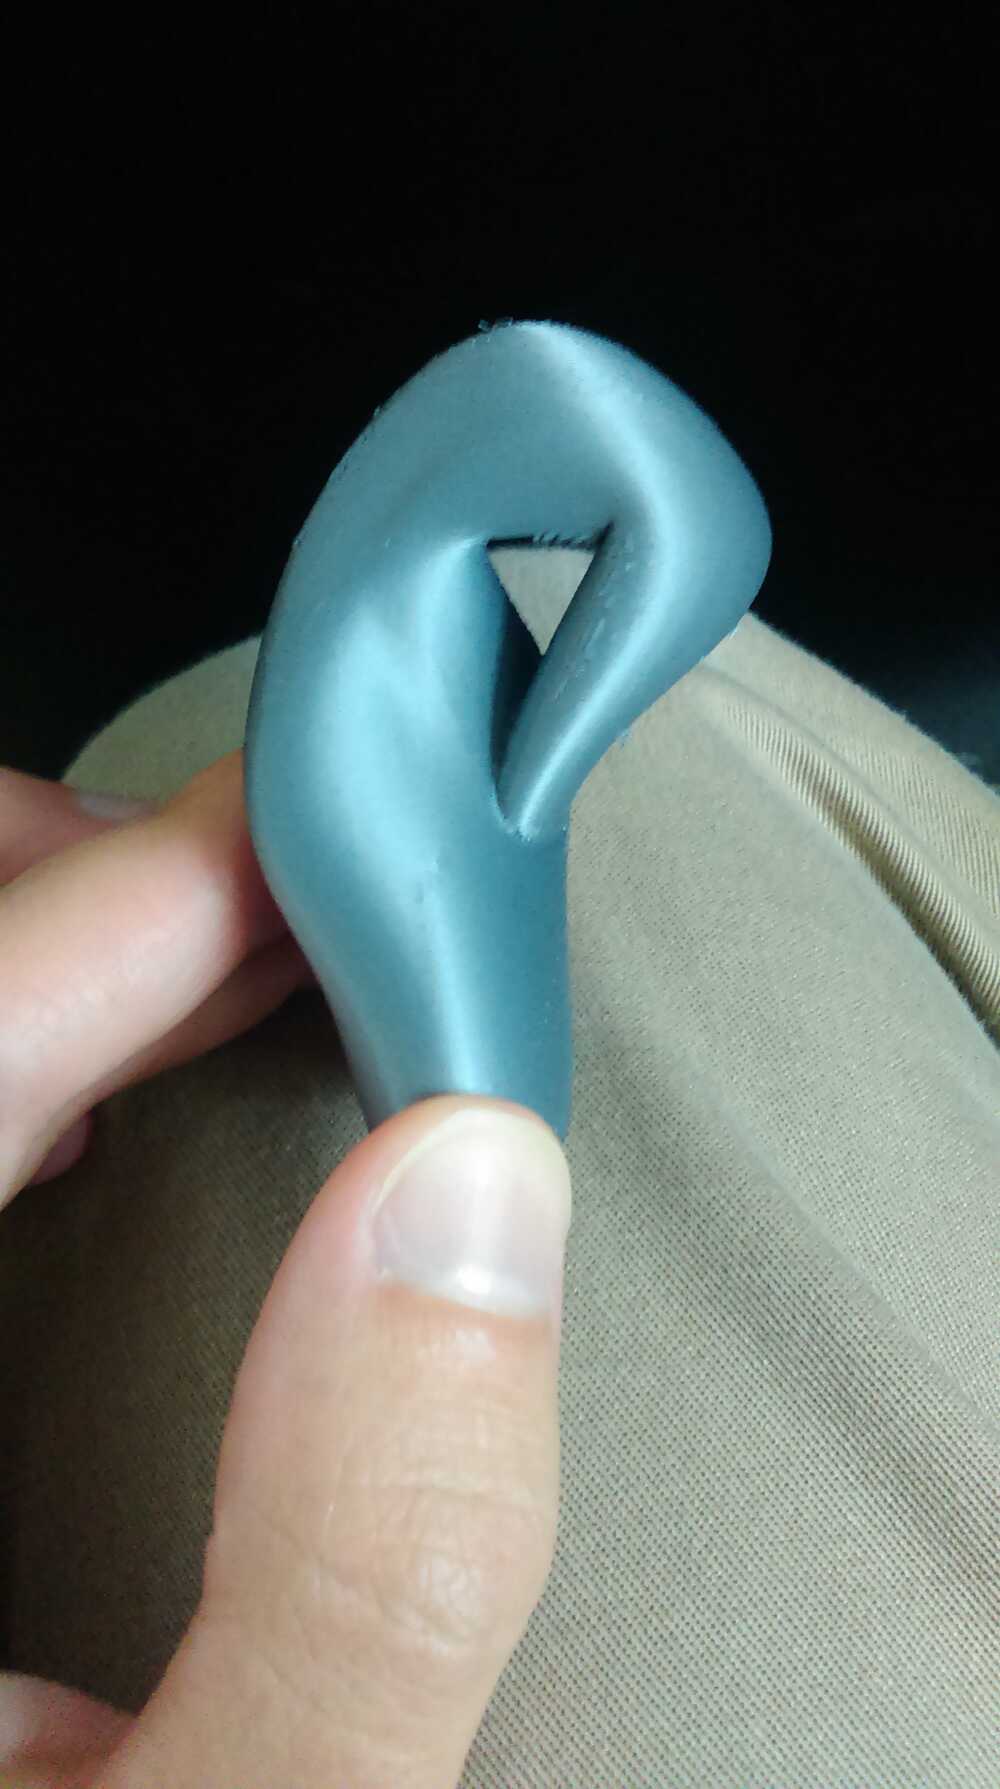
Next, it was time to do the inverse transform--to turn a digital model into a physical object. The assignment was to use a 3D printer to make something that could not easily by made with conventional subtractive techniques. I decided to make a three-dimensional immersion of a klein bottle, a shape that, like a Mobius strip, has only one surface, but, unlike a Mobius strip, has no edges. Interesting, this sort of 3D representation of a klein bottle (which can only be represented without self-intersection in a four-dimensional or higher space) can actually be filled with liquid, which I have always found cool.
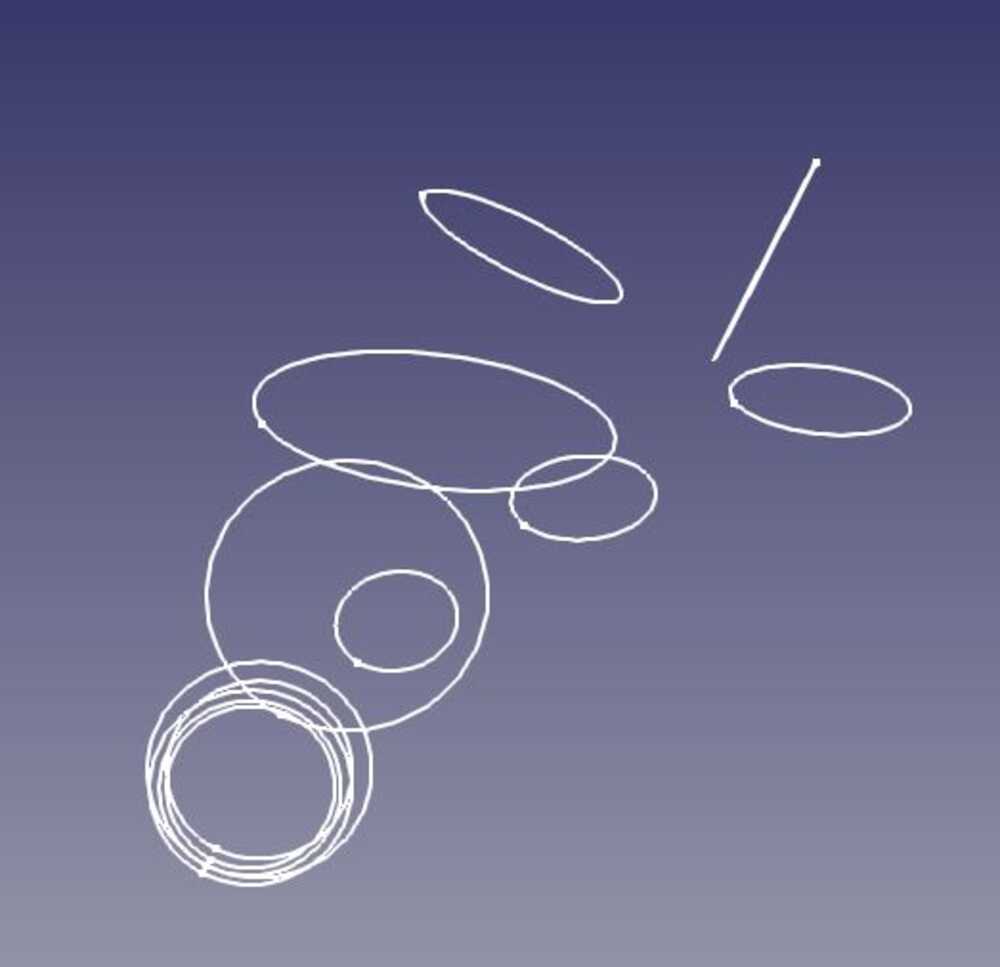
I started by creating a series of elliptical profiles and then lofting them into a klein-bottle surface in FreeCAD.
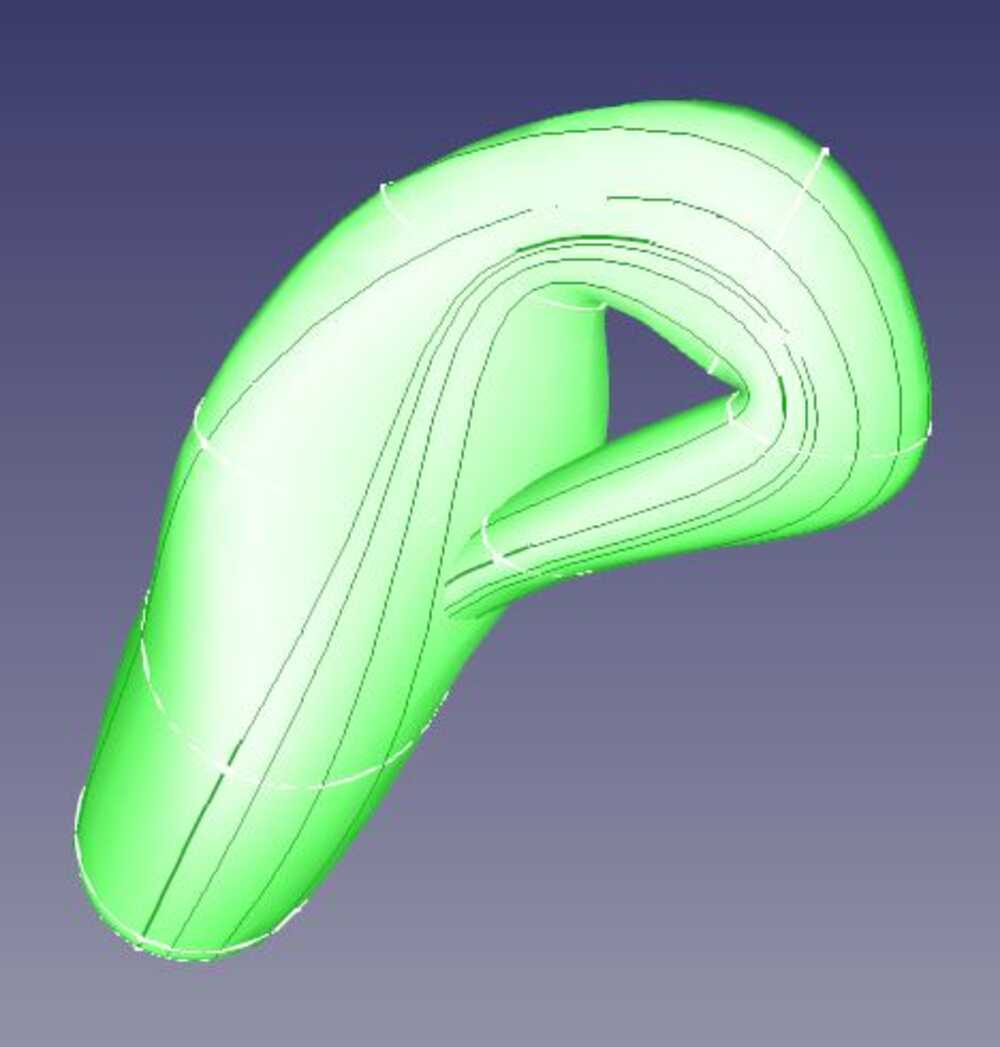
The next step was difficult. I had a representation of a klein bottle, but it was only a thin shell and had no thickness, which would be necessary for slicing the model for printing. CAD processing on a klein bottle surface, however, turns out to be hard--precisely because of the interesting topological features of the shape. Because klein bottles have only one surface, it is not possible consistently to define an inside and outside of the mesh--the klein bottle surface is non-orientable. Most mesh and object-processing algorithms, however, rely on being able to define the direction of the surface normals consistently. This isn't possible on a klein surface, so I kept getting errors when trying to add thickness.
I ended up solving this using the uniform resampling module of MeshLab, a resampling process that is volumetric (and so doesn't need to find the normals) and that can be set to resample at offsets from the original surface, thus creating two meshes that sandwich a thickness. After this, I cleaned up the mesh by filling holes and making sure the mesh was watertight and manifold and then used the mesh CSG tool in MeshLab to remove an undesired surface inside the "handle" of the bottle resulting from the way I lofted the shape. The resulting mesh can be seen below. It has some holes, and for some reason has its normals flipped, but happily PrusaSlicer deals with that fine.
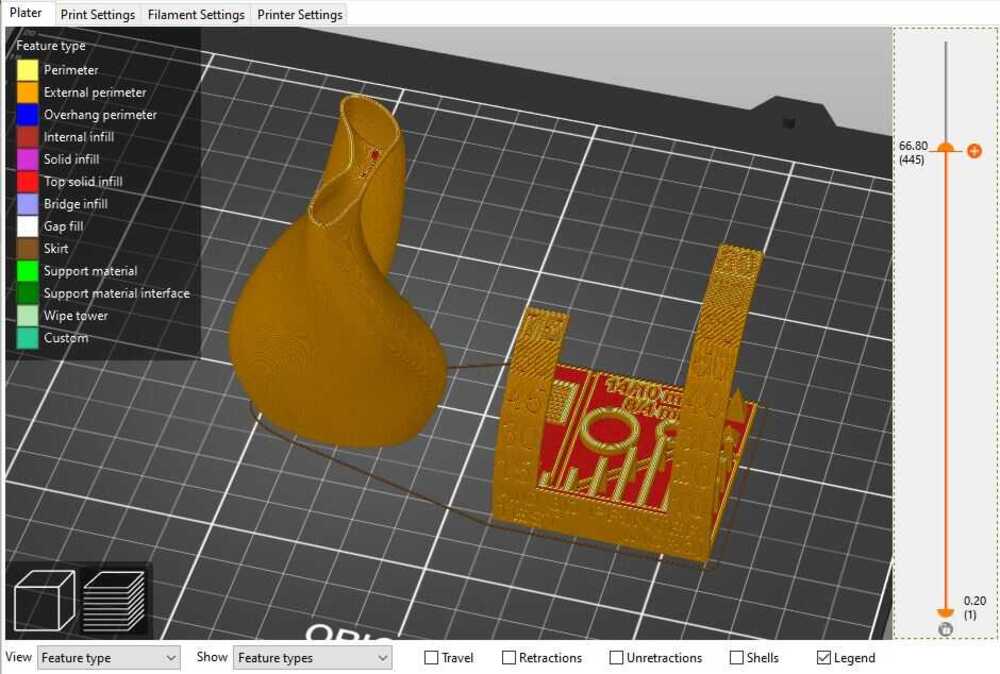
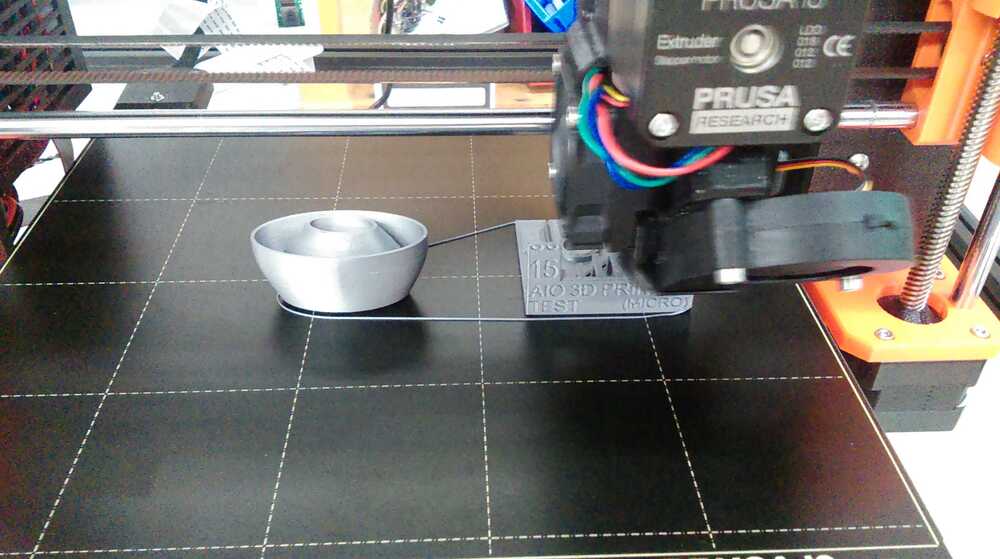
The final step before printing was the slicing, which I did using PrusaSlicer, a really nice and easy to use slicer made to go with the Prusa 3D printers that we were using. I imported the stl and then sliced it using the 0.15 mm resolution defaults. Along with my klein bottle, I plated a test stl file that I got from Thingiverse so that I could characterize the printer performance at the same time. With the settings I selected, printing would take just over five hours.
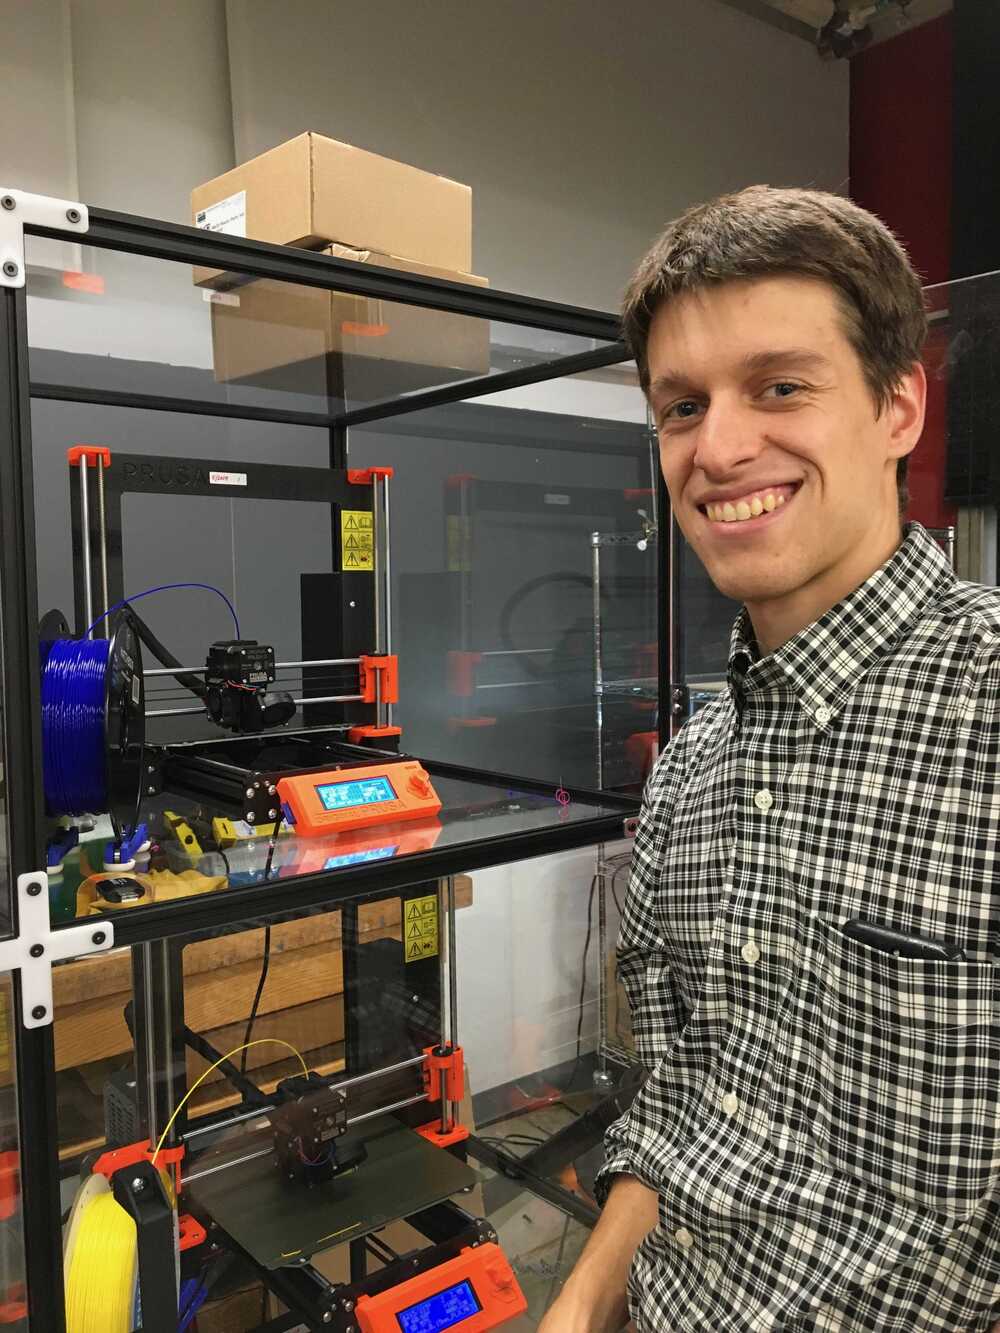
The printers (Prusa i3 MK3Ss) were just out-of-the-box. I had helped to assemble the frame for one of them just the week before, but already they were hard at work.

While the printer built up the layers, I kept an eye on it to make sure it started out right
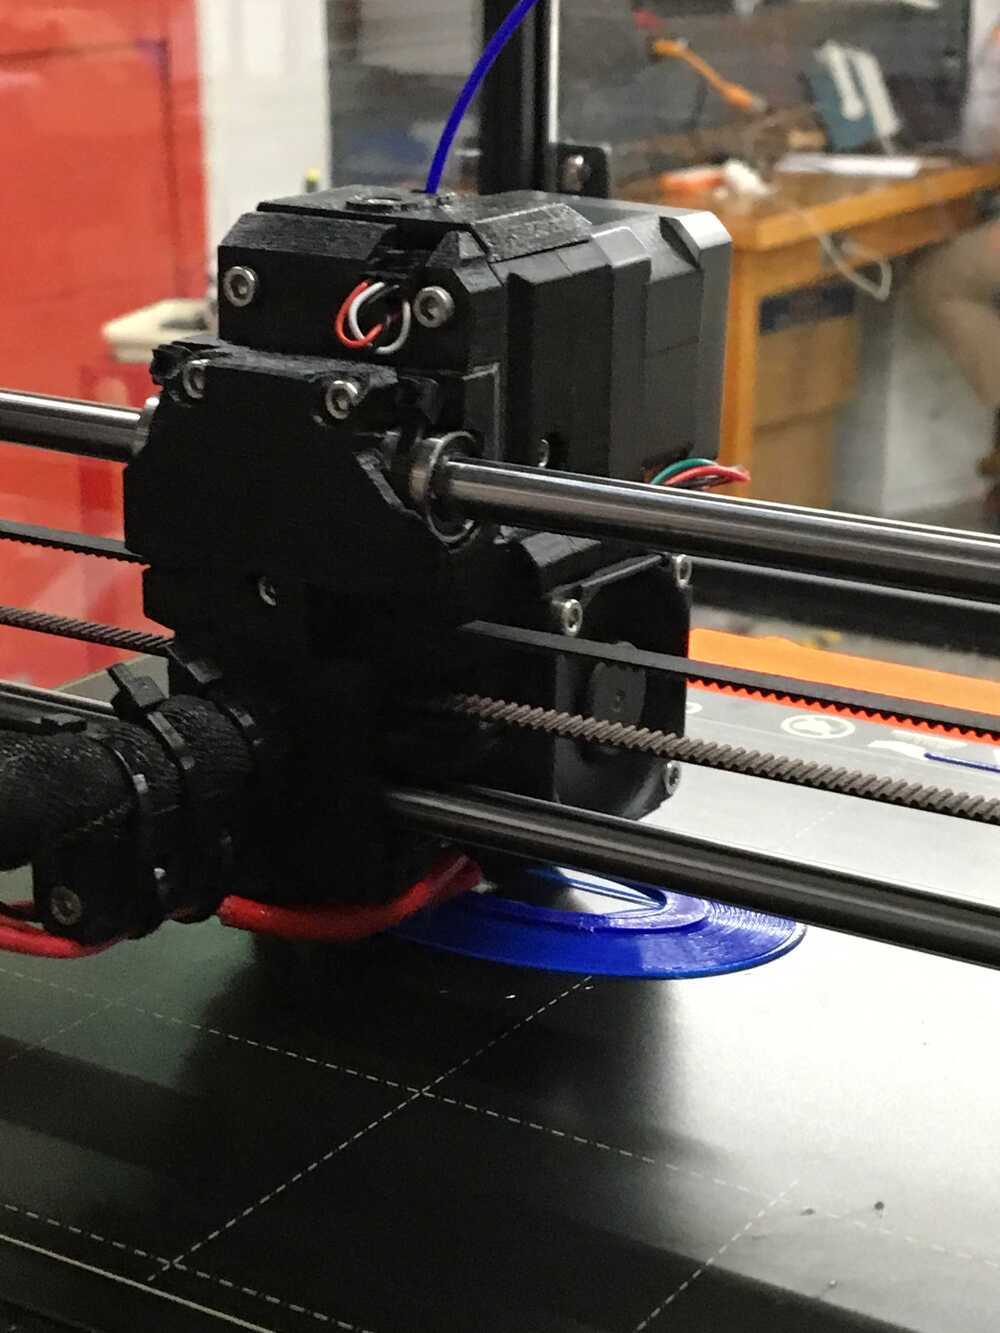
...but when I came back to pick up the finished pieces after a lab meeting, I found this (the half-finished klein bottle is lying behind the printer:
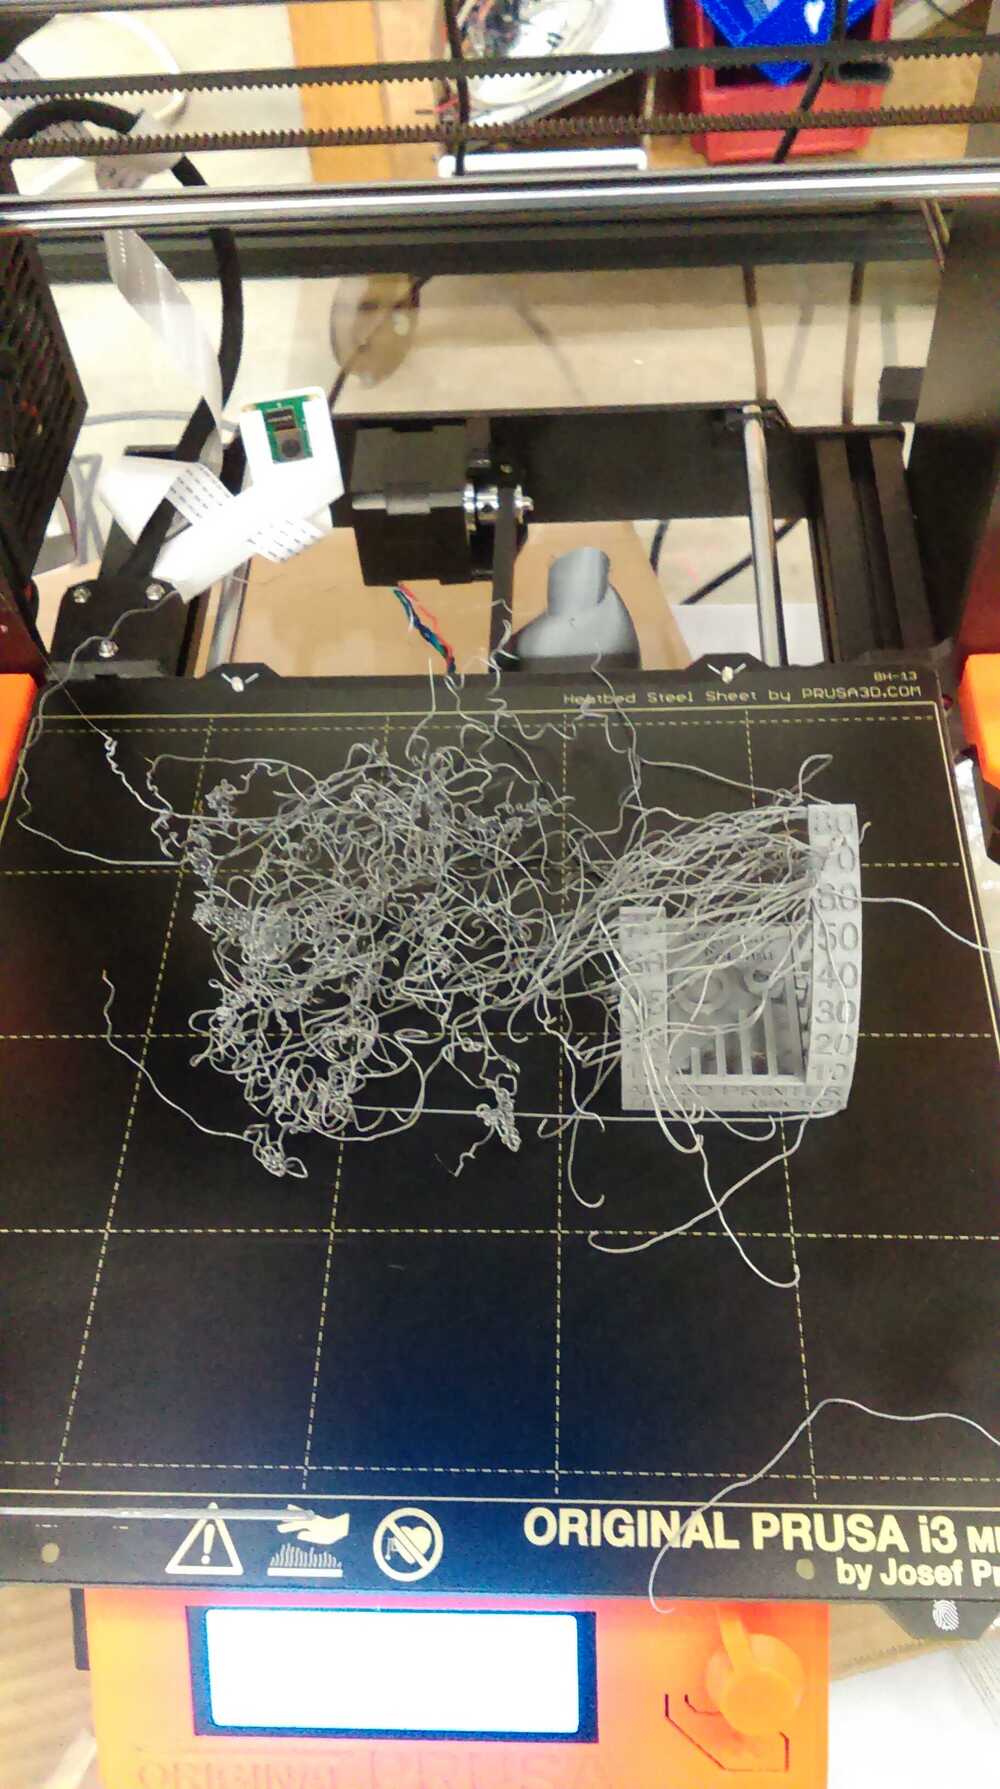
It's a bit hard to figure out what happened exactly, but it looks likely that, due to the small footprint of my object, it had become disconnected from the base plate, and the filament therefore had nowhere to stick, causing this huge mess. The test piece did however come out great, after the loose filament had been trimmed, and what there was of the bottle looked good.
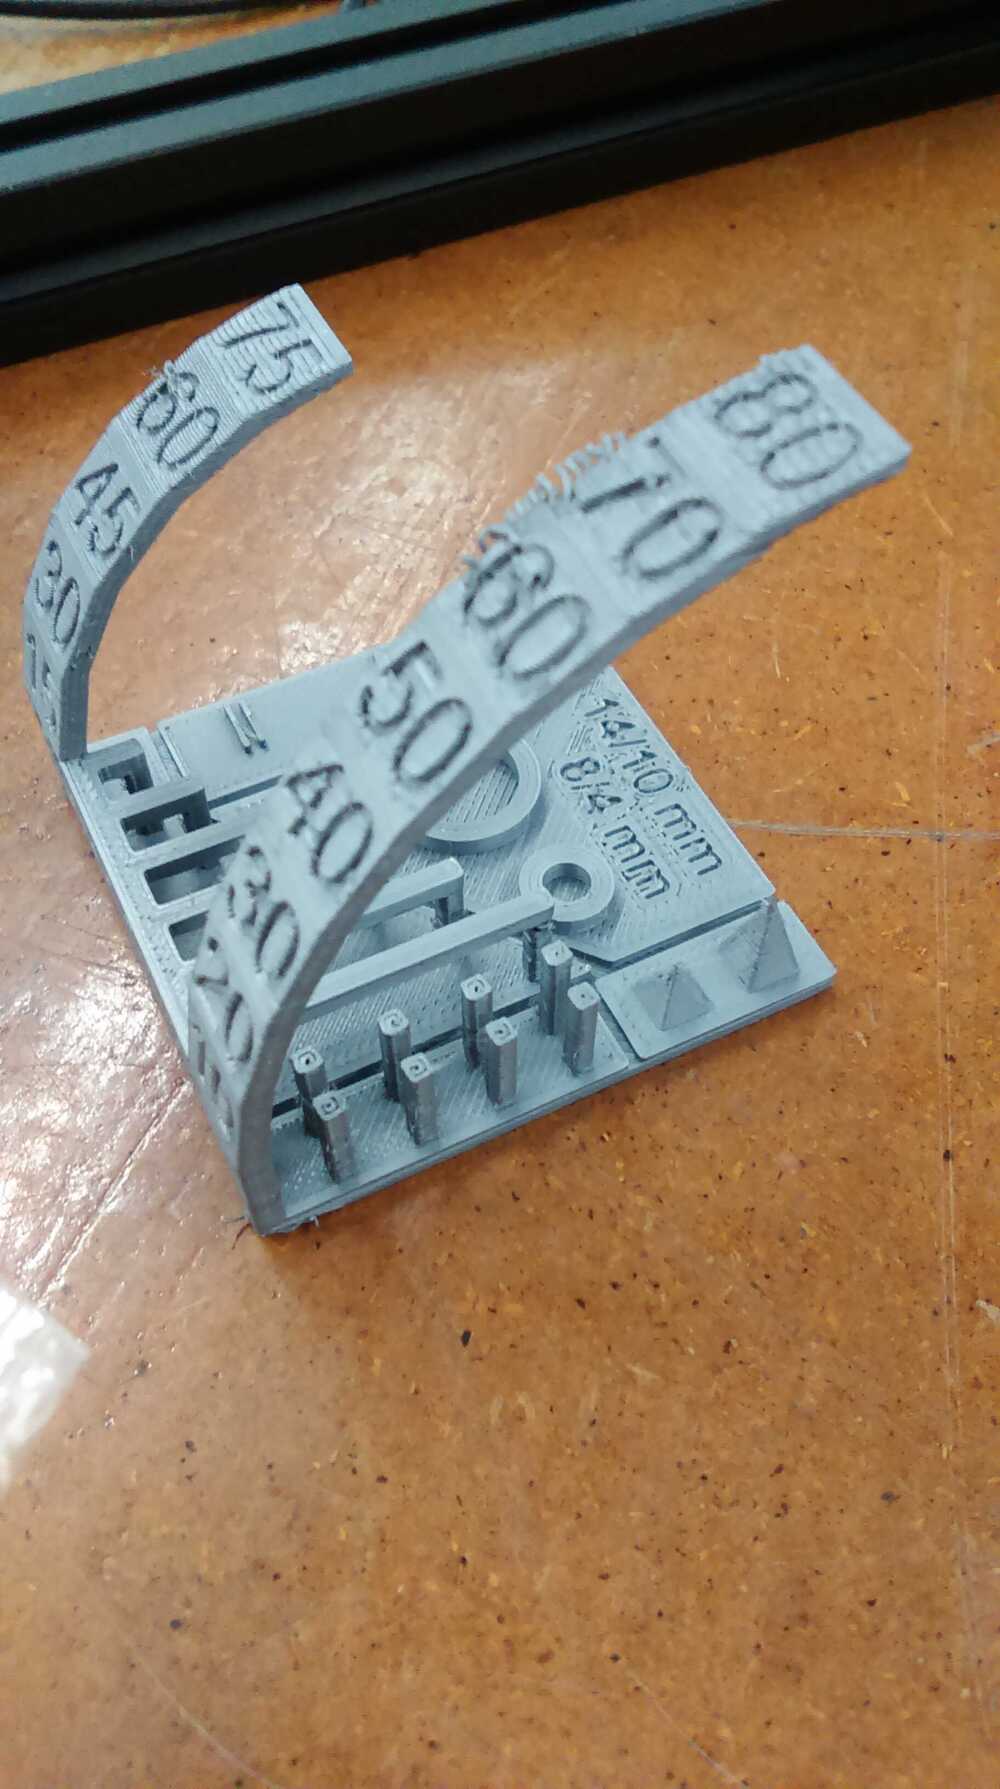
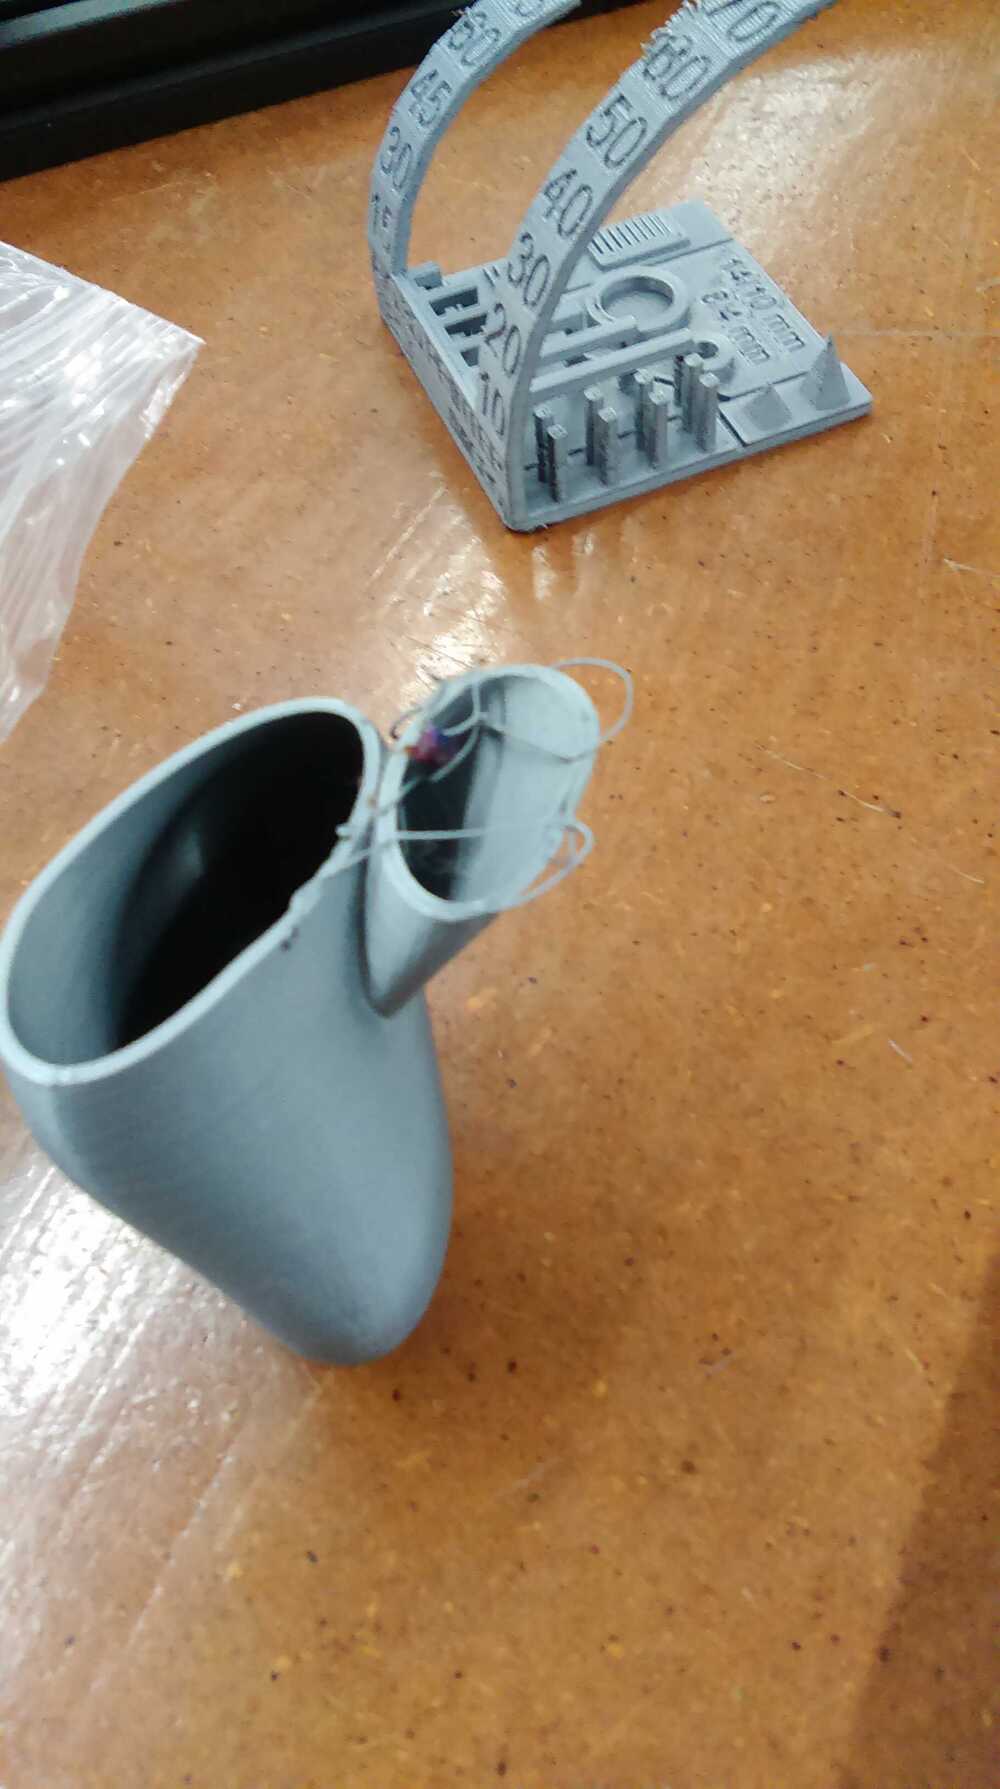
The test piece showed really good bridging up to 25 mm, good overhangs up to 60 degrees with reasonable overhangs up to 80 degrees, good resolution, but some problems with stringing of filament between separate parts. This could be fixed by playing with extruder settings, but I didn't worry about it as it seemed not to affect my model.
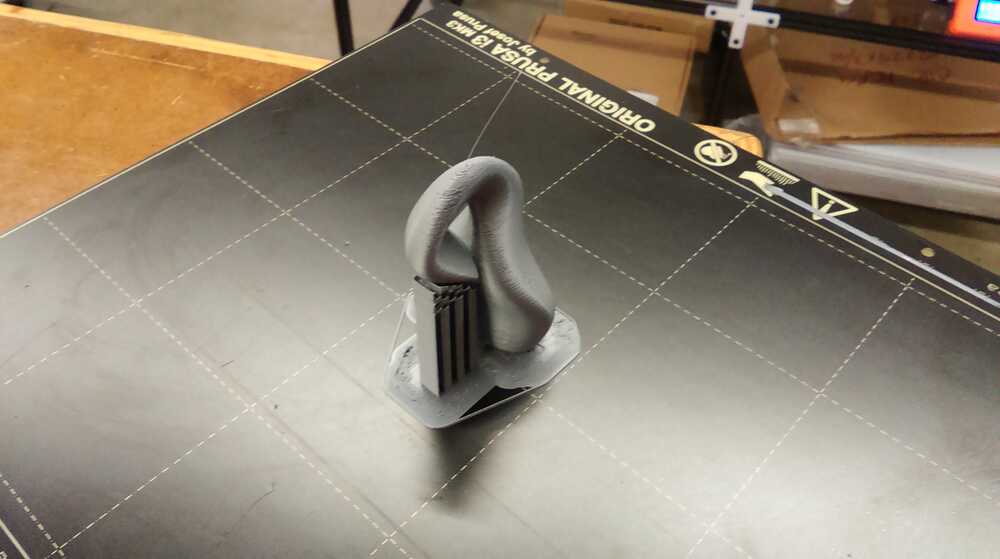
I hypothesized that my print had failed because the footprint of my model was too small. I therefore tried printing it again, but slightly scaled up and with a brim to increase the adhesive surface.
Unfortunately, this print came unstuck also. Time was running short, so I quickly sliced another run, this time smaller in order to save print time, and with supports (including a raft) in order to increase stability. I also ran a printer first layer calibration in order to make sure that the first layer was adhering correctly. This should finish right before I need to catch the bus to MIT for class, so hopefully I'll have a success for class. If not, I have some spaghetti to show off!
...and here it is! Finished just in time for class, and looking very nice: