Week 4
Let's go home
3D Printing
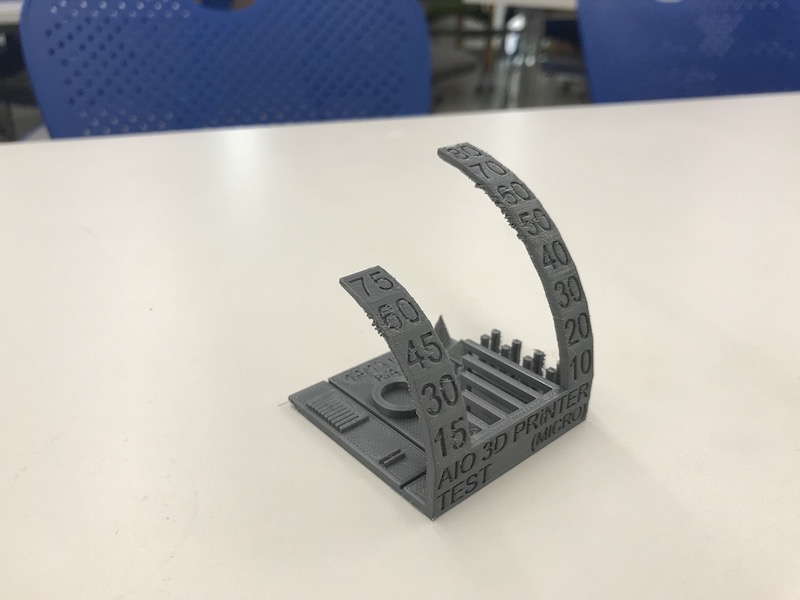
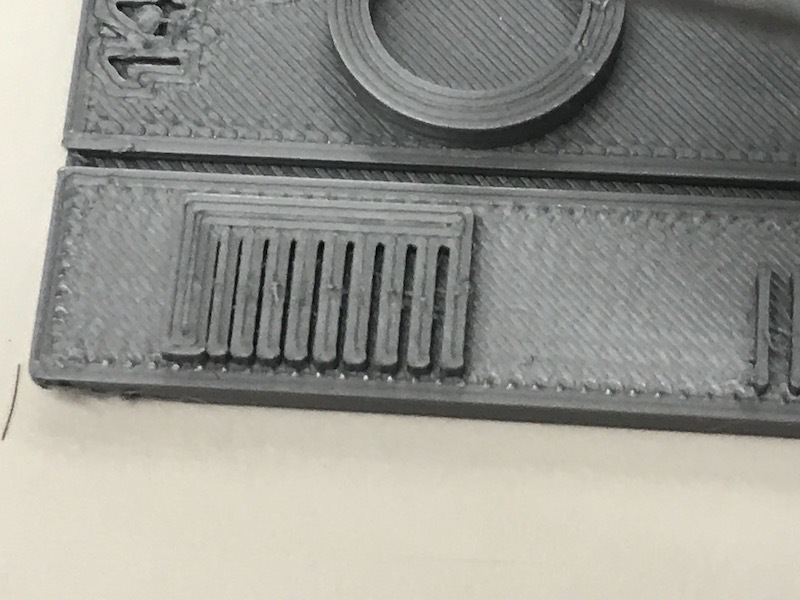
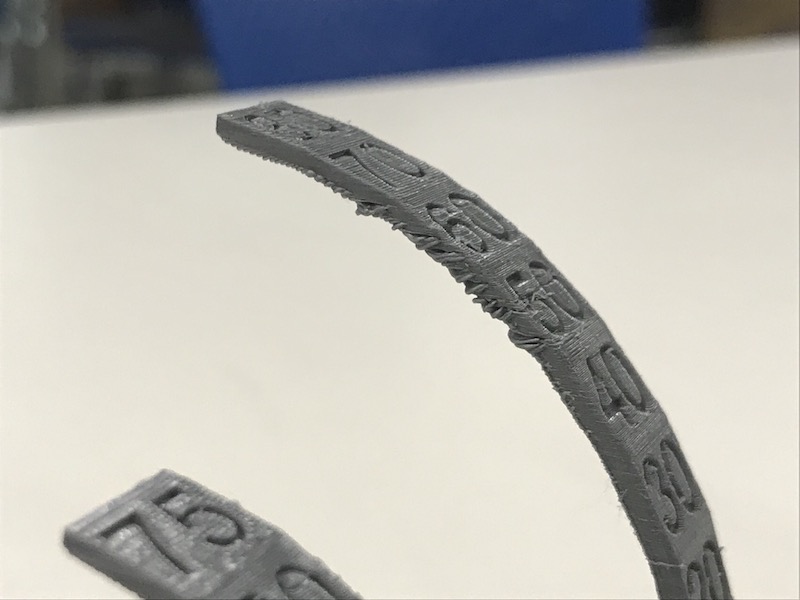
Started this week by characterizing the 3D printer (Prusa I3 MK3) in the Harvard lab with a few friends. The printer took in PLA. We printed out this characterization file. You can see the output of the print below. For some reason, the scaling didn't end up being 1:1, so the actual object ending up being smaller than the mm descriptions from the .stl file.
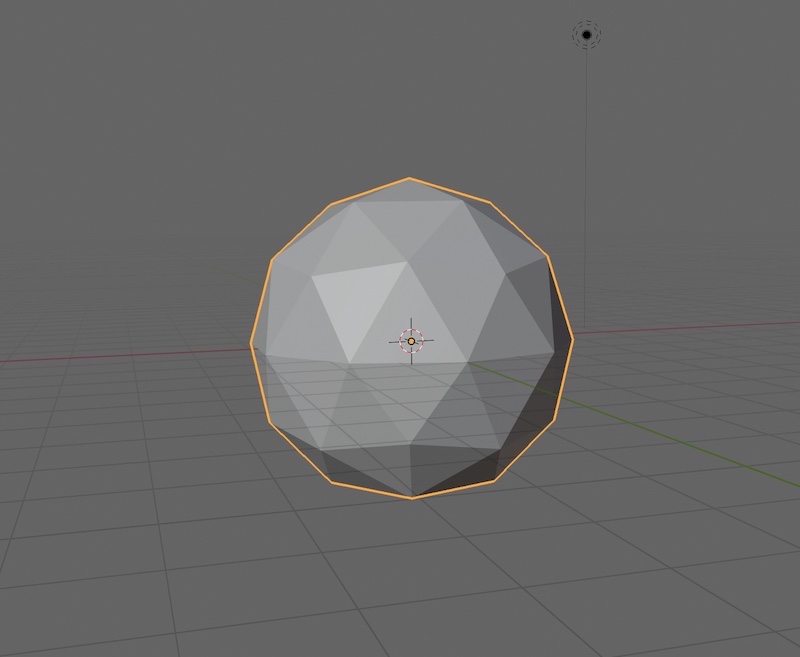
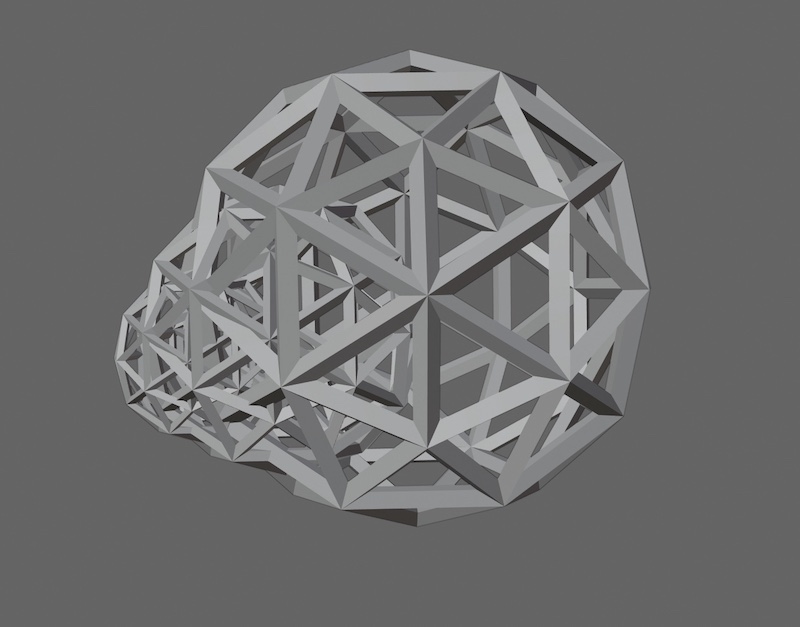
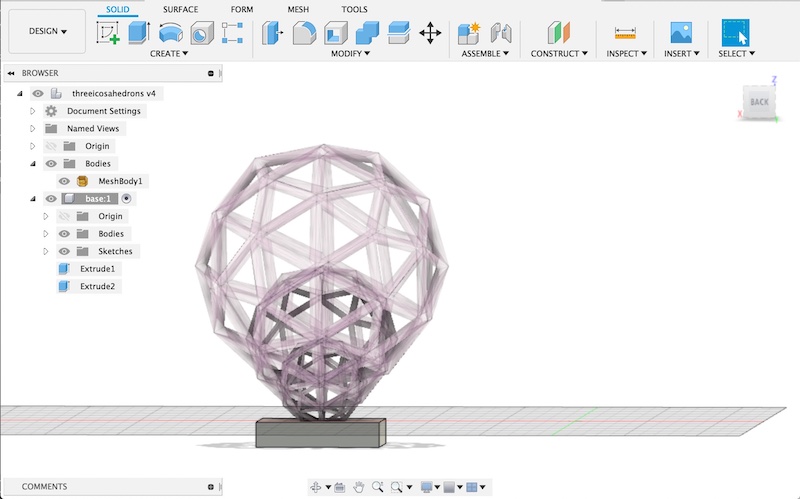
For my 3D printing project, I decided to use Blender to make a geometric model because I hadn't yet used the software and wanted to gain some experience using it. I started by taking an 80-sided polyhedron that modeled a sphere.
I took this solid polyhedron and used a modifier to change it to a wireframe.
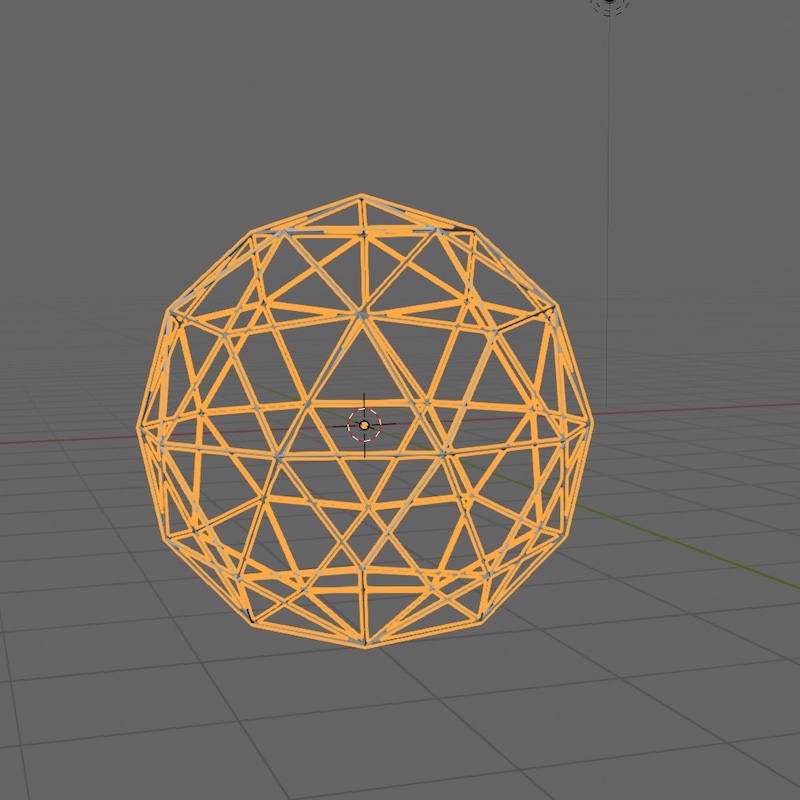
I then increased the thickness of the wireframe.
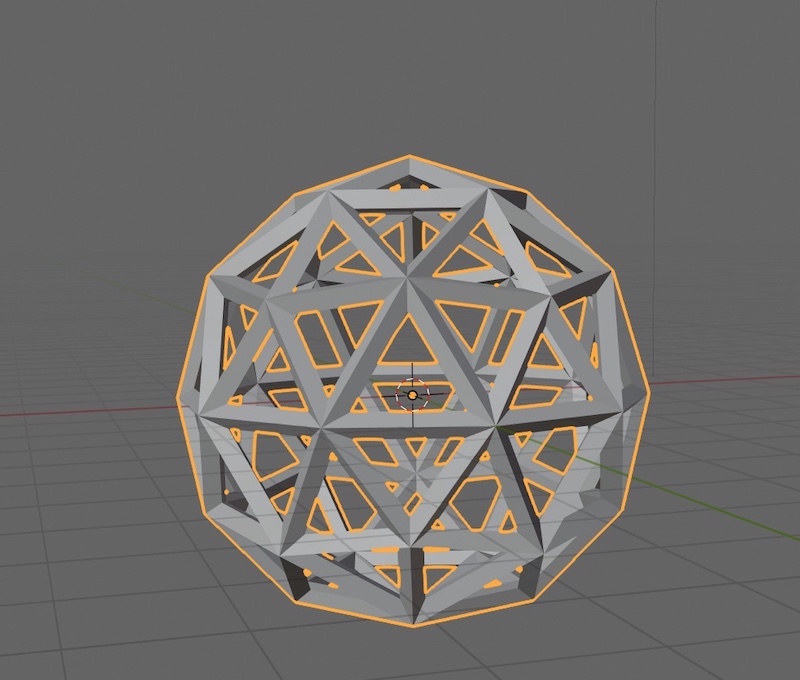
From here, I created an empty object, then added an array to the polyhedron, and set the "Object Offset" of the polyhedron to the "Empty" object. This will allow me to define a geometric relationship that will describe where additional copies of teh polyhedron will go.
I scaled the empty object so that the ratio of its size to the size of the original polyhedron was 3:5. I also set the count of the array to 3 so that there would be 3 copies of the polyhedron.
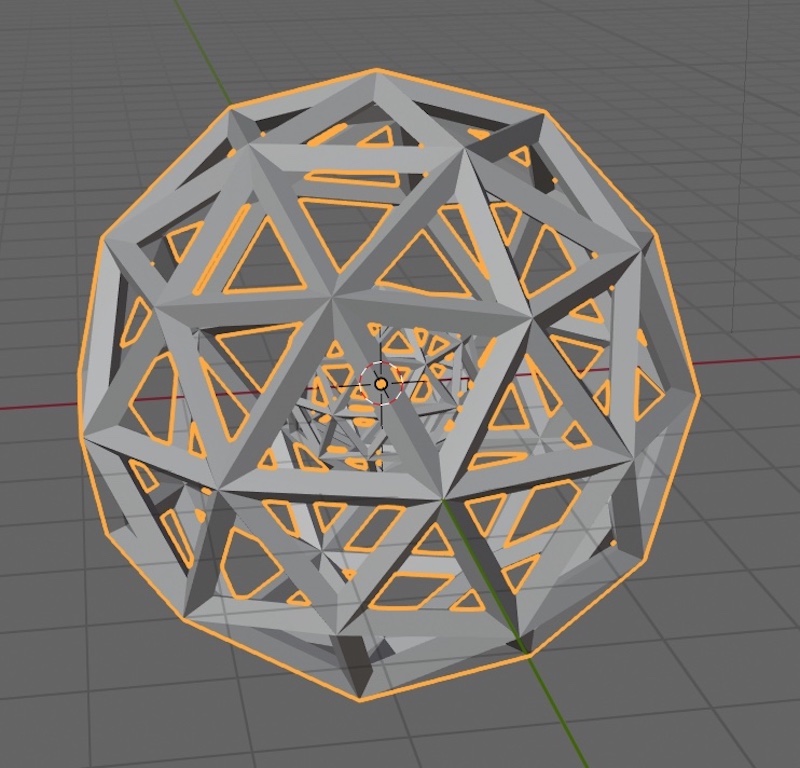
I then played with the relative offset to find a configuration of the objects I liked. I ended up setting the x offset to 0.5.
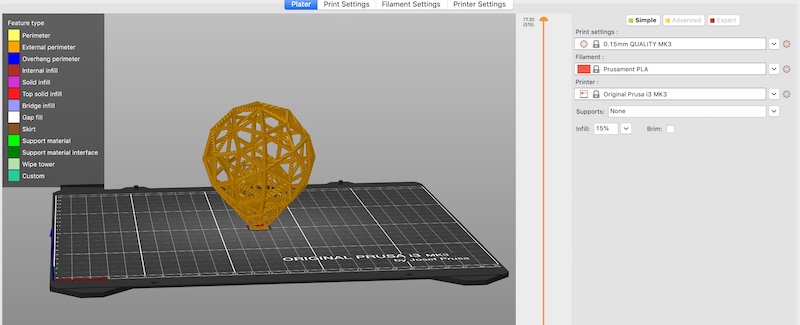
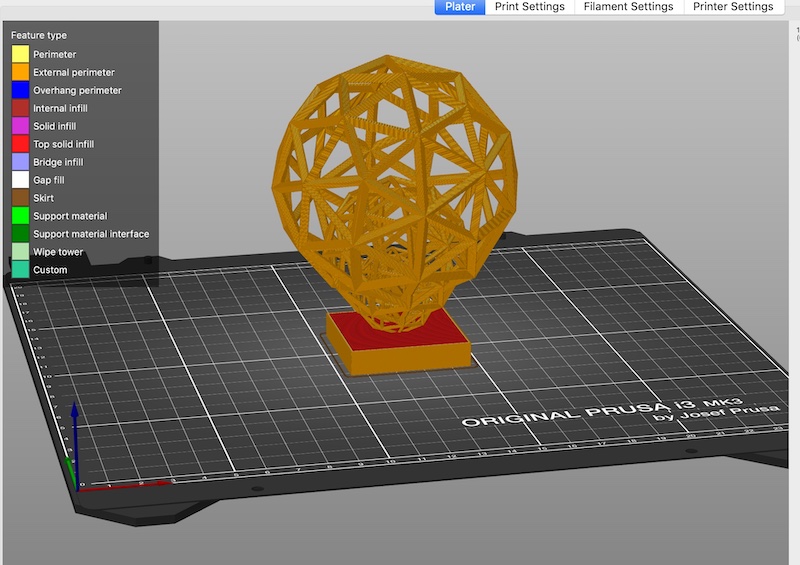
When I imported the 3D object I built into PrusaSlicer to create the .gcode file for 3D printing, PrusaSlicer informed me about an error that had to do with having empty layers or layers that were too small. I realized that the base of my sculpture had a very thin edge on the bottom that was the source of the problem, so I brought the object into Fusion 360 and built a small, little square base for the sculpture to sit on so that PrusaSlicer would be happy!

Now PrusaSlicer is happy!
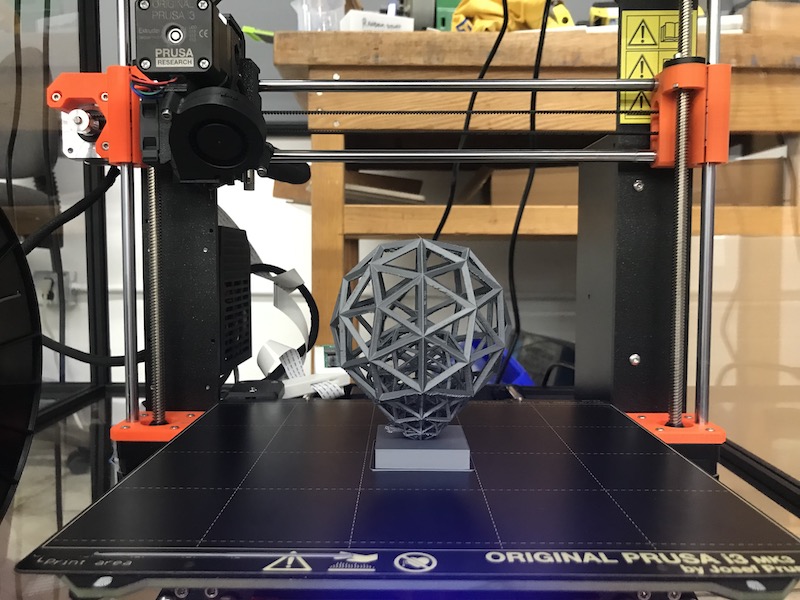
I warmed up the printer to handle printing with PLA polymer.
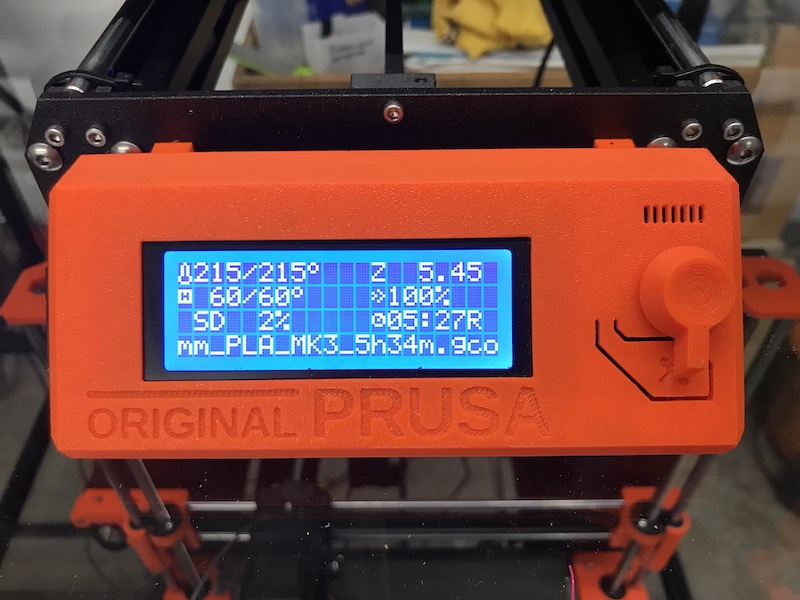
And the printing begins!

But unfortunately, the base was too small, and the print didn't adhere properly to the printer bed. The sculpture ended up lifting off the bed and I decided to stop the print.
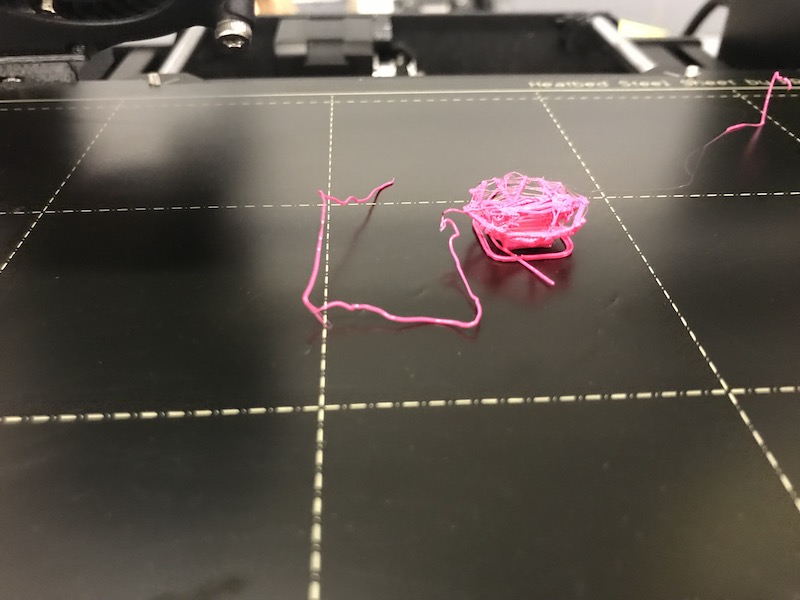
I needed a bigger base! So I went back into Fusion 360 and made just that.
Prusa Slicer is stil happy :)
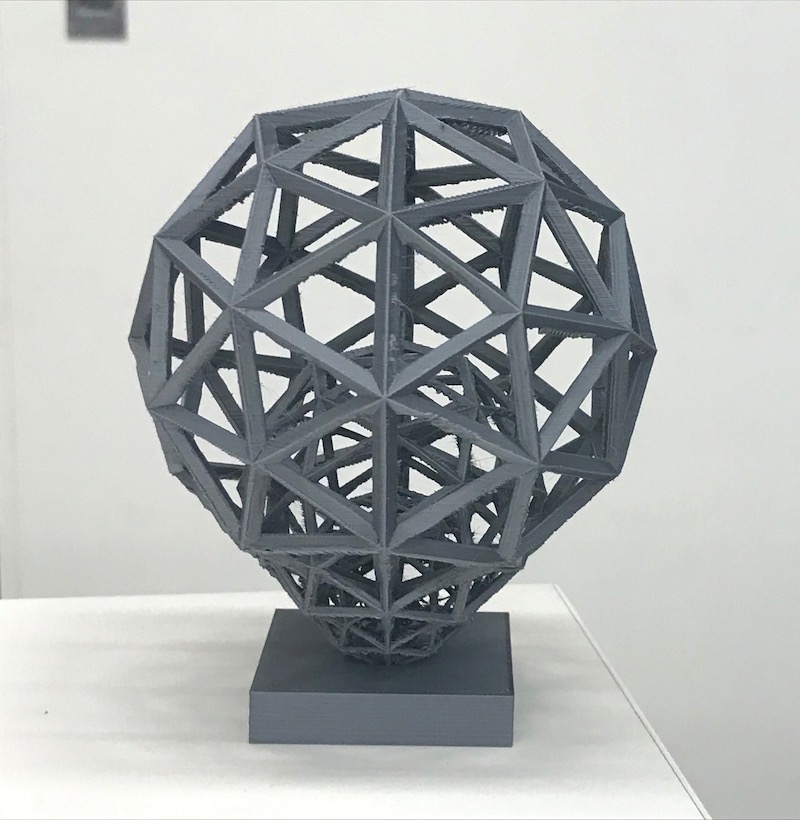
And about 9.5 hours later, the 3D print has been made and is beautiful!
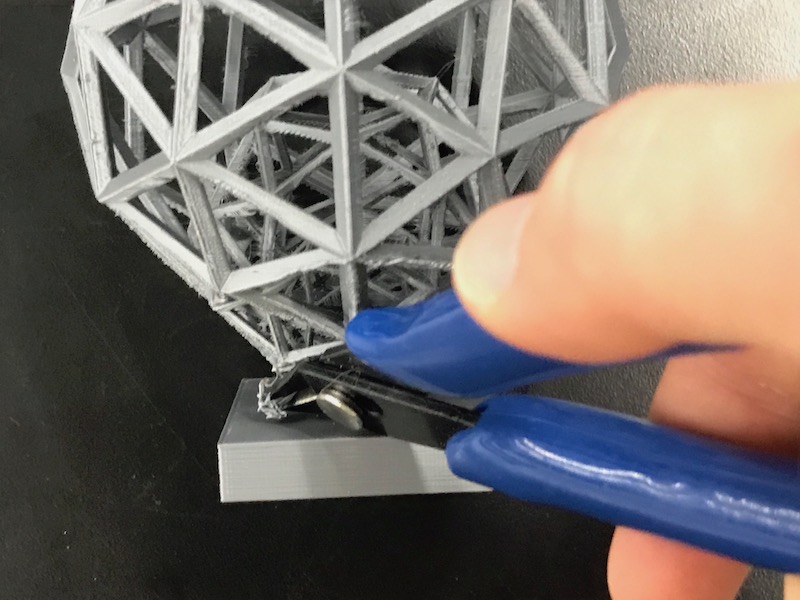
There's just one small area of hairy polymer near the base.
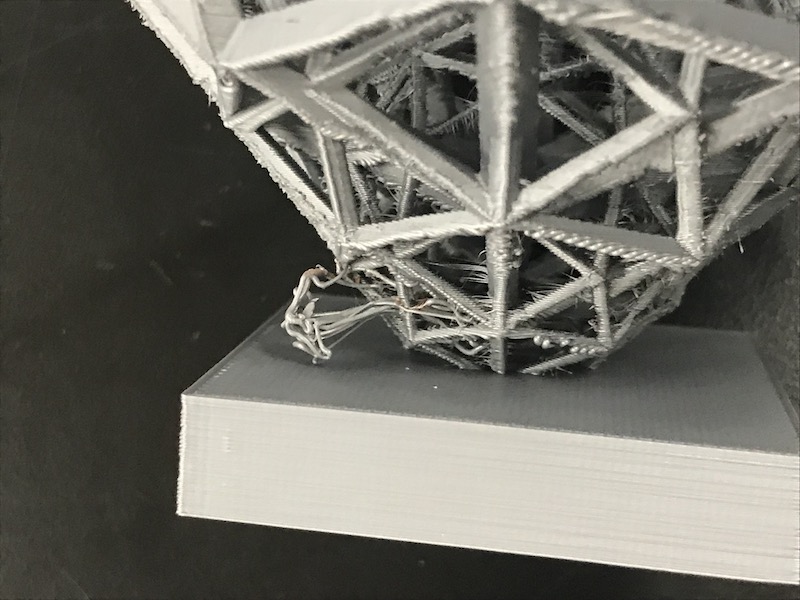
I took some wire-cutters and clipped that piece off.
Here's the sculpture against a white background:
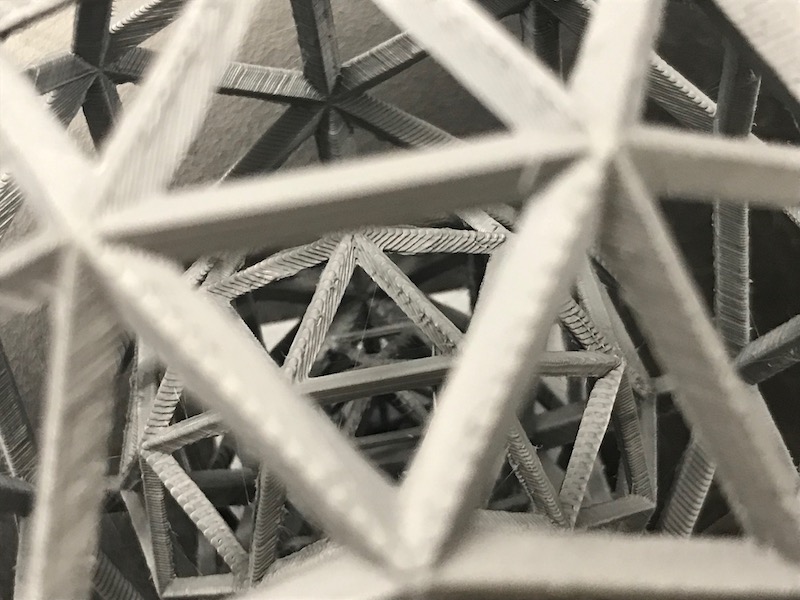
Here it is looking from the top down (you can see the nested polyhedra!):
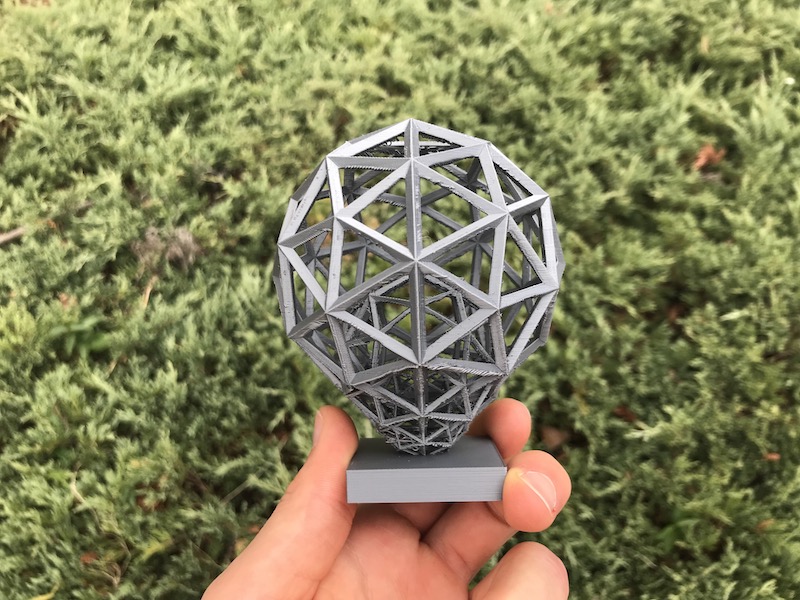
And here it is out in the world having itself a good time:
3D Scanning
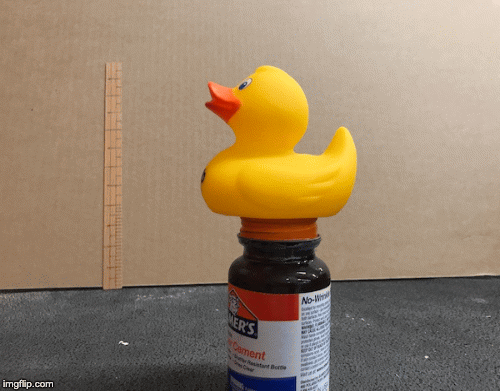
For scanning, I decided to scan a rubber duck from CS50. The duck is used for rubber duck debugging, which is an approach to solve bugs where a programmer simply states their algorithm out loud line by line to the duck. Simply stating the problem out loud is often enough to figure out what's going wrong. I also decided to try to use my iPhone camera to do the 3D scanning. I started by circling the duck and taking about 45 photos from all different angles.
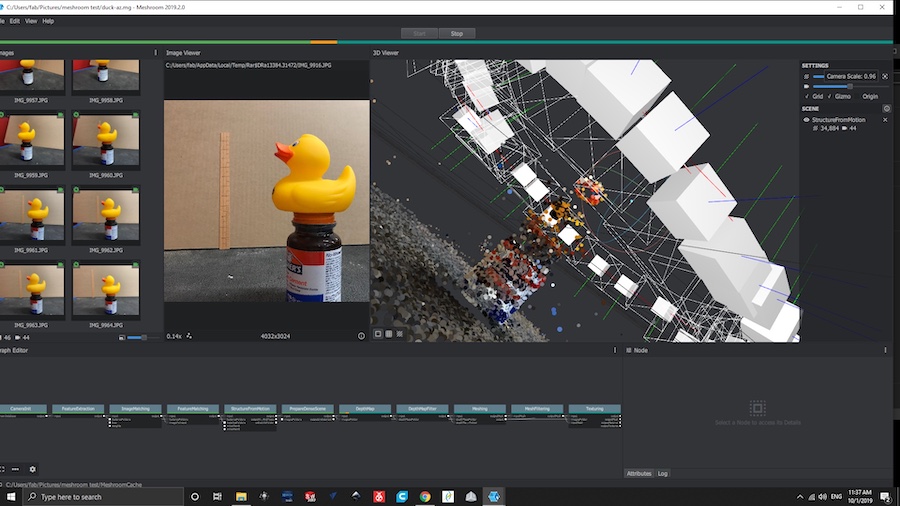
I imported those photos into Meshroom which takes advantage of the AliceVision photogrammetry software. I wasn't able to run the software on my computer because I didn't have a powerful enough NVIDIA graphics card, but luckily there was a computer that did have the horsepower in the Harvard shop. After about 25 minutes, Meshroom finally was able to produce a mesh that described the 3D environment I captured.
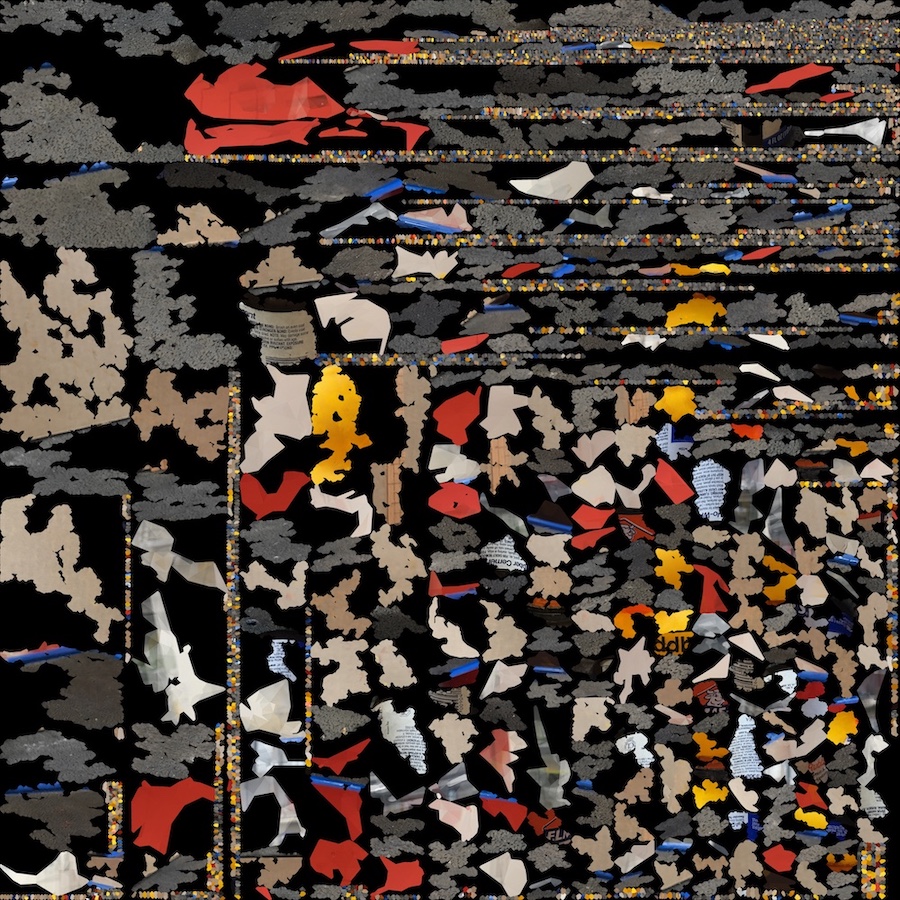
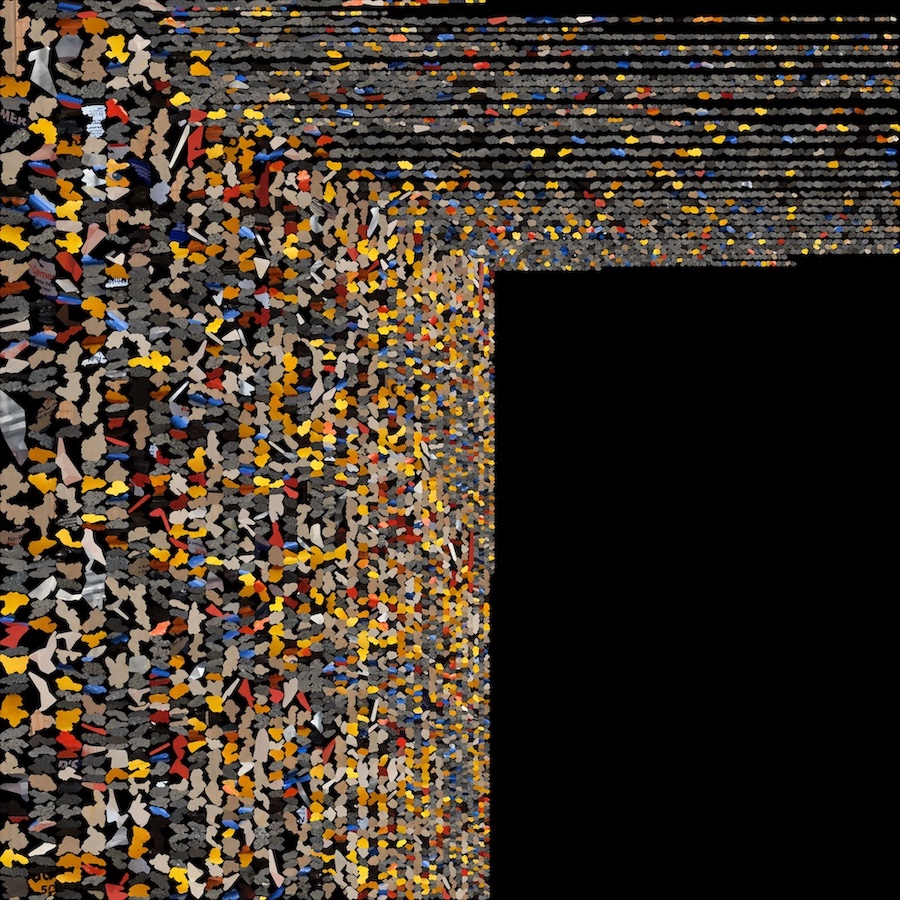
Along with the mesh, it also outputted two different texture mappings which I think are absolutely beautiful when not even rendered in 3D space. You can see the two of them below.
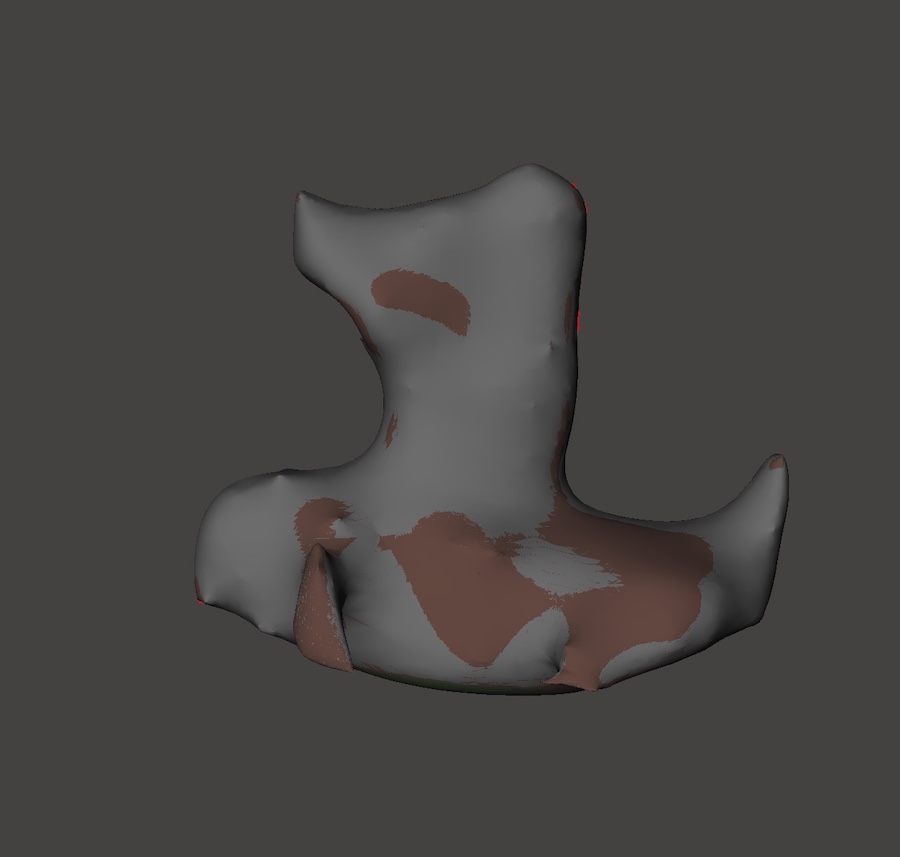
I imported the mesh from Meshroom into a different application, Meshmixer, to improve the scan. The only problem was that it captured ALL of the environment and there was debris everywhere! You can see what the duck in the yellow circle in the image below.
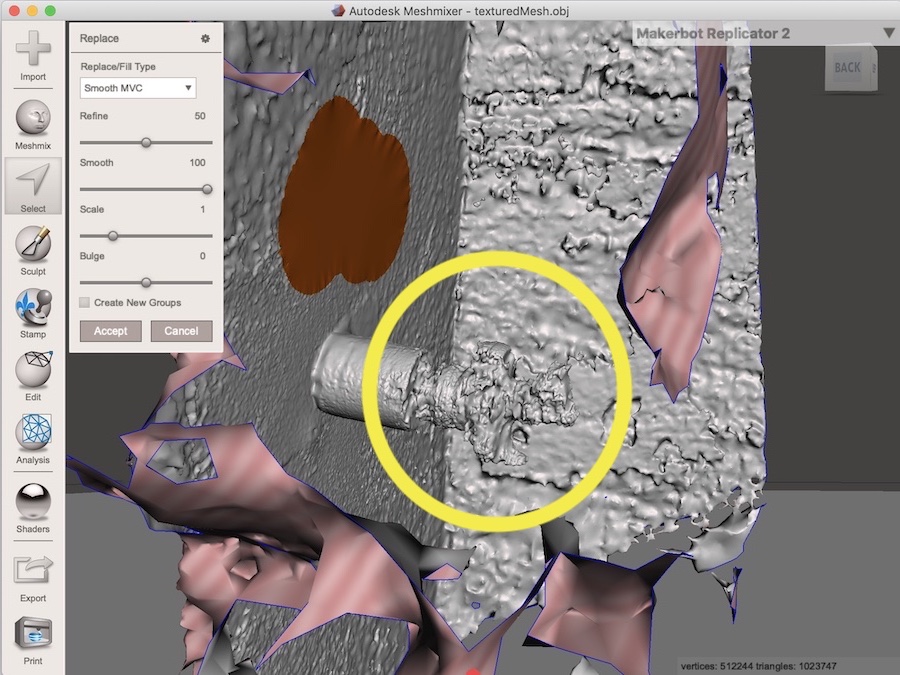
I started by removing all the unnecessary debris from the environment in order to just focus on my main object of interest, the duck.

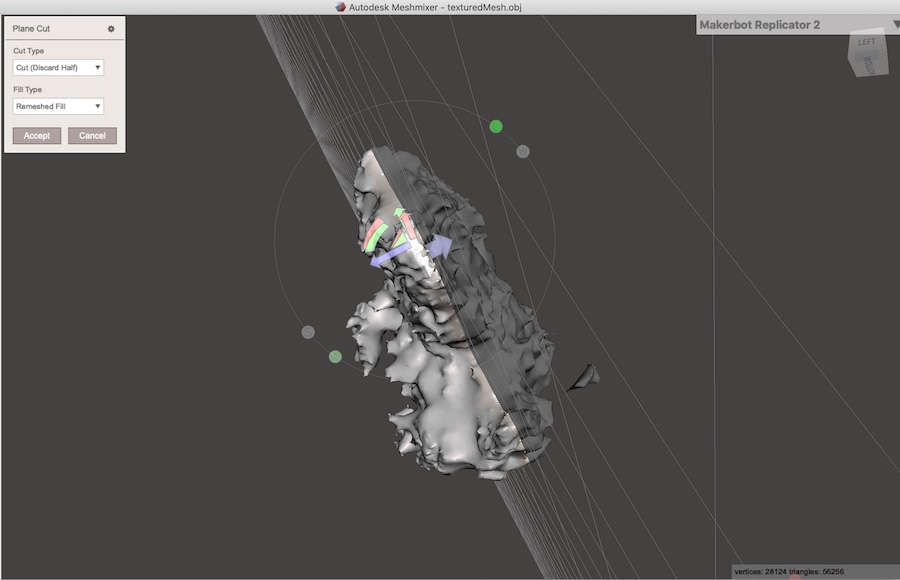
It was hard to manually remove the last bit of the glue bottle that the duck was laying, so I removed it by slicing the 3D mesh with a plane and then deleted the bottom of the cut.

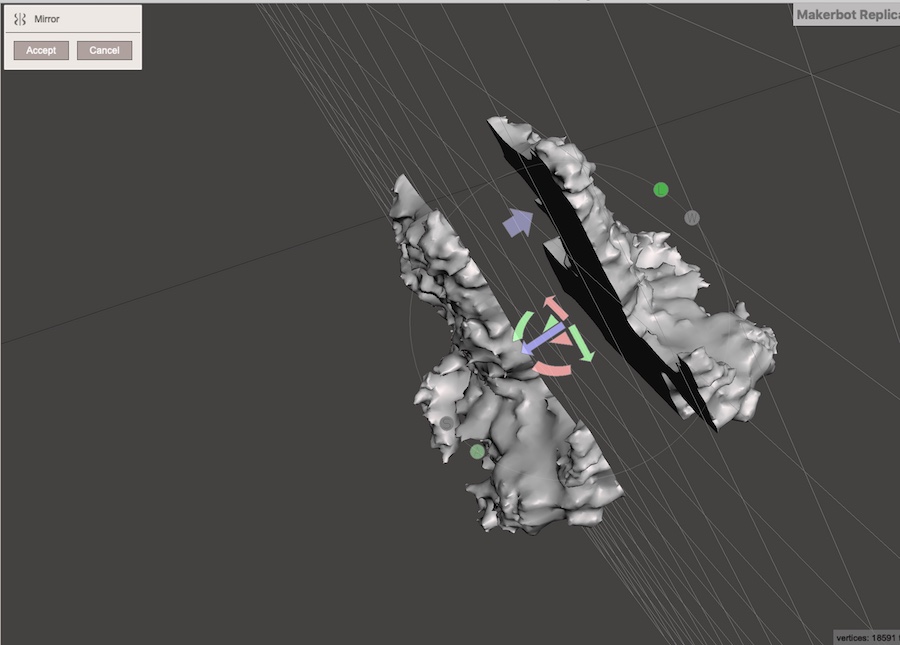
The scan of the duck also wasn't exhibiting bilateral symmetry, which most complex animals show! So I also decided to slice the duck vertically.
I then duplicated and mirrored one side of the duck.
Then I aligned it with its other half and joined the two sides together.
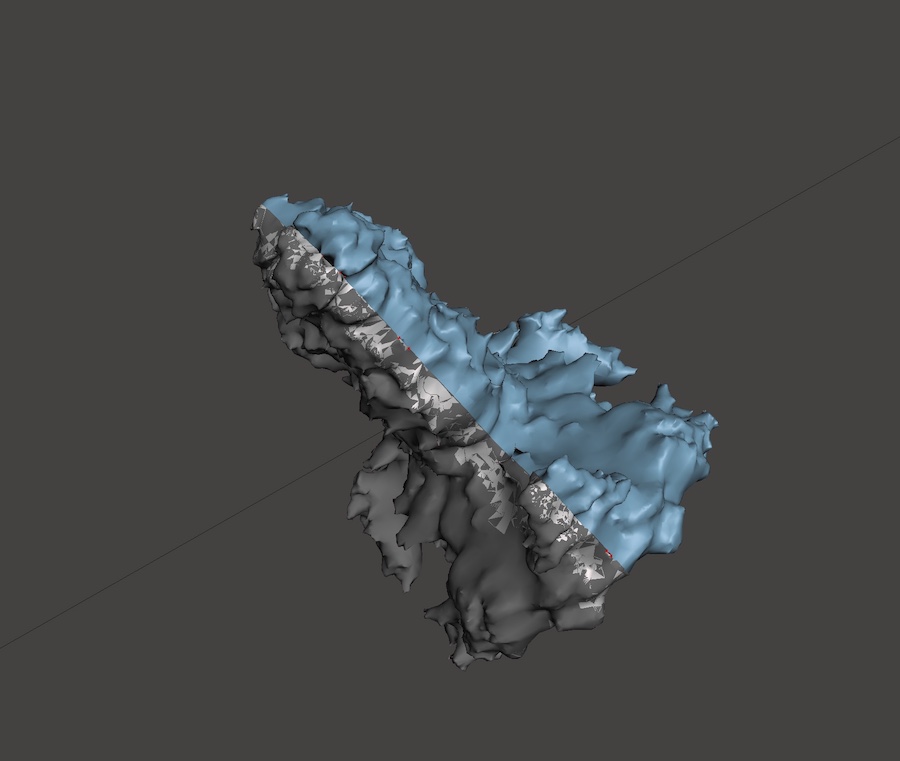
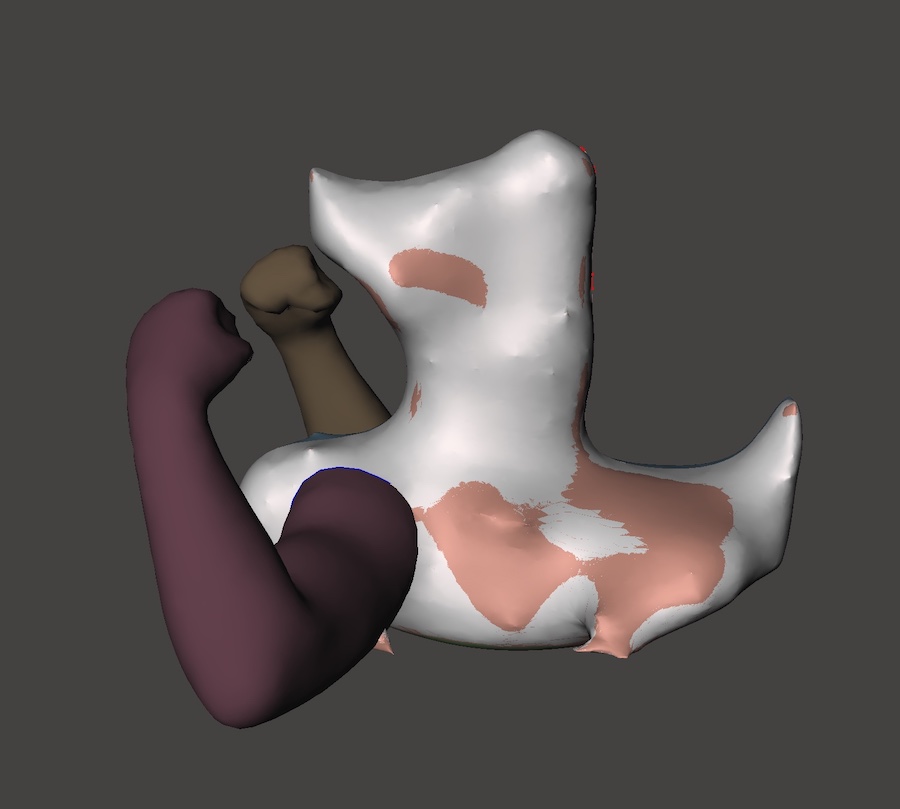
From here, I smoothed the mesh in order to remove all of the noise that the scanning software introduced.
Finally, just for some fun, I added two strong, pre-made mesh arms that I found in Meshmixer.
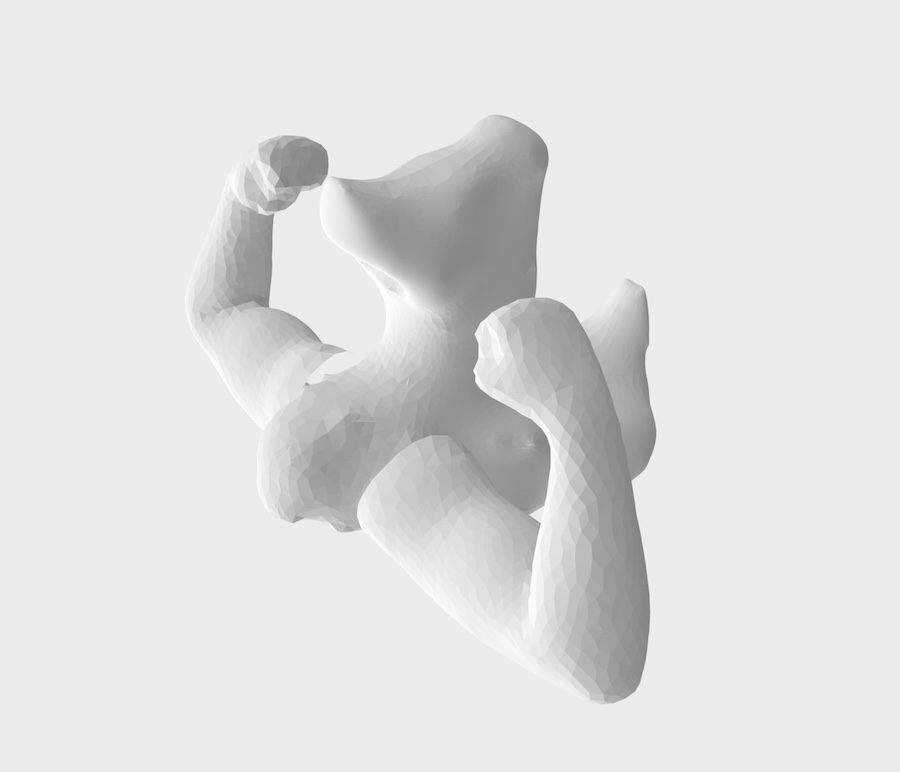
"Duck with Muscles: Oh, wow. Baby Wizard was a parasite? He set me up with my wife."