david gil
Art Design and the Public Domain | 2020
Harvard Graduate School of Design
vinyl cutting

loading the material
The process started by choosing a black and white image with a png extension. I opted for a stylized silhouette of Staley Kubrick’s face. I then followed the vinyl cutter instructions posted the Science Center. The knife was already correctly mounted. I lowered the loading leveler in the back of the cutter to raise the rolling wheels. Then I loaded the black vinyl facing up from the back of the cutting machine. I placed the rolling wheels under the white markings of the cutting machine and raised the loading leveler to lock the material in place. I then press “menu” on the keypad of the cutting machine to select the type of material, in my case roll, and validated with enter. The head with the cutting knife position in the origin.
printing
I saved my image on the desk of the computer connected to the cutting machine. Double clicked on the shortcut “start mods server” on the desktop to connect the cutting machine to the network. I then navigated to mods.cba.mit.edu to open to vinyl cutter GX-24. A window with the cutting set ups appeared. I loaded my .png Stanley Kubrick file and adjusted scale by changing pixel density to measure 10x10cm. I then pushed the “calculate” button, the different set up windows recognized the file and was ready to send to printer. The first file cut perfectly.
I then used the arrows to change the origin of the cutting machine and followed the entire process a second time in order to cut a second “sticker”. For some reason, the cutting machine did not recognized the origin I had entered and went back to the default origin. After it finished printing a second time, I changed again the origin, but was again unsuccessful. At the end I decided to remove the vinyl from the machine, to cut it by hand and to place it in the machine again. In total I cut 3 files. After the “stickers” were printed, I used transfer paper to weed the unwanted material and to place the vinyl sticker on my computer.
laser cutting
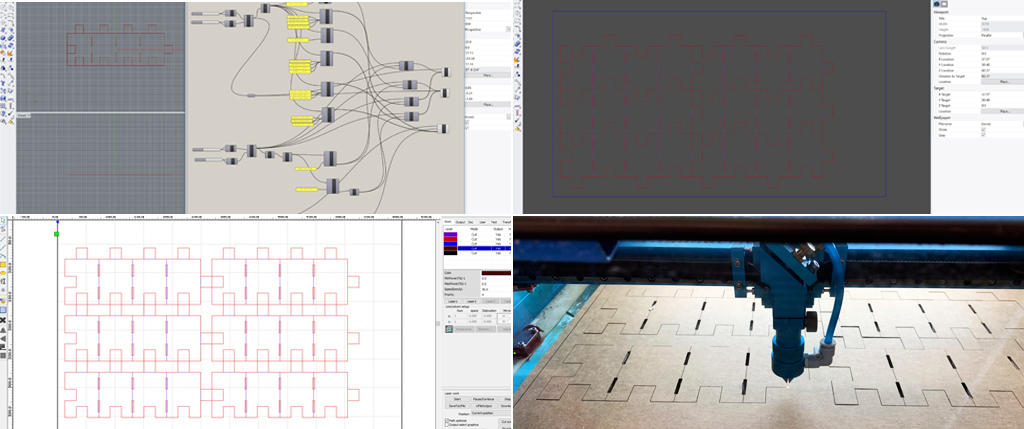
parametric design
The laser cutting project was a bit more challenging than the vinyl cutting one because even if I currently have basic knowledge of Rhino, parametric design using GrassHopper is completely new to me. I tried to integrate basic grasshopper parametric design to some basic concepts of deployable surfaces I acquired during a class on deployable surfaces I took last fall with Chuck Hoberman. I was able to parametrize all the shapes in grasshopper and to link them to rhino, but I was not able to create a finished completely parametric cutting file using exclusively grasshopper. Once my grasshopper file was finished, I had to retrace the file using Rhino.
cutting
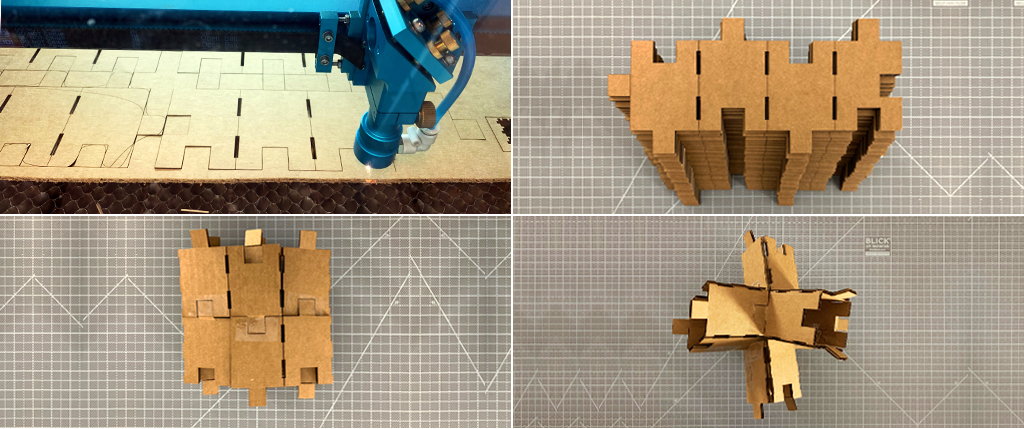
With the file, I went to the Science Center and follow the cutting procedures. First I turned on the fan, cooling water and laser cutting machine. I then opened RDWorks V8 on the desk top of the computer connected to the cutting machine. I then imported the Rhino file. To my surprise, the file was not imported to scale. I had to go back to my Rhino to create guideless indicating the scale of the cutting table to make it easy to scale to the right dimensions. I reimported the file, placed the carton on the cutting table, moved the laser head to the origin, adjusted the laser height to a 6mm spacer using button arrows. I then selected the strength and speed of the cutting process of the different colors in my drawing. In my case, I wanted to both cut all the way through and also to slit the material to 50% in order to allow bendability. Once I was ready, I launched the cutting process.
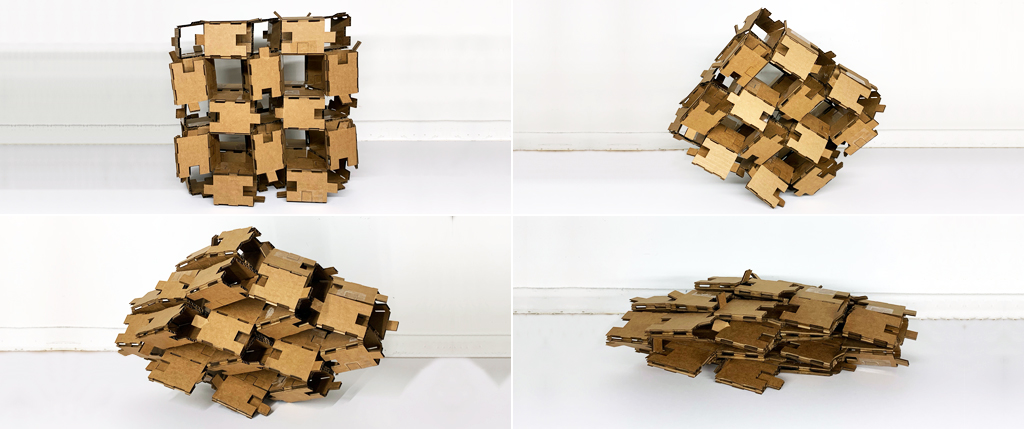
For the first cut, some extra lines I had created as guidelines were cut on the material. I realized I had not ignored them on the cutting instructions. I tried assembling the usable cut pieces, I found some mistakes in assembly, therefore I had to add some corrections to the Rhino file. Once corrections were executed, I started the process again, this time the cutting process was good and the assembly was perfect. I repeated the process 4 times and assembled the pieces.
