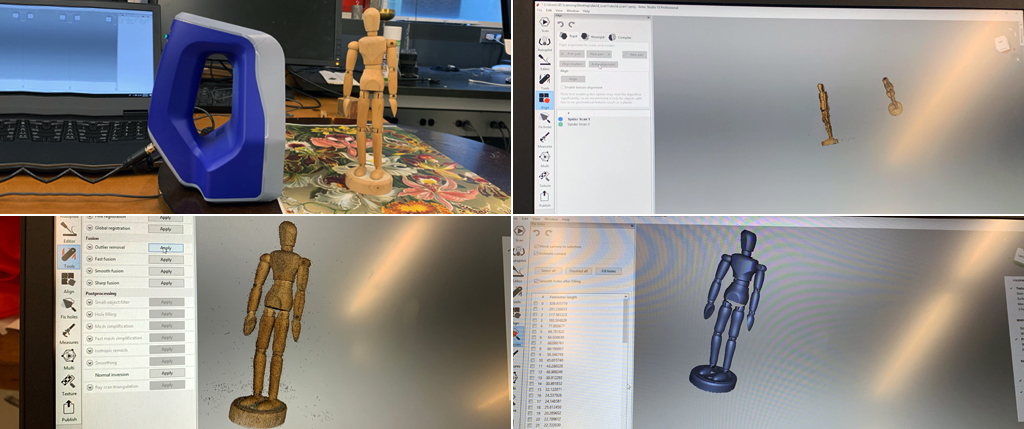
For the exercise, I used Harvard’s Artec 3d scanner which is very good at capturing fine details and it is very flexible because it is handheld, so you can easily go around the object freely. I chose to scan a miniature artists wooden jointed manikin, which I placed on top of a rotating bed covered with a sheet of paper with a heavy pattern in vivid colors. This makes it easier for the scanner to recognize the horizontal axis. I opened Artec Studio 13 professional and clicked the switch in the back and the scanner, a flickering light started flashing on the object and a preview of the object appeared on the screen as I manually rotated the base to scan the object 360 degrees. The scanner has a temperature alignment tool, so if we go too close (red) or too far (blue), a gradient of colors appears on a histogram of the screen, to assure optimum scanning the object should appear green on the preview screen. Once the object is rotated 360 degrees, I click again on the scanner, the editor runs through the scanned file and I chose “fine registration” to align the individual frames captured by the scanner (8 frames per second). Each frame is shown on the workspace identified by a different color and layer. For better quality and to fill the holes that were not scanned, I proceeded to a second scan. At this point, the workflow removes the horizontal based from the scan and the two scanned objects appear on the screen. They can be rotated individually for manual alignment, I opted for “auto align”, it worked. I then requested “global registration” and “outlier removal” to remove the “dirt” content around the object. Then I requested “fast fusion”, a list of “holes” or unscanned surfaces appears on the workflow, they could be fixed one by one or all at once. At this point, I had enough data and proceeded to export meshes into a STL file (for non-textured files) OVJ (for textured files).
3d printing
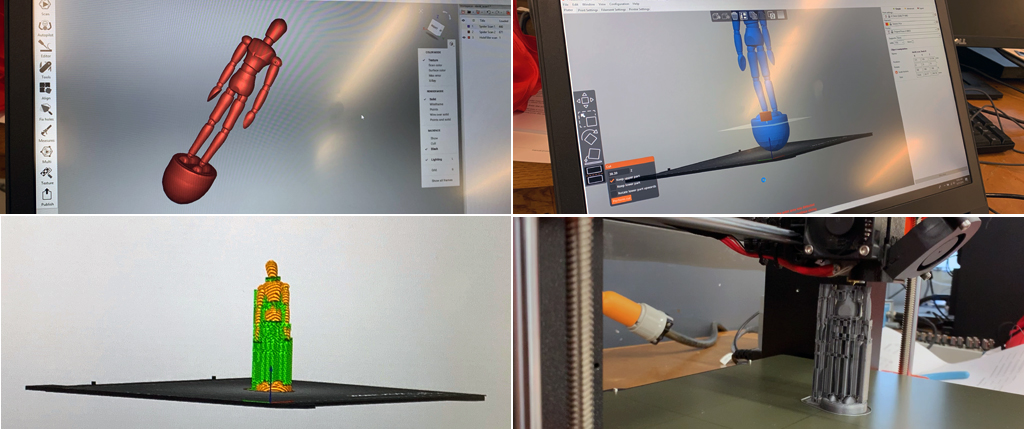
I opened my STL file in the Prusa slicer platform. Since my object lay flat on the horizontal axis, I did not rotate it to perform a scan of the bottom of the object, so the final file read some extra material under the object. I proceeded to cut this extra surface and to slice the file. It automatically filled the support material needed to perform the print. I saved my g-code sliced file to a ST card, inserted it into the Prusa 3d printer. I selected the file, the 3d printed heated the bed and the extruder, I then selected the material to be used, in this case PLA. Once heated at the right temperature, a couple of initial guidelines were printed to make sure the printer is aligned. The 3d model starts to print. The screen indicates the time it will take to finish the printing process, in my case, it was three hours and thirty minutes.