So to start off, I got a copper blank and cleaned off any oils with isopropyl alcohol.
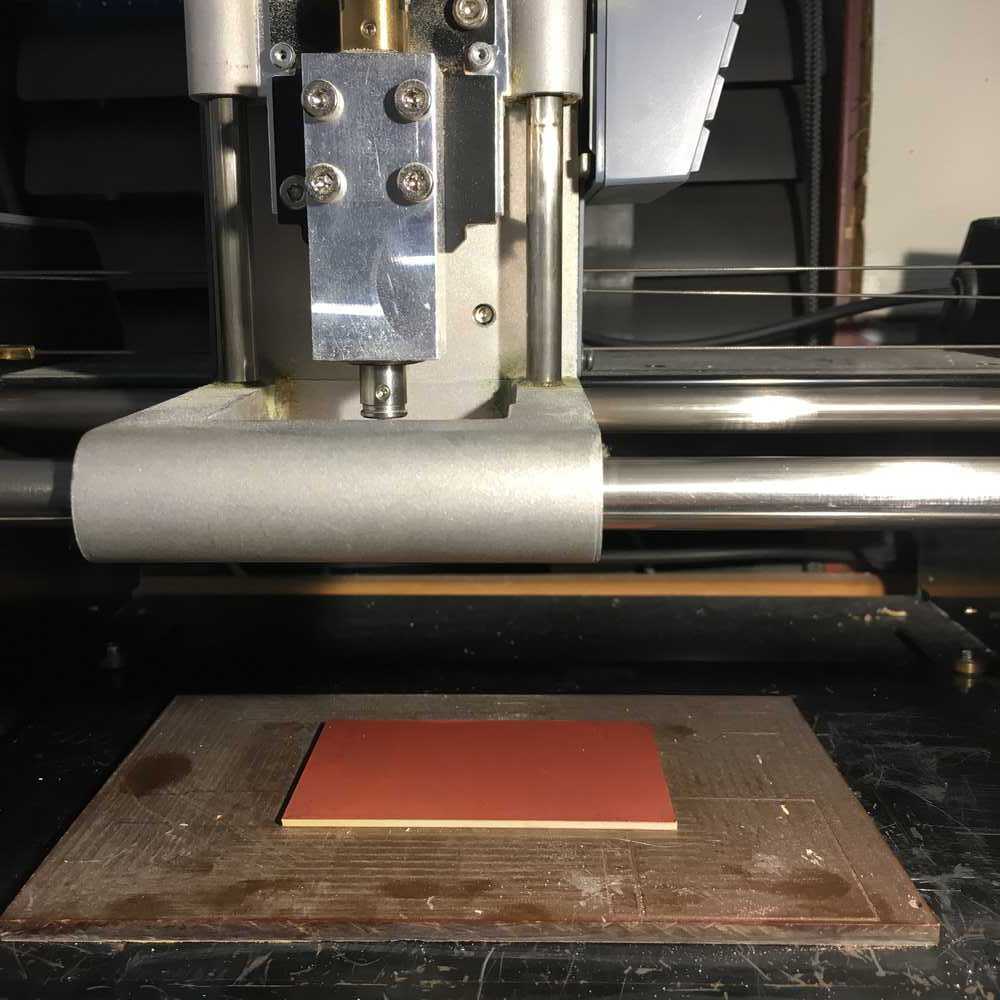
Then I positioned it on the milling machine (Roland MDX-20) with double sided tape. So far so good.
In order to connect to the machine, I typed start_mods_server in the terminal.
I hit a snag here because I thought the mods server wasn't connecting to the Roland MDX-20 milling machine. When I tried to "move to home" or reset origin from the computer, nothing would happen. Turns out there are two states the machine can be in. In for the machine to receive serial commands (ei. those that the mods server sends) viewing mode needs to be off.
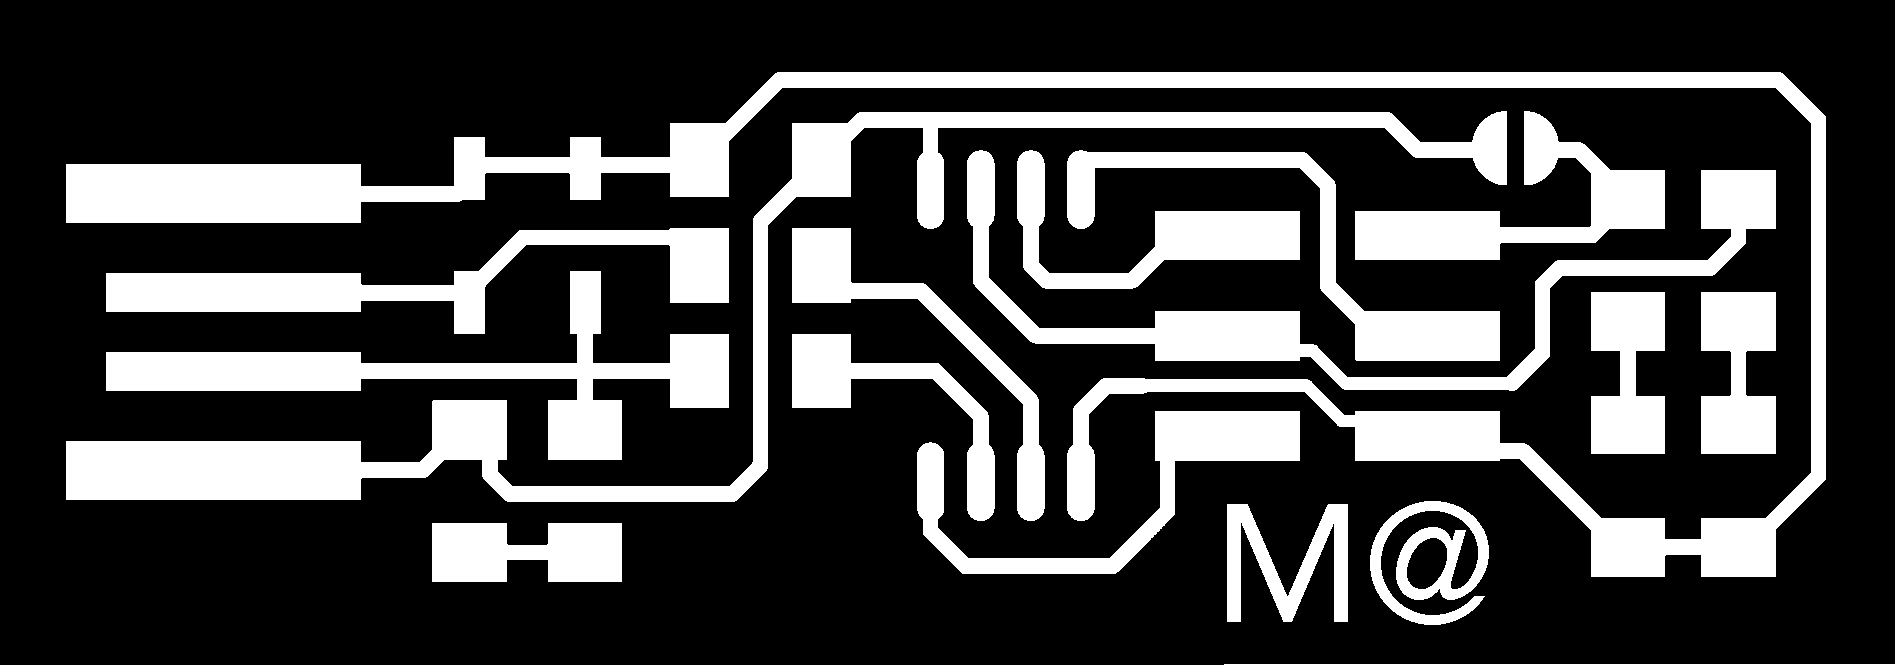
With the mods server running, I uploaded the traces .png file and reset the origin.
I'm not sure how to adjust the height of the machine itself. There is too much space between the blank and the bit.
I tried running the job to see what would happen. My suspicion that I need to move everything lower was confirmed. The machine was running through its routine well above the blank. How do I move the milling head lower? (The directions in the lab say "Use up and down keys on the Modela so that spindle is within 5mm of its minimum position 'z' position", but when I try to do this the bit just starts to spin — there is no motion on the z-axis at all.)
😑 After an hour or two of painful experimentation, I figured out the problem. There are two milling machines that mas863 students at Harvard have access to: a Roland SRM-20 and a Roland MDX-20. The SRM-20 works fine. The MDX-20 (which I have been using) is broken in a very subtle way. It turns out that there is a sensor in the machine that detects whether the safety cover is down and if it is not, manual control of the z-axis via the up and down buttons will not work. Unfortunately, the part of the plastic safety cover that triggers this sensor has snapped off, so there is no way to set the machine's z axis... I have decided to just use the other machine for now.
The SRM-20 is more intuitive so far.
Although I fear that the threading on one of the screws may have been stripped...?
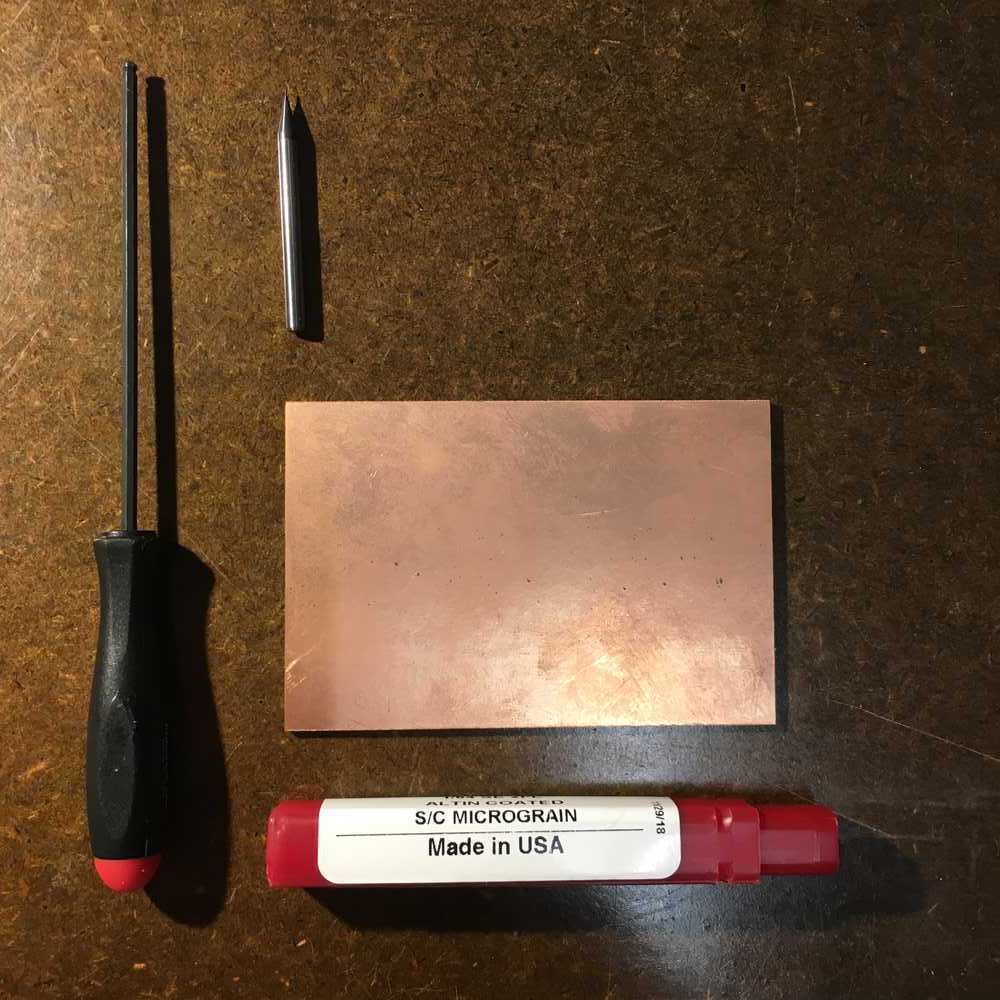
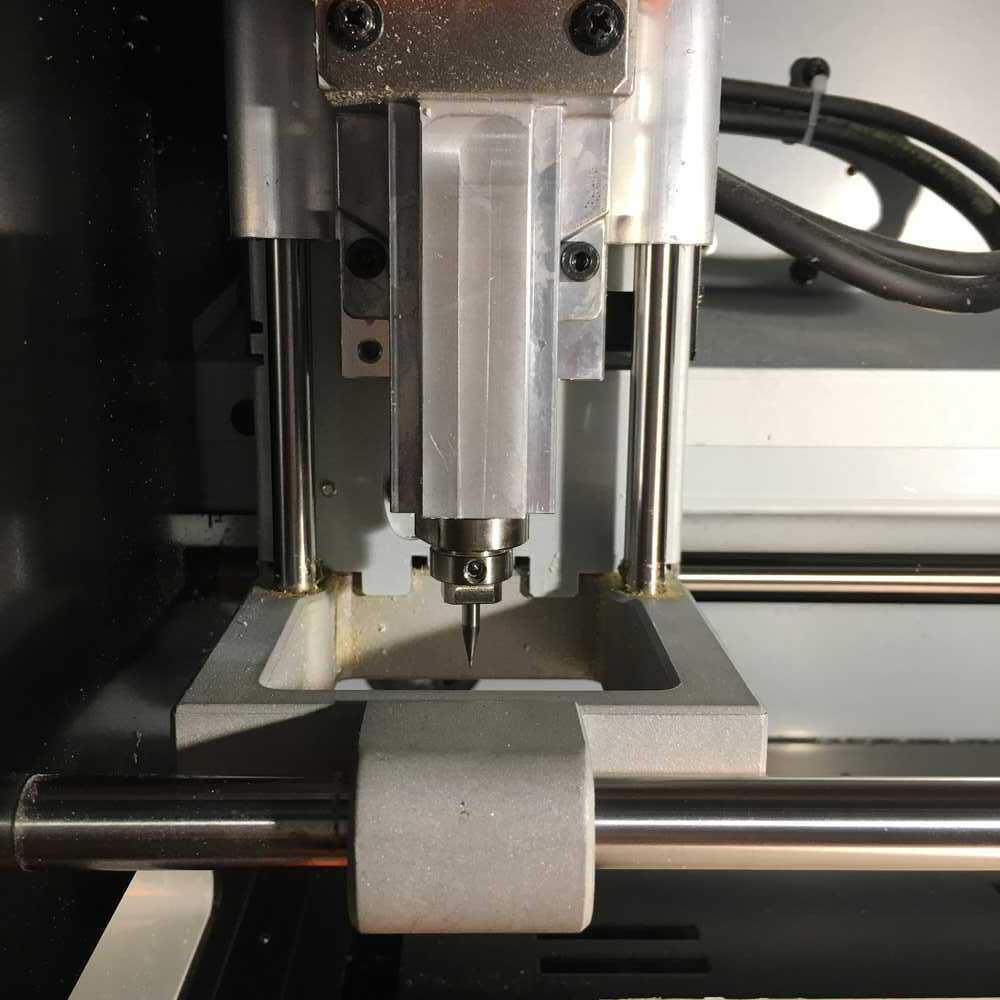
I inserted a new 1/64 bit while the machine was in the home position.
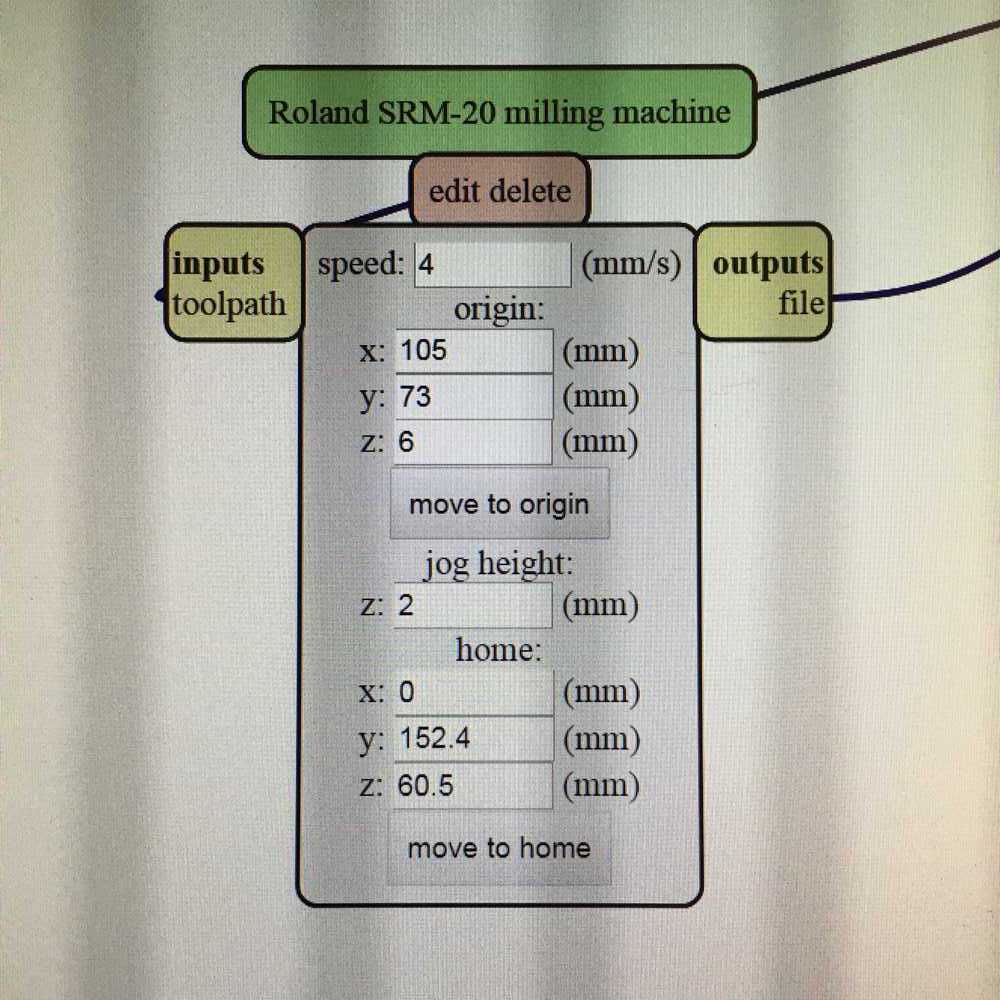
I moved the bit to origin (x: 105mm, y: 73mm, z: 6mm)

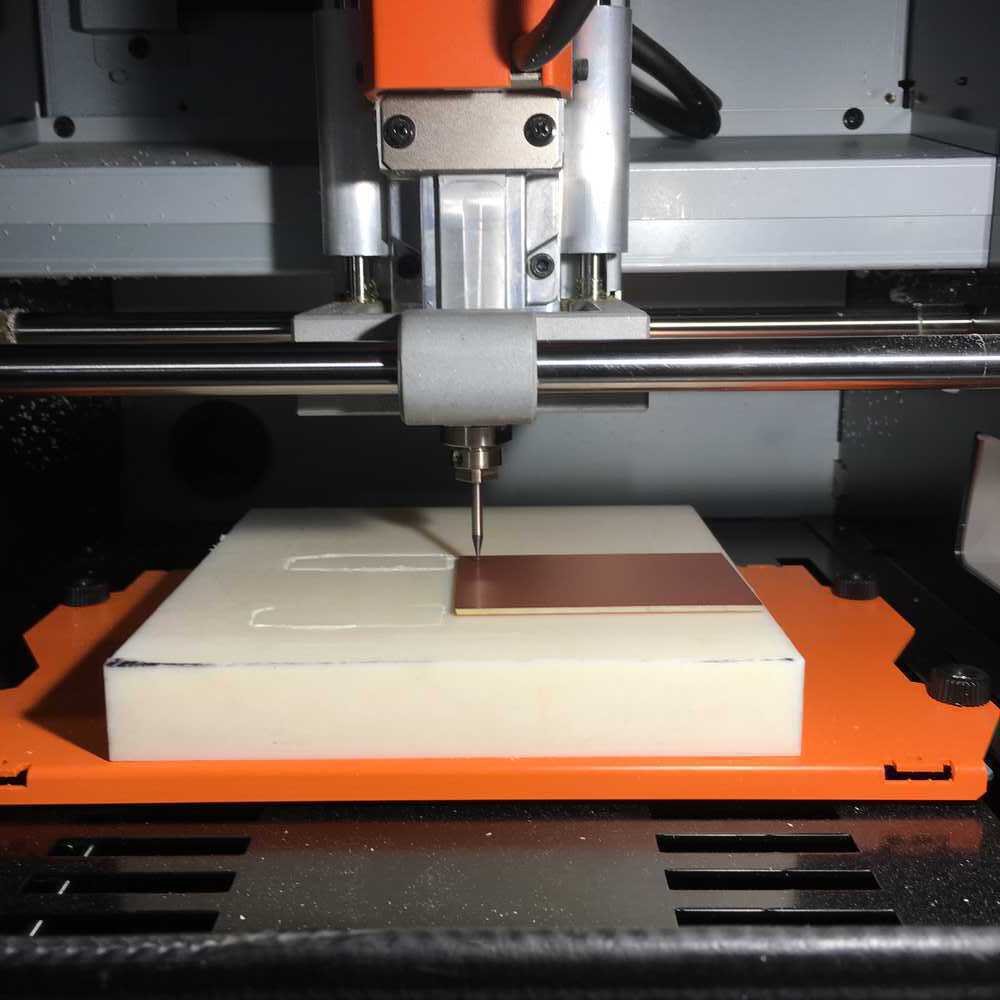
I loosened the toolbit, until it was resting on the surface of the board. Then I started the job.
The tool began going through the motions, but in the wrong position. How can I stop a job halfway through on the SRM-20?
I tried again. The problem last time was that I started the job while the bit was positioned at the origin. Make sure that the head is in the home position before sending a job over to the machine. The new issue is that the force of the bit lifted the board off of the double sided tape. Luckily I think I managed to terminate the job before the bit broke... 🤞(The bit fell out. Perhaps it also wasn't tight enough)
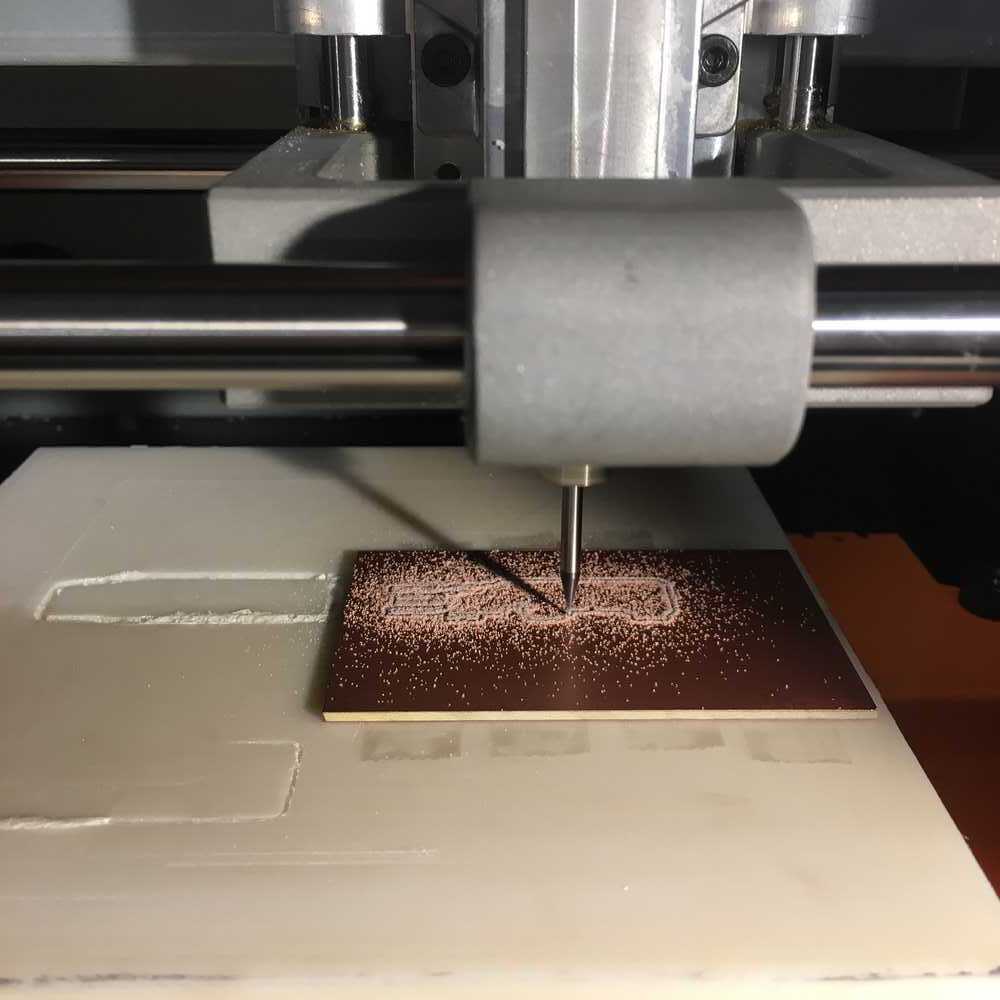
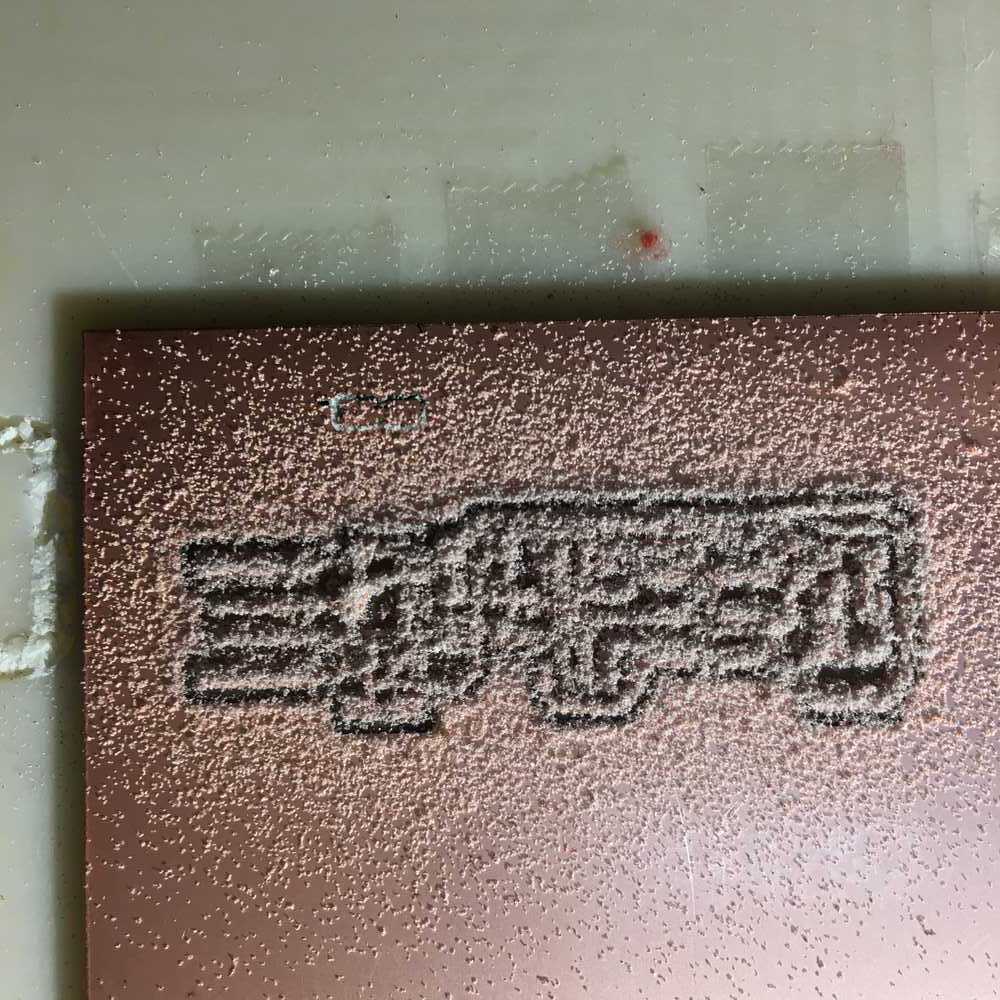
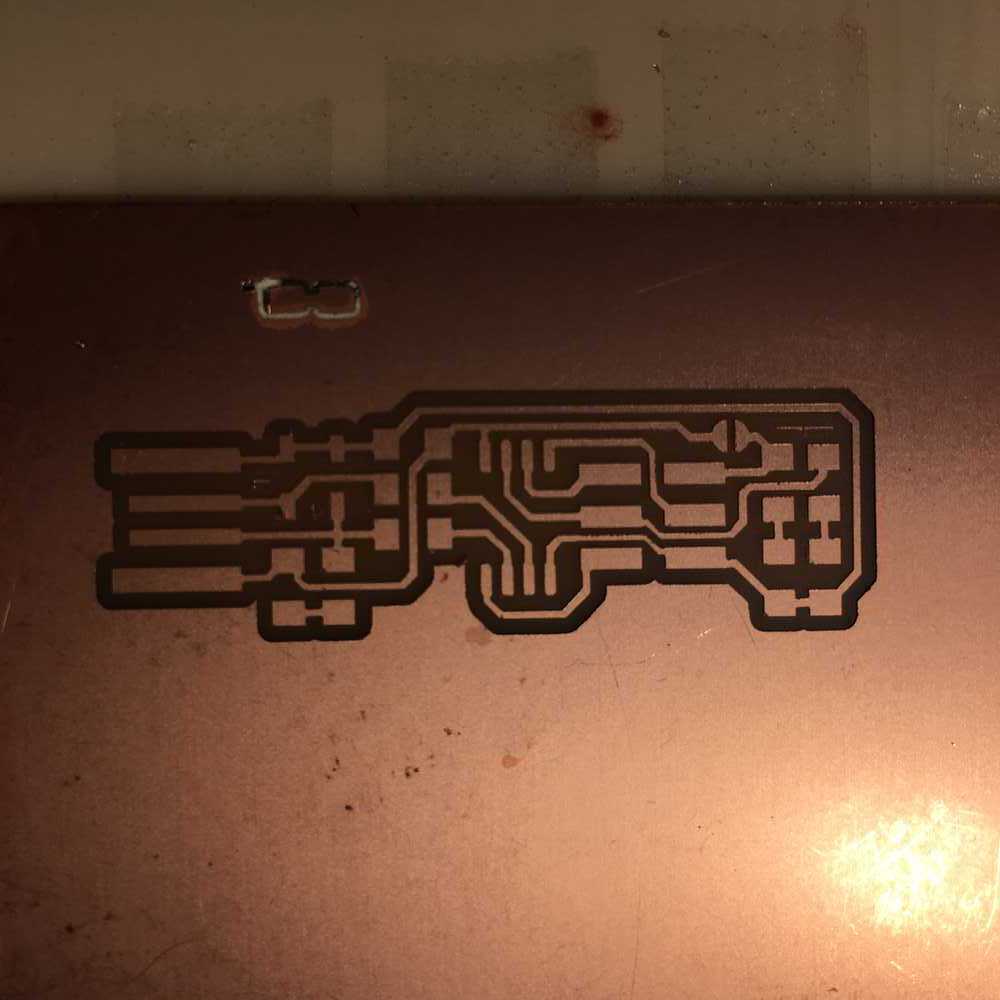
Third time is the charm. I used the default settings on the mods server and the traces came out nicely. Now to cut the circuit out.
Ugh. I was too ambitious here and wanted to mill another ciruit before cutting the other and ended up getting the new origin wrong and cut over the previous ciruit board... One more time.😳
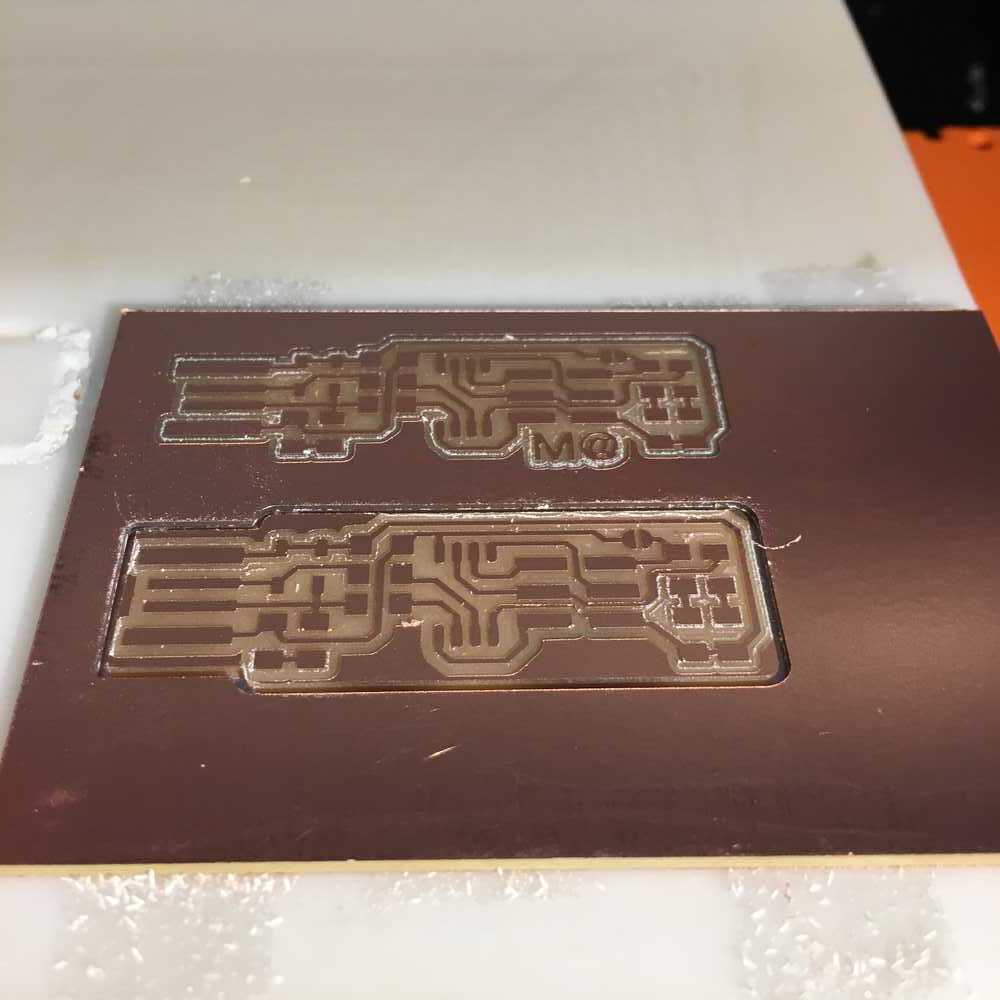
mill outline (1/32) rather than mill traces (1/64)!This worked perfectly the first time which I was surprised by.
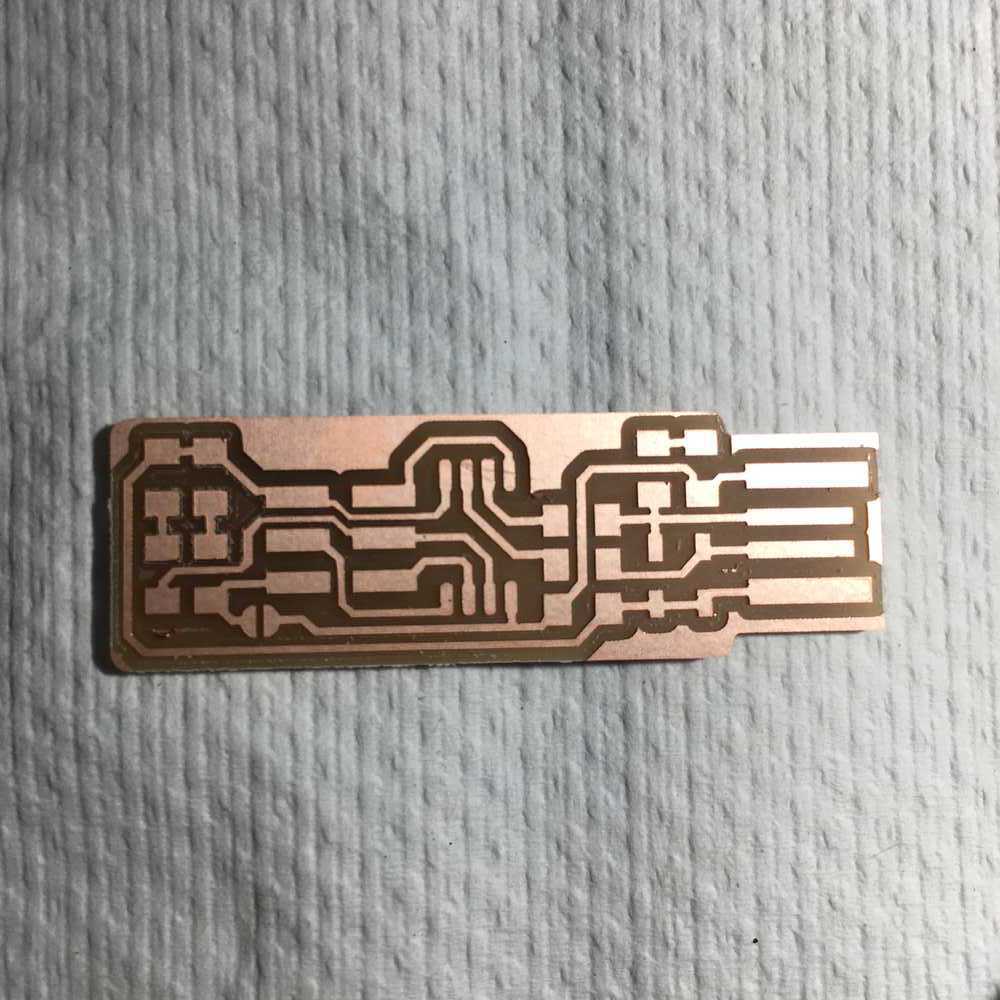
I think I got a little lucky here because of the way I had taped the board down. Make sure you position the tape in such a way that when the board is cut out, it will still be held in position!
I washed the board with more isopropyl alcohol. On to soldering… (though I might save that for tomorrow?)
Started off the day be washing my circuit board again with alcohol.
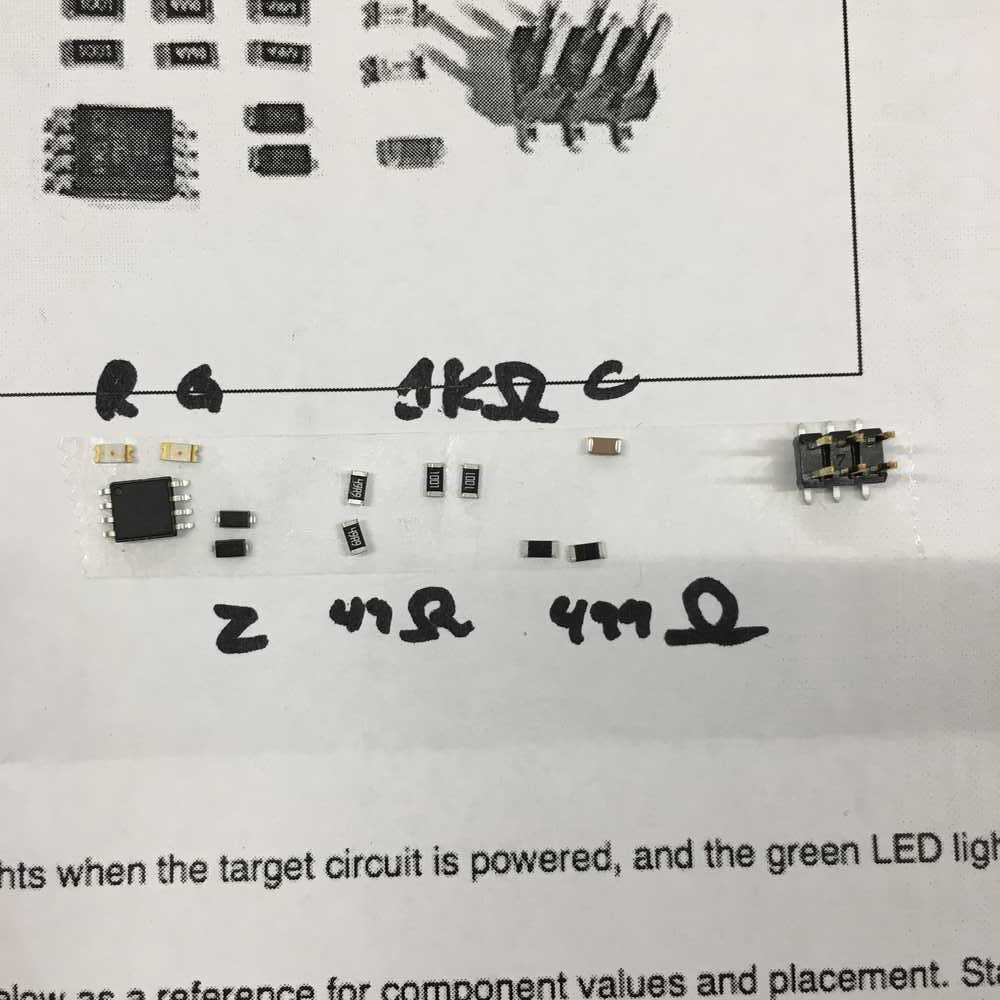
Collected all the components. Found solder, tweezers and solder braid.
Now to get to work. Technique-wise, I am going to start with small components at the edge and the work my way in. I will tack down components with a drop of solder to keep them in place.
I found soldering quite challenging at first but it got progressively easier. A few things that I wish that I had known before hand are...
I needed to heat up the copper much more than I expected to get clean joints.
(Don't worry too much about damaging the component.)
When applying the solder, it should melt effortlessly. Also at the beginning, I wasn't adding enough solder. You need to use more than you'd think!
Make sure to check orientation of every component before solder…
(but also don't worry because using the heat gun isn't that bad).
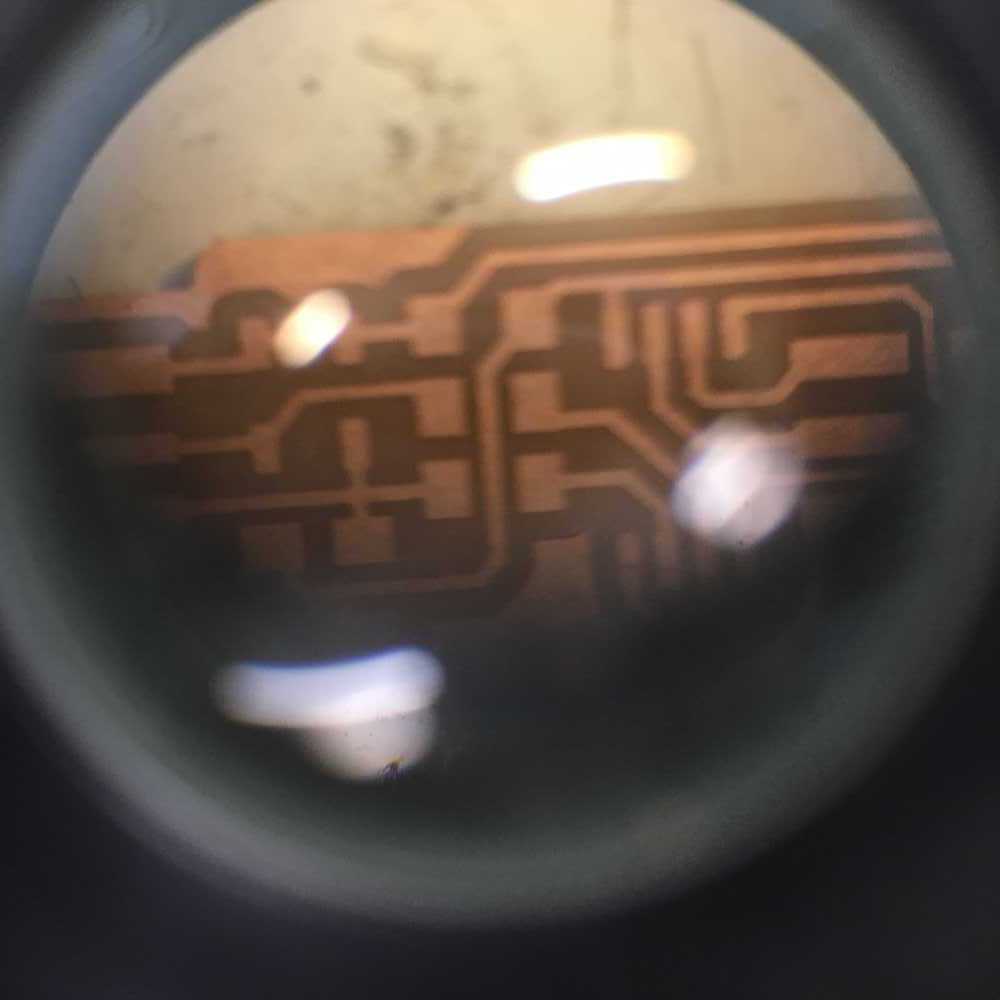
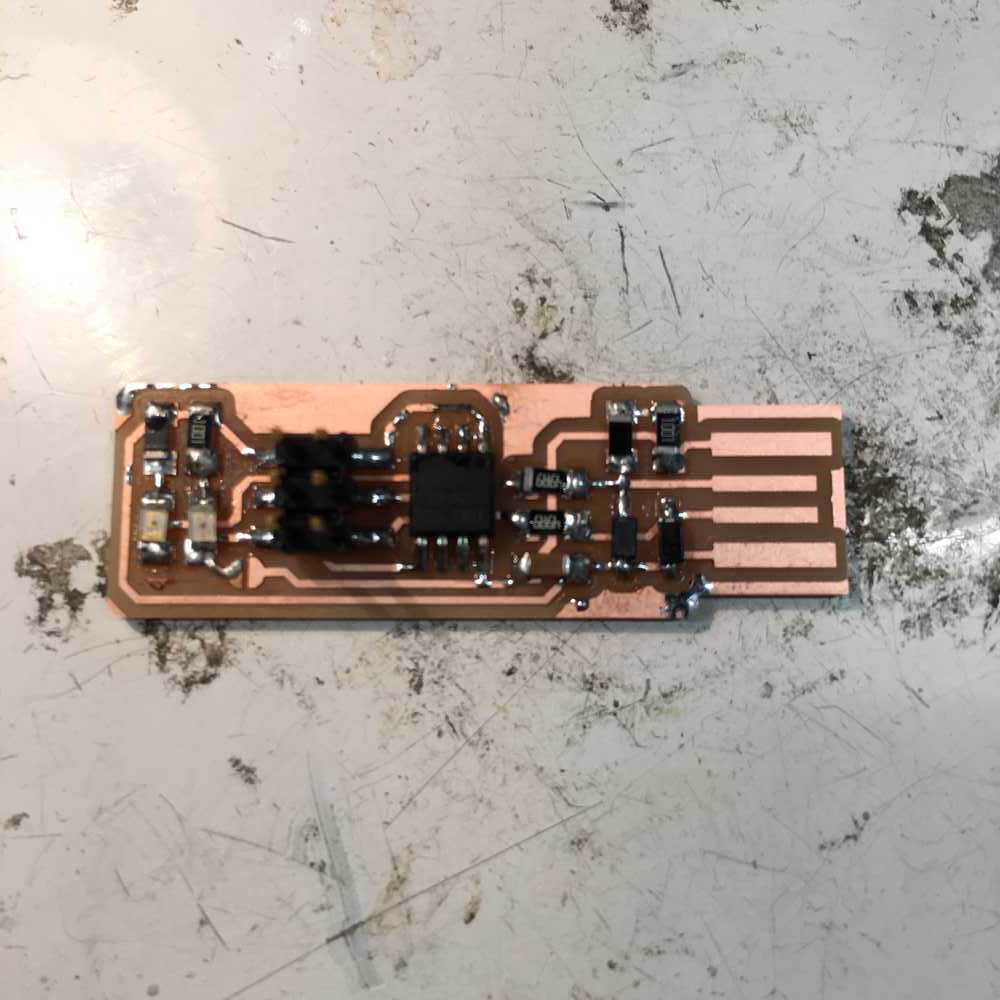
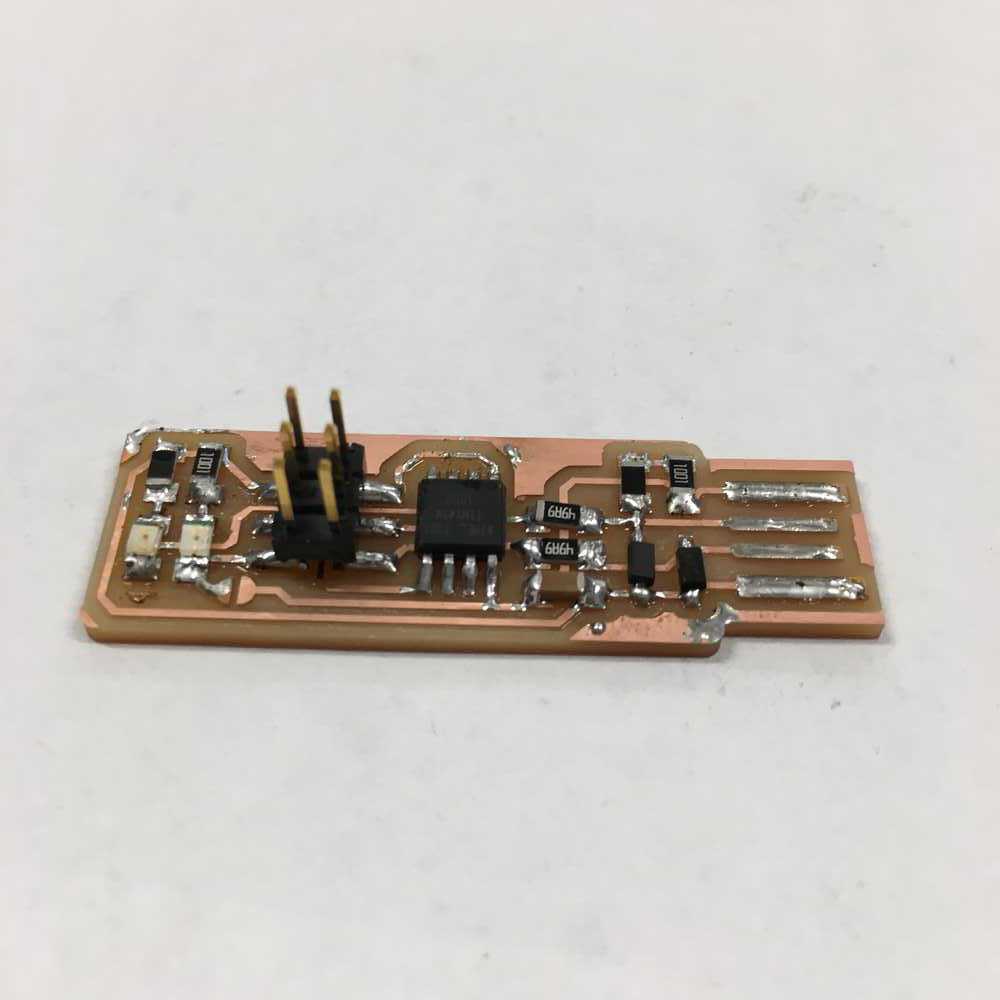
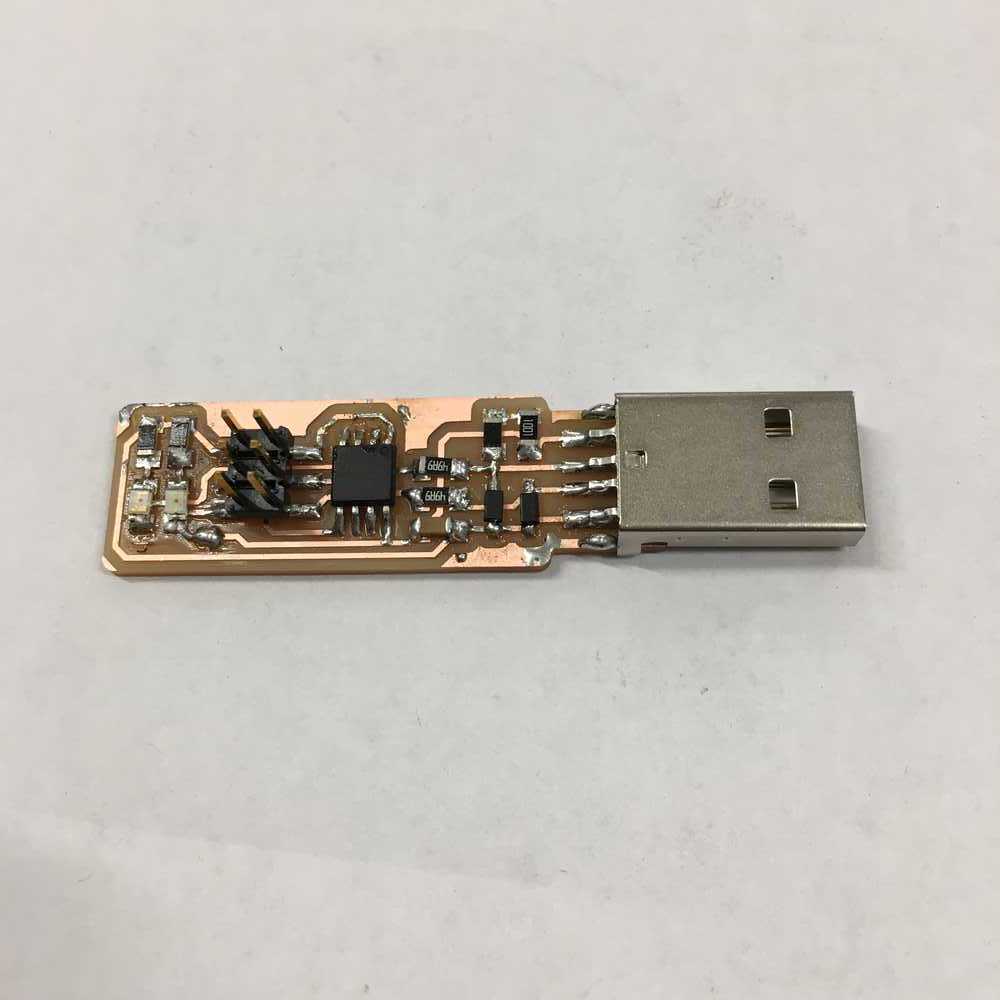
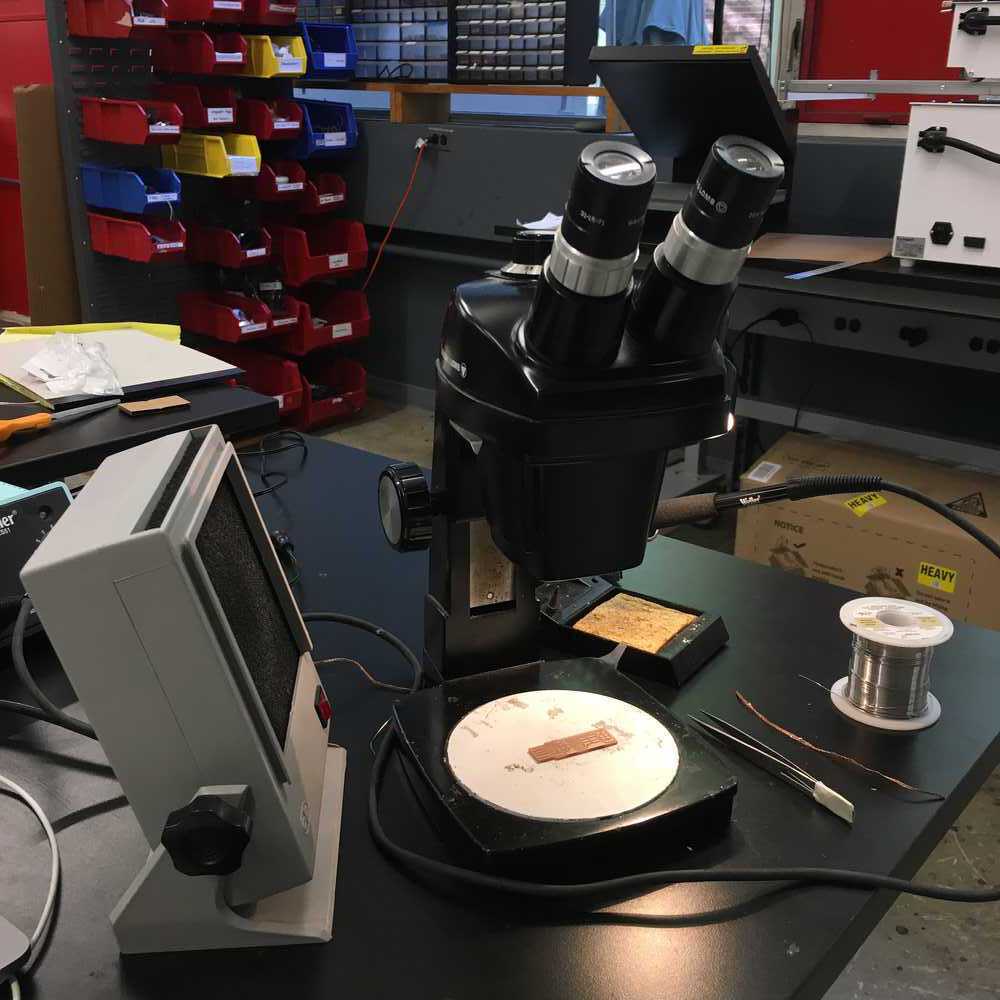
When I was done soldering, I checked the board with a multimeter to see if there were any places where the circuit would short. It seemed okay.
Download the zip file with the programmer code.
Unzip it and cd into the directory.
Run make which should produce a .hex file
If you aren't using another FabLab programmer, then you'll need to update a parameter in the makefile
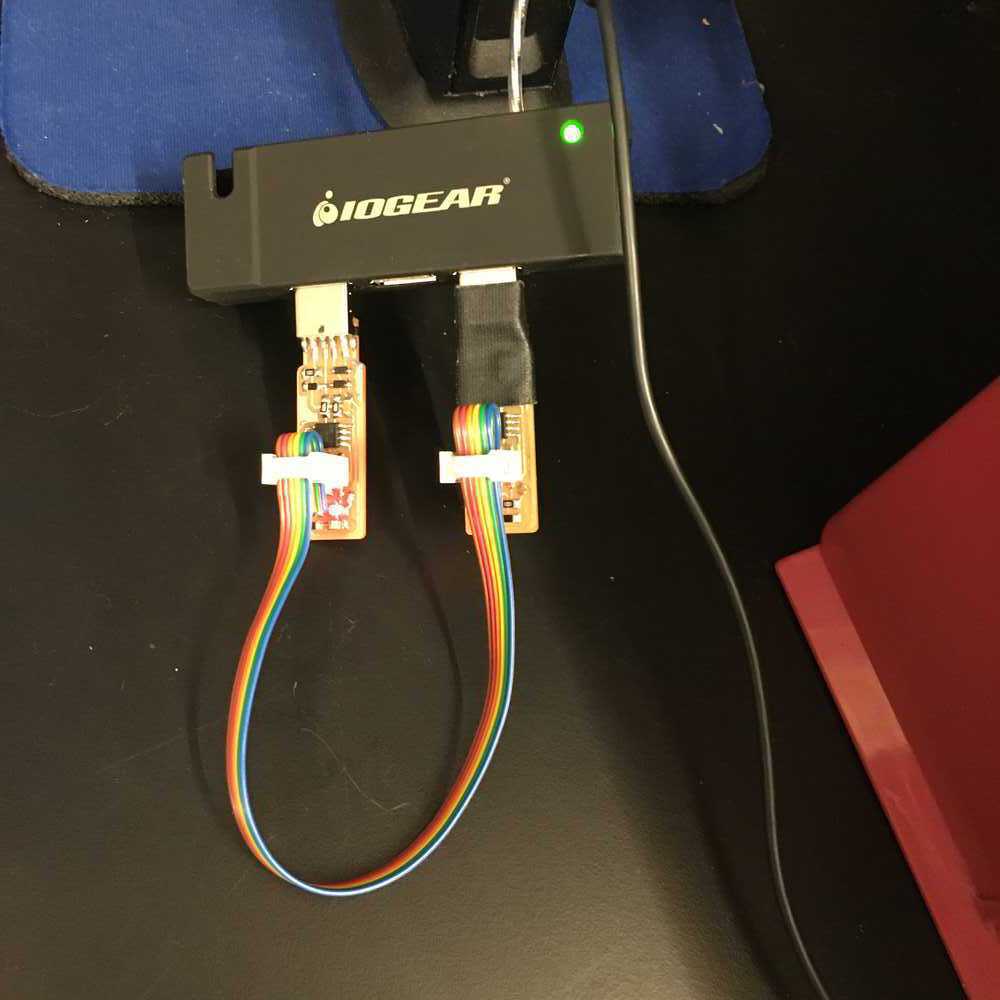
Connect your board via the 2x3 pin header to a working programmer that is plugged into your computer.
Run make flash
Run make fuses
Unplug everything, then insert your board into one of your computer's USB ports.
Run lsusb and if you see tinyUSB, many manufacturers, then everything worked!
imagemagick & ffmpeg CommandsCompress all JPGs to quality 50% width 1000:
mogrify -quality 50% -resize 1000 *.jpg
Run this in /assets directory before committing!
ffmpeg -i input.mp4 -vcodec libx264 -vf scale=-1:180 -an -ss 00:02:16 -t 00:03:46 index2.mp4
Use this to format timelapse
crop size (width:height:xoffset:yoffset):

   ffmpeg -i input_video -vf crop=1500:800:200:100 -vcodec libx264 -b:v 1000k -an output_video.mp4
https://video.stackexchange.com/questions/4563/how-can-i-crop-a-video-with-ffmpeg
Take a rectangular input video (eg. Filmed via iPhone) and crop it to a square
ffmpeg -i in.mov -filter:v "crop=in_w:in_w:0:(in_w-in_h)/2" -c:a copy out.mp4
And run du -s * | sort -rn before committing.
Also rotate images based on EXIF data.
mogrify -auto-orient *.JPG