This week's assignment was: cut something on the vinylcutter and design, lasercut, and document a parametric construction kit.
Laser Cutting
Throughout my time at MIT, I've lived in East Campus. Every fall, we usually have a lot of construction going on in the courtyard for REX. Over the years we've had roller coasters, forts, giant bridges, and more. I wanted to design and laser cut something that could fit in with the EC REX designs,
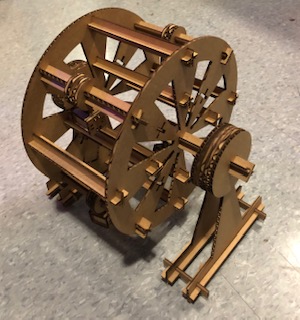
so my final idea ended up being a ferris wheel!
This week we were focusing a lot on parametric designs, so before I started modeling I made sure to draw out all of my components and label
which dimensions I was planning to set as which parameters to make the process a little less overwhelming. I really recommend drawing your design out
ahead of time. By the end of the modeling process I had so many parameters and some had similar names which made it harder to remember what each of them
were for. But, I could check my initial sketches to make sure I wasn't changing something accidentally. Here are some of my starting sketches:
I learned a lot about Fusion 360 this week. Setting up your hierarchy in a way that makes sense to you is really important! I made a separate sketch for
each one of my pieces. I ended up parameterizing every dimension of each of my pieces because I wanted the overall design to be fully customizable
(how large the wheel is, how tall it is, how many carts there are, how far apart the wheels are, how wide the cut outs in the wheel were, etc). I also
wanted to make sure it could easily be adjusted if I ended up having a cutout too close to an edge or something like that. This ended up helping me a lot in the end since the initial size I arbitrarily chose for the wheel ended up being too big for the laser cutter bed. I was able to change
the values of a few of the parameters to have everything fit. Here are some of the parameters I had going on:
I've got a few other tips for anyone else new at using fusion 360. Firstly, you can alter between 'real' lines and 'construction' lines when drawing
a line in a sketch by pressing x. I found it really helpful to use construction lines as my constraint lines and draw my design lines based on those.
This made it a lot easier to ensure that things I wanted centered between two other things remained there even when I was scaling or changing the
dimensions of some of the involved pieces. The downside is that when you save your sketch as a dxf and import to the laser cutting software, the
construction lines will be seen as cut lines and that can really mess up your design! Make sure you delete them all and scroll in because some end up super tiny! Another way around this is to extrude your sketch and use the project feature to select a face to export as a dxf. (Also, the circular and
rectangular pattern tools are incredibly useful.)
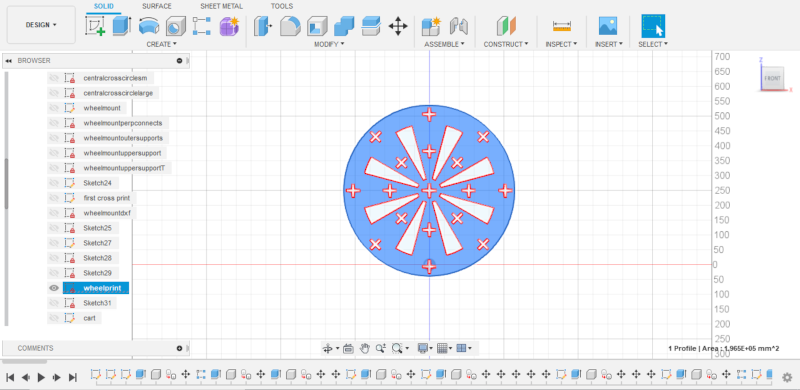
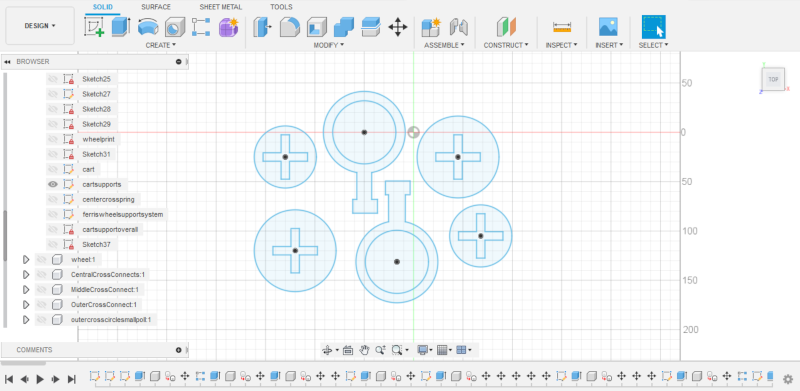
Once I finished making a sketch for each component, I extruded the sketches by a thickness unit. I then made each a component and dragged them around
to get an overall look at what the wheel might look like assembled (I didn't extrude all of the pieces I'd need though) and to see if the relative dimensions looked right. This ended up working out okay, but I wish I had used the assemble feature in Fusion instead and will make sure to become more familiar with that next time. But, this is what I ended up with by having a lot of separate components all visible together:
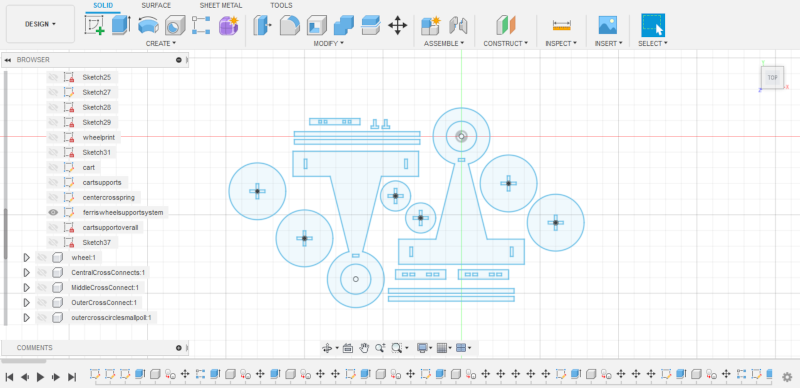
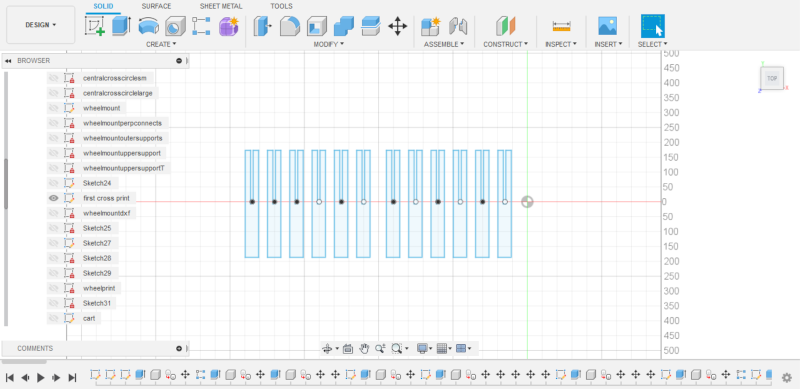
Since I was finished modeling, it was time to start the laser cutting! To get your files on over to the laser cutter, you can export your sketch in Fusion as a dxf file. I then used a USB to bring my files over to the laser cutter. We did our group assignment (group page linked at the top) and found settings that seemed to work well for cardboard cutting press fit joints. Once I opened my dxf in Corel Draw, I was able to choose the material I was using and had the power set to 100% and the speed set to 11%. I made sure to check that the laser was at the right height above the cardboard and that the fans were on. It's also really important to check where your design is located by positioning the laser around each edge. That way, you can make sure that your entire design fits. Then, it was time to cut! These settings ended up working really well on my test cuts, so I moved on to cutting my overall design. I scaled down by 2 when importing into Corel Draw, so I had to adjust my thickness parameter to 2 times the measured thickness. Once that was fixed, I was ready to print bigger jobs. To make things faster and to minimize cardboard waste, I used Fusion to combine the sketches for my components into new sketches. I did this by just copying and pasting the sketches I wanted. I made one sketch for each "system". So, one for the carts, one for the cart supports, one for the wheels, and so on. Here are what those sketches ended up looking like:
If needed, it was pretty easy to copy, paste, delete, and rotate certain components in Corel Draw. This helped make the 'system' structure I had going on work out well. For example, since I had the cart system dxf file with all the pieces for one cart, I could just copy and paste those components in Corel Draw to print
as many carts as I needed. After I printed one system, I made sure that system fit together the way I wanted it to and with the previous systems I printed
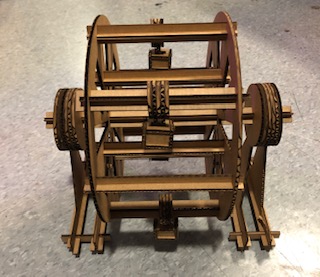
before printing new systems. Everything ended up fitting together well in the end! My final assembled ferris wheel ended up looking like this:
Vinyl Cutting
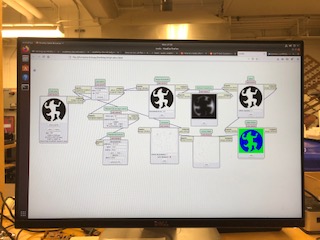
Continuing the EC theme of this week, I decided to vinyl cut a laptop sticker of my EC hall logo. I live on 2E, also called Beast. Our logo is a werewolf-like being in front of a full moon. Conveniently, I already had a black and white png of this logo from previous merch designs! I uploaded the png to the mods software, which creates the cutting path. This is what the page looked like right before the print:
Once I printed it out, I cut my sticker out from the rest of the sheet. Then, I stuck masking tape to the red, nonsticky side of the sticker. I peeled
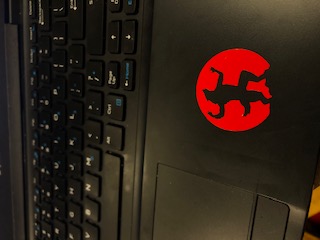
off the backing of the sticker to reveal the sticky side, placed it down on my laptop, smoothed it out, peeled the masking tape off (as in plane as I
could), and then used tweezers to remove the rest. Here is what my finished sticker looks like on my laptop: