HTM(a)A Arch Section Group Work
Laser Cutting
The group assignment was: characterize your lasercutter's focus, power, speed, rate, kerf, joint clearance and types.
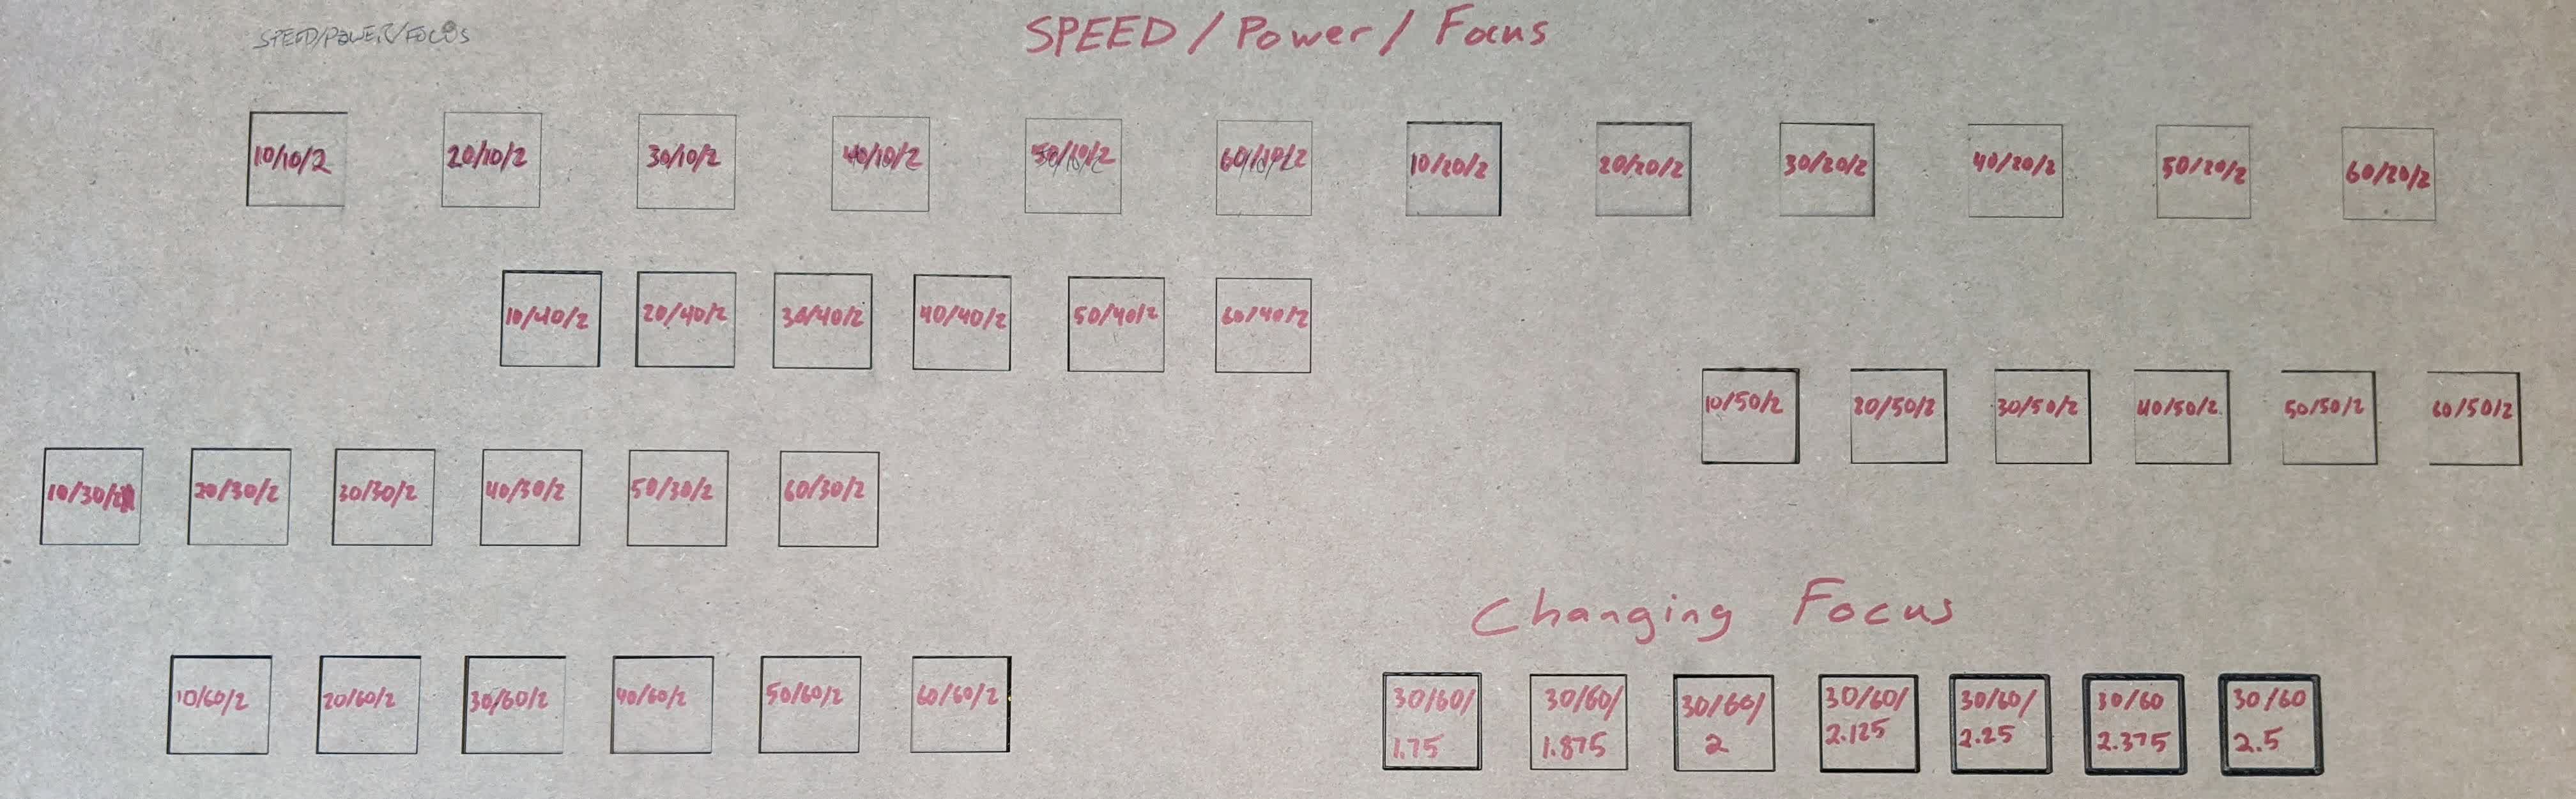
We started by cutting 1" x 1" squares at verious speed and power settings on the laser cutter. We tested speeds and powers ranging from 10%-60% in 10% increments as shown below.
The objective was to fully cut through the cardboard while minimizing burning. We found that a speed of 30% and power of 60% did the best. As you can see, the squares are all
over the place, this was because we forgot to set the printing view from Viewport to a set Window.
Next, we took those settings and tried out different focal distances. The initial cuts before were all with a distance of 2" from the botom of the lens plate to the top of the cardboard.
We investigated distances between 1.75" - 2.5" at 1/8" increments, and found that the focal distance of 1.875" resulted in a full cut and the least kerf.
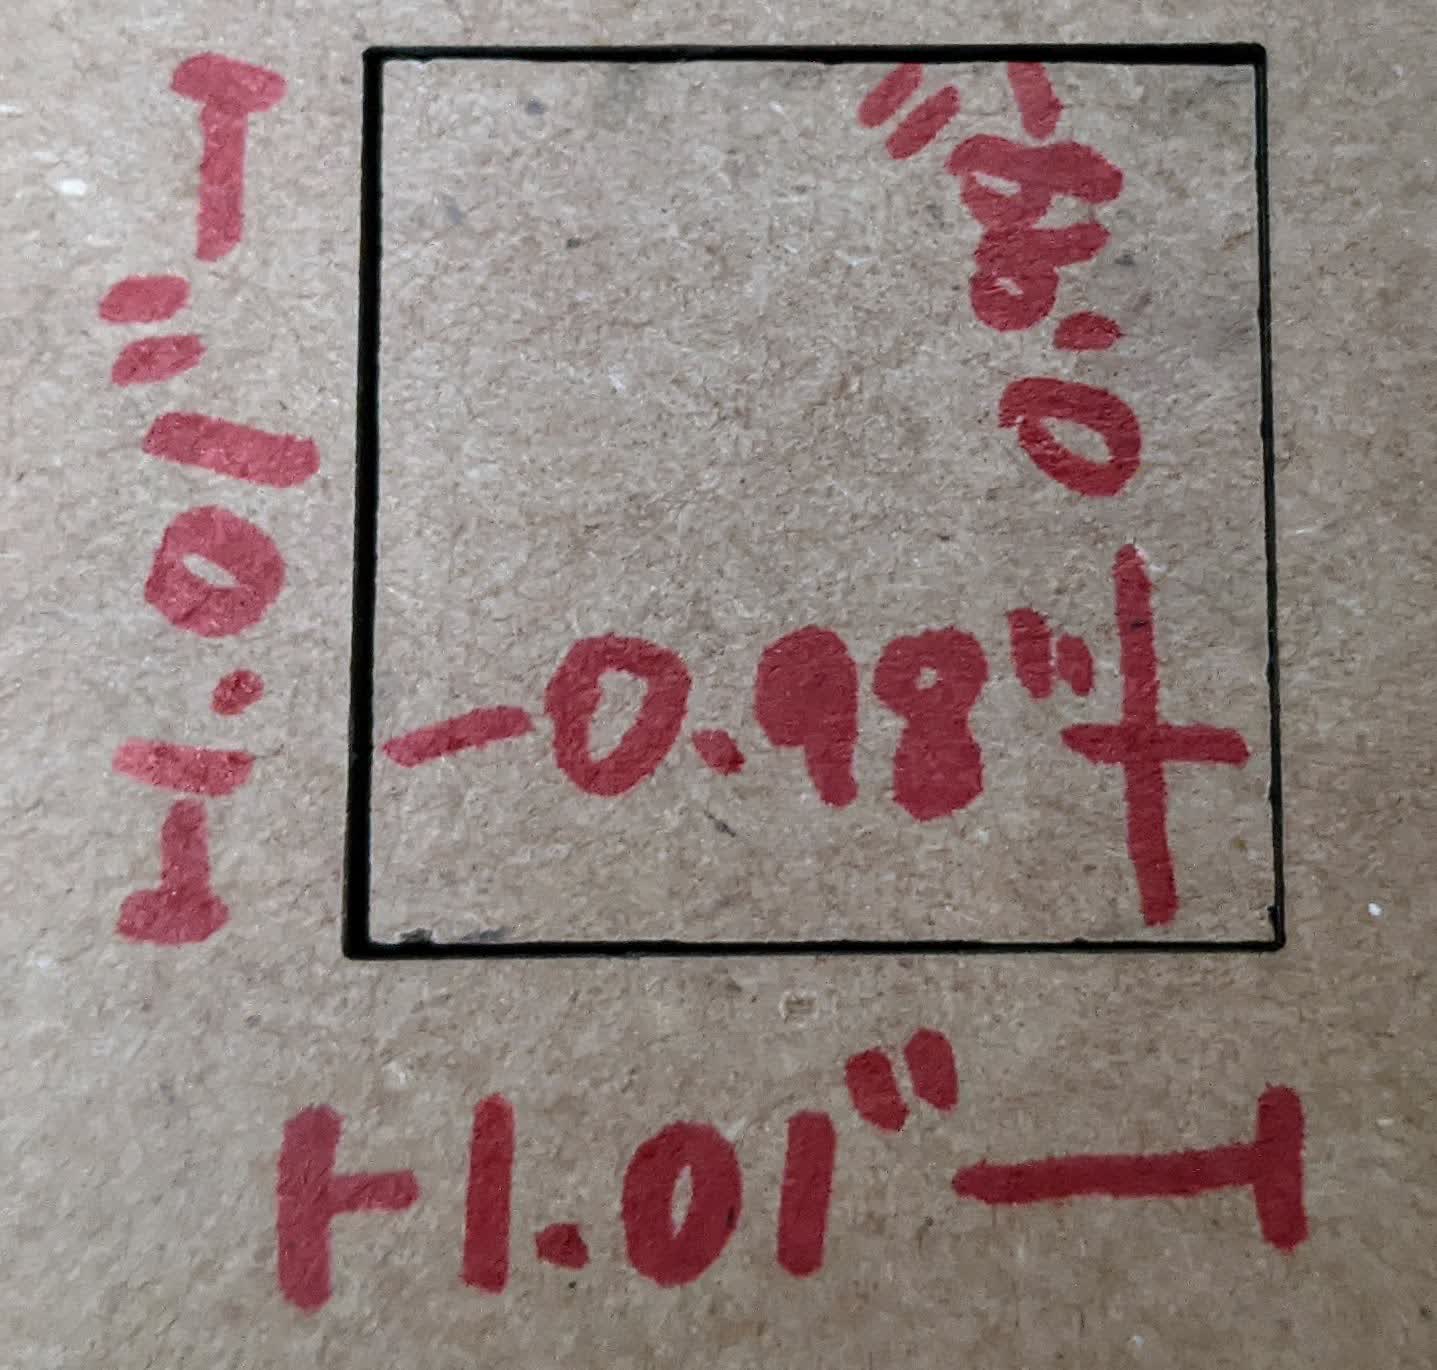
 The kerf of the laser was calculated by measuring the square cutout and the square hole left behind. The square measured 0.98" across and along, and the hole measured 1.01" along and across. That means
that the kerf of the laser is (1.01-0.98)/2=0.015" (0.381mm)
The kerf of the laser was calculated by measuring the square cutout and the square hole left behind. The square measured 0.98" across and along, and the hole measured 1.01" along and across. That means
that the kerf of the laser is (1.01-0.98)/2=0.015" (0.381mm)
 Next, we wanted to see the joint slot size that worked best for an assembly. The holding joint had to be big enough to fit two peices together, but small enough to create a firm grip for a strong assembly.
To do that, we cut what we called a "comb", where we investigated slots ranging from 3.5 mm - 4.5 mm in 0.1 mm increments. We made 2 of these to test out fits
Next, we wanted to see the joint slot size that worked best for an assembly. The holding joint had to be big enough to fit two peices together, but small enough to create a firm grip for a strong assembly.
To do that, we cut what we called a "comb", where we investigated slots ranging from 3.5 mm - 4.5 mm in 0.1 mm increments. We made 2 of these to test out fits
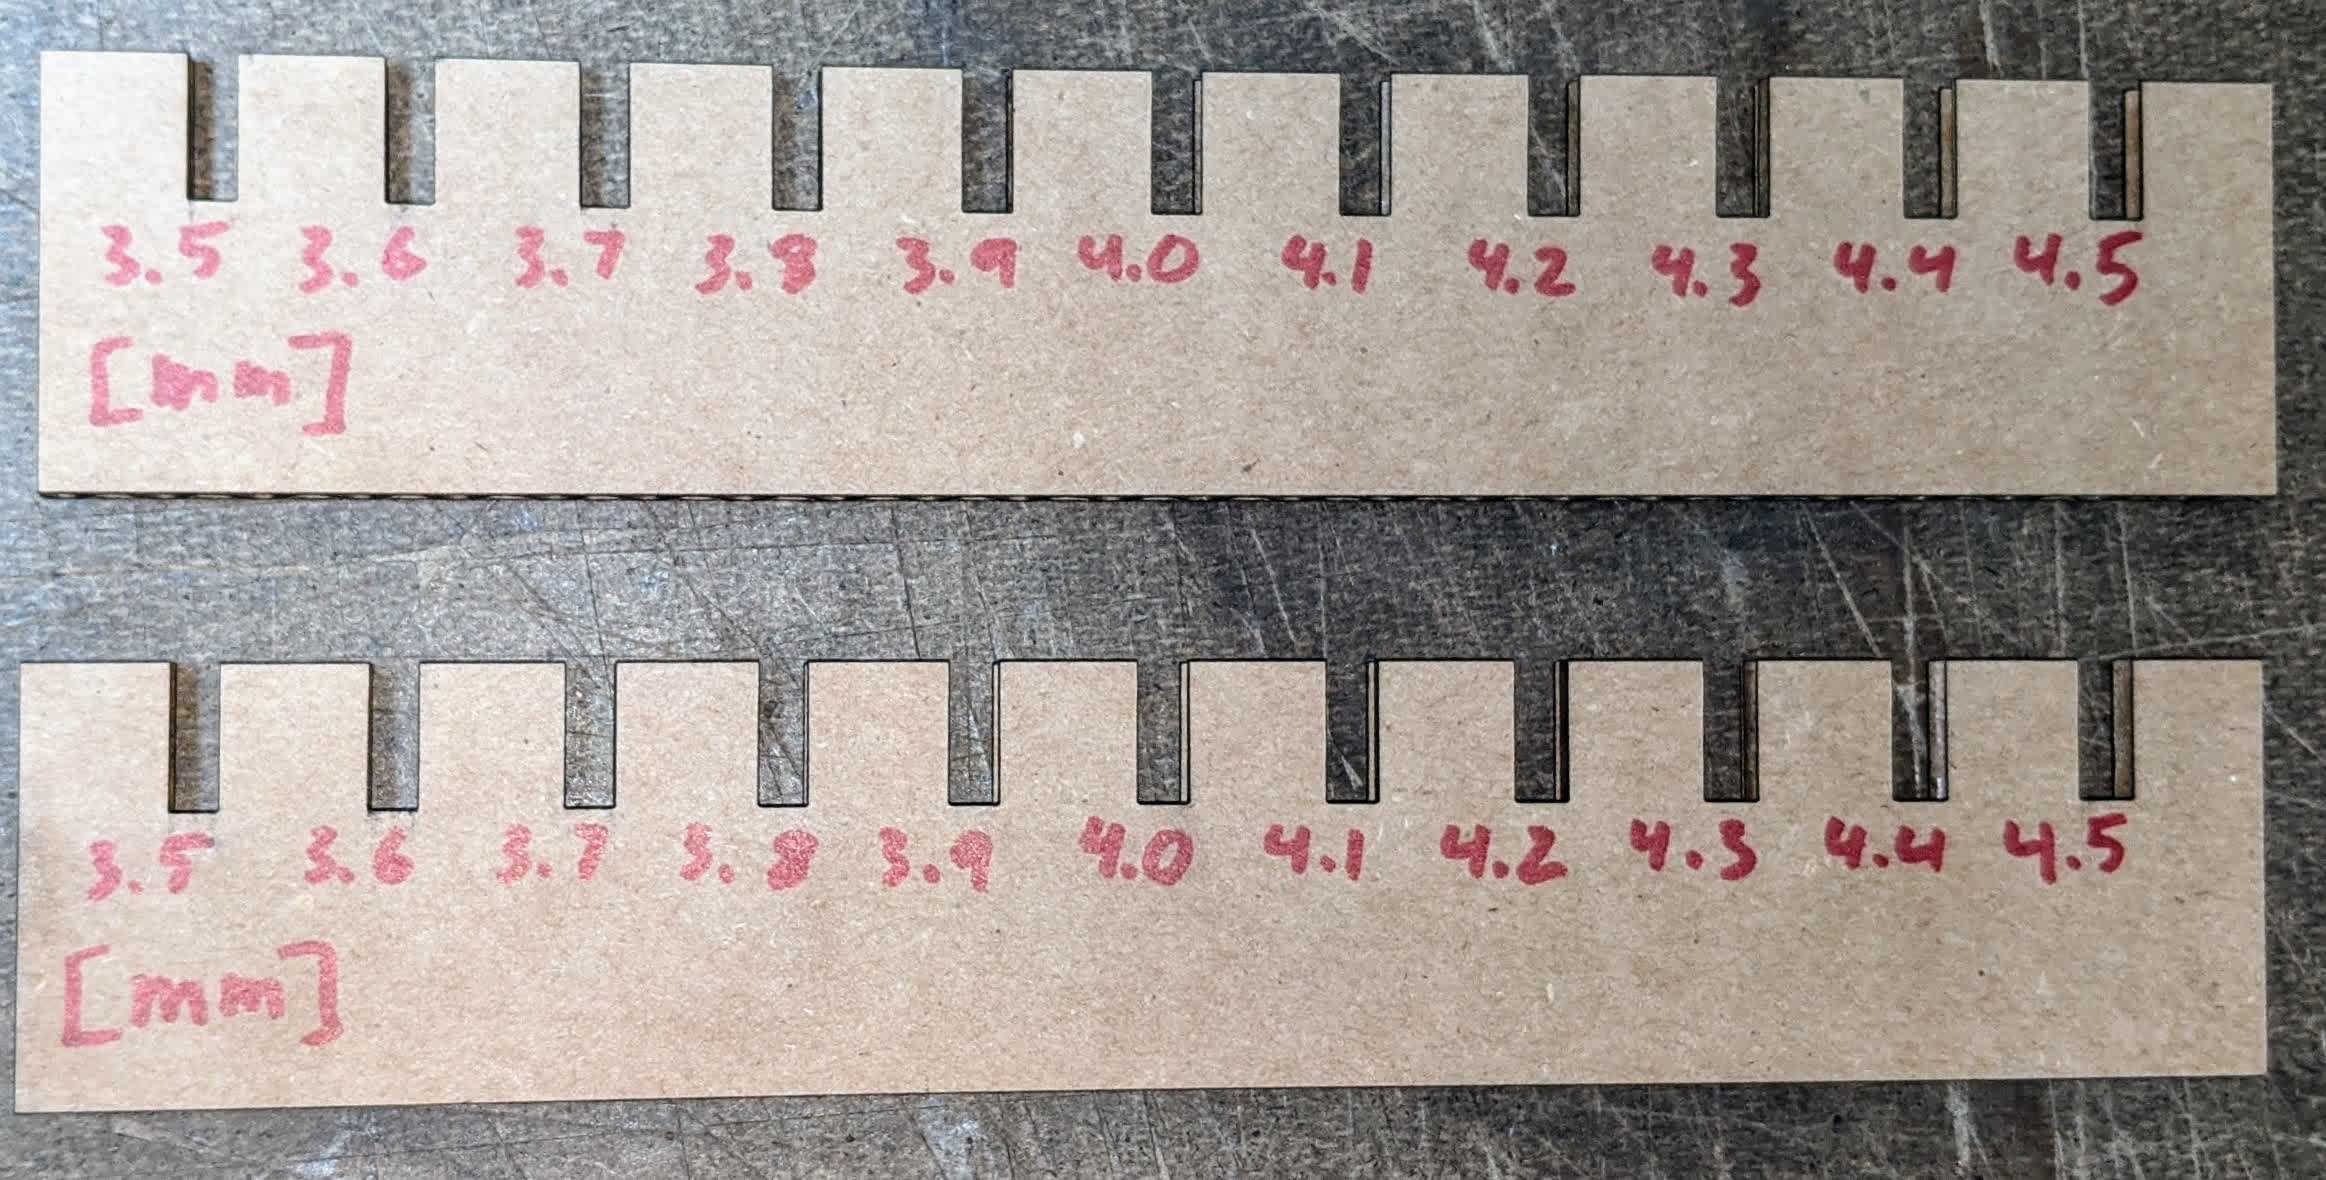 We found that the best fit was a slot size of 3.6 mm. It was big enough to fit and small enough to create a strong, firm joint.

Files: testcombs.dxf