
Week 4: Molding and casting
Skills used: Fusion 360, CAM, Router, casting materials
For this week, our assignment was to design a mold, use the router to mill it, and then use it to cast parts. This was one of my favorite weeks so far, I loved how crafty and open-ended it felt. I decided that for this week I would recreate a McDonald's happy meal toy from 1997, which has weirdly become a meaningful object in my life. In middle school, my best friend Isaac found a keychain in the parking lot and put it on his clarinet case (we were obviously extremely cool and sporty) and I thought it's facial expression was hilarious so as a very nice gesture at the end of middle school, he gave me the keychain. I then gave it back at the end of high school, then he gave it back when we graduated from undergrad, then I gave back it to him again when he graduated from a master's program.
One of the handoffs c.2015
We're both graduating again (for the final time) in 2021, so I wanted to see if I could recreate the little guy from the keychain so when he gives me back the keychain I can give him his own to have too.
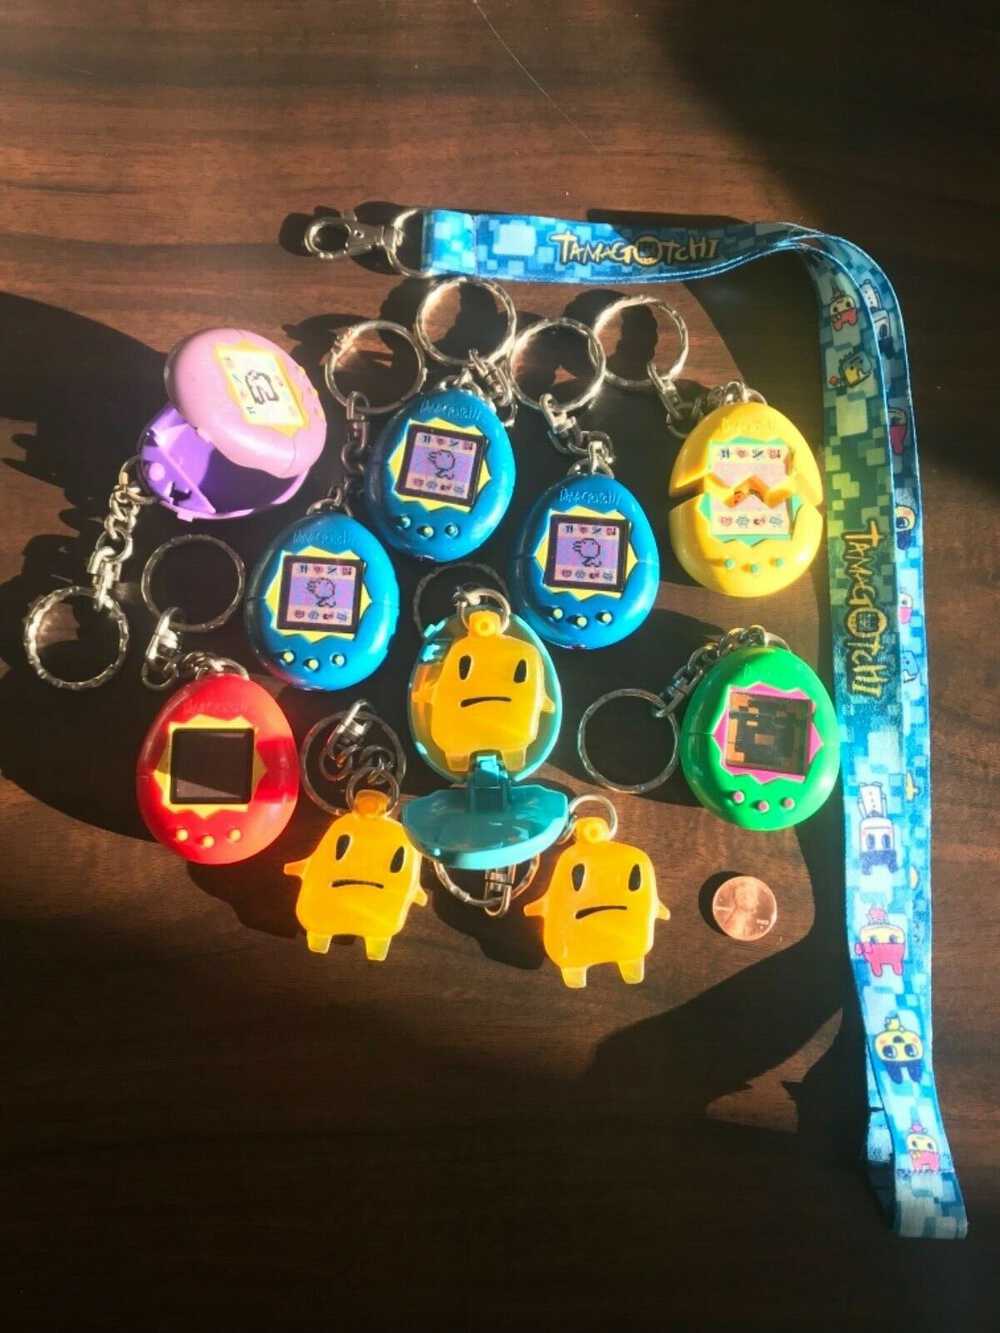
Neither of us knew what it was at first but somehow we did some internet sleuthing and found out it was a McDonald's tomagatchi toy from 1997 so I was able to find that on ebay to use as a reference image.
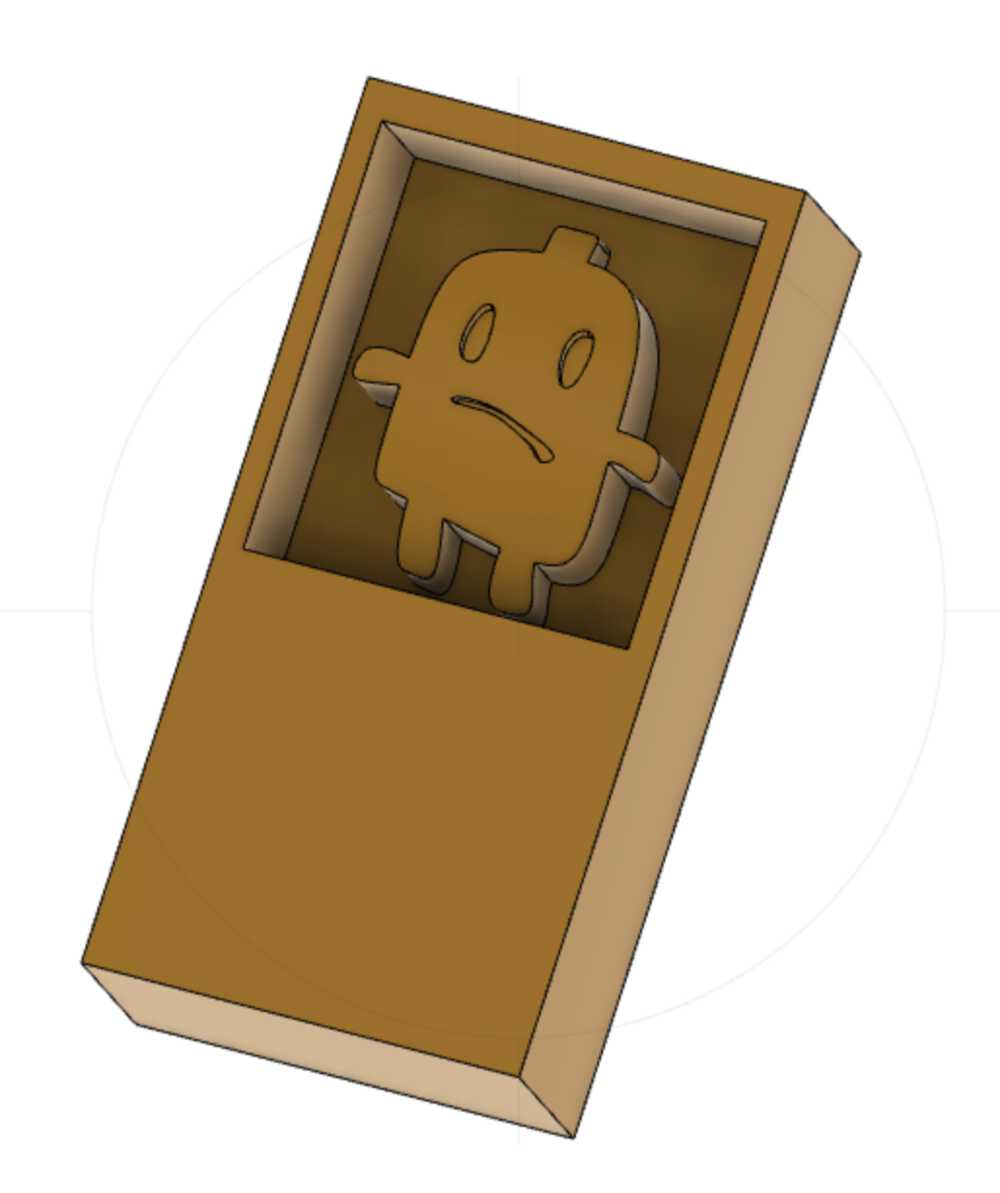
The final model in Fusion 360 - even though in the original toy the face is pretty flat, I made my replica curved on the top so that I could take advantage of the 3-axis milling (thanks to Anthony for pointing that out).
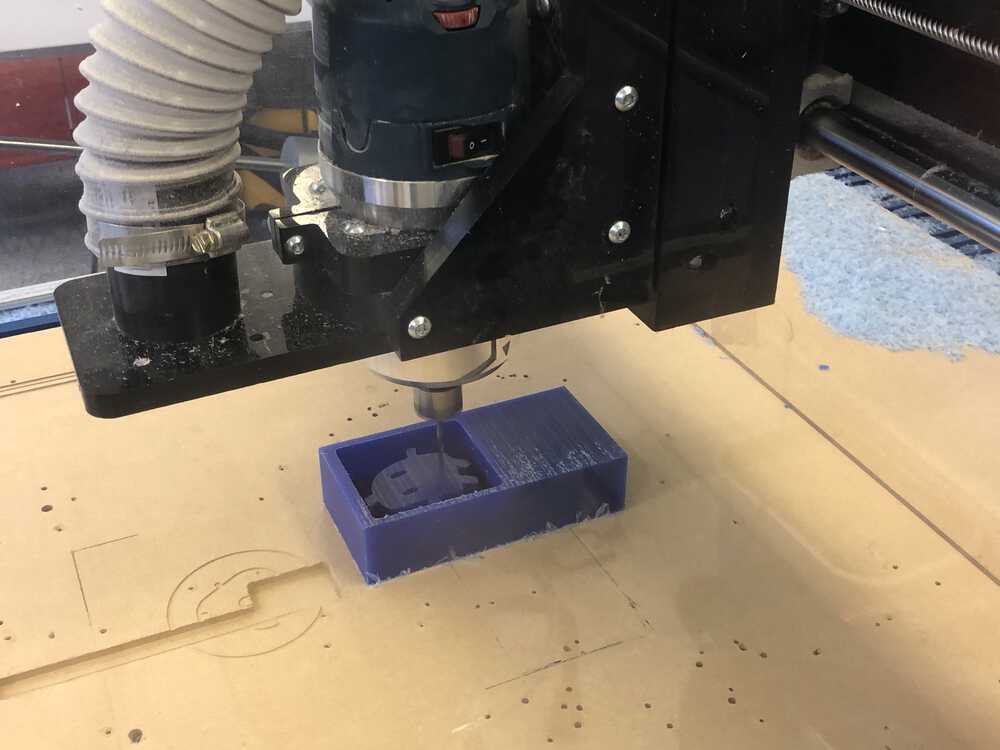
After CAM, I did a rough pass with the 1/4" bit and then a finishing cut with the 1/8" bit. The surface finish wasn't perfect so I also did a little bit of sanding with sandpaper and then gave it a quick once over with the heat gun to get rid of the rough surface from sanding. I then used the wax mold to cast oomoo to create a mold for the final product.
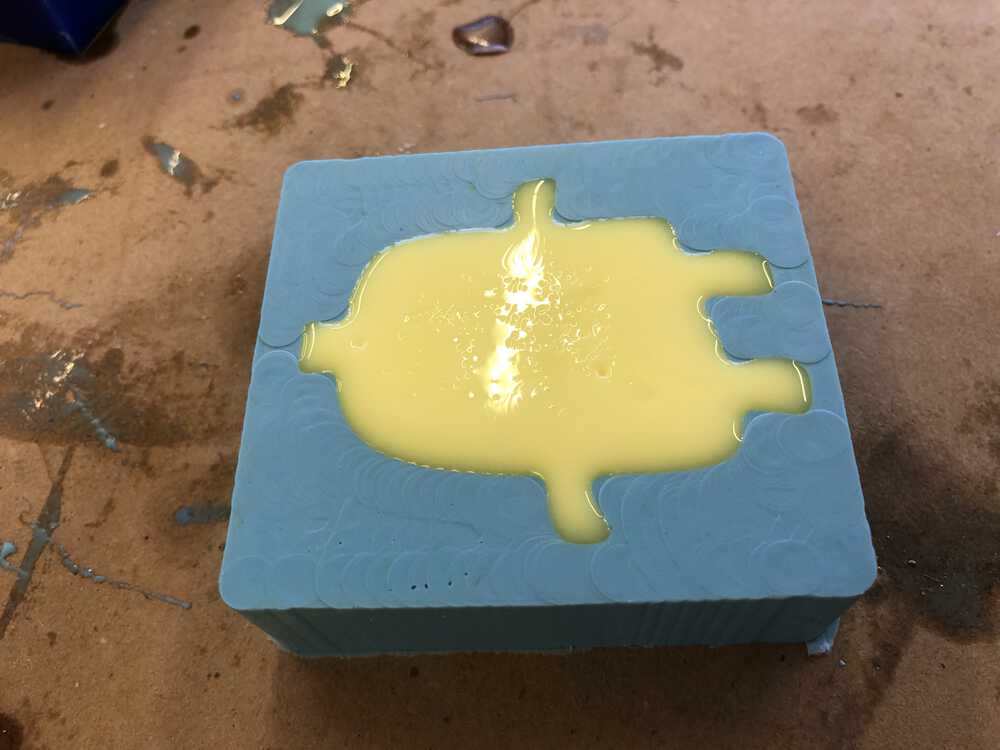
For my first pour, I used the white plastic, and colored it with yellow dye. The color is pretty off but the clear plastic was really bubbly in our test pours and I wanted to try to keep that to a minimum for my first try. I used the vacuum chamber to pull out bubbles from the plastic after mixing and before pouring, and after the pour there were only very small bubbles on the back surface so I was happy with the outcome.
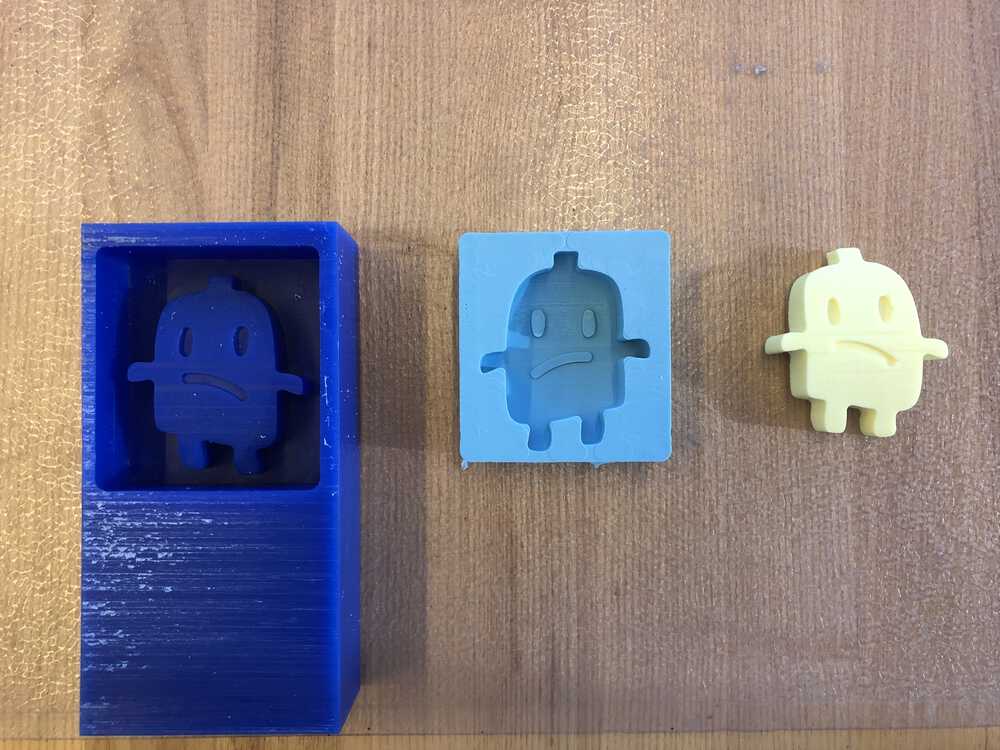
All 3 steps - original wax cut, oomoo mold, and the cast opaque plastic.
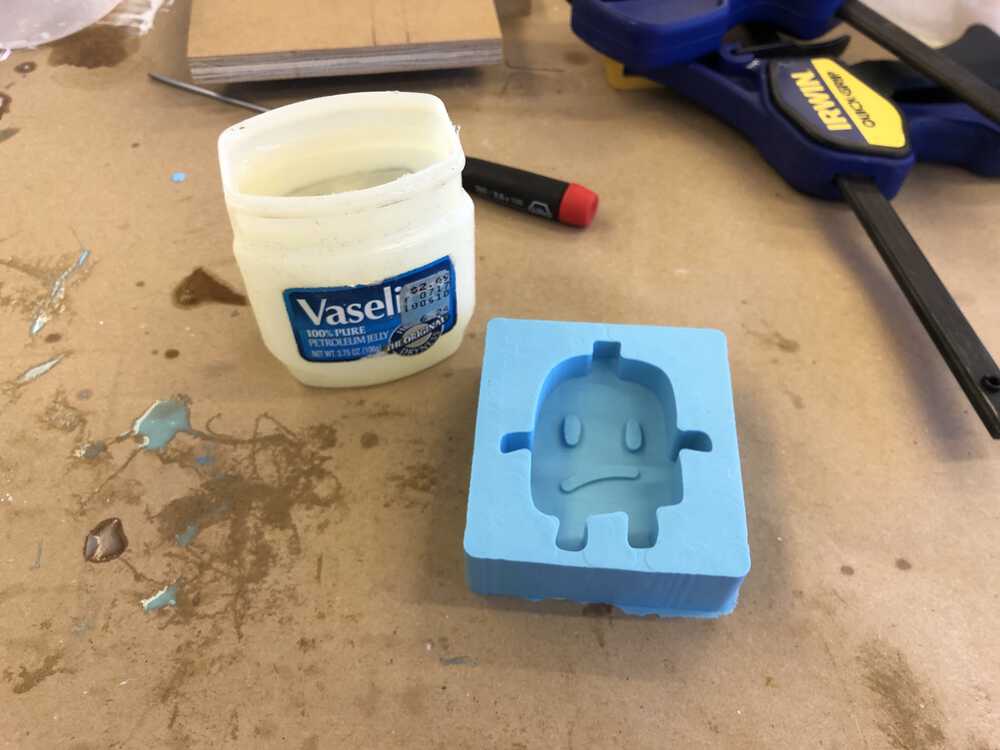
I was extremely hooked on this process and wanted to keep experimenting - I thought it might be fun to try to cast oomoo in oomoo to make a squishy version (inspired by a discussion in the shop of another 90s hobby of mine, collecting tiny colorful erasers in fun shapes). Because we weren't sure if the oomoo would release itself once cast, I lined the mold with a light layer of vaseline to create a barrier.
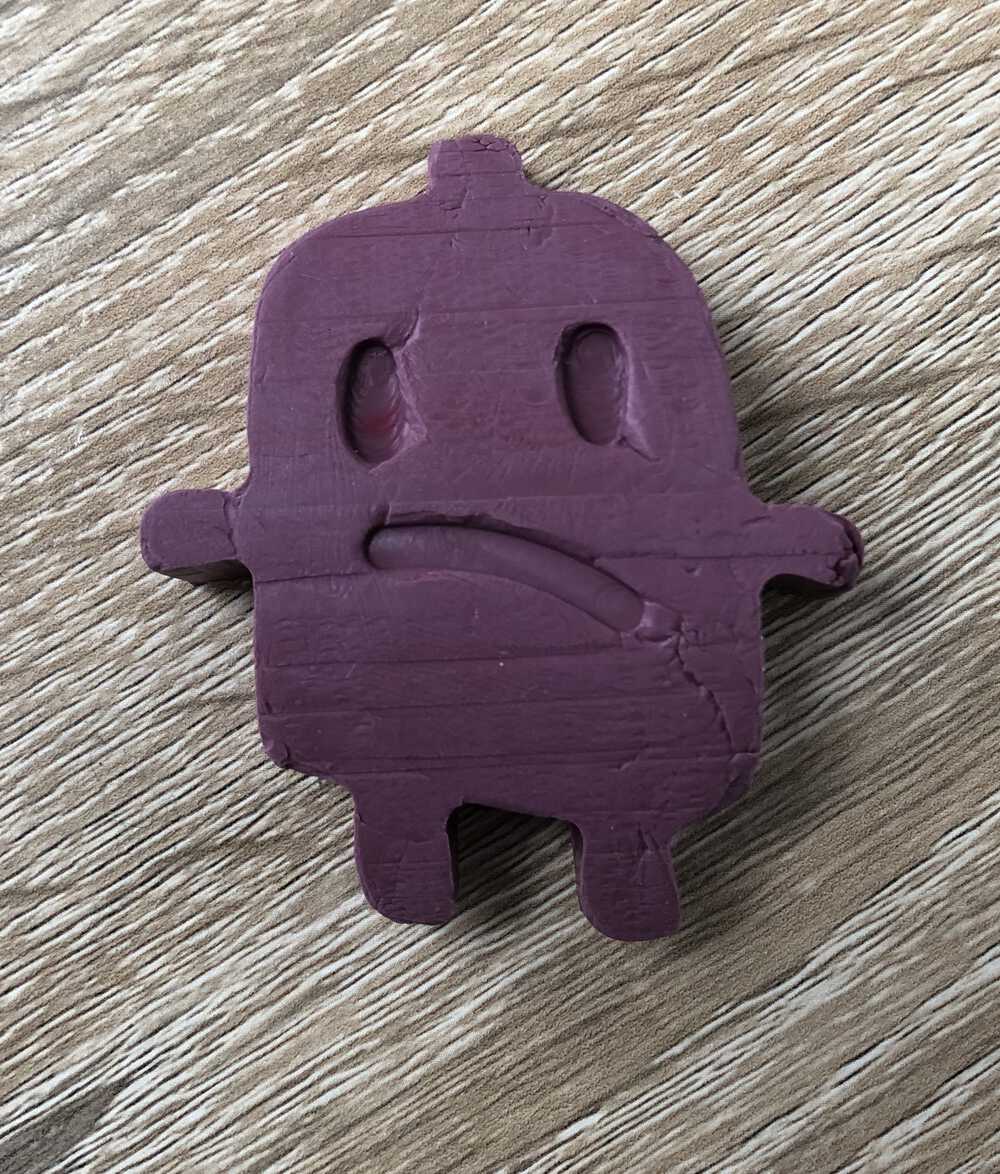
Here is the oomoo cast (I also used red dye to create the purple color combined with the blue oomoo). I think it worked pretty well considering it was the first experiment, but the oomoo did in fact stick to itself and left a few parts a bit weird after trying to pull it from the mold.
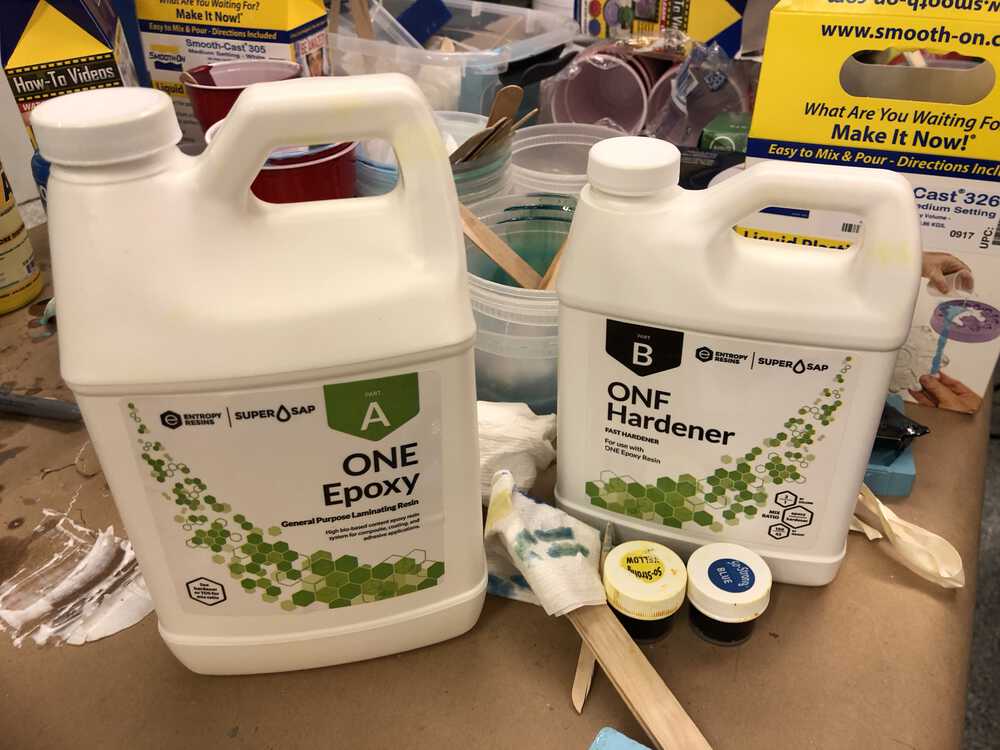
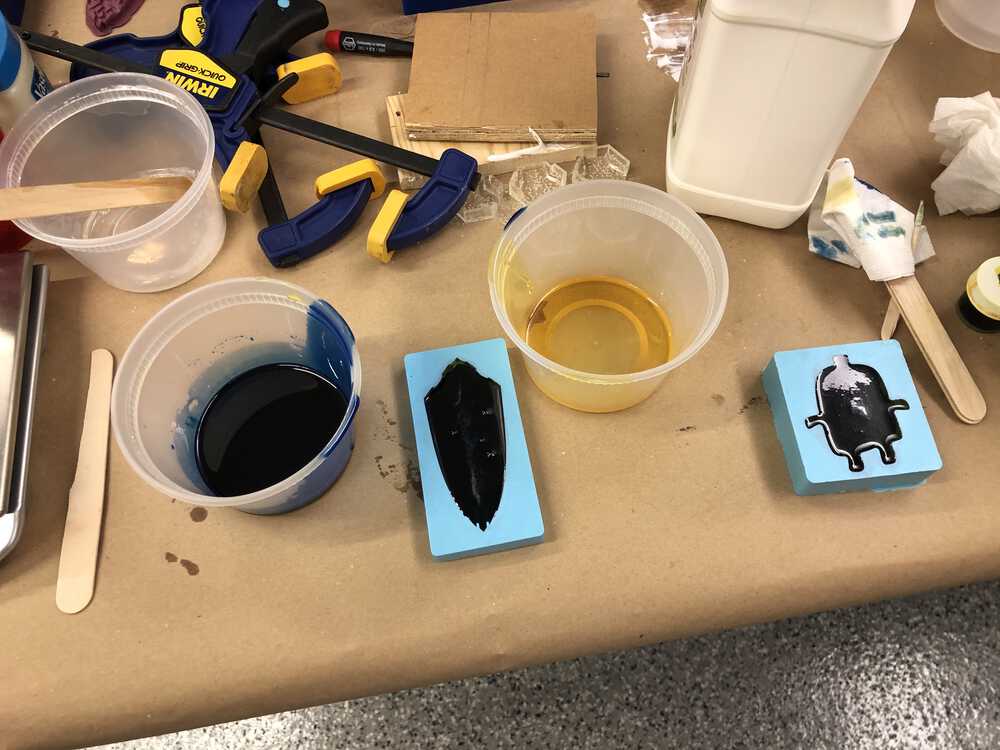
I still wanted to play more with casting so I decided to try a multi-color epoxy pour using this epoxy we had in the shop. I mixed two colors of epoxy and then poured them simultenously into the mold (I also used Anthony's shield mold so I wasn't limited to my one mold). I then used a piece of the stirring stick to swirl the colors together a bit in the hope that the clear epoxy would show the colors well through the shape.
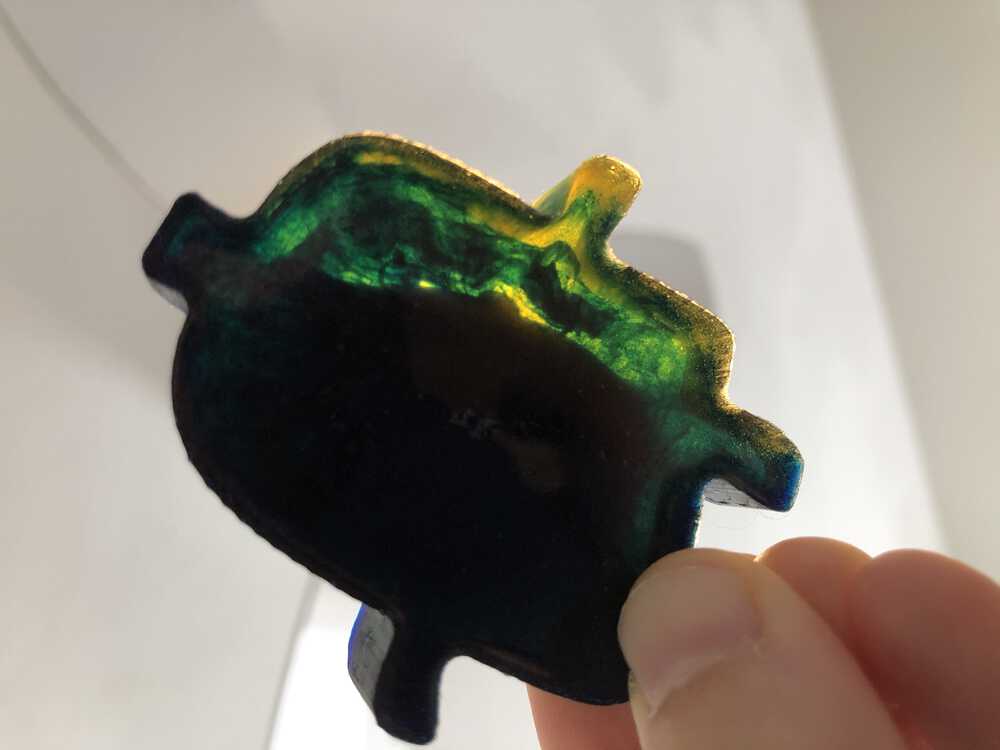
The result of the epoxy pours. The colors look great when there is more yellow and less blue - it seems like with the clear epoxy you need very very little color and I overdid it with the blue so it's not transparent enough there to see the mix. This definitely will not be my last time playing with oomoo and making casts!!! I don't think I'll need it for my final project but maybe I can think of a way to incorporate it so I can keep experimenting with this process.